Stone guard??Walnut shells, Glass Bead, or Poly beads???
 11-03-2006, 07:51 PM
#16
Burning Brakes
Thread Starter
Join Date: Aug 2006
Location: Fredericksburg VA
Posts: 777
Likes: 0
Received 0 Likes
on
0 Posts
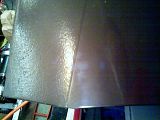
Ok.. on the fender is this part of the stone guard or is this something added to the paint?
Is it under the paint?
If it is part of the stone guard should I remove it or repaint over it?
early 85 fender....
Is it under the paint?
If it is part of the stone guard should I remove it or repaint over it?
early 85 fender....
 11-03-2006, 09:50 PM
#17
Three Wheelin'
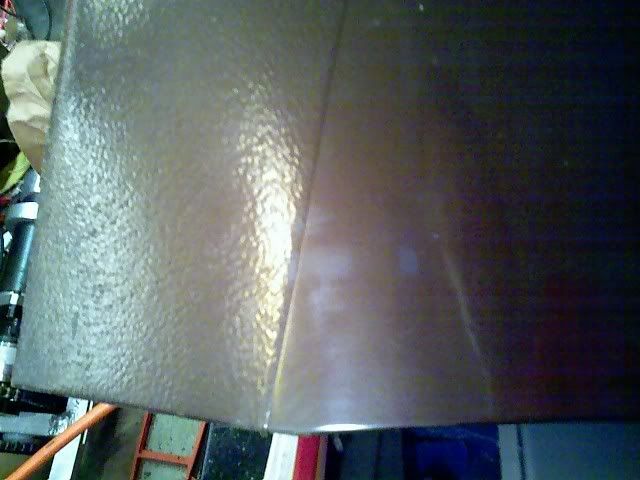
It's hard to tell from your photo, but the bottom edges of the doors and insides of the fenders have a "rough edge". The pain has somethin in it like spray in truck bedliner to protect from stone chips.
You have a PM as well.
You have a PM as well.
11-03-2006, 10:17 PM
#18
RL Community Team
Rennlist Member
Rennlist Member
The ripply texture along the rockers is a polyvinyl chloride chip-resistant layer under the top coats.
I would not blast for all the good reasons already mentioned. If you do elect to blast you really do need a pressure-feed set-up. Siphon feed will take forever and use up a king's ransom in blast media.
What I would suggest is sand everything down to the factory paint (you would probably end up with a combination of the factroy primer and factory top coat showing up. The original primer is stuck on really well, take advantage of that. Obviously you will have to go to bare metal where there was damage repaired by the bondo. Get some dollies and basic body hammers and read up on how to use them (many places to dig this info up). It is a real skill to get metal back 100% perfect to shape (and I can't do it except of very simple dents) but it is not hard at all to get it quite close and then you can use Evercoat metal glaze to perfect it. The metal glaze is also good to fill any remaining deep paint chips.
Sand to the grit recommended for your primer. I used Glasurit 285-60 HS primer, and the data sheets recommended P320. Wear a good dusk mask when sanding. A dual-action sander helps speed things up, but I did it all by hand... it took forever though. I spent 8 hours on the engine compartment alone, but everything was well scuffed, which is important for a good bond:
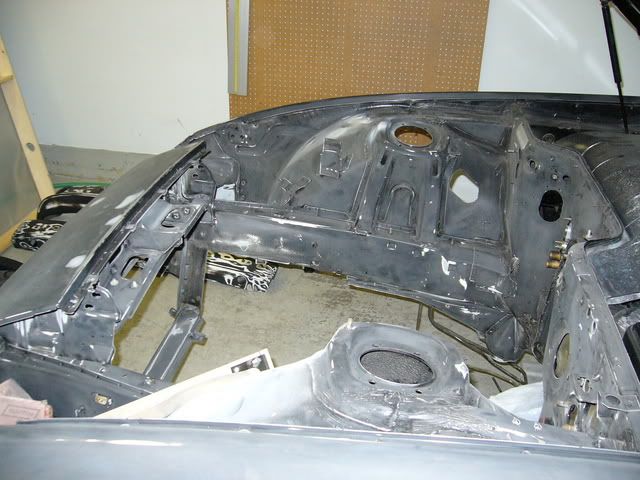
Other "hard" areas are around door hinges etc. If you sand by hand, use sanding blocks as much as possible (obviously you can't in tight corners etc.). Where you do expose bare metal, use the systems's etch primer or epoxy primer before the HS primer filler.
I would not blast for all the good reasons already mentioned. If you do elect to blast you really do need a pressure-feed set-up. Siphon feed will take forever and use up a king's ransom in blast media.
What I would suggest is sand everything down to the factory paint (you would probably end up with a combination of the factroy primer and factory top coat showing up. The original primer is stuck on really well, take advantage of that. Obviously you will have to go to bare metal where there was damage repaired by the bondo. Get some dollies and basic body hammers and read up on how to use them (many places to dig this info up). It is a real skill to get metal back 100% perfect to shape (and I can't do it except of very simple dents) but it is not hard at all to get it quite close and then you can use Evercoat metal glaze to perfect it. The metal glaze is also good to fill any remaining deep paint chips.
Sand to the grit recommended for your primer. I used Glasurit 285-60 HS primer, and the data sheets recommended P320. Wear a good dusk mask when sanding. A dual-action sander helps speed things up, but I did it all by hand... it took forever though. I spent 8 hours on the engine compartment alone, but everything was well scuffed, which is important for a good bond:
Other "hard" areas are around door hinges etc. If you sand by hand, use sanding blocks as much as possible (obviously you can't in tight corners etc.). Where you do expose bare metal, use the systems's etch primer or epoxy primer before the HS primer filler.
11-03-2006, 10:28 PM
#19
Hey Man
Rennlist Member
Rennlist Member

Originally Posted by amjf088
The ripply texture along the rockers is a polyvinyl chloride chip-resistant layer under the top coats.
I would not blast for all the good reasons already mentioned. If you do elect to blast you really do need a pressure-feed set-up. Siphon feed will take forever and use up a king's ransom in blast media.
What I would suggest is sand everything down to the factory paint (you would probably end up with a combination of the factroy primer and factory top coat showing up. The original primer is stuck on really well, take advantage of that. Obviously you will have to go to bare metal where there was damage repaired by the bondo. Get some dollies and basic body hammers and read up on how to use them (many places to dig this info up). It is a real skill to get metal back 100% perfect to shape (and I can't do it except of very simple dents) but it is not hard at all to get it quite close and then you can use Evercoat metal glaze to perfect it. The metal glaze is also good to fill any remaining deep paint chips.
Sand to the grit recommended for your primer. I used Glasurit 285-60 HS primer, and the data sheets recommended P320. Wear a good dusk mask when sanding. A dual-action sander helps speed things up, but I did it all by hand... it took forever though. I spent 8 hours on the engine compartment alone, but everything was well scuffed, which is important for a good bond:
Other "hard" areas are around door hinges etc. If you sand by hand, use sanding blocks as much as possible (obviously you can't in tight corners etc.). Where you do expose bare metal, use the systems's etch primer or epoxy primer before the HS primer filler.
Best advice I've seen yet on this thread. I'm putting a 'sticky' on this one.
11-03-2006, 11:07 PM
#20
Burning Brakes
Thread Starter
Join Date: Aug 2006
Location: Fredericksburg VA
Posts: 777
Likes: 0
Received 0 Likes
on
0 Posts
Originally Posted by amjf088
The ripply texture along the rockers is a polyvinyl chloride chip-resistant layer under the top coats.
.
.
I took off the damaged fender and have tried my hand at hammer and dolly...
I got it ok but I need to melt all the undercoating off first to get it better....
The undercoating kinda defeats the dolly underneath....
I have a siphon feed / self recovery rig I was building... I was itching to finish it and try it out... I guess it won't be on the porsche...
Thanks for the tips....
Any suggestions on where to get something to emulate the polyvinyl layer?
Otherwise one quarter panel will look kinda bald down low...
 11-05-2006, 01:23 PM
#22
RL Community Team
Rennlist Member
Rennlist Member
Thank you for those nice remarks!
As far as "re-creating" the PVC effect where it was mucked up by the repair, I would suggest the following (which is what I did in one area where the coating was cosmetically damaged by a hard scrape):
Remove all crap & residue around the repaired area and feather (by sanding) the edges of the good PVC around the repair area.
Then, use 3M rocker panel spray (LINK) to start building up a new coating. Practice with this stuff on some scrap metal for a while. The thickness of each coat, as well as the spray distance, affects the resulting texture. With some practice, you will be able to create a texture pretty similar to the original. A sealer can then be sprayed over this and then it can be primed and re-finished with the rest of the car. I was pretty happy with my results. If your repair area is large, you may want to re-do the entire rocker to get a completely uniform look. There are other rocker coatings on the market, but I know that 3M has an excellent track record. Any automotive refinish store is likely to carry it.