When you click on links to various merchants on this site and make a purchase, this can result in this site earning a commission. Affiliate programs and affiliations include, but are not limited to, the eBay Partner Network.
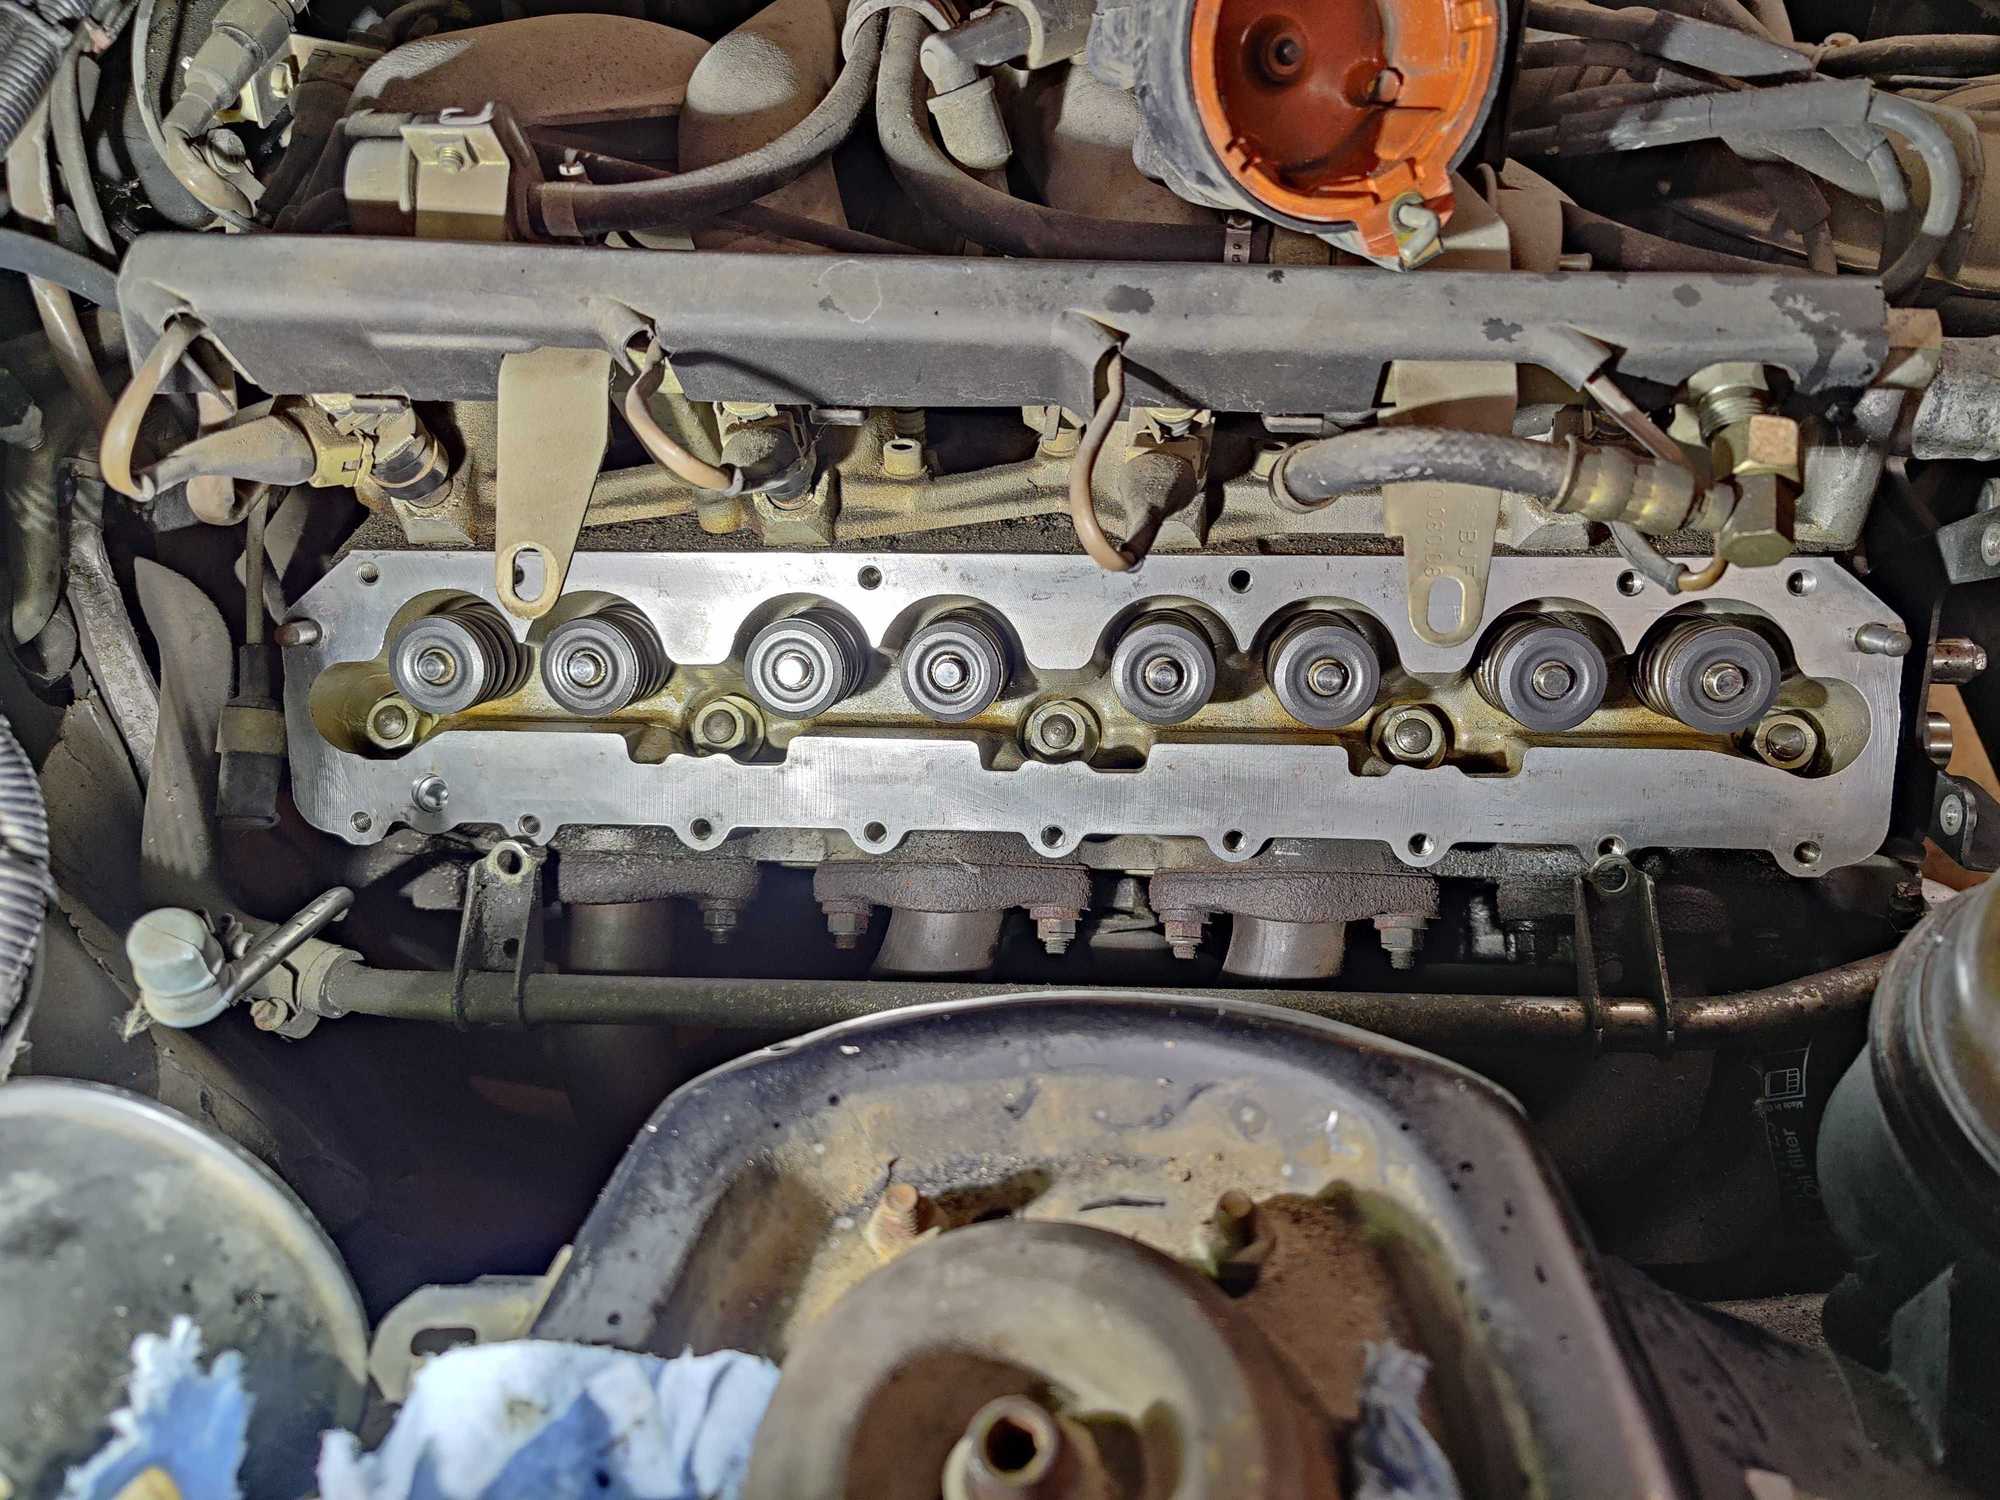
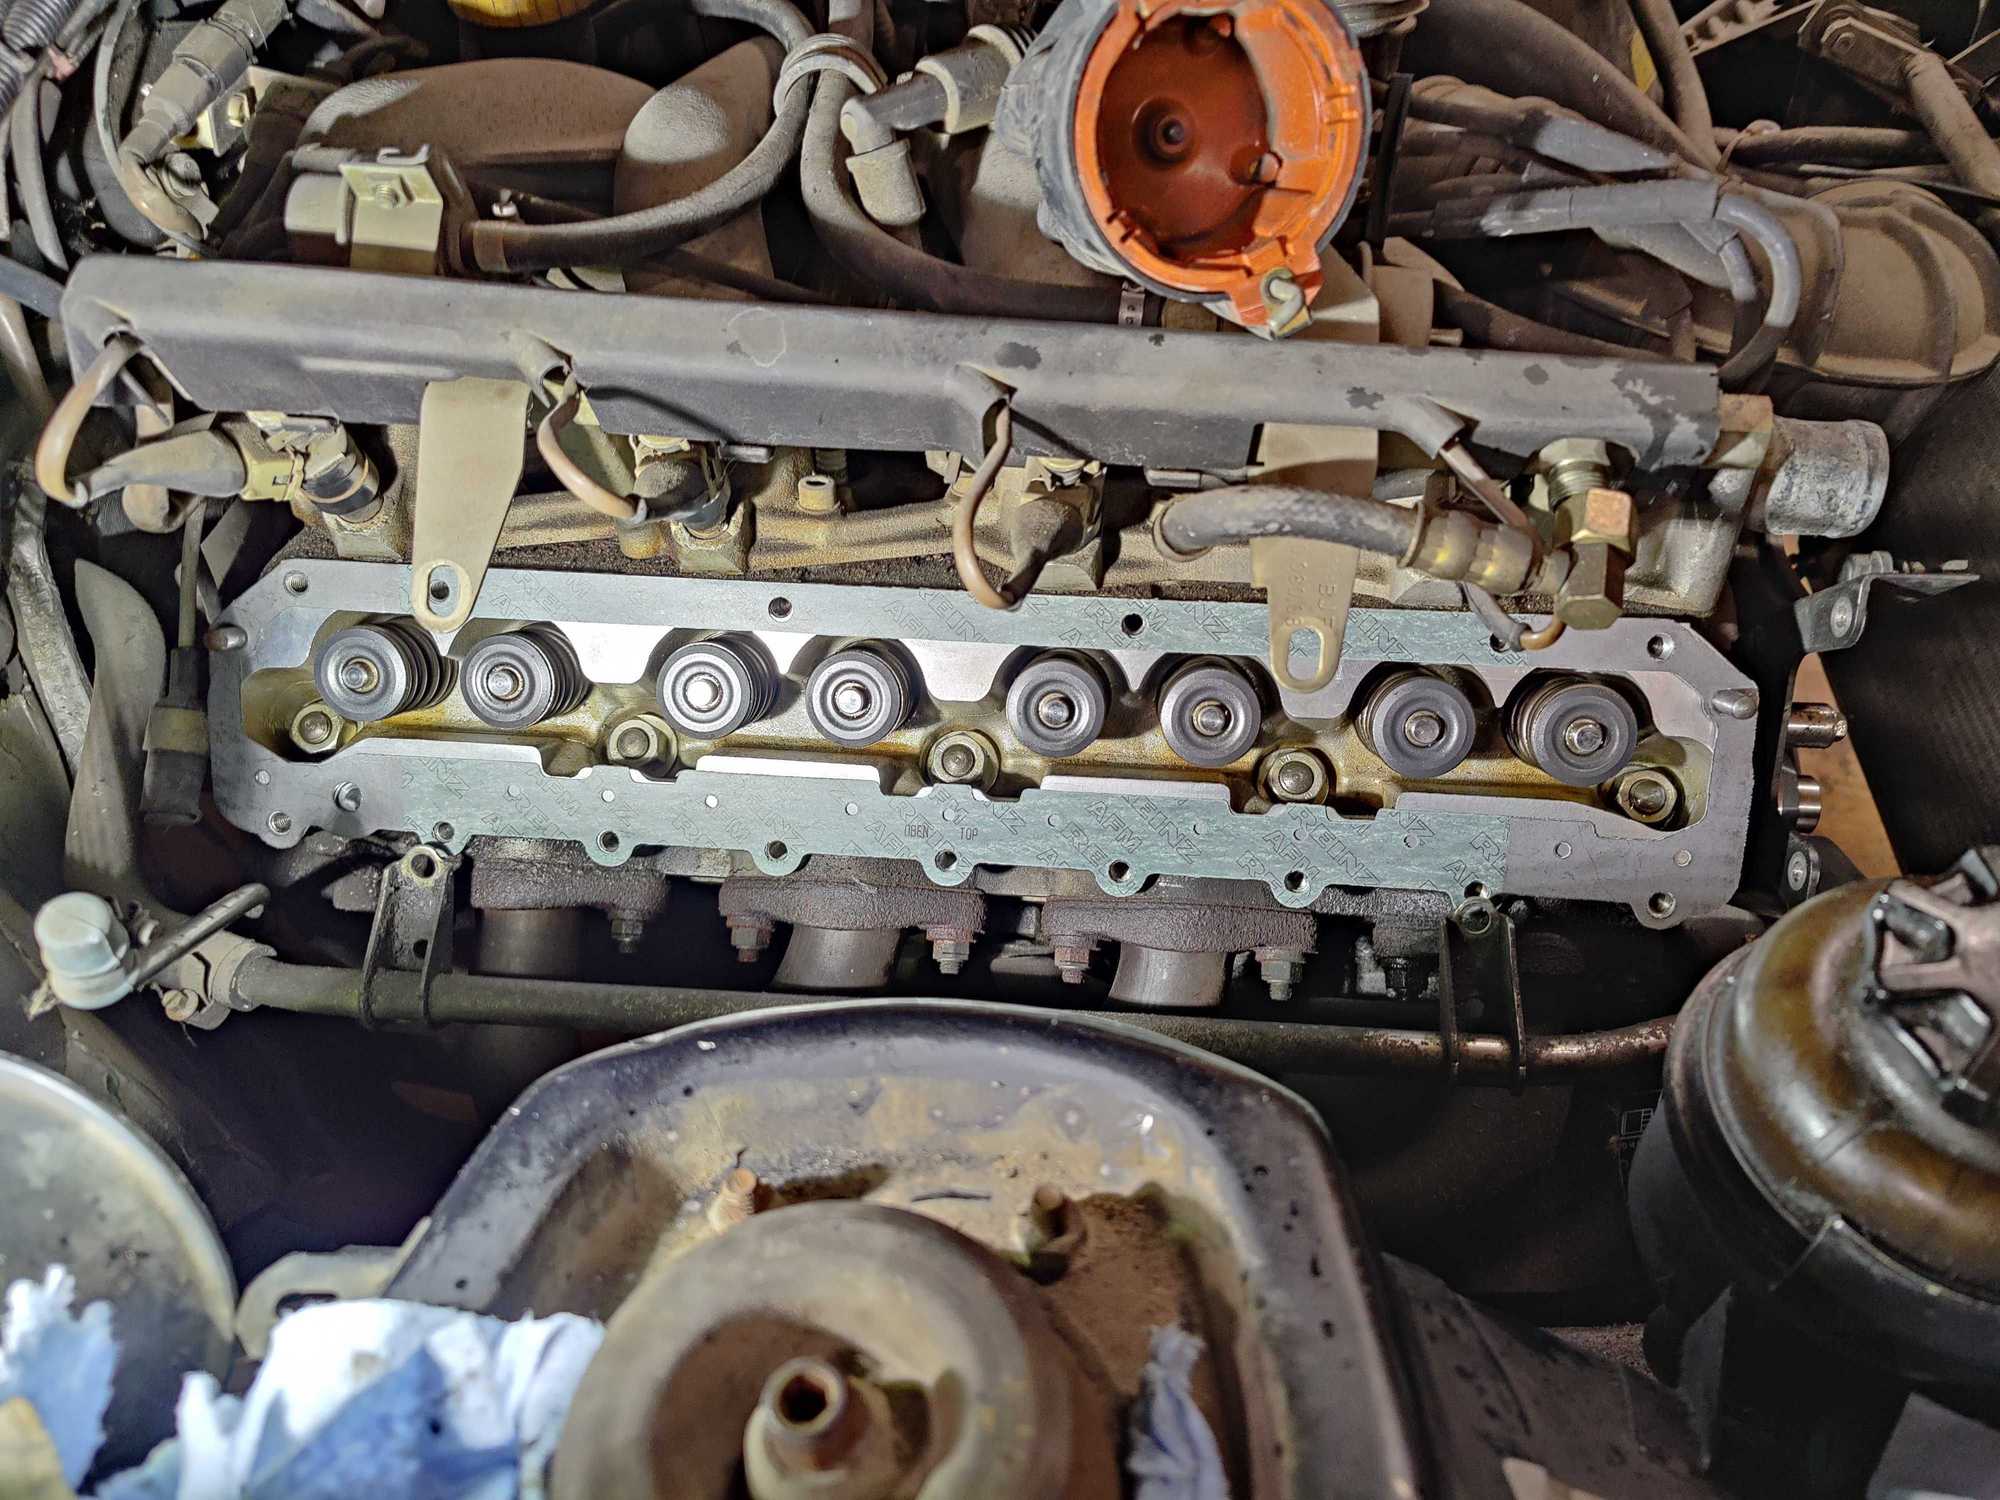
Not a big update, but I got the idler and tensioning pulleys and rollers installed. Also, got the pulleys on the crank and crank bolt installed and remounted the P/S pump. Cleaned up the belt tensioner while I have it out. Now I'm doing another 4 day process of gasket removal--this time at the junction of the cam housing and head. Amazing how well a piece of paper can stick to a piece of metal. After that, I think it will be an intricate process of cleaning the gasket material, solvents, etc out from around the valves. There is also some, but a surprisingly little, amount of stuff that settled in this area during the presumably years that the cam housing was off that I'll get out as well. I can't know if any bugs or whatever committed suicide in the oil passages during this time. So I'll proceed and see what happens.
Today I got the rest of the old cam housing off and got the cam housing assembly installed. Next up, the belts, wires, plugs, distributor cap, and figuring out how to get the fuel rail all back together.
There are also probably some bolts and attachment points that will be orphaned that I'll need to find a home for.
Good work on installing the cam box! Did you replace the front and real seals on the cam box? The front o-ring behind the cam gear is known to leak. The bolt can be tough to remove and it's advisable to replace the bolt after removal. The rear gasket is just a cork gasket. I used a very thin layer of sealer when I installed a new cork gasket.
Good work on installing the cam box! Did you replace the front and real seals on the cam box? The front o-ring behind the cam gear is known to leak. The bolt can be tough to remove and it's advisable to replace the bolt after removal. The rear gasket is just a cork gasket. I used a very thin layer of sealer when I installed a new cork gasket.
Yeah, the car came without the cam housing--just the cam, cover, lifters, and hardware. So I bought a used, cleaned up cam housing that came with a set of new seals and replated hardware. Putting it together was pretty easy but the distributor coupler that came with the car was trashed and so was my first replacement. Took me a while to get a working one.
Removed the injectors which were frozen to the intake and packed them up to get sent out
The injectors are about the only thing holding me back from starting the car now (that I know of). I also noticed a shiny brass hole in my steering rack that looks like it hasn't been open to the world for very long. Some research indicates that there is probably a small tube coming from somewhere else on the rack and I need to find it and plug it in. I still have no idea what it does.
I'm probably going to also order some vacuum fittings.
With the tensioner clocked this way, the wrap on the lower balance pulley is reduced and can allow the belt to jump time. The upper belt run can also contact the water pump pulley and does not allow the correct setting for the idler pulley.
I'm sure these will be down the priority list but a couple other things that can be gleaned from the photo are that, 1) according to the height of the oil pan, the motor mounts are completely collapsed and 2) there is a TSB for a replacement suction hose and fitting for the power steering to eliminate the hose winding around the water pump which can be easily damaged.
Ah, I see what you mean now. Yeah, I did notice it gets mighty close to the water pump pulley, and the idler pulley was extremely difficult to get right, but I did get it. The second time around should be a lot easier...
Thanks for also looking at the pictures in detail. I called out the random placement of the P/S hose earlier because it made me uncomfortable. Previously it was ziptied to the blocked off port on the water pump, which I no longer have, so I was going to secure it elsewhere. I assume this is what I need to do that upgrade? https://944online.com/update-for-pow...ring-hose.html So far, I haven't been able to find a diagram showing how this one is supposed to be routed.
Yes, the motor mounts are completely trashed. All the suspension bits will be close to the top of the list after I get this thing running. Normally, they're the first things I attack when I get a "new" car, but normally the cars at least run already.
This is an enjoyable thread, I really like the backstory and the journey and have my fingers crossed for when you get the cleaned injectors back!
Originally Posted by Gage
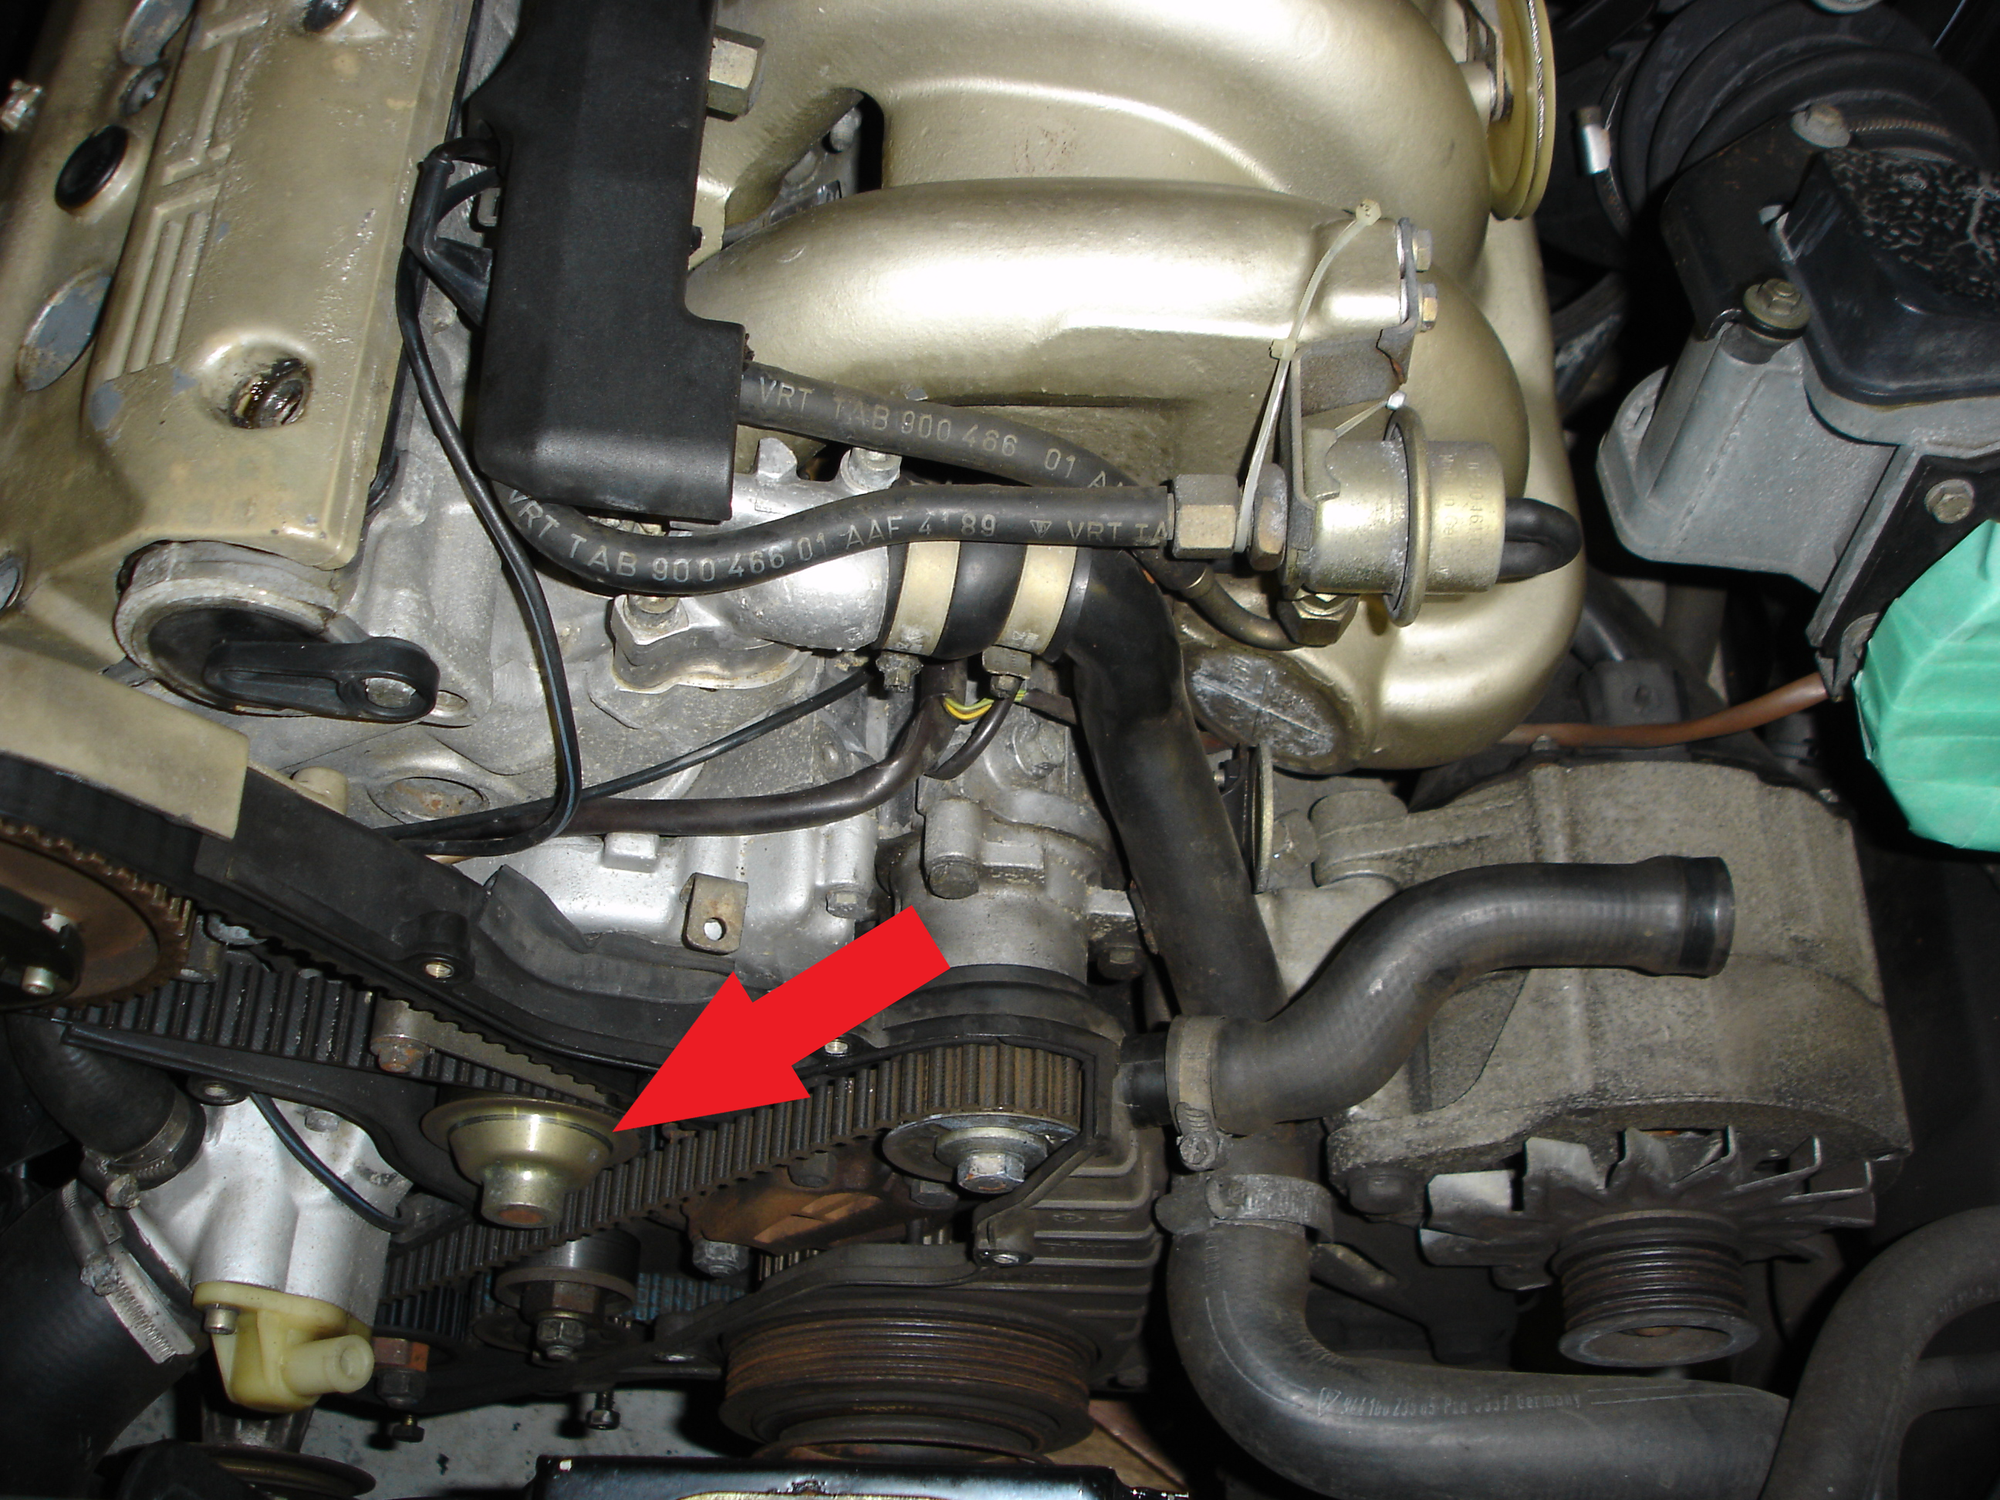
You should re-tension the balance belt by turning the tensioner clockwise. This will put the belt in the proper position.
Thank you for this point Gage! Looking at my motor (still on the stand), I see I did the same thing, so will definitely try and tension by rotating the other way. Interestingly, when I looked back at the pictures of when I took the car apart shortly after getting it, I see that it had been tensioned the same way, and indeed there was a track on the water pump pulley from the balance belt (see red arrow). Really appreciate the knowledge share!
This is an enjoyable thread, I really like the backstory and the journey and have my fingers crossed for when you get the cleaned injectors back!
Thanks for the luck! It didn't go great, but I did make some progress.
I got the rebuilt injectors back and also received the "complete" set of vacuum fittings. Before messing with the fuel rail, I starting replacing vacuum fittings next to the fuel rail and worked my way towards the brake booster. When replacing the fat line at the booster, I broke the check valve that presses into the booster. I don't have a spare one of those. The set of fittings also didn't come with enough of the thin hard line, or the small rubber connectors. So I'm going to order more of that stuff and the 2 check valves including the one I broke.
Then I went to route the plug wires and broke one of them after I realized that I installed it on the distributor cap in the wrong position. I thought Beru was legit, but there was definitely a bad crimp and I can't get the boot off to try to re-crimp it. So I need to get a replacement set of plug wires. The old ones are marked W. Germany so might be original.
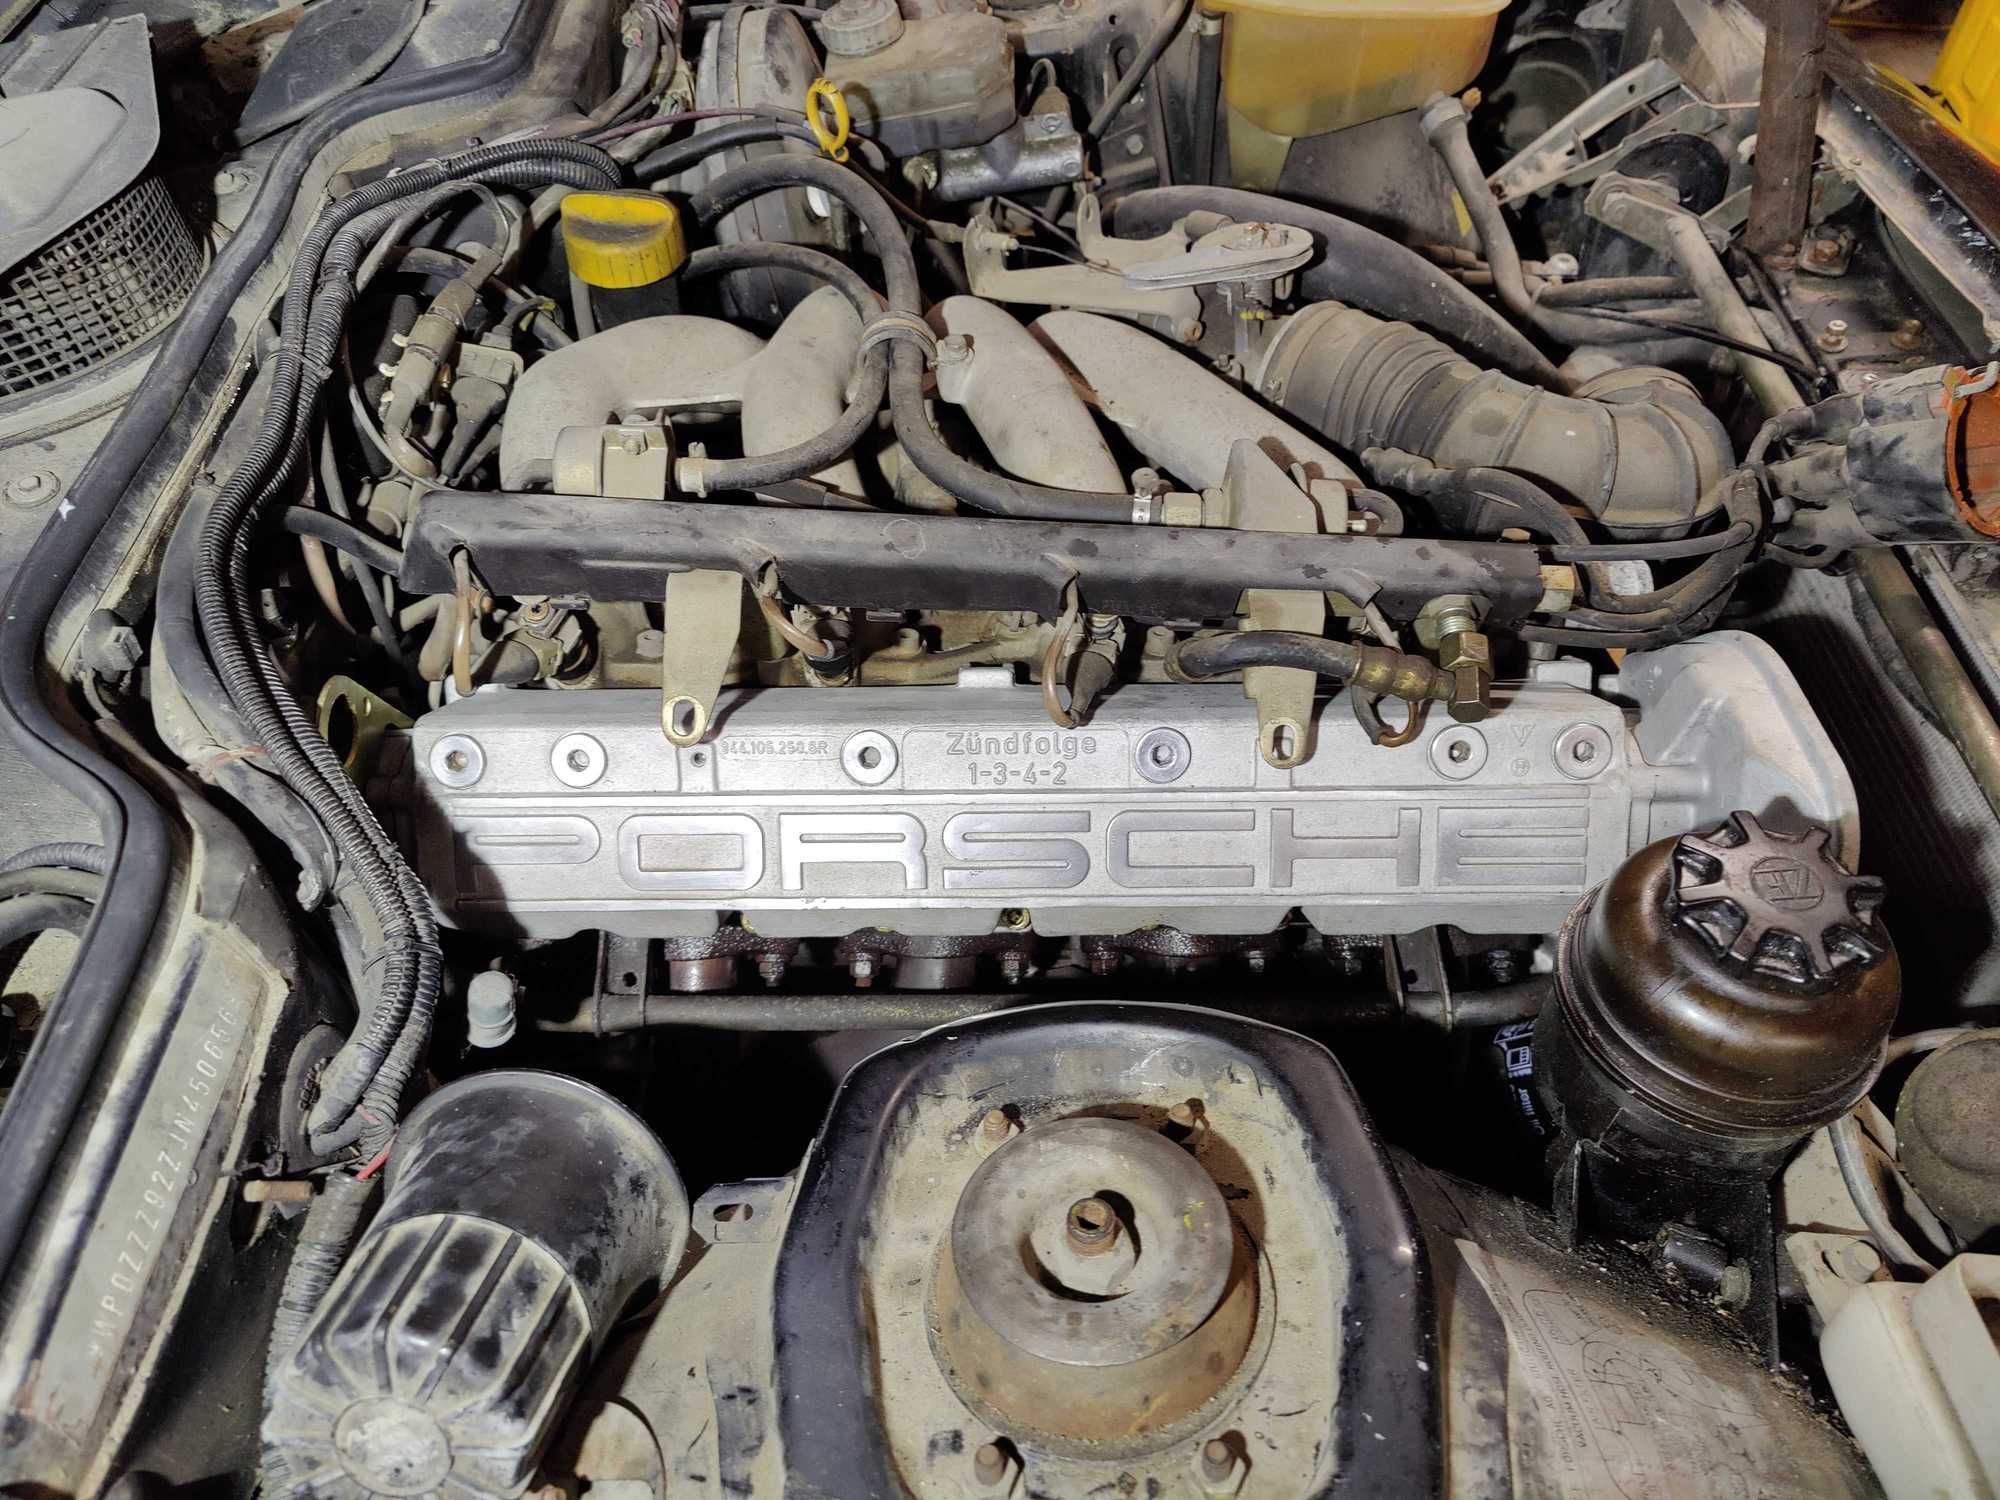
My fuel rail and plug wires were in disarray when I got the car so I don't know the proper way to route the plug wires, injector wires, fuel lines, and everything under the rail cover. I also can't find a picture that seems to be original. Does anyone have a photo of this they can share?
I also retensioned the balance shaft belt CLOCKWISE. Thanks again Gage for that important little detail.
I also keep noticing some coolant on my balance tensioner. Every time I see it, I clean it off, and next time I'm there a week or two later, it's back. The weird thing is that I had the water pump off for so long that it had long stopped dripping any fluid. I also drained the radiator a couple months ago and also removed the upper radiator hose to the block and the large radiator hose to the water pump and drained most of the fluid out of those before doing the water pump. So if anything I did is leaking, I have no idea where the coolant would be coming from. It's not dripping down the engine at all, it's falling from space out into the plane of the balance belt. It might have dripped out or still be dripping out of the heater hose is all I can think of right now...
OK, I know it's been a while, but I have made progress:
I swapped out all the broken vacuum components and finished swapping the easy to reach ones that were not yet broken.
Finished putting the front end of the engine back together with the accessory belts and such.
Replaced the fuel filter.
Finished locking down the fuel rail.
Installed new distributor rotor and cap.
Installed new plugs and wires.
Installed the starter with new bolts.
Gave it a crank.
I'm happy to say that the engine will start and run on its own accord. Also, the wipers and headlights work. Unfortunately, I can't upload video of it running here.
However, it's only running on 2 cylinders. It seems like 2 and 4 are running and 1 and 3 are not. They all have spark, and all of the injectors were rebuilt about a month ago. I don't have a tool for checking the pulses on the injectors. Perhaps I can borrow an oscilloscope from work... I have a fuel pressure gauge that I can probably adapt to get on the rail to see where it's falling.
I'm pretty sure I connected the plug wires in the correct order. I put #1 at the line cast in the dist cap and went clockwise around according to the firing order on the cam housing, which I'm pretty sure ends up looking like this:


 12-19-2023, 01:23 AM