When you click on links to various merchants on this site and make a purchase, this can result in this site earning a commission. Affiliate programs and affiliations include, but are not limited to, the eBay Partner Network.
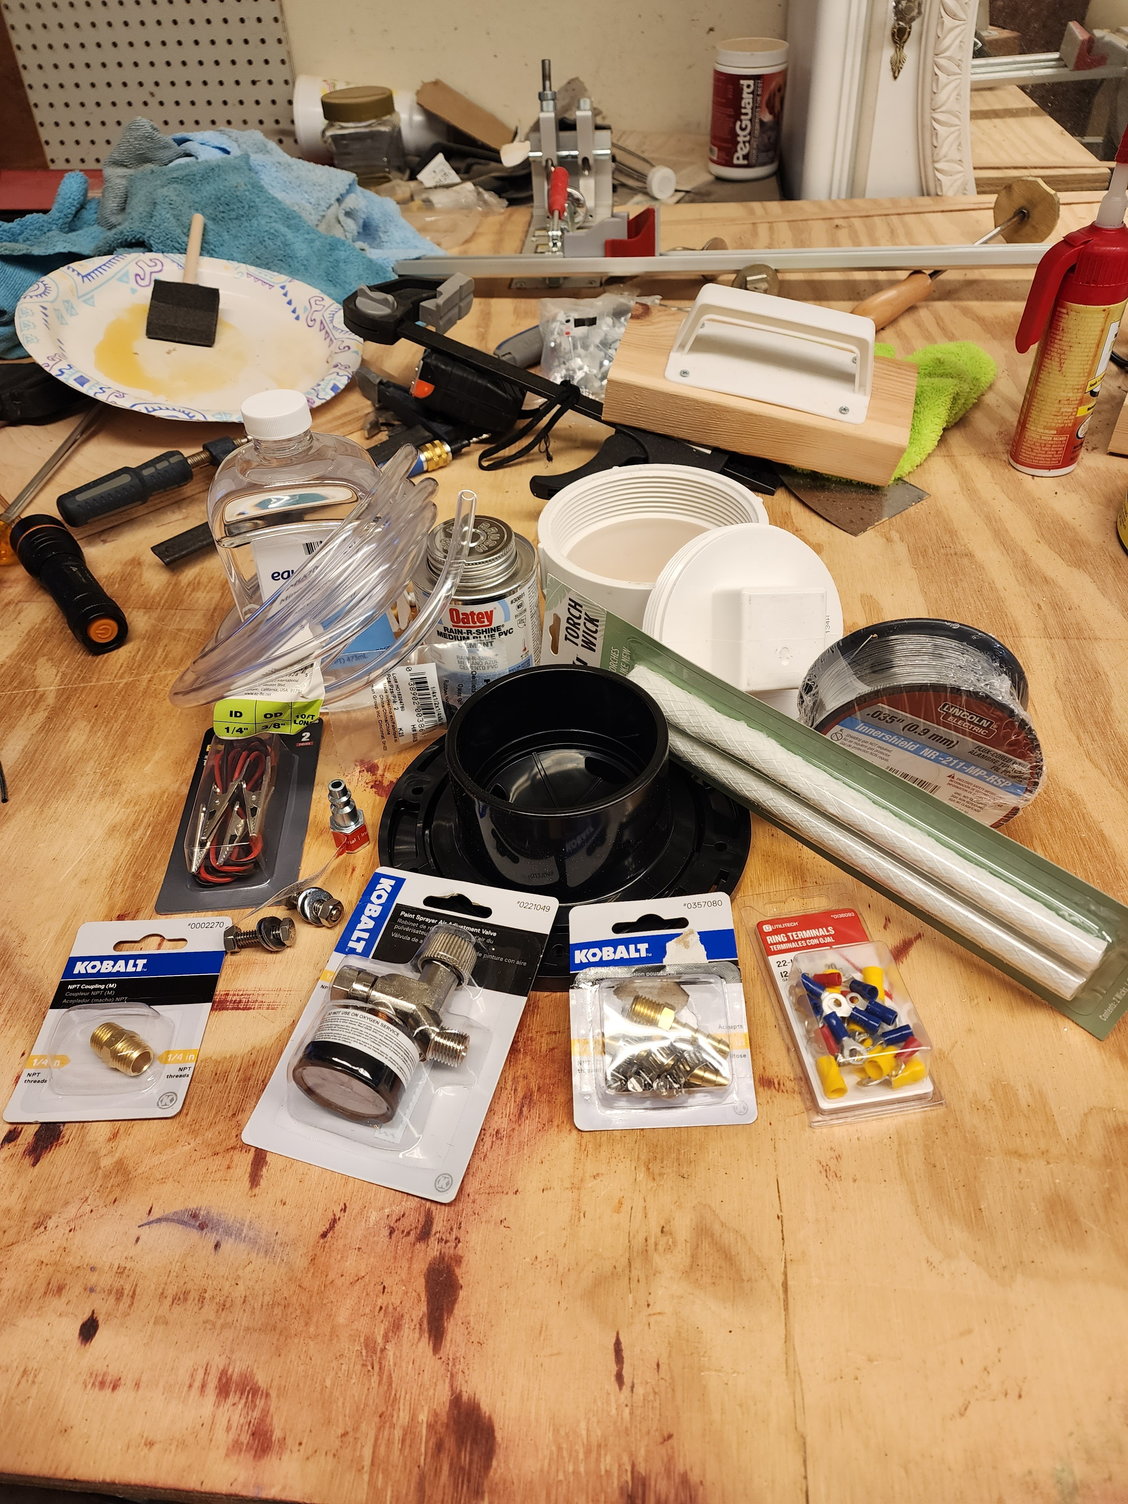
I found all the above, except the test lead alligator clamps and mineral oil, at Lowes. I had to go to Walmart for those. There were several "battery clamp" solutions at Walmart. One was a battery tester ($11) I could have hacked the clamps off of. And they also sold just clamps themselves for battery chargers ($5 for a set). However, to be honest, both seemed overkill for this project. I opted for the alligator clips because I wanted something smaller and easier to store.
There have been a few setbacks and learning opportunities. The first was I didn't have the right size bits for the air lines. A 3/8" bit is too small, and 1/2" is EXACTLY the size of the OD of the threads. AKA, the 1/4 adapters fit perfectly into the hole, but the threads have nothing to "bite" into. You need something just slightly smaller than 1/2". I could get a little bit of bite and used some thread sealant and hoped. But in the end, the inlet side stripped out attaching the air regulator. Final testing is on hold while the JB weld sets. That's my solution to not being able to thread the fittings. I also used some around the outlet, just to make it stronger.
I'm not sure what the perfect size is so that you can get the air line connectors to screw in and cut threads. What's between 3/8" and 1/2" in drill bits? Whatever it is, I don't have it in any of my bit sets. Using 1/2" works, you just have to be ready to use JB weld or something similar to make it solid.
The second lesson was when I tried to use welding wire like the guy in the video did. I used to have resistance wire (I used to build my own vape coils) but had no idea if I even still had it, or if I could find it. And I didn't want to unspool my welder to use its wire. However, the wire I bought was so brittle it would snap in half instead of wrapping around the wick. So I tore my storage apart. I finally found my old resistance wire (26 gauge), and so I used that.
That comes to the third lesson. I tried to OHM out the wire before wrapping it. But I couldn't get a reading. I later figured out that was because my MM was trying to auto-adjust, and just holding the leads on the wire was not making a good enough connection for it to zero in and give me a reading. I could have likely gotten a reading by manually setting the range, but I didn't know that then. So I just wrapped up the wick with what LOOKED right. Once I had it together I could get a reading. 9.6 OHMS. The meter could auto-adjust with a solid connection. I feared that was too high, but gave it a try anyway. It would produce some very weak smoke, but not near enough to be useful. I would say the wick was wrapped with 16-20 wraps to get that 9.6 OHMS.
Next, I decided to go to the other extreme. I cut the wire till I just had 3-4 wraps. 2.1 OHMs once I was done. I hooked that up and had LOTS of smoke! Yeah!! Then, after 4 seconds, the wick caught on fire. CRAP!!! That was a bit of fun and excitement. And it didn't exactly want to go out either. But I got it out finally. So I rewrapped it again. I'm now at about 8-10 wraps, 4.6 OHMS. The smoke is pretty decent. Waiting for the JB weld to set before trying it out. I suspect it's going to be just a little too light again. I think 3.5 or so OHMS is going the be the magic number. But we'll see tomorrow.
I haven't seen the air regulator used on the other DIY solutions, but I didn't want to trust the one on my big compressor to go low enough. My pancake compressor might have gone low enough, but I started thinking if I wanted to take it to a buddy's house to help them troubleshoot in the future, what would I do if they didn't have a regulator? Or a good one at least. So I added my own! It's for a paint gun. And I will admit, it's great. The amount of airflow control is very precise! Just what I was wanting! You can have just a trickle!
Once I get it dialed in, I'll post up exactly what OHMS worked. But I know this setup is GOING to work, just got to get the smoke production right. The total cost was about $60, if you don't include the welding wire I couldn't use, if you didn't use the regulator (or get a cheap one from HF), and didn't have to buy PVC cement. Surprisingly, 1/3 of the cost was the PVC cleanout adapter and cap. Those were expensive for some reason. Those are the white PCV pieces.
Vinyl hose, 10': $3.98
1/4 "repair kit" (brass fitting on the base the vinyl hose plugs into and fitting on the end of the hose): $5.98
1/4 quick connect coupler: $2.98
PVC toilet "knock out" flange (base): $2.77
Ring terminals: $6.35
Pressure regulator: $18.98 (optional)
1/4x1/4 M/M adapter(to screw regulator into base): $3.98
Cleanout adapter (what cap screws into): $16.68
Cap: $6.88
Wick: $4.98
Stainless steel bolts (power connectors. 2xbolts 2xnuts 4xwashers): $3
1/4 rubber grommets (to seal bolts): $0.78
Aligator leads: $2.50
Mineral Oil: $2
Resistance wire: $? (didn't know where to find local, used some I had)
I don't know if vape shops sell resistance wire anymore. DIY vape coils have kinda gone out of style. But you could check there. If anyone knows a chain that carries resistance wire, please share. I was trying to show a way to build this locally without having to use amazon. From shopping to done (aside from waiting for JB weld to set), this took me maybe 3 hours. I wanted to do my testing this weekend, so waiting on stuff online was not something I wanted to do.
A valuable tool for intake leaks. You should also consider building a boost tester. The smoke tester will not find boost leaks (e.g. a cracked intercooler boot that opens up and bleeds pressure.)
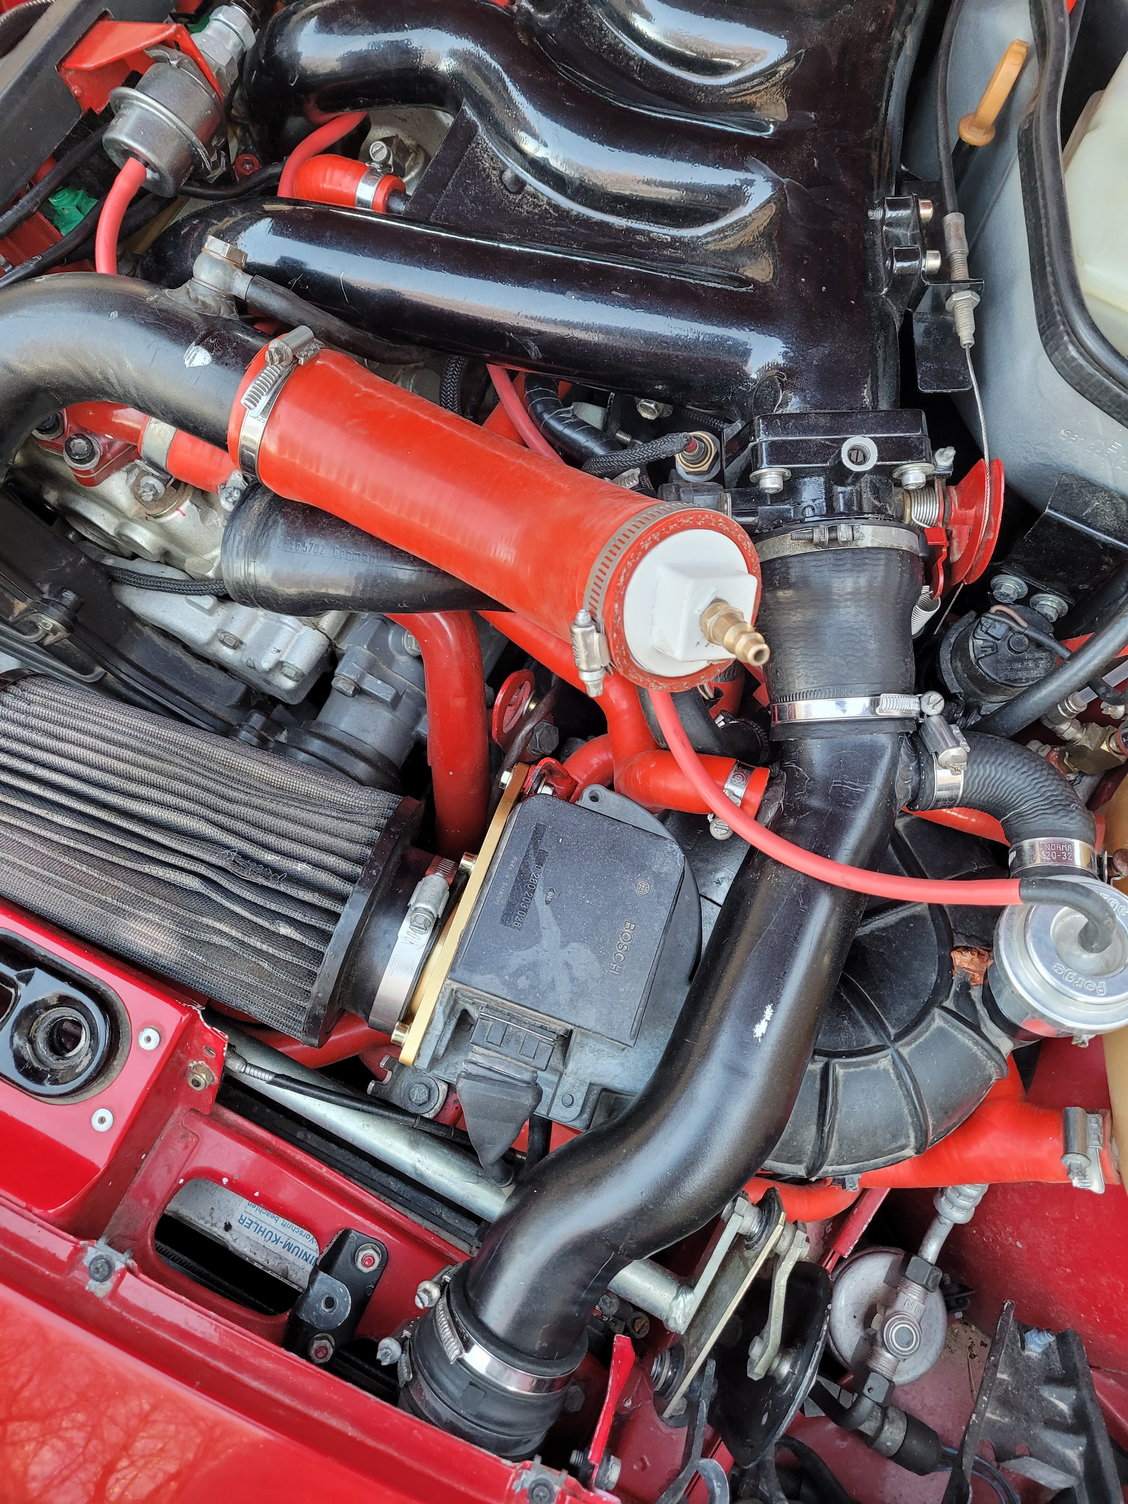
So, the smoke on 4.6 OHMS is a little low, but good enough for testing. I just found I don't have any major vacuum leaks. I tried from three different places. The FPR hose, the BOV hose, and the hose that runs along the back, to the big plastic "one way" valve over by the break booster/in front of the fuse box on the late models. That one wasn't great because it seems to go into a "switch" that's closed by default. I did check smoke WAS getting in the system by opening the oil filler, and smoke came out. I could detect some lazy smoke hanging around under the turbo cycling/timing valve. But it wasn't blowing out, just hanging out. I mean, I was putting smoke in with pressure! Some HAS to come out SOMEWHERE.
Any ideas of better places to feed smoke in? I am going to adjust my OHM's to get more smoke, just making sure there isn't a better spot to feed into.
So, the smoke on 4.6 OHMS is a little low, but good enough for testing..
I built one of those about two years ago. I never got the ohms right. I am sure now that I had too few wraps. The whole damn thing caught fire inside and was melting the vinyl tubing. Then I couldn't get a low enough psi. I threw in the towel and have since bought a smoke machine with onboard air.
If you get yours running right it is a cool project.
I am pressurizing at 15+-psi. This way I can check for leaks that might only occur under full boost conditions (I run 15+-psi). I found it to be much easier to listen for leaks instead of trying to figure out where the smoke was coming from. It will be hard to hear very small leaks. When I could not hear any more leaks (might need to use a hose to pinpoint leak) I used soap and water at connections. The weld for the bung on the intercooler hard pipe had a very small crack which would create very small bubbles, not big enough too worry about.
The smoke setup I have I could likely go up to 15psi. I designed it that way, with just this thought in mind. I need to do more testing, however. I can listen for leaks AND see them. And still use the bubble test if all else fails. We'll see. I'll report back with my results once I have them.

 02-12-2023, 01:17 AM