When you click on links to various merchants on this site and make a purchase, this can result in this site earning a commission. Affiliate programs and affiliations include, but are not limited to, the eBay Partner Network.
Locate and visit a machine shop or two in your area and get quotes for a basic valve job. Might not be so bad. Obviously, the HG and new nuts are cheap (the factory doesn't suggest that you need to replace the studs).
Hardest part is cleaning the mating surfaces.. but it seems you're finding pleasure in the mundane. Yes, those balance shaft areas are something else, eh?
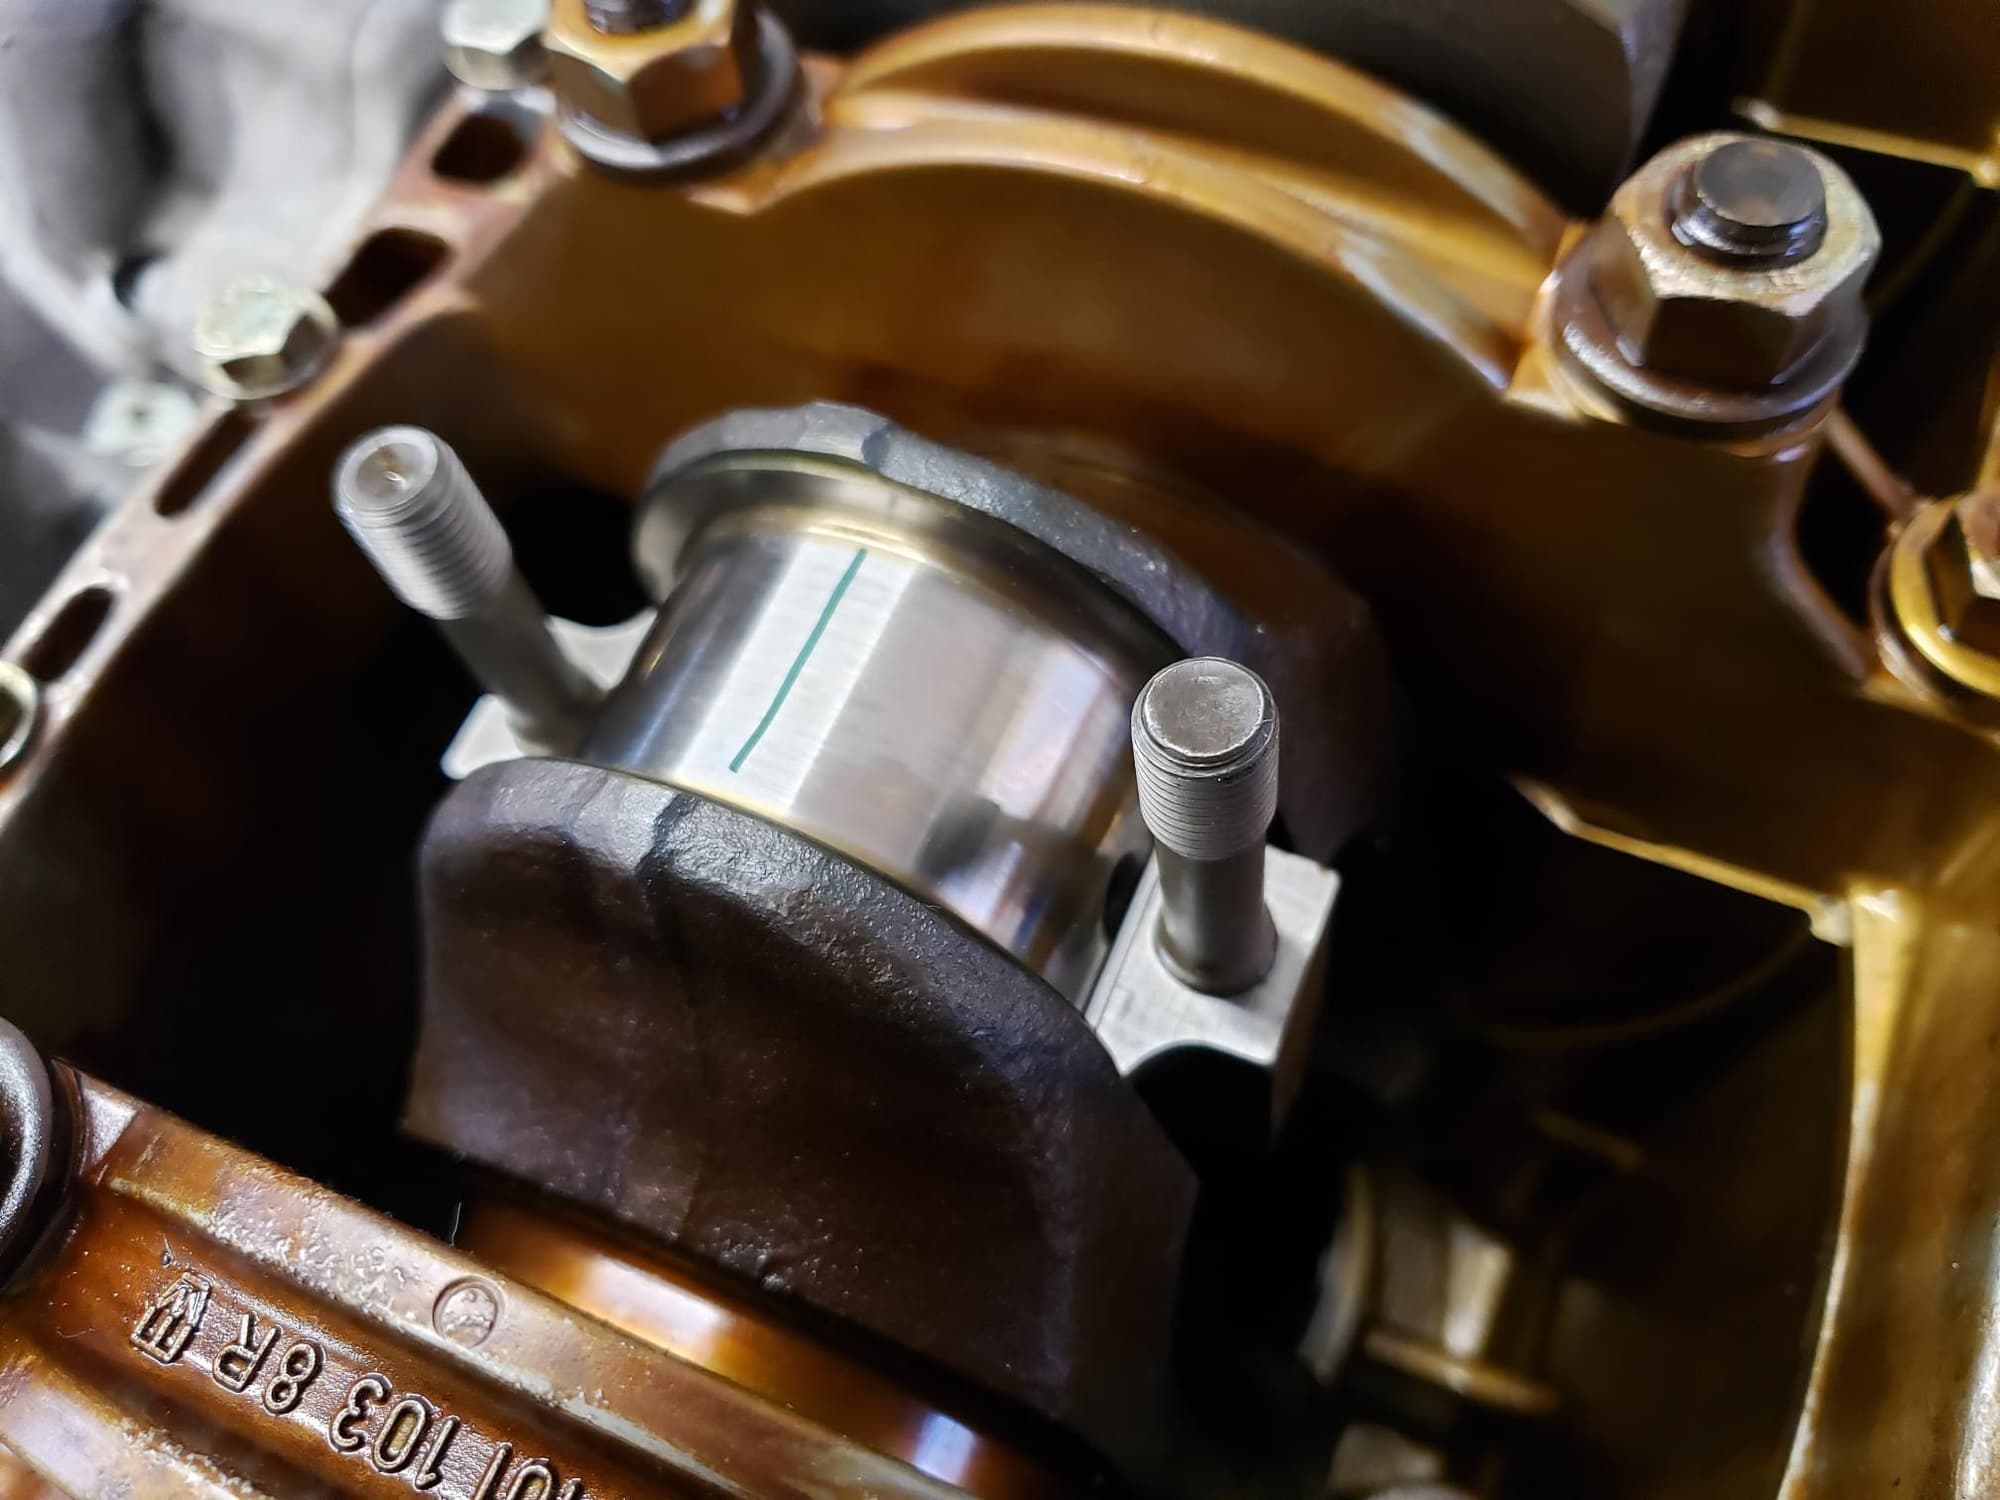
I've done half the rod bearings now and I've been very happy with how the old bearings and the journals are looking. I'm installing standard sized bearings, so I'm using Plastigauge on each new bearing to check for clearances.
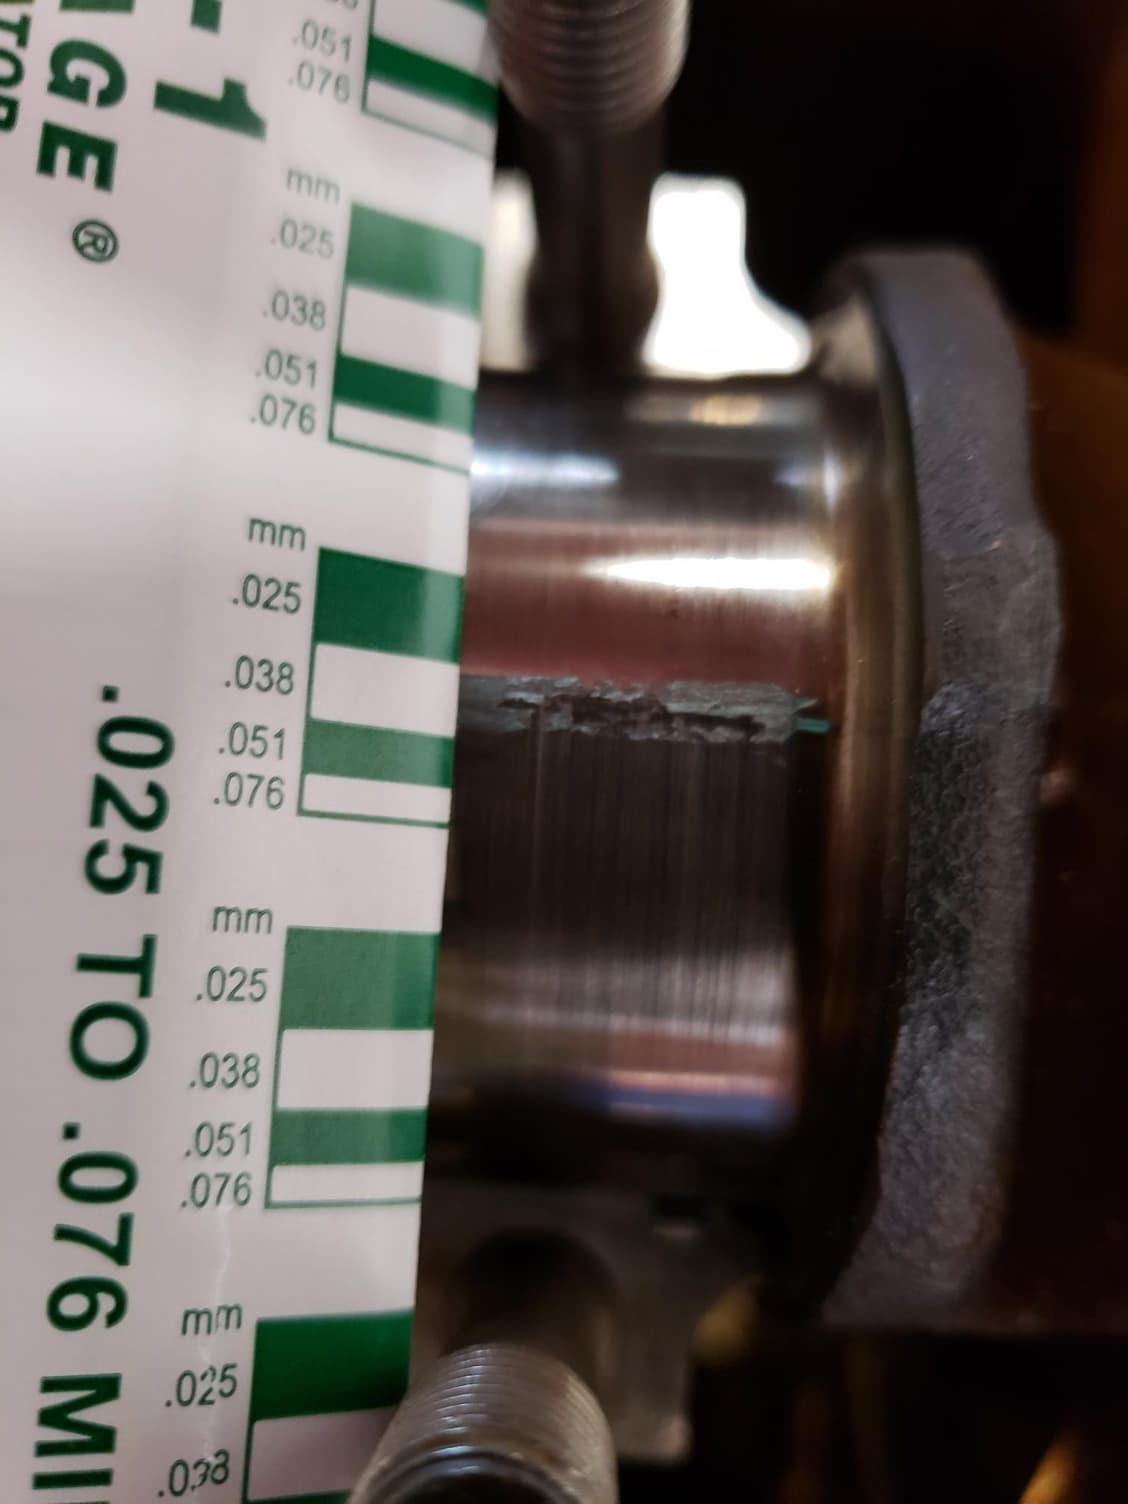
Here's a journal with a small strip of Plastigauge, and then again after having the rod cap and bearing torqued over it. Spec is 0.030-0.088 mm., and I'm probably around 0.045, so good to go.
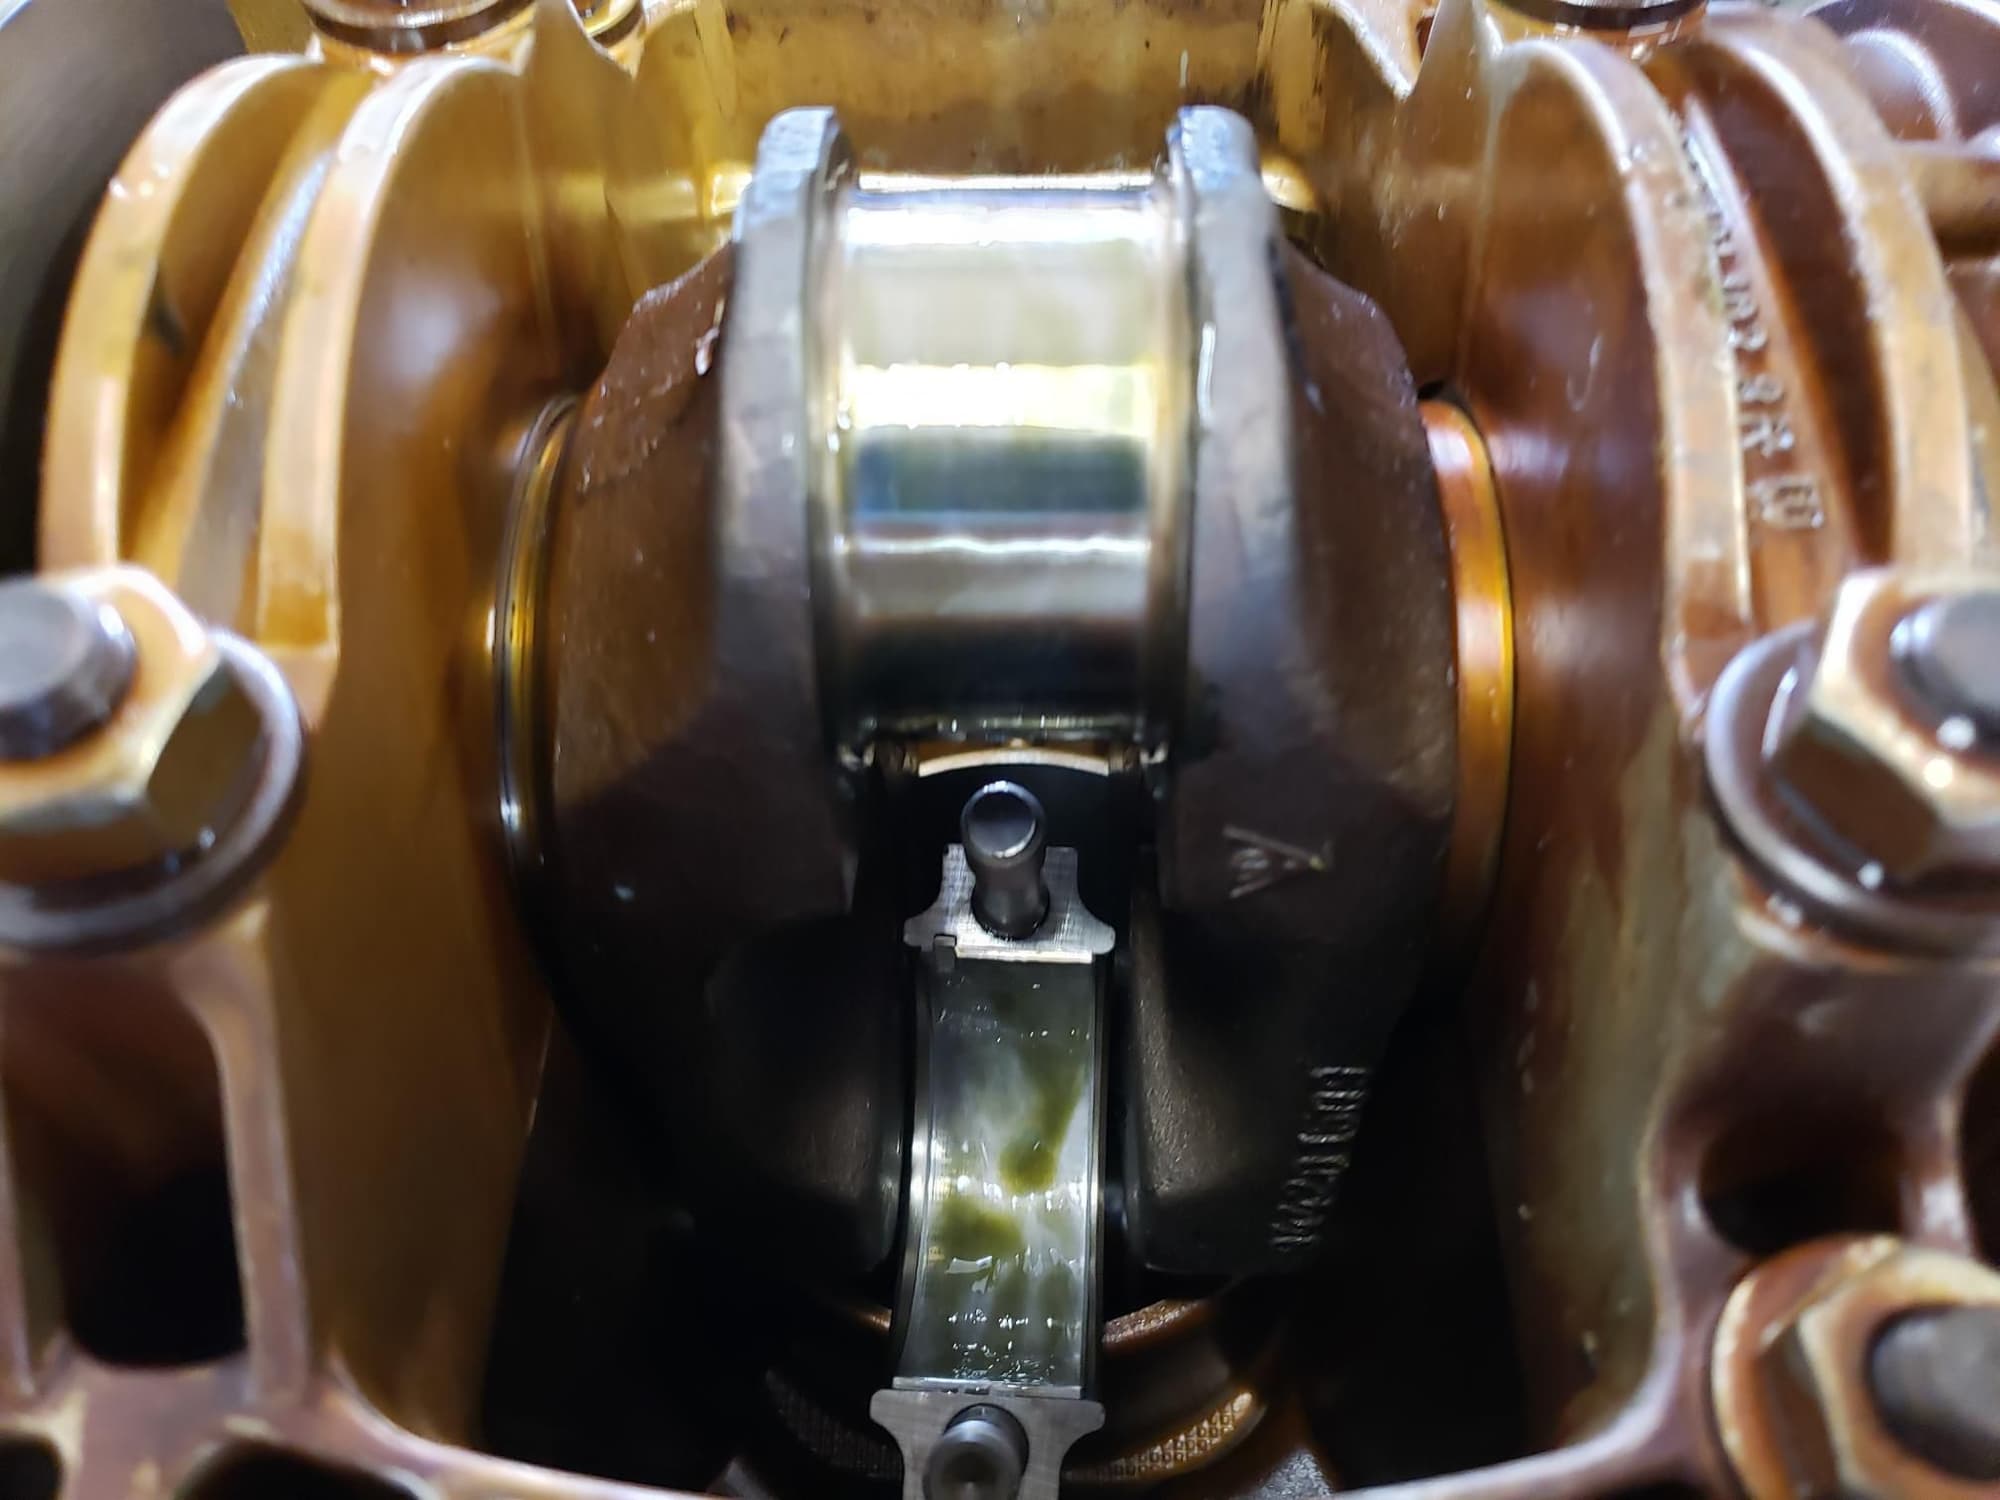
Then the new bearing with assembly lube ready for final installation. 55 ft/lbs. then 59.
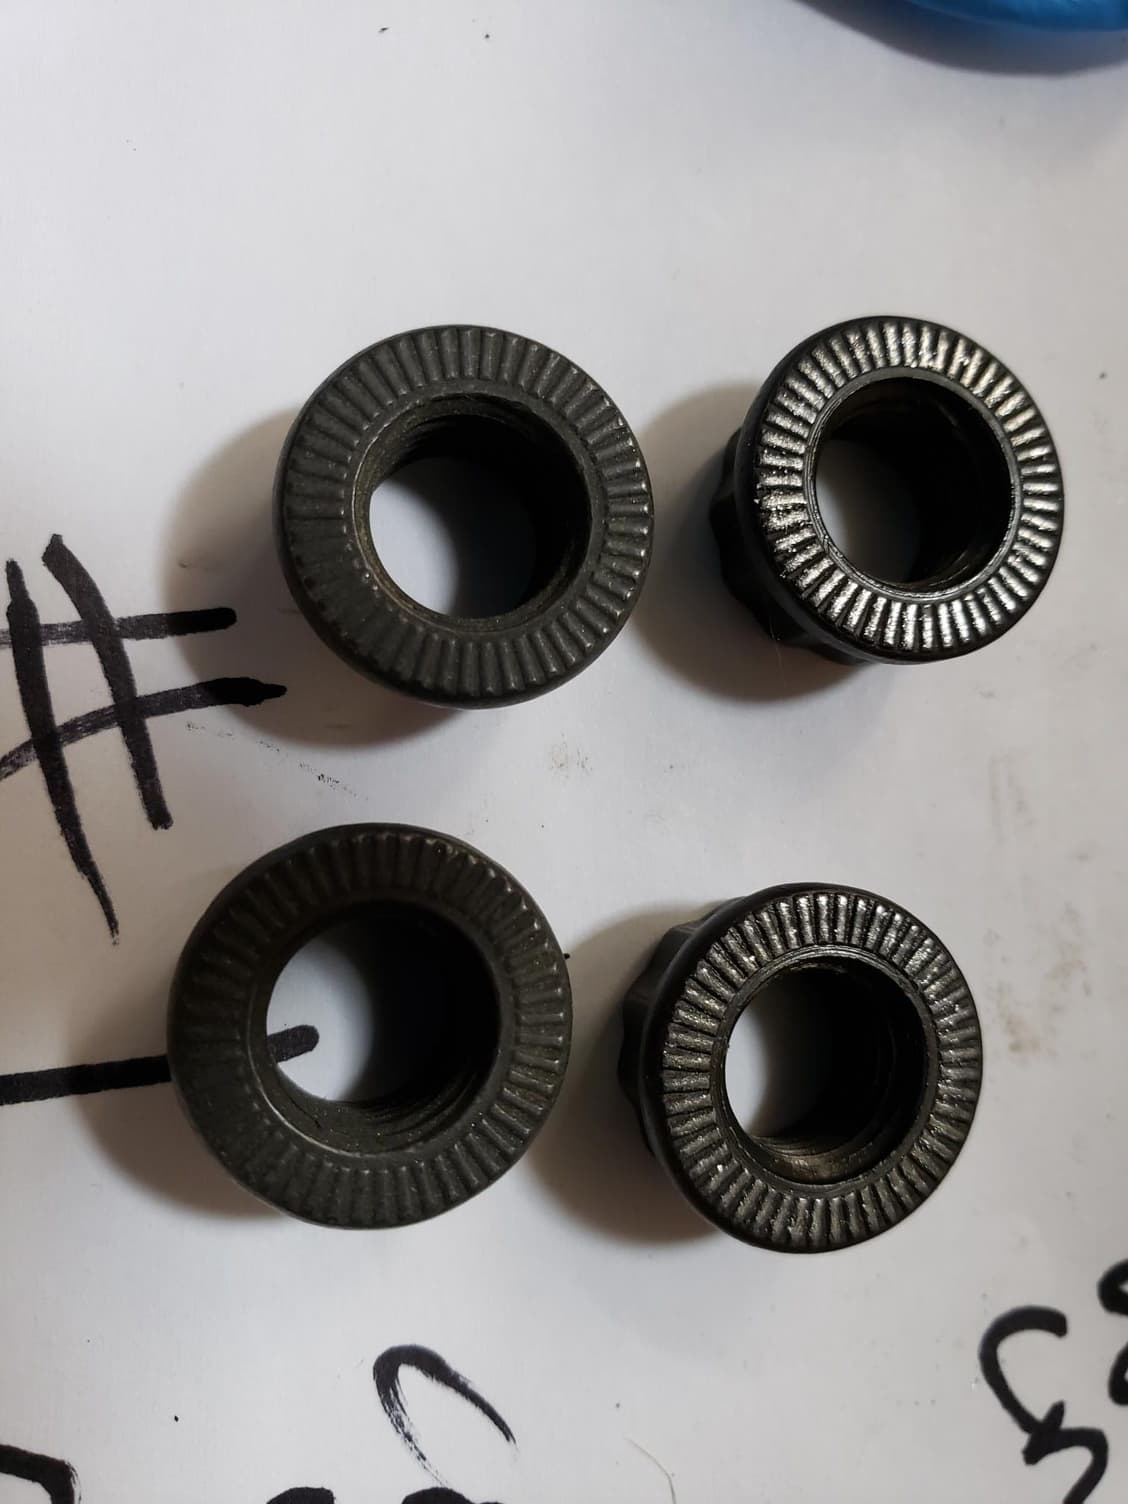
Here's a photo of why you want to use new rod nuts. You can see knurling on the bottom of the nuts that gets distorted when it's torqued down, causing them to lock in place, compared to the new, unmarred ones.
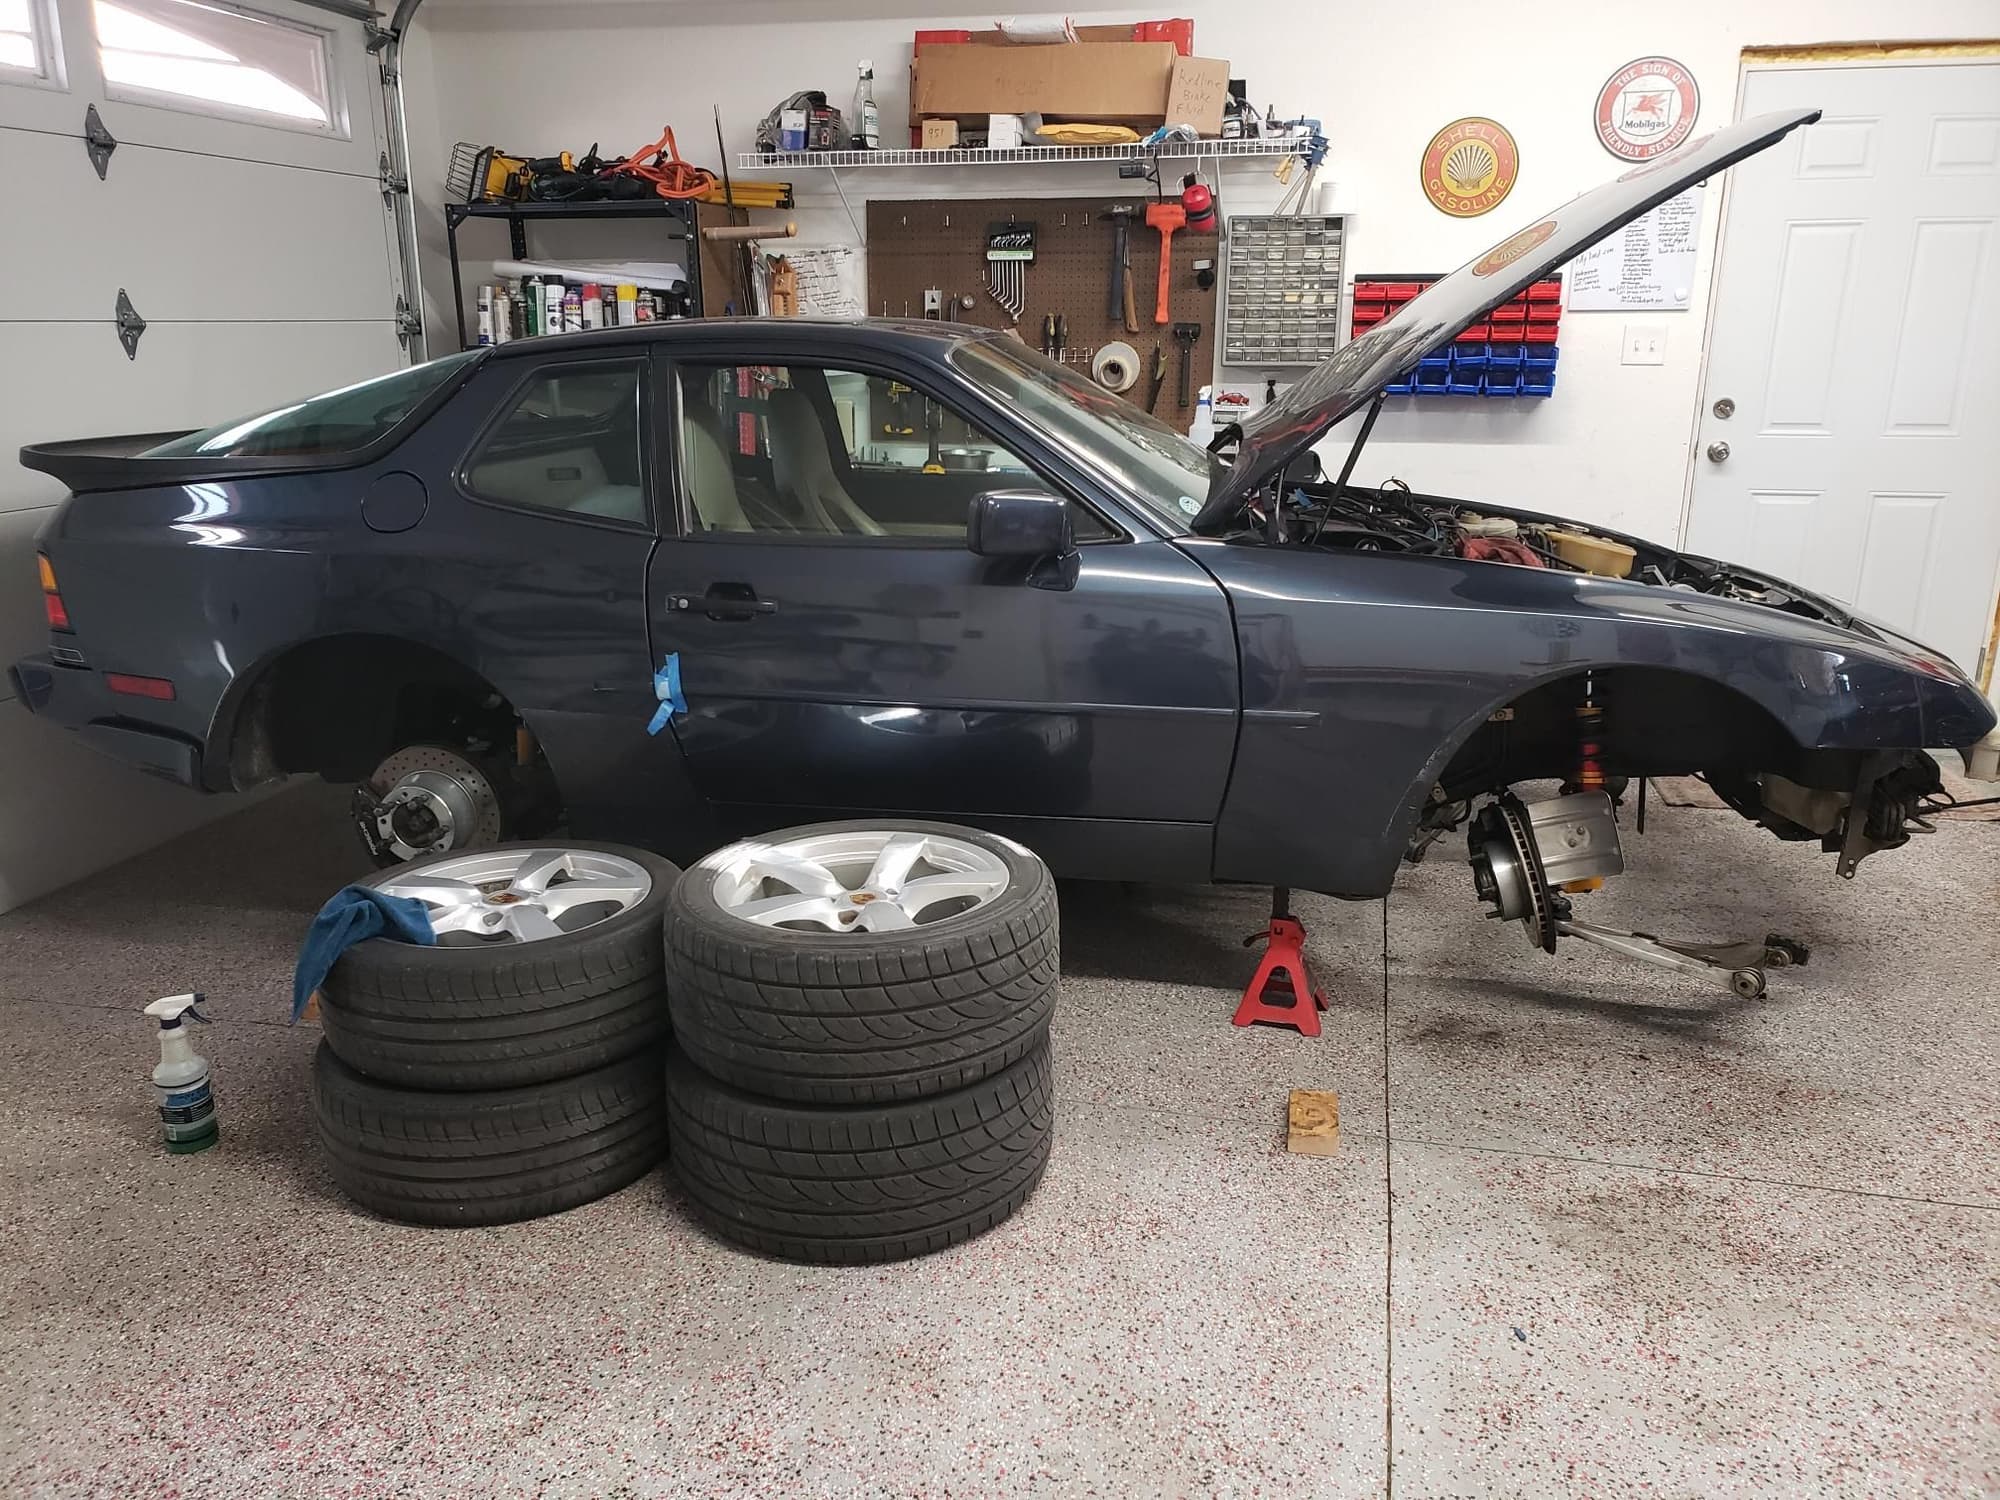
Here's my car waiting patiently (?) for it's freshened up engine.
As you can see I stole the wheels off it...so my wife and I could autocross the Boxster. Those Federal 595RS tires on a square setup worked very nicely on the Boxster. First time I could really get the car to rotate.
That's it for now, but more soon cuz I'll be on Spring Break starting on Thursday!
Do the head with the engine out of the car. It's not that expensive to get the valves lapped and new seals installed. When I took mine in, they said it was perfectly flat and didn't need to be refinished, so they just did the valves and seals. Cost about $150 for labor.
There's a chance one of the two small bolts in the front, left of the head will break off since they can be easily contaminated with coolant and weld themselves to the block. This is what happened to me. Much easier to deal with it with the engine out than in the car.
Replace every gasket, seal and o-ring while you have it out. You will thank yourself later. If the A/C system is not functioning and you want to get it going again sometime down the road, consider removing the hard lines and having them rebuilt. Also changing the clutch line, clutch master and slave is quite easy to do now as well. My clutch felt so much better after changing everything. If you don't want to to the master and slave, then at least do the line. The rubber portion is 30+ years old....
Since I finished the rod bearings, I removed the head this morning. It's true, the two allen bolts at the front of the head were difficult to get out. It was a miracle I got the second one out without breaking it!
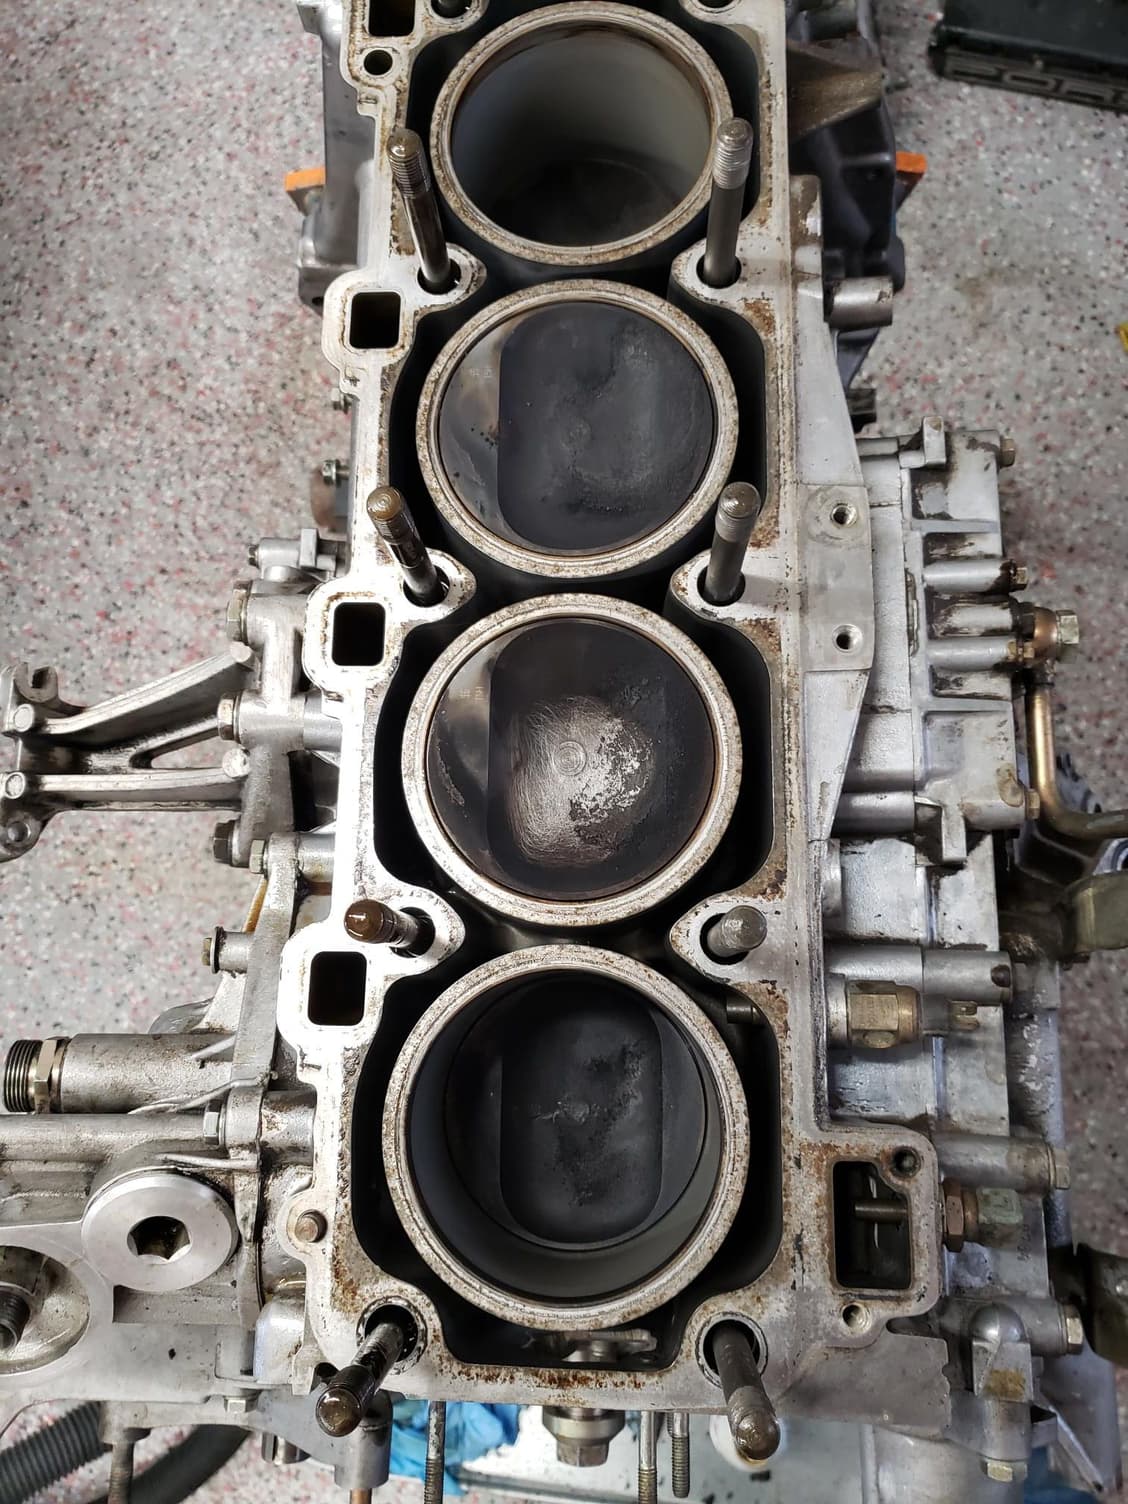
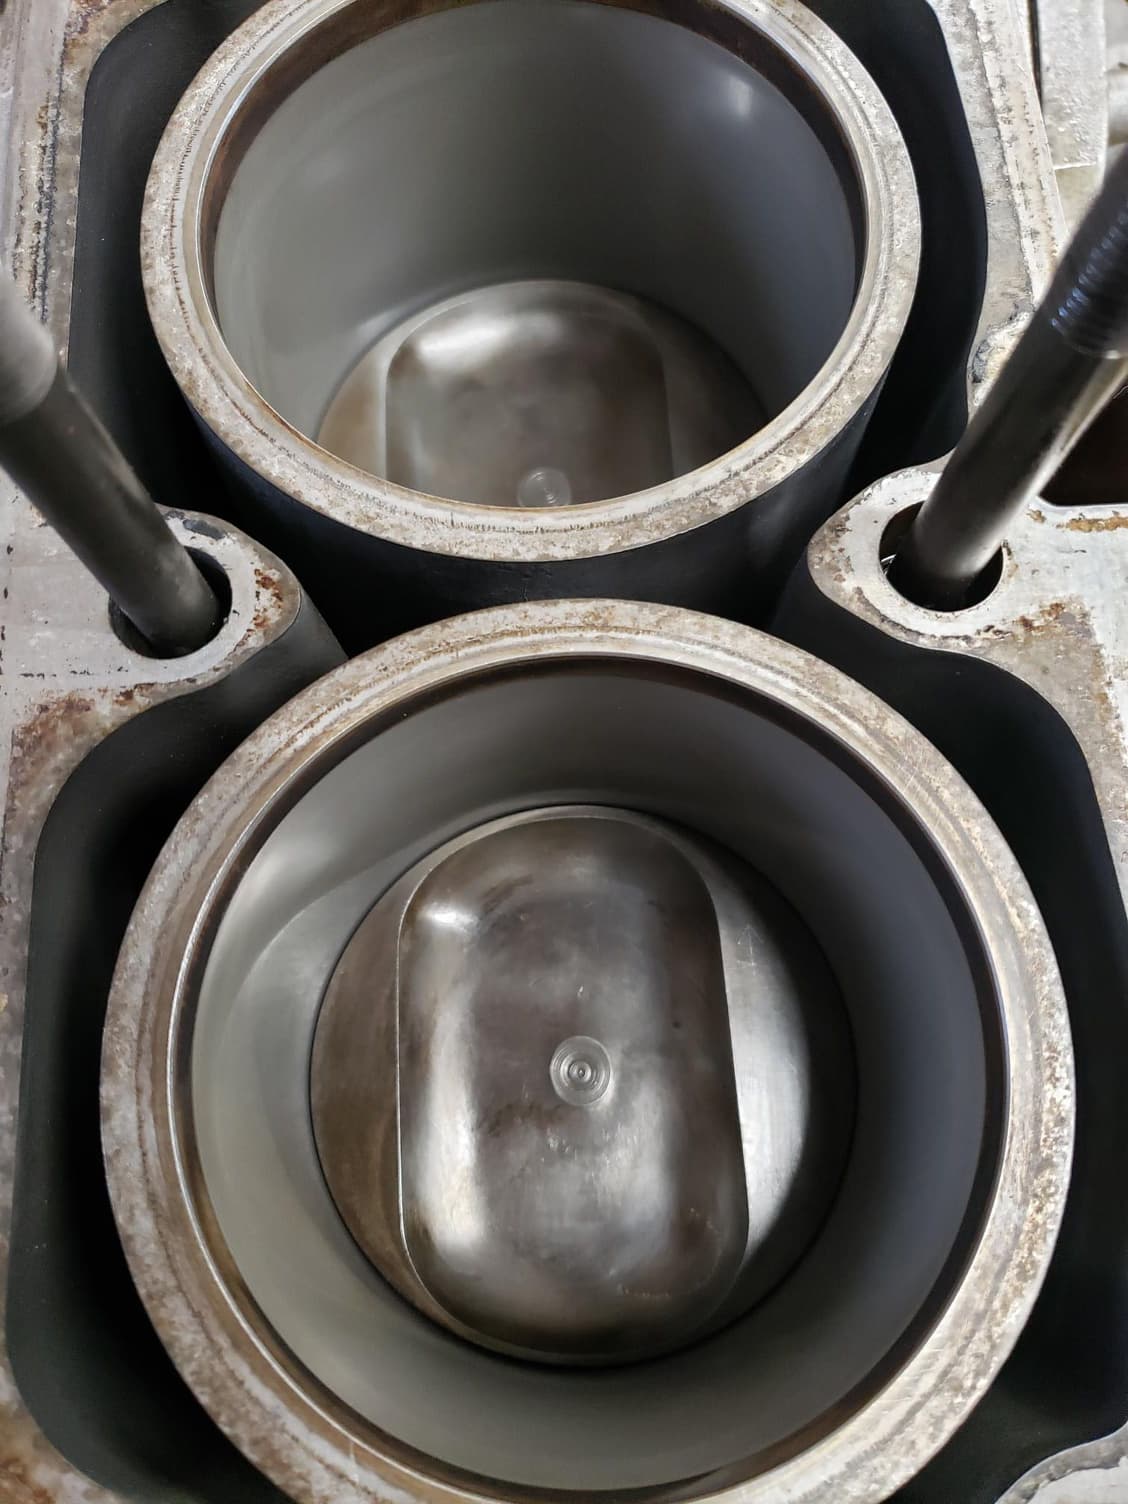
Other than that, the head came without much of a fight. A few good taps with a rubber mallet got it started. Decent amount of carbon on the piston tops, but not terrible. The cylinder bores look funky, but this is before wiping them clean.
After cleaning off the carbon, #2 and 3 pistons are looking good. Very nice bores. What's the thought on removing the bit of carbon build up at the top of the bores? I seem to remember hearing that leaving it can help the head gasket seal better.
New valve guides and stem seals are on the way, so when I get those, I'll get the head to a machine shop for the refresh. Front of engine seal kit from Paragon is supposed to arrive today, so I should have more to keep me busy.
While you are waiting, if you hadn't already, turn the engine almost upside down, using some WD40, brake cleaner etc., something with the red straw, spray around the piston at the cylinder wall with one hand and light air pressure from a blower in the other hand, sort of pressure washing any dirt, carbon, gasket crumbs that might have fallen between the piston and cylinder wall and is now resting on your top ring.
You don't want any of this material scratching up your cylinders on start up.
T
Thanks for the good suggestion. I decarbon the tops with a shop vac in one hand, then put vacuum against the piston gap to clean it before rotating. But I still get nervous there's going be something stuck in there, so an extra precaution is appreciated.
968to986 I just want to thank you for this thread, all your posts and pictures. I am about to talking on this very same project and your posts have been very informative.
Would like a description and picture of your mating surface clean-up technique. I used a stone to great effect
I haven't gotten to the point of pre-assembly cleaning of the mating surfaces, but as I figure out my methods, I'll post it. I appreciate the suggestions.
Originally Posted by ZRDeuce
968to986 I just want to thank you for this thread, all your posts and pictures. I am about to talking on this very same project and your posts have been very informative.
Thanks, glad to hear it's useful! The updates may be slow at times but I'll keep doing them as I make progress.
Here's a few gratuitous photos just because.
It's kind of crazy that the engine has been torn down to a short block:
What it looks like when your engine has a systematic, controlled explosion in your garage. I can't believe how many parts there are. Everyone I invite into the garage is in disbelief.
New parts for the front of engine reseal, oil pan gasket, cam box gaskets, and valve guides and seals for the head.
Your "garage" looks as comfy as a living room. For someone who works under a plastic tent, it's heaven. Nice! PS that's a lot of mating surfaces to clean lol
Your "garage" looks as comfy as a living room. For someone who works under a plastic tent, it's heaven. Nice! PS that's a lot of mating surfaces to clean lol
Yes, it�s a real privilege to work in my recently built garage, and really it�s more than I ever dreamed I could have (well I dreamed it, just didn�t believe it!). Up until two years ago, I always worked on my cars outside or when I was really living large, I worked in a Harbor Freight zip up tent. My wife always called it the circus tent.
Yes, it�s a real privilege to work in my recently built garage, and really it�s more than I ever dreamed I could have (well I dreamed it, just didn�t believe it!). Up until two years ago, I always worked on my cars outside or when I was really living large, I worked in a Harbor Freight zip up tent. My wife always called it the circus tent.
You are double-lucky my friend: my wife's descriptions include far more expletives

 02-25-2019 | 03:26 PM


")
