When you click on links to various merchants on this site and make a purchase, this can result in this site earning a commission. Affiliate programs and affiliations include, but are not limited to, the eBay Partner Network.
Very cool! Should be a fun car when it's all sorted. Are you doing the powder coating or sending it out? I'm not too crazy about the non-factory color scheme, but I really like that you're making it your own and the quality looks great.
Are you doing the powder coating or sending it out?
I do most of my PC. Some things, like the cam cover, I will send out because I can not do the color I want. My kiln is only about 32" high so I am also limited in size.
I highly recommend getting a PC set up. It is cheaper, faster and far more durable then painting. The media blasting gets the pieces pretty clean and gives the surface a nice key. I do small pieces in a large toaster oven, so you do not need a large oven or kiln to get started.
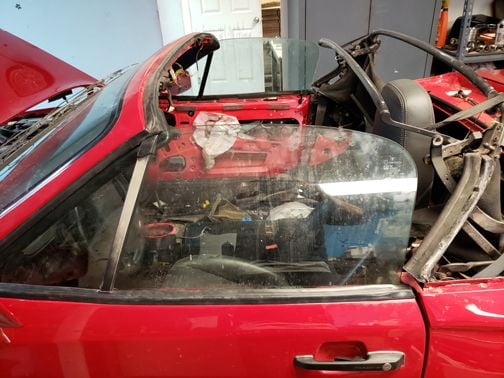
I finally switched the passenger handle to a script handle so I could finally put the windows back in.
Yeah windows!! The may be dirty but they are in! What an ordeal.
I decided to put the quarter windows in first. They are held in by two bolts on the top edge of the window and one stud attached to the bottom of the window channel. This stud has to be removed in order to get the window channel through the opening in the top. So I removed the stud, put the window in and tightened the two top bolts. When I went to put the stud in...well that has to be done before you lower the channel all the way down. So off with the two top bolts, pull window up six inches, attach stud (with integrated big washer), lower window, attach top two bolts and go to attach bolt to stud on bottom only to realize the stud on the bottom with the attached large washer needs to clear a wire harness at the bottom of the door . The only way to do that, yep raise the window again! So I sorted that out and decided to put the rubber window strip (?) on top of the door on. You guessed it, the quarter window has to be unbolted in order to put it in! So I unbolted the window, put strip in, bolted window back up then did the drivers side quarter window.
Now that I finally got both quarter windows in, after way too many tries, it was time for the main windows. Here is a hint for convertible owners - the main windows have to be put in before the quarter windows! So out with the quarter windows!
I managed to get the main windows in. If you think I remembered to attach the stud to the quarter window before bolting the top two bolts on, you are sadly mistaken. I am not that bright. Or perhaps I am a masochist.
When I got the car and tested the windows to say they moved slowly would be an understatement. They barely moved. When I had the doors apart I took the window motors apart and replaced the hard nasty grease with fresh. Also replaced all the rollers, some of the original ones were not quite round. I also scrubbed the felt window channel out real good. With everything clean and greased the windows now work, honestly at least 20 times faster then they did. They seem like normal power windows!
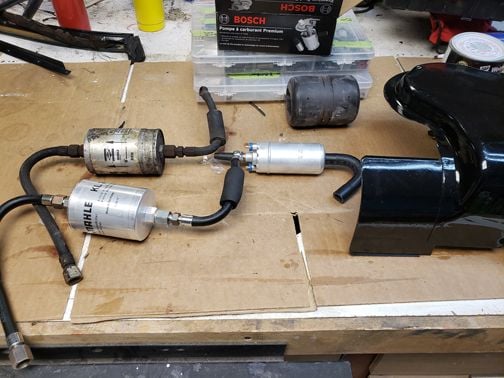
Got some more parts in for the fuel system.
Big difference between the old and new! Just waiting on the bolt and crush washers for the fuel pump.
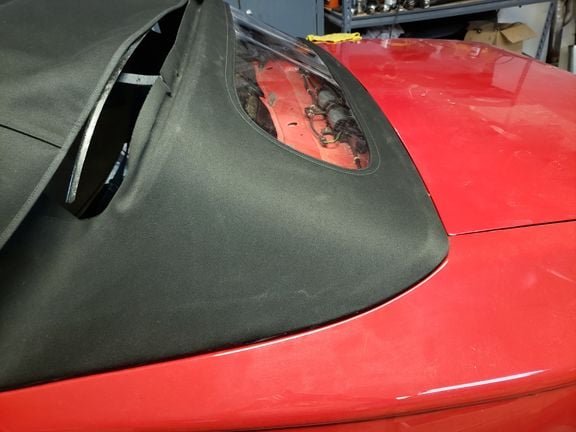
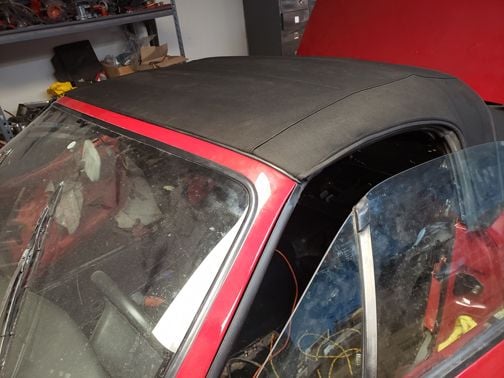
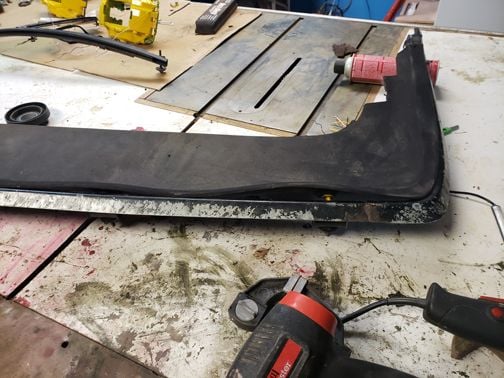
Started installing the new top.
Did the back part first.
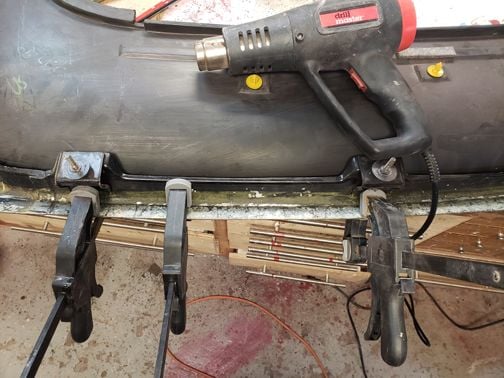
With all the complex curves I thought this would be hard. It turned out to be real easy. No wrinkles in the fabric and a perfect fit. The window has a couple of waves in it that hopefully will shrink out with a couple of heat cycles. The fabric is tight though.
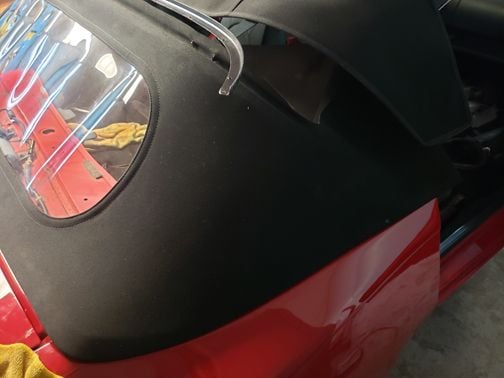
For those who have done this before I am sure you noticed my mistake. No rear shelf. Must be put in before you bolt the back down. Arghhhhhh.
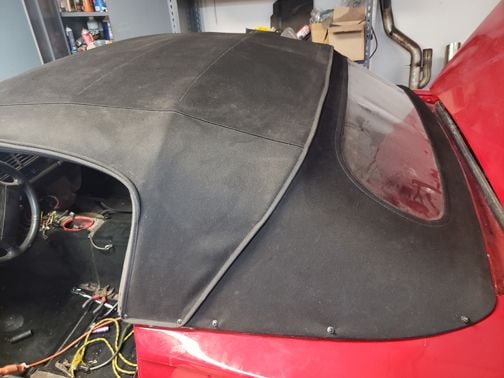
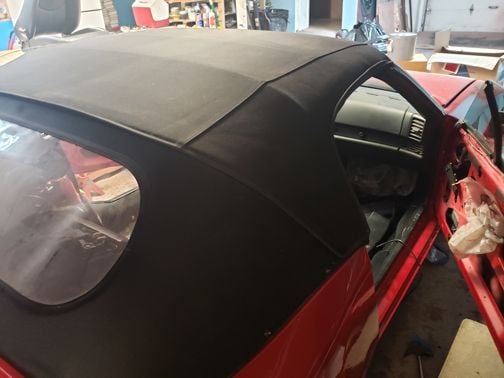
Next was the front part. Unfortunately I did this before realizing the rear shelf needed to be in!
Yes, I did notice the dirt over everything and will wash eventually
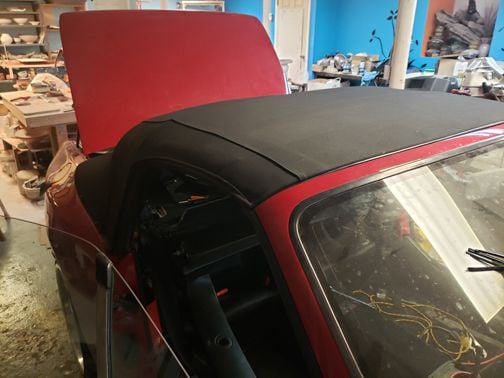
Overall I think the top came out great. Still need to make a couple of tweaks in positioning the top - would have been much easier before I put the top on, of course! Headliner is only half in so will finish that this week.
I helped friends replace a top on an Eclipse and a La Baron, those were afternoon jobs with a staple gun. This car however is a HUGE job! If I did not keep the old top and frame, putting this jigsaw puzzle together would have been really, really hard.
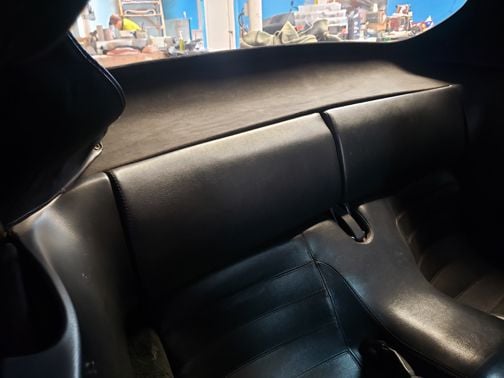
Made a little progress. I had to "convince" some of the interior panels to conform. Here is the rear shelf before
A little "convincing"
and final
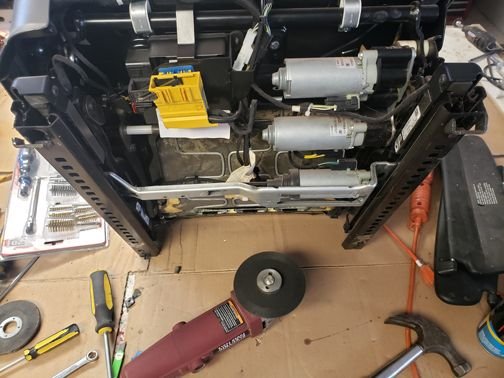
I started in on getting the seats to work, I cut the pins off along with the front angled mount so they would mount up
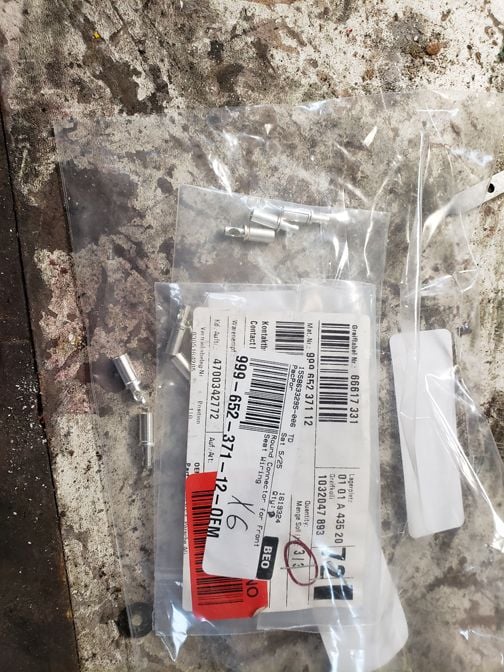
Since the electrical connections are different I decided to match the 997 wiring to the 944. I got the connector, ordered the non refundable MALE pins, and this is what I got
$32 worth of non refundable FEMALE pins. Will order from Porsche directly
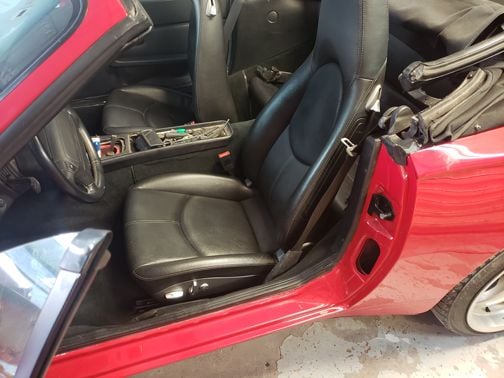
Test fitted the seats
Also in the above picture you can see I got rid of the "twist" in the seat belt. Also put satin vinyl on the front window channel
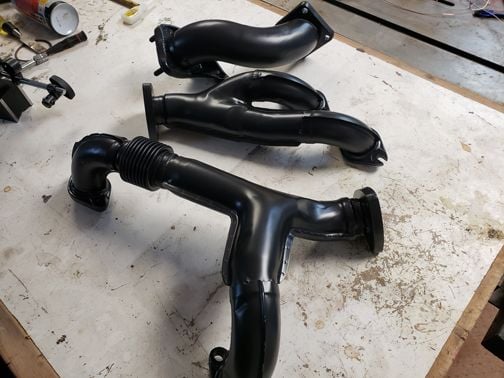
Picked up some exhaust from ceramic coat
I am halfway to dropping the rear suspension so I can remove the TT. I think I will leave the TT out until I install the engine to make it easier. Although dropping the rear twice...
As I wait for my head to come back, the block will get assembled this week
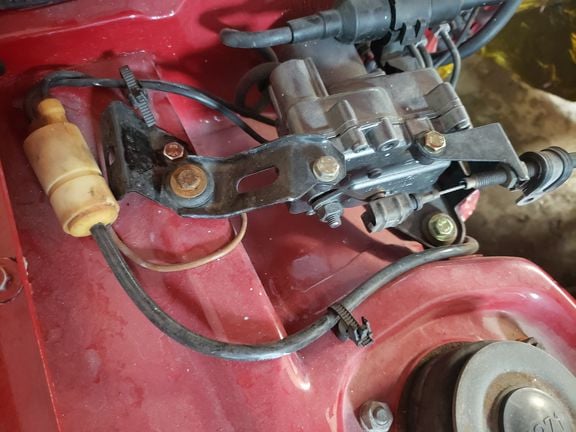
ZOO, thanks. I highly recommend you put in an emergency release cable for the trunk in. I am looking to replace my whole latch with something better.
aussie944cab, I bought it off ebay from autoseatsandtops, the price changes from time to time, from 375ish to 500ish, so wait till it is lower.
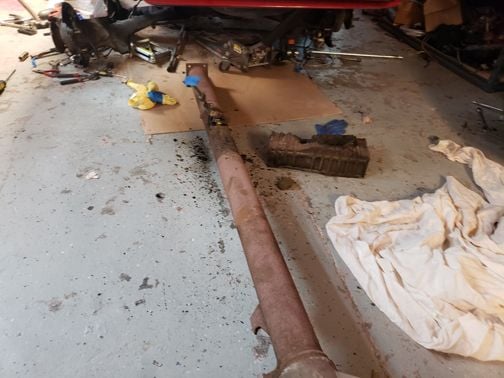
I got the TT out
That was fun on a major scale! Just need to do it two more times.
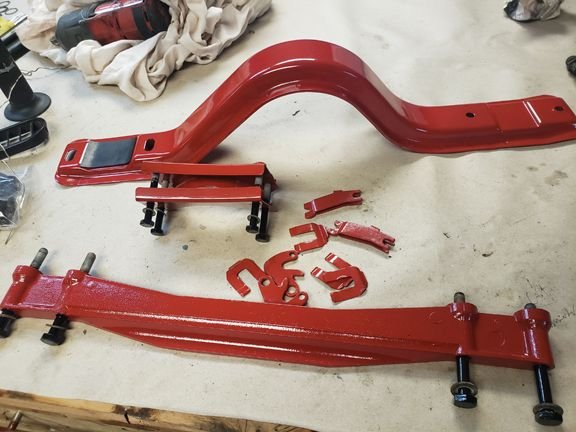
Also cleaned up the hardware and braces
Hoping the powder coat on the bolts will help with galvanic corrosion between the steel and aluminum.
Did your car come with the ABS module? I'm pretty sure all years of the 944S2 had ABS from the factory. If so, having ABS is much better than having your wheels lock up. Personally I'm sure there are some crossover wiring between the DME and ABS module. I have no idea how you would wire it with a 951 DME, unless it's a later turbo with ABS which is pretty rare. Thanks, Kevin
A light coat of nickel based never seize will prevent the galvanic corrosion.
I plan to use anti seize wherever possible. The powder coating is for the parts that do not get anti seize. Here is a better picture of what I did. PC on the head, shaft and tip of bolts.
Anti seize will go on the threaded part. The head and tip of many of the bolts show severe degradation of the zinc chromate protective layer. Some have lost all the coating and started to rust. I do not have pictures but the smooth shaft of the bolts going through the cross support had galvanic corrosion from from the steel touching the aluminum. In a loose space like this the anti seize would be washed away eventually.
Just for fun, a while ago, I blasted all the zinc chromate off a bolt (you can literally see it blasting away while your doing it) and put it in my engine compartment to see how it would do.
Can you guess which bolt/washer has been stripped? This is stored indoors and the engine compartment has been hosed off 8 or 10 times (I know it needs washed again!). The bolt started rusting after the very first rinse! Never blast off the coating without re-coating it with something. I have electroplated some back to the original zinc chromate but it is a pain. When/if I get the time/energy I have been thinking about plating all the ground bolts/connectors in gold to prevent ground issues. Maybe this weekend. I just picked up my head from the machine shop and want to slap everything together, so maybe not.
Did your car come with the ABS module? I'm pretty sure all years of the 944S2 had ABS from the factory. If so, having ABS is much better than having your wheels lock up. Personally I'm sure there are some crossover wiring between the DME and ABS module. I have no idea how you would wire it with a 951 DME, unless it's a later turbo with ABS which is pretty rare. Thanks, Kevin
Yep, it does have ABS. I have yet to check the wiring for this, I just ASSUMED it was a stand alone system and never looked into it. There is no need for it to communicate with the DME that I can think of. The wheel speed sensors are specific to the ABS, or at least I do not think the DME could use this information. This is an old car, on newer cars the ABS HAS to communicate with the computer (DME, ECU etc) because of traction and stability control etc. I have yet to research this particular ABS system, but in the early days of ABS ABS sucked on any surface that did not have perfect traction (rain,snow,ice,dirt etc). If I remember correctly, there was a car or two you could turn the ABS off and I was mad that this was not offered on all cars.
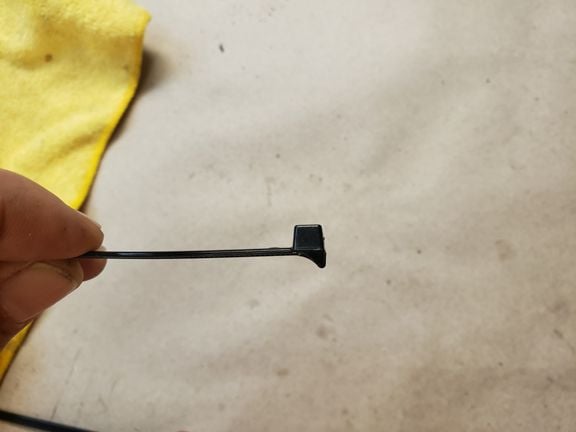
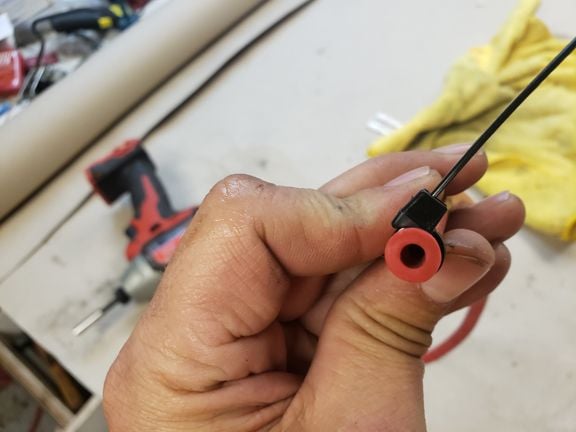
I know this is silly, but I ordered some zip ties to secure the silicone vacuum lines better then normal zip ties. Here is what I ordered
Here you can see that there is no gap when tight, without deforming the hose.
compared to a normal zip tie (with a much smaller "head") that leaves a gap. I imagine a bigger "head" would leave a bigger gap - and possible air leak.
I was worried they might be too big, but seems to seal pretty good. Hopefully they work.
You are right about the ABS - it is purely stand alone system, it has it's own separate harness that does not communicate with DME or other computers except for dash light.
This is the first time I can see zip ties like this - very interesting! How are they called?


 03-22-2019, 02:08 PM