A/C Upgrade Project Completed. It works! (long w/pics)
 04-15-2006, 10:18 PM
#1
Three Wheelin'
Thread Starter
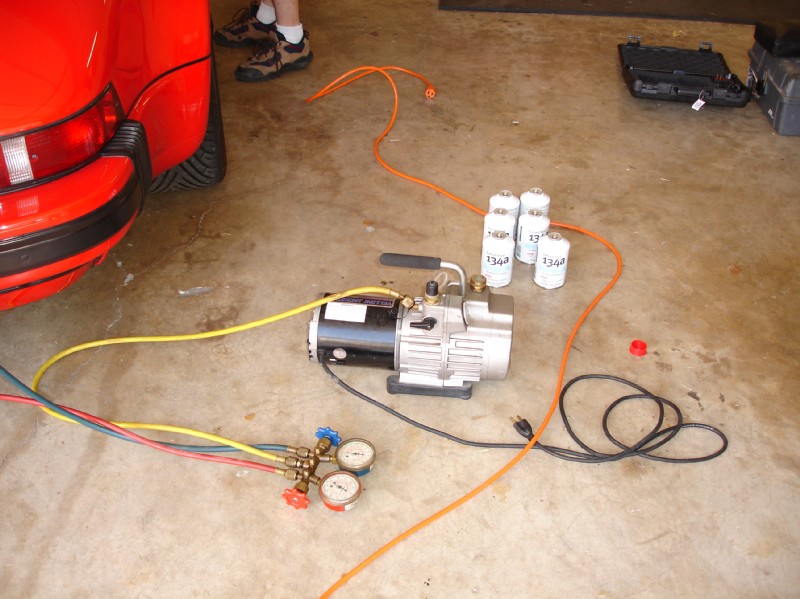
I finally finished the A/C upgrade project for my 930 that I started in November. I replaced the rear condenser with a much higher efficiency multi-flow condenser, all the hoses with barrier hoses, the evaporator with a higher-efficiency serpentine evaporator and the drier with a new one that incorporated a high-low cut off switch. A local Porsche enthusiast and A/C expert Bill Middleton brought his gear over last night and evacuated the system, letting it pull vacuum all night, then returned this morning and charged the system. It is working very well. A vent thermometer showed the temperature at the center vent in the low 30's. Today's weather was sunny, high of 87, humidity of 42%. Some pictures follow. Hope this doesn't bore you but I wanted to document a little of what is involved in one of these upgrades for those who are interested.
I decided to do this project because my factory A/C didn't work well. I bought the car last June and had the A/C charged at that time. It worked just OK for about a month, then became ineffective. In Dallas, if you don't have A/C, it's just no fun to drive, so I decided to upgrade it with the type of products I had read about in posts on the message boards.
It took so long for several reasons. One, I had never done this before so wanted to be very careful. Two, I didn't have a lot of free time to spend and three, I had a couple of development issues to overcome. I bought the parts for my upgrade as a kit from Retroair (retroair.com) located in Dallas near where I live. This was a major selling point for me as I got to meet the man and see the products before I bought...and I knew where he lived. Rock Browning, owner of Retroair, was a first class guy to deal with and I now consider him a friend. He has a background of building air conditioning kits for Jaguars and had also developed a kit for the 911 Carrera using the advanced products I described earlier. Unfortunately he didn't have a specific rear condenser for the Turbo since a development vehicle had never been available. He had an advanced multi-flow condenser he thought would work and we agreed I would try to fit it to my car.
My objective with mods on my Porsches is to never cut anything and to stay as "factory" as possible. My intent with the rear condenser was to make it fit using the same brackets the existing condenser used. My car is a 1989 930. It also uses a connection from the compressor to the condenser that is not just a flexible hose -- it is in large part a hard aluminum line that runs close to the deck hinge and leaves clearance for the air filter and oil filler cap when the deck is closed. I wanted to retain that type of connection as well but wasn't sure how I was going to do it.
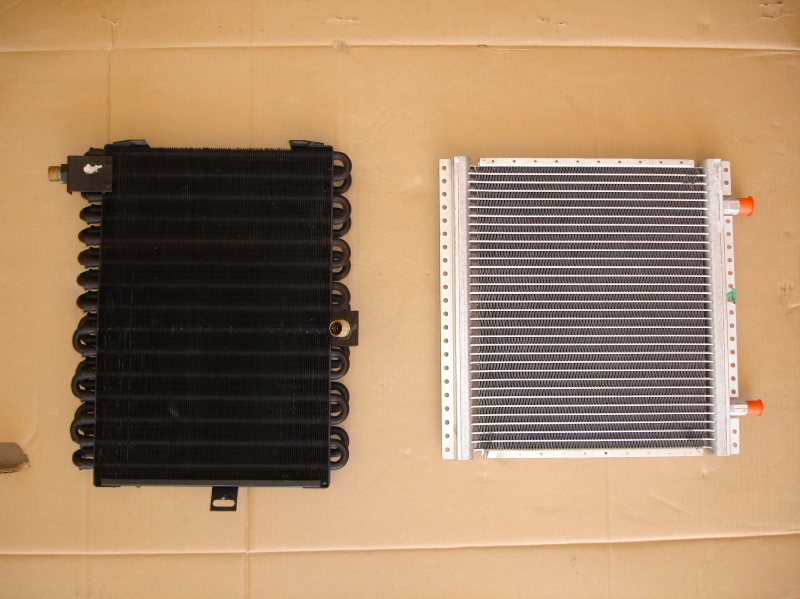
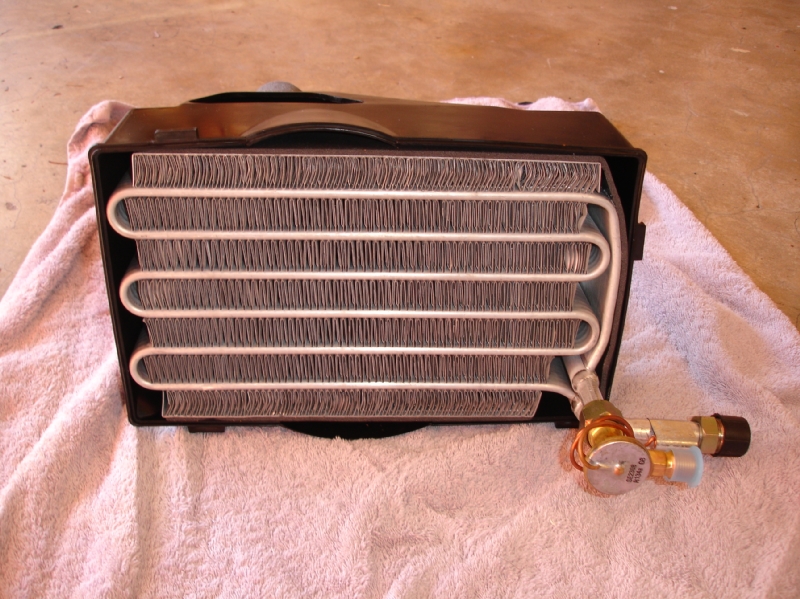
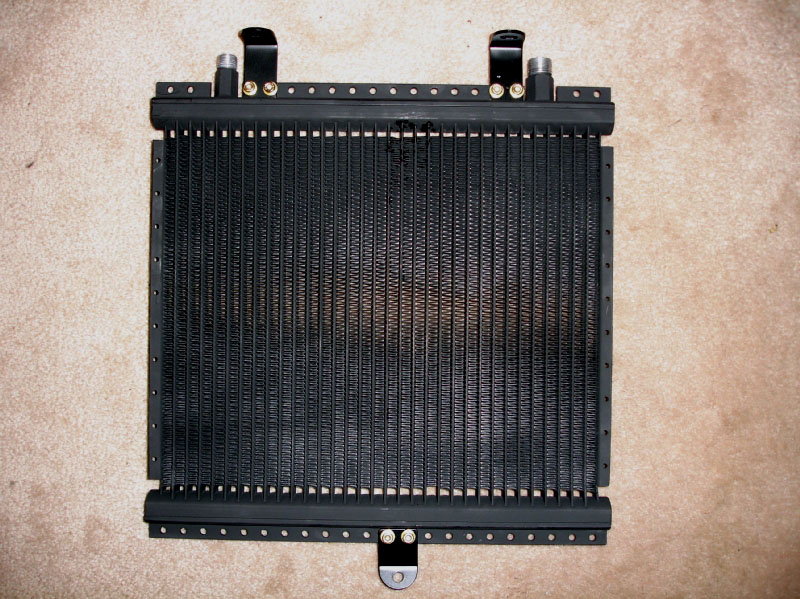
I removed the old condenser. Here is how it compares to the multi-flow condenser I wanted to fit.
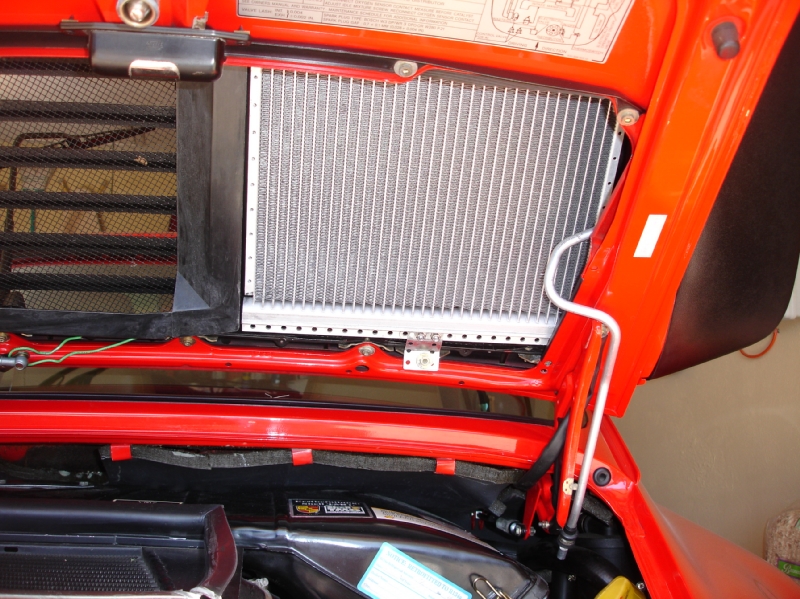
I tried several ways to fit it to my deck and found the best way was with the connections on top (when deck open). This is close to how the original connections run and appeared to leave just enough room to connect the hose fittings. I fashioned some brackets to attached to the factory mounting points and mounted it.
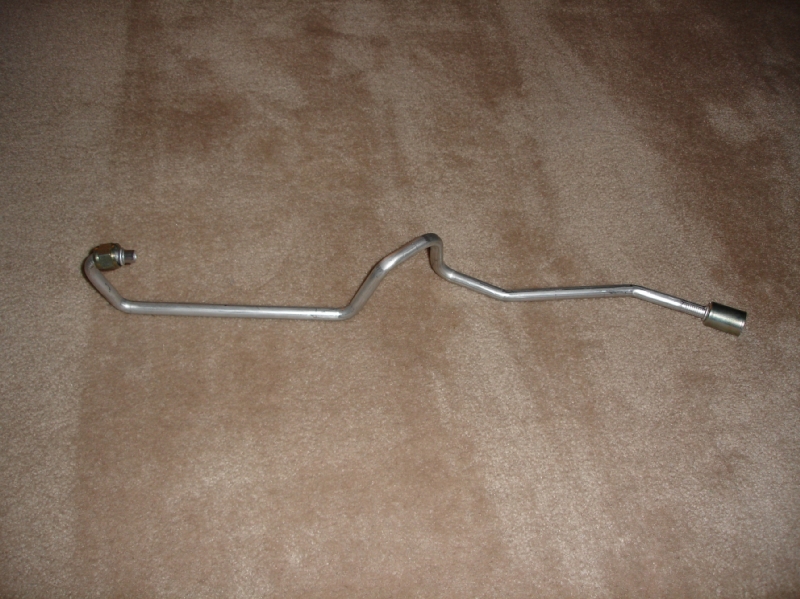
The hard line connection like the factory used was another challenge. Long story short I bent a piece of solid aluminum rod to match the old hose and hard line with the necessary extension to the fitting at the top of the new condenser.
I scoured the internet and found a shop in Texas about 150 miles from Dallas who would make custom A/C parts like this. I took my aluminum rod and my 930 there one day and we made a few prototypes until one fit just right. It's now programmed in their computer and they can make them in about 10 minutes.
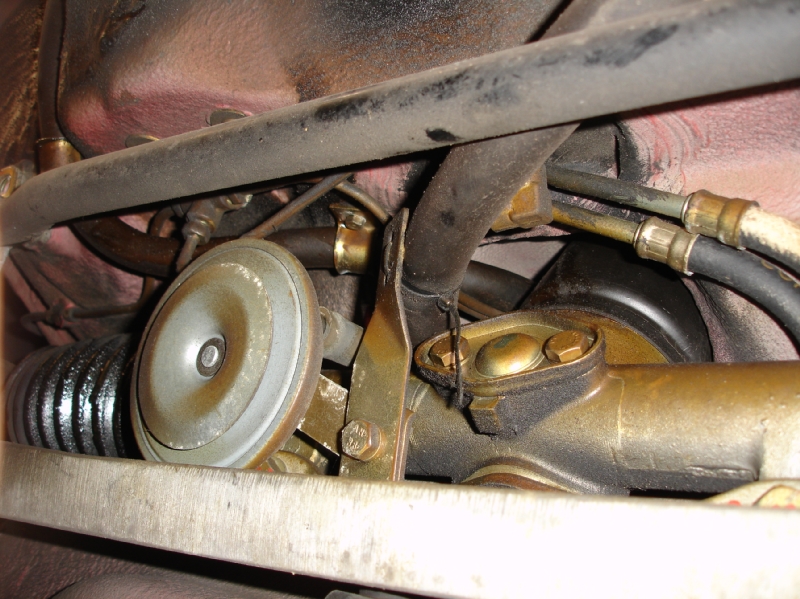
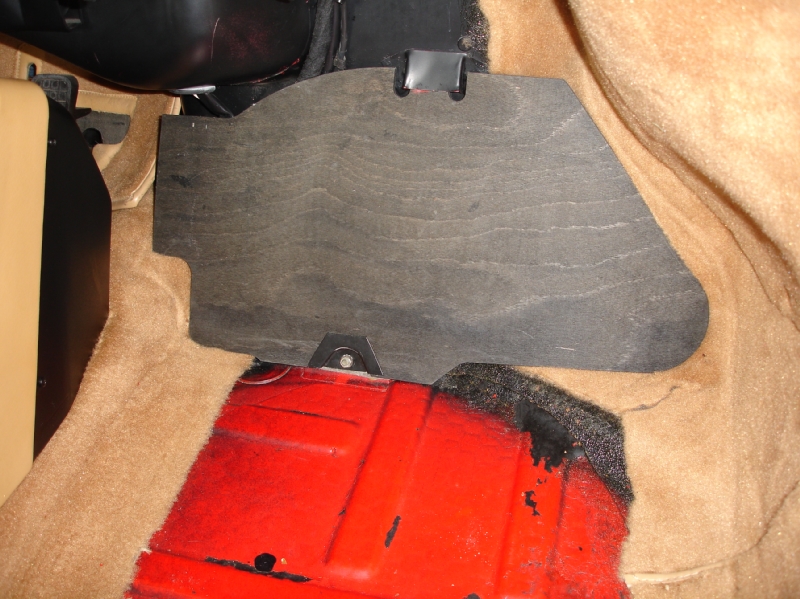
Those problems basically solved, I started removing the hoses, a fairly simple task. I attached cord to the ends of the hoses as I pulled them out of the engine compartment towards the front of the car. The hoses exit through each rear lower corner of the engine compartment. The skid plate under the gas tank had to come off to gain access to the hoses as they went up to the evaporator. This is held on with the same bolts and nuts that secure the sway bar so at this point my car was out of commission until completion. Here is what lays under the skid plate:
Very kludgey how Porsche did some of this A/C stuff...
I removed the passenger floorboard to remove the air intake -- necessary to remove the evaporator.
I found more than I expected. This electronic "thing" was also in there, sloppily installed too.
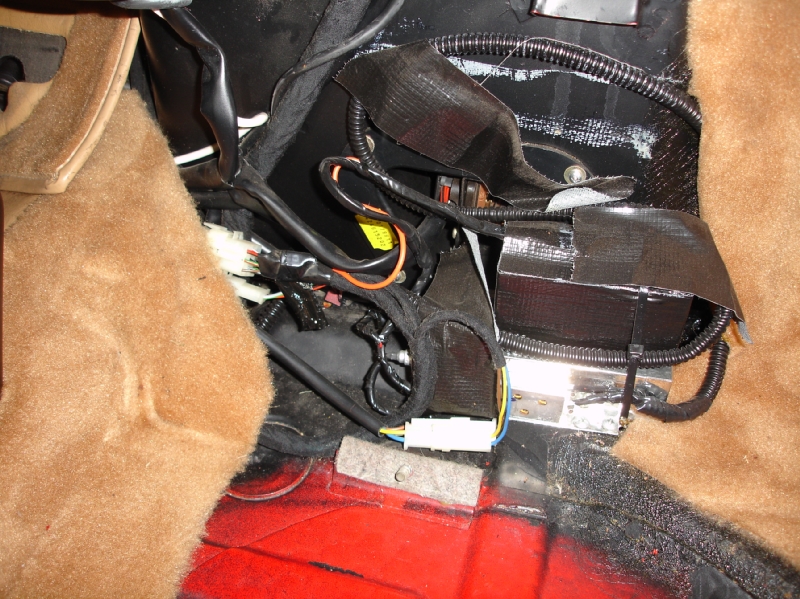
I learned by posting pics on this message board it was a LoJack device, probably installed when the car was new. I removed it and threw it away. I also came to learn when I was installing my new hoses that the holes in the floor where the LoJack had been screwed down were right over the main A/C hose from the compressor to the evaporator. The putz installer screwed right into the A/C hose! No wonder the system couldn't hold a charge!
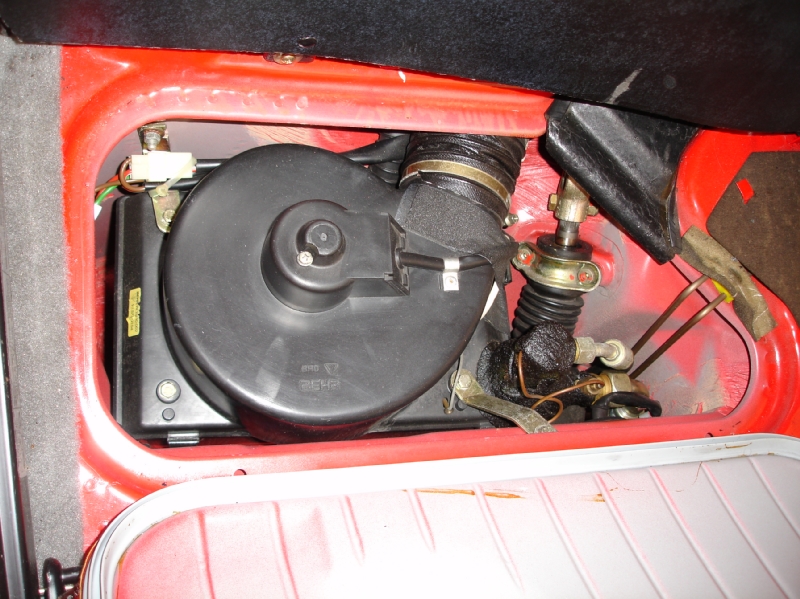
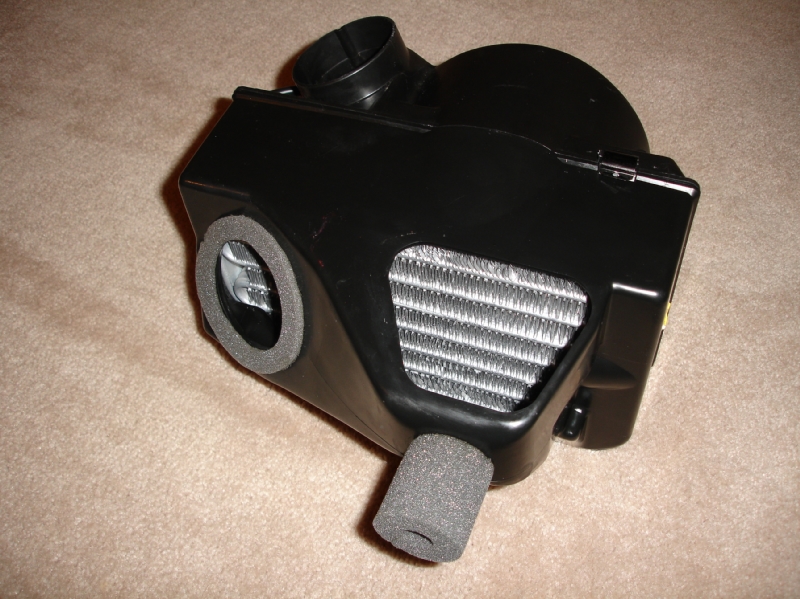
I removed the hoses from the evaporator housing in the smugglers box, disconnected its electrical connection, pulled out the thermostat wire and removed the evaporator.
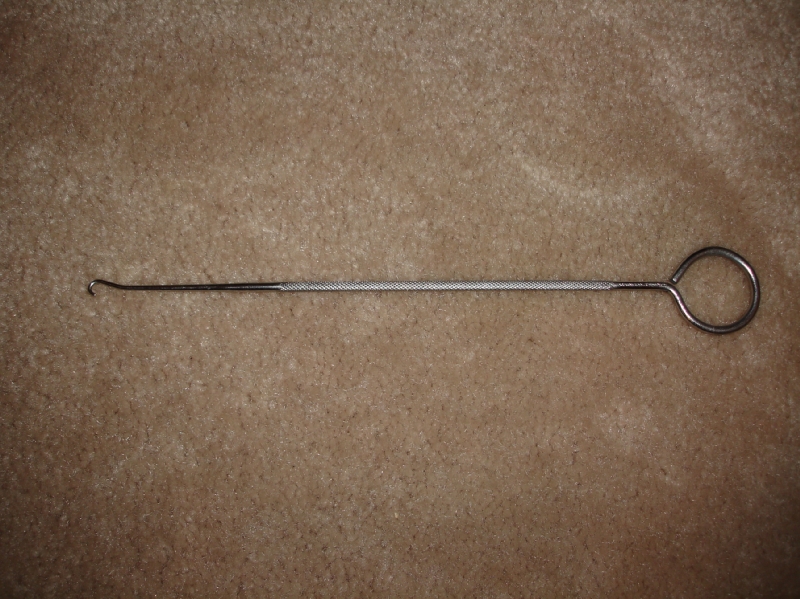
I opened the evaporator box to remove the evaporator. I highly recommend a tool like this to remove and replace the four little spring clips that hold the two halves of the evaporator housing together. It hooks into the little holes in the clips. You can then pull them open to remove them or pull them across to snap them back on. It makes life much easier.
I installed the new evaporator core and a new foam kit I bought from Porsche to replace the deteriorated foam. Also added the appropriate sticky insulation around the expansion valve, supplied with the kit.
Another little development issue I had to figure out was how to connect the new high-low pressure switch on the drier into the circuit to the A/C compressor. Here is the new drier compared to the old one. You can see the switch connections on top of the new drier:
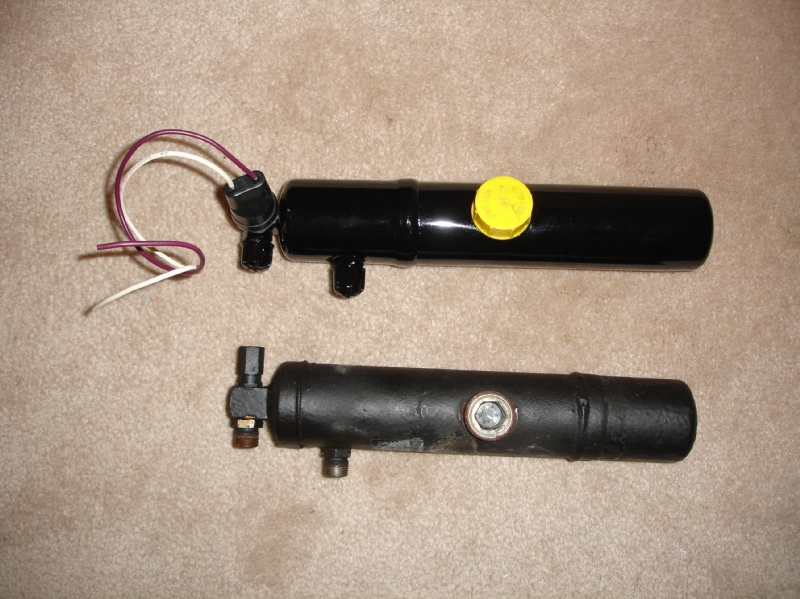
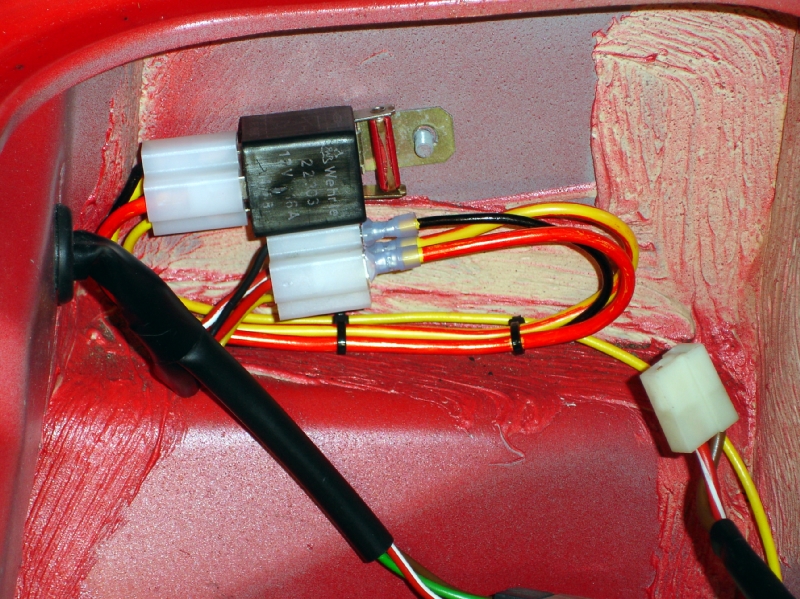
The easy way would have been to simply cut one of the wires going to the compressor relay (the yellow one) and connect the wiring from the switch in between. But remember my rule about never cutting anything? Escpecially the factory wiring harness! I worked out a way to do it with what I called a "bridge harness", an additional relay connector and some wiring I could tap into instead of the factory harness. It worked well. This was not part of the kit.
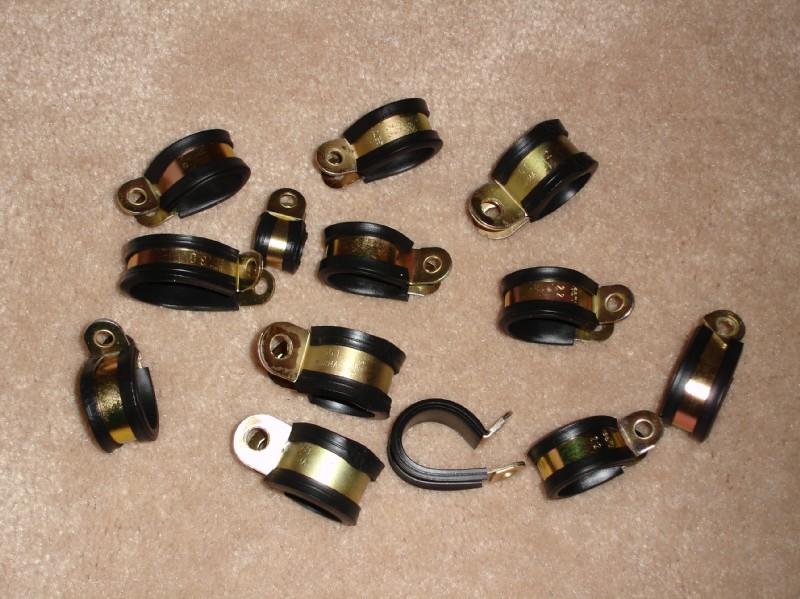
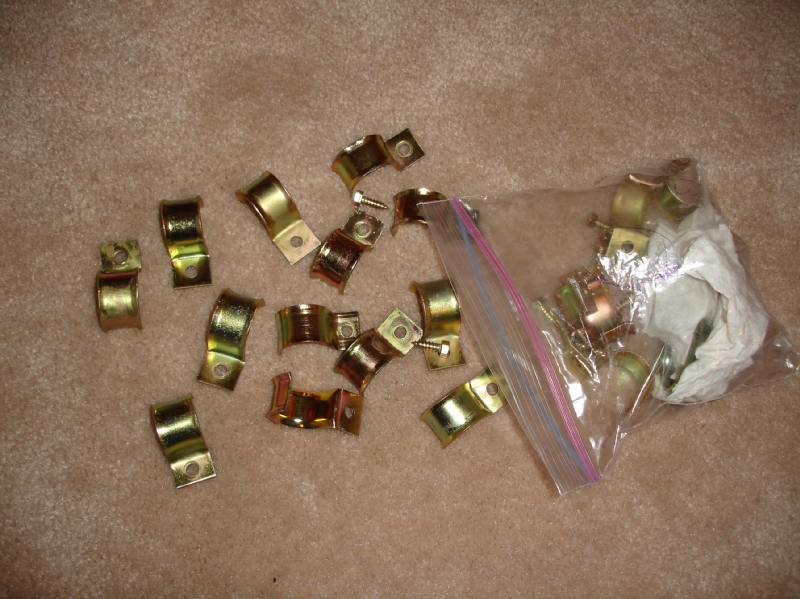
What made it a little more time consuming was I wanted to clean everything and have all the metal clamps, screws, etc replated. I scrubbed and waxed the driver's wheel well and the underside of the car, anywhere I had to run the new hoses. I also refurbished the bracket in the drivers wheel well that holds the drier. It had a little surface rust on it so I sanded it and gave it the POR-15 treatment. The plating came back completed:
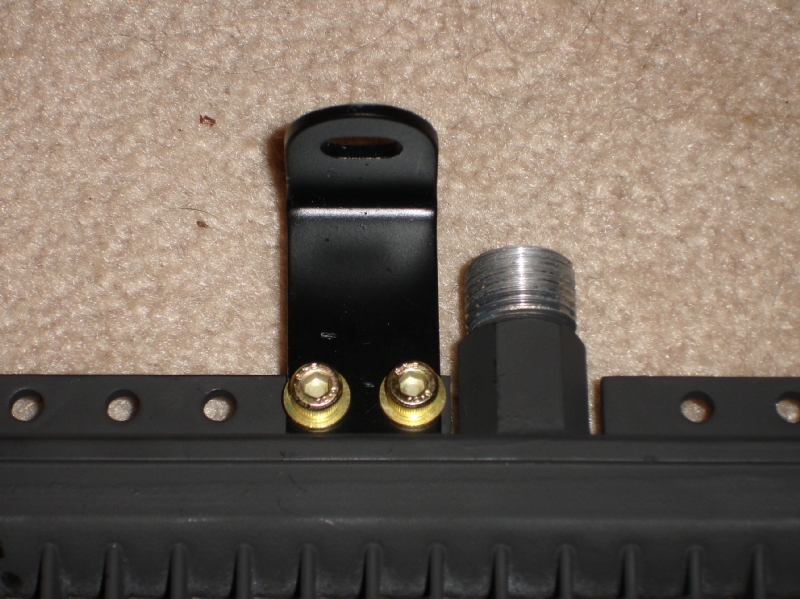
Retroair had my prototype brackets made into laser cut production parts. Retroair supplies screws and lock nuts to attach them to the condenser, but I used yellow zinc allen screws like the factory used to attached the condenser to the deck lid. I also painted the condenser to look like the original.
Installed the new hoses and we were ready to charge!
Bill used a differential thermometer to monitor the intake and center vent temperatures. We were optimally charged when we maximized the difference.
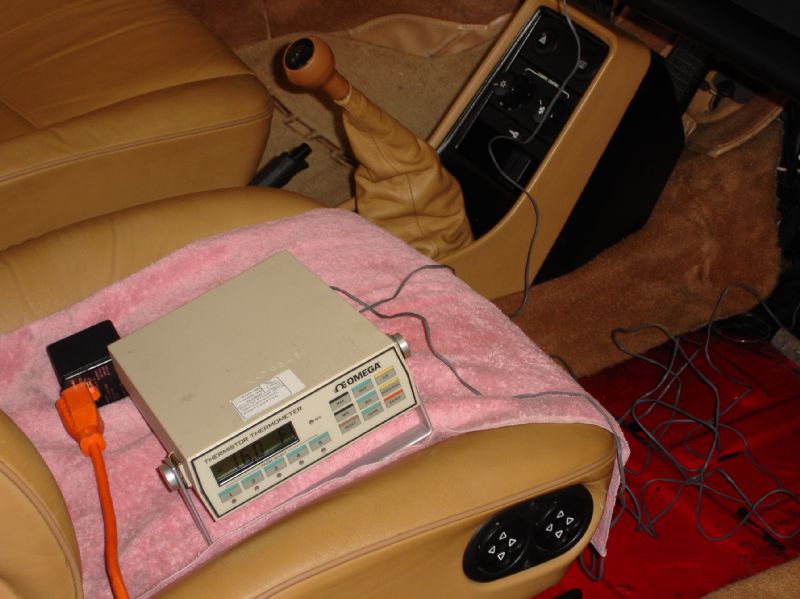
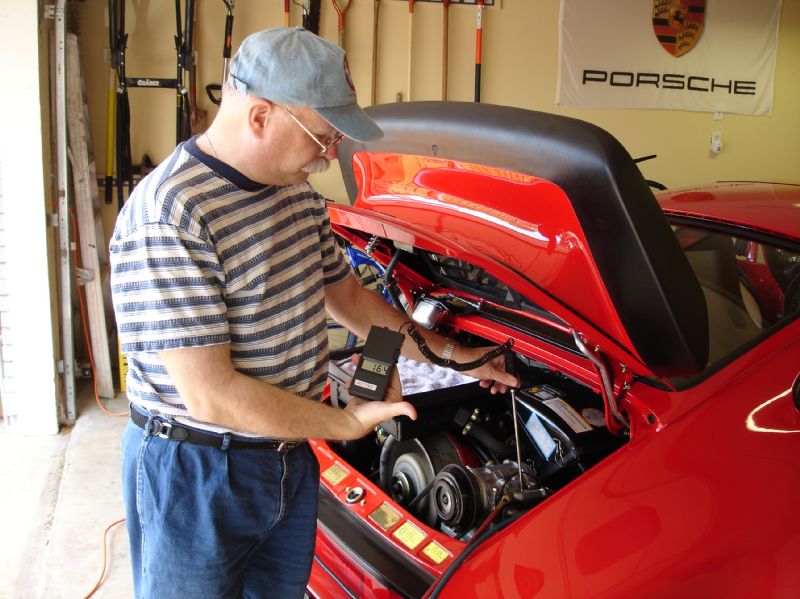
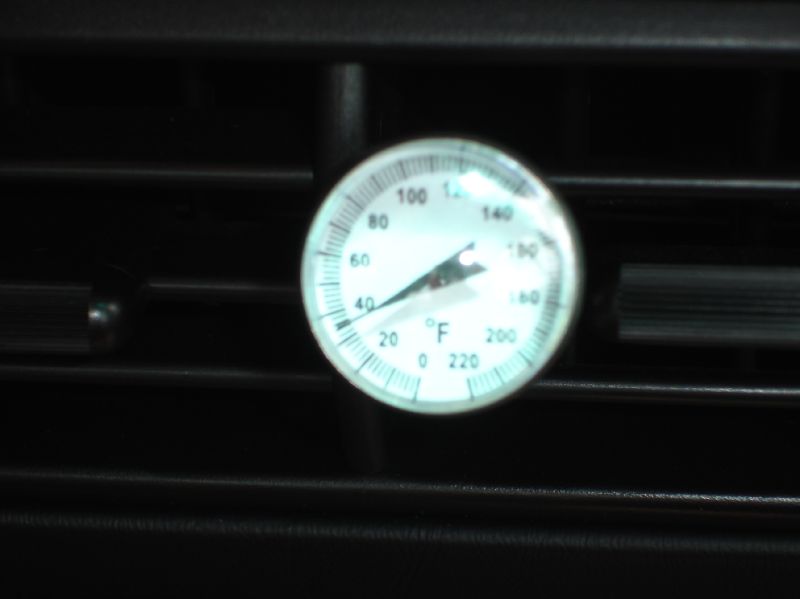
Finally, a nice drive with a thermometer in the cool-blowing center vent.
This was a fun, sometimes frustrating project. I learned a lot. It took me over four months of just a few hours on weekends to complete but I sweated every detail. I could probably do the whole thing now, just to replace everything with no cleaning or anything, in a weekend. I am very pleased with how well the A/C is now working. The condenser, brackets and hard line hose are now a part of the Retroair 930 kit. As local temps climb into the summer 90's and 100's, I am sure I won't continue to get mid 30's air coming out of the vents but it will still be comfortable. It makes the car much more pleasant to drive.
Hope you found this interesting. BTW, I have no affiliation with Retroair.
I decided to do this project because my factory A/C didn't work well. I bought the car last June and had the A/C charged at that time. It worked just OK for about a month, then became ineffective. In Dallas, if you don't have A/C, it's just no fun to drive, so I decided to upgrade it with the type of products I had read about in posts on the message boards.
It took so long for several reasons. One, I had never done this before so wanted to be very careful. Two, I didn't have a lot of free time to spend and three, I had a couple of development issues to overcome. I bought the parts for my upgrade as a kit from Retroair (retroair.com) located in Dallas near where I live. This was a major selling point for me as I got to meet the man and see the products before I bought...and I knew where he lived. Rock Browning, owner of Retroair, was a first class guy to deal with and I now consider him a friend. He has a background of building air conditioning kits for Jaguars and had also developed a kit for the 911 Carrera using the advanced products I described earlier. Unfortunately he didn't have a specific rear condenser for the Turbo since a development vehicle had never been available. He had an advanced multi-flow condenser he thought would work and we agreed I would try to fit it to my car.
My objective with mods on my Porsches is to never cut anything and to stay as "factory" as possible. My intent with the rear condenser was to make it fit using the same brackets the existing condenser used. My car is a 1989 930. It also uses a connection from the compressor to the condenser that is not just a flexible hose -- it is in large part a hard aluminum line that runs close to the deck hinge and leaves clearance for the air filter and oil filler cap when the deck is closed. I wanted to retain that type of connection as well but wasn't sure how I was going to do it.
I removed the old condenser. Here is how it compares to the multi-flow condenser I wanted to fit.
I tried several ways to fit it to my deck and found the best way was with the connections on top (when deck open). This is close to how the original connections run and appeared to leave just enough room to connect the hose fittings. I fashioned some brackets to attached to the factory mounting points and mounted it.
The hard line connection like the factory used was another challenge. Long story short I bent a piece of solid aluminum rod to match the old hose and hard line with the necessary extension to the fitting at the top of the new condenser.
I scoured the internet and found a shop in Texas about 150 miles from Dallas who would make custom A/C parts like this. I took my aluminum rod and my 930 there one day and we made a few prototypes until one fit just right. It's now programmed in their computer and they can make them in about 10 minutes.
Those problems basically solved, I started removing the hoses, a fairly simple task. I attached cord to the ends of the hoses as I pulled them out of the engine compartment towards the front of the car. The hoses exit through each rear lower corner of the engine compartment. The skid plate under the gas tank had to come off to gain access to the hoses as they went up to the evaporator. This is held on with the same bolts and nuts that secure the sway bar so at this point my car was out of commission until completion. Here is what lays under the skid plate:
Very kludgey how Porsche did some of this A/C stuff...
I removed the passenger floorboard to remove the air intake -- necessary to remove the evaporator.
I found more than I expected. This electronic "thing" was also in there, sloppily installed too.
I learned by posting pics on this message board it was a LoJack device, probably installed when the car was new. I removed it and threw it away. I also came to learn when I was installing my new hoses that the holes in the floor where the LoJack had been screwed down were right over the main A/C hose from the compressor to the evaporator. The putz installer screwed right into the A/C hose! No wonder the system couldn't hold a charge!
I removed the hoses from the evaporator housing in the smugglers box, disconnected its electrical connection, pulled out the thermostat wire and removed the evaporator.
I opened the evaporator box to remove the evaporator. I highly recommend a tool like this to remove and replace the four little spring clips that hold the two halves of the evaporator housing together. It hooks into the little holes in the clips. You can then pull them open to remove them or pull them across to snap them back on. It makes life much easier.
I installed the new evaporator core and a new foam kit I bought from Porsche to replace the deteriorated foam. Also added the appropriate sticky insulation around the expansion valve, supplied with the kit.
Another little development issue I had to figure out was how to connect the new high-low pressure switch on the drier into the circuit to the A/C compressor. Here is the new drier compared to the old one. You can see the switch connections on top of the new drier:
The easy way would have been to simply cut one of the wires going to the compressor relay (the yellow one) and connect the wiring from the switch in between. But remember my rule about never cutting anything? Escpecially the factory wiring harness! I worked out a way to do it with what I called a "bridge harness", an additional relay connector and some wiring I could tap into instead of the factory harness. It worked well. This was not part of the kit.
What made it a little more time consuming was I wanted to clean everything and have all the metal clamps, screws, etc replated. I scrubbed and waxed the driver's wheel well and the underside of the car, anywhere I had to run the new hoses. I also refurbished the bracket in the drivers wheel well that holds the drier. It had a little surface rust on it so I sanded it and gave it the POR-15 treatment. The plating came back completed:
Retroair had my prototype brackets made into laser cut production parts. Retroair supplies screws and lock nuts to attach them to the condenser, but I used yellow zinc allen screws like the factory used to attached the condenser to the deck lid. I also painted the condenser to look like the original.
Installed the new hoses and we were ready to charge!
Bill used a differential thermometer to monitor the intake and center vent temperatures. We were optimally charged when we maximized the difference.
Finally, a nice drive with a thermometer in the cool-blowing center vent.
This was a fun, sometimes frustrating project. I learned a lot. It took me over four months of just a few hours on weekends to complete but I sweated every detail. I could probably do the whole thing now, just to replace everything with no cleaning or anything, in a weekend. I am very pleased with how well the A/C is now working. The condenser, brackets and hard line hose are now a part of the Retroair 930 kit. As local temps climb into the summer 90's and 100's, I am sure I won't continue to get mid 30's air coming out of the vents but it will still be comfortable. It makes the car much more pleasant to drive.
Hope you found this interesting. BTW, I have no affiliation with Retroair.

 04-16-2006, 10:28 AM
#5
Racer
Join Date: Nov 2004
Location: Ontario Canada
Posts: 370
Likes: 0
Received 0 Likes
on
0 Posts
nice job Jastx. I like seeing someone take the extra steps to insure a great job. I had my system converted to 134A as well but didn't change any components as you did. It doesn't get hot enough up in Ontario to justify that.
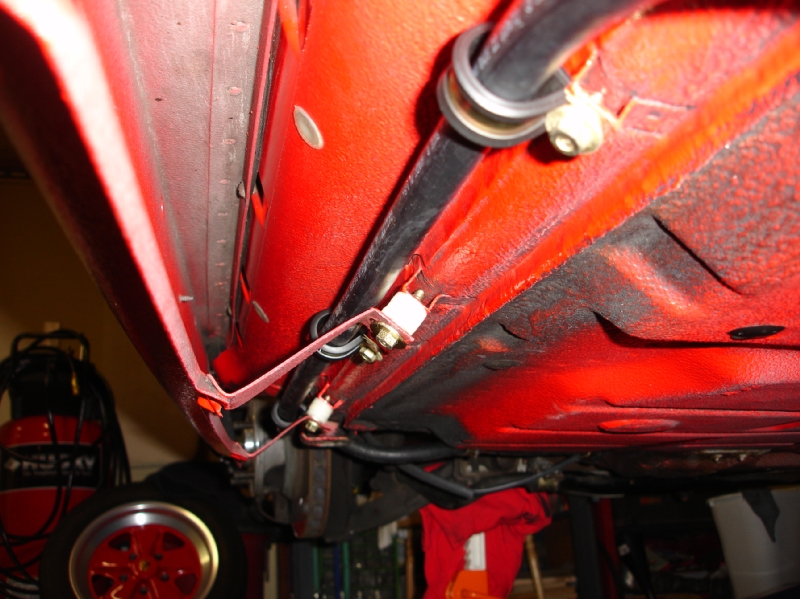
Off subject here but did you install those white spacers on your boxed runner support brckets? I don't believe my slantnose has those but it makes sence as I do recall when looking under that the bracket is being pulled to the mounting points instead of being in their natural state of fastening, just curious....
Off subject here but did you install those white spacers on your boxed runner support brckets? I don't believe my slantnose has those but it makes sence as I do recall when looking under that the bracket is being pulled to the mounting points instead of being in their natural state of fastening, just curious....
04-16-2006, 11:11 AM
#6
Three Wheelin'
Join Date: Aug 2005
Posts: 1,980
Likes: 0
Received 0 Likes
on
0 Posts
Thanks John, I'm in the middle of my AC upgrade now. Mine was driven by the fact the evaporator blower motor fried so I had to go in there anyway. New barrier hoses, evaporator, condenser, and receiver drier are going in. Hopefully I'll only be down a week with an intensive effort on the weekend and finishing it up on a couple of weeknights. Long pole in the tent is getting all of the old hoses out and up to a hydraulic shop on Monday that will make me new ones complete with the right fittings.
04-16-2006, 12:05 PM
#7
Rennlist Member
John - Great write-up! Thanks for the pics...gives me something to seriously ponder with my car for the upcoming summer.
No more sweaty backs and under the thighs drives for you my friend!
Yasin
No more sweaty backs and under the thighs drives for you my friend!
Yasin
Trending Topics
04-16-2006, 02:42 PM
#8
Three Wheelin'
Thread Starter
Originally Posted by turboGary
Off subject here but did you install those white spacers on your boxed runner support brckets? I don't believe my slantnose has those but it makes sence as I do recall when looking under that the bracket is being pulled to the mounting points instead of being in their natural state of fastening, just curious....
Thanks for the comment. Those white spacers were original.
04-16-2006, 04:26 PM
#9
Instructor

Join Date: Jun 2002
Location: Seattle, WA.
Posts: 229
Likes: 0
Received 0 Likes
on
0 Posts
Excellent write-up. I don't care much about AC up north here in Seattle, but I still love to see a good job, carefully researched, executed and documented.
Would like to know the total amount it cost, though, as someone else asked...
Would like to know the total amount it cost, though, as someone else asked...
04-16-2006, 09:38 PM
#10
Three Wheelin'
Thread Starter
Thanks for the compliments! A couple have asked about the cost. Check out the kit at http://retroair.com. I think it's pretty reasonable for what you get. Like I said earlier, of the three or four vendors who sell A/C solutions for 911's, this one was located just a few miles from where I live. Because I designed the fit for the condenser to help complete the kit for the 930, I did get a discount. But it was the condenser that sold me. The multi-flow unit in this kit is the highest efficiency technology out there. With the small area the condenser occupies in the turbo, you need all the efficiency you can get.
Aside from the kit itself, other expenses I incurred were about $60 for replating parts, $35 for the foam kit for the evaporator (kind of a rip for what I got), $10 or so for the electrical parts for my "bridge harness", $35 for two new factory stainless clamps to hold the new drier, $12 dollars for the air duct hose I used between the evaporator and the dash area ductwork -- the original fell apart in my hands as I was replacing it. Normally I would have purchased new from Porsche but I thought the material wasn't so hot and it was night, after the dealer had closed. Lowes bulding supplies came to the rescue with this nice high-tech tubing material. Only thing was I had to buy 12 feet and need maybe four inches. I also spent $35 for a can of POR-15 to restore the drier bracket. I bought six cans of Dupont SUVA 134a refrigerant for charging the system for about $65. We used four. Finally, basic clean-up and protection products like Wurth Citris Degreaser, 3M Adheasive Remover, Rejex, 303 Aerospace Protectant, etc. I already had items like zip ties to replace those used by the factory that I had to cut. Oh, then there was stupid stuff like $7.50 for a large roll of black duct tape. It was the closest thing I could find to replace the 10" piece of tape on top of the evaporator -- got to keep that factory look, ya know!
I mentioned cleaning as I went. Every nut, bolt, screw, washer, lock washer, clamp, A/C fitting, any metal I touched or removed got cleaned, replated, and waxed before being put back on. Any rubber and all the A/C hoses get the 303 Aerospace protectant treatment. Any hose clamp screw mechanism got a shot of Corrosion X protectant (by the people who make Rejex). I want these parts to stay looking new.
I failed to mention in my write up, but I also took many, many digital pics of every piece I touched. It was because of that I could make sure every one of the 300 screws, clamps and other parts I had plated wound up back in the same place, just as the factory intended. Even the zip ties follow the exact same route. It was also how I could tell I got all of my plated parts back.
My write up was a summary. I have many more detailed pics and can go into much more detail for those who want more information. Just PM me and ask.
10-24-2006, 03:27 AM
#11
Instructor

Join Date: Nov 2005
Location: Singapore
Posts: 154
Likes: 0
Received 0 Likes
on
0 Posts
Thanks John for sharing the valuable experience. Another way to make us enjoy the car much more! I am sure it makes a great difference with good aircon system. Porsche probably didn't include that in their design! haha
10-24-2006, 10:10 AM
#12
Three Wheelin'
Join Date: Aug 2005
Posts: 1,980
Likes: 0
Received 0 Likes
on
0 Posts
Great write-up and conversion John. Like you I live in a high heat/humidity area (Florida). We set record highs last weekend, 92 degrees F here in Orlando, to today's record low (51 degrees F) when we awoke this AM. I had my system converted to 134a also. We replaced the condenser, dryer, new barrier hoses, new expansion valve, and a new compressor. The system works quite well now, and with the new hoses doesn't leak down every month. The car is now drivable 12 months a year (I did anyway, but I just sweated ;-) ). The last thing I did was get the windows tinted with the best solar film I could get. We even tinted the windshield. That seemed to really help as my car would get so hot baking in the sun with the windows rolled-up that the AC took the entire trip just to get the interior to quit radiating heat, much less cool-down anything. It probably doesn't help my car is black on black, but man that thing could get hot. I used to leave the windows cracked to ensure I didn't blow one out and to let the heat have some place to escape.
10-24-2006, 12:26 PM
#13
Addict
Rennlist Member
Rennlist Member
Join Date: Jun 2004
Location: Near Atlanta, Ga. Peachtree City
Posts: 1,344
Likes: 0
Received 1 Like
on
1 Post
John,
Great write up and pics! All of us appreciate someone going to the trouble that you went through and then sharing it with us. I did the same thing to my '87 targa a couple of years ago and know what it took on your part. A couple of questions; dose Retroair recommend a rear cond. fan? did you have to alter or cut anything to get the new rear cond. to fit?
Rudy
10-24-2006, 02:31 PM
#14
Three Wheelin'
Thread Starter
Thanks for the compliments!
srf506, you can tint the windshield? Legally? Black on black in FL -- I can imagine. Wow!
Rudy, I think Retroair may have a fan available now but there are several out there. Although I thought about it at the time I decided to try it without first. I haven't had any problems, so haven't wished for a fan. If I were to do it again, I'd probably install one just to have it -- easier to do during the install than afterwards.
No cutting or modification of any kind to install the Retroair system. That's one of my "things" about mods -- I don't do many mods and never any that couldn't be completely reversed. No cutting or bending metal and no cutting wiring harness. Knowing what I know now, I would file down the flange of the condenser (the part at the top and bottom with the holes in it through which the brackets are bolted) on the upper and lower right hand corners (like a 30 or 45 degree angle) to make it easier to slide into place. See the photo of the condenser with the brackets on it, you can see where I mean, just basically trim the corners. Other photos show it, but the right side of the condenser slides into a space in the deck lid. With the hoses attached, it is difficult to fit. Filing the corners would have provided a little wiggle room to slide it in and would have made a nice difference in the ease of installing it.
10-25-2006, 11:03 AM
#15
Three Wheelin'
Join Date: Aug 2005
Posts: 1,980
Likes: 0
Received 0 Likes
on
0 Posts
John,
You can tint the windshield, but its not legal. We used a "Platinum" kind of film that isn't real dark. Probably about 1/2 to 3/4 as dark as the top tint strip in an American car's windshield, but, its got like a 40-45% solar load reduction factor. My biggest issue with it is that although its clean and not that dark, the film has a "texture" to it that I can perceive in the my sight line as I look through it. It doesn't really interfere with me seeing anything, but there's this "grain" kind of effect I see. I believe it might be the adhesive I'm seeing. Of course I'm 54 years-old now and although I can't read w/o glasses anymore I can still see far away like a hawk. People who have ridden in the car with me say they can't see it so maybe its my imagination.
I'll try and post some pics this weekend after I get her all washed up and "pretty" again.