When you click on links to various merchants on this site and make a purchase, this can result in this site earning a commission. Affiliate programs and affiliations include, but are not limited to, the eBay Partner Network.
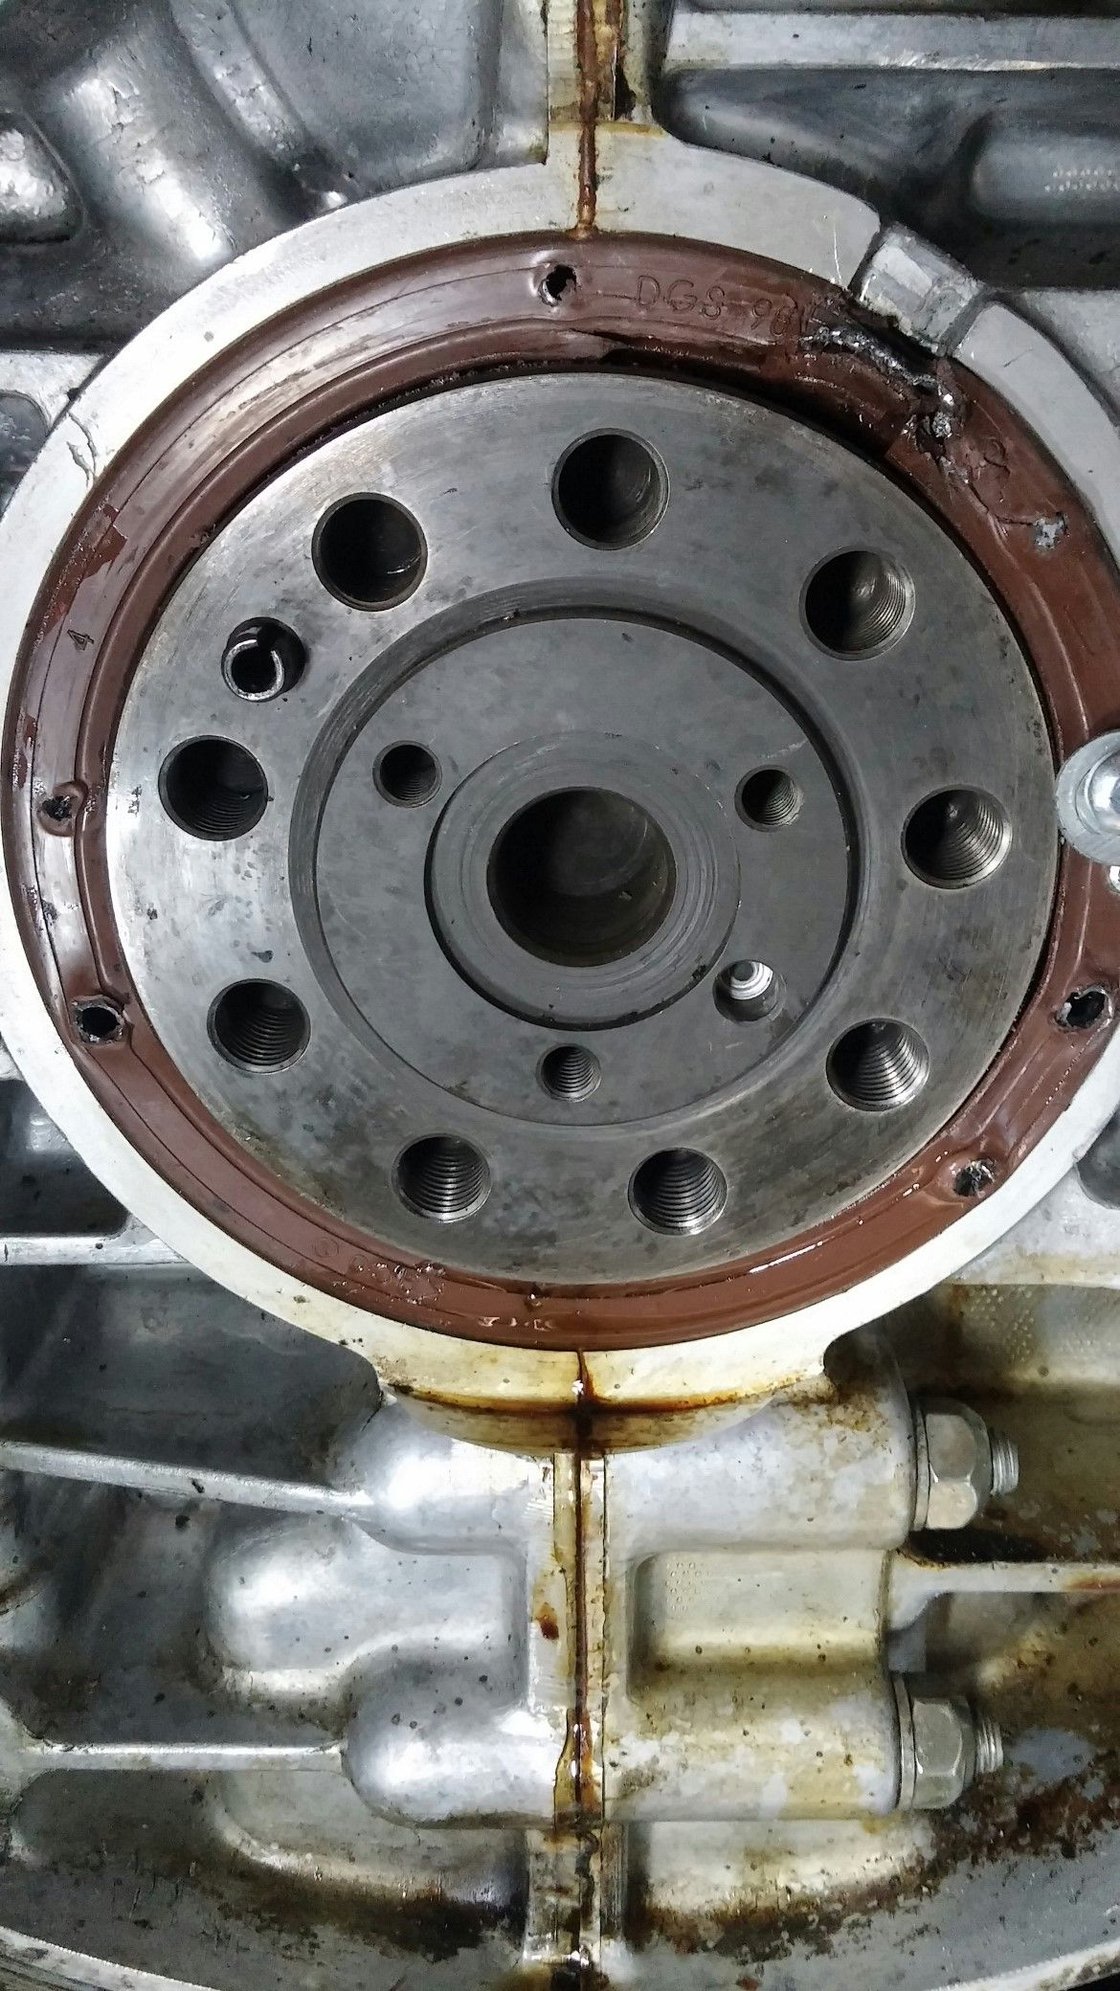
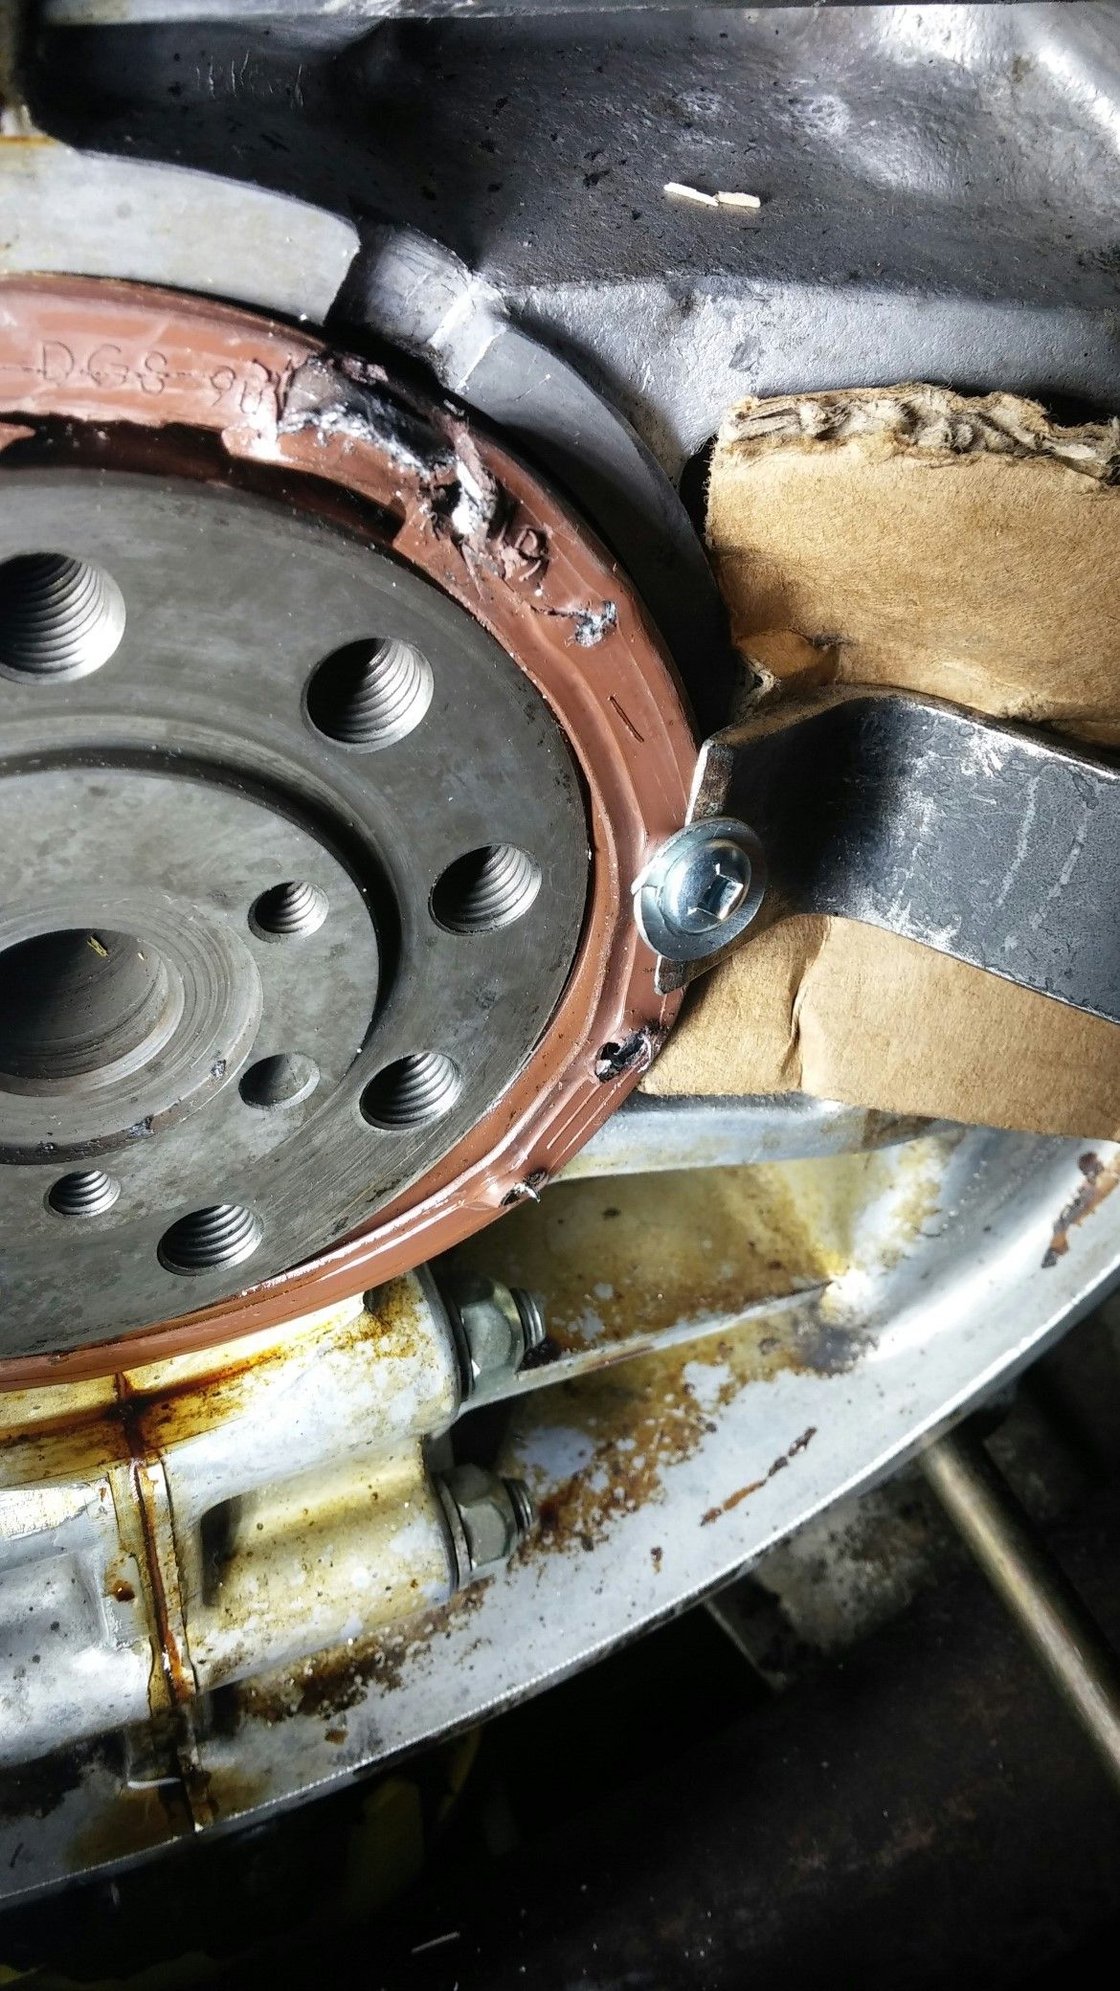
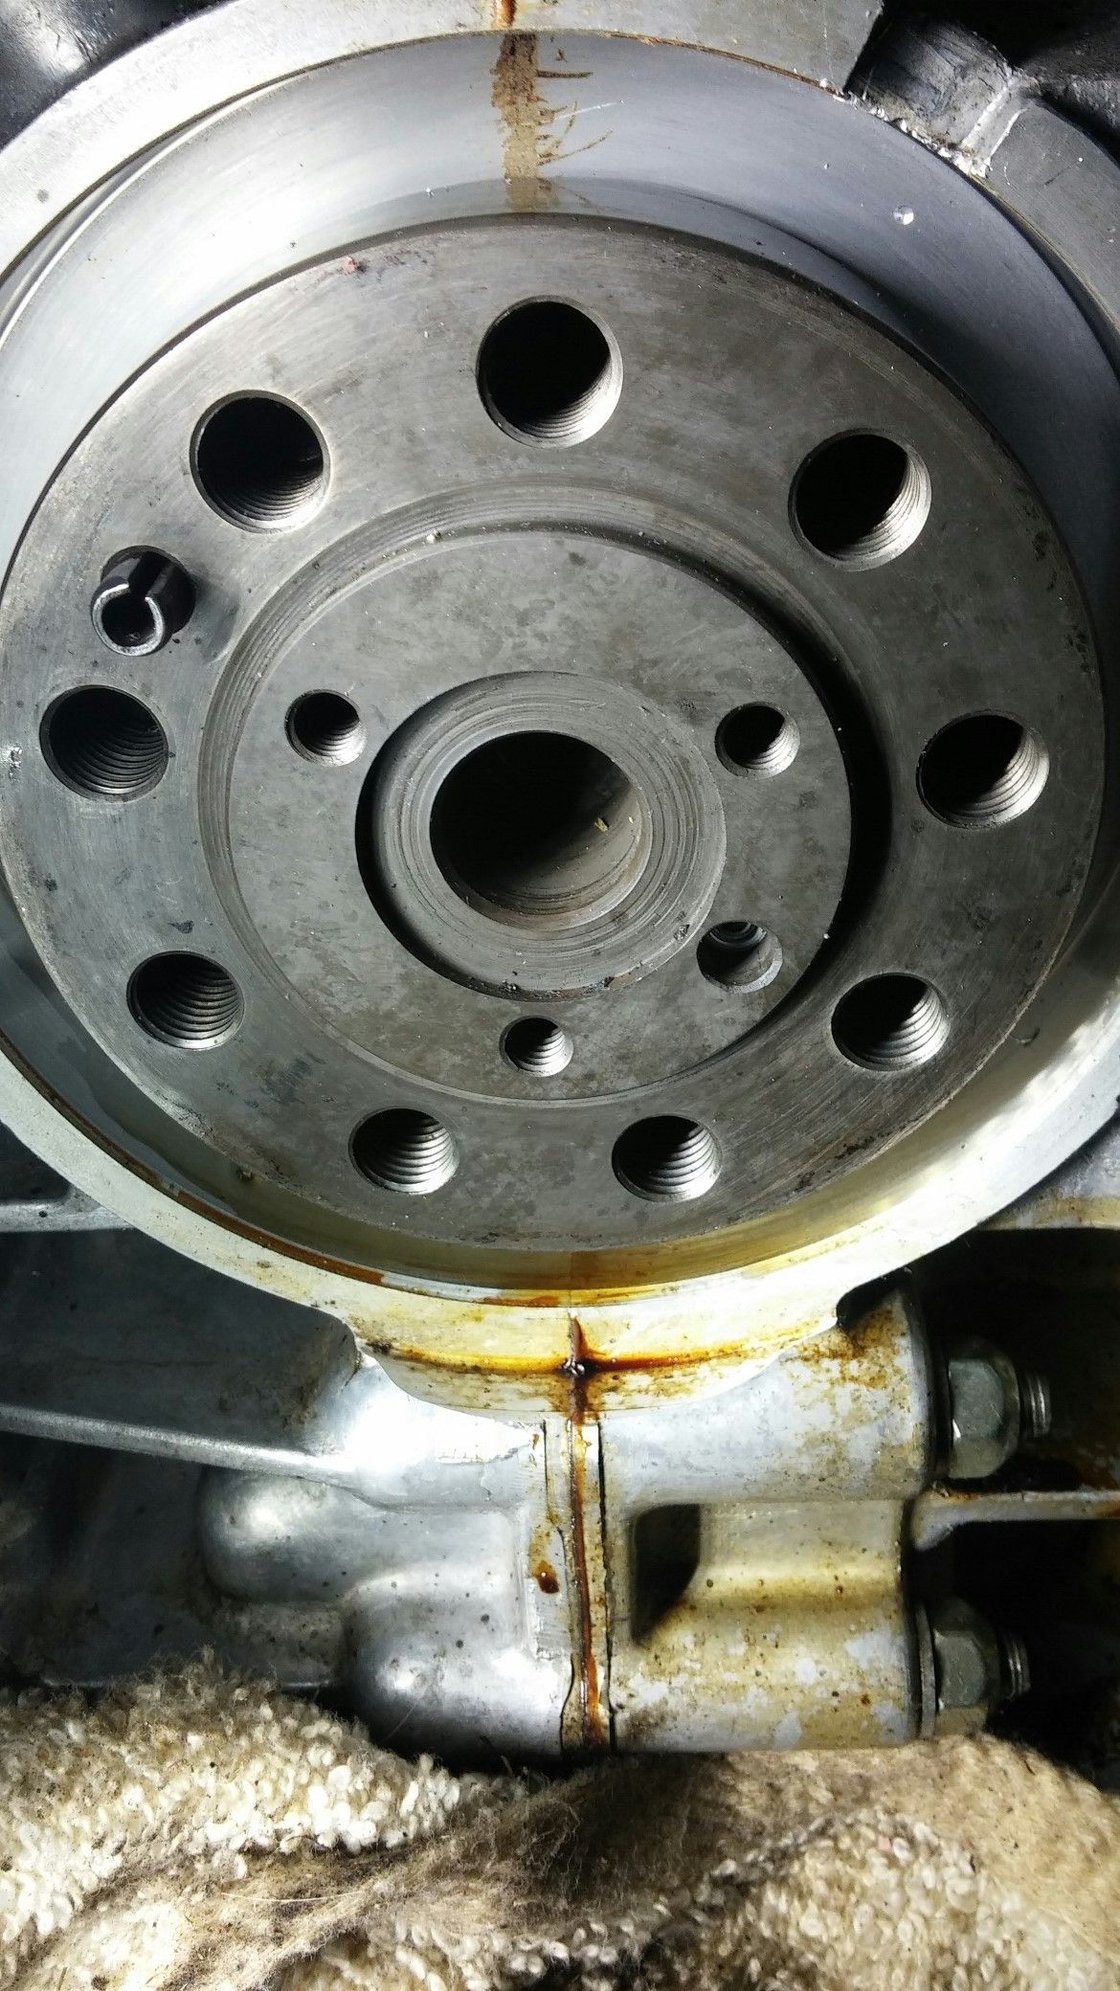
While doing my clutch, I decide to replace the rear main seal as there appeared to be a leak. Here are the pics of the removal. On the last image, you can see a small mark where the drill bit hit. I don't think this will be an issue given how the seal sits, but anyone think otherwise? And if so, what to do? Thanks, Paul
You can see lots of failed attempts with self tapping metal screws. A few broke and a few ripped out before I got one that worked. Very nerve racking.
Here, I finally get the movement that I was hoping for.
And here is the seal out. There are a couple burrs in the front of the cutout area that I will polish away, but I am most concerned about the drill bit indent at the 1 o-clock below the cutout. Any thoughts.
On a job like this I usually heat up the seal to help with removal. from what you've shown, you should be OK but I would use some Curil-T on the seal as a backup measure.
It looks great. You don't want to know what I have gotten away with on lesser cars over the years. I have had cam bearings with massive pits and gashes in them and lobes with pitting and the machine shop guy always says run 'em.
The seal wiper runs on the crank, not on the case.
That indent will have no effect, as that isnt the sealing surface. I've never had a seal that tough to pull. You can also come in with a punch from the side at the notch, and get a hook behind to lever it out.
I'd be more concerned with the nicks at the notch. You want to make sure they are dressed, so they don't scratch the seal on the outside.
Last edited by Ed Hughes; Dec 1, 2014 at 06:37 PM.
Thanks for the input here guys. I will take care of those blemishes on the notch and set the new seal this weekend. Pretty nerve wracking experience with that many failed attempts. Makes we wonder if I erred in pulling it, but I don't have much time for second guessing. More to learn and do... and my wife needs her garage spot back by January (we'll see).
A sharp object to grab the seal at the notch aids in removal. Don't sweat the tiny drill mark; it won't affect sealing. I'm pretty sure the seal isn't actually supposed to even bottom out against the surface that you drilled into. I believe you install the seal flush with the outer surface of the engine case rather than bottoming it out. Good advice about cleaning up any burrs before installing the new seal. I would install the new seal dry and avoid curil or any other sealant which could cause the seal to walk outward before the sealant cures. There is a good thread over on Pelican on engine sealing including the rear main seal:
Porsche's Top 5 Most Questionable Naming Decisions
Slideshow: For a company obsessed with engineering precision, Porsche has occasionally named its cars in ways that left even loyal enthusiasts scratching their heads.
Pogea Racing's 964 Porsche 911 Reimagination Stands Out in a Crowded Field
Slideshow: Pogea Racing's latest Porsche 964 project blends carbon-fiber construction, modern chassis upgrades, and up to 500 horsepower while keeping the air-cooled 911 experience firmly analog.
Talos Takes Your 991 Porsche 911 GT3 to the Next Level for a Cool $1.13 Million
Slideshow: Talos Vehicles has transformed the Porsche 911 GT3 RS into a carbon-bodied, race-inspired machine that costs well over $1 million before the donor car is even included.
9 Vehicles Porsche Helped Engineer that Aren't Porsches
Slideshow: Long before engineering consulting became trendy, Porsche was quietly helping other automakers build everything from supercars to economy hatchbacks.
9 Features and Characteristics That Only Porsche People Understand
Slideshow: Some brands build cars. Porsche builds traditions, obsessions, and a few habits that stopped making sense decades ago but somehow became part of the charm.




 Rear Main Seal Battle