

Installing an MSD Streetfire and new coil
 12-31-2013 | 12:57 AM
#1

Thread Starter
Track Day
Joined: Apr 2011
Posts: 17
Likes: 0
From: Texas
With much help from members of the Pelican 911 forum, I completed a successful install of MSD's Streetfire CDI box and Compact Coil MSD Blaster SS on my 911SC. I ordered the male 6 pin connector and faston connectors for it from Mouser electronics. I can switch back to the Bosch unit with only 3 new holes drilled in the electrical panel. The nice part about all of these parts is the cost - less than $200 for the Box, Coil, crimper tool and connectors. I sourced the parts from Summit Racing for coil and Streetfire. The crimper came from Altex electronics. Hardware came from Tanner Electronics and True Value.
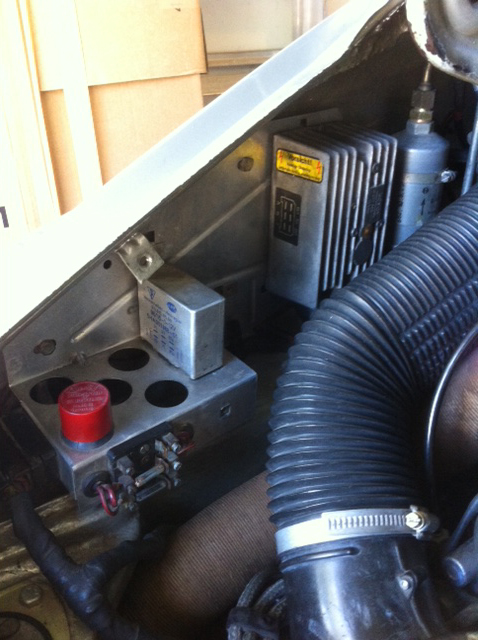
Before:
After:
Disconnect the battery (-) terminal an remove the Bosch CDI, 14 pin connector and then the aluminum electrical panel. Remove the captive nuts on the back. Save the parts, for they are sure to increase in value.
I got the four rubber standoffs and hardware from an electronic surplus company http://www.tannerelectronics.com/location.html and the fender washers from a True Value. I used as many existing holes as possible. I marked the top hole positions after mounting the standoffs to the Streetfire.
I positioned the coil in the blank space (where the external VR would be located decades ago). The new coil comes with standoffs and complete hardware (connectors, coil wire boot, etc). Make sure you drill the holes with the panel off the side wall of the engine compartment.
The Front

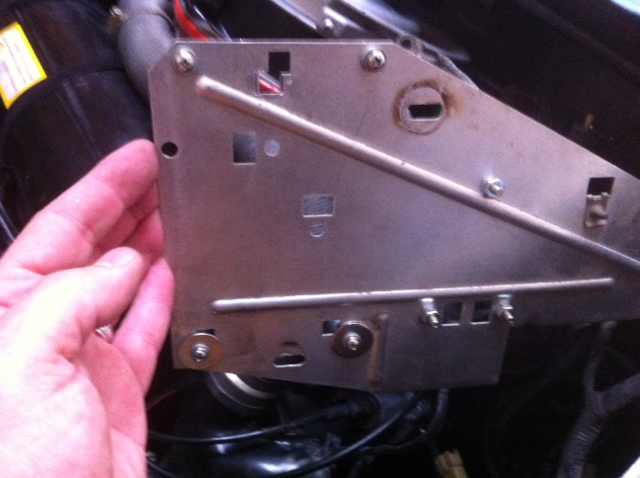
The back
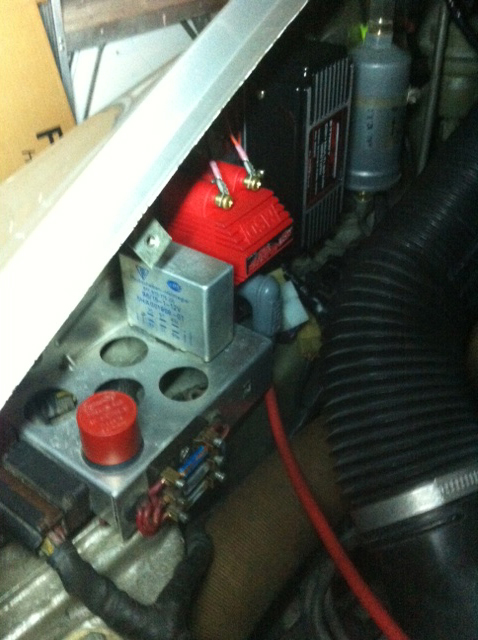
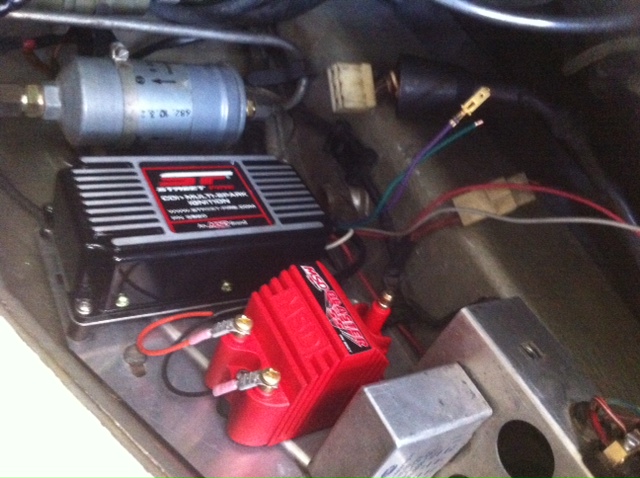
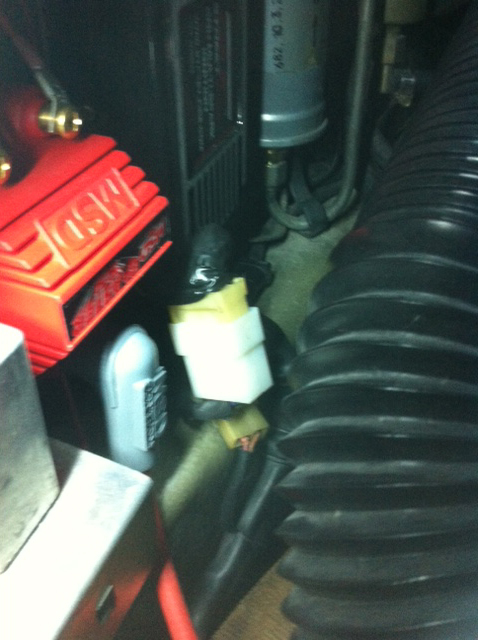
Mount the panel back on the car and then mount the Streetfire CDI (with clipped loop), and the coil. I made sure the coil fit behind the electrical cover. See the fuse panel to the left? If you clean it up like I did, don't mount it back as you see here. It's backwards.
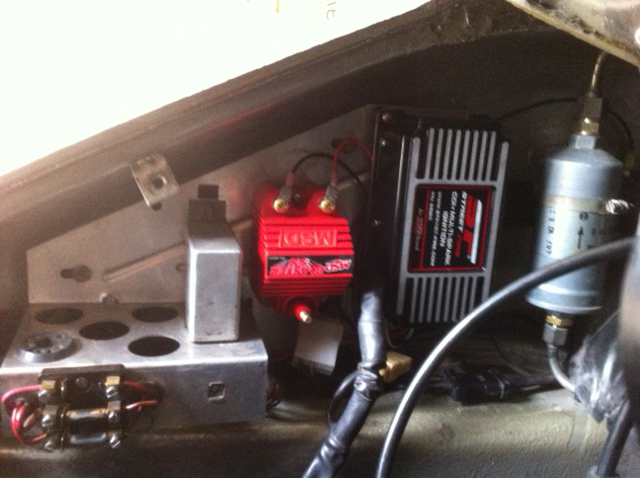
Here is the correct orientation.
Wiring
Read the Streetfire instructions and understand them. Clip the wire loop they tell you to on the Streetfire box for 6 cylinder operation. I did not at first start. (greedy little kid). Luckily nothing blew up.
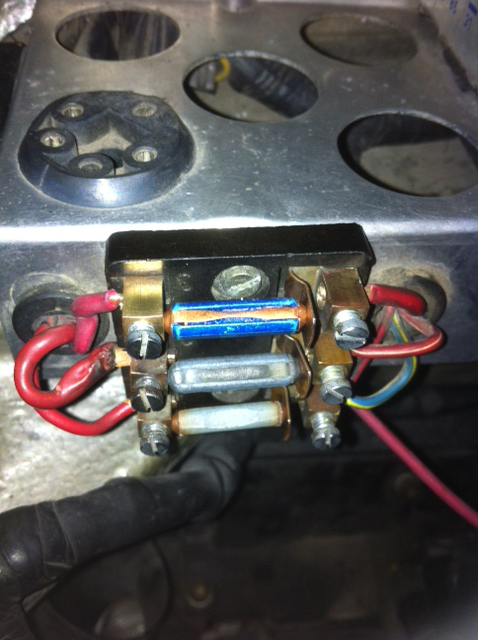
You'll use the Grey, small red, purple, and green wires to the 6 pin. The orange (more like light red) wire goes to the + on the coil. The small black goes to the - of the coil. The fat black wire goes to the ground post behind the fuel accumulator and filter (a good time to polish all the ground there) The fat red wire goes to the upper fuse of the fuse panel as shown in the photo above. It was vacant for Sportomatic!
The grey wire goes to the Tach signal wire of the 6 pin.
The small red goes to the red wire of the 6 pin.
The green wire goes to the ground wire of the distributor on the 6 pin.
The purple wire goes to the + wire of the distributor on the 6 pin.
You won't use the white wire of the Streetfire for the 911SC. Tape it behind the box.
A successful crimp of a Faston connector:
NOTE
You may have to switch the green and purple wires after you start (mine happened to be reversed in the loom for some reason) You'll know you have this problem when you set the timing since it will be over 30� advanced and run horribly.
I used the male end connector and faston blades described by timmy2 on the Pelican site:
The housing is part # 571-180906, 27 cents each
The pins for it ( needed) are part # 571-42460-1, 19 cents each.
You can plug the existing 6 pin up with the Streetfire and tuck the plug behind the cover.
I used a solid core coil wire to the distributor and attached the nice MSD 90� boot to it.
Rotor
I read that the MSD ignitions blow up ignition rotors. Do this:
http://forums.pelicanparts.com/porsc...on-detail.html
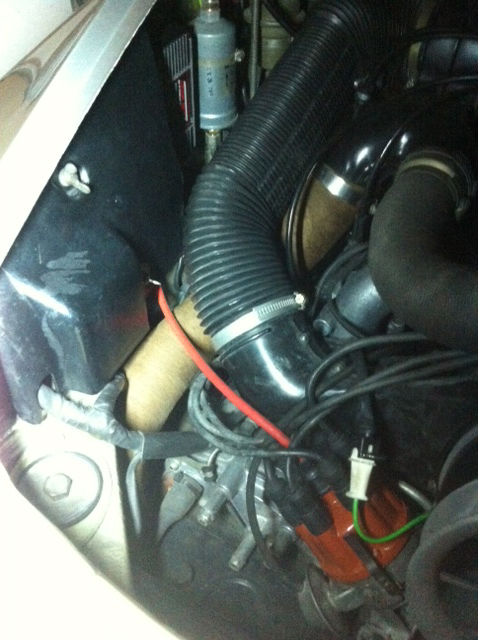
I removed my old coil, mounting plate, the stainless shielding from my ignition wires (Beru), used heat shrink tube to insulate the old coil wires and grounds and tucked them back over the fan shroud and buttoned everything back up.
It looks like this when done.
It started after I sorted some errors out as mentioned above. I timed it as marked on the pulley. I set the mixture using the lift plate method. It's running well through warm up to operational temperature.
What is nice about this unit is that you can set red line on the box. I set it at 6300 rpm.
Here is the thread from Pelican, and I bow to the people that helped me sleuth the trouble and for their pioneering excellence.
http://forums.pelicanparts.com/porsc...l-install.html
Before:
After:
Disconnect the battery (-) terminal an remove the Bosch CDI, 14 pin connector and then the aluminum electrical panel. Remove the captive nuts on the back. Save the parts, for they are sure to increase in value.
I got the four rubber standoffs and hardware from an electronic surplus company http://www.tannerelectronics.com/location.html and the fender washers from a True Value. I used as many existing holes as possible. I marked the top hole positions after mounting the standoffs to the Streetfire.
I positioned the coil in the blank space (where the external VR would be located decades ago). The new coil comes with standoffs and complete hardware (connectors, coil wire boot, etc). Make sure you drill the holes with the panel off the side wall of the engine compartment.
The Front
The back
Mount the panel back on the car and then mount the Streetfire CDI (with clipped loop), and the coil. I made sure the coil fit behind the electrical cover. See the fuse panel to the left? If you clean it up like I did, don't mount it back as you see here. It's backwards.
Here is the correct orientation.
Wiring
Read the Streetfire instructions and understand them. Clip the wire loop they tell you to on the Streetfire box for 6 cylinder operation. I did not at first start. (greedy little kid). Luckily nothing blew up.
You'll use the Grey, small red, purple, and green wires to the 6 pin. The orange (more like light red) wire goes to the + on the coil. The small black goes to the - of the coil. The fat black wire goes to the ground post behind the fuel accumulator and filter (a good time to polish all the ground there) The fat red wire goes to the upper fuse of the fuse panel as shown in the photo above. It was vacant for Sportomatic!
The grey wire goes to the Tach signal wire of the 6 pin.
The small red goes to the red wire of the 6 pin.
The green wire goes to the ground wire of the distributor on the 6 pin.
The purple wire goes to the + wire of the distributor on the 6 pin.
You won't use the white wire of the Streetfire for the 911SC. Tape it behind the box.
A successful crimp of a Faston connector:
NOTE
You may have to switch the green and purple wires after you start (mine happened to be reversed in the loom for some reason) You'll know you have this problem when you set the timing since it will be over 30� advanced and run horribly.
I used the male end connector and faston blades described by timmy2 on the Pelican site:
The housing is part # 571-180906, 27 cents each
The pins for it ( needed) are part # 571-42460-1, 19 cents each.
You can plug the existing 6 pin up with the Streetfire and tuck the plug behind the cover.
I used a solid core coil wire to the distributor and attached the nice MSD 90� boot to it.
Rotor
I read that the MSD ignitions blow up ignition rotors. Do this:
http://forums.pelicanparts.com/porsc...on-detail.html
I removed my old coil, mounting plate, the stainless shielding from my ignition wires (Beru), used heat shrink tube to insulate the old coil wires and grounds and tucked them back over the fan shroud and buttoned everything back up.
It looks like this when done.
It started after I sorted some errors out as mentioned above. I timed it as marked on the pulley. I set the mixture using the lift plate method. It's running well through warm up to operational temperature.
What is nice about this unit is that you can set red line on the box. I set it at 6300 rpm.
Here is the thread from Pelican, and I bow to the people that helped me sleuth the trouble and for their pioneering excellence.
http://forums.pelicanparts.com/porsc...l-install.html
Last edited by oneblueyedog; 01-14-2014 at 10:48 PM. Reason: Photos have bad links
12-31-2013 | 02:42 AM
#2
Thread Starter
Track Day
Joined: Apr 2011
Posts: 17
Likes: 0
From: Texas
12-31-2013 | 01:39 PM
#3
Race Car
Joined: May 2003
Posts: 4,045
Likes: 61
From: SoCal
Why all the effort for no real benefit and a number of negatives?
Read here;
https://rennlist.com/forums/911-foru...n-exposed.html
Read here;
https://rennlist.com/forums/911-foru...n-exposed.html
12-31-2013 | 02:35 PM
#4
Drifting
Joined: Sep 2001
Posts: 2,467
Likes: 14
From: redmond wa
Negatives, WHAT negatives.....?
My '78 is still running the (antique...) Bosch you repaired but one more failure and the MSD goes in...
Bosch. or Porsche, did not even have enough engineering expertise to know to go to an E&I laminated metal core TRANSFORMER type ignition coil. 30% gain in ignition performance right there.
Not saying the OEM system doesn't do a perfectly adequate job.


Trending Topics
 05-04-2014 | 09:42 PM
#10

Track Day
Joined: May 2014
Posts: 16
Likes: 1
From: Malibu CA
Great install thread. I did a similar setup with a different CDI, and have a couple of things to add.
1. You need very good power to insure reliability of the Street Fire. I had trouble with the upper fuse connection that you used. Problem was the 14 pin connector was intermittent for that +12vdc coming from the starter motor. [that is where that fuse gets it power. I cleaned the 14 pin and it was OK, but I did not trust it.
I tapped into the heavy red wire BEFORE the 14 pin connector. I put a new 20 amp fuse in this line and feed it straight to the CDI.
2. Installed a 10,000 UF 25V electrolytic capacitor and mounting bracket to filter the new power line mentioned above. There is a very long lead to the battery, and this Cap filters out RFI and makes sure the CDI has enough reserve power ALL the time.
3. If your 911 has points or Pertronix, you use the white wire. the wires you refer to are for magnetic pickup.
4. The Street Fire is a good value, however I am not comfortable with the age of the design and the Chinese manufacturing. I guess at that price you could always afford a spare for your tool kit in the car.
5. Make sure you have a matching coil and a good coil for any CDI.
My 1973 RS tribute with MFI and 2.7 sure works so much better with the Daytona-Sensors CD-1 I installed.