New Member with 911 Carrera RallyCross Project
#376
Mixed bag of progress today but no oil temperature posts; not cold enough to do any meaningful testing.
First off, to make sure we win this weekends RallyCross we added some stickers/power.


Ralph Thayer Automotive is the series sponsor in case you were wondering.
Then we installed the last of our LED gauge illumination lamps: the aftermarket voltmeter. It cost nearly as much as the bloody voltmeter!

Then the postman arrived with a spare transmission. OK, it was a big truck. We are now practising round the clock so we can do transmission swaps between runs at the next RallyCross.

First off, to make sure we win this weekends RallyCross we added some stickers/power.


Ralph Thayer Automotive is the series sponsor in case you were wondering.
Then we installed the last of our LED gauge illumination lamps: the aftermarket voltmeter. It cost nearly as much as the bloody voltmeter!

Then the postman arrived with a spare transmission. OK, it was a big truck. We are now practising round the clock so we can do transmission swaps between runs at the next RallyCross.

#377
We had a very interesting weekend with the car, racing and making a movie!
Firstly Ryan Symancek arrived Thursday as guest driver and filmmaker for the weekend. Ryan is famous for his film series he made for /DRIVE about his experiences building his first car for RallyCross and driving a Group B Lancia 034 in New Zealand among other things. After those exploits were were hoping he wouldn't be underwhelmed by our little 911. We needn't worried.
Friday was spent prepping the car, loading the van and shooting some moving footage from the back of our Audi. It was an interesting process and the car was a star performer. Here are some iPhone shots we took of the proceedings.


One interesting result of all this was that the oil temperature reached 195F. It was 46F outside and mostly were were making passes at around 50mph so that was somewhat encouraging especially as this somewhat replicated the conditions we expected Saturday at the event. Consequently we decided to remove the plastic tape blocking of half the whale tail slots.
Race day morning we were greeted by thick fog and freezing temperatures. We were happy we had left the winter tires on the car and that the venue was only an hour away. The temperature kept going down the closer we got till it was only 24F when we unloaded and set up camp!

By the time the runs got underway the sun had emerged and burnt off most of the fog. It even climbed above freezing, barely. Ryan managed to spin the car on his first practice lap but after that he got it down. The thing is so easy to drive anyway, once you figure out not to lift mid corner. After 8 runs each and much filming Ryan finished 2nd and I was fifth, after I demolished a bunch of cones on my sixth run. I'm rusty, what can I say?


Video:
The car ran flawlessly, almost. After my debacle with the wall of cones I suffered a stuck throttle at wide open and shut the car down mid-run. It fired right back up at idle so we are not too sure what happened. One theory is that broken pieces of cone got jammed up in the throttle linkage as it runs almost under the transmission. At these temperatures cones just shatter when you hit them! Another is that, due to the deep ruts that were forming we were jamming frozen mud into the linkage and jamming it up that way. Either way it is a bit worrying and something we may need to address if we decide to RallyCross the car again.
Oil temperature-wise we got some good results. whale tail fully open but engine oiler cooler still shrouded we saw 195F again during the runs. This was in temperatures in the mid- thirties so quite encouraging. We drove the car home below freezing but only got 140F at highway speeds, not surprisingly.
So we can't wait for Ryan's film to be done now and released to YouTube. Expect it in about a month. Oh, and our new mascot, RALLIDOG was a big hit too.

Firstly Ryan Symancek arrived Thursday as guest driver and filmmaker for the weekend. Ryan is famous for his film series he made for /DRIVE about his experiences building his first car for RallyCross and driving a Group B Lancia 034 in New Zealand among other things. After those exploits were were hoping he wouldn't be underwhelmed by our little 911. We needn't worried.
Friday was spent prepping the car, loading the van and shooting some moving footage from the back of our Audi. It was an interesting process and the car was a star performer. Here are some iPhone shots we took of the proceedings.


One interesting result of all this was that the oil temperature reached 195F. It was 46F outside and mostly were were making passes at around 50mph so that was somewhat encouraging especially as this somewhat replicated the conditions we expected Saturday at the event. Consequently we decided to remove the plastic tape blocking of half the whale tail slots.
Race day morning we were greeted by thick fog and freezing temperatures. We were happy we had left the winter tires on the car and that the venue was only an hour away. The temperature kept going down the closer we got till it was only 24F when we unloaded and set up camp!

By the time the runs got underway the sun had emerged and burnt off most of the fog. It even climbed above freezing, barely. Ryan managed to spin the car on his first practice lap but after that he got it down. The thing is so easy to drive anyway, once you figure out not to lift mid corner. After 8 runs each and much filming Ryan finished 2nd and I was fifth, after I demolished a bunch of cones on my sixth run. I'm rusty, what can I say?


Video:
The car ran flawlessly, almost. After my debacle with the wall of cones I suffered a stuck throttle at wide open and shut the car down mid-run. It fired right back up at idle so we are not too sure what happened. One theory is that broken pieces of cone got jammed up in the throttle linkage as it runs almost under the transmission. At these temperatures cones just shatter when you hit them! Another is that, due to the deep ruts that were forming we were jamming frozen mud into the linkage and jamming it up that way. Either way it is a bit worrying and something we may need to address if we decide to RallyCross the car again.
Oil temperature-wise we got some good results. whale tail fully open but engine oiler cooler still shrouded we saw 195F again during the runs. This was in temperatures in the mid- thirties so quite encouraging. We drove the car home below freezing but only got 140F at highway speeds, not surprisingly.
So we can't wait for Ryan's film to be done now and released to YouTube. Expect it in about a month. Oh, and our new mascot, RALLIDOG was a big hit too.

#378
We think we have the oil temperature concerns addressed now. With some 5W40 oil in there and a cover over the engine oil cooler I think we should be fine. Time to move on to other issues: poor running and "popping" noises at idle!
We read on the forums that the popping noises are probably due to intake leaks; either from aging vacuum lines, oil filler gasket or, more than likely, intake manifold. It seems the bolts come loose and they can suck in the paper gaskets! These issues might also account for the rough idle. Of course there are other possible causes for the idling so we decided to look at plugs and ignition too.
So off with the distributor cap. Doesn't look pristine in there.

Neither does the rotor arm

We found these loose wires in front of the engine too. Can't believe after how many times we've had the engine out we haven't noticed them before. We must have forgotten what they were previously for, surely.

Plugs all look OK though the gaps were a little tight.

Uh Oh, another oil leak. Put it on the list.

So we gapped the plugs, cleaned up the cap and rotor, checked the oil cap gasket, looked around for deteriorating vacuum lines and checked the intake manifold bolts. Every bolt was loose! Not hand tight loose but almost. We torqued them back down and fired it back up, hoping that would be sufficient to sort it out for now.
It was Runs like a champ again. I think we'll plan on removing the intake manifold and replacing the gaskets and vacuum lines next time the engine is out. Which, judging by the proliferation of oil leaks recently will be quite soon.
Next we are off to Sno*Drift rally with the car to do some spectating and sell some wheels! Stay warm.
We read on the forums that the popping noises are probably due to intake leaks; either from aging vacuum lines, oil filler gasket or, more than likely, intake manifold. It seems the bolts come loose and they can suck in the paper gaskets! These issues might also account for the rough idle. Of course there are other possible causes for the idling so we decided to look at plugs and ignition too.
So off with the distributor cap. Doesn't look pristine in there.

Neither does the rotor arm

We found these loose wires in front of the engine too. Can't believe after how many times we've had the engine out we haven't noticed them before. We must have forgotten what they were previously for, surely.

Plugs all look OK though the gaps were a little tight.

Uh Oh, another oil leak. Put it on the list.

So we gapped the plugs, cleaned up the cap and rotor, checked the oil cap gasket, looked around for deteriorating vacuum lines and checked the intake manifold bolts. Every bolt was loose! Not hand tight loose but almost. We torqued them back down and fired it back up, hoping that would be sufficient to sort it out for now.
It was
 Runs like a champ again. I think we'll plan on removing the intake manifold and replacing the gaskets and vacuum lines next time the engine is out. Which, judging by the proliferation of oil leaks recently will be quite soon.
Next we are off to Sno*Drift rally with the car to do some spectating and sell some wheels! Stay warm.
#379
One more project on our to do list before we head to Sno*Drift was to relocate the battery to the smuggler's den, the recessed box in the trunk that used to house the AC blower. Weight distribution is the oft touted reason for doing this and there may well be some benefit in that regard but to us it felt necessary because we could never get jumper cables on the terminals in the stock location behind the front left headlight and that seemed important, especially as we head into the depth of winter.
The RENNLINE relocation kit is a well designed beauty that comes with everything you need to bolt the battery securly in place. We opted for the clamp with space for a disconnect switch but did not order the switch, yet. The main pieces are anodized aluminium and all the fasteners are stainless steel. The instructions are very clear too.

Here it is fully assembled but without the battery.

This particular kit is designed for the Odyssey PC925 battery and as we have had good luck with these batteries in the past had no hesitation to go with one of these again.

And this is where it's all headed.

It drops right in and rests on the lip of the aperture. It is then clamped to the lip with two small plates and srews.

Now for the tricky bit: wiring it up. The idea is to cut the terminal off the existing battery cable and pull it through the firewall into the passenger compartment and fish it into the smuggles box through the hole in the central tunnel that used to flow air to the AC blower. It's a bit fiddle espaecially as the cable is quite big and stiff but it was quite manageable. Once in we soldered and new ring connector on the end.


With the main battery cable now in the smuggler's box this left a bunch of wires in the old location without a positive feed. We ran a new fat cable from the battery back to this area and temporarily bolted them all together while we figured out how best to connect them. We also had to include two more wires for our rally lights into this configuration.

Then we had a brilliant idea: use a radiator isolator mount from our Audi Quattro and a Tupperware box!


Worked perfectly
The RENNLINE relocation kit is a well designed beauty that comes with everything you need to bolt the battery securly in place. We opted for the clamp with space for a disconnect switch but did not order the switch, yet. The main pieces are anodized aluminium and all the fasteners are stainless steel. The instructions are very clear too.

Here it is fully assembled but without the battery.

This particular kit is designed for the Odyssey PC925 battery and as we have had good luck with these batteries in the past had no hesitation to go with one of these again.

And this is where it's all headed.

It drops right in and rests on the lip of the aperture. It is then clamped to the lip with two small plates and srews.

Now for the tricky bit: wiring it up. The idea is to cut the terminal off the existing battery cable and pull it through the firewall into the passenger compartment and fish it into the smuggles box through the hole in the central tunnel that used to flow air to the AC blower. It's a bit fiddle espaecially as the cable is quite big and stiff but it was quite manageable. Once in we soldered and new ring connector on the end.


With the main battery cable now in the smuggler's box this left a bunch of wires in the old location without a positive feed. We ran a new fat cable from the battery back to this area and temporarily bolted them all together while we figured out how best to connect them. We also had to include two more wires for our rally lights into this configuration.

Then we had a brilliant idea: use a radiator isolator mount from our Audi Quattro and a Tupperware box!


Worked perfectly
#380
Last week we talked about prepping the car for Sno*Drift rally, even though it wasn't competing. Well now we feel obliged to let you know how it all went.
Of course it wouldn't be rally unless you were burning the midnight oil just before you left and that's exactly what we did though, of course, it wasn't planned that way. When we moved the trailer into position to load the car the next morning we found the lights only worked if we jiggled the trailer plug back and forth. Uh oh! We carefully removed the plugs cover and promptly three loose wires came out of their terminals with no clue as to which terminals they were.

We have no documentation of what terminal does what and the interweb wasn't forthcoming so we dashed out to Autozone before they closed to purchase another plug so we'd at least have a diagram and, if needed, a spare plug. The issue soon became that there were three loose wires and only two loose terminal screws. This was compounded by a wiring diagram that had the plug notch 180 degrees out of position which suggested our plug was always wired wrrong. But it wasn't as it always worked before. Oh, and the wire colors were all different too! It took a few hours to realize all these but when accounted for we got it back together. The extra wire? That turned out to be the trailer brake ground so we twinned it up with the trailer ground. PHEW! still Wednesday; just.
Loading up the car and trailer next afternoon was unefentful, thankfully, and the weather wasn't too bad with just some light snow forecast for later. Piece of cake.

So it was an easy drive to Lewiston and some logistical jiggery pokery soon saw the 911 parked at the rental house and the RALIVAN and trailer locked up in the local hardware store's yard (same owner). Then a quick jaunt over to race HQ in Atlanta via the snow covered "scenic route" had us registered, acredited and smiling. The Nokian tires proving more than adequate for the snow covered ice encrusted back roads. Back to the rental. Drinks, dinner and rally banter ensued.
The next two days were a blur of spectating and hob nobbing with participants and rally enthusiasts at our vendor booth and both parc exposes. The car really is a massive hit, even getting more attention on local TV than the rally cars. (see below) The car ran flawlessly all weekend and proved more than adequate for the conditions. There's just so much grip! After sitting in Atlanta service for two cold days the RALIVAN sputtuered into life Sunday morning to drag us all back down state without a hiccup. All said a thouroughly enjoyable but exausting weekend.
Video:

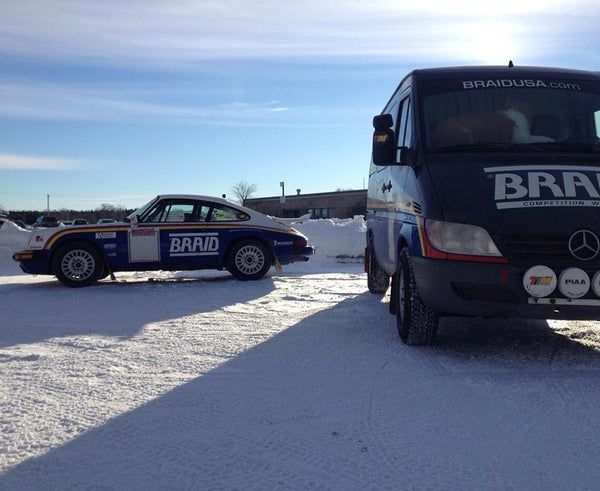
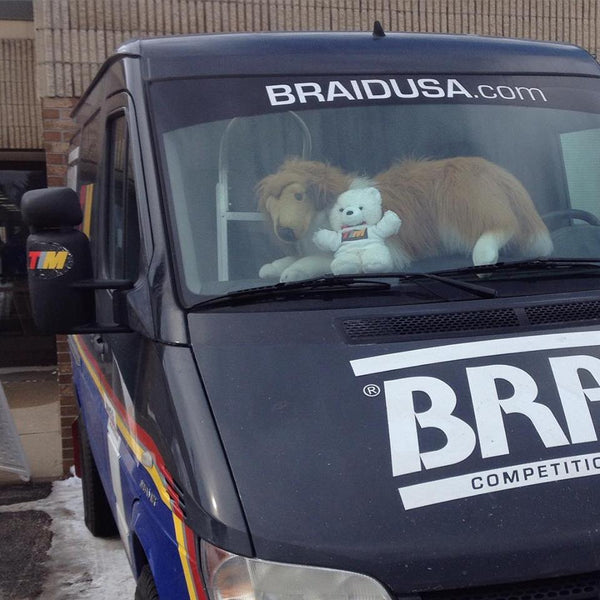
Of course it wouldn't be rally unless you were burning the midnight oil just before you left and that's exactly what we did though, of course, it wasn't planned that way. When we moved the trailer into position to load the car the next morning we found the lights only worked if we jiggled the trailer plug back and forth. Uh oh! We carefully removed the plugs cover and promptly three loose wires came out of their terminals with no clue as to which terminals they were.

We have no documentation of what terminal does what and the interweb wasn't forthcoming so we dashed out to Autozone before they closed to purchase another plug so we'd at least have a diagram and, if needed, a spare plug. The issue soon became that there were three loose wires and only two loose terminal screws. This was compounded by a wiring diagram that had the plug notch 180 degrees out of position which suggested our plug was always wired wrrong. But it wasn't as it always worked before. Oh, and the wire colors were all different too! It took a few hours to realize all these but when accounted for we got it back together. The extra wire? That turned out to be the trailer brake ground so we twinned it up with the trailer ground. PHEW! still Wednesday; just.
Loading up the car and trailer next afternoon was unefentful, thankfully, and the weather wasn't too bad with just some light snow forecast for later. Piece of cake.

So it was an easy drive to Lewiston and some logistical jiggery pokery soon saw the 911 parked at the rental house and the RALIVAN and trailer locked up in the local hardware store's yard (same owner). Then a quick jaunt over to race HQ in Atlanta via the snow covered "scenic route" had us registered, acredited and smiling. The Nokian tires proving more than adequate for the snow covered ice encrusted back roads. Back to the rental. Drinks, dinner and rally banter ensued.
The next two days were a blur of spectating and hob nobbing with participants and rally enthusiasts at our vendor booth and both parc exposes. The car really is a massive hit, even getting more attention on local TV than the rally cars. (see below) The car ran flawlessly all weekend and proved more than adequate for the conditions. There's just so much grip! After sitting in Atlanta service for two cold days the RALIVAN sputtuered into life Sunday morning to drag us all back down state without a hiccup. All said a thouroughly enjoyable but exausting weekend.
Video:


#381
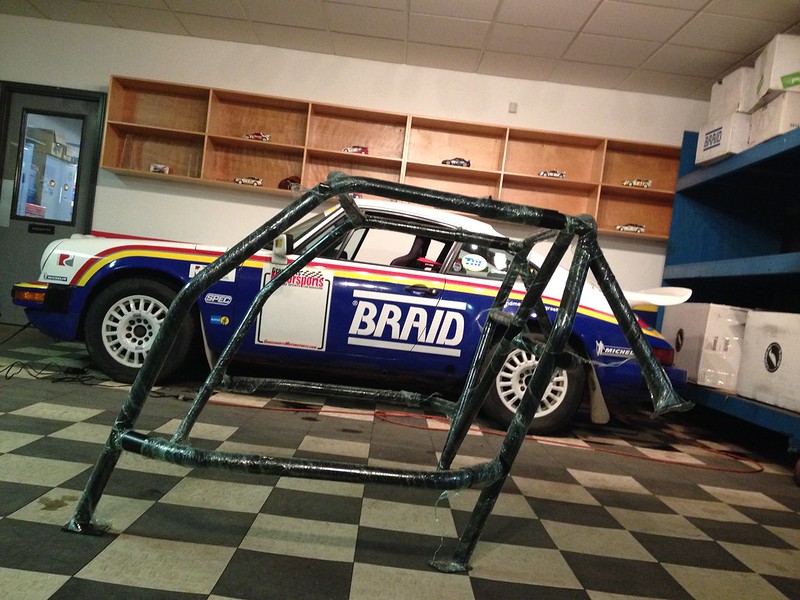
That's right, our little 911 is getting a roll cage. Does this mean we are going racing? Maybe. Motivations for this are three-fold: 1) safety during track days etc. 2) Race car credibility generally. We are showing the car a lot more these days. 3) This six point bolt in cage is SCCA time-trial approved and should allow us to run the Empire Hill Climb later this year!
We picked it up from a chap in Cincinnati who was selling for "Local pickup only" as a few of the bolt on sleeves had been welded "for additional safety" which rendered it less easy to ship.
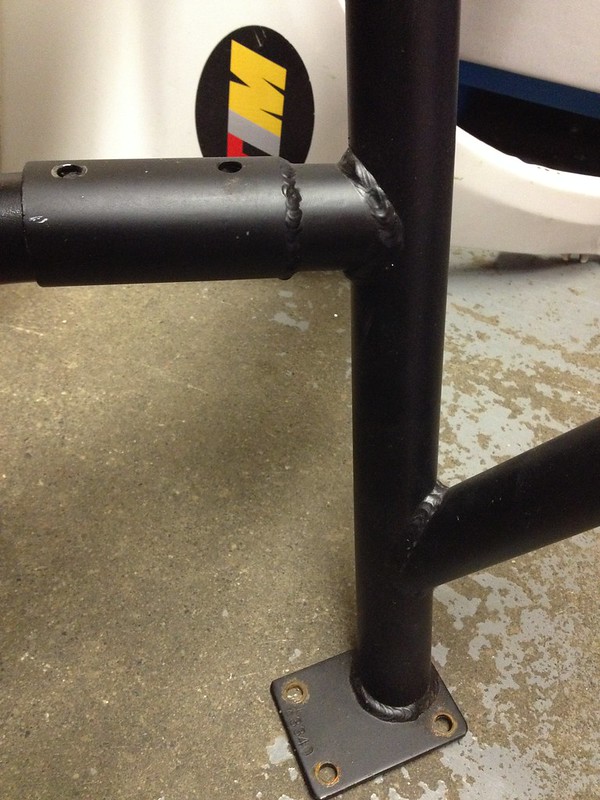
Fortunately that allowed us to win the auction for a great price as it really narrowed the market for it and, although we were willing to drive down to Cincinnati for it a good friend of the shop, Nick Clute very kindly volunteered to pick it up for us on his way back from Florida. SWEET!
We would prefer a white cage and will probably paint it before final installation but first we have to make sure it fits and that we can still install two seats with harnesses as only the driver's side harness bar is looped for extra clearance. So first thing was to remove the seat and harness bar from the car.
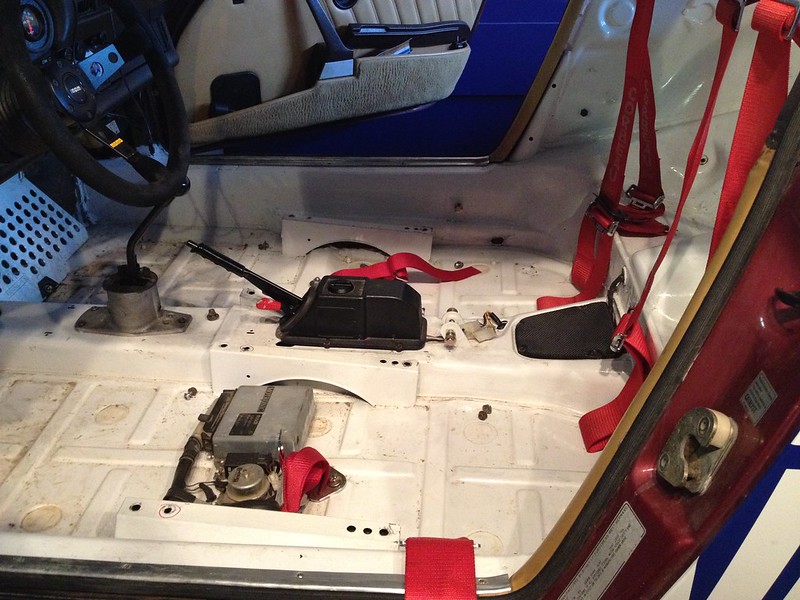
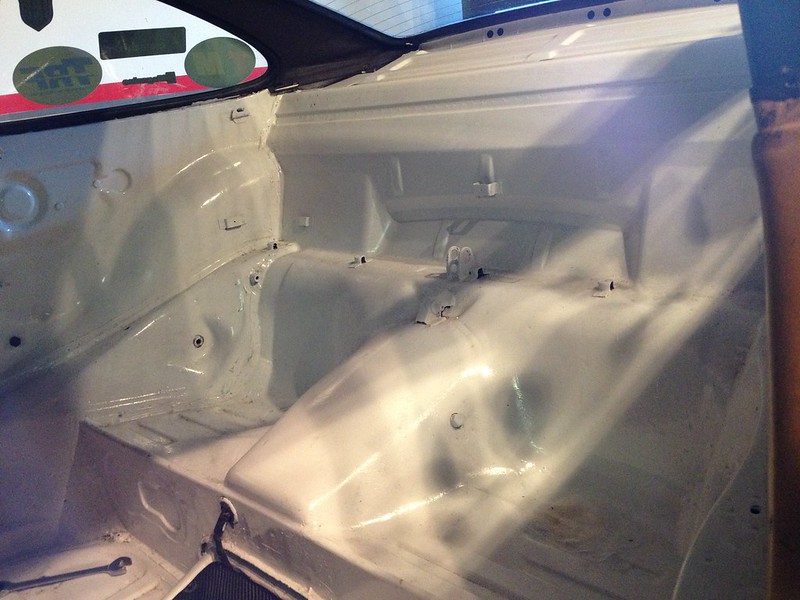
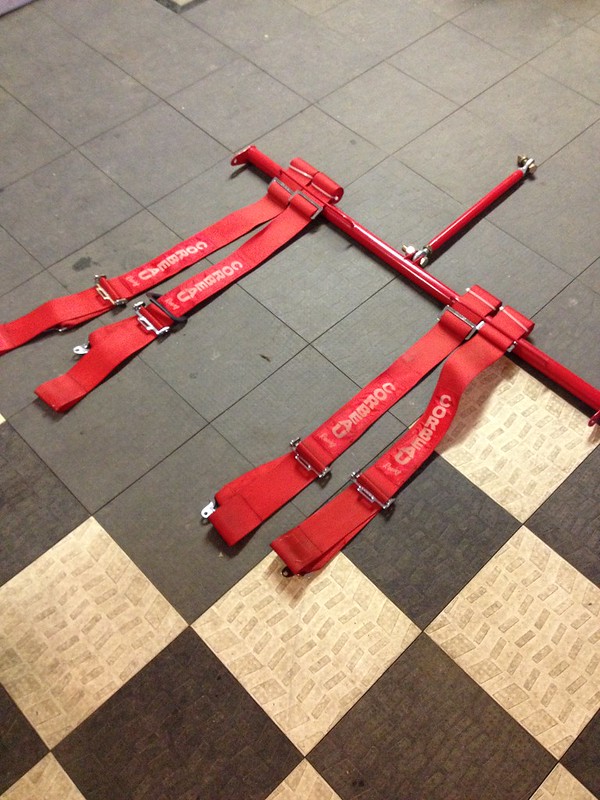
The rear hoop was a bugger to muscle into place unassisted but we managed and immediately a problem presented itself: we had assumed that the bolt holes in each sleeve and bar were factory drilled thus making the sleeve locations universal. WRONG. Every sleeve must have been drilled in the car as none of the holes would match up. So we wrestled the rear hoop back out and started to put this jigsaw puzzle of a cage back together in a way that rendered it somewhat 911 shaped. Eventually we had it figured out and marked everything so it could be reassembled the same way in the car. PHEW what a job.
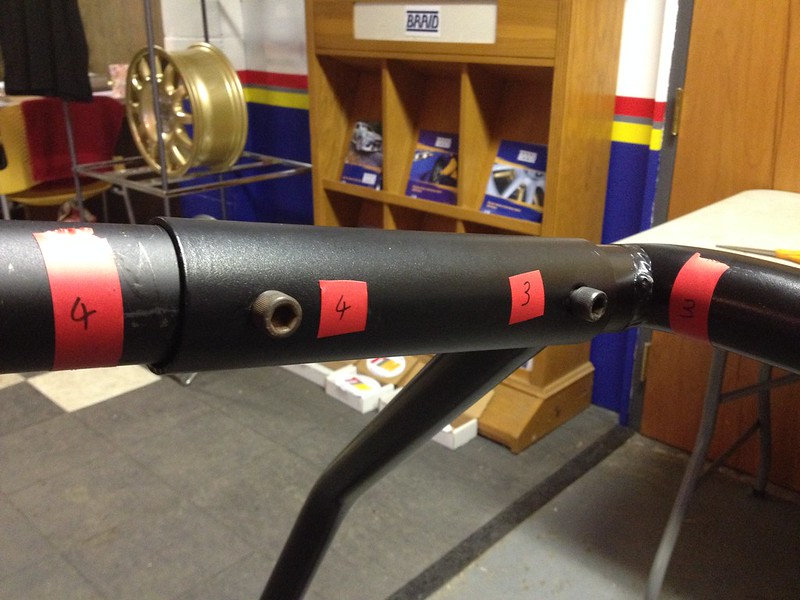
Three hours later the cage was fully assembled in the car but it was tight and even though all the bolts were loose it had very little flexibility. It seems it is going to mount exactly where it is now and nowhere else.

Again, a few issues presented themselves; non of which are insurmountable. Firstly, the sun visors are clearly never going to work with this cage in place. I guess they are coming out.
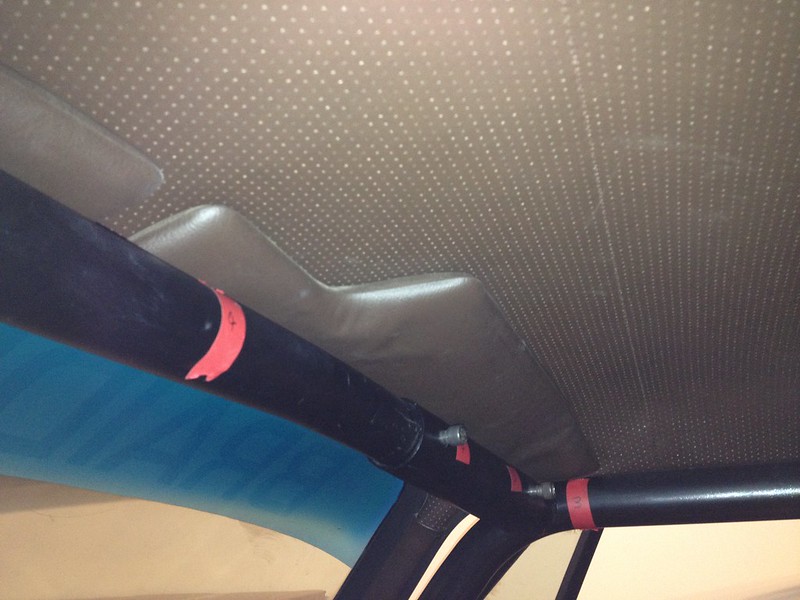
And secondly, the door pockets line up perfectly with the door bars. Either they go or the door bars go.
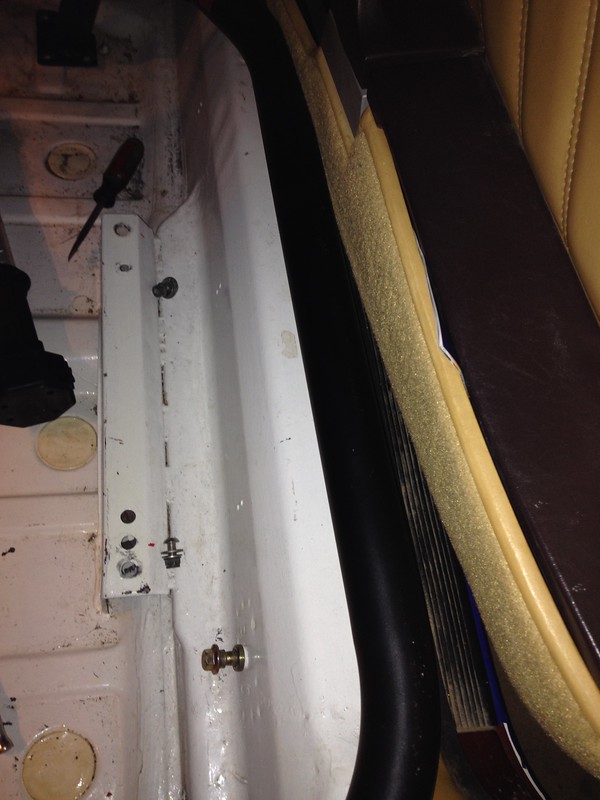
I think we'll source some RS door cards from RENNLINE to tidy this issue up.

So next job is putting the seats and harnesses back in to see if they still work then adjusting the feet locations, if we can and marking bolt holes. Then taking it all back out, drilling holes (gulp), painting it and finally throwing it back in. Stay tuned, it's about to get interesting.
#382
We never thought this project would need a "part #2" when we started it. Guess what? There's going to be a "Part #3" as well!
When we left Part #1 we had the cage fully assembled in the car and had noted a few things to tweak and/or remove. Next we test fitted the seats to see how they would work with the car, with particular interest in how we might mount the shoulder belts since we lost the harness bar. Before we did that we took the covers off to give them a wash. Three years of RallyCrossing had left them less than pristine.
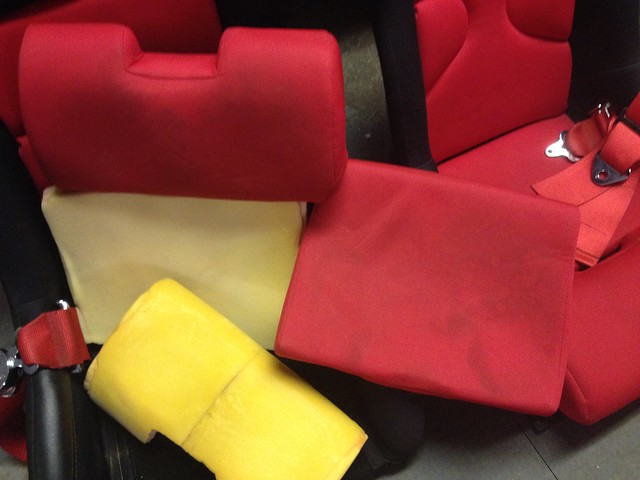 image by Team Illuminata Motorsport, on Flickr
The seats still fit but we are a little flummoxed by the height of the cage's harness bars as they seem too low. The rules say something like 10-20 degrees from horizontal and a short as possible but we think this is out of that range. Maybe we attach to the OE rear seat belt mounts which are 3 feet away and offset to the outside about six inches. More on that in Part #3.
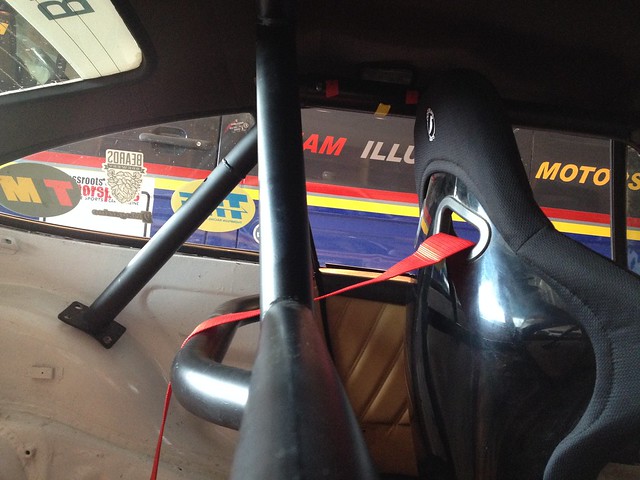 image by Team Illuminata Motorsport, on Flickr
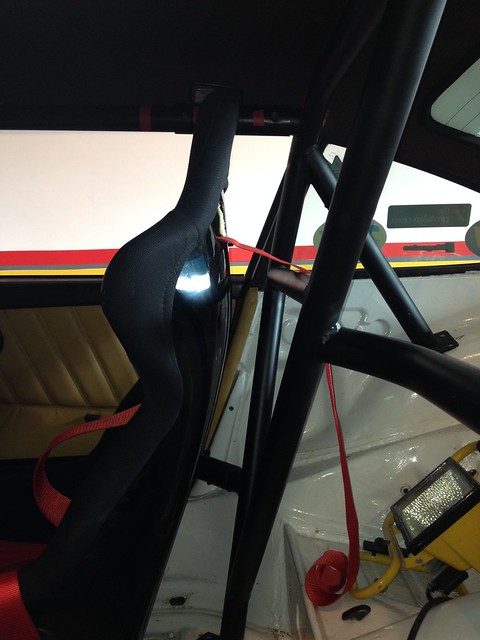 image by Team Illuminata Motorsport, on Flickr
Moving on, we next removed the door bars and door pockets so we could at least close the doors.
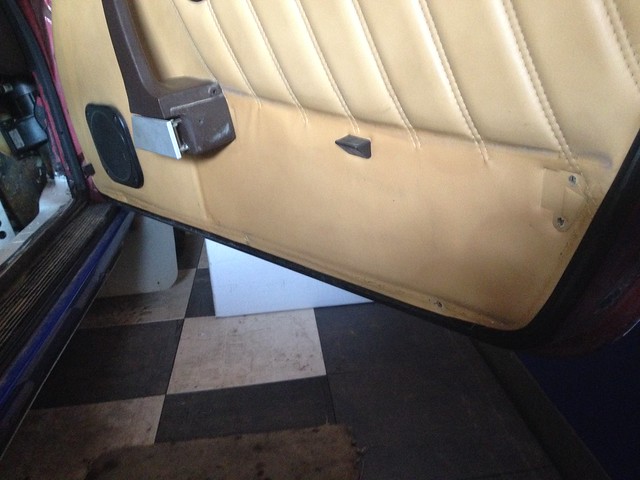 image by Team Illuminata Motorsport, on Flickr
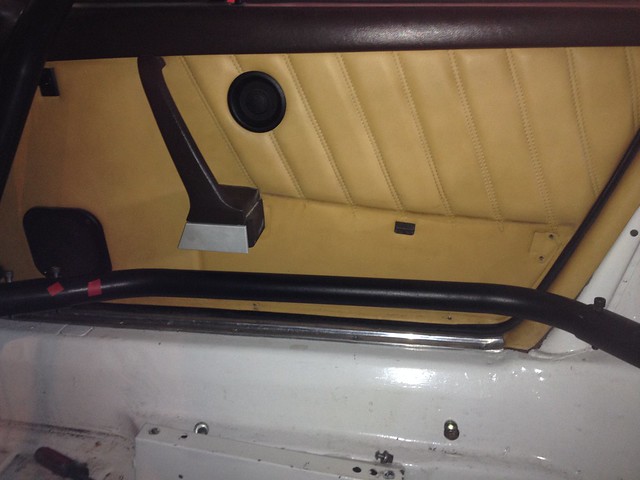 image by Team Illuminata Motorsport, on Flickr
And then started to work on the fitment issues, the main one of which was that the feet didn't want to sit on the wheel wells like they are supposed to.
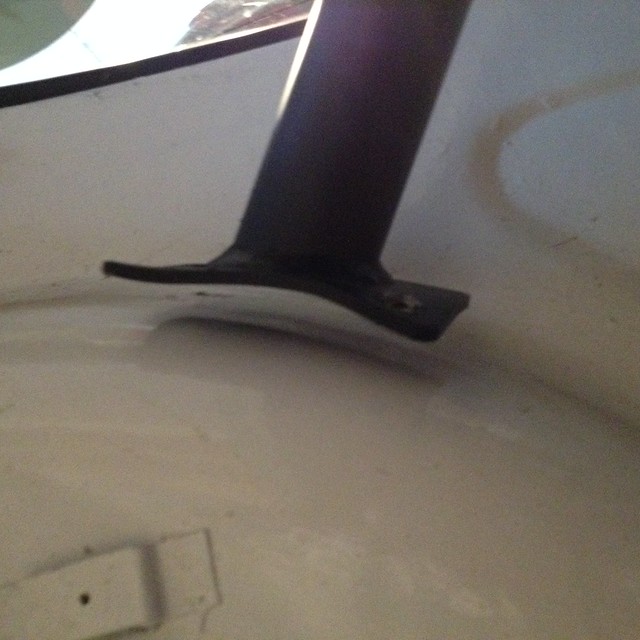 image by Team Illuminata Motorsport, on Flickr
We suspected (hoped) this was because a) the floor was a little high from poor jacking or hitting things and b) the door bars were rubbing on the b-pillar and not allowing the rear hoop to go back far enough. Both of these proved to be the case and were each addressed with the same specialized tool: a BFH, the b-pillars after first removing their tan leather wrap. We'll paint those white like the rest of the interior later.
 image by Team Illuminata Motorsport, on Flickr
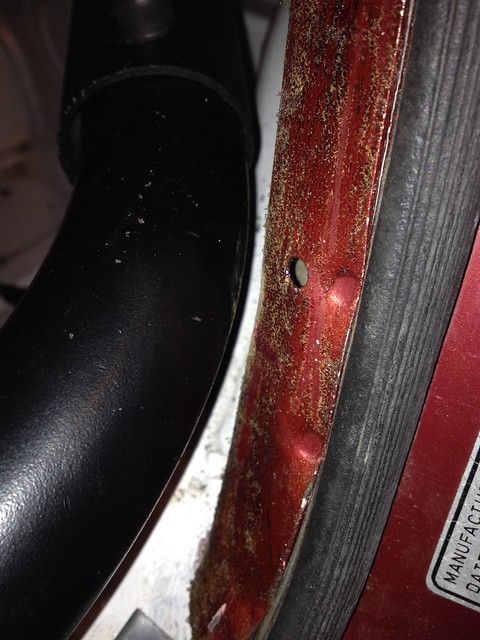 image by Team Illuminata Motorsport, on Flickr
Now everything was falling where it should it was time to drill holes and commit to this cage!!!
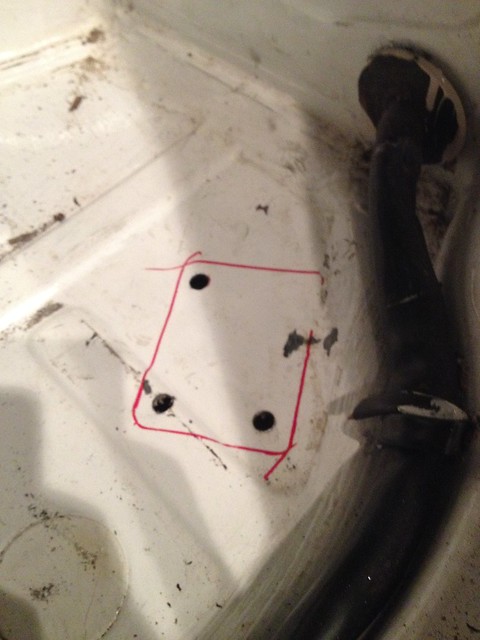 image by Team Illuminata Motorsport, on Flickr
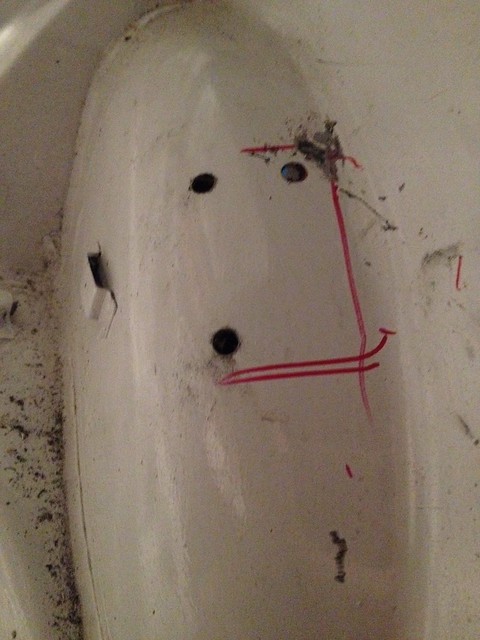 image by Team Illuminata Motorsport, on Flickr
and then take the whole thing out and reassemble it again so we can paint it.
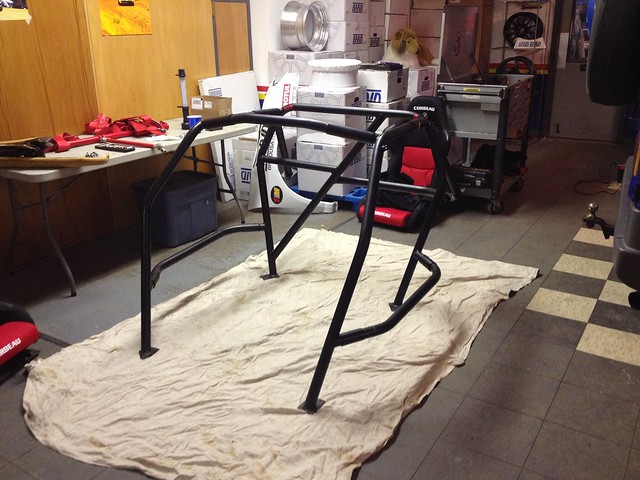 image by Team Illuminata Motorsport, on Flickr
BTW the seat cushions turned out lovely
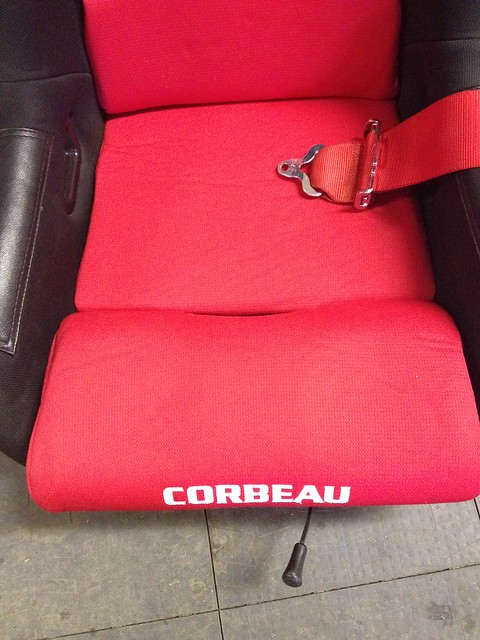 image by Team Illuminata Motorsport, on Flickr
In Part #3 we will finish this project once and for all.
When we left Part #1 we had the cage fully assembled in the car and had noted a few things to tweak and/or remove. Next we test fitted the seats to see how they would work with the car, with particular interest in how we might mount the shoulder belts since we lost the harness bar. Before we did that we took the covers off to give them a wash. Three years of RallyCrossing had left them less than pristine.
 image by Team Illuminata Motorsport, on Flickr
The seats still fit but we are a little flummoxed by the height of the cage's harness bars as they seem too low. The rules say something like 10-20 degrees from horizontal and a short as possible but we think this is out of that range. Maybe we attach to the OE rear seat belt mounts which are 3 feet away and offset to the outside about six inches. More on that in Part #3.
 image by Team Illuminata Motorsport, on Flickr
 image by Team Illuminata Motorsport, on Flickr
Moving on, we next removed the door bars and door pockets so we could at least close the doors.
 image by Team Illuminata Motorsport, on Flickr
 image by Team Illuminata Motorsport, on Flickr
And then started to work on the fitment issues, the main one of which was that the feet didn't want to sit on the wheel wells like they are supposed to.
 image by Team Illuminata Motorsport, on Flickr
We suspected (hoped) this was because a) the floor was a little high from poor jacking or hitting things and b) the door bars were rubbing on the b-pillar and not allowing the rear hoop to go back far enough. Both of these proved to be the case and were each addressed with the same specialized tool: a BFH, the b-pillars after first removing their tan leather wrap. We'll paint those white like the rest of the interior later.
 image by Team Illuminata Motorsport, on Flickr
 image by Team Illuminata Motorsport, on Flickr
Now everything was falling where it should it was time to drill holes and commit to this cage!!!
 image by Team Illuminata Motorsport, on Flickr
 image by Team Illuminata Motorsport, on Flickr
and then take the whole thing out and reassemble it again so we can paint it.
 image by Team Illuminata Motorsport, on Flickr
BTW the seat cushions turned out lovely
 image by Team Illuminata Motorsport, on Flickr
In Part #3 we will finish this project once and for all.
#383
Just a car guy
Rennlist Member
Rennlist Member
Joined: Jan 2002
Posts: 9,927
Likes: 836
From: South Lyon, Michigan, Ewe Ess Eh
Hey Paul - I don't recall the seats having the red inserts. Maybe I was sitting on them and paying attention to other things - or maybe they are newer than the last time I drove it?
The angle of the harness does not look too bad. Have you measured it? The more important question is where do your (or your drivers) shoulders line up with respect to the openings in the seats? If shoulders are higher than the openings, then you do have an issue.
Oh - on closer look - I see the navigator's bar is higher than the driver's bar. You may want to have a similar bar placed on the driver's side at a higher level than the navi. It will be a balancing act between how wide it will be due to how high it needs to be. I'd mock up something with cardboard tubing and trial fit everything prior to any welding.
#384
Hey Paul - I don't recall the seats having the red inserts. Maybe I was sitting on them and paying attention to other things - or maybe they are newer than the last time I drove it?
The angle of the harness does not look too bad. Have you measured it? The more important question is where do your (or your drivers) shoulders line up with respect to the openings in the seats? If shoulders are higher than the openings, then you do have an issue.
Oh - on closer look - I see the navigator's bar is higher than the driver's bar. You may want to have a similar bar placed on the driver's side at a higher level than the navi. It will be a balancing act between how wide it will be due to how high it needs to be. I'd mock up something with cardboard tubing and trial fit everything prior to any welding.
The angle of the harness does not look too bad. Have you measured it? The more important question is where do your (or your drivers) shoulders line up with respect to the openings in the seats? If shoulders are higher than the openings, then you do have an issue.
Oh - on closer look - I see the navigator's bar is higher than the driver's bar. You may want to have a similar bar placed on the driver's side at a higher level than the navi. It will be a balancing act between how wide it will be due to how high it needs to be. I'd mock up something with cardboard tubing and trial fit everything prior to any welding.
No Scott, they were always red. I believe you did sit on them.
Thanks for the advice on the belts. I may hold off painting it now.
#385
OK, part #3. Final part? Read on..................
Painting took just two coats of brushed on Rustoleum; the same and left over paint we used for the interior. It was a bit of chore having to paint all round each tube and, because we didn't want to remove the sleeves again, required a bit of touch up later. But it is done and we think looks cracking!
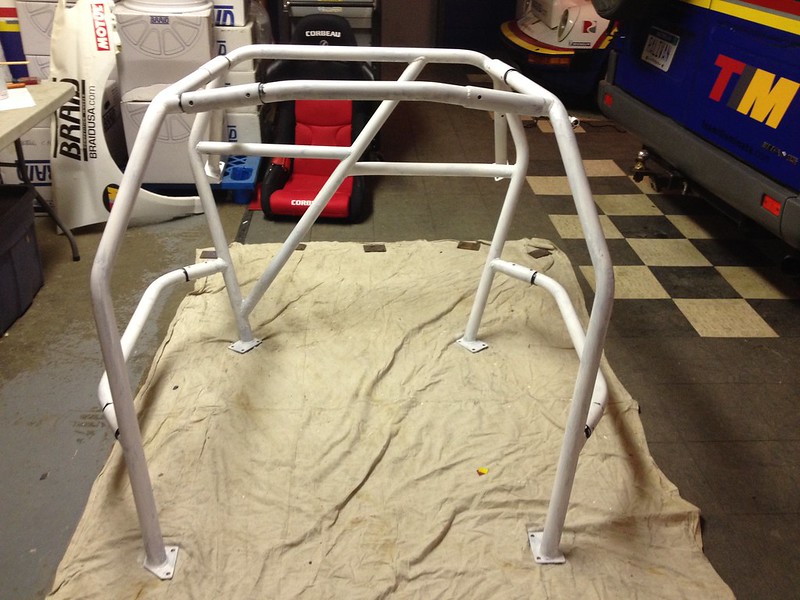 image by Team Illuminata Motorsport, on Flickr
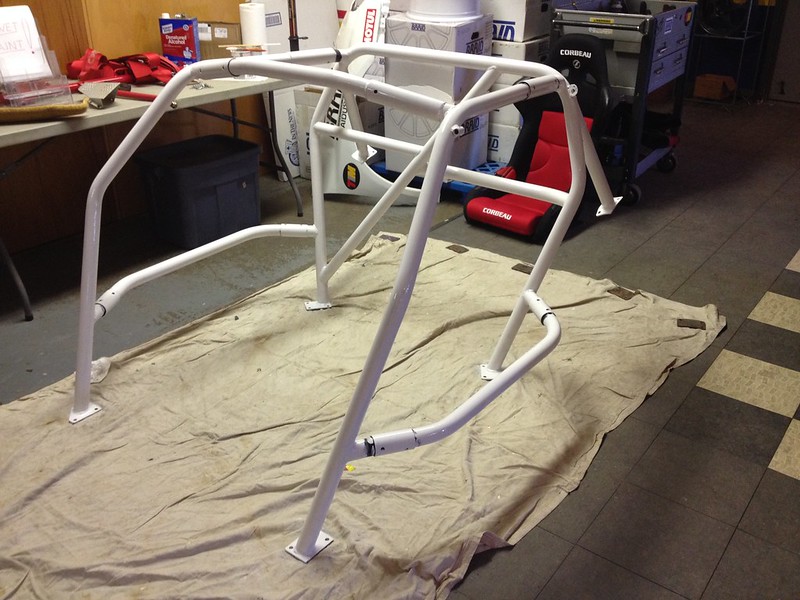 image by Team Illuminata Motorsport, on Flickr
While it was drying we ran to Fastenall to get some new hardware. We didn't like the black allen screws that came with the kit and wanted new nylock nuts too.
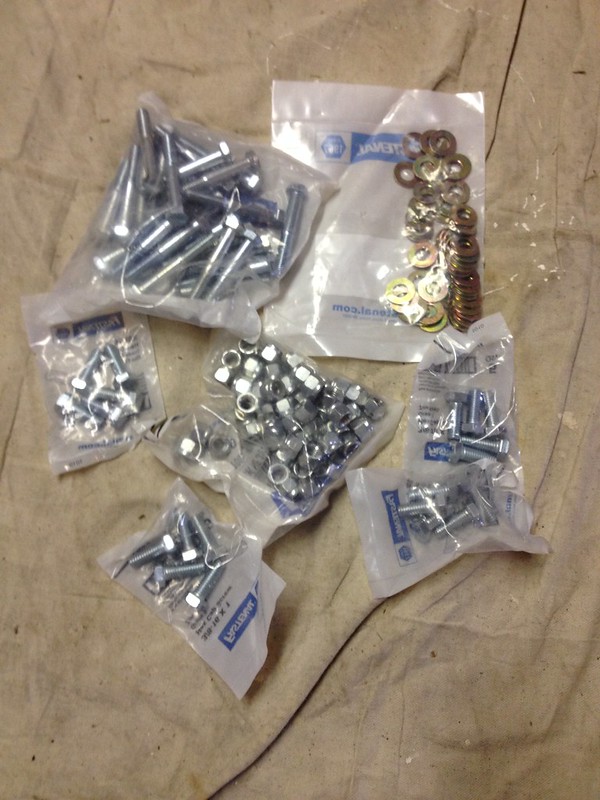 image by Team Illuminata Motorsport, on Flickr
Then we threw it back in the car. cinched everything down and it fit perfectly.
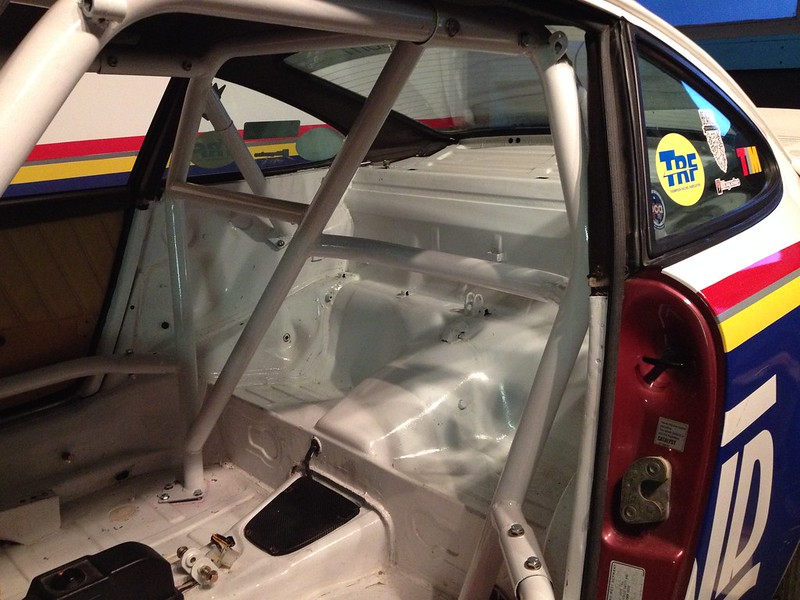 image by Team Illuminata Motorsport, on Flickr
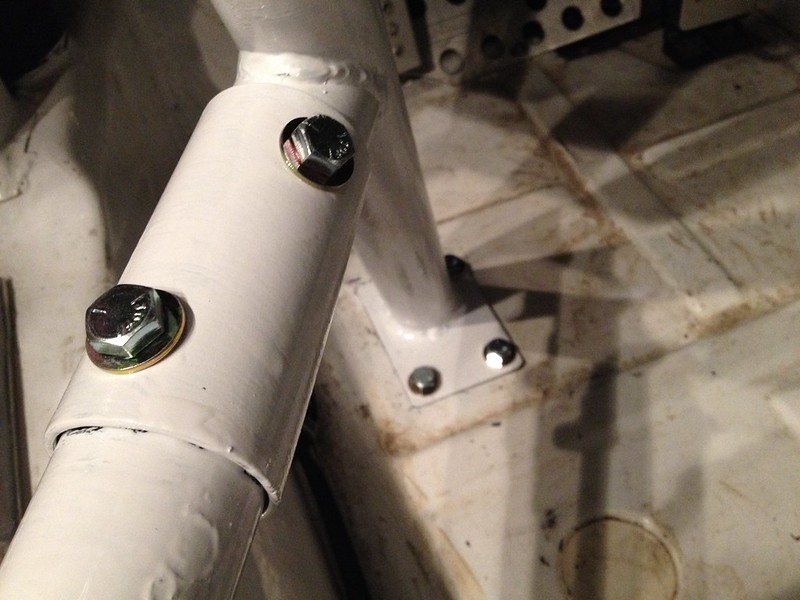 image by Team Illuminata Motorsport, on Flickr
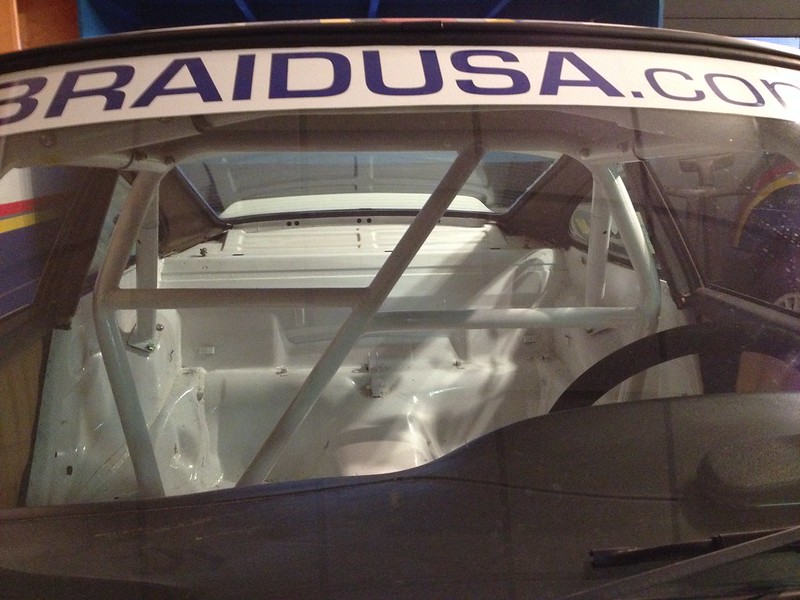 image by Team Illuminata Motorsport, on Flickr
Then we put the seats and belts back in to complete the project. Well, so we thought.
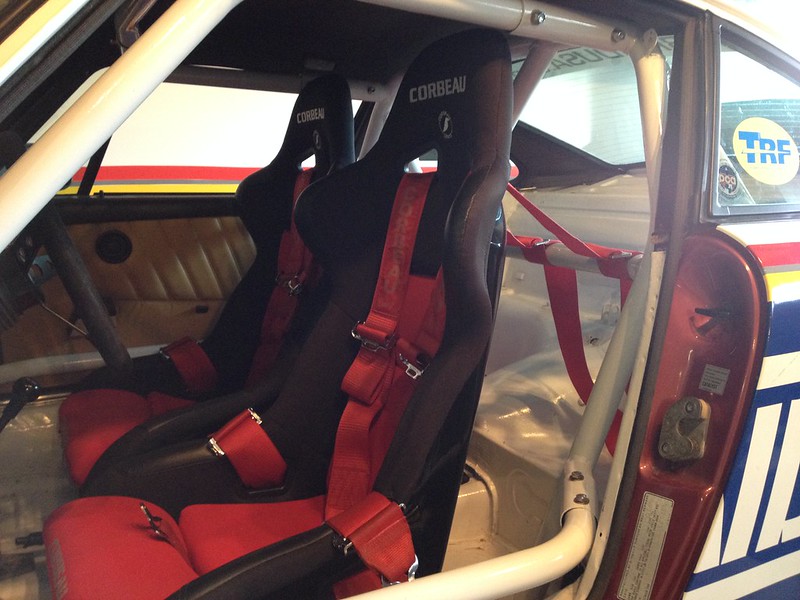 image by Team Illuminata Motorsport, on Flickr
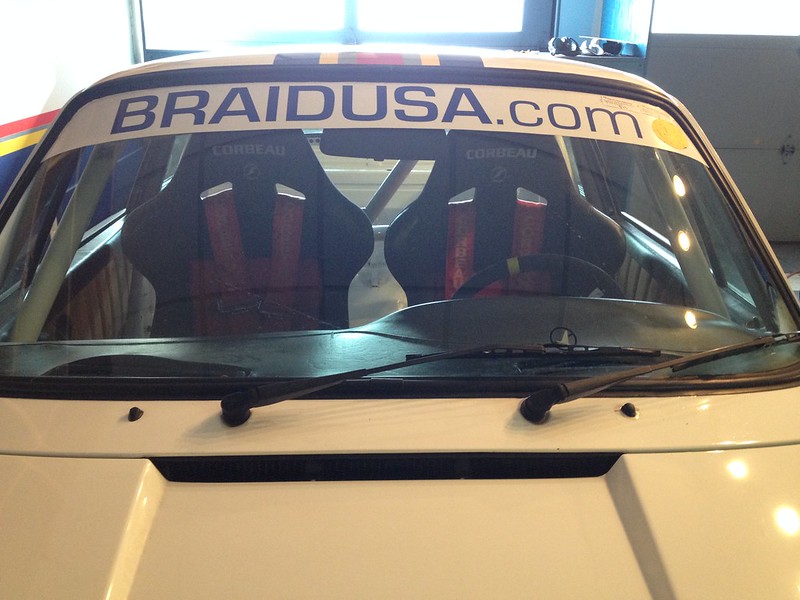 image by Team Illuminata Motorsport, on Flickr
As you can probably see the seats sit too high; both for shoulder belt angle and head to cage relationship. Unfortunately we don't see any way to get them lower without cutting the existing mounting pads away and fabricating new ones and that is definitely another project so this one is done.
Painting took just two coats of brushed on Rustoleum; the same and left over paint we used for the interior. It was a bit of chore having to paint all round each tube and, because we didn't want to remove the sleeves again, required a bit of touch up later. But it is done and we think looks cracking!
 image by Team Illuminata Motorsport, on Flickr
 image by Team Illuminata Motorsport, on Flickr
While it was drying we ran to Fastenall to get some new hardware. We didn't like the black allen screws that came with the kit and wanted new nylock nuts too.
 image by Team Illuminata Motorsport, on Flickr
Then we threw it back in the car. cinched everything down and it fit perfectly.
 image by Team Illuminata Motorsport, on Flickr
 image by Team Illuminata Motorsport, on Flickr
 image by Team Illuminata Motorsport, on Flickr
Then we put the seats and belts back in to complete the project. Well, so we thought.
 image by Team Illuminata Motorsport, on Flickr
 image by Team Illuminata Motorsport, on Flickr
As you can probably see the seats sit too high; both for shoulder belt angle and head to cage relationship. Unfortunately we don't see any way to get them lower without cutting the existing mounting pads away and fabricating new ones and that is definitely another project so this one is done.
#386
Loving what you're doing with your car and the cage is a great idea, as was the skid plate.
Back on the first page of the thread you mentioned that rallycross is not as hard on the cars as normal rallies are. Crashes aside, I'm not sure that's always the case. Here's a shot of my favourite car at the rallycross I competed in last weekend - the course was flat when walked but the stadium had hosted a jet sprint four weeks earlier and the loose soft sand they put back into the 'rivers' got ejected by off roaders that ran earlier in the day. By the end of day 1, under lights at 10pm, we were dropping down into some of the apexes to the point of the headlights disappearing below ground level.
This pic was shot on day 2, after overnight rain had consolidated the loose sand and a full morning's track prep had much improved the condition of the infield compared to Saturday. Stuart was on his second engine for the meet by then. Stuart McFarlane's '74/'75 rally special:
Attachment 1026064
(photo by, and purchased from, Geoff Ridder)
Loving the prep and look of your car and bet she would've done well there too. I was slumming it in a sub $2000 DC2 Integra that was caged but set up for track - lowered and on street tires.
Looking forward to your next adventure.
#387
Loving what you're doing with your car and the cage is a great idea, as was the skid plate.
Back on the first page of the thread you mentioned that rallycross is not as hard on the cars as normal rallies are. Crashes aside, I'm not sure that's always the case. Here's a shot of my favourite car at the rallycross I competed in last weekend - the course was flat when walked but the stadium had hosted a jet sprint four weeks earlier and the loose soft sand they put back into the 'rivers' got ejected by off roaders that ran earlier in the day. By the end of day 1, under lights at 10pm, we were dropping down into some of the apexes to the point of the headlights disappearing below ground level.
This pic was shot on day 2, after overnight rain had consolidated the loose sand and a full morning's track prep had much improved the condition of the infield compared to Saturday. Stuart was on his second engine for the meet by then. Stuart McFarlane's '74/'75 rally special:
Attachment 1026064
(photo by, and purchased from, Geoff Ridder)
Loving the prep and look of your car and bet she would've done well there too. I was slumming it in a sub $2000 DC2 Integra that was caged but set up for track - lowered and on street tires.
Looking forward to your next adventure.
Back on the first page of the thread you mentioned that rallycross is not as hard on the cars as normal rallies are. Crashes aside, I'm not sure that's always the case. Here's a shot of my favourite car at the rallycross I competed in last weekend - the course was flat when walked but the stadium had hosted a jet sprint four weeks earlier and the loose soft sand they put back into the 'rivers' got ejected by off roaders that ran earlier in the day. By the end of day 1, under lights at 10pm, we were dropping down into some of the apexes to the point of the headlights disappearing below ground level.
This pic was shot on day 2, after overnight rain had consolidated the loose sand and a full morning's track prep had much improved the condition of the infield compared to Saturday. Stuart was on his second engine for the meet by then. Stuart McFarlane's '74/'75 rally special:
Attachment 1026064
(photo by, and purchased from, Geoff Ridder)
Loving the prep and look of your car and bet she would've done well there too. I was slumming it in a sub $2000 DC2 Integra that was caged but set up for track - lowered and on street tires.
Looking forward to your next adventure.
I did say that didn't I.
Was that an SCCA sanctioned event. Car looks amazing but they are not supposed to get air like that or have ruts deep enough to flip a car. I thought.
#388
Spring is finally here and it appears our little 911 has decided what it's new role in life will be: as a show car!. I know, I know, they should be driven and it's a race car but to be honest sales are keeping us busy and it is over 30 years old now. Perhaps retirement is appropriate. Having said that we do have two defenses to mount: one, it keeps getting invited to shows and two, we have entered the next Detroit Region RallyCross so it's not all show and no go.
So what prompted this you may ask? Well we did rather enjoy showing the car off at last year's Northern Worthersee show in Frankenmuth, you may recall it won best Porsche or something. And the UR quattro of our friend Tim Maskus also won Best Of Show so these cars are very popular and get a lot of exposure.
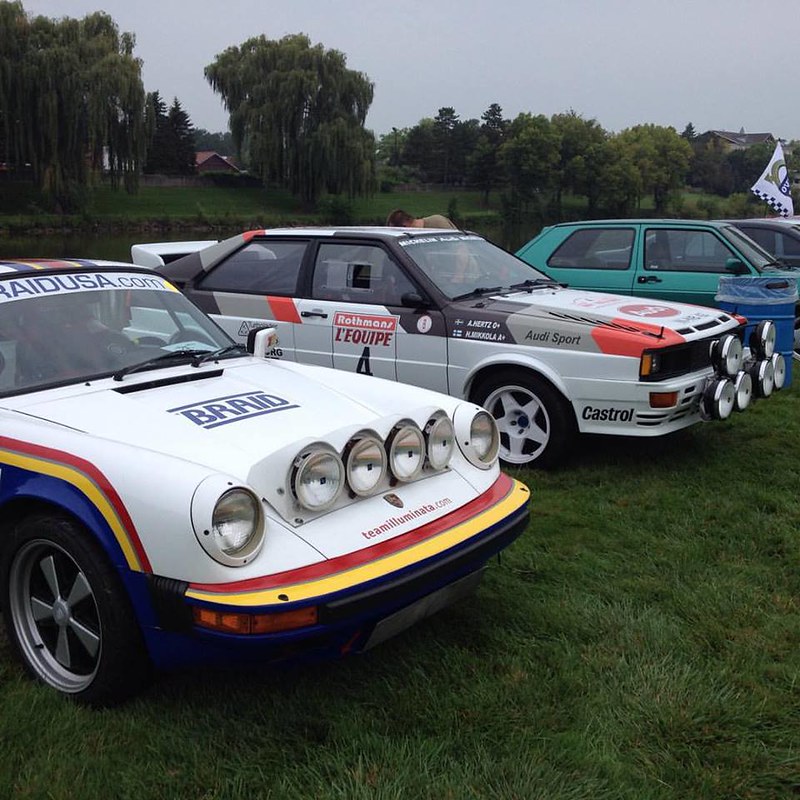 11899765_10153160145150773_3751792130510941922_n by Team Illuminata Motorsport, on Flickr
The car is also very popular at local car and coffee gatherings as you can imagine.
[IMG] image by Team Illuminata Motorsport, on Flickr[/IMG]
 11069309_10205210970846134_5786907419007244818_n by Team Illuminata Motorsport, on Flickr
Which may have contributed it being invited to this year's Eyes On Design show. which is a HUGE honor.
 Eyes On Design by Team Illuminata Motorsport, on Flickr
So then we thought it would be good exposure to once again attend the Motorstadt show in June but this time as a vendor, again with the car of course. This one is a similar crowd as Wurthersee and they have always appreciated the older German stuff.

But then we also got invited to The Concours d'Elegance of America along with a bunch of other rally oriented cars. It can't get any better.
 13151443_1180457198666449_2627125366945133411_n by Team Illuminata Motorsport, on Flickr
However, despite all this attention we are not detailing the car. It's still a race car after all.
.
So what prompted this you may ask? Well we did rather enjoy showing the car off at last year's Northern Worthersee show in Frankenmuth, you may recall it won best Porsche or something. And the UR quattro of our friend Tim Maskus also won Best Of Show so these cars are very popular and get a lot of exposure.
 11899765_10153160145150773_3751792130510941922_n by Team Illuminata Motorsport, on Flickr
The car is also very popular at local car and coffee gatherings as you can imagine.
[IMG]
 image by Team Illuminata Motorsport, on Flickr[/IMG]
 11069309_10205210970846134_5786907419007244818_n by Team Illuminata Motorsport, on Flickr
Which may have contributed it being invited to this year's Eyes On Design show. which is a HUGE honor.
 Eyes On Design by Team Illuminata Motorsport, on Flickr
So then we thought it would be good exposure to once again attend the Motorstadt show in June but this time as a vendor, again with the car of course. This one is a similar crowd as Wurthersee and they have always appreciated the older German stuff.

But then we also got invited to The Concours d'Elegance of America along with a bunch of other rally oriented cars. It can't get any better.
 13151443_1180457198666449_2627125366945133411_n by Team Illuminata Motorsport, on Flickr
However, despite all this attention we are not detailing the car. It's still a race car after all.
.
#389
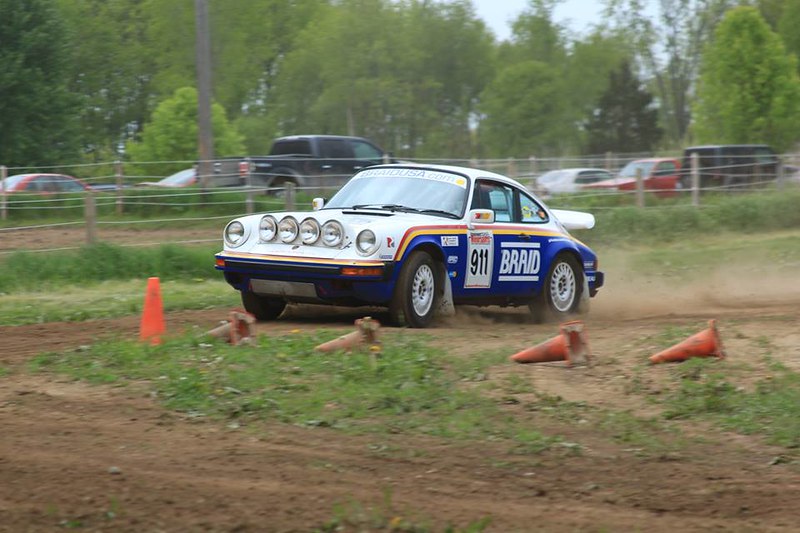
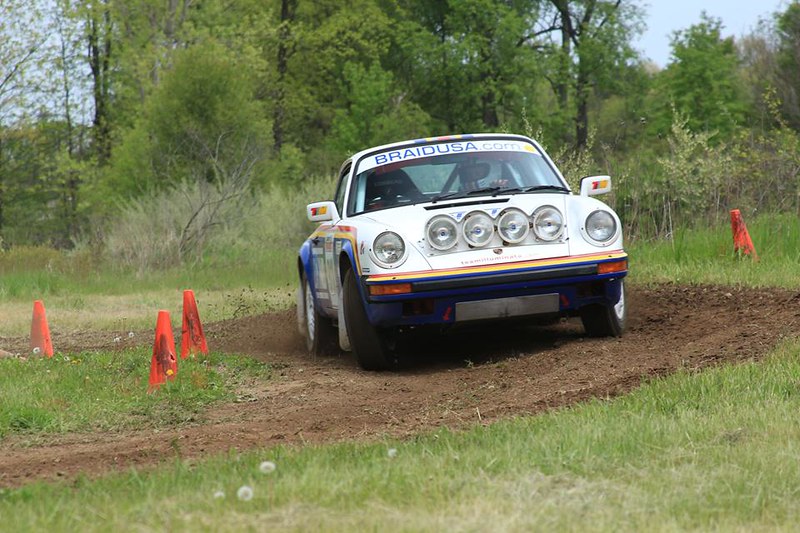
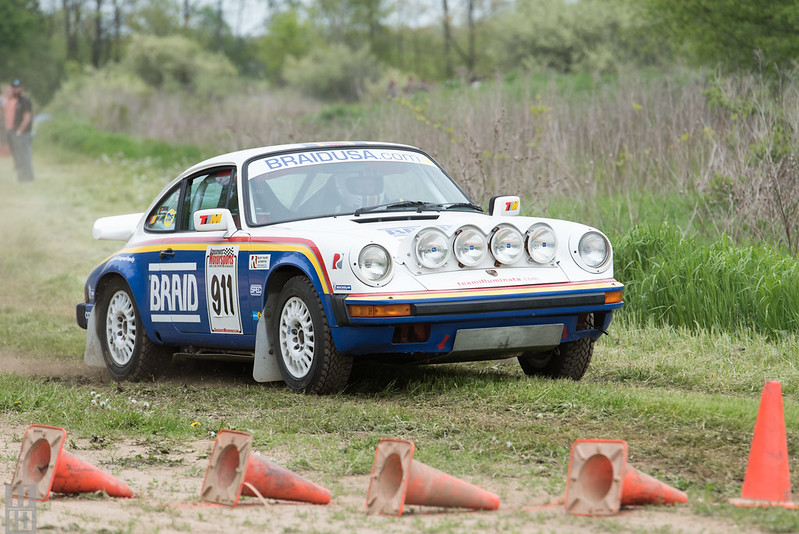
Was fortunate to make the list for the Detroit region of the SCCA RallyCross this past weekend. These events are always over-subscribed and for good reason; they are a great fun and exceptionally well run.
Unfortunately not driving competitively for six months really diminishes ones skills so, for the first time ever in a RallyCross the poor car did not take home a trophy. I apologized to it profusely.
Still, despite my lack of ability the car is still a crowd pleaser and produces excellent action shots and video:
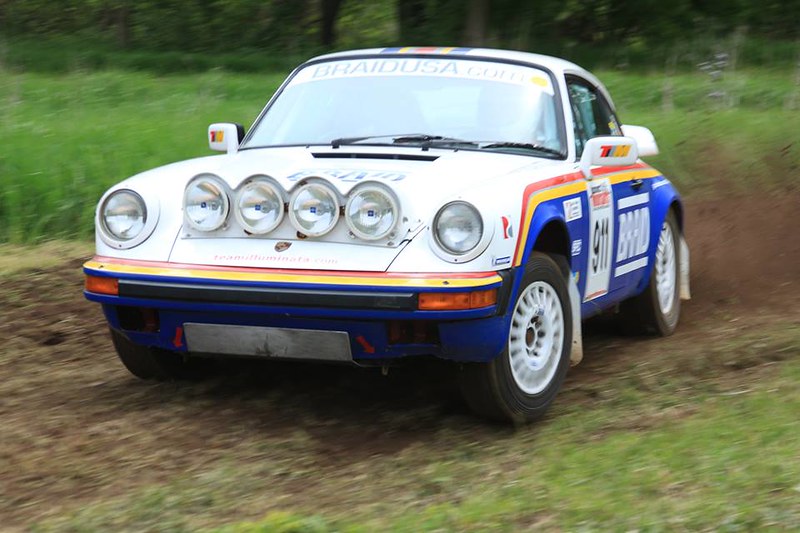 13266128_10207531422097382_5490087071613639158_n by Team Illuminata Motorsport, on Flickr
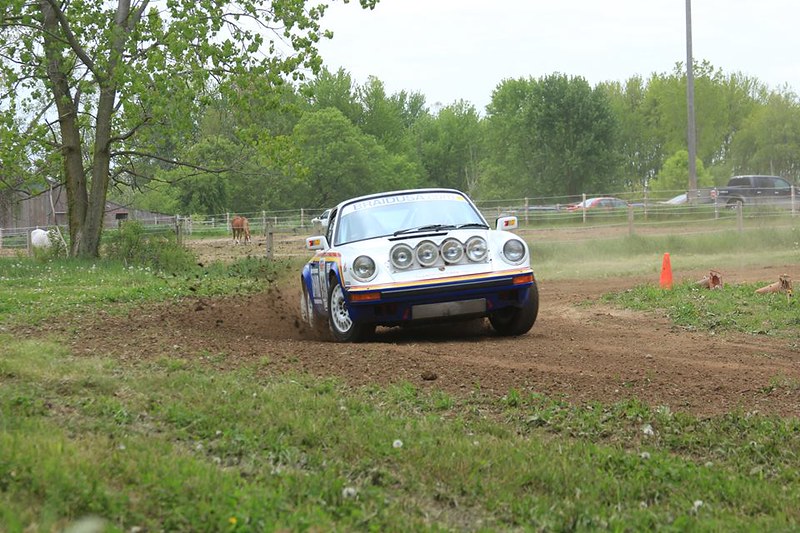 13263830_10207531411417115_1259497671807684254_n by Team Illuminata Motorsport, on Flickr
 13220995_10207531410497092_8809029149891773887_n by Team Illuminata Motorsport, on Flickr
 13227123_10207531427337513_8321023225533723341_n by Team Illuminata Motorsport, on Flickr
 27088134381_05299c5453_o by Team Illuminata Motorsport, on Flickr
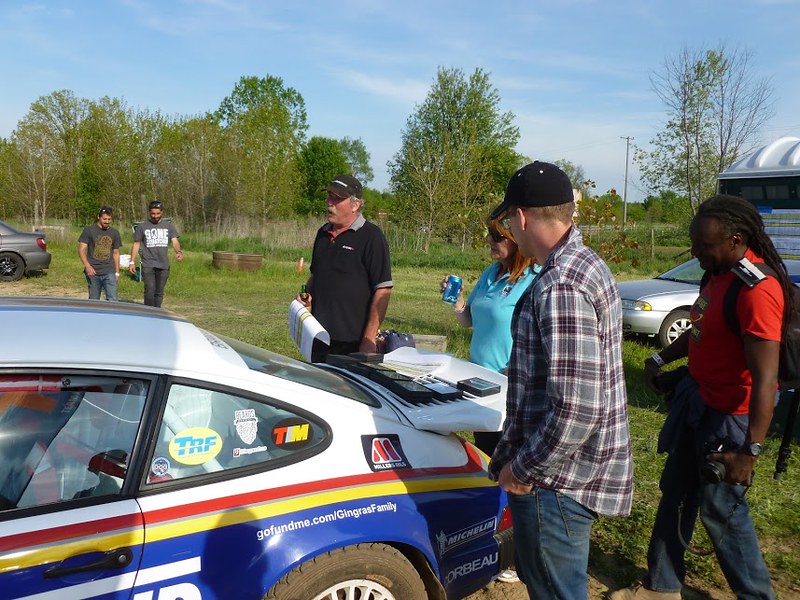
The spoiler also doubles as a trophy table!
 BrianThorpe5 by Team Illuminata Motorsport, on Flickr
Pictures by Brian Thorpe and Scott Banes.
Unfortunately not driving competitively for six months really diminishes ones skills so, for the first time ever in a RallyCross the poor car did not take home a trophy. I apologized to it profusely.
Still, despite my lack of ability the car is still a crowd pleaser and produces excellent action shots and video:
Facebook Post
 13266128_10207531422097382_5490087071613639158_n by Team Illuminata Motorsport, on Flickr
 13263830_10207531411417115_1259497671807684254_n by Team Illuminata Motorsport, on Flickr
 13220995_10207531410497092_8809029149891773887_n by Team Illuminata Motorsport, on Flickr
 13227123_10207531427337513_8321023225533723341_n by Team Illuminata Motorsport, on Flickr
 27088134381_05299c5453_o by Team Illuminata Motorsport, on Flickr
The spoiler also doubles as a trophy table!
 BrianThorpe5 by Team Illuminata Motorsport, on Flickr
Pictures by Brian Thorpe and Scott Banes.
#390
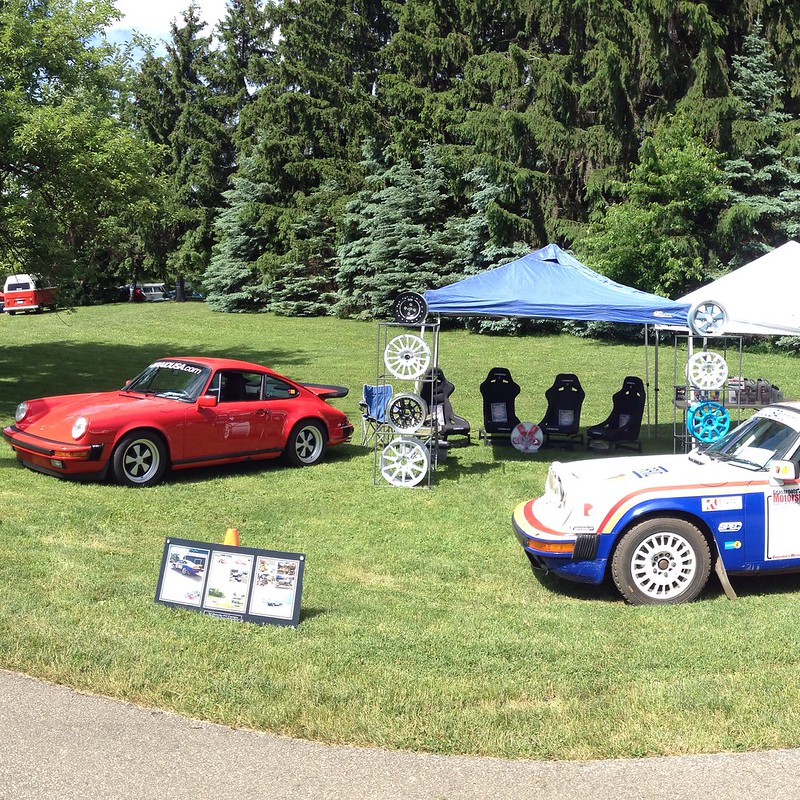
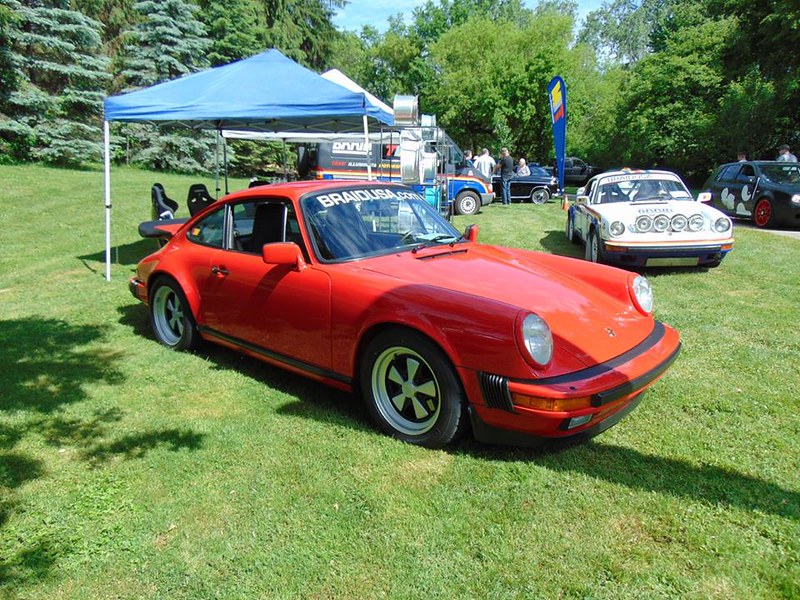
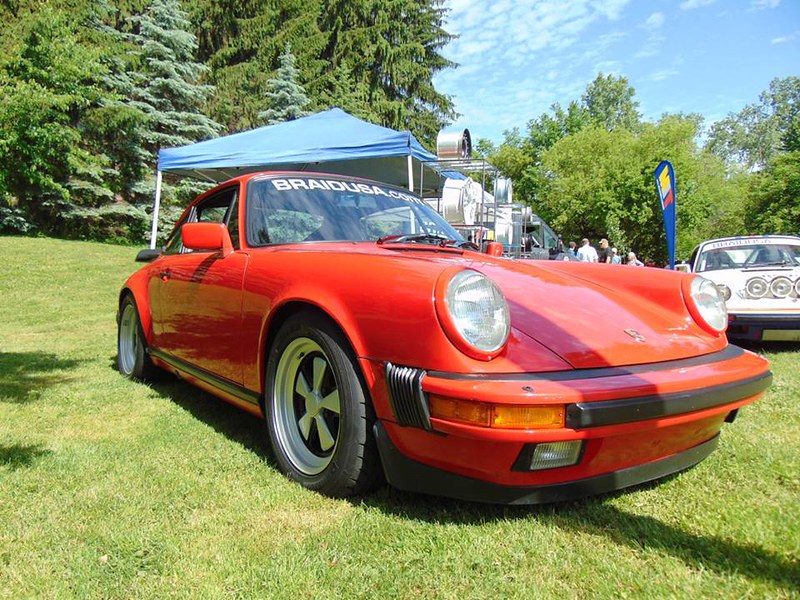
As the opening salvo in our "All Show and All Go" program for 2016 we entered the car in it's first proper show of 2016, the Motorstadt show put on by the Michigan Volkswagen Enthusiasts and held on the beautiful grounds of the Austrian Society. We also entered our other 911 and our RALIVAN in the show and took along the entire dog and pony show too! It was a long day resulting in 2nd place for the RallyCross 911.
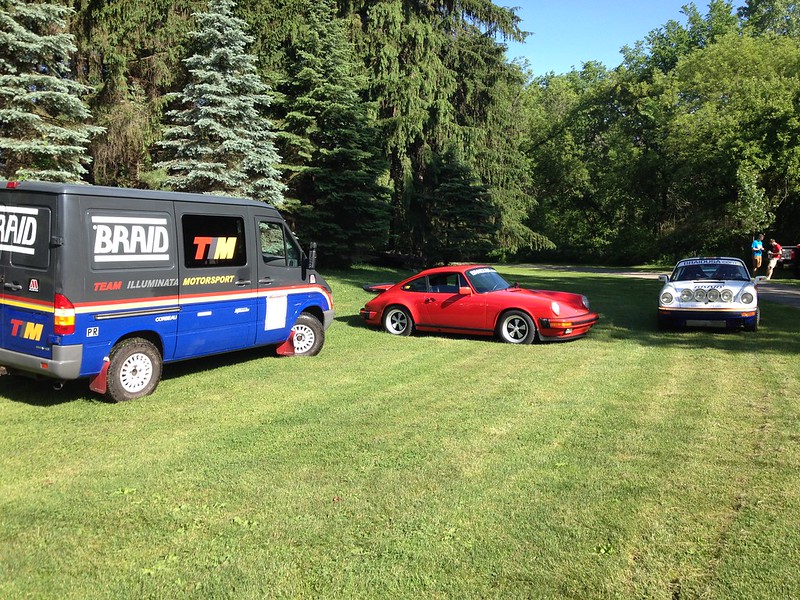 IMG_9167 by Team Illuminata Motorsport, on Flickr
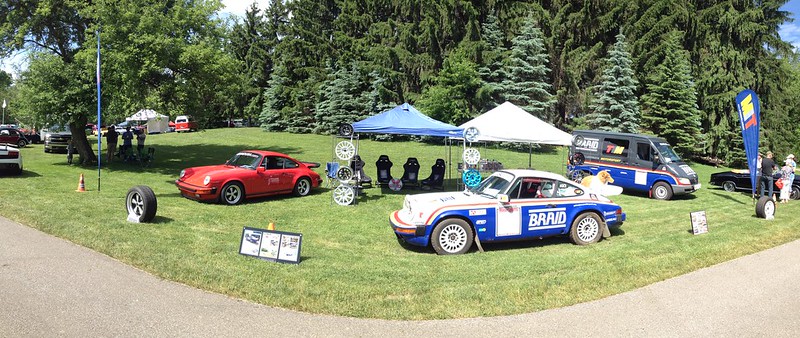 IMG_9168 by Team Illuminata Motorsport, on Flickr
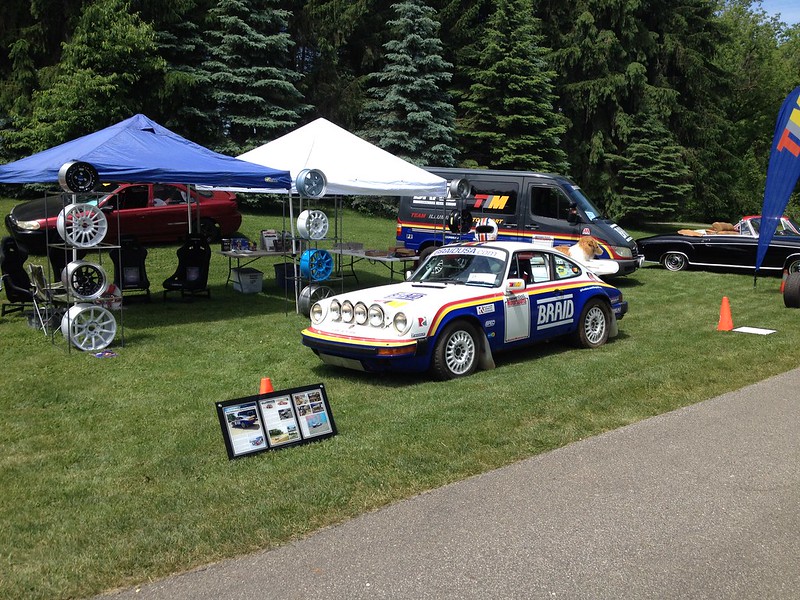 IMG_9172 by Team Illuminata Motorsport, on Flickr
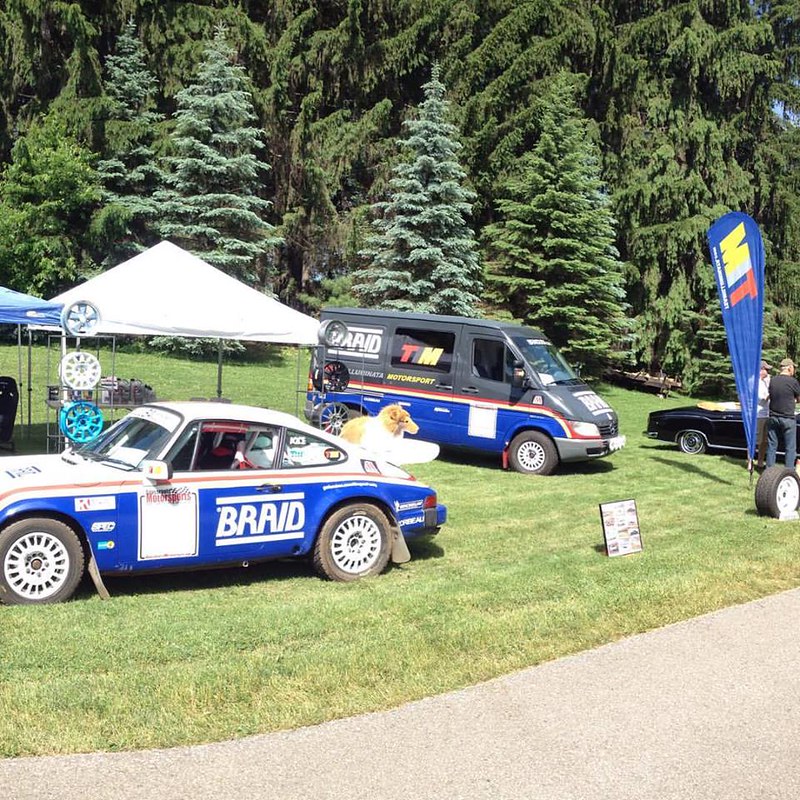 13393926_10153704860675773_3400659960073357387_n by Team Illuminata Motorsport, on Flickr
 IMG_9169 by Team Illuminata Motorsport, on Flickr
 13321906_1173476469338869_7581010964925592193_n by Team Illuminata Motorsport, on Flickr
 13315364_1173476512672198_7763240109415140100_n by Team Illuminata Motorsport, on Flickr
The next event on the calendar is Eyes On Design. That's a BIGGIE. We might have to get in some practicing.
 IMG_9167 by Team Illuminata Motorsport, on Flickr
 IMG_9168 by Team Illuminata Motorsport, on Flickr
 IMG_9172 by Team Illuminata Motorsport, on Flickr
 13393926_10153704860675773_3400659960073357387_n by Team Illuminata Motorsport, on Flickr
 IMG_9169 by Team Illuminata Motorsport, on Flickr
 13321906_1173476469338869_7581010964925592193_n by Team Illuminata Motorsport, on Flickr
 13315364_1173476512672198_7763240109415140100_n by Team Illuminata Motorsport, on Flickr
The next event on the calendar is Eyes On Design. That's a BIGGIE. We might have to get in some practicing.


