

Replacing a Turn signal, headlight beam changer 1983 911 SC
 03-30-2012, 06:14 AM
#1
Intermediate
Thread Starter

First of all I want to thank everyone that is always ready to answer my questions. I like to contribute as well when able. Todays issue is I had a new turn signal and headlight beam changer installed in my car last year in Florida. I now live in Tennessee and almost as soon as I had it installed and moved North the new one quit working. The turn signals work fine but every time I have the low beams on at night as soon as the turn signals self cancel the lights go to high beam. Even when I am not using the turn signals it is hard to have the headlights stay on low beam. I hit a bump or whatever the it will not keep the low beams on. I am assuming there is an issue with the detent or whatever keeps it locked in low beam.
I am sure there was a warrenty but honestly I lost faith in my mechanic down there and have to deal with this on my own now because of many other issues that have occured with my car since he worked on it and I have spent well over $10k on many items that needed replacing or upgrading.
I can not blame him if the part went bad after only a month or two but I know when he replaced it he stripped my headlight switch when he removed that to make the new connections when the turn signal beam changer was installed.
I am pretty handy and have alittle idea what I have to do. I know I have to remove the steering wheel and plastic housing the covers the switch. Can anyone here give me any more advice on what has to be done to put the replacement I have ordered in? Or if there is something I can do to try to repair or make the one in there now work properly? I have heard you do not have to put out the push/ pull headlight switch to place the turn signal indicator is this true? Is there room to get the old wires off and new ones on or do I have to cut the old ones and splice the new ones to them?
I want to take on this project on in about two weeks and appreciate any advice I can get from you fellow Porsche enthusiasts .
.
I spent a lot of money on my car last year, much more than I should have but everything clutch, drivetrain, tranny and suspension, brakes that needed replacing I replaced. It drives like a new car with about 180,000 plus on the original engine that has never had the heads off or any major repairs. Anyone who ever drives it is very impressed with the performance of an old 83 SC with that many miles it and is still a very tight car. I still love it despite a leak I am now looking for in one of the windows somewhere I believe it to be the windshield gasket because the rear window one and sunroof gaskets were just changed. More questions on that when I get to that project. Thanks all and keep the rubber on the road and tail end of those old 911's following the front and not passing it!
I am sure there was a warrenty but honestly I lost faith in my mechanic down there and have to deal with this on my own now because of many other issues that have occured with my car since he worked on it and I have spent well over $10k on many items that needed replacing or upgrading.
I can not blame him if the part went bad after only a month or two but I know when he replaced it he stripped my headlight switch when he removed that to make the new connections when the turn signal beam changer was installed.
I am pretty handy and have alittle idea what I have to do. I know I have to remove the steering wheel and plastic housing the covers the switch. Can anyone here give me any more advice on what has to be done to put the replacement I have ordered in? Or if there is something I can do to try to repair or make the one in there now work properly? I have heard you do not have to put out the push/ pull headlight switch to place the turn signal indicator is this true? Is there room to get the old wires off and new ones on or do I have to cut the old ones and splice the new ones to them?
I want to take on this project on in about two weeks and appreciate any advice I can get from you fellow Porsche enthusiasts
.I spent a lot of money on my car last year, much more than I should have but everything clutch, drivetrain, tranny and suspension, brakes that needed replacing I replaced. It drives like a new car with about 180,000 plus on the original engine that has never had the heads off or any major repairs. Anyone who ever drives it is very impressed with the performance of an old 83 SC with that many miles it and is still a very tight car. I still love it despite a leak I am now looking for in one of the windows somewhere I believe it to be the windshield gasket because the rear window one and sunroof gaskets were just changed. More questions on that when I get to that project. Thanks all and keep the rubber on the road and tail end of those old 911's following the front and not passing it!
 03-30-2012, 09:32 AM
#2
Team Owner
Hi Dave
Sounds like you have had quite the adventure but you have some to the right place .. remember you are gonna get very limited help until you show us a pic of your ride
But i think we can get you going with little trouble.
First things first however.
It is very likely your new switch is beinning to fail like your old one did because you are runnng too much current through the switch and it is beginning to melt. Total failure is imminent. You need to fix the cause of the problem before you burn out another one. It is a very simple process to install a headlight relay ki and can be done for less than 20 bucks or so.
this will reduce the current running through your switch from amps to milliamps. The thread I have posted below will talk about that .
Getting the switch out is very simple and should not require any splicing. A search on this forum may even reveal a step by step but in escence you are correct.
1. take the wheel off
2. take off the upper and lower plastic shroud.
3. take the screws out that secure the switch housing to the steeering column
4. disconnect electical connections.
You are correct also that some of the connections go to the main headlight switch, dropping that down will make life a LOT easier . Not sure how you strip one of those though .
Anyway when you get your asembly out on to a workbench you will be able to see how it works and what the problem is.
I have posted a thread below to help you understand the workings of the switch.
10-16-2012, 01:18 PM
#5
Advanced

Join Date: Nov 2002
Location: Lancaster Oh.
Posts: 80
Likes: 0
Received 0 Likes
on
0 Posts
I just read this string on the same issue I am having with the turn signal switch....high beams come on with canceling of turn signal. I am installing new headlights and they come with a relay that is to be installed on the battery for the headlight installation. Is this the same as the relay you (Dave) mention in your post?? Please advise and send me the post as I am going to tear into this next....headlights are in route and will arrive late week Thanks
05-10-2020, 11:15 PM
#7
Hi Dave
Sounds like you have had quite the adventure but you have some to the right place .. remember you are gonna get very limited help until you show us a pic of your ride
But i think we can get you going with little trouble.
First things first however.
It is very likely your new switch is beinning to fail like your old one did because you are runnng too much current through the switch and it is beginning to melt. Total failure is imminent. You need to fix the cause of the problem before you burn out another one. It is a very simple process to install a headlight relay ki and can be done for less than 20 bucks or so.
this will reduce the current running through your switch from amps to milliamps. The thread I have posted below will talk about that .
Getting the switch out is very simple and should not require any splicing. A search on this forum may even reveal a step by step but in escence you are correct.
1. take the wheel off
2. take off the upper and lower plastic shroud.
3. take the screws out that secure the switch housing to the steeering column
4. disconnect electical connections.
You are correct also that some of the connections go to the main headlight switch, dropping that down will make life a LOT easier . Not sure how you strip one of those though .
Anyway when you get your asembly out on to a workbench you will be able to see how it works and what the problem is.
I have posted a thread below to help you understand the workings of the switch.
Sounds like you have had quite the adventure but you have some to the right place .. remember you are gonna get very limited help until you show us a pic of your ride
But i think we can get you going with little trouble.
First things first however.
It is very likely your new switch is beinning to fail like your old one did because you are runnng too much current through the switch and it is beginning to melt. Total failure is imminent. You need to fix the cause of the problem before you burn out another one. It is a very simple process to install a headlight relay ki and can be done for less than 20 bucks or so.
this will reduce the current running through your switch from amps to milliamps. The thread I have posted below will talk about that .
Getting the switch out is very simple and should not require any splicing. A search on this forum may even reveal a step by step but in escence you are correct.
1. take the wheel off
2. take off the upper and lower plastic shroud.
3. take the screws out that secure the switch housing to the steeering column
4. disconnect electical connections.
You are correct also that some of the connections go to the main headlight switch, dropping that down will make life a LOT easier . Not sure how you strip one of those though .
Anyway when you get your asembly out on to a workbench you will be able to see how it works and what the problem is.
I have posted a thread below to help you understand the workings of the switch.
Trending Topics
05-11-2020, 11:33 AM
#8
Team Owner
now that i think about it i think wheel has to come off. i think there are two screws under the wheel . let me see if i have a pic.
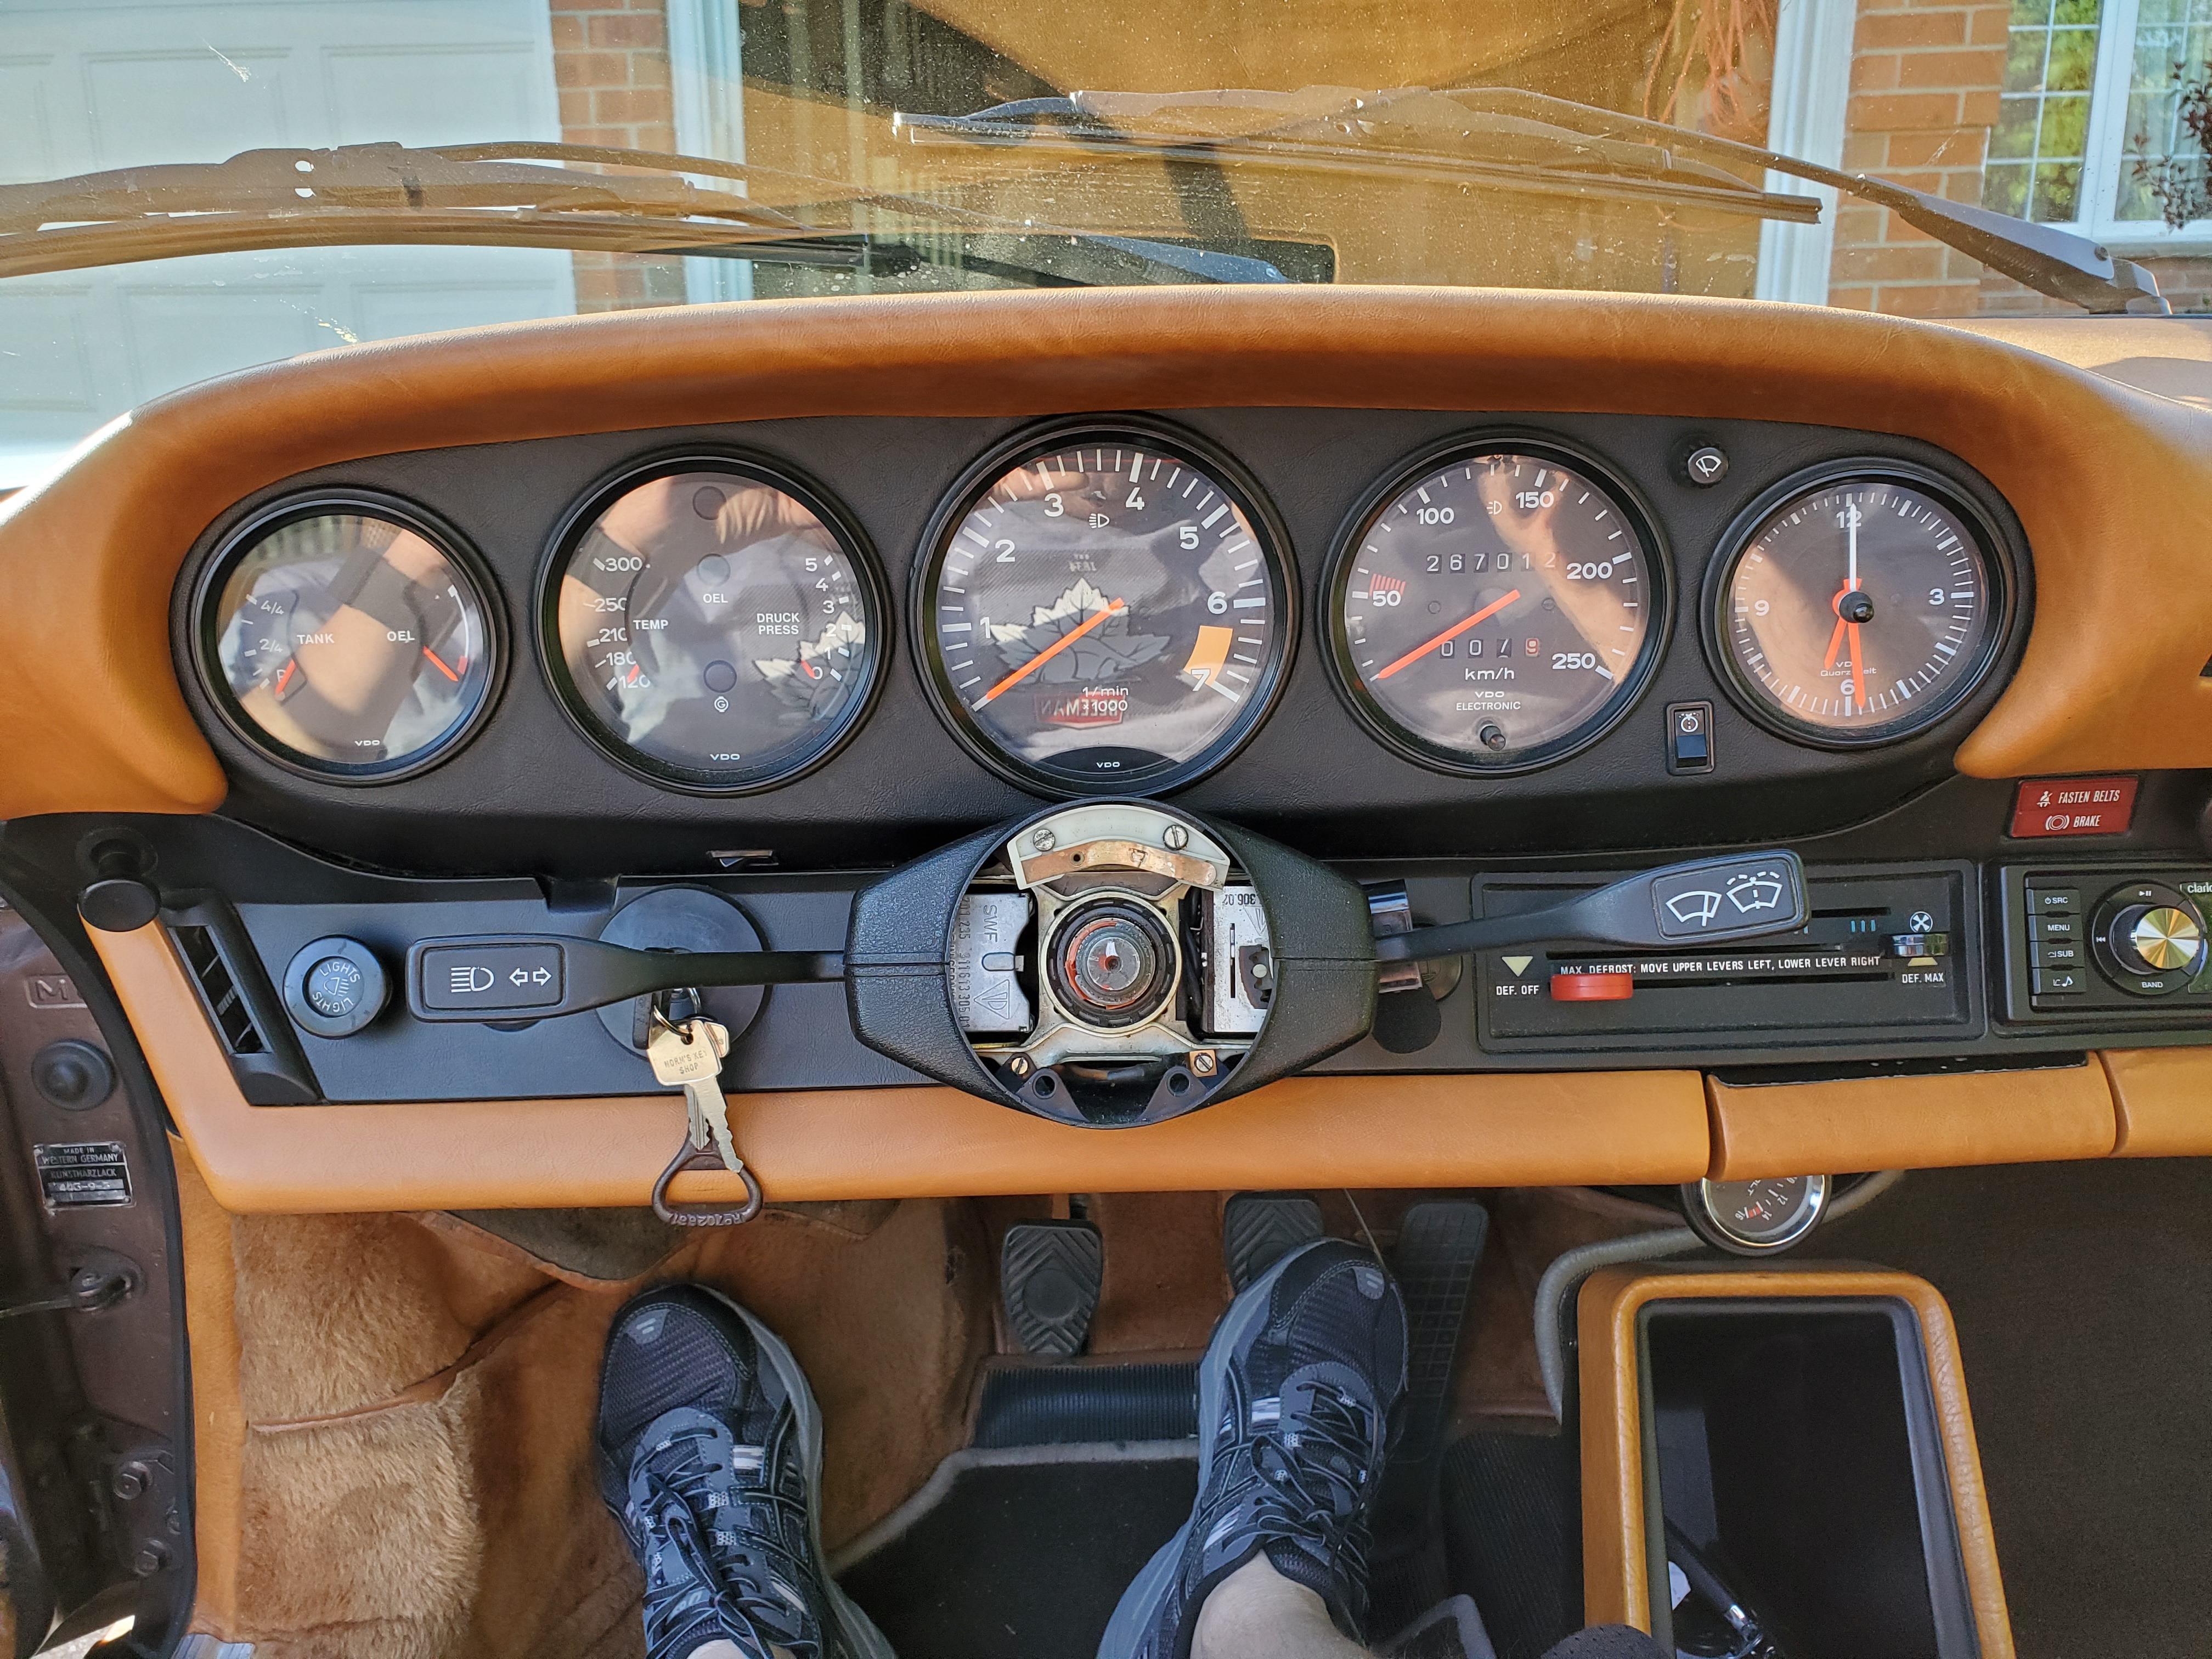
yeah looks like screws under the wheel, two for the top and two for the bottom.
05-12-2020, 01:45 PM
#9

- Take off steering wheel.
- Take apart clamshell housing.
1a) Remove the horn pad.
Pull gently at the orange and purple dots.
Be patient.
Unclip wire that is connecting the horn pad.

1b) Unbolt the steering wheel.
You'll need 1 1/6" socket or 27mm. And extension bar.
Check that SAE toolbox, you probably have the 1 1/16" socket!
A deep well impact socket will be too big for the cavity.
Fish out the nut and washer in there.

1c) Mark the wheel and the spline so you can realign the marks when installing.

1d) Remove the wheel.

2a) Remove clam shell housing.
2 side screws.
2 horn contact screws.
4 clamshell screws.
2 side screws.

The 2 front top screws are hidden by the horn contact (horizontal brass strip)
so unscrew and move that aside. Then remove the 4 screws.
Notice the ground terminal that is attached to the bottom right screw.

Gently wriggle the clamshell off.
 05-12-2020, 01:50 PM
#10
05-12-2020, 05:41 PM
#12
Team Owner
a couple of extra points...
ALWAYS loosen and tighten away from the windshield. As that could be a very expensive slip.
Have someone counter hold the wheel , you dont want to sheer off the steering lock.