When you click on links to various merchants on this site and make a purchase, this can result in this site earning a commission. Affiliate programs and affiliations include, but are not limited to, the eBay Partner Network.
GT3er - I thought about it briefly. It is definitely a less expensive option but I opted for Griffith's instead for a few reasons. My understanding is the installation instructions for the Classic Air are not nearly as comprehensive as the Griffiths. This was a big one for me as I really am a novice wrencher at this point. Second, it doesn't come with an actual Sanden compressor but rather something similar to a Sanden. Grifiths comes with it's own proprietary Kuehl compressor. Grifiths has put a ton of time testing all of their own equipment and they used to use other companies compressors and they have now designed one to suit their own system perfectly. Additionally and ultimately those giant under dash vents from Classic Air were just too ugly and were the real deal breaker. Here is a good link to a thread on Pelican Parts that describes one guys experience with Classic Air. Sounds like it works just fine but it seems a little Half-arsed for me and I don't want to hack anything on this car. I love it too much!
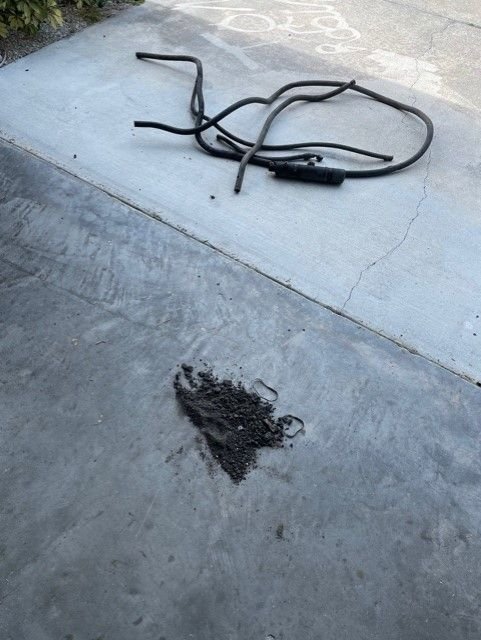
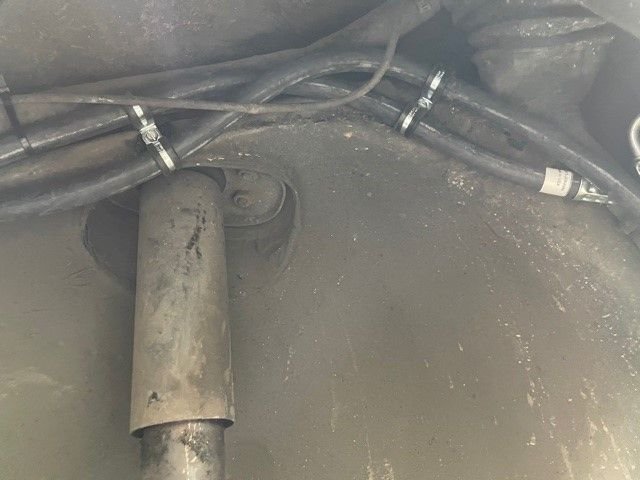
Well, Made some decent progress this weekend when life permitted. I was able to put in about 7-8 hours over Saturday and Sunday. I removed almost all of the old hoses and their fittings and cleaned out 42 years of dirt hidden behind the old AC hoses.
In an effort to make pulling the new hoses a little easier I decided to attach some thin rope to the end of the old hose during removal. After removing the old hose I left the rope in place and attached it to the new hose with duct tape and used it to gently pull while pushing trough from the other side. I think it helped because I've read some posts that said the re-routing is a difficult one person job. I haven't gotten to all the new hoses yet and in fact the one from the rear wheel well condensers is supposed to be the hardest so I'll see if this proves to be helpful next weekend.
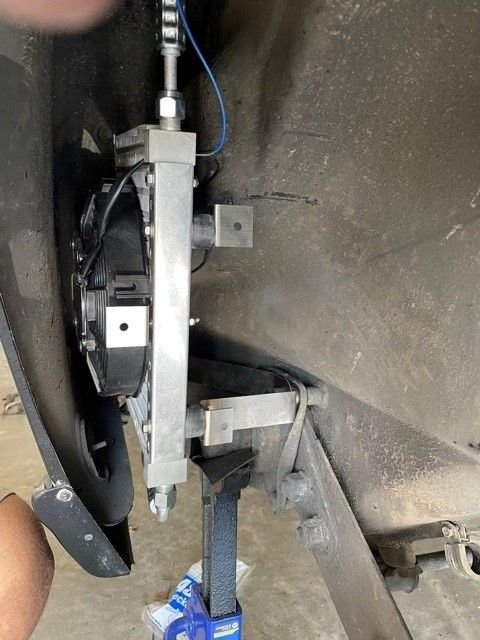
After removing the old hoses and doing some long over due spring cleaning it was time to test fit the first of the two new rear wheel well condensers. The attachment of the new condenser utilizes the two fender support brackets. New rubber bushes sit below the condenser and a new longer bolt replaces the original one to attach at the bottom of the condenser. You do have to drill a new hole in the seam from the lover valance and fender for the side support bracket but once in the condenser attachment feels rock solid. The side bracket is not installed yet in the photo below.
Now it's time to remove the condenser and carefully drill a hole through the interior wall to pass electrical for the condenser fan into the engine bay.
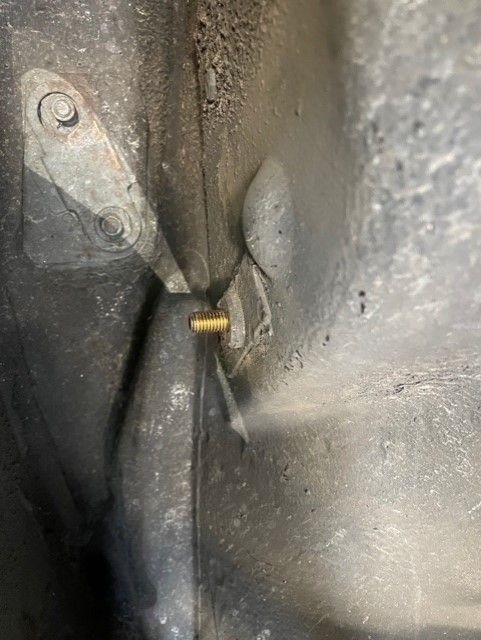
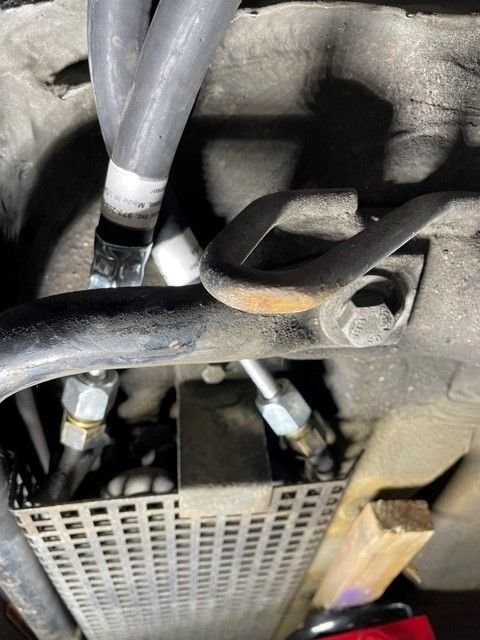
With that done now I moved onto the 2nd wheel well condenser. The instructions say to remove the bolt that anchors the seat belt retractor and replace it with a longer bolt provided. This one proved to be a little tricky because once the longer bolt went in there was nothing for it to bite into and I couldn't torque it tight. I'll have to add a washer and nut and then mount the condenser and add another Nylock nut on the end. The bottom mounts via a bracket that gets attached to torsion bar plate by removing the existing bolt and replacing it with provided longer bolt and spacers. No photo of that this time but I will when I get this condenser fitted permanently. The test fit of this front condenser in the rear wheel well is a little challenging but the condenser is designed to allow you to adjust the mounting brackets on the unit until you get it to sit where you want it to. It's pretty ingenious.
Here is a photo of the seatbelt retractor replacement bolt and then of the condenser that will get installed next weekend.
So far so good but for a newbie it's a little challenging but I'm taking my time and trying to get it right. I've got about 16 hours into it so far and I probably have that much more at least before it's ready to be taken for a professional charging. Next weekend should hopefully see this condenser installed, the new receiver dryer installed and the new barrier hoses for both routed to their connections. Wish me luck!
Cheers!
Picked up again on Sunday and got a solid 6-7 hours in. Removed and re-installed the front real wheel well condenser because I didn't like the way it was sitting so I adjusted the bracket to get a little more space between the fan and the fender. Ran the new barrier hose from the rear positioned condenser in the rear wheel well to this condenser in the forward position of the rear wheel well and then a new barrier hose from there to the front condenser.
Then I installed the new receiver/dryer and ran the new hose to the front condenser. These two hoses were by far the most challenging part of the job. These two hoses have to get snaked through the front wheel well, behind the water battle and down through a myriad of smaller tubes and wires. If I had not attached a rope to the old hoses as I pulled them out I can't imagine how hard it would have been. It made it a lot easier to be able to pull a little as I pushed the back side of the hoses in. Griffiths recommends doing them together but I had more luck doing them separately.
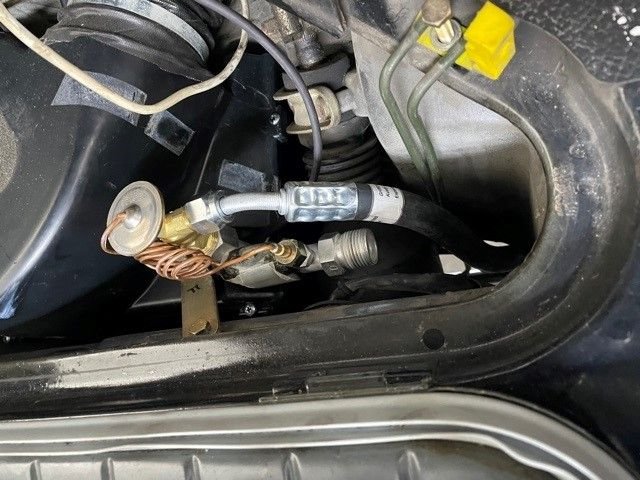
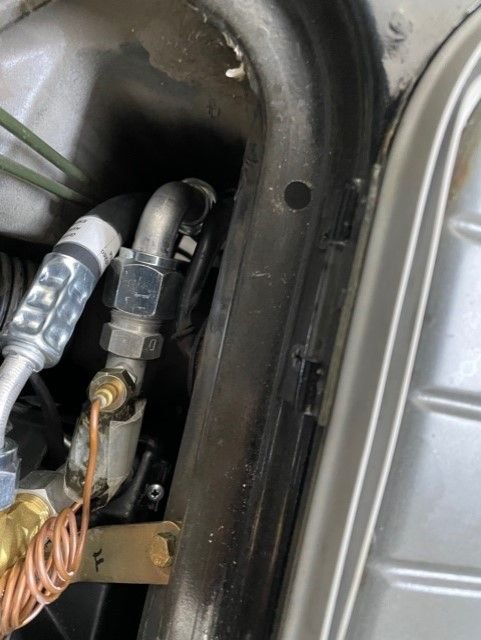
Then another new barrier hose from the receiver/Dryer to the evaporator box under the car and up through the tunnel next to the steering rack into the box and connected to the expansion valve.
Still a good amount of work to go. I have to cut and install stone guards for the two wheel well condensers, Run a new barrier hose from the compressor to the evaporator, wire the electric in the engine bay, Install the new thermostat, install the new vents in cabin under the dash and flush the old condensers and install the new compressor. I may be ambitious but I'm hoping one more long day and I'll be ready to have it professionally charged with R-134A. Then we'll find out if I did all of this craziness correctly!
Thanks @veduta. I am following your progress closely. Can�t wait to read how it works to help me make a decision to go the same route for my �87 coupe.
Good luck for remaining work.
Cheers
Thanks @veduta. I am following your progress closely. Can�t wait to read how it works to help me make a decision to go the same route for my �87 coupe.
Good luck for remaining work.
Cheers
My 88 Cab has Griff's full system. Installed in 2008. Still freezes me out in the Alabama summer. We are supposed to hit 96 next week...no big deal! Rarely have the fan on high other than the first 10 minutes for cool down than back it up to about 70% variable fan speed. Best money I ever spent. I daily drove the car in Florida, Alabama, and Hawaii for almost a decade as well as weekend driving all over Germany for there years. It's a great system with great support.
That's some great work your doing. I want to upgrade the AC on my 89 930. I was debating the electric or the full Griffiths. Its black on black so basically unusable in Miami in the summer. I think I am leaning toward the Griffiths as the electric AC alters the car to much. Plus there are more reviews of the Griffiths in very hot climates working extremely well.
LJPviper, I'm in the same boat as you. Black on Black and I'm on the gulf side of south Florida. The car is just not usable after may and before October so this was a necessity. I just pray to god I've done everything correctly and it works as advertised. I'm really going to try and get the install complete this weekend so I can drive it down to Naples for work and drop it off at a reputable shop for charging. Fingers crossed.
OK, so I didn't get as far as my optimistic self thought I would but had a good day of install on Sunday none the less. Got about 6 hours in and as usual for all of my projects there is a learning curve and somethings I had to remove and re-do. This week I got the last hose removed and installed. This is the one that goes from the deck lid condenser to the evaporator in the smugglers box.
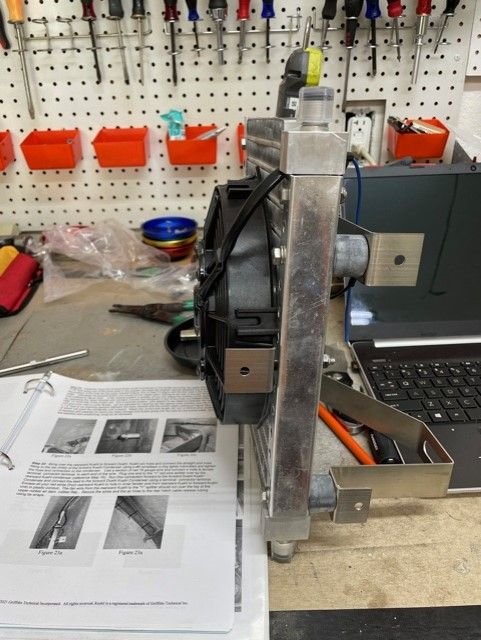
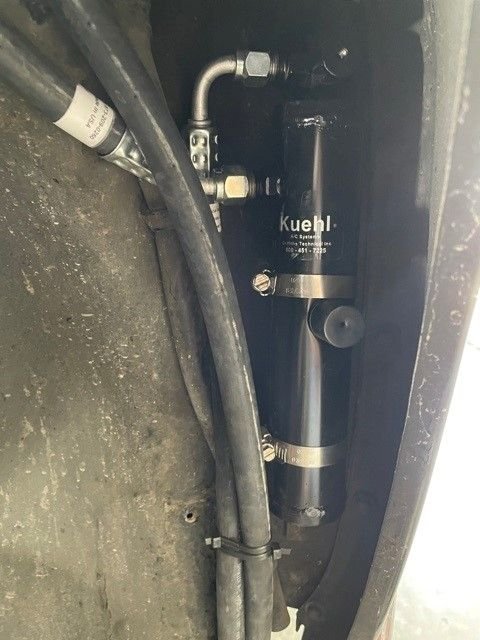
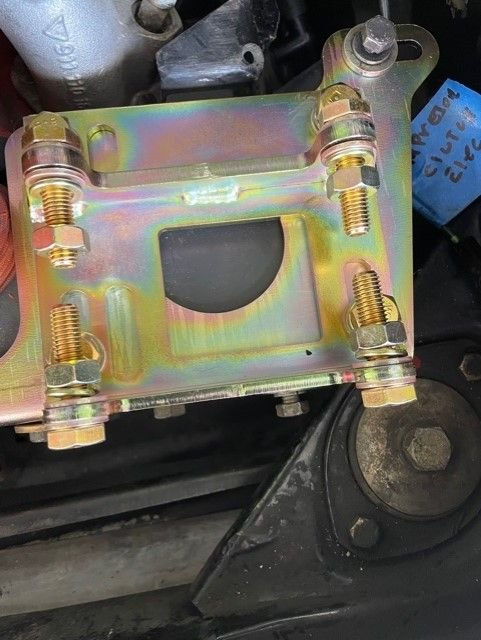
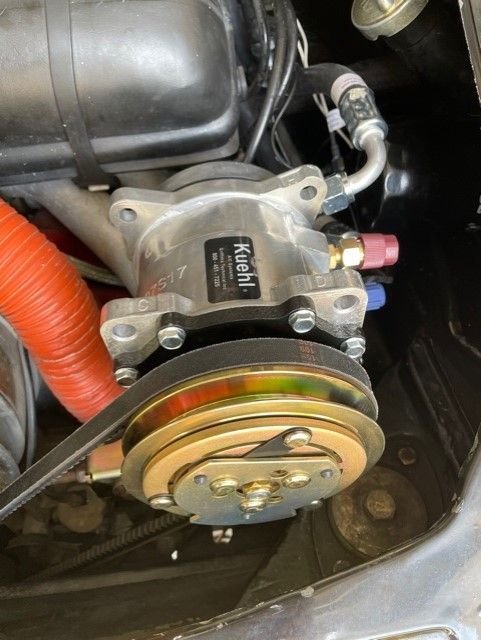
I also installed the hose from the new compressor to the deck lid condenser and that is all hoses in and system closed. The new Keuhl compressor is an impressive replacement. The nice thing about the system is the provide an adapter plate that installs directly over the existing mounting plate and it is highly adjustable.
I spent alot of time getting the compressor filled with oil, the plate installed, the compressor on the plate and all of the hard to reach nuts and bolts to get it all snugged down.
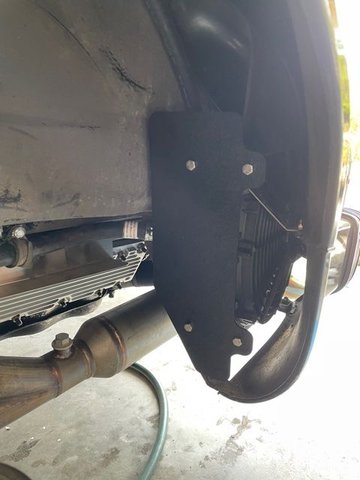
I also installed the stone guards for the two wheel well condensers. The front one was custom and you are provided the materials to template and cut it out so that went rather smoothly.
I'm going to try and get a little at a time in the evenings this week to wrap it up so I can get it charged by friday and see how it works. Still left are the under dash vents to install and the wiring of the 2 wheel well condensers. I also have the new thermostat switch to install and the reassembly of the center console. Fingers crossed!
My 88 Cab has Griff's full system. Installed in 2008. Still freezes me out in the Alabama summer. We are supposed to hit 96 next week...no big deal! Rarely have the fan on high other than the first 10 minutes for cool down than back it up to about 70% variable fan speed. Best money I ever spent. I daily drove the car in Florida, Alabama, and Hawaii for almost a decade as well as weekend driving all over Germany for there years. It's a great system with great support.
Good luck!
Thank you very much for your input @Pavegeno928 . I am gaining momentum towards a decision. This @veduta thread re installation is also a great input.
Cheers
I spent alot of time getting the compressor filled with oil, the plate installed, the compressor on the plate and all of the hard to reach nuts and bolts to get it all snugged down.
!
Do all the compressor bolts have to be loosened or removed to adjust the belt tension? Basically my question is what�s involved in removing the AC belt if the alternator belt breaks?


 05-07-2021, 03:46 PM