When you click on links to various merchants on this site and make a purchase, this can result in this site earning a commission. Affiliate programs and affiliations include, but are not limited to, the eBay Partner Network.
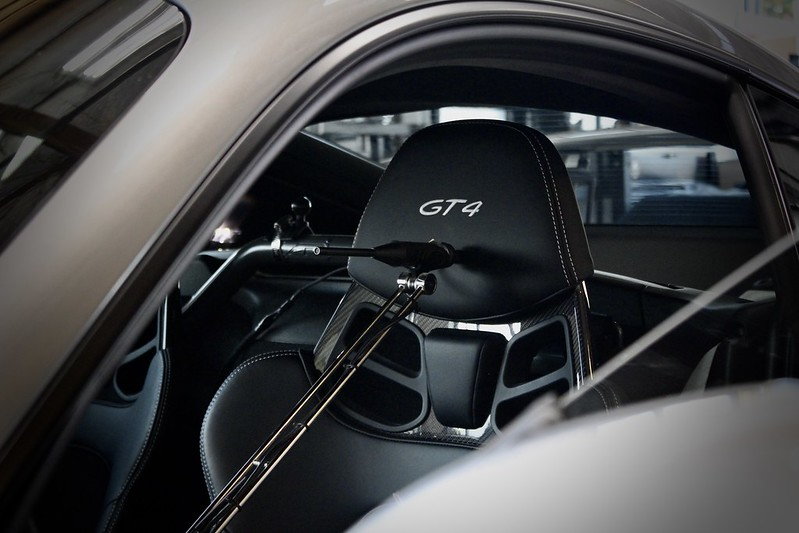
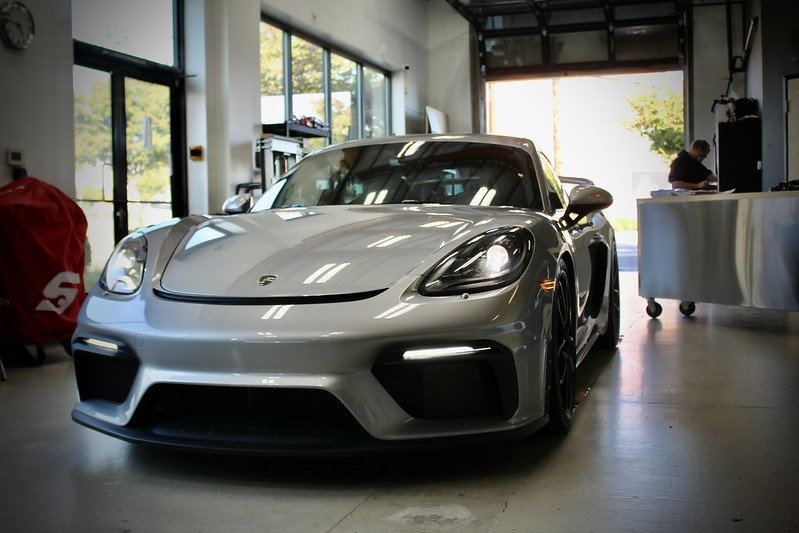
We've been a bit silent over here but it's time to finally share some of the awesome developments we've made in the past few months! As of today we are officially releasing our new and vastly improved Stage Two audio upgrade for the 718(and 991.2) with Sound Package Plus(SPP). I want to thank @DrewGebs for being our development partner and @mr965 for letting us install the first official kit into his gorgeous GT Silver GT4 and take a stupid amount of photos for our install guide!
For those that aren't familiar, SPP is the base stereo option for these cars and it's a fairly disappointing experience if you're a music enthusiast. There is no dedicated amplifier in this system so the speakers are powered directly off the internal amp board in the PCM. There are no plus sides to this. We have a serious lack of power which means the dynamics are suppressed, the detail is underwhelming, and the distortion is heavy at higher volume levels. We also have no way to compensate for the inefficiencies since the PCM only gives us basic audio adjustment. All of this adds up to a lackluster sound that doesn't complement the rest of the car in any respect. Luckily, we've come up with a strategic way to make some major improvements in the audio performance.
If you've seen any of our previous systems, you probably already know a lot about our approach to these types of upgrades. For those of you who are meeting us for the first time, here's a brief overview of our goals — For starters, we need everything to be as bolt-in/plug-n-play as possible. No wires cut, no holes drilled — something that could be easily installed by a local shop or the vehicle owner and painlessly put back to factory in the future. Secondly, we want it to perform well. This sounds like a blatantly obvious goal, but you'd be surprised how many companies are out there focusing on making things fit but not putting enough energy into how they'll actually sound. This is why we've never offered full speaker-only upgrades or a la carte products. There's a very strategic methodology that's used to develop these solutions and that's why the results we get are nonpareil.
Without dragging this out too far, let's start with what the Stage Two includes:
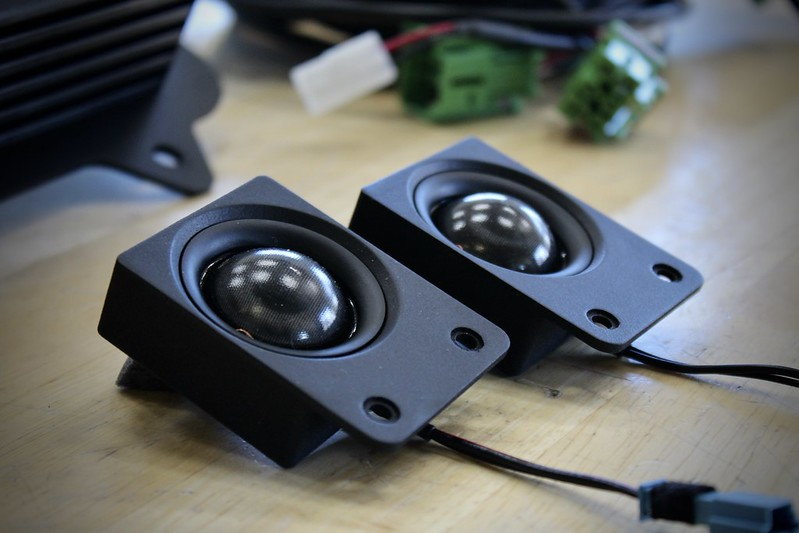
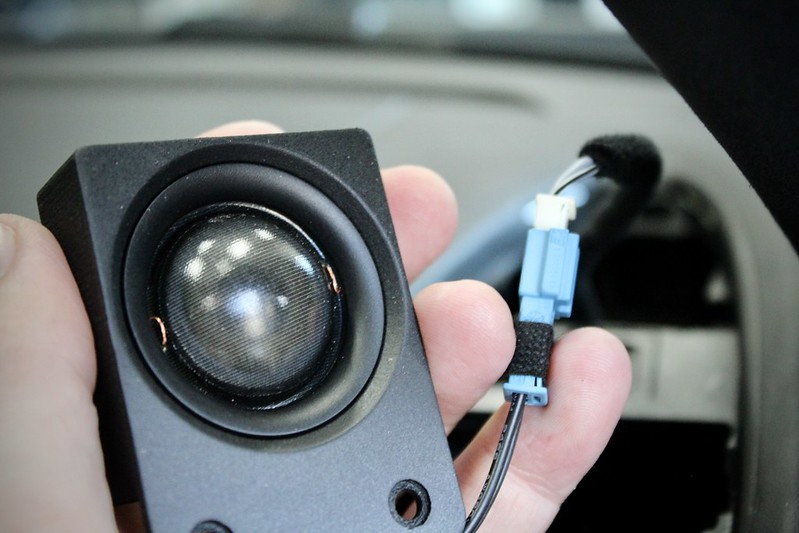
Premium Tweeter Upgrade (this is the Stage One upgrade)
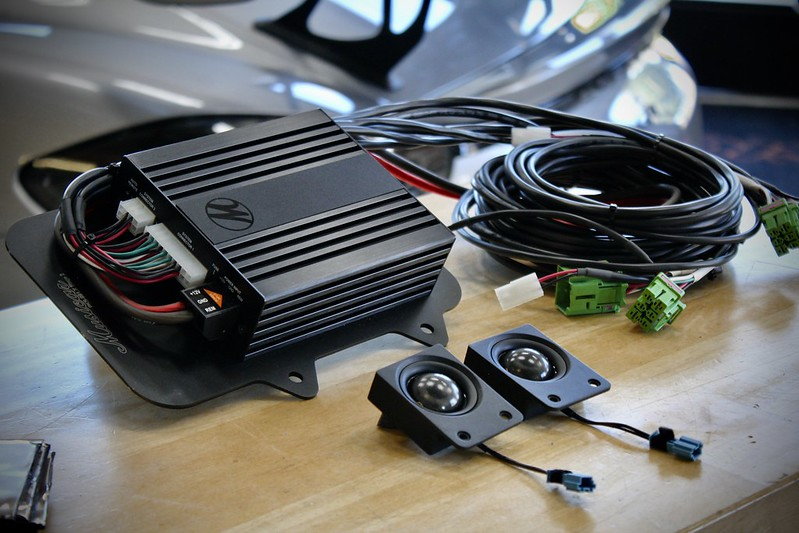
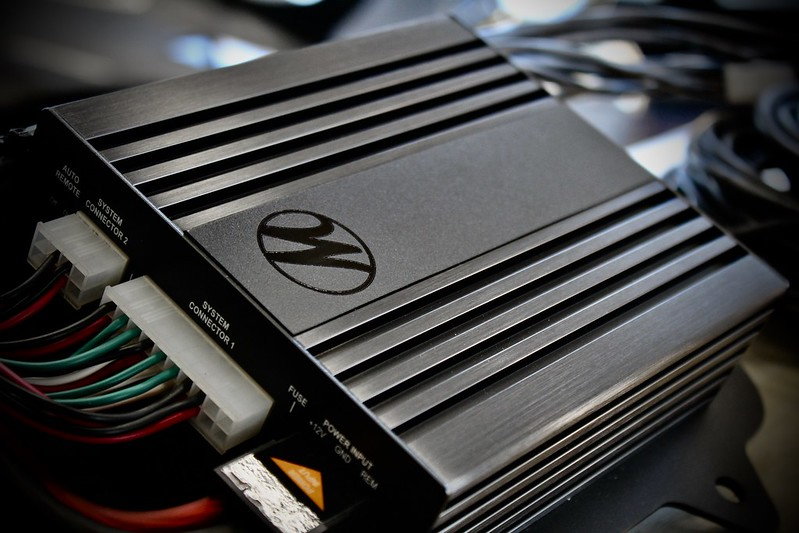
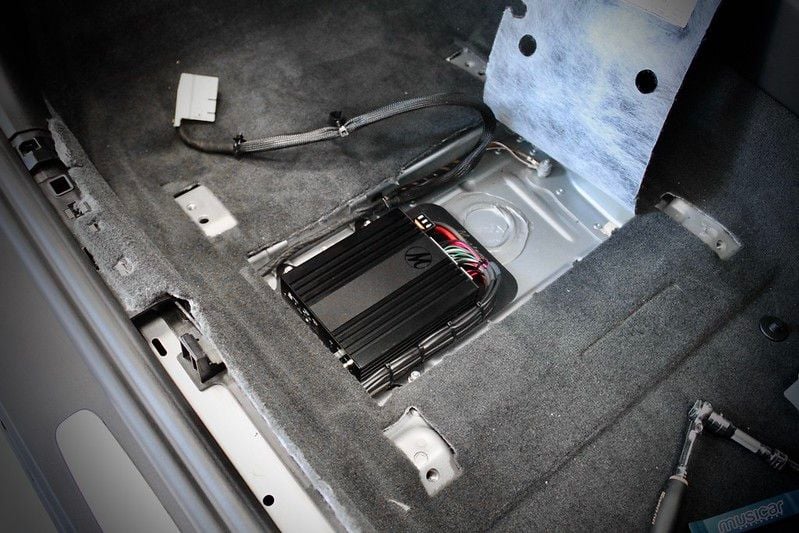
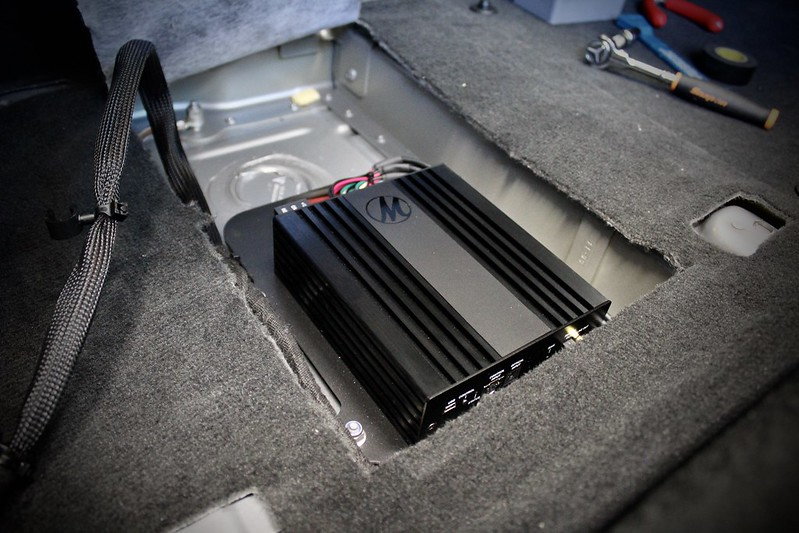
Premium DSP Amplifier
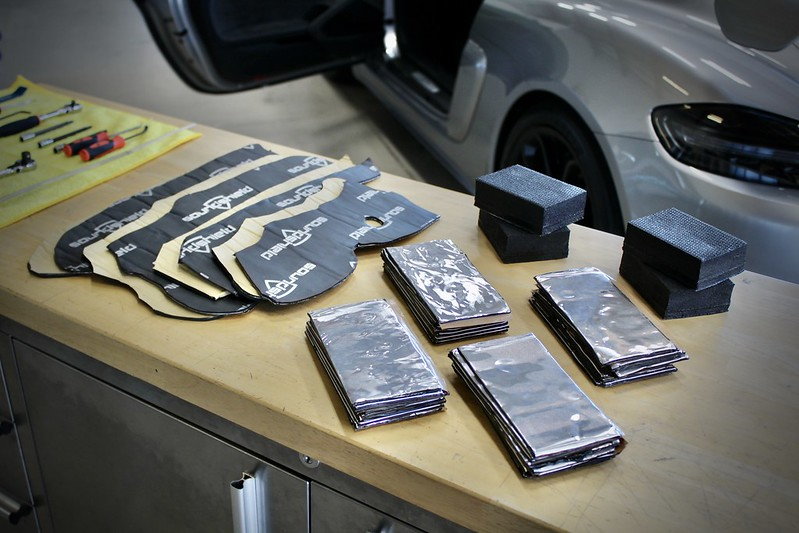
Acoustic Treatment for Doors
The approach here is to utilize the factory midrange and woofers in the doors, but give them the power they need to perform properly and optimize the entire setup using the amplifier's built-in sound processor. That combined with the upgraded tweeters and the acoustic treatment make for a well-balanced system that sounds leaps and bounds better than the factory system. Honestly it's a whole lot better than the Bose system, even with the factory base stereo speakers in the door! Here's an overview of the install and a bit more information on the process.
Step One - Acoustic Treatment (~1.5hr)
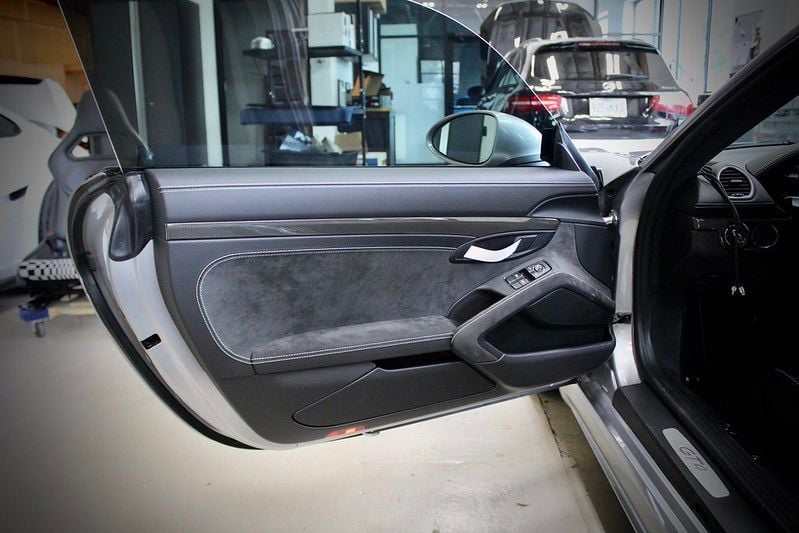
I always like to start by pulling the door panels and treating the door cavities acoustically. It's the easiest portion of the install and having the door panels off means we can get the passenger seat out of the car without risk of damaging the upholstery. The door panels are relatively simple to remove. To start, we need to pop off three plastic covers revealing four torx bolts securing the panel. Once we remove those the door will slide up and off the hooks that hold it in place. Once it's free, we can disconnect the wiring and the door handle cable to free the panel and set aside.
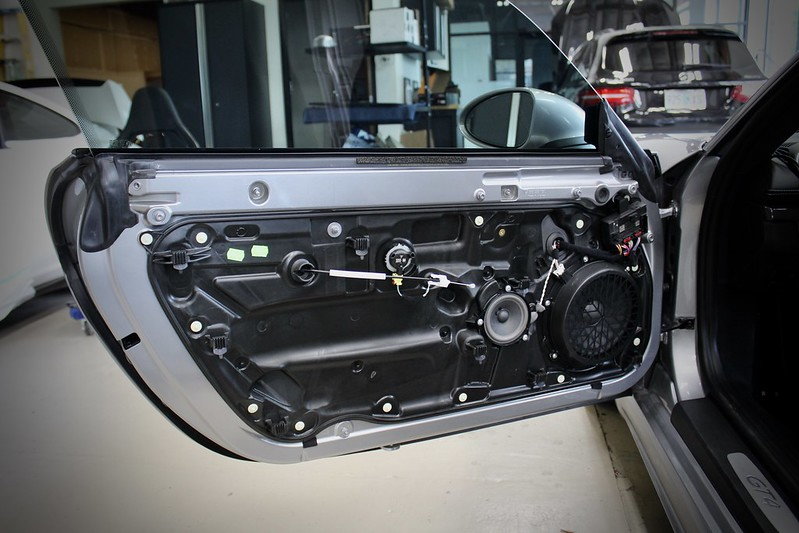
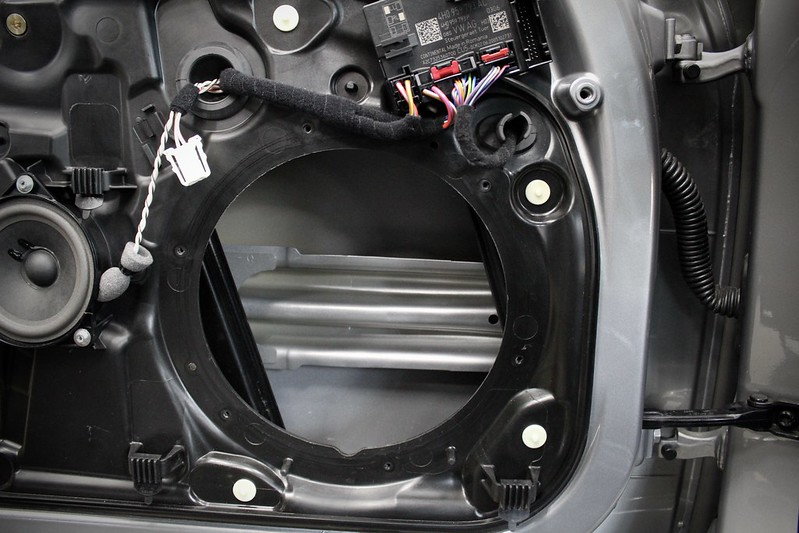
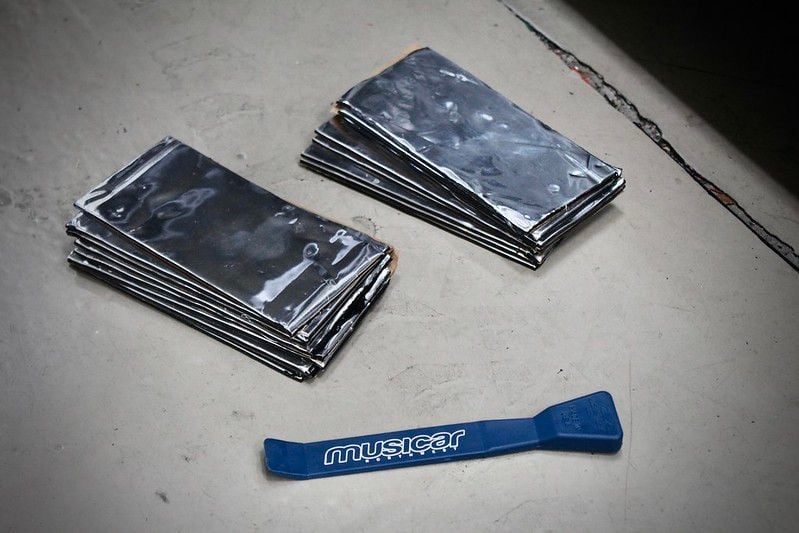
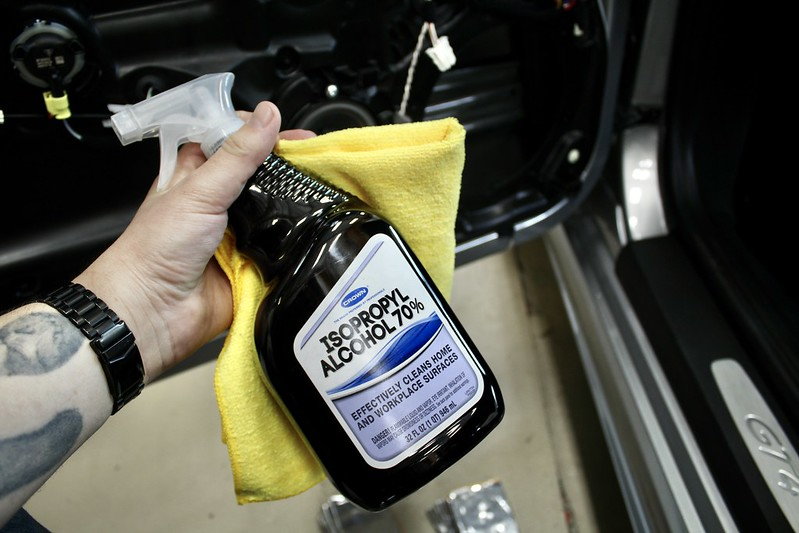
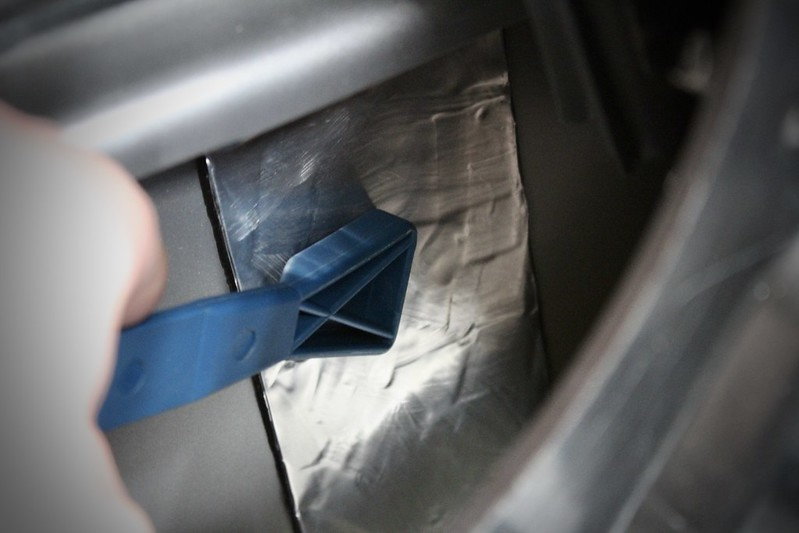
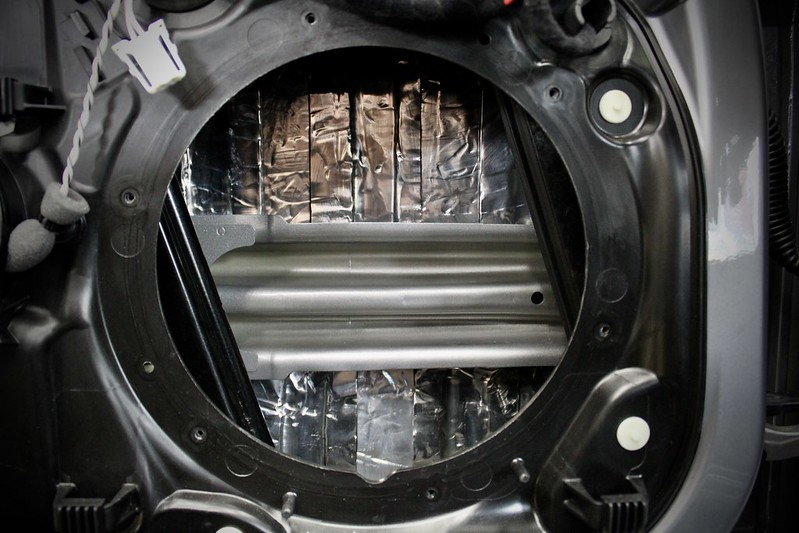
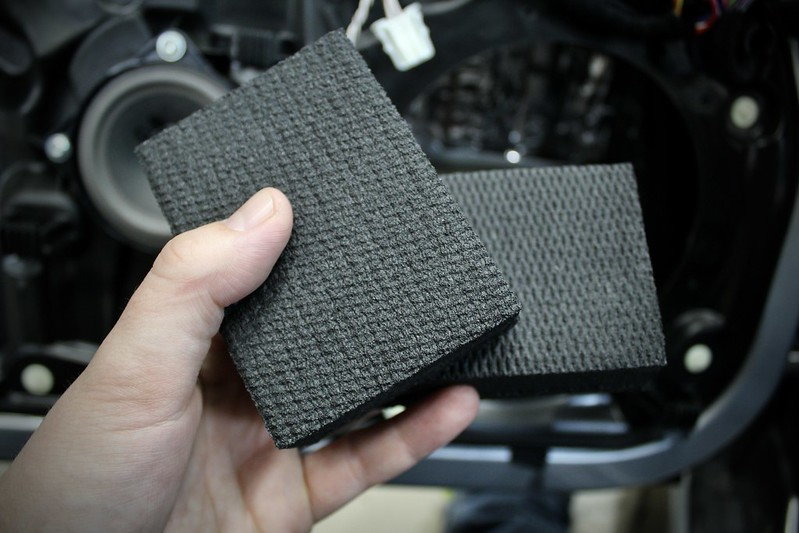
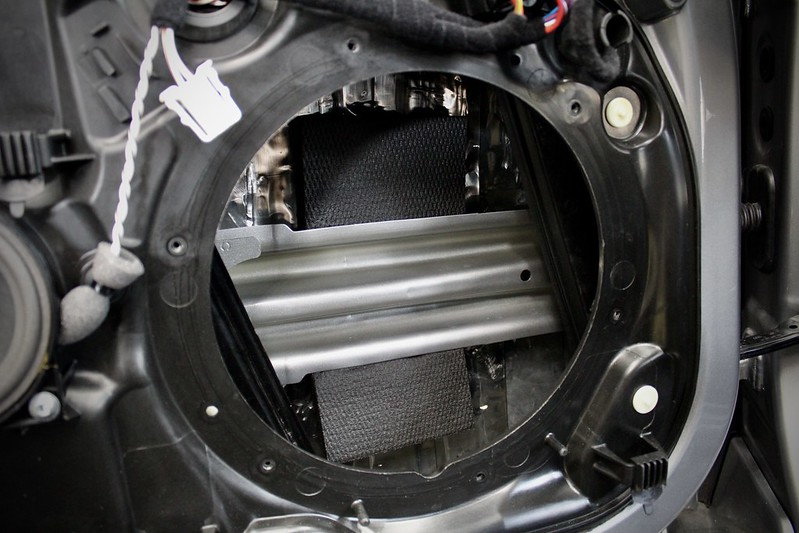
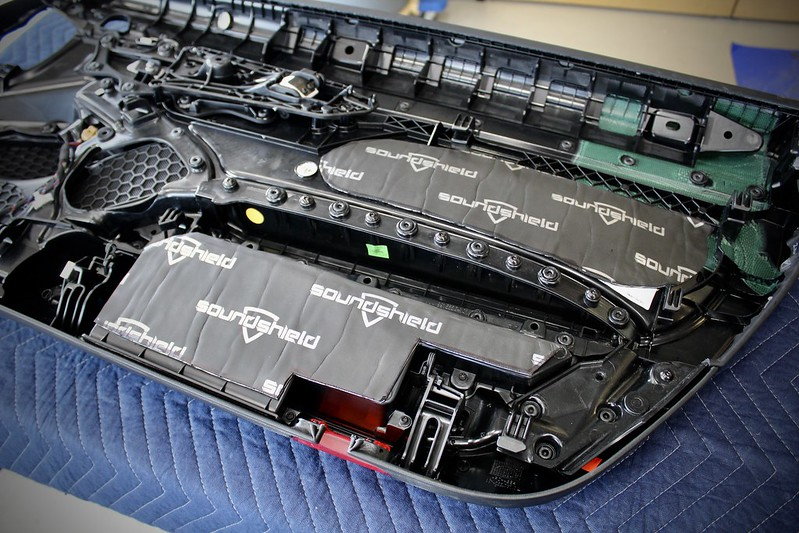
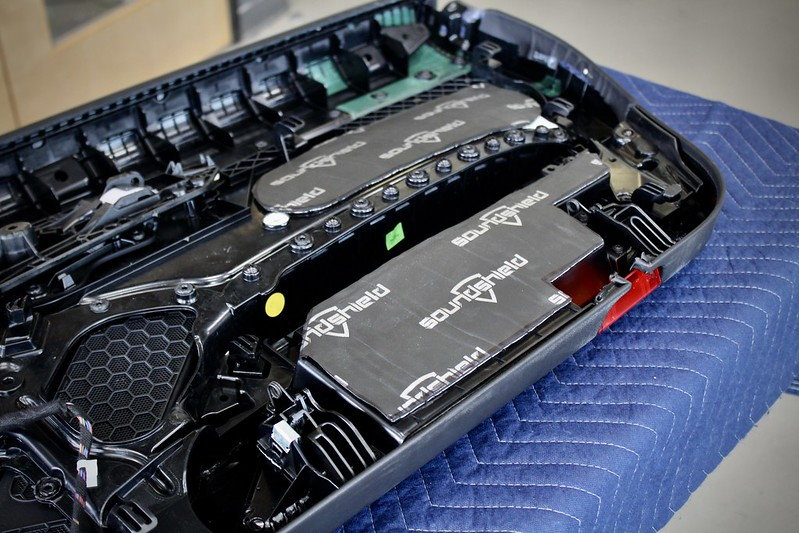
Once the panel's off we can disconnect and remove the woofer to gain access to the inside of the door cavity. Some folks like to remove the entire inner door skin but it's not necessary to adequately damp the panel. That said, it can make it easier if you have a tough time contorting your hands through the woofer's mounting hole. The first media that gets applied is a constrained-layered damping material comprised of adhesive, butyl rubber and metallic foil. The combination is designed to add mass to the panel so that we lower it's resonant value. Without dragging you all through the technical ditch, this means better bass response and less road noise. To apply, I clean the surface with alcohol to prep for adhesion. We pre-cut the material into tiles that get applied in a strategic pattern. Last but not least we apply two Blackhole Tiles that help with some of the cancellation and standing waves that occur within the door cavity.
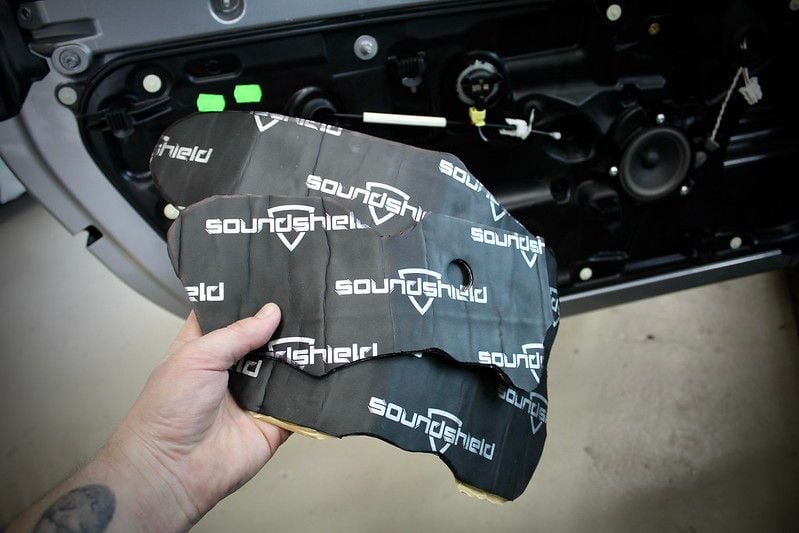
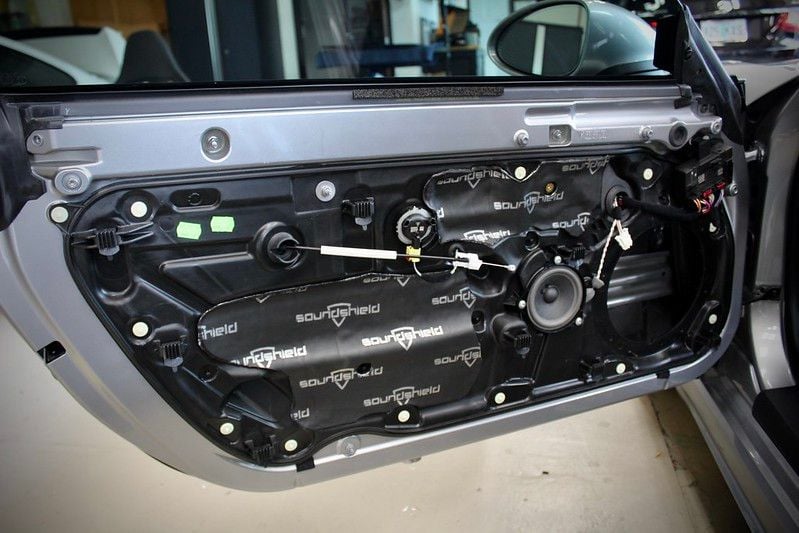
Next we apply the SoundShield material to both the door and the door panel itself. This media is a combination of the butyl-based damping with a closed-cell foam cover layer. This helps with resonance and also acts as a buffer between the plastic panels to deaden rattles. Without this we'd have too many vibrations and rattles to enjoy the new high-quality sound.
Now that we'd got that done, we'll install the amplifier before reinstalling the woofers or the door panels.
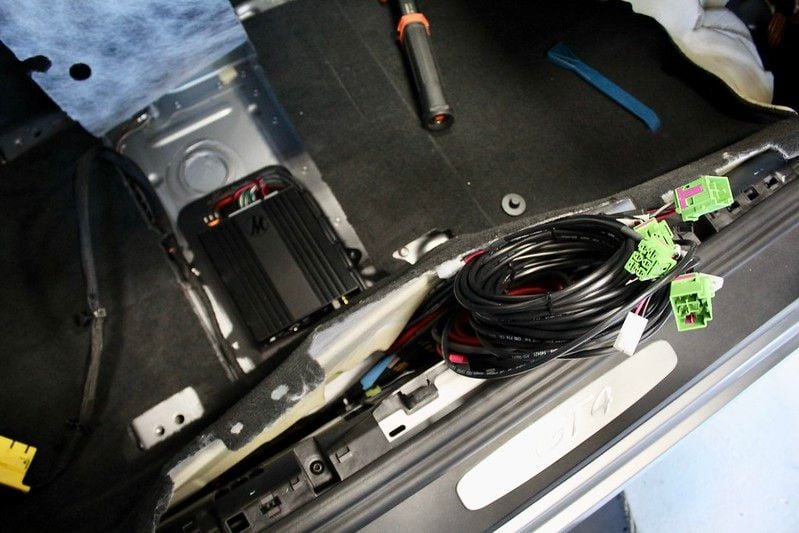
Step Two — Amplifier Install (~2.5hr)
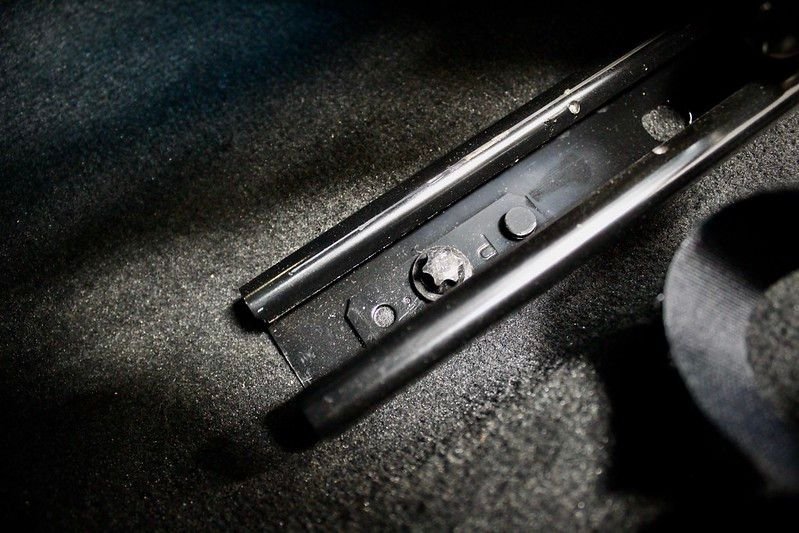
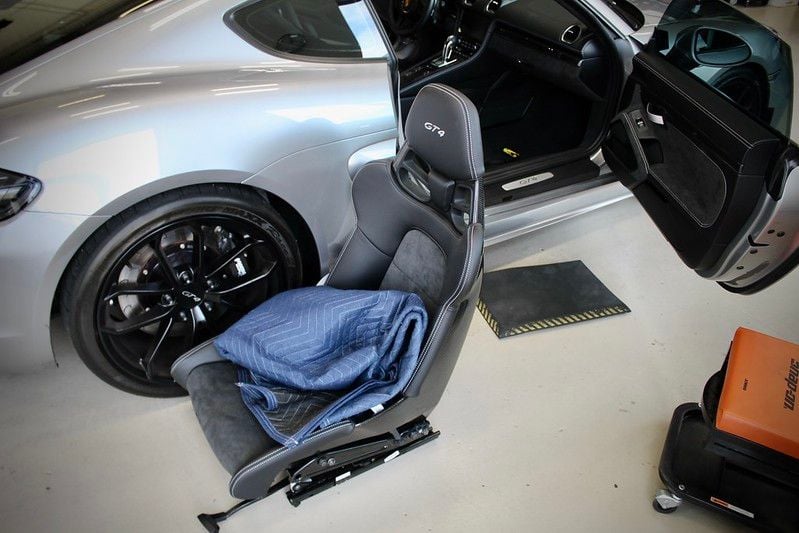
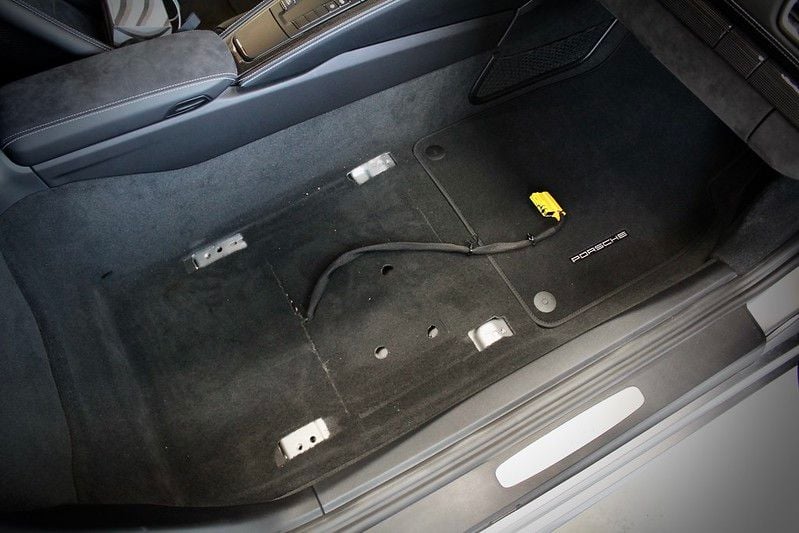
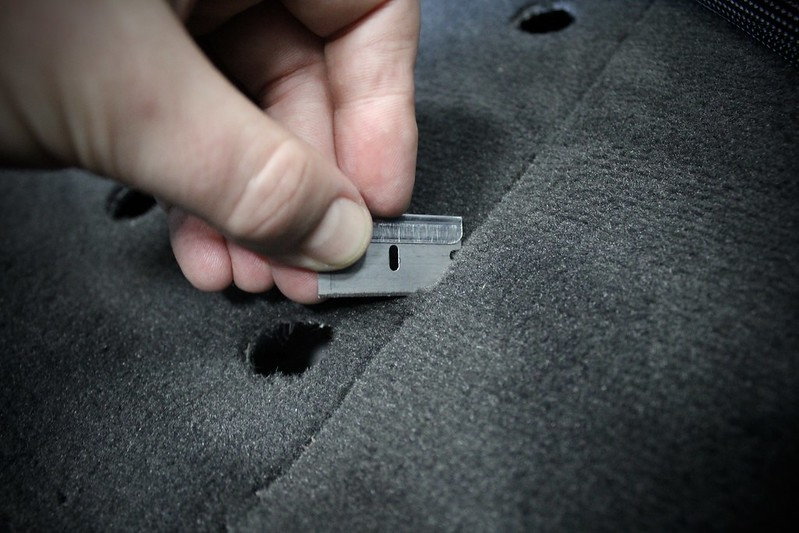
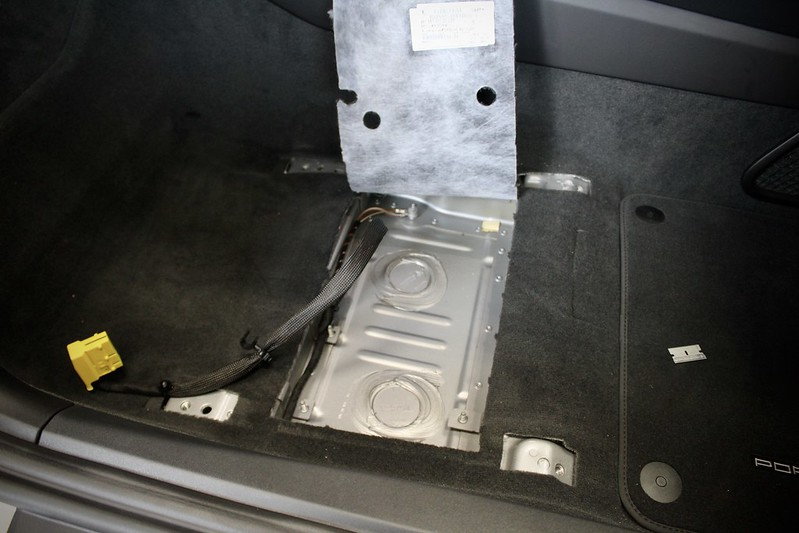
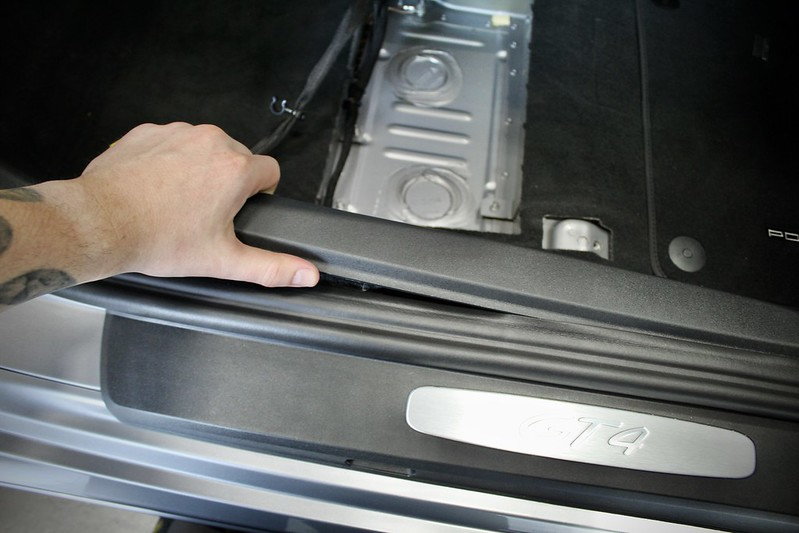
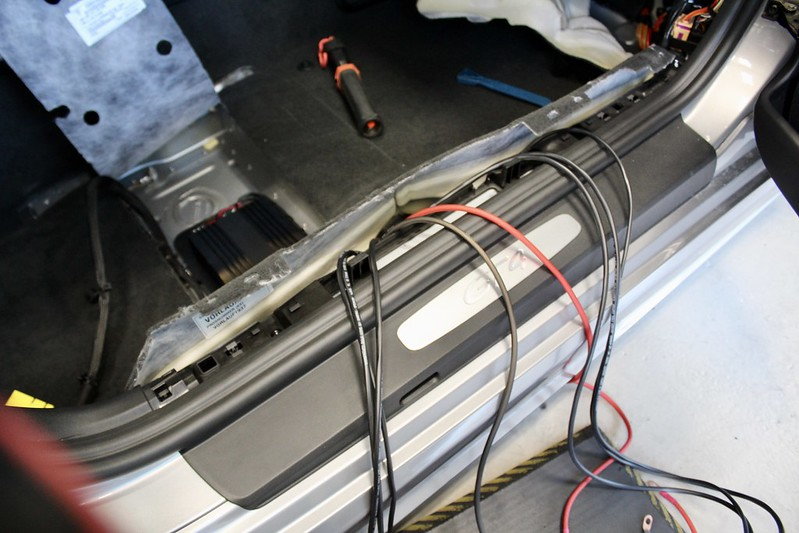
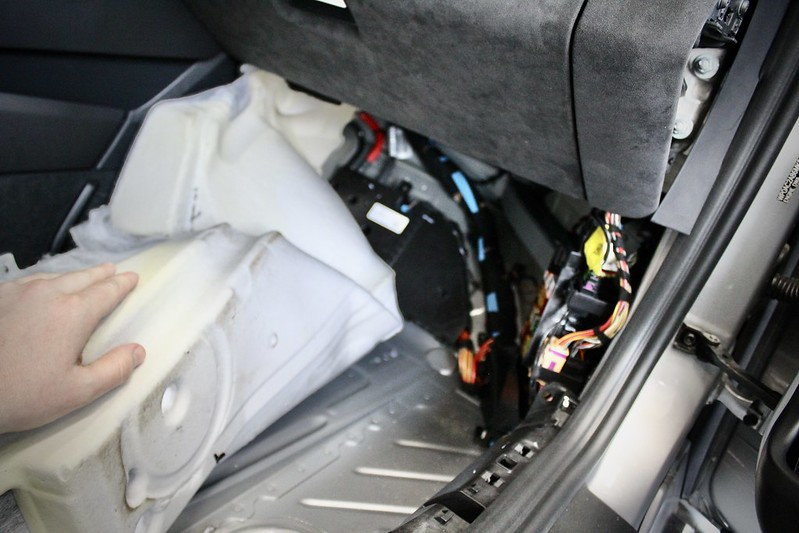
Installing the amplifier is the most involved portion of the process, but still a fairly simple job with the provided wiring harnesses and mounting system. We start by removing the passenger seat to gain access to the factory amplifier cavity. There's no amplifier there in this configuration, but the mounting posts still exists to mount our new DSP amplifier. We have to cut the perforations in the carpet to open the flap for the first time. Once we have that cavity open, we remove the door sill so that we can pull the carpet up and pass the amplifier through into it's mounting position. The wiring comes pre-terminated to the amplifier and made to specific lengths for where it will end up in the car.
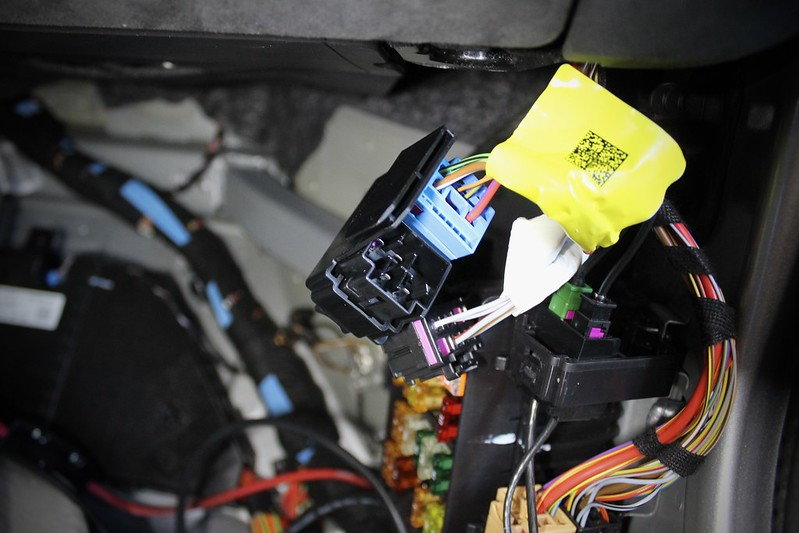
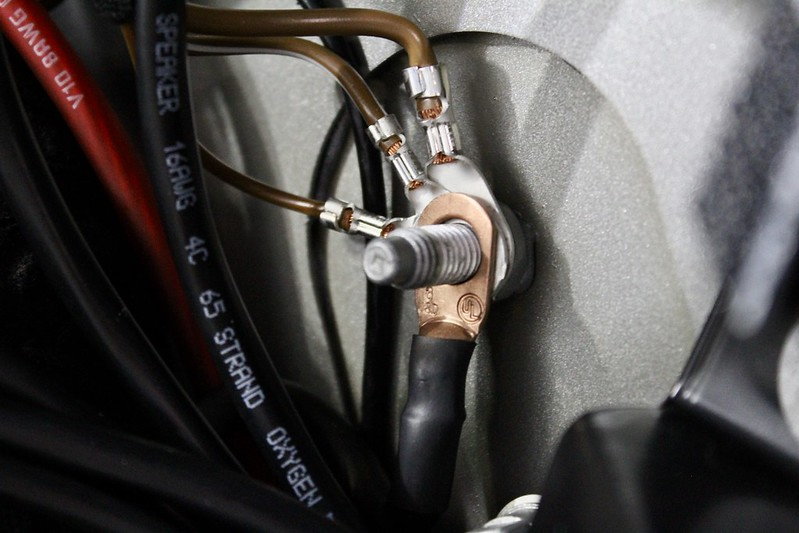
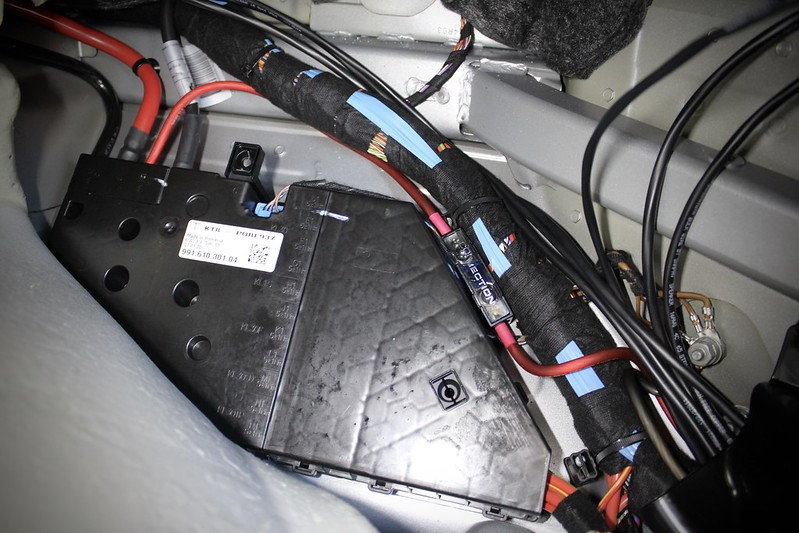
Once we have the amp in place and the wiring loose, we can pull the rest of the panels we need to access the wiring harnesses and power/ground points. Most of the connection points are in the passenger footwell and kick panel and that's where we start. There's a harness at the top of the kick panel we need to attach our T-Harness to in order to intercept the audio signal path. This will be done in both kick panels for left and right audio. The other connections we need to make are power and ground connections in the footwell. The ground lug we use is just forward of the passenger kick panel and the power connection is made at the power distribution module. That power connection is at the very top inside corner of the passenger footwell against the center console.
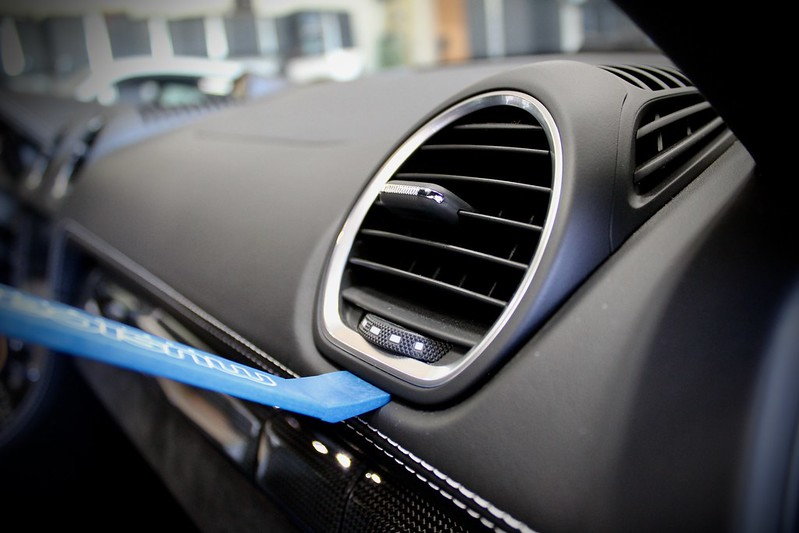
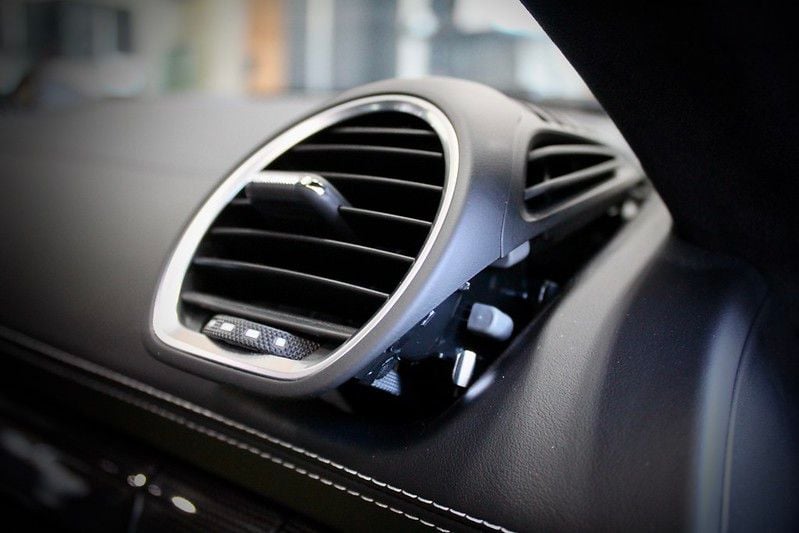
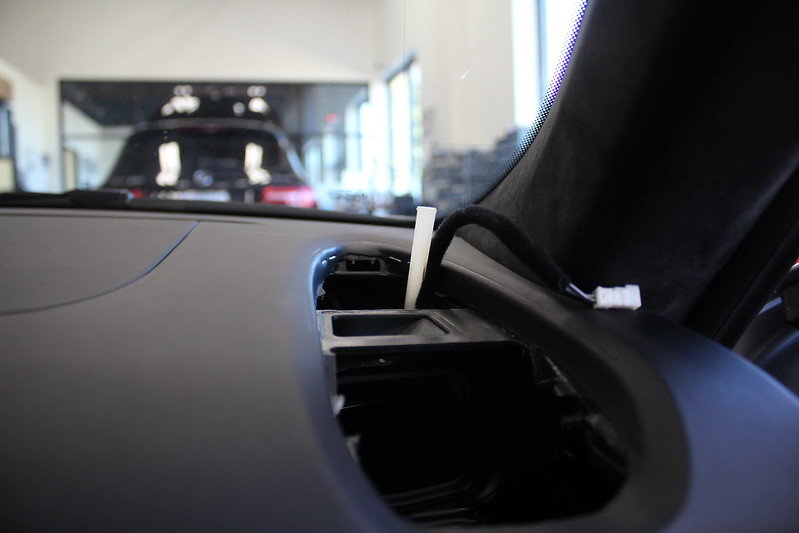
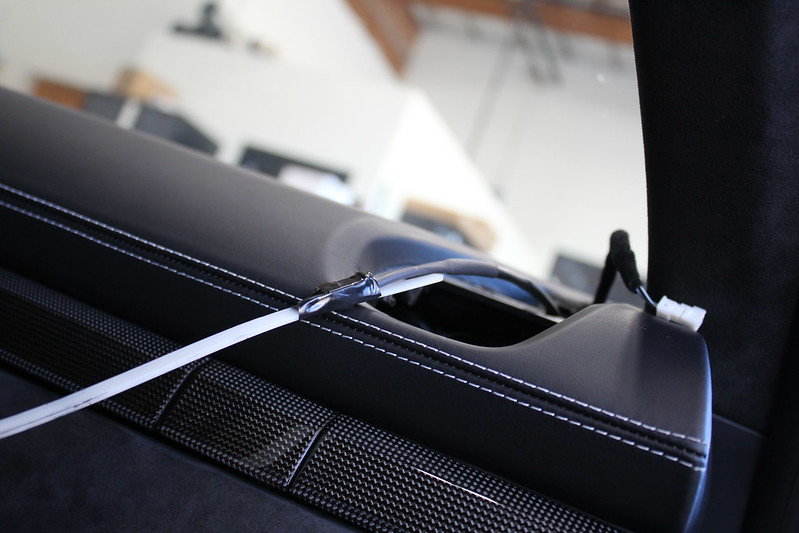
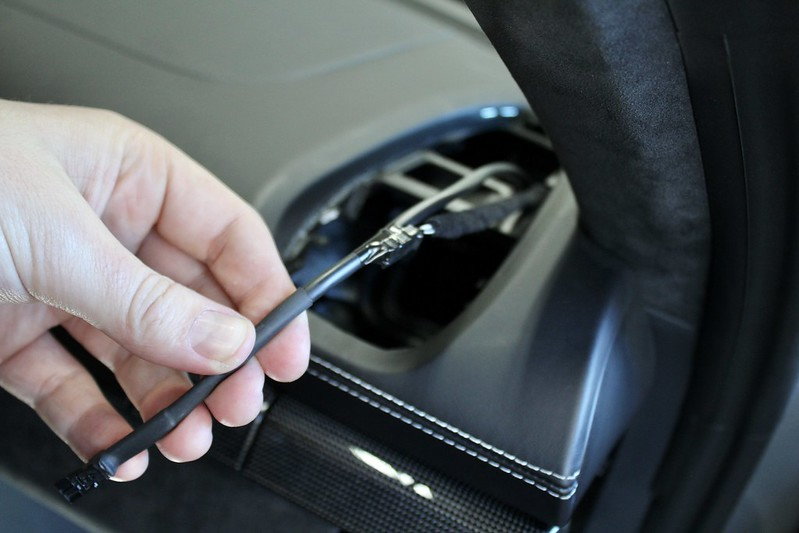
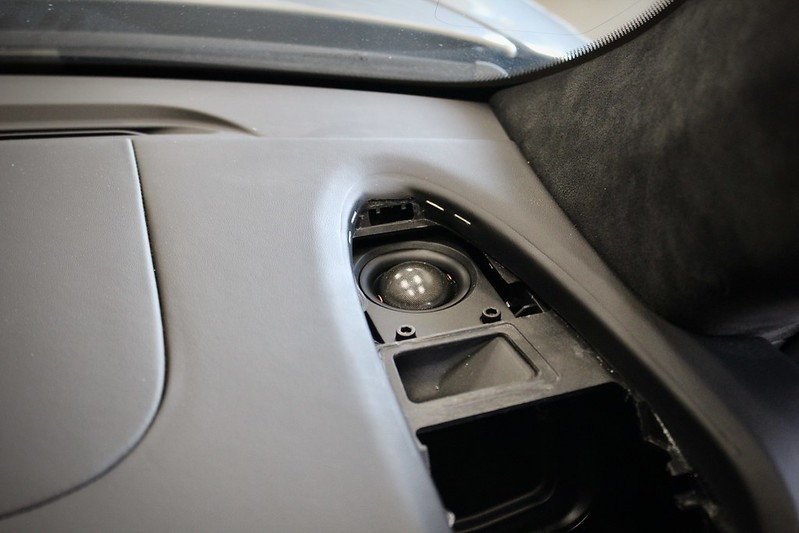
With the main connections made on the passenger side we can pass the driver's side t-harness behind the console and over to the other kick panel. With those connection made the last step in wiring is to run the dedicated tweeter wires. The factory system marries the front midrange and tweeter on one single channel and puts a capacitor on the tweeter so it doesn't play low frequencies. We want to separate those speakers into independent channels for better control and more power. We start by removing the factory tweeters to open up the wiring path we need. That involves unclipping the vent assembly and the OEM tweeters. We then use an oversized zip-tie to find the path and pull the new tweeter wires through. I like to tape the factory connector to the new wiring so it doesn't rattle around or get lost in the dash.
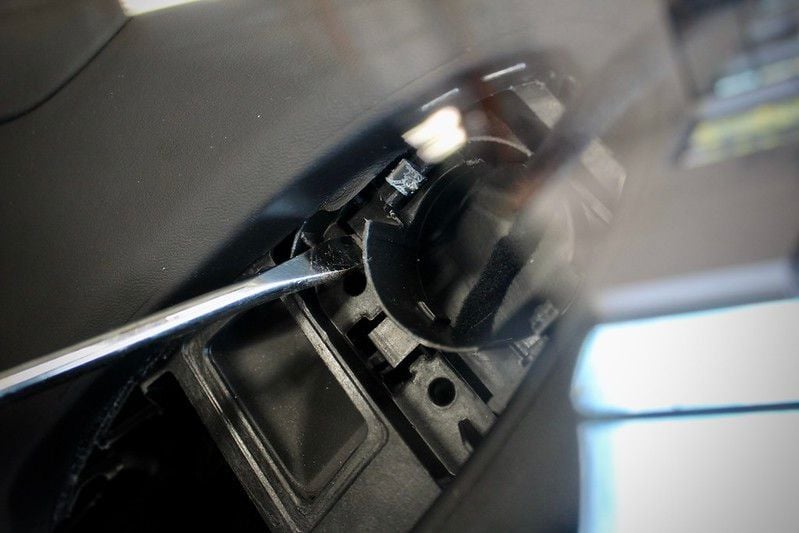
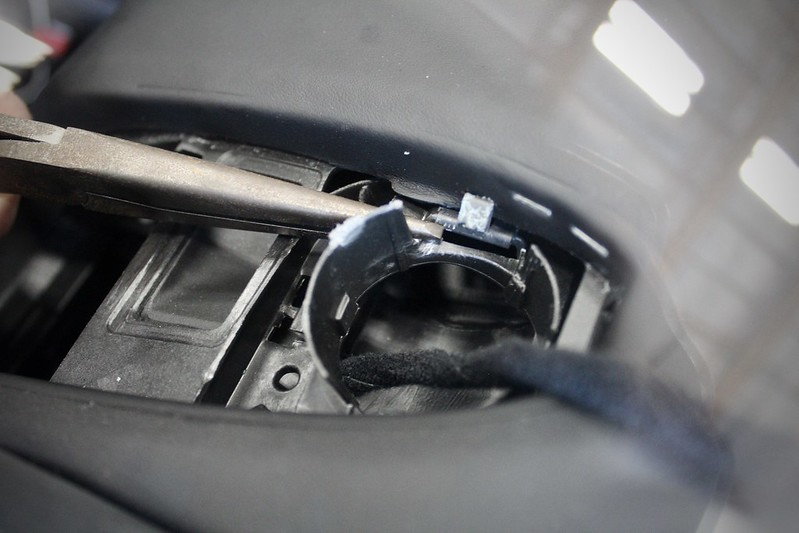
Step Three — Tweeter Install (~1hr)
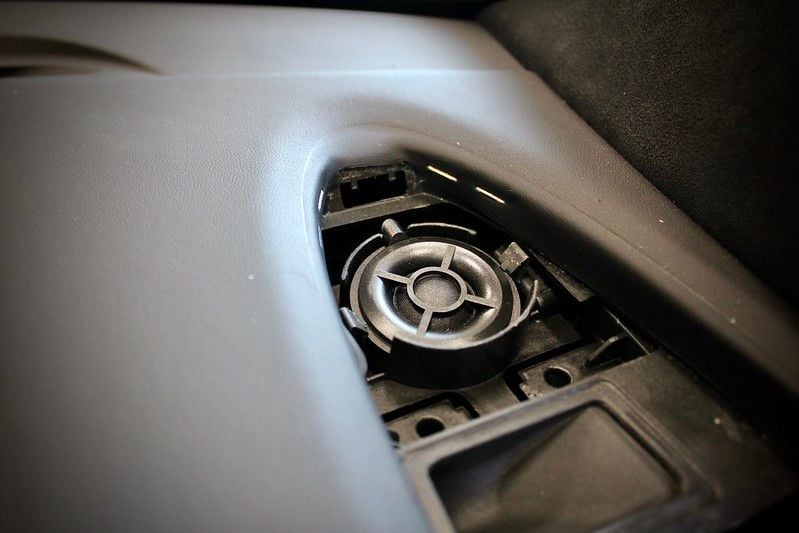
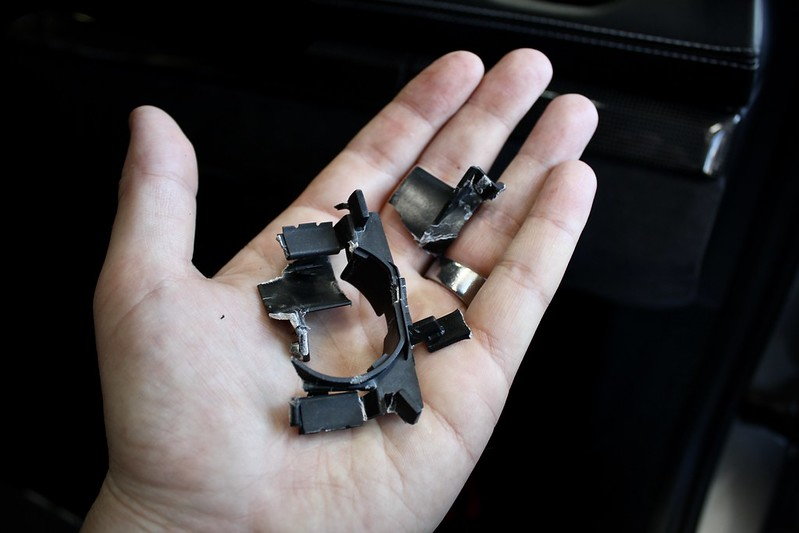
Now that we have the wiring in place for the tweeters we can plug in the new versions and install them. Before we do we'll have to break out the mounting plate for the factory tweeter. It's a thin plastic plate that's only tacked in place with a few connecting strips. I use a large flat blade screw driver and some needle nose pliers to remove that media. This is a bit of a pain and will probably come out in many pieces(as pictured). We're working on an inset that allows the factory tweeters to bolt back in should the car ever need to go back to OEM.
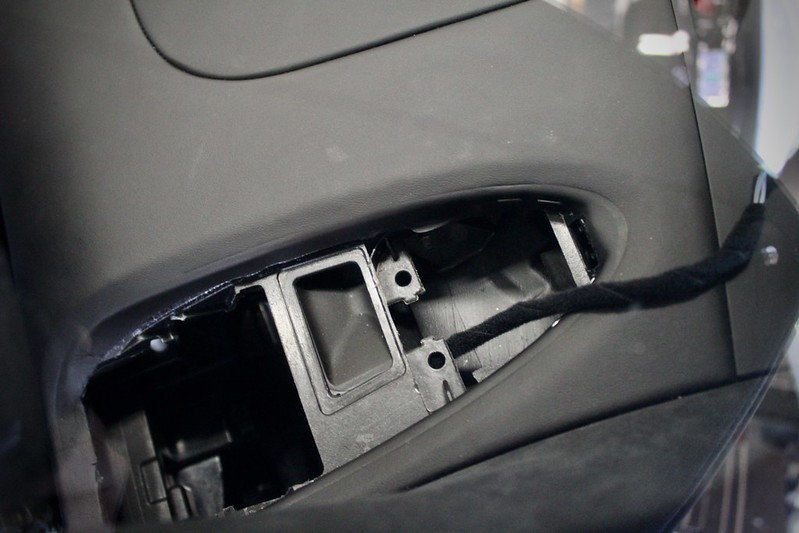
With that plate removed we can slide our speed nuts onto the two tabs in the tweeter cavity, plug the tweeter in, and then set it them place while we install the hardware. These don't have a forward screw location like the 91 versions. Instead there's a small shelf at the front of the cavity that the assembly will rest on.
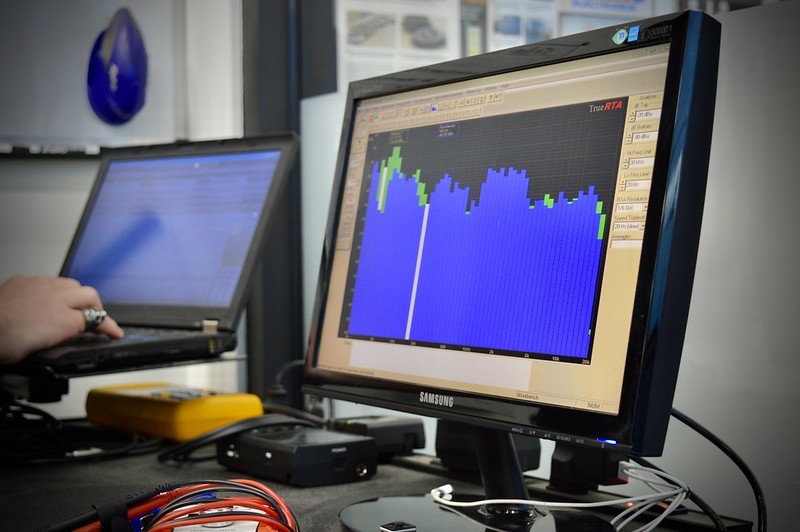
At this point we can reinstall the vents, the seat and the door panels. We'll go back and make sure the amplifier is bolted down and everything looks correct. I also like to turn the radio on just to test the audio output before reinstalling the seat. This package comes pre-tuned for the acoustics of the 718, but since it was our first install after the development car, I wanted to make a few tweaks and refine the sound just a bit more for the final tune that will ship with new orders.
That's it! We're done!!
The install took me about 6 hours but an hour or more of that was taking photos. I would say that a pro could finish this in about 4-5 hours and a DIY could be done in 5-7. Either way, it's a one-day job and a hell of a payoff for that investment of time. The kit price is $2,695 and we're taking orders right now with a 2-3 week lead time. We also have the Stage One tweeter upgrade, Stage One+ with acoustic treatment, or a full Stage 3 system like this one that a good friend of our just installed in a 918 GT4:Musicar Stage 3 Review For My DeMan 4.5L GT4
The results on this Stage Two upgrade are phenomenal. On top of the added detail and clarity we have a true stereo image and real staging. The bass is more pronounced and has real texture to it as well as more overall output. Of course, I'm biased here so perhaps @mr965 will chime in and let us know what he thinks!!!
The Cayman is a fairly noisy car (fine by me), it is not say, an Audi where you can really enjoy the sound of an upgraded system because it is a quieter car… so I have a few questions.
How much weight does the complete kit add to the car?
Perhaps you do not want to say, but what brand of speakers and amplifier do you use for the upgrades.
What is the power output of the amp and what are the speakers rated at?
Although you have “tweaked” the sound system, can someone go into the settings via a lap top and adjust them to their likings because after all is said and done, anything “audio” is subjective and personal.
Last edited by Jet Jockey; 10-17-2021 at 04:04 AM.
The Cayman is a fairly noisy car (fine by me), it is not say, an Audi where you can really enjoy the sound of an upgraded system because it is a quieter car… so I have a few questions.
How much weight does the complete kit add to the car?
Perhaps you do not want to say, but what brand of speakers and amplifier do you use for the upgrades.
What is the power output of the amp and what are the speakers rated at?
Although you have “tweaked” the sound system, can someone go into the settings via a lap top and adjust them to their likings because after all is said and done, anything “audio” is subjective and personal.
You're right, the Cayman is definitely not the most quiet car out there, and without treating the entire interior it's probably not the best environment to spend tens of thousands of dollars in high-end audio. That said, the factory audio sucks and there's no reason anything should suck on a $90k+ car. The car in the thread is actually mostly for track but the owner wanted to get a bit more enjoyment on the two hour trip to the local road courses out here.
To answer your questions more specifically, the net weight gain is only around 10lbs including the wiring — Not enough to make a difference in your driving experience or track times.
Happy to share the manufacturers! Both the tweeters and the amplifier are a custom variation made for our kits by the manufacturer. The tweeters are built off Morel of Israel's Elate MT350's and the amplifier is built by Audiotec-Fischer of Germany. Both companies with a long history of well-performing and reliable products.
Total power output is roughly 580w. That's split up with 65w to each tweeter and each midrange, with 160w to each woofer. It's tough to know what the power ratings are for the OEM speakers, but I can say that when they're tuned properly we can get the volume levels up to 100% on good recordings without fear of damaging the equipment.
You are absolutely right, sound is subjective — only to a certain degree though. We do allow for the DSP to be adjusted after installed, but there is no warranty implied on the speakers at that point since it's easy to make the wrong adjustments and cause issues.
Thank you… sounds like a great upgrade kit.
One more question… this kit will fit in any 718 model I assume (I have a 2018 GTS)?
No problem, and yes it will fit any 718 sub model including Boxster/Spyder. We will also have applications for the Bose cars very soon, too!
I see this is for cars without a Bose system (must have skipped over that info)… My Cayman has the Bose in it and call me crazy but I actually think it sounds OK in a Cayman, certainly not “HIFI” but decent enough.
I will be very interested in seeing your offering for upgrading Bose equipped cars. I had the Bose upgrade in my 981 Cayman S and have it spec'd in my soon to arrive Spyder, so I feel that I have a reasonably good idea what it does well and of it's shortcomings.
I see this is for cars without a Bose system (must have skipped over that info)… My Cayman has the Bose in it and call me crazy but I actually think it sounds OK in a Cayman, certainly not “HIFI” but decent enough.
The BOSE in the Cayman definitely sucks less. That said, we still have an enormous amount of room for improvement. As you mentioned earlier, audio can be subjective based on your past experience. Some folks thing the BOSE is adequate and others would rather listen to a bluetooth speaker, lol. We'll have a similar solution for Bose cars in 30-60 days with the opportunity to pre-order in the next couple weeks.
Originally Posted by StilettoPat
I will be very interested in seeing your offering for upgrading Bose equipped cars. I had the Bose upgrade in my 981 Cayman S and have it spec'd in my soon to arrive Spyder, so I feel that I have a reasonably good idea what it does well and of it's shortcomings.
I'll be posting the pre-order for the BOSE system once we're done with development and working on production. We're looking at roughly 2-4 weeks before the development is done, but I will certainly post on here when with more information. It might end up in the 991.2 forum, but I'll post a link here if that's the case.
Will the Bose upgrade be offered in stages? Also, the installation looks very complex. Do you have an installation shop in Los Angeles that works with your products?
Will the Bose upgrade be offered in stages? Also, the installation looks very complex. Do you have an installation shop in Los Angeles that works with your products?
The Stage One and Stage Three are currently available for the Bose cars, Stage Two is the only one that's in development still. The STG1 can be upgrade to either STG2 or STG3, but we cannot go from STG2 to STG3 due to the different amplifiers. PM me your email if you want me to send you all of those details.
Also, we do have a few trusted resources in the Los Angeles area that would be happy to help with installation. I can email you their information as well.
I am familiar with the equipment you guys are using and they are very solid choices. You guys seem like very competent installers. With that said, it’s a GT4. I would be reluctant to add any weight to the doors. If you’ve ever installed door speakers in a car like a Miata, then you know it doesn’t take much weight to change the driving dynamics of some cars. When I had a Miata, 20 years ago, we took the door panel off and realized that when we removed the door speaker and the plastic surround we had nearly an 8 inch hole we could mount a speaker in. We dropped in a 1,000.00 set of focal 7 inch woofers and deadened the door. Then we used focal best tweeter and a great amp. The car sounded absolutely amazing. It definitely drove a litttle different though. You could feel a few pounds in the doors.
I have Bose in my GT4. It’s fine for what the car is. It plays loud enough to be heard over the GT4s other noises. My home system is Naim and Focal. The GT4s Bose system doesn’t even sound like music at all compared to my home system. With that said the GT4 is an extremely noisy environment and I only occasionally listen to music in there.
The Stage One and Stage Three are currently available for the Bose cars, Stage Two is the only one that's in development still. The STG1 can be upgrade to either STG2 or STG3, but we cannot go from STG2 to STG3 due to the different amplifiers. PM me your email if you want me to send you all of those details.
Also, we do have a few trusted resources in the Los Angeles area that would be happy to help with installation. I can email you their information as well.
-Nick
Do you have any installers in the SF Bay Area that you can recommend for a Bose Stage One upgrade?
I do have some contacts in that area that I'm sure could help out!
Originally Posted by 2seats
I am familiar with the equipment you guys are using and they are very solid choices. You guys seem like very competent installers. With that said, it’s a GT4. I would be reluctant to add any weight to the doors. If you’ve ever installed door speakers in a car like a Miata, then you know it doesn’t take much weight to change the driving dynamics of some cars. When I had a Miata, 20 years ago, we took the door panel off and realized that when we removed the door speaker and the plastic surround we had nearly an 8 inch hole we could mount a speaker in. We dropped in a 1,000.00 set of focal 7 inch woofers and deadened the door. Then we used focal best tweeter and a great amp. The car sounded absolutely amazing. It definitely drove a litttle different though. You could feel a few pounds in the doors.
I have Bose in my GT4. It’s fine for what the car is. It plays loud enough to be heard over the GT4s other noises. My home system is Naim and Focal. The GT4s Bose system doesn’t even sound like music at all compared to my home system. With that said the GT4 is an extremely noisy environment and I only occasionally listen to music in there.
I'm willing to bet that you can't and won't notice a difference in the driving dynamics of the GT4(or any modern production sports car) with an added 2-5lbs in each door. You have to remember that 20 year old Miata was ~1,000lbs lighter and that doesn't take into account any weight reduction mods you might have done. The cars we work with are daily driver/weekend cars that are designed for more road time than track time. Because of that, we're not worried about adding 10-15lb of overall weight. It's an inconsequential amount in these applications.
As for the Bose in your GT4, I'm wondering if you might listen to it more if it actually sounded closer to your reference home system Ż\_(ツ)_/Ż
Originally Posted by Dave I
Do you have any installers in the SF Bay Area that you can recommend for a Bose Stage One upgrade?
Sure do! Have a great partner we work with in the Bay Area!
That said, Stage One can be a pretty simple DIY if you're up to it. PM me with your email and I can get you more info on everything!
I had a Level 2 + sub from Nick and MusicarNW in my 2010 BMW 335i and it was one of the best systems in a car I have had the pleasure of listening to! I sold it last year for a leased 330i and still miss it!
Nick, for those of us interested in a package from you for a 718 - What system is easier to start specced with, base or Bose? I have yet to spec mine and am between going with a plug and play set-up vs going Burmester


 10-17-2021, 03:35 AM