

Shifter upgrade pictures
 04-11-2009, 01:01 AM
#1

First I started by getting the "Golden Rod" treatment on my rear shift rod.
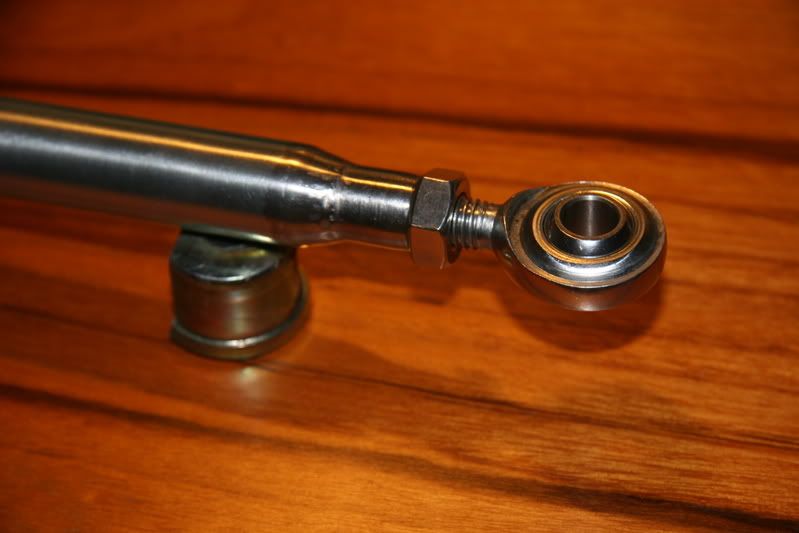
I ordered two ball joint rod ends from McMaster Carr to use at both ends of the forward shift rod.
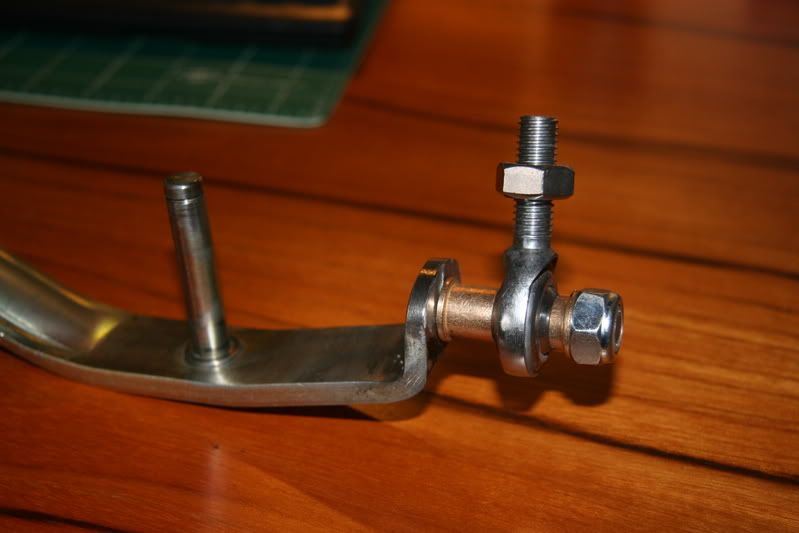
Then I decided I would use the bolts from the old mount to replace the ***** on the shifter and the forward mount. I used a grinder to remove the ball mounts. Then I drilled the holes out bigger to accept the bolts. I took the bolts to a machine shop and had the first shoulder cut down on a lathe to accept the rod ends.
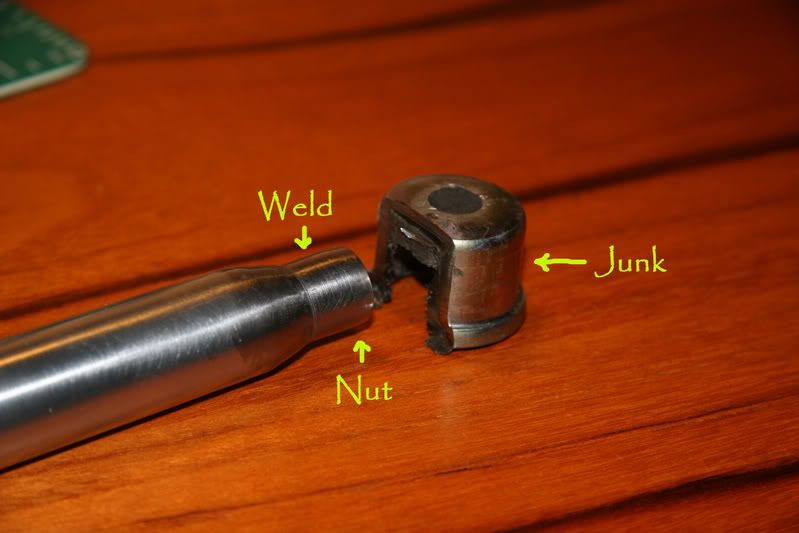
One end of the forward shift rod will accept the rod end without modification. On the other end, I cut off the old cup with the plastic bushing. I then welded a nut to the end so the rod would have threads for the new rod end to screw into. (Since my welding skills are non-existent, I rounded off the welded nut so it would not look so bad.)
You can see the completed assembly turned out pretty well. No slop or possible dropping of the shift rod from the plastic bushings. The pictures tell the story and questions or comments are welcomed.
I can't wait to finish the car so I can try out the new set-up.
I ordered two ball joint rod ends from McMaster Carr to use at both ends of the forward shift rod.
Then I decided I would use the bolts from the old mount to replace the ***** on the shifter and the forward mount. I used a grinder to remove the ball mounts. Then I drilled the holes out bigger to accept the bolts. I took the bolts to a machine shop and had the first shoulder cut down on a lathe to accept the rod ends.
One end of the forward shift rod will accept the rod end without modification. On the other end, I cut off the old cup with the plastic bushing. I then welded a nut to the end so the rod would have threads for the new rod end to screw into. (Since my welding skills are non-existent, I rounded off the welded nut so it would not look so bad.)
You can see the completed assembly turned out pretty well. No slop or possible dropping of the shift rod from the plastic bushings. The pictures tell the story and questions or comments are welcomed.
I can't wait to finish the car so I can try out the new set-up.
 04-11-2009, 01:17 AM
#2
Seared
Rennlist Member
Rennlist Member
Albert,
This could not be more timely! I received the beautiful parts (yellow zinc dichromate plated) back from you today (Friday) and just finished installing my version. It shifts perfectly and clears the tunnel cover with room to spare. I'll take some pics tomorrow and post them.
Also, I was always ticked by how the stock shift lever leans to the right while in Neutral. Took care of that tonight...
Remove ball cup from spare forward rod & weld on appropriate nut:
Rod end (Heim) installed:
Spare shift lever with welded-on stud, bronze spacers & rod end:
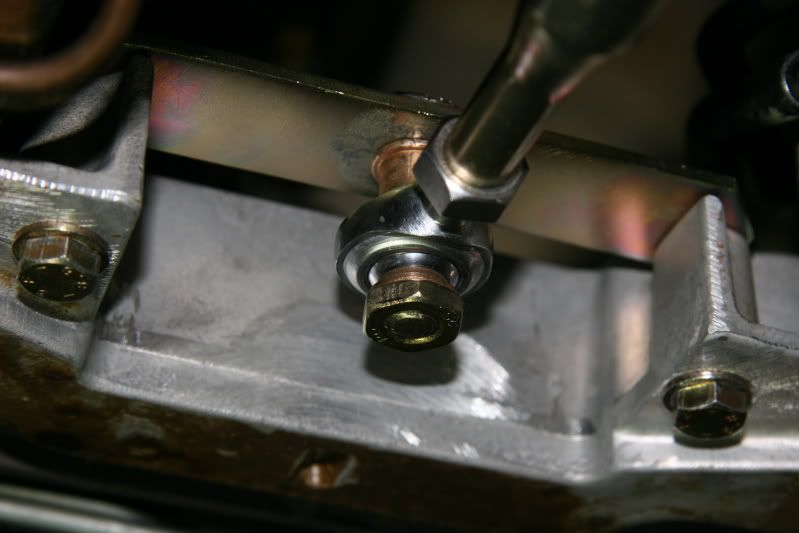
Installed rod, forward end:
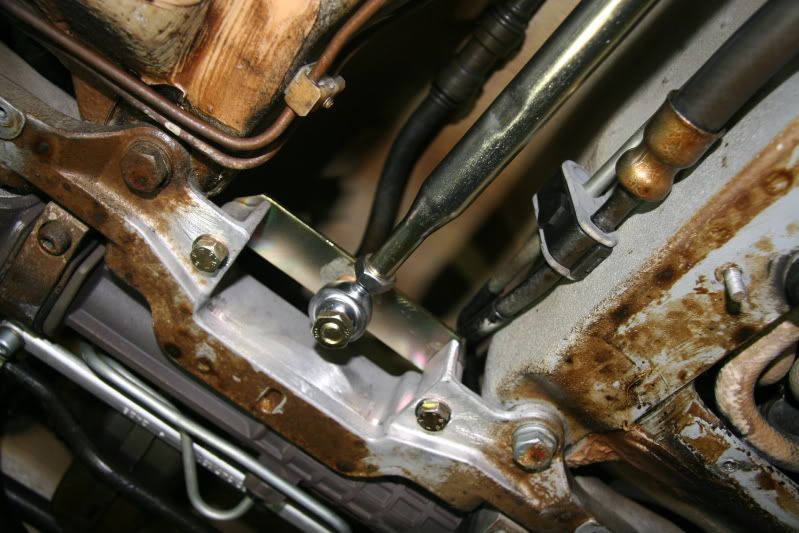
Forward end:
Installed rod, shifter end:
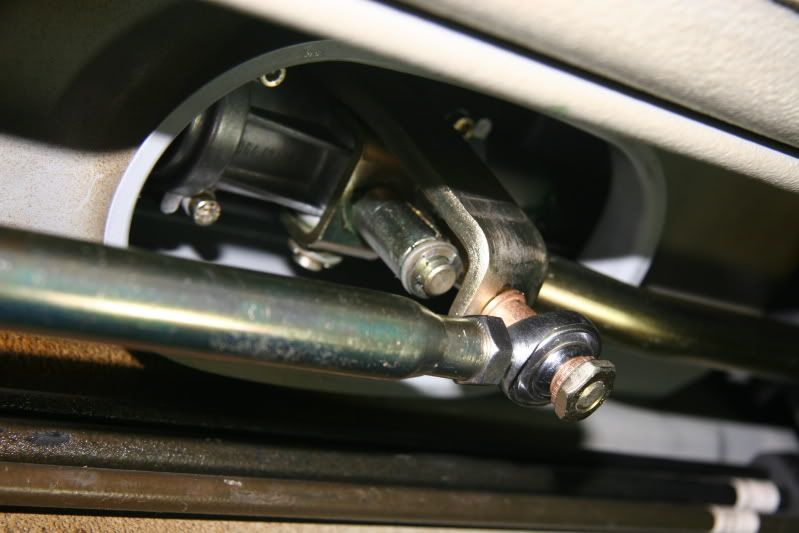
Shifter end:

Porsche RS shift rod:

Andreas
This could not be more timely! I received the beautiful parts (yellow zinc dichromate plated) back from you today (Friday) and just finished installing my version. It shifts perfectly and clears the tunnel cover with room to spare. I'll take some pics tomorrow and post them.
Also, I was always ticked by how the stock shift lever leans to the right while in Neutral. Took care of that tonight...
Remove ball cup from spare forward rod & weld on appropriate nut:
Rod end (Heim) installed:
Spare shift lever with welded-on stud, bronze spacers & rod end:
Installed rod, forward end:
Forward end:
Installed rod, shifter end:
Shifter end:
Porsche RS shift rod:
Andreas
Last edited by AOW162435; 04-11-2009 at 03:16 PM.
04-11-2009, 03:03 PM
#4
Rennlist Member
Very nice!
Funny, I have the same parts on my workbench right now. Waiting for parts, hopefully this week.
I like the way you recycled the shoulder bolts! Sweet!
Funny, I have the same parts on my workbench right now. Waiting for parts, hopefully this week.
I like the way you recycled the shoulder bolts! Sweet!
04-11-2009, 03:20 PM
#5
Noodle Jr.
Rennlist Member
Rennlist Member
The thing i'm most shocked about is the visible cosmoline on Andreas's car!!! Even my steering rack mounting straps/bolts are cosmo free.......
04-11-2009, 03:26 PM
#6
Seared
Rennlist Member
Rennlist Member
Trending Topics
04-11-2009, 10:17 PM
#8
Seared
Rennlist Member
Rennlist Member
 04-12-2009, 01:41 AM
#9
Addict
Rennlist Member
Rennlist Member
aribop,
Question for you... Could the modification be made to the front ball joint only with relative ease? It looks to me like it could.
I ask because tonight I discovered a significant amount of play in the front ball joint of the rod you modified with the ball joint rod ends. The rear ball (the one that mounts on the end of the shifter assy) is nice and tight. But, the front one is pretty lose, and since I've got the whole thing pulled apart anyway, I figure now is the right time to correct the problem(s).
04-12-2009, 01:50 AM
#10
Yes, pretty easily modified. The correct sized rod end will screw right into the rod. Then it is just a matter of cutting the ball off the crossbar and welding in a stud or bolt that the rod end can slide over.
04-12-2009, 09:55 PM
#14
Drifting
05-02-2010, 07:23 PM
#15
8th Gear

Join Date: May 2010
Posts: 8
Likes: 0
Received 0 Likes
on
0 Posts
First I started by getting the "Golden Rod" treatment on my rear shift rod.
I ordered two ball joint rod ends from McMaster Carr to use at both ends of the forward shift rod.
Then I decided I would use the bolts from the old mount to replace the ***** on the shifter and the forward mount. I used a grinder to remove the ball mounts. Then I drilled the holes out bigger to accept the bolts. I took the bolts to a machine shop and had the first shoulder cut down on a lathe to accept the rod ends.
One end of the forward shift rod will accept the rod end without modification. On the other end, I cut off the old cup with the plastic bushing. I then welded a nut to the end so the rod would have threads for the new rod end to screw into. (Since my welding skills are non-existent, I rounded off the welded nut so it would not look so bad.)
You can see the completed assembly turned out pretty well. No slop or possible dropping of the shift rod from the plastic bushings. The pictures tell the story and questions or comments are welcomed.
I can't wait to finish the car so I can try out the new set-up.