How to Get the Most Out of Your Porsche Photos

Piecing together multiple images under different lighting conditions can help add depth to your next photoshoot.
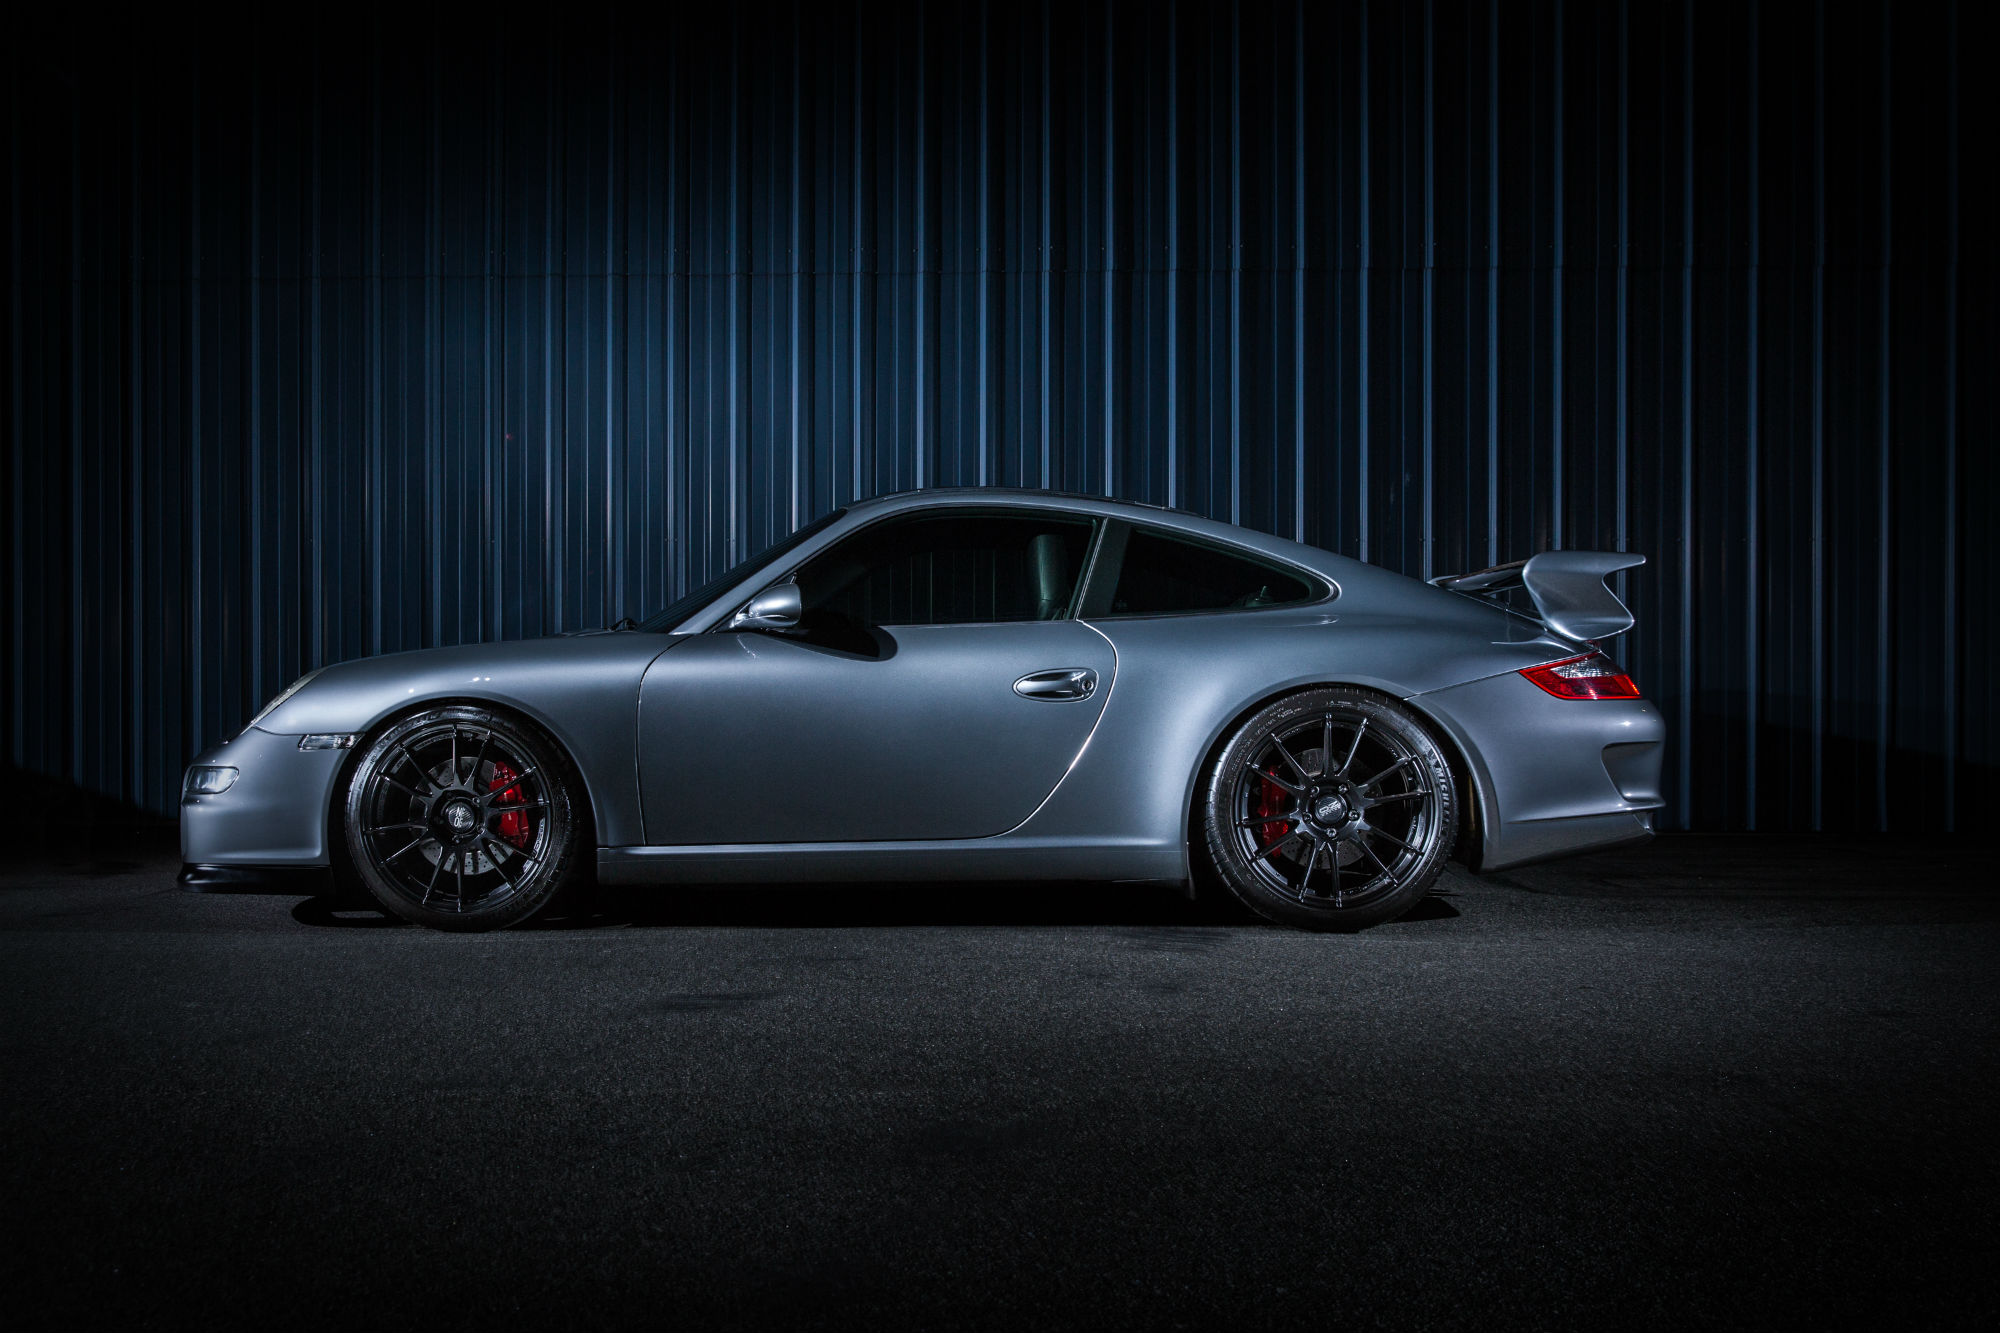
Have you ever wondered how to get some of those awesome photos that look like they were shot in a studio and must have taken hours to set up and capture? I’m here to explain my process and how you can get an image like this with very minimal gear and without breaking the bank. We recently found a nice industrial-looking backdrop that would work perfectly for our shot.
Next, we have our subject, a fantastic 2008 Porsche 911 GT3. To start, you have to figure out what specific details you want to capture. Because of the simple shoulder lines on the GT3, I definitely wanted to capture a very simple, elegant side shot.
Once we have our car lined up, the first secret is to mount your camera on a tripod. You will be putting a lot of images together to create this look, so a stationary camera fired by a simple remote allows you to get some shots without having to worry about the camera moving. For this shoot, I’m using a simple tripod, a Canon 5D MkIII, an EF 24-70mm f/2.8L lens, and a single flash with a remote trigger on the camera. The strobe is mounted to a common light stand extended to the length I want with no reflectors or modifiers.
(You can always try putting a softbox or reflector around your light to change how it hits the car. Because of the round lines of the GT3, I wanted a slightly harder light to hit the car for the look I’m going for.)
I started with some test shots to figure out the power of the light and how we want to angle it. One key is to make sure the light isn’t pointed directly at the car. You actually want to point it away from the vehicle so that the softer side light is what hits it.
Make sure the light isn’t pointed directly at the car. You actually want to point it away from the vehicle so that the softer side light is what hits it.
Next, I walk down the length of the car trying to hit it evenly to get a nice covering of light through each image. I also make sure to hit specific areas like the wheels, as well as the front, rear, and background. Another key principle to remember is to shoot everything you can. I typically overshoot the subject, using different heights, angles, and directions, because once you are gone, you won’t be able to go back and re-shoot. After I feel like I have everything I need, it’s time to move things to Photoshop.
After selecting the images I think I’ll need from Lightroom, I open them all as layers in a single Photoshop file. From there, I select a simple layer that doesn’t need much, if any, retouching to use as a base. From there, I have my different images and they are all set to “lighten” as the blending mode. With the blending more changed, each layer will only display the lightest parts of each image, brightening each part of the image to create a completely illuminated car. From there I can see how much of the car is illuminated by each layer and make sure every part of the car is lit evenly and correctly.
Next, I create “masks” to be able to brush away parts of each layer I don’t want, and I can begin to blend the things I do want from each layer. You can see from the second video when I reactivate the masks the image really starts coming together. After I have my images edited and balanced, I save the new file and open it back up in Lightroom to do some more editing and playing with the shadows, colors, and other effects to really make the image pop with a little bit of style.
James Donnelly is a Los Angeles-based music, automotive, event, and fashion photographer. He has shot for iconic brands like Jaguar and Gibson Guitars, and he has photographed every superstar from Lenny Kravitz to Metallica. Check out his recent photos from Long Beach Grand Prix that appeared on Rennlist, and see his full portfolio of amazing work at Jim Donnelly Photo.