
Start of a Winter Project
 11-01-2009, 11:32 PM
#1
Rennlist Member
Thread Starter
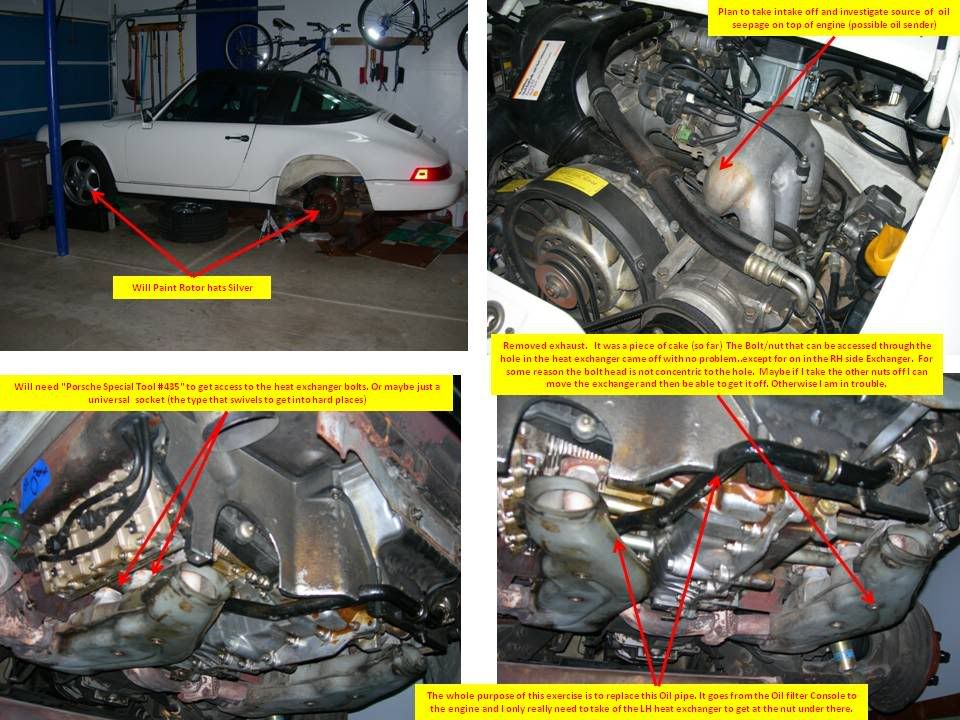
Hey guys...just wanted to show you my fun for this weekend. Started tearing into the back end of my car to get at an oil line that looks like its seeping. Also to investigate where else the oil is coming from. The exhaust came off easy enough without the use of penetrating oil or any heat. The Heat exchangers are going to require a swivel socket or something to get to the nuts.
The Allen head nut/bolt that is accessed through the heat exchanger came off real easy too (again without any penetrating solution or heat), so I am hoping for the best with the other nuts...soon as I can get a correct tool to get at them. The only problem is for some reason on of those silly nuts is not concentric to the hole in the exchanger so my socket does not line up with it. I will have to figure out that.
I am taking off as many of the easy stuff as possible so that I can clean off the oil residue from as many parts as I can.
Anyway looking forward to some good times this winter Hopefully I get everything buttoned back up without having a whole bunch of extra nuts and bolts that I don;t know where it goes. Wish me luck.
Here are some pics
 11-02-2009, 12:19 AM
#3
Pro
Nice work so far...
i'm just about to tackle installing a set of headers and new exhaust system so these photos are great. Thanks for taking the time to share.
Neil
i'm just about to tackle installing a set of headers and new exhaust system so these photos are great. Thanks for taking the time to share.
Neil
11-02-2009, 12:35 AM
#4
Rennlist Member
Thread Starter
How does the powdercoating hold up to the heat? There was foam, or whats left of it on the back of the tin. Did you replace that on yours? I assume you redid your tin that is why I ask.
Thanks
 11-14-2009, 11:17 PM
#7
Rennlist Member
Thread Starter
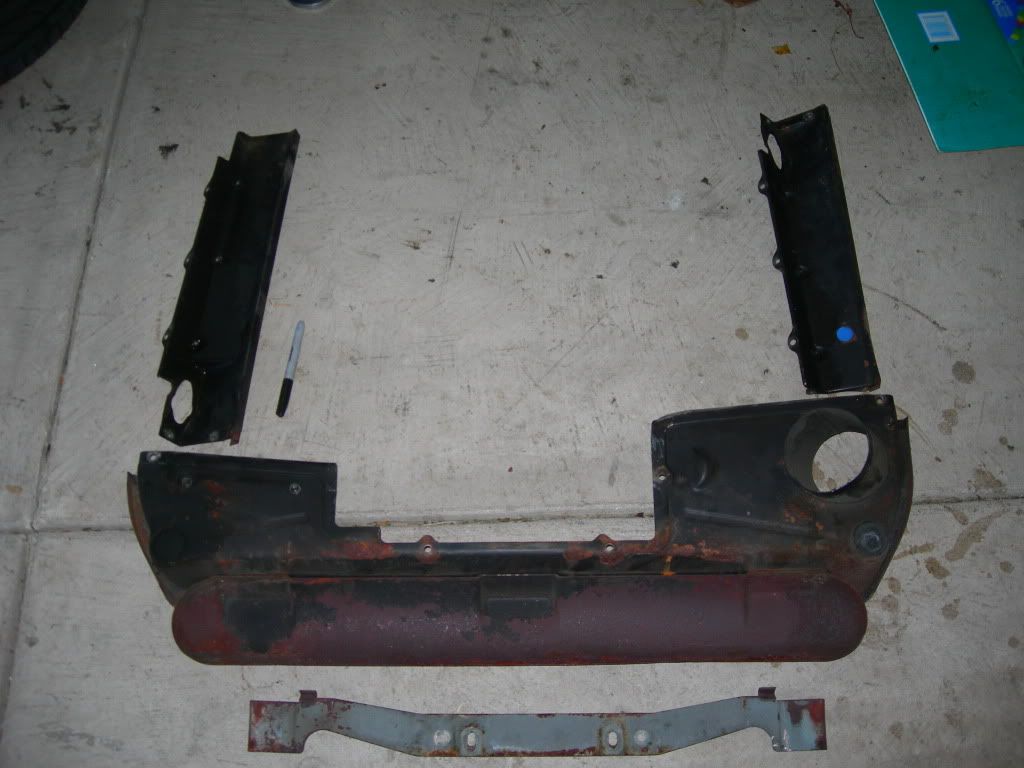
It sure is a slippery slope. I took the Engine Tin out. Wasn't really planning on it but here it is.
What should I do now?
Powdercoat it? or Clean it and shoot it with some High Temp Paint?
Anyone know roughly how much it is to Powdercoat them and also how durable is the Powdercoat with the heat that is around the Catalytic converter?
What should I do now?
Powdercoat it? or Clean it and shoot it with some High Temp Paint?
Anyone know roughly how much it is to Powdercoat them and also how durable is the Powdercoat with the heat that is around the Catalytic converter?
Trending Topics
11-14-2009, 11:31 PM
#8
Rennlist Member
Thread Starter
Everything has been going according to plan so far. Been real careful with just about everything.
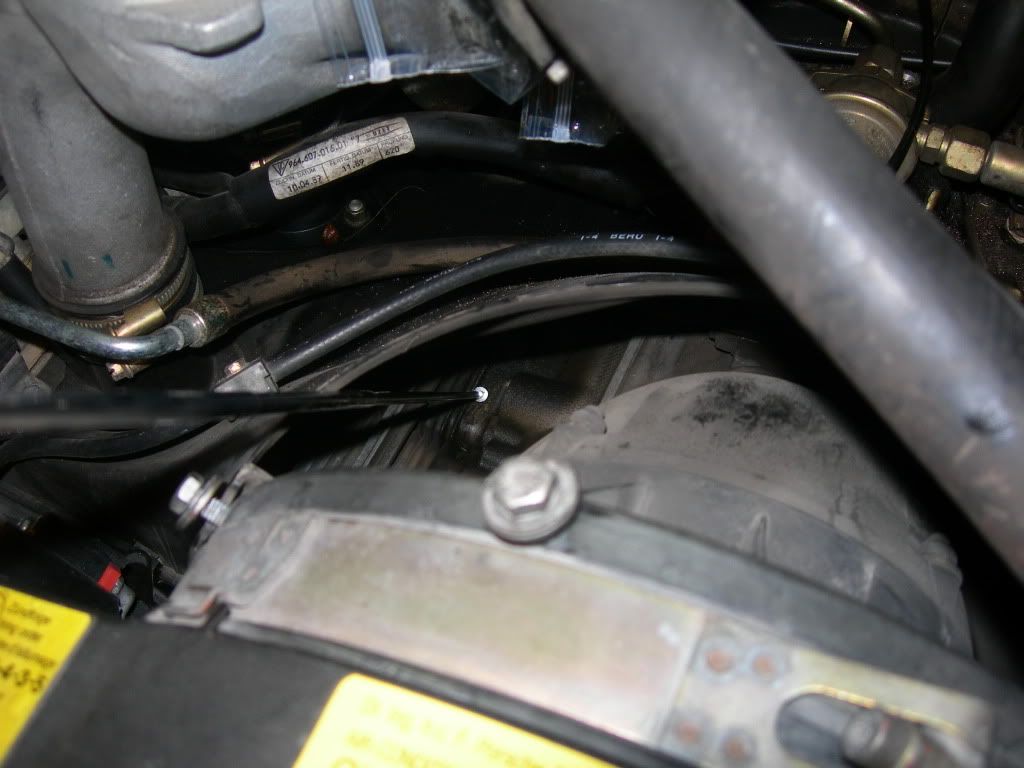
Well in the process of taking out the Engine tin. I did something stupid. I did not have my socket on correctly and it slipped of the wrench and ended up in the nether regions.
Basically fell somewhere under/behind the fan. See the pic to where the arrows are pointing.
I can't see it and stuck a magnet down in there and can't find it.
Anyone have any ideas on how to retrieve it from here?
11-14-2009, 11:47 PM
#9
Rennlist Member
Thread Starter
I took of the cover over the fan and peared under the engine shroud.
Looks like I have some wet spots in the following areas. May be hard to see. I am pointing too it with a pointer. Doesn't look major so I am going to leave it as it is and keep an eye on it.
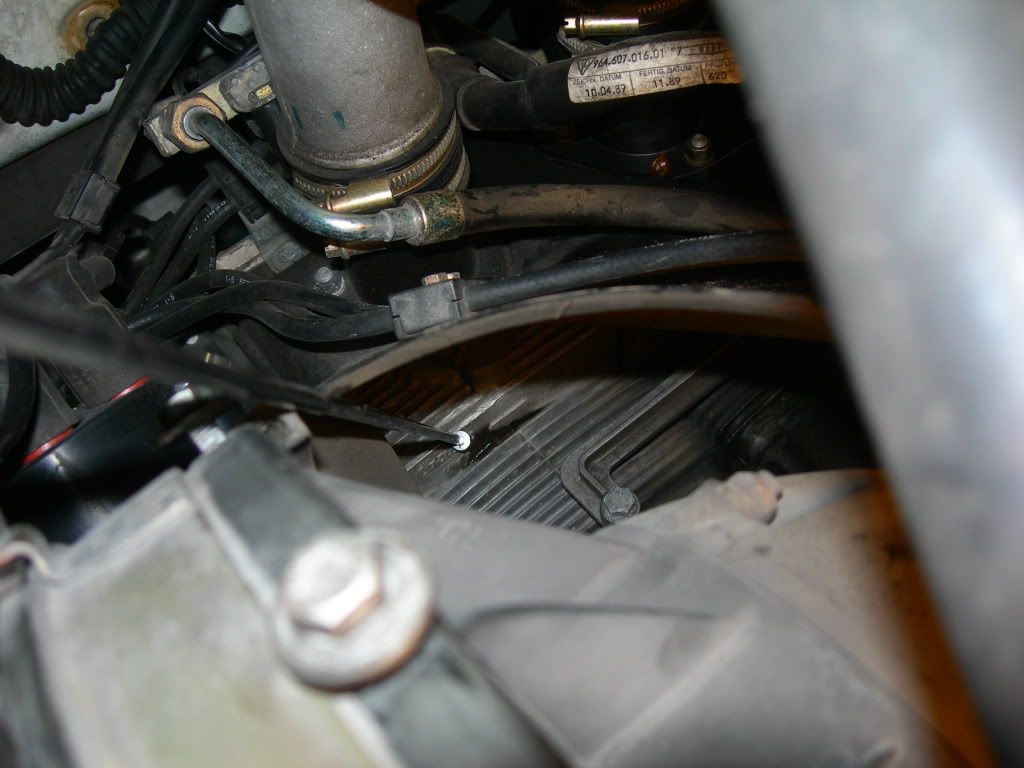
Looks like I have some wet spots in the following areas. May be hard to see. I am pointing too it with a pointer. Doesn't look major so I am going to leave it as it is and keep an eye on it.
11-15-2009, 03:06 AM
#10
Three Wheelin'
Join Date: Dec 2003
Location: Rancho Palos Verdes CA
Posts: 1,569
Likes: 0
Received 2 Likes
on
2 Posts
Have the tins all Sand blasted and powder coated. Probably less than 100 bucks for all of it. I did all mine including all the heat shields, motor carrier and ducting.
While you are in there take out the rear engine carrier and send it into Rennline for reinforcing and toss in a pair of RS motor mounts ! It's worth it !
Keep going winter is just getting started....
While you are in there take out the rear engine carrier and send it into Rennline for reinforcing and toss in a pair of RS motor mounts ! It's worth it !
Keep going winter is just getting started....
11-15-2009, 03:47 PM
#11
Rennlist Member
Thread Starter
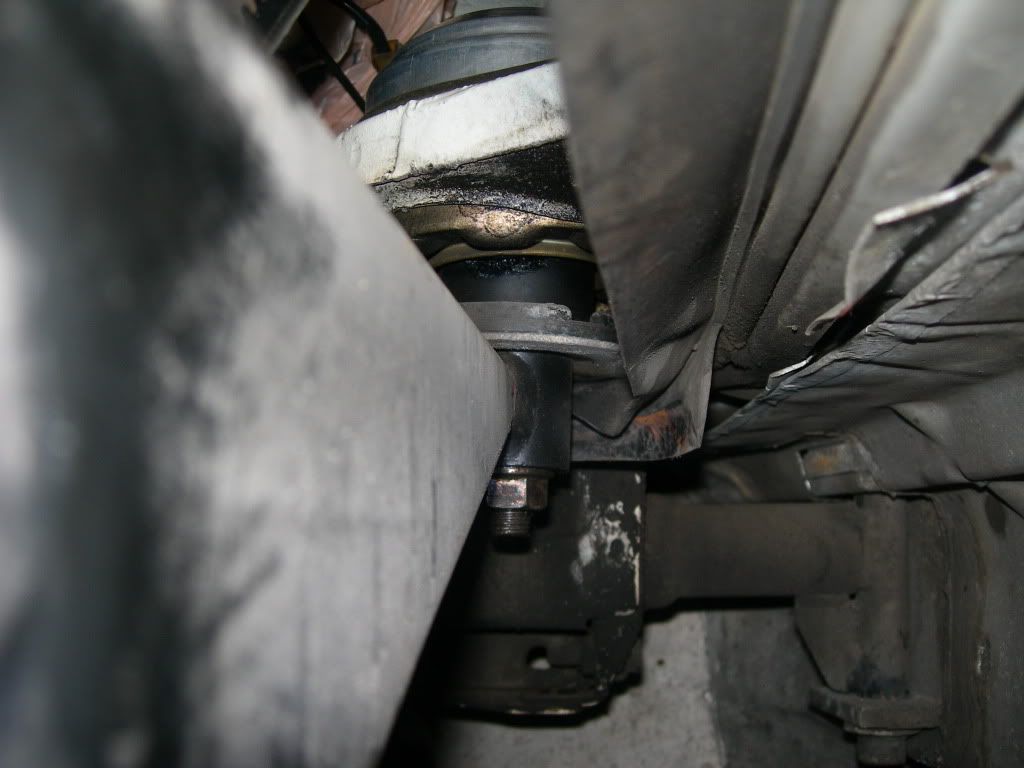
What is the benefit of using the RS mounts vs using a 964 replacement set?
After reading your suggestion, I decided to go search the threads and take a look at mine.
Here are pics of mine. Think they need to be replaced? There seems to be some grease like stuff coming out of both of them.
Left side Mount:

Right Side Mount:
Last edited by ducnine; 11-15-2009 at 04:13 PM.
11-15-2009, 05:15 PM
#12
Three Wheelin'
Join Date: Dec 2003
Location: Rancho Palos Verdes CA
Posts: 1,569
Likes: 0
Received 2 Likes
on
2 Posts
More than likely they are pooped out. I love the RS mounts some opt for the Wevo mounts which are similar in design. I got mine at Sunset Porsche. Reinforcement kit recommended on the engine carrier!
Do it now while its all apart.
Do it now while its all apart.
11-22-2009, 09:59 PM
#13
Rennlist Member
Thread Starter
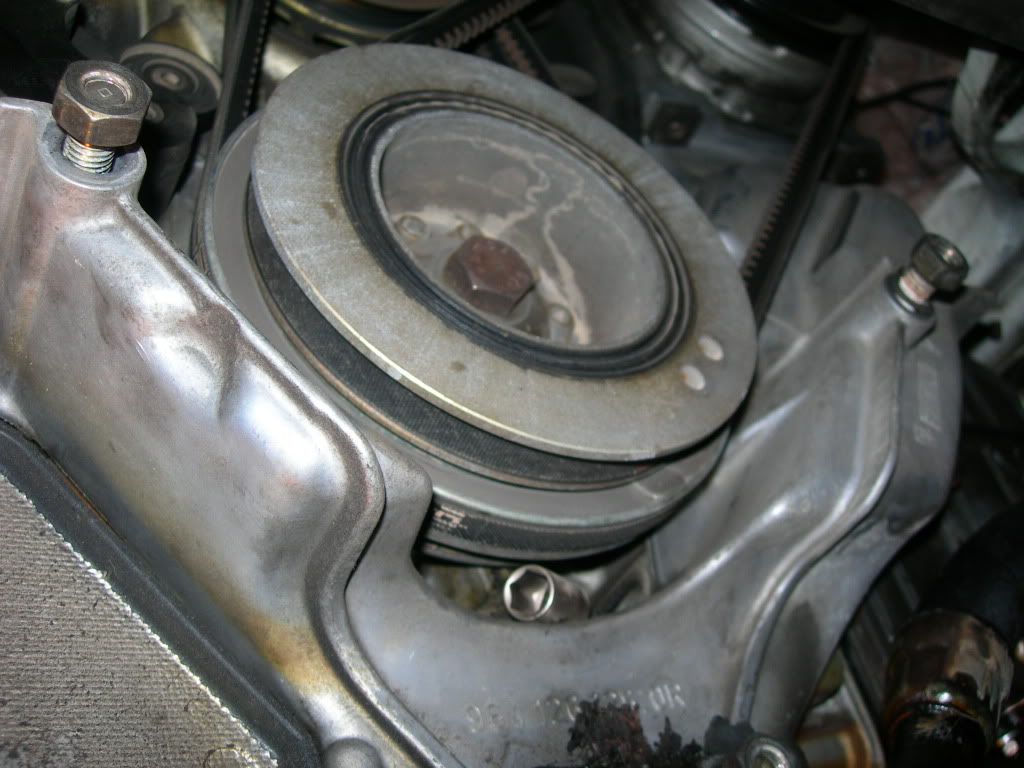
Took out the Engine mounts and the rear engine carrier. Loe and behold I found my long lost 10mm socket. See it right there under the pully?
Here are the pics of my old mounts. Whether they are good or not I am not quite sure. I do hear liquid sloshing around when I shake them. I am getting the RS mounts from Sunset soon.
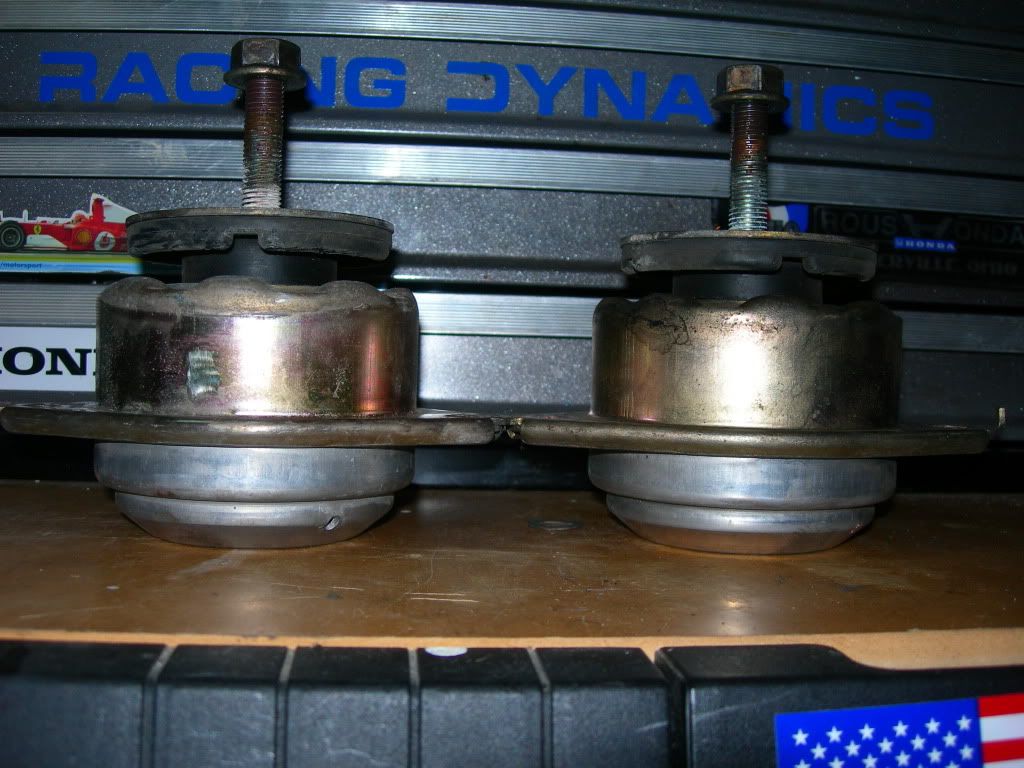
Here are the pics of my old mounts. Whether they are good or not I am not quite sure. I do hear liquid sloshing around when I shake them. I am getting the RS mounts from Sunset soon.
11-22-2009, 10:04 PM
#14
Rennlist Member
Thread Starter
Here are my heat exchangers and rear engine carrier. I plan to somehow clean up the heat excangers (any suggestions) and send the carrier to Rennline for reinforcing.
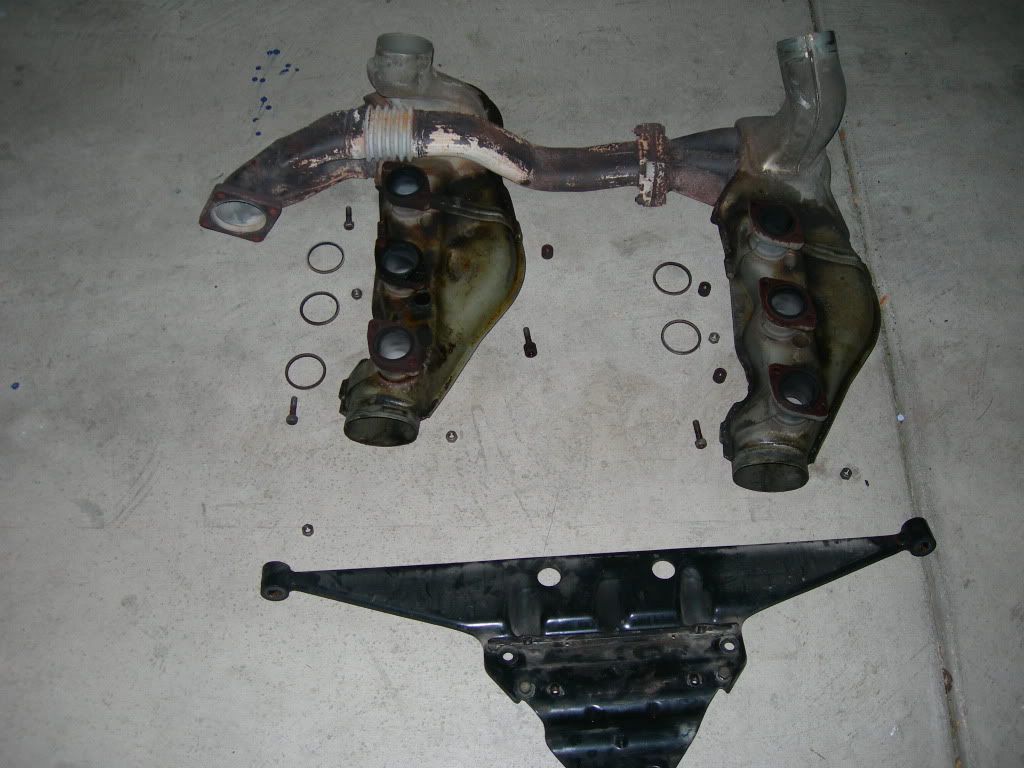
I used PB Blaster on all the heat exchanger bolts/nuts. Most all of the nuts came off without a hitch. I used a 3/8' Drive 13 mm universal socket. What a godsend. It worked like a charm. Only thing is for 4 of the nuts, the studs came out with the nut. the Studs do not look broken, looks like it loosend out. If that is truely the case, I will order new studs. But when I put it back in is there some loc-tite like stuff I can put on it to make sure it won't come out again?
I used PB Blaster on all the heat exchanger bolts/nuts. Most all of the nuts came off without a hitch. I used a 3/8' Drive 13 mm universal socket. What a godsend. It worked like a charm. Only thing is for 4 of the nuts, the studs came out with the nut. the Studs do not look broken, looks like it loosend out. If that is truely the case, I will order new studs. But when I put it back in is there some loc-tite like stuff I can put on it to make sure it won't come out again?
11-22-2009, 10:11 PM
#15
Rennlist Member
Thread Starter
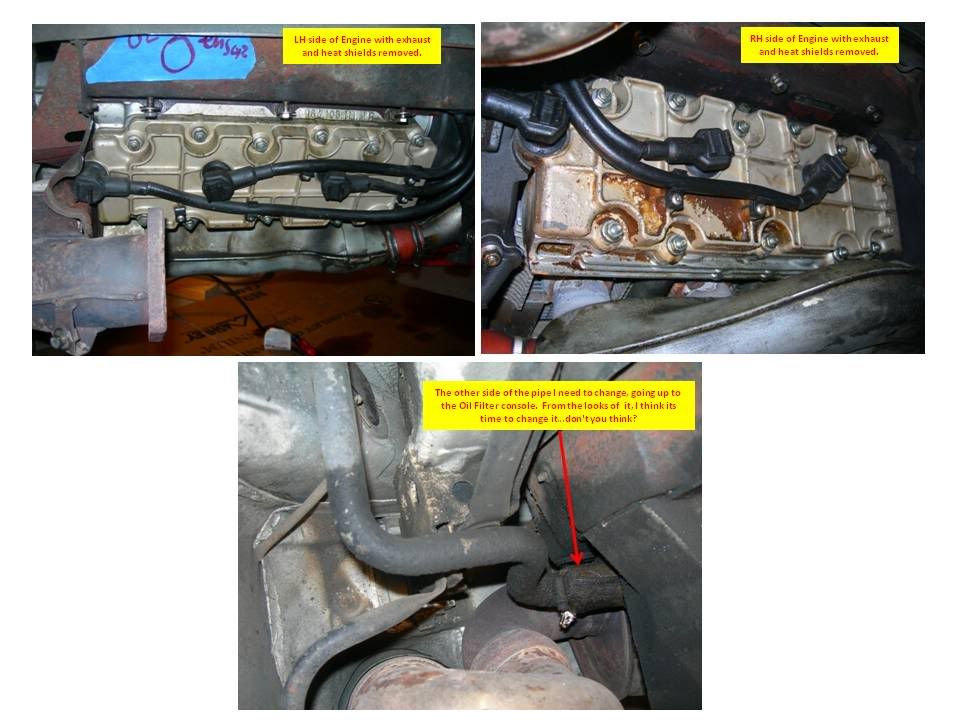
This is looking up at the left side exhaust outlets on the engine
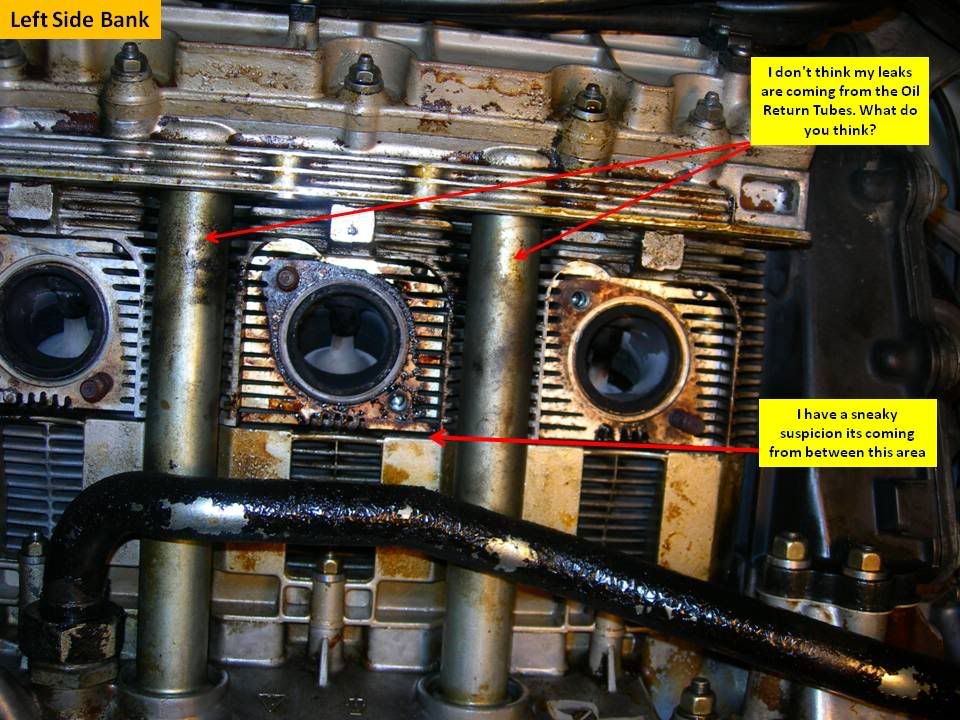
[SIZE="4"]This is looking at the right side exhaust outlets on the engineSIZE]
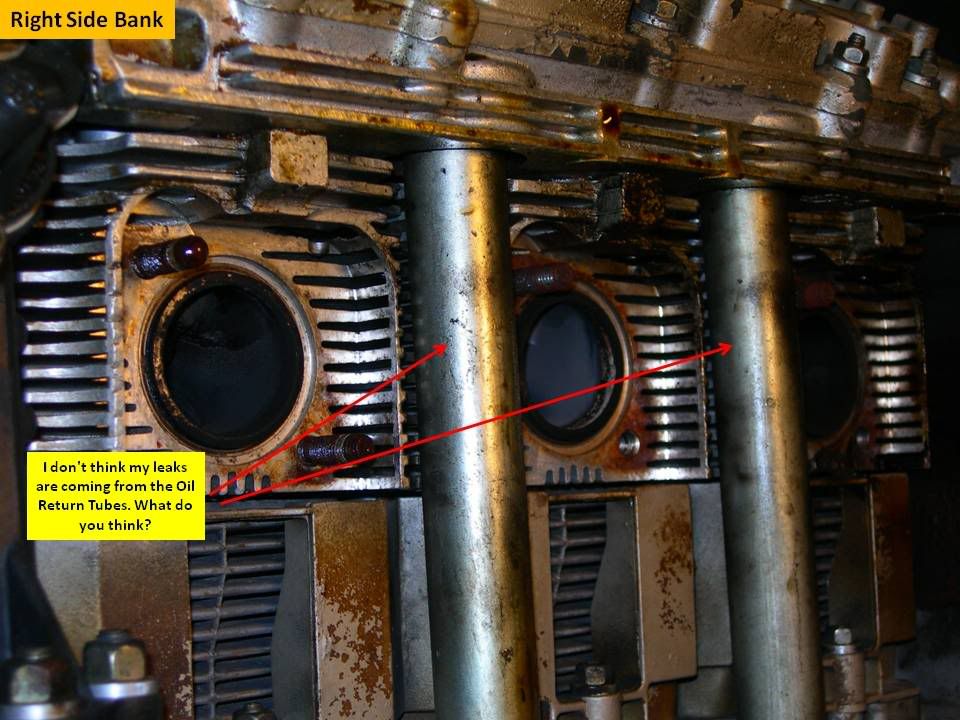
Now here is a close up of all 6 of the exhaust outlets on the engine together and some of my questions, that I hope you guys can answer.
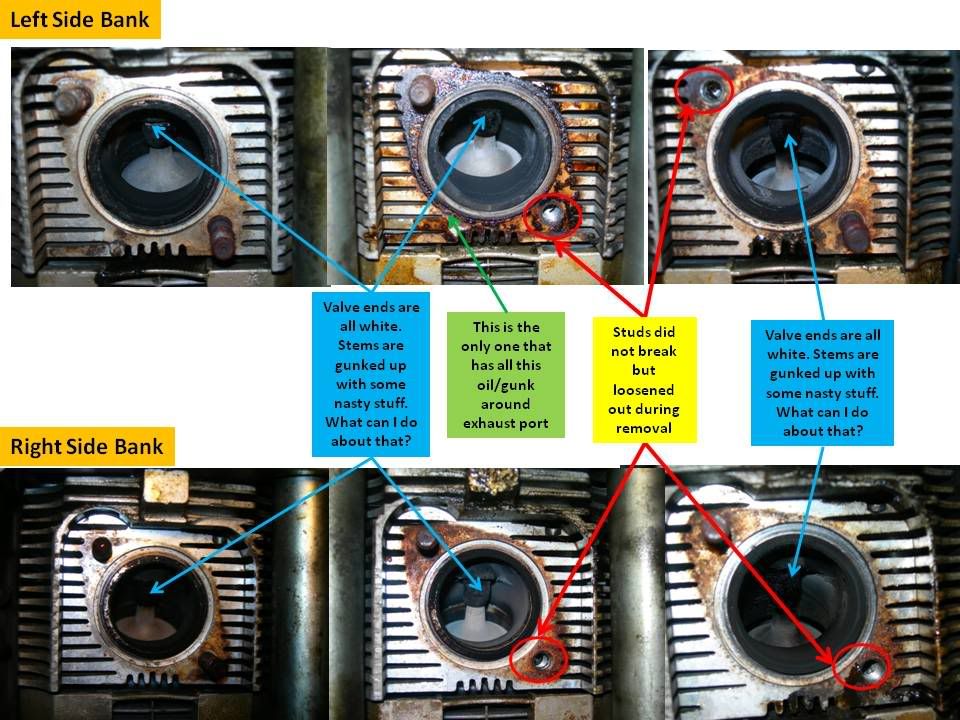
[SIZE="4"]This is looking at the right side exhaust outlets on the engineSIZE]
Now here is a close up of all 6 of the exhaust outlets on the engine together and some of my questions, that I hope you guys can answer.