When you click on links to various merchants on this site and make a purchase, this can result in this site earning a commission. Affiliate programs and affiliations include, but are not limited to, the eBay Partner Network.
So I have a box of goodies coming from Texas but unfornately the pivot bolt is out of stock at this time. I have the larger 17mm pivot bolt and matching arm from my 83. Is an upgrade possible?
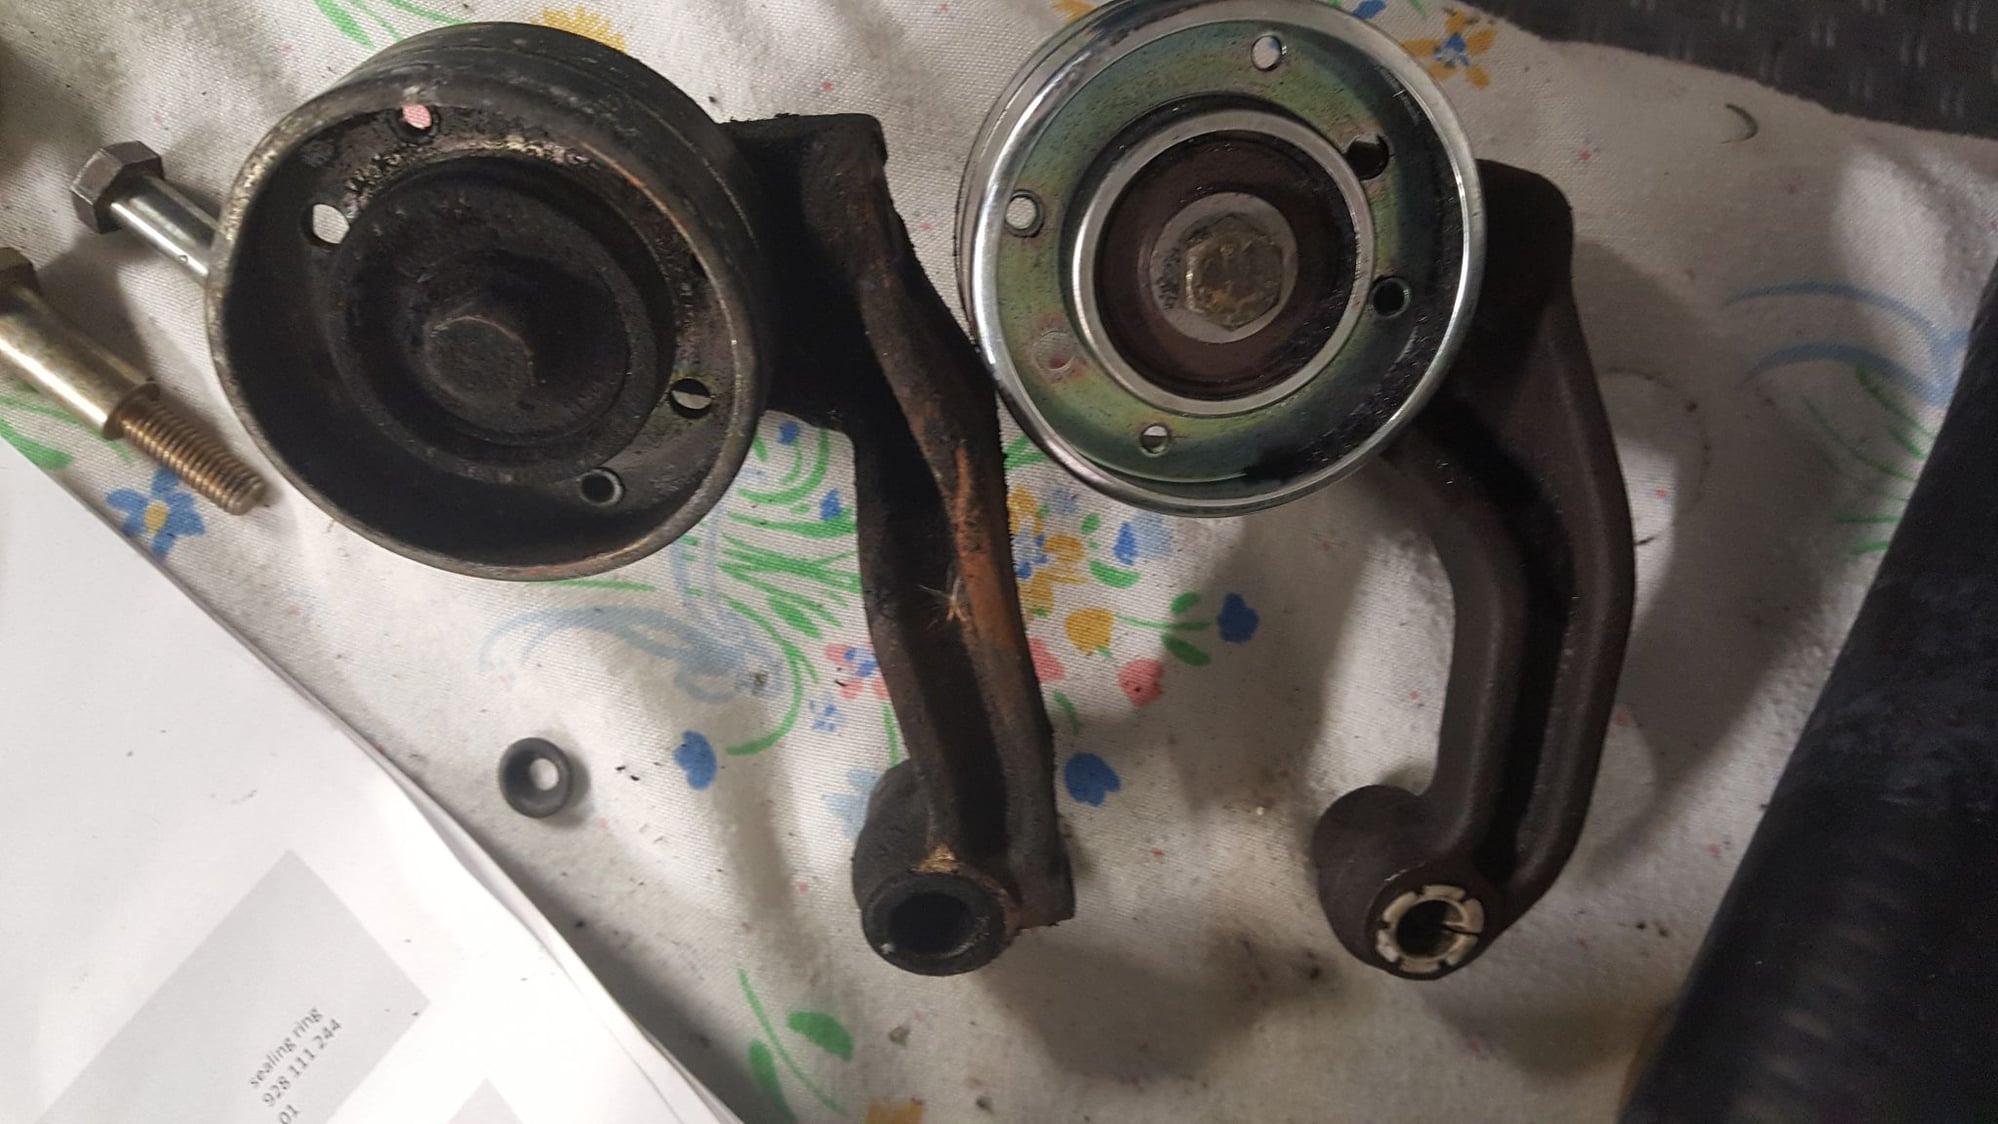
They appear to be the same depth etc with except of pivot bolt.
Whats the diffrence between early and late pivot bolt? I was wondering if the late bolt will fit with late bushings or are the hole diffrent?
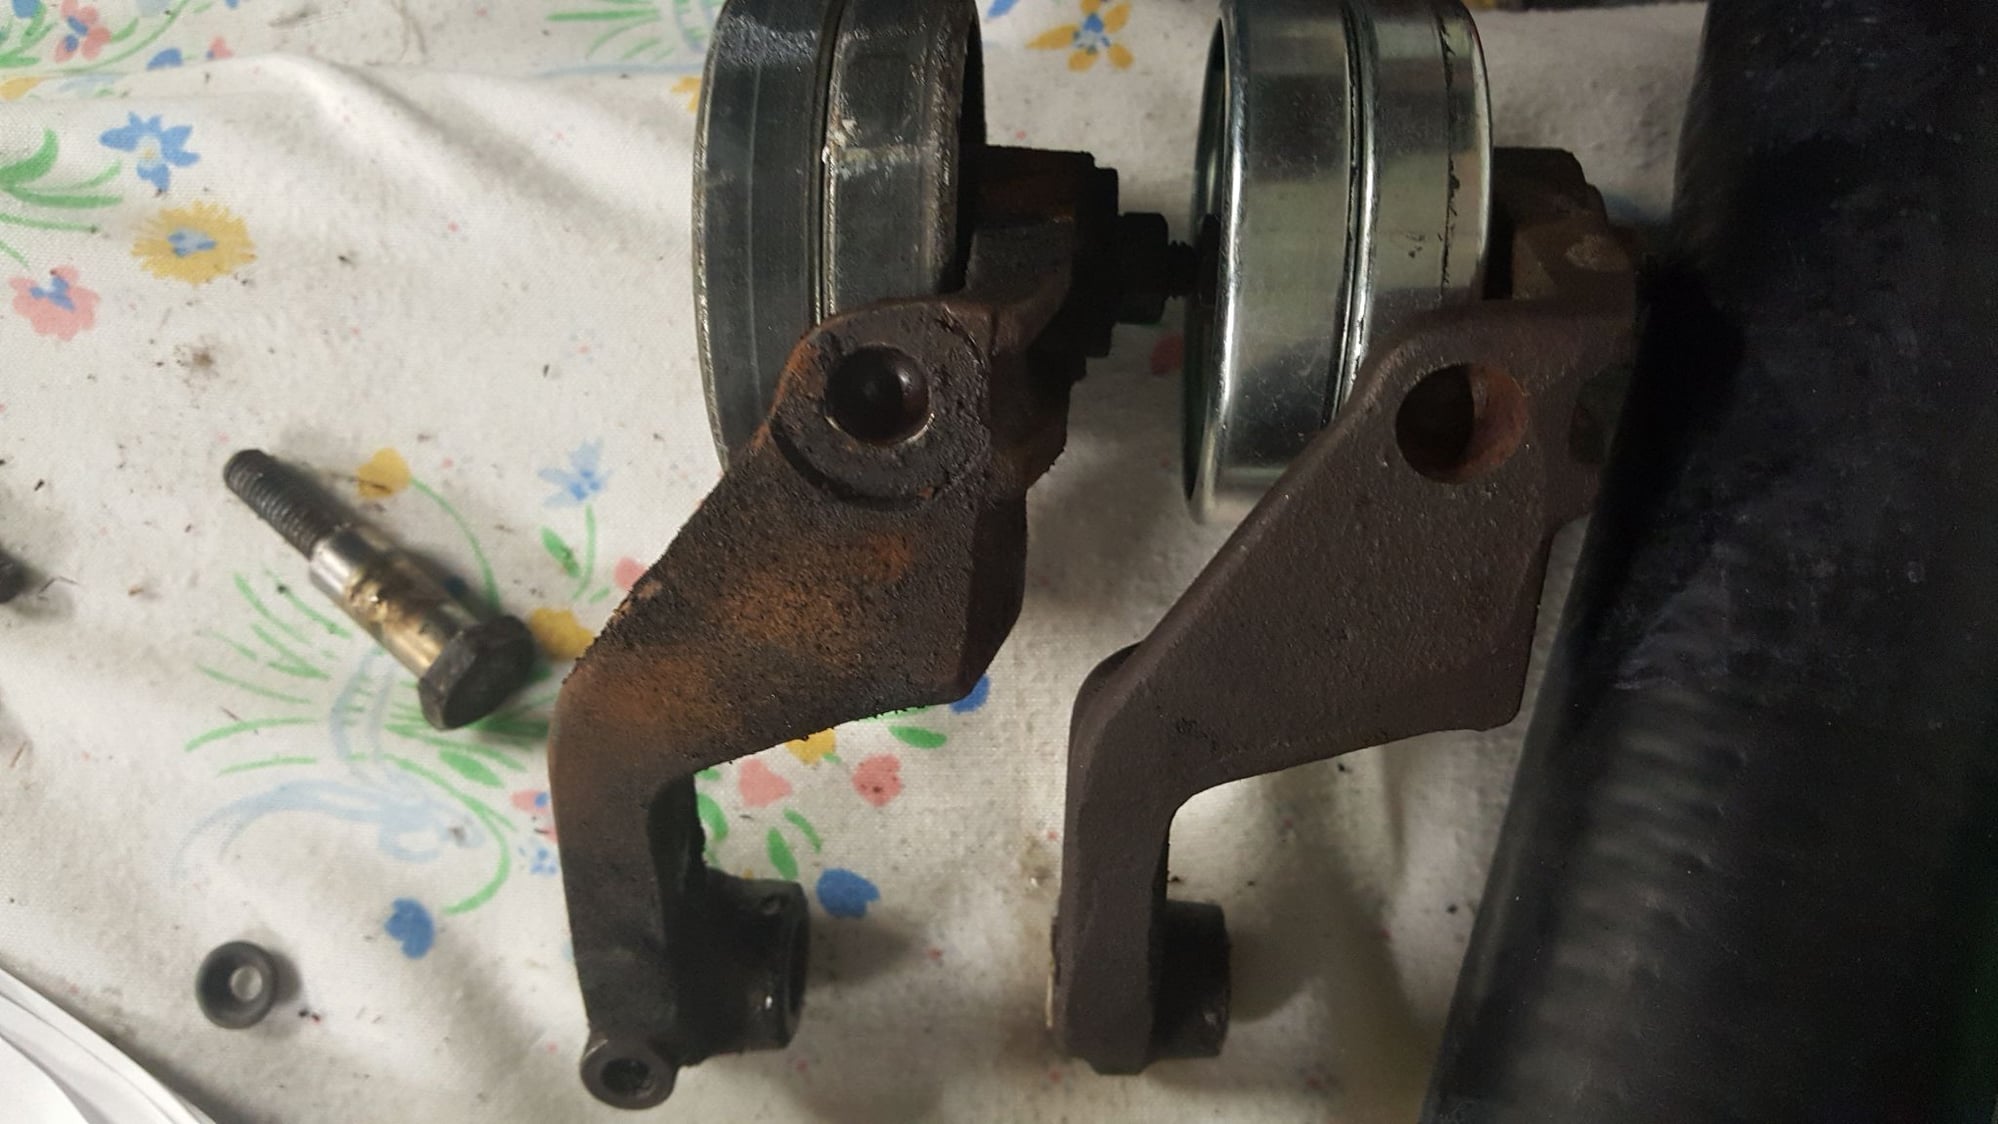
this is a bad angle but in reality the only difference appears to be the hole for the pivot bolt. The newer one is on the left. It has the hole for the bigger bolt and bushings. Everything else seems the same
this is a bad angle but in reality the only difference appears to be the hole for the pivot bolt. The newer one is on the left. It has the hole for the bigger bolt and bushings. Everything else seems the same
Yes, there was an updated arm for the larger OD pivot bolt. The threads are the same size on the pivot bolt...so it's not any stronger in terms of shear. However, the larger diameter and larger bushings, add some stability.
I used to do this update whenever I was doing a belt/tensioner rebuild on the small diameter pivot pin models.
Just make sure all the offsets are the same on both arms, as there was a later version with different offsets. Somewhere in 1983 or 1984, the tensioner offset and the arm offset were changed to improve the angle to the roller and reduce twist on the arm.
Porsche made several changes until they arrived at the double sheer version in 1987, which was virtually indestructible and unchanged through the end of the 928 model run.
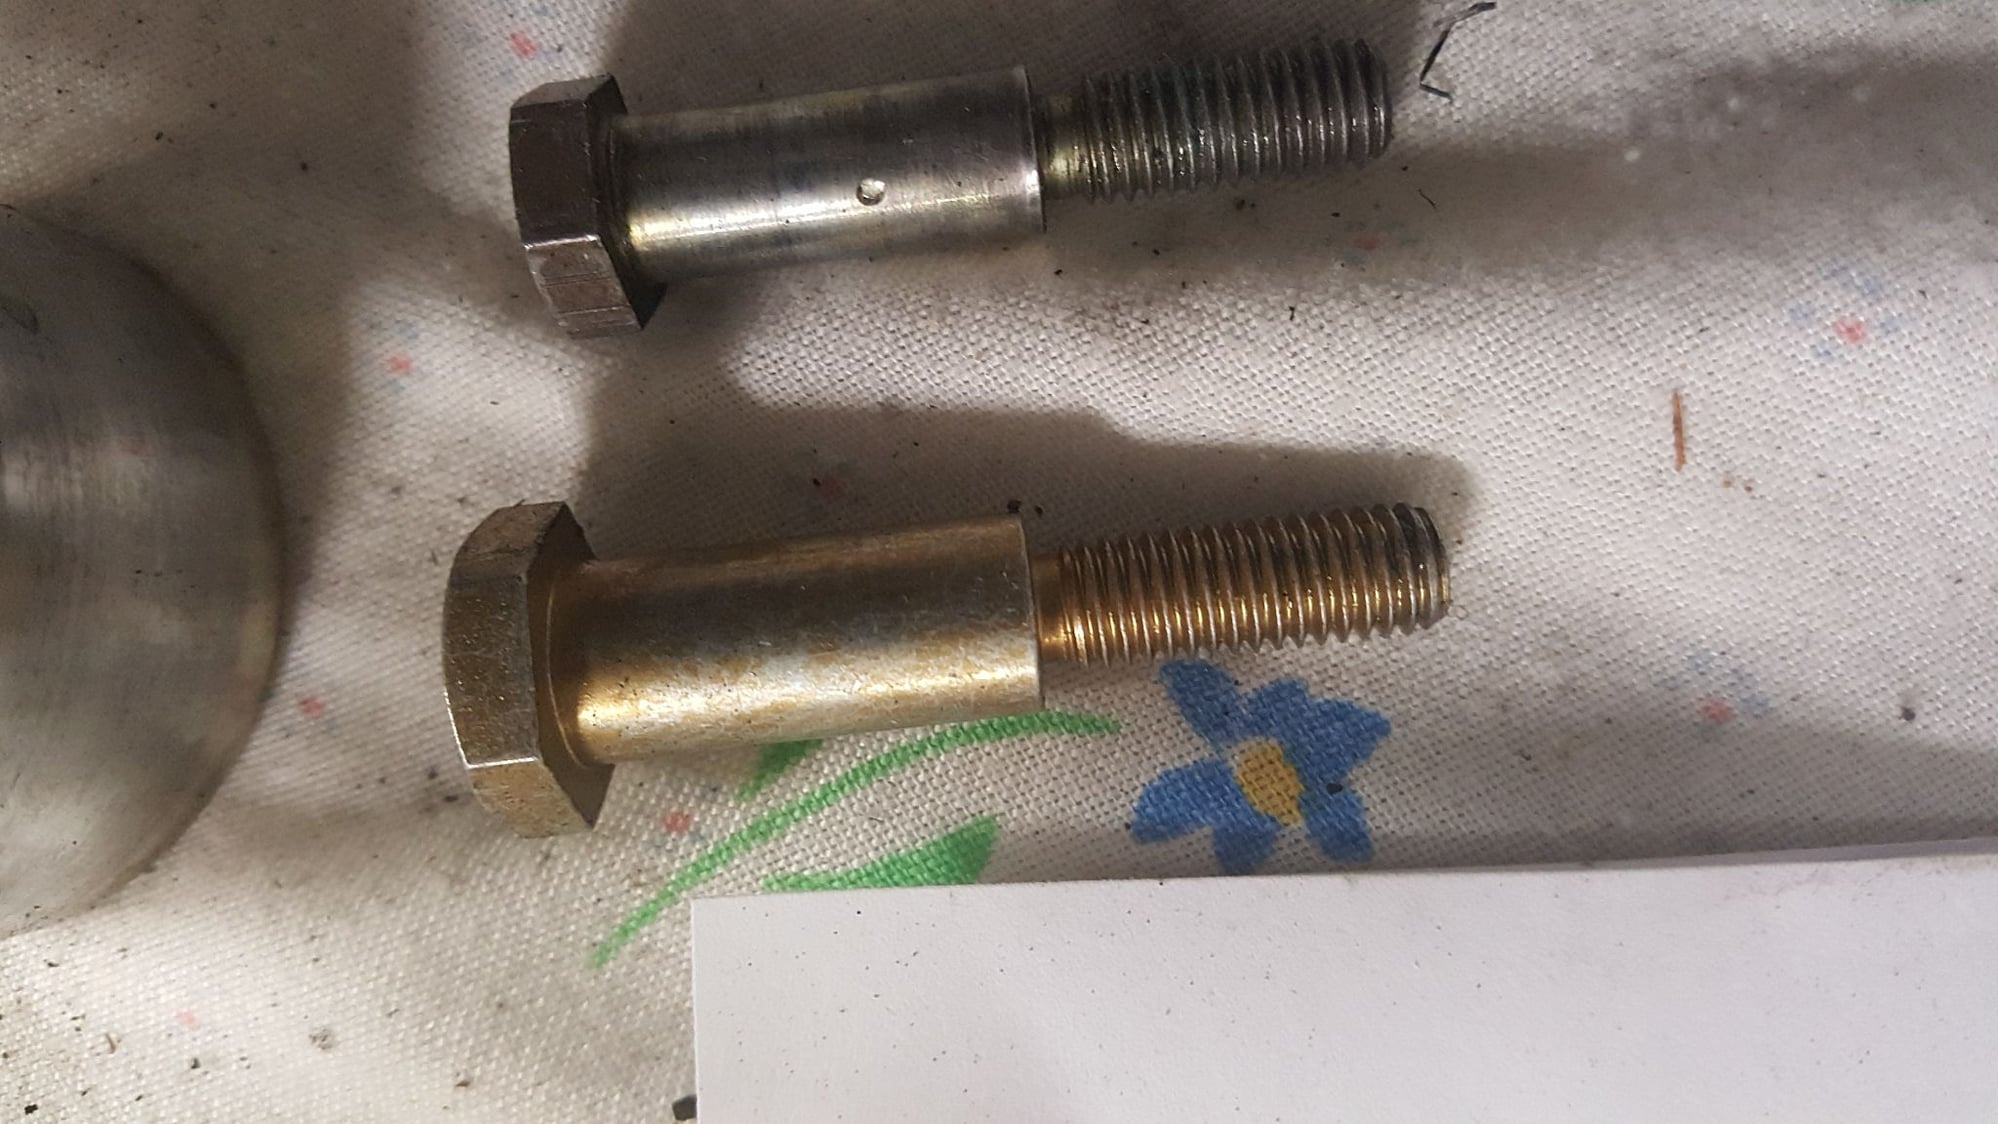
Thanks everyone for all the help. Here is a couple of pictures to round out the post. I took multiple measurements and the angles and spacing are the same. Last photo compares the pivot bolts. I am going to switch over my new roller to the 83 arm and use the larger pivot bolt.
this is the nice aluminum adapter that Greg Brown makes to update the early tensioner to the larger boot since the original boot is NLA. As you can see, I did manage to remove it after being pressed in place. It is a very tight fit and has a thin o ring that sits up at the rim. I will be using JB weld epoxy to a fix it into position. I believe a combination of the other ring and the epoxy will limit any oil migration underneath the adapter.
this is the nice aluminum adapter that Greg Brown makes to update the early tensioner to the larger boot since the original boot is NLA. As you can see, I did manage to remove it after being pressed in place. It is a very tight fit and has a thin o ring that sits up at the rim. I will be using JB weld epoxy to a fix it into position. I believe a combination of the other ring and the epoxy will limit any oil migration underneath the adapter.
Simply file off the high spots on the tensioner housing casting and my adapter will slide right on.
The O-ring I provide is not really necessary, if you get a good coating (and good coverage) of JB Weld (the exoxy I use). It's there only to help the sealing process....double sure.
Hope this works for you, this time! I've been making these, for many years....over a hundred in service.... and they have worked very well.
Thanks for making these, Greg and thanks for the great service. I am sure it will be perfect once I follow the steps. I will post some pics later on to help those who may be doing the same job in the future
Just to put a period at the end of the sentence....
I carefully filed the casting lines from the end of my tensioner and used some emery cloth to scuff up both the end of the tensioner and the inside of the adapter ring. Final fit remained snug. I skipped the o ring as it was getting deformed on installation.
I used two part JB weld and applied liberally to both surfaces. I fit the adapter and spaced it forward a hair to allow the front timing cover to fit between the adapter and the tensioner body lip.
End result? No leaks. It is installed and in service without an issue! Unfortunately my phone died so no final pics. Second time is a charm!
The later 83 pivot arm and pivot pin fit great and worked perfectly.

 02-14-2017, 08:31 PM