

1983 928S
 02-02-2017, 06:59 PM
#121
Burning Brakes
Thread Starter
I started tearing out the interior for HVAC overhaul and LED conversion on the pod.
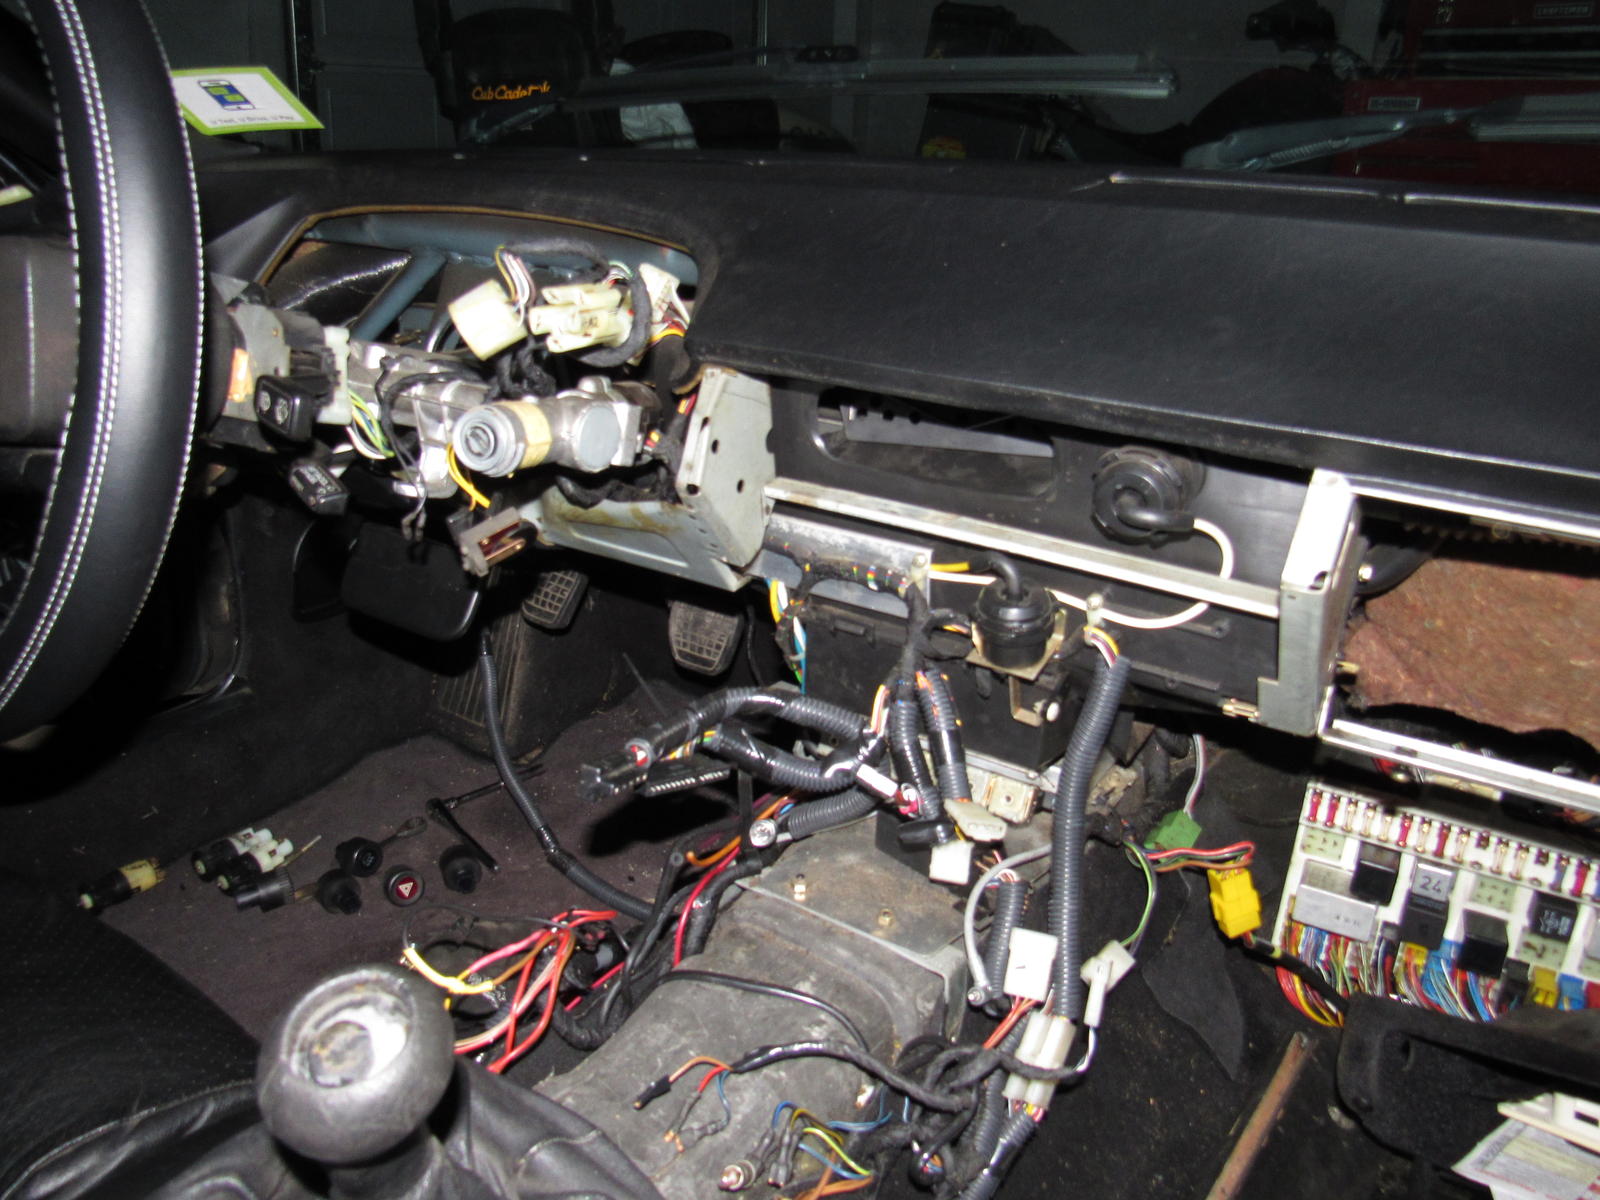
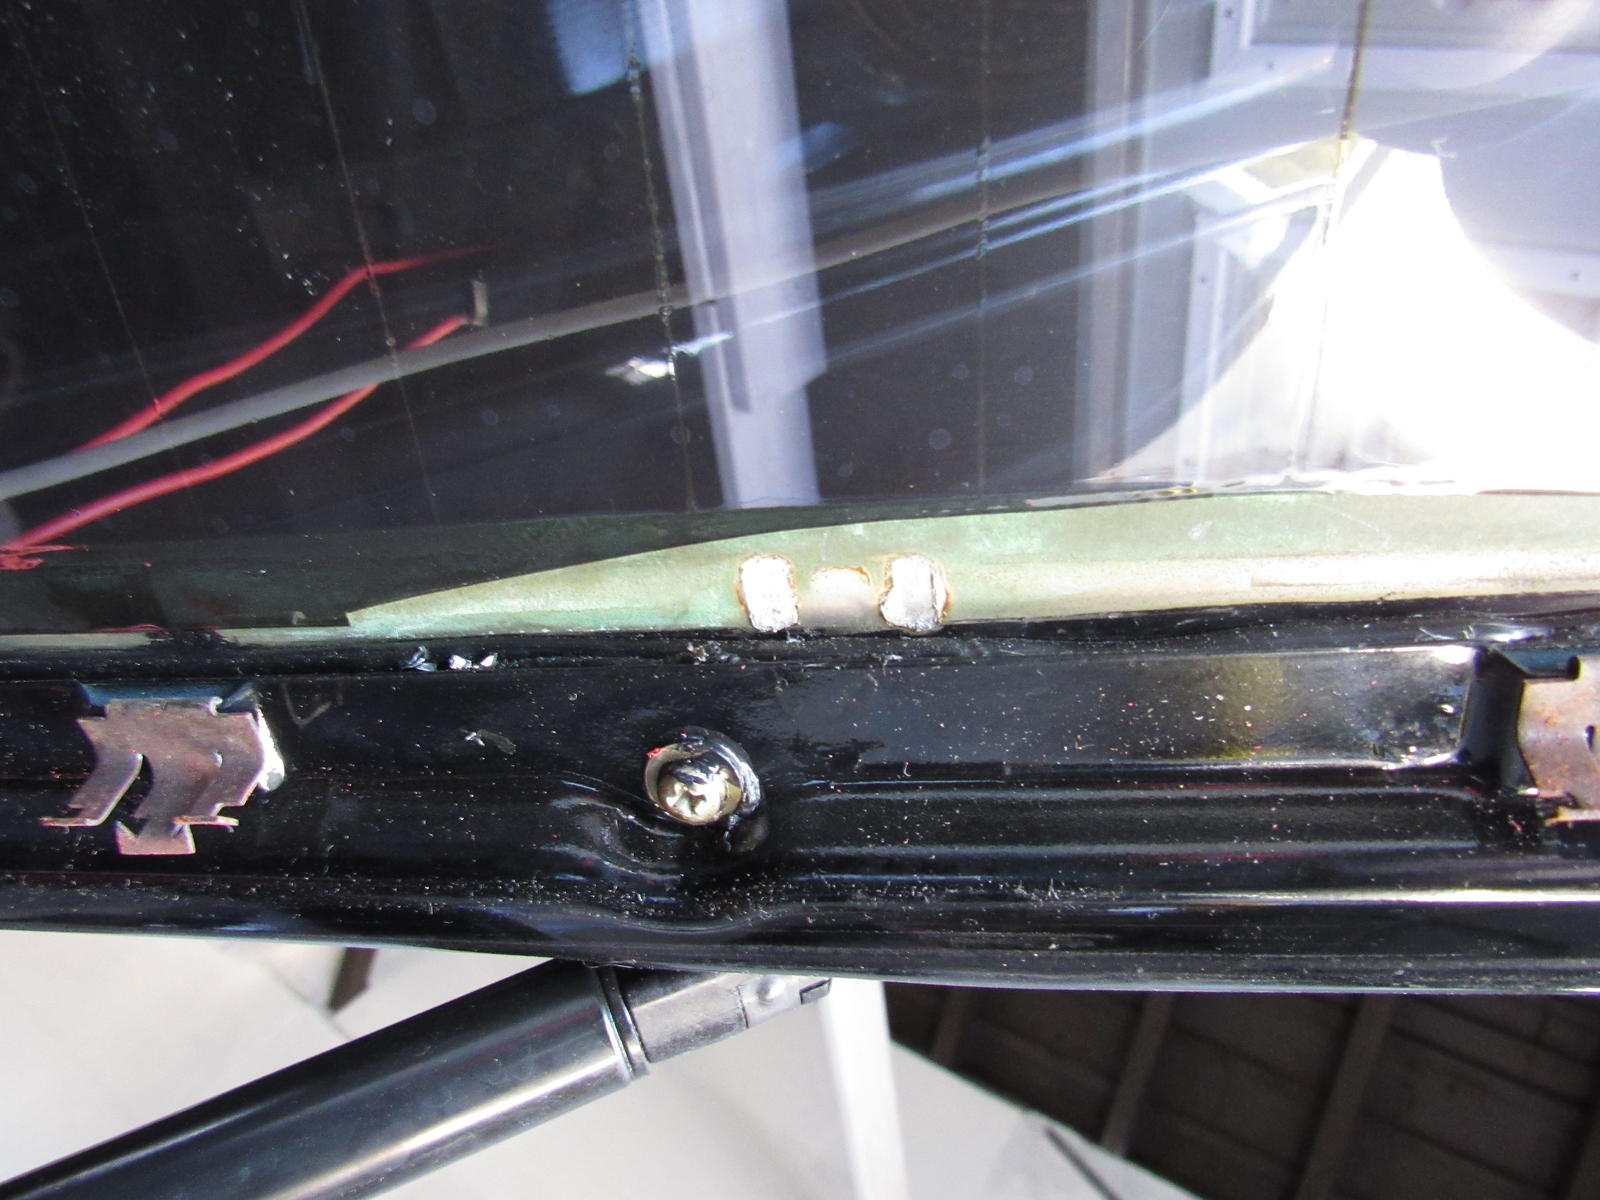
First question, there is a flap behind the center flap of the console (see above) that does not attach to anything on the left side (see below). The right is attached to the arm of the vacuum pod. I reached in and could not feel an attachment point, what am I missing?
The vacuum pods that I've tested all work but I will replace the rubber diaphragms within. I will test the vacuum actuators as well. Anything else to check while I'm in here?
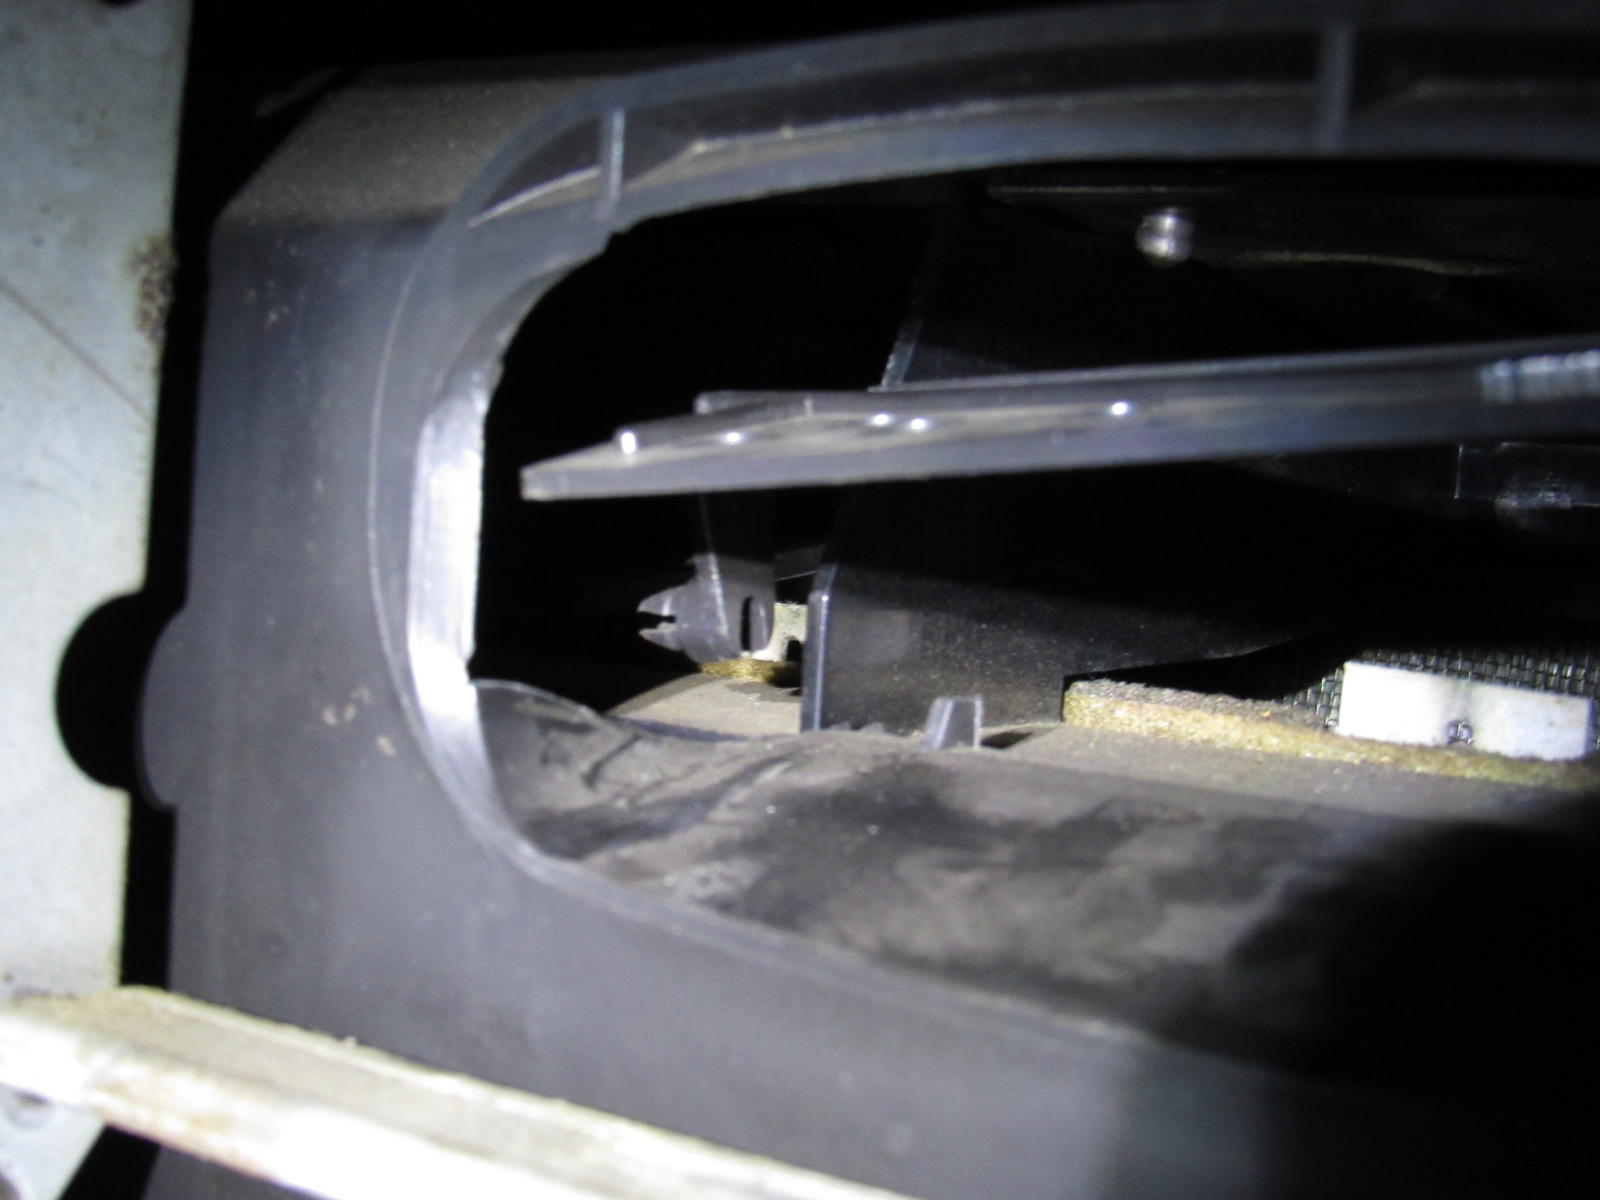
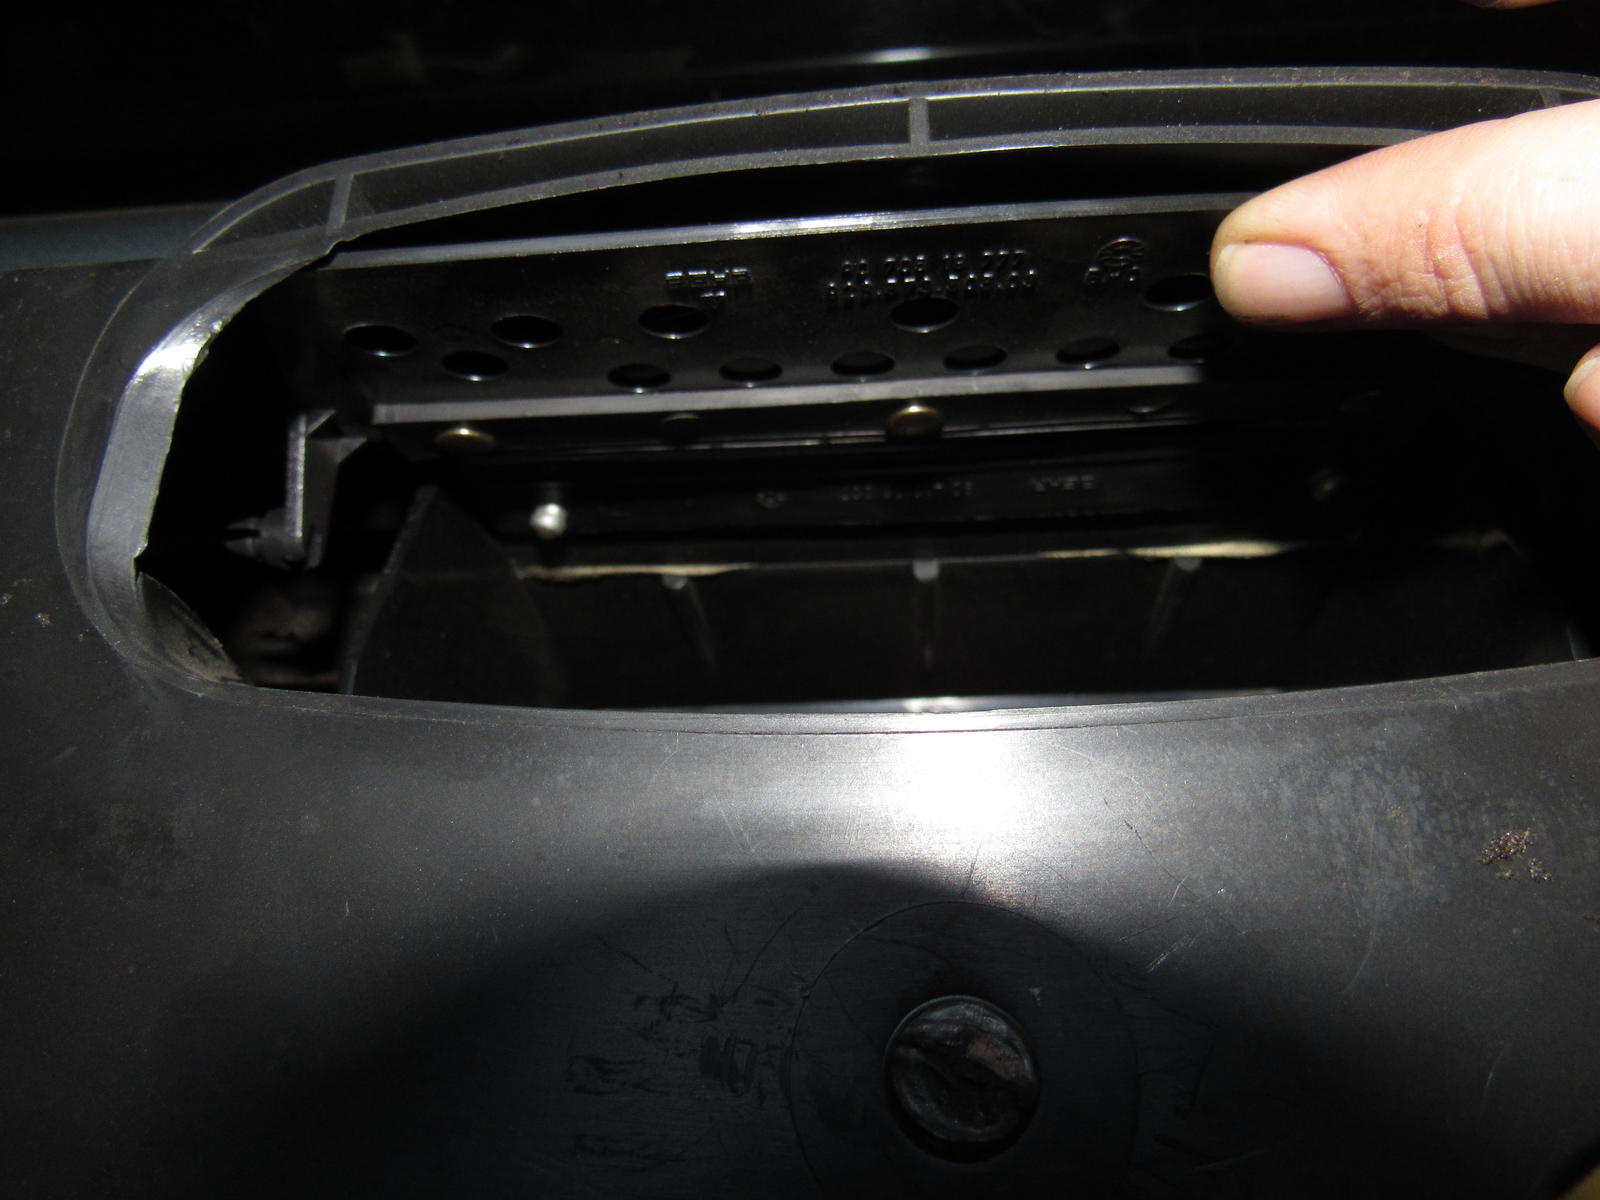
I opened up the HVAC head and wonder what parts if any are available for replacement. The black plastic gear found behind the **** is broken in two and all the mounting ears of the main brown plastic part of the head are cracked and broken. Maybe someone has a junk HVAC head that has good plastic still?
I cleaned the tracks with an eraser and let me say this is satisfying and they shine up really well. I will probably have to glue and reinforce the plastic parts as best as I can. The H trim piece of the center console seemed to be holding it in place pretty well without screws.
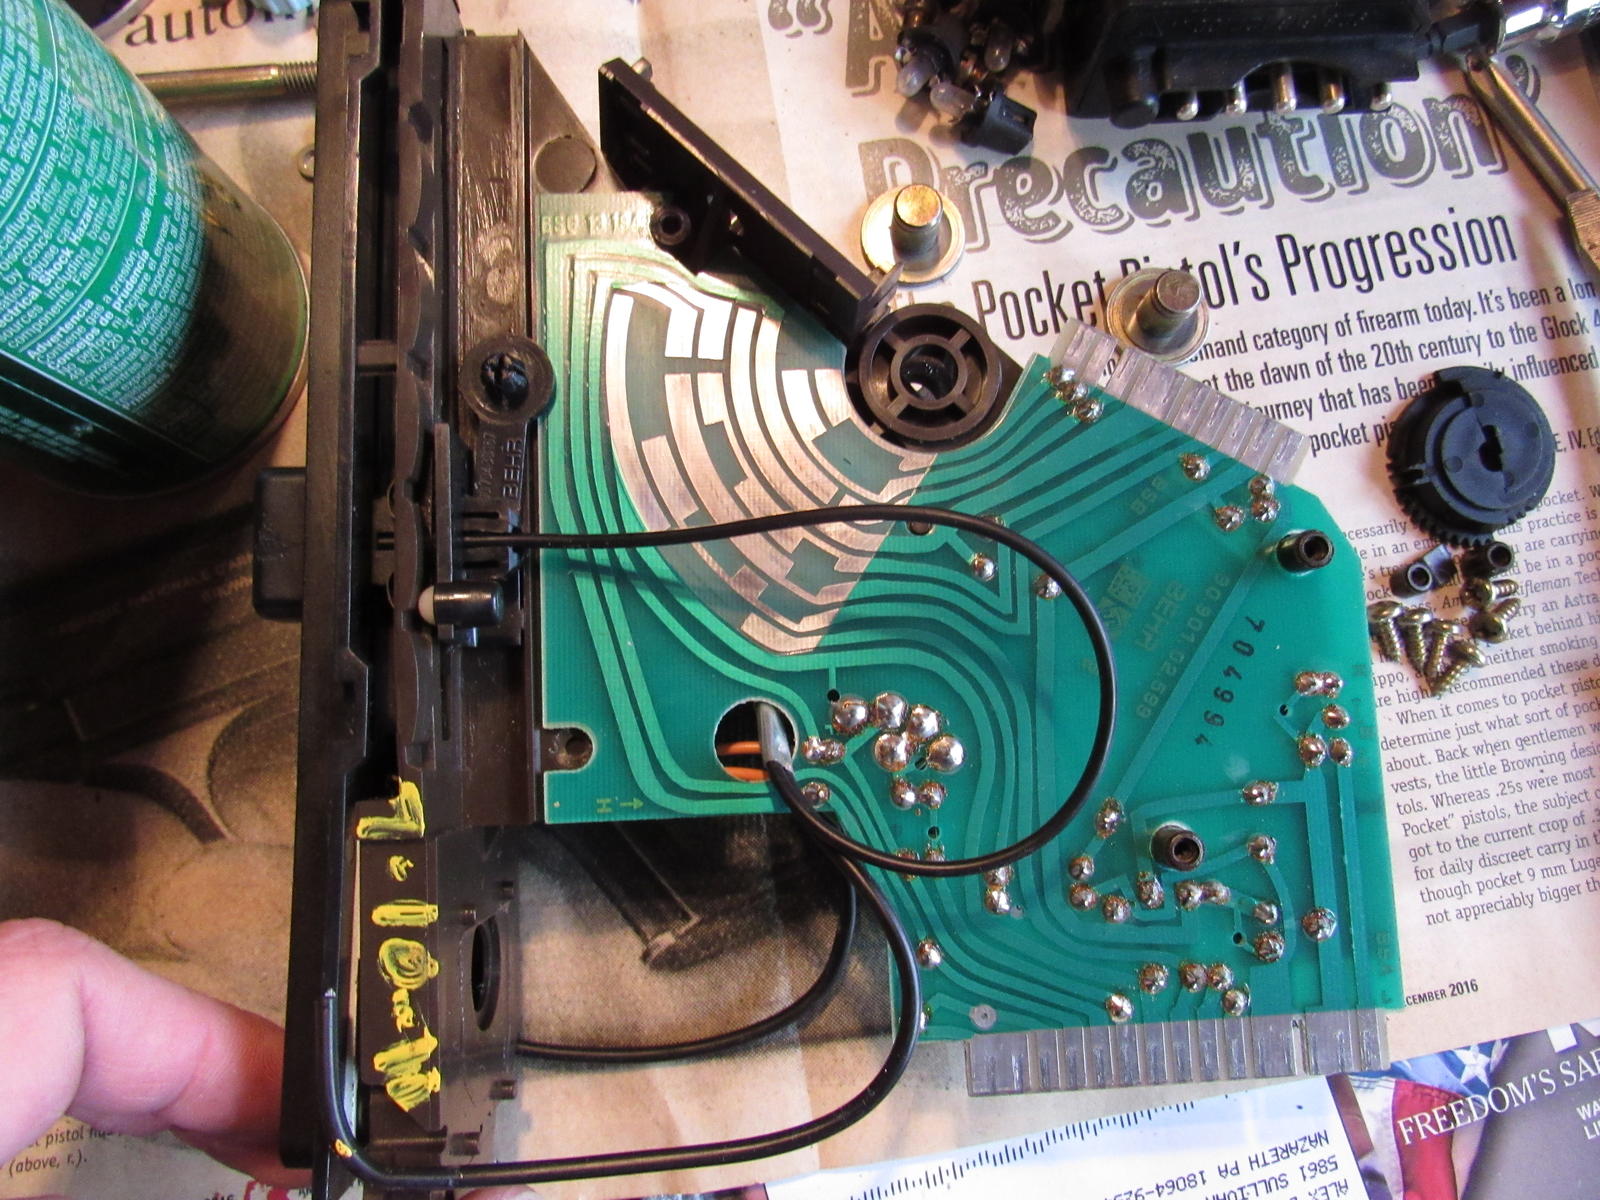
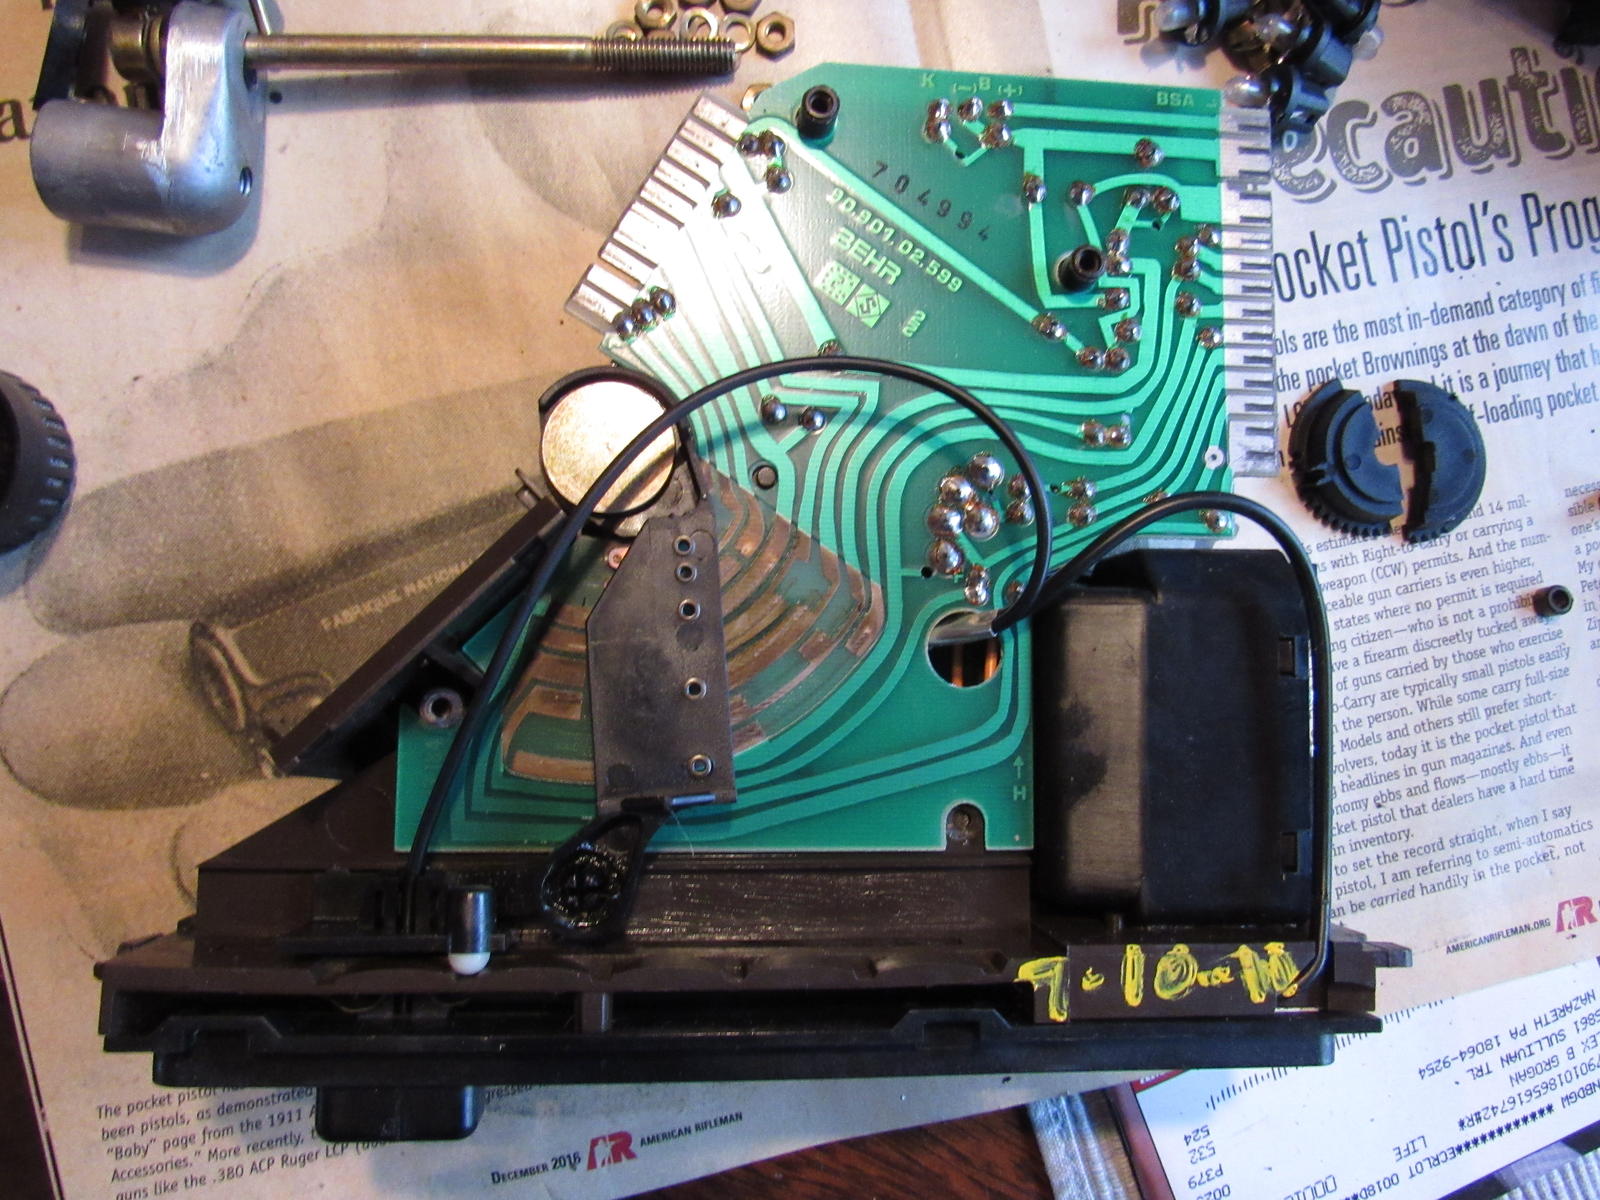
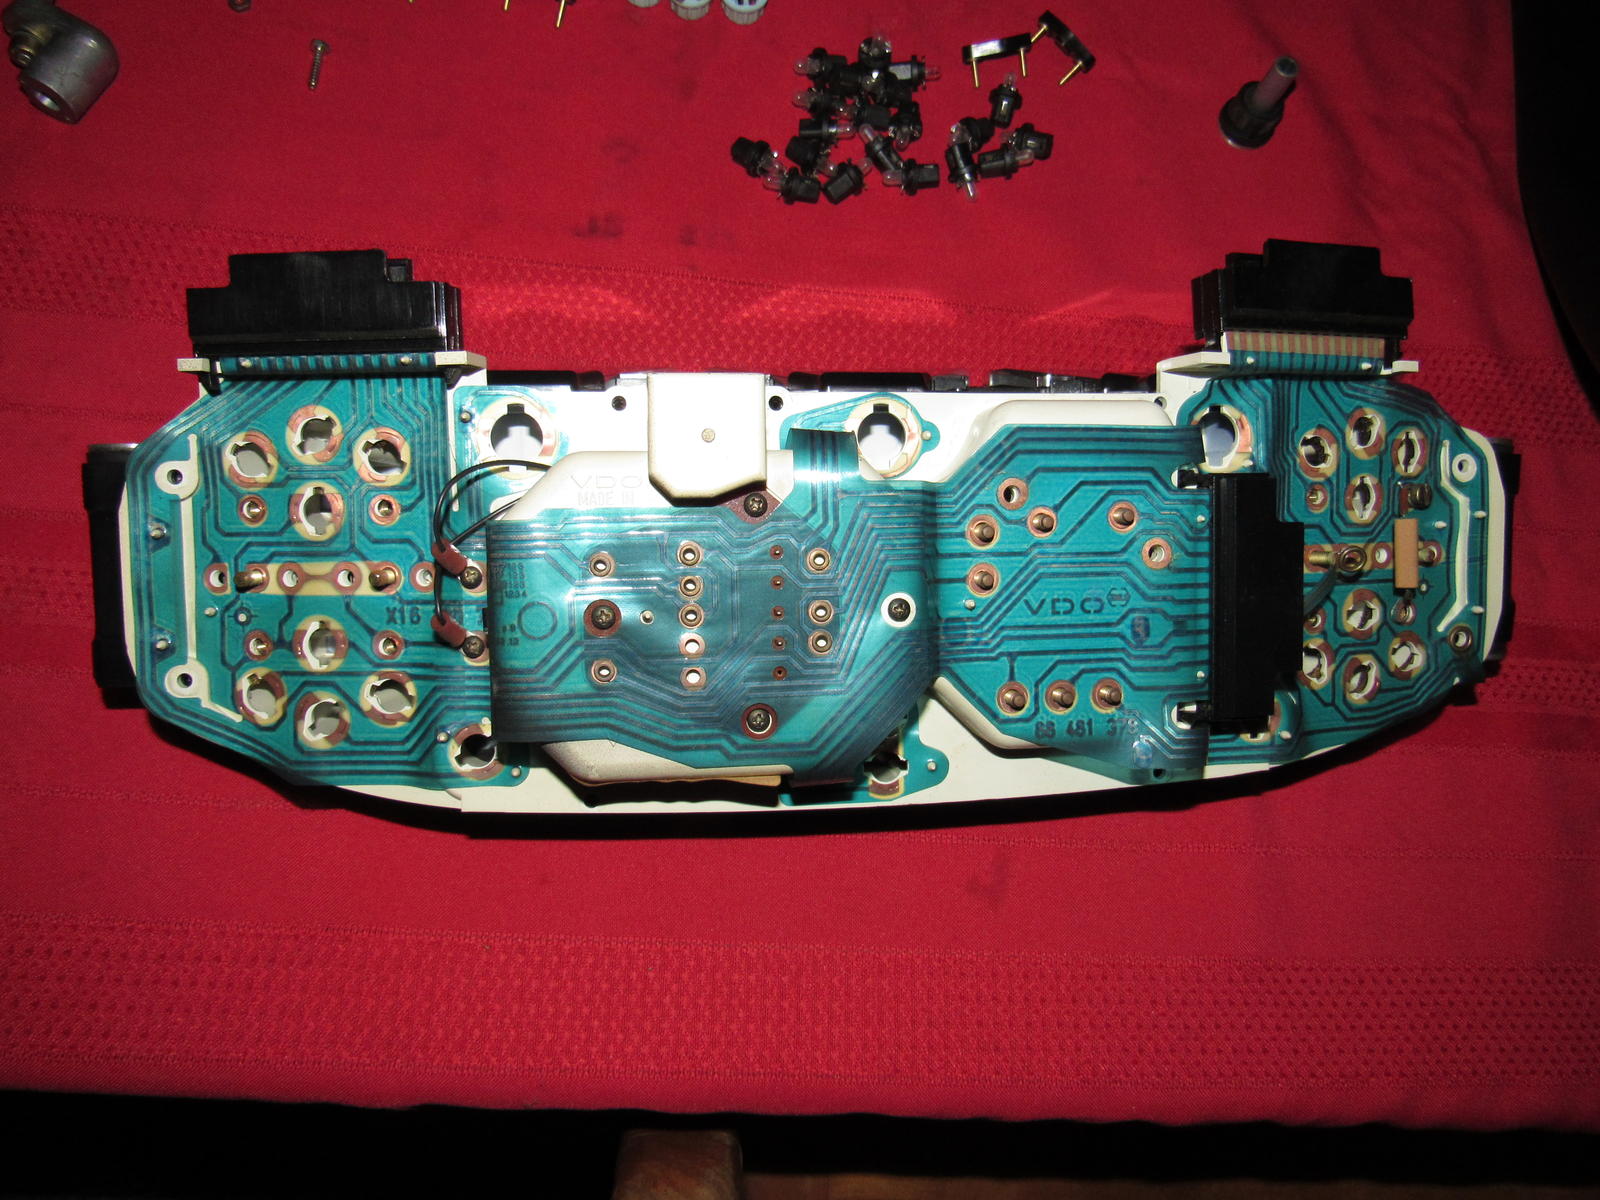
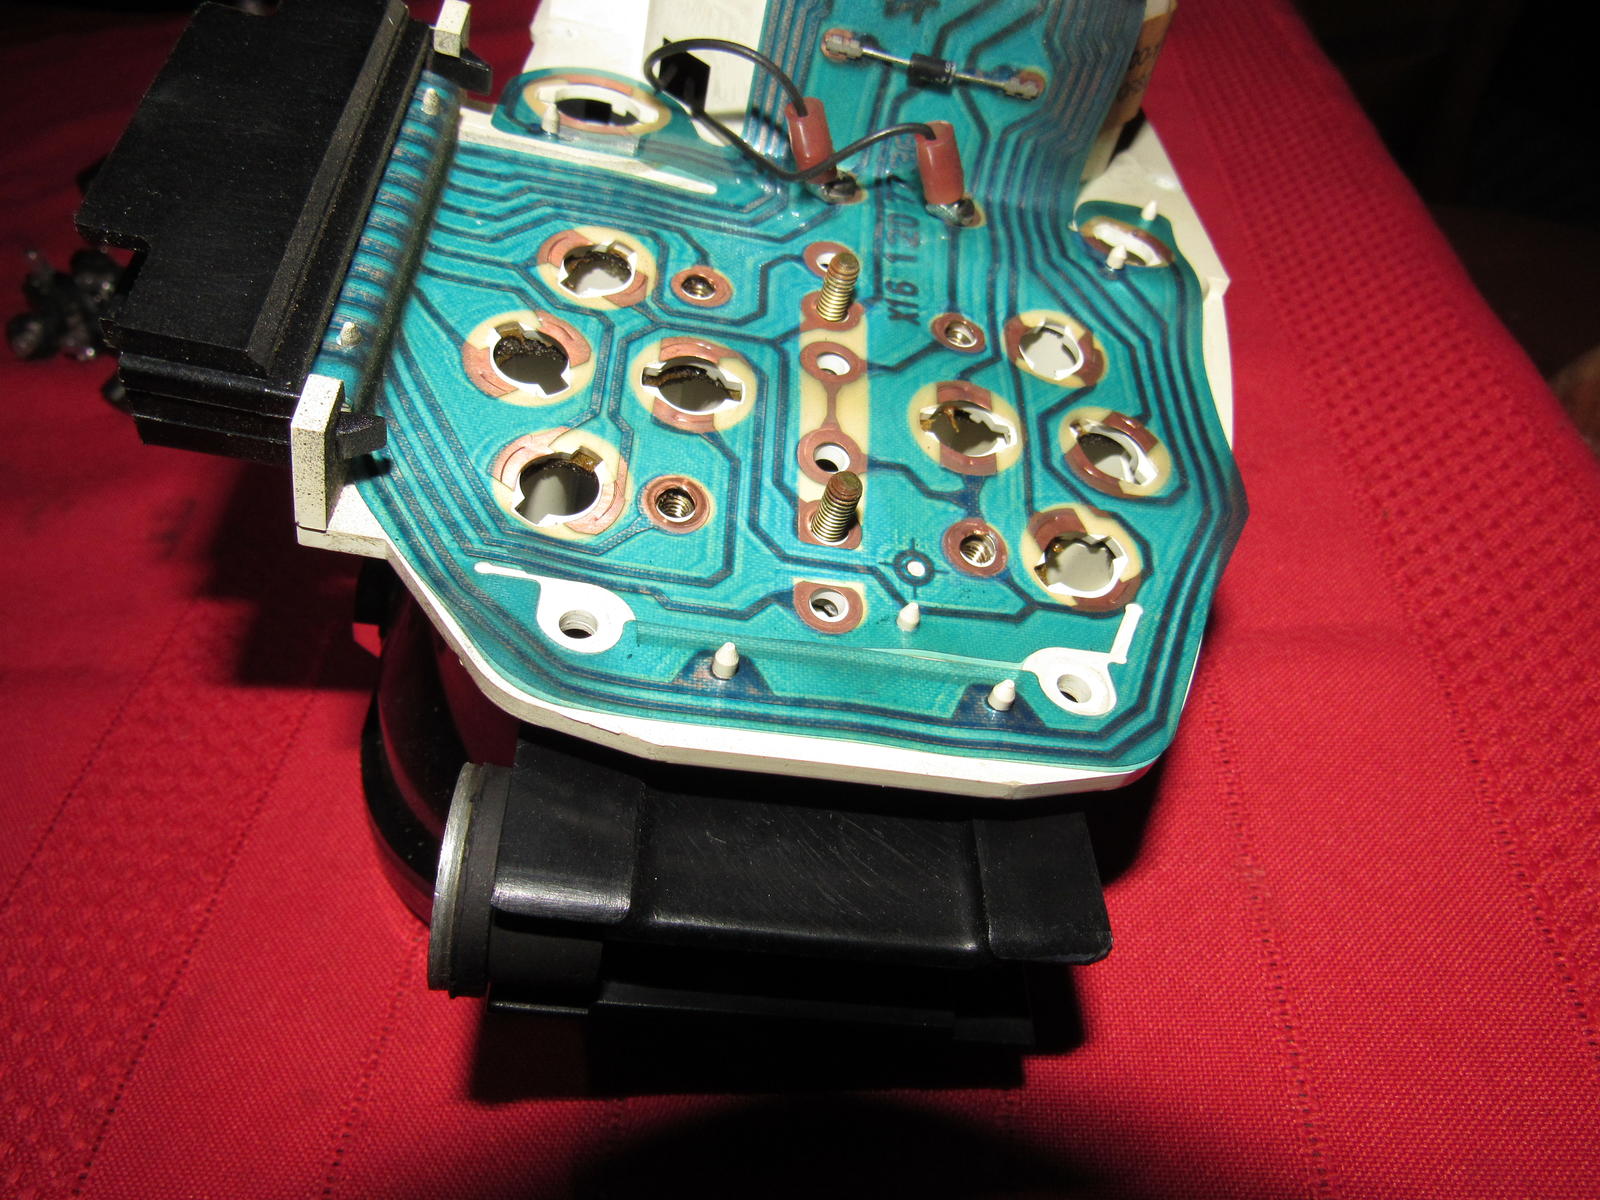
So next there is the gauge cluster. The 'circuit foil' is in good shape but I will give it a cleanup, replace the ODO gear, and change the bulbs to LEDs.
Another question, I believe the 'low voltage' warning light bulb closes the exciter circuit for the alternator, should I leave an incandescent here? There is plenty of info on LEDs for digital backlit gauges but not so much for the older ones.
First question, there is a flap behind the center flap of the console (see above) that does not attach to anything on the left side (see below). The right is attached to the arm of the vacuum pod. I reached in and could not feel an attachment point, what am I missing?
The vacuum pods that I've tested all work but I will replace the rubber diaphragms within. I will test the vacuum actuators as well. Anything else to check while I'm in here?
I opened up the HVAC head and wonder what parts if any are available for replacement. The black plastic gear found behind the **** is broken in two and all the mounting ears of the main brown plastic part of the head are cracked and broken. Maybe someone has a junk HVAC head that has good plastic still?
I cleaned the tracks with an eraser and let me say this is satisfying and they shine up really well. I will probably have to glue and reinforce the plastic parts as best as I can. The H trim piece of the center console seemed to be holding it in place pretty well without screws.
So next there is the gauge cluster. The 'circuit foil' is in good shape but I will give it a cleanup, replace the ODO gear, and change the bulbs to LEDs.
Another question, I believe the 'low voltage' warning light bulb closes the exciter circuit for the alternator, should I leave an incandescent here? There is plenty of info on LEDs for digital backlit gauges but not so much for the older ones.
 02-19-2017, 11:55 PM
#122
Burning Brakes
Thread Starter
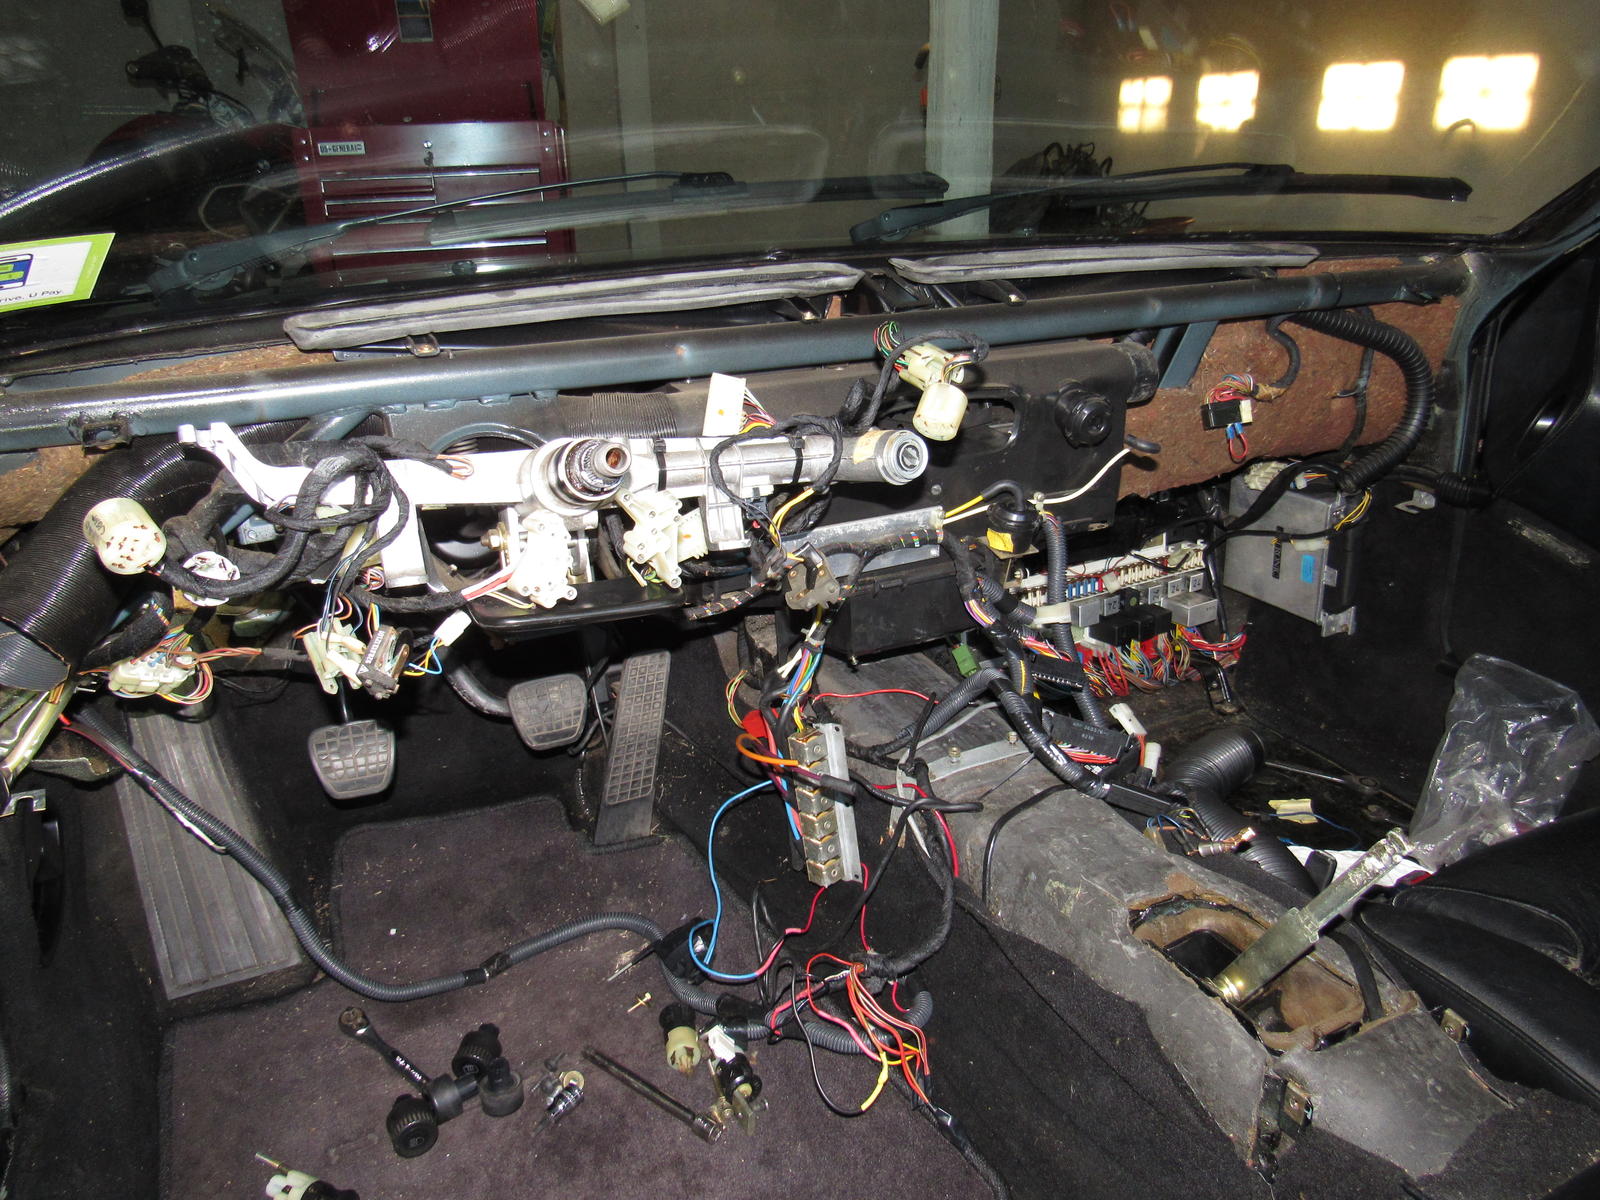
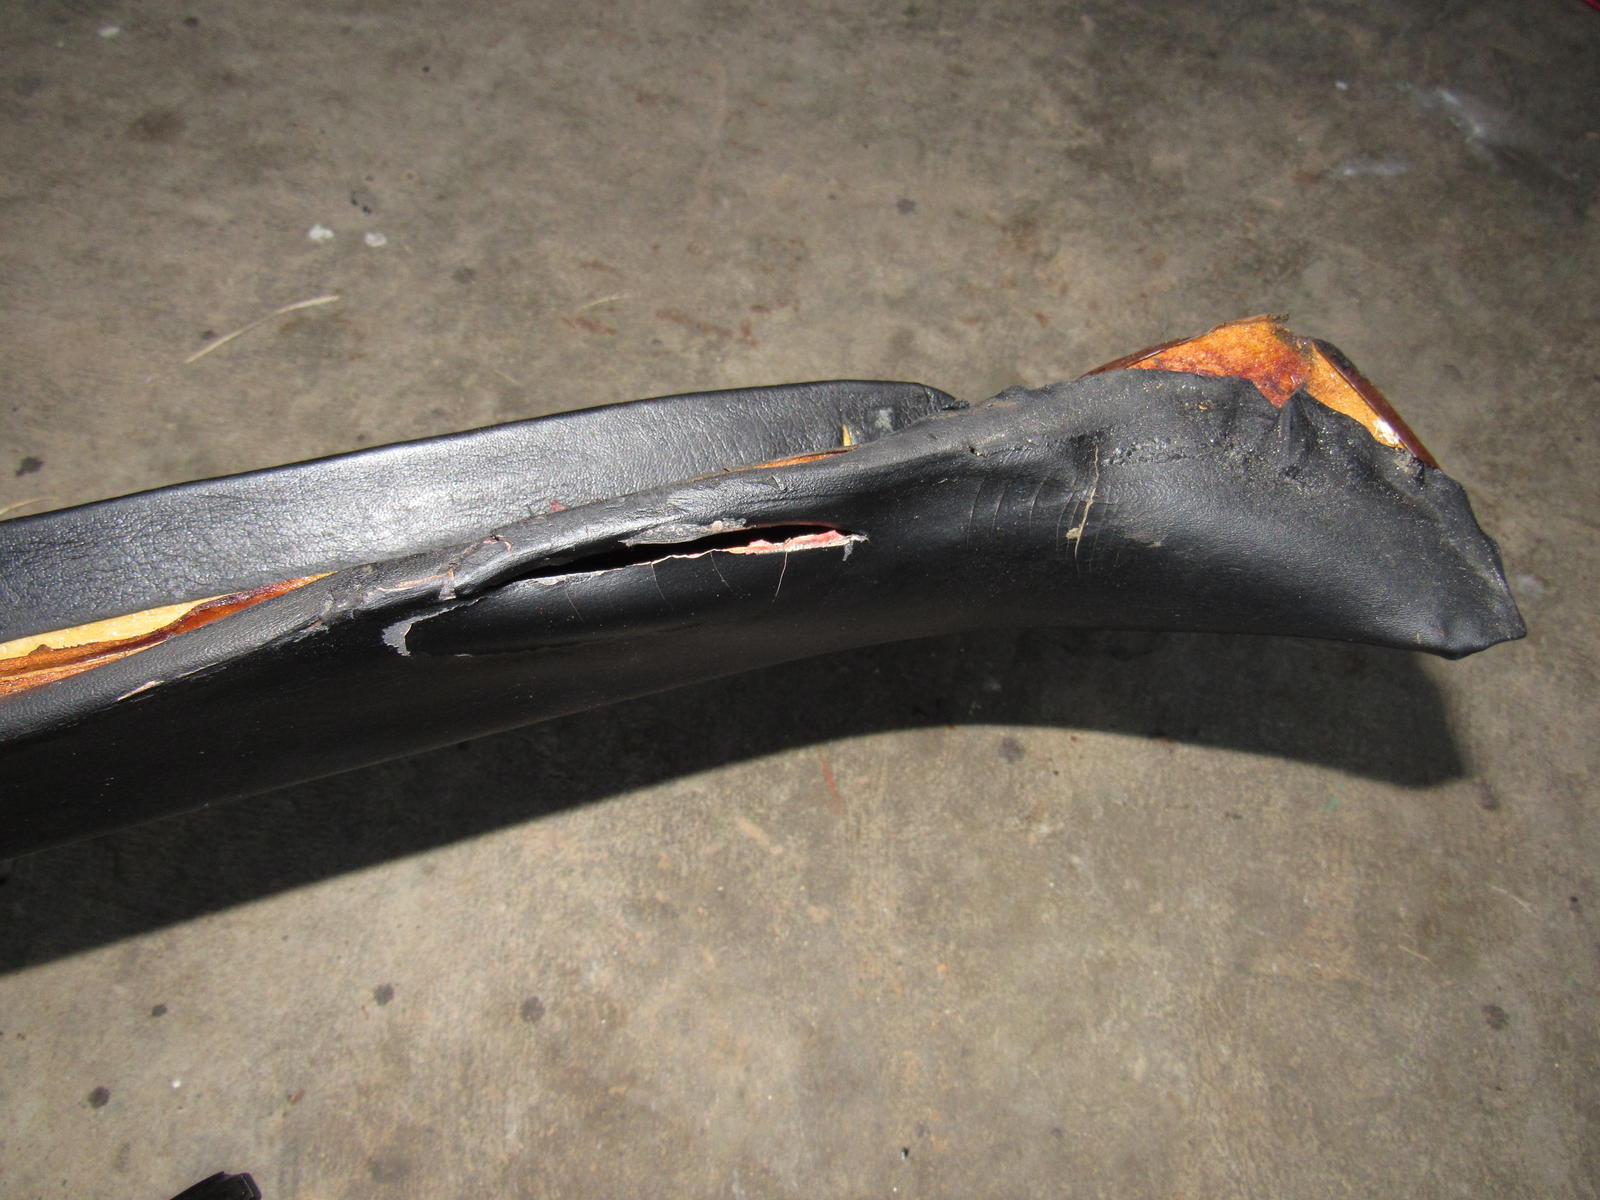
I did some further work on the interior today. I removed the dash and A pillars and am contemplating getting them wrapped in leather.
The A pillars appear to be made from an expanding foam material somewhat like 'Great Stuff' used to seal cracks around the home. Mine are pretty crispy, not sure they can be saved. Curiously the left side is leather but the right is vinyl.
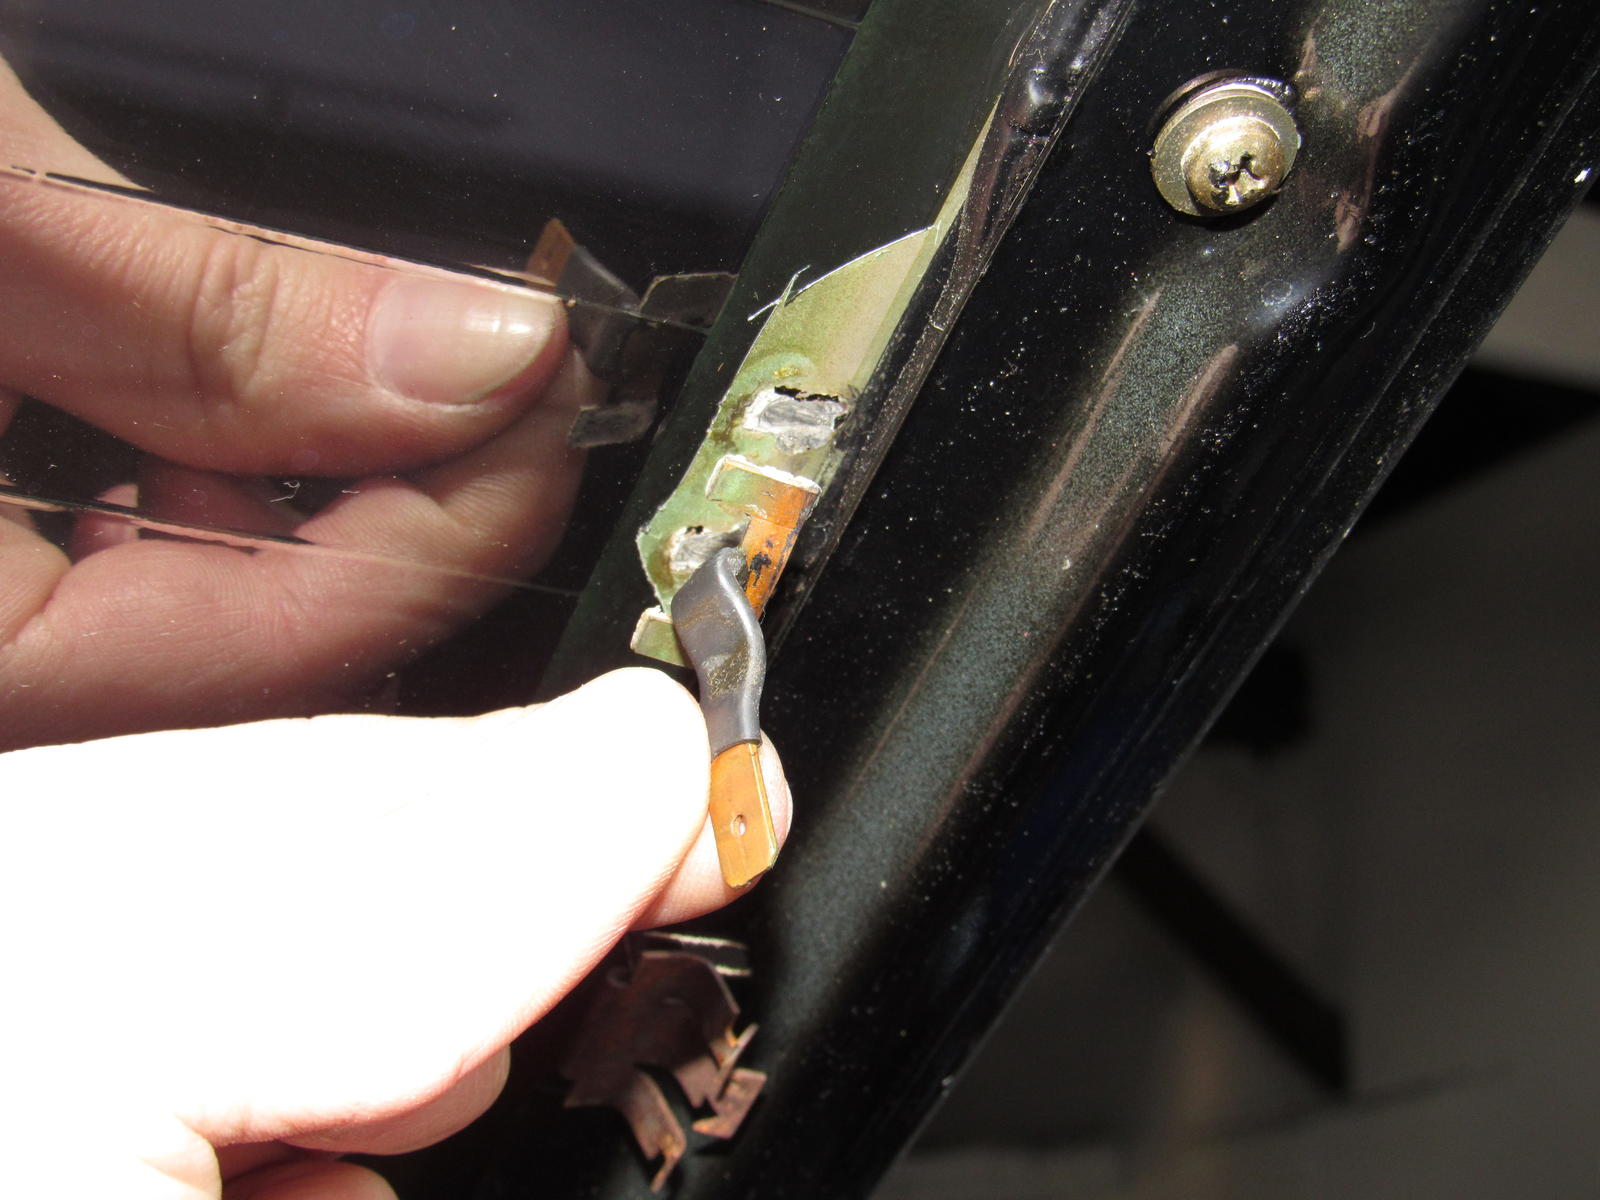
To answer my own question about the center HVAC flap. It is only attached to the vacuum pod on the right but it is symmetrical so provisions for mounting from the left means the same part is compatible with a reverse setup for RHD cars. It is hinged at the top and mine is broken.
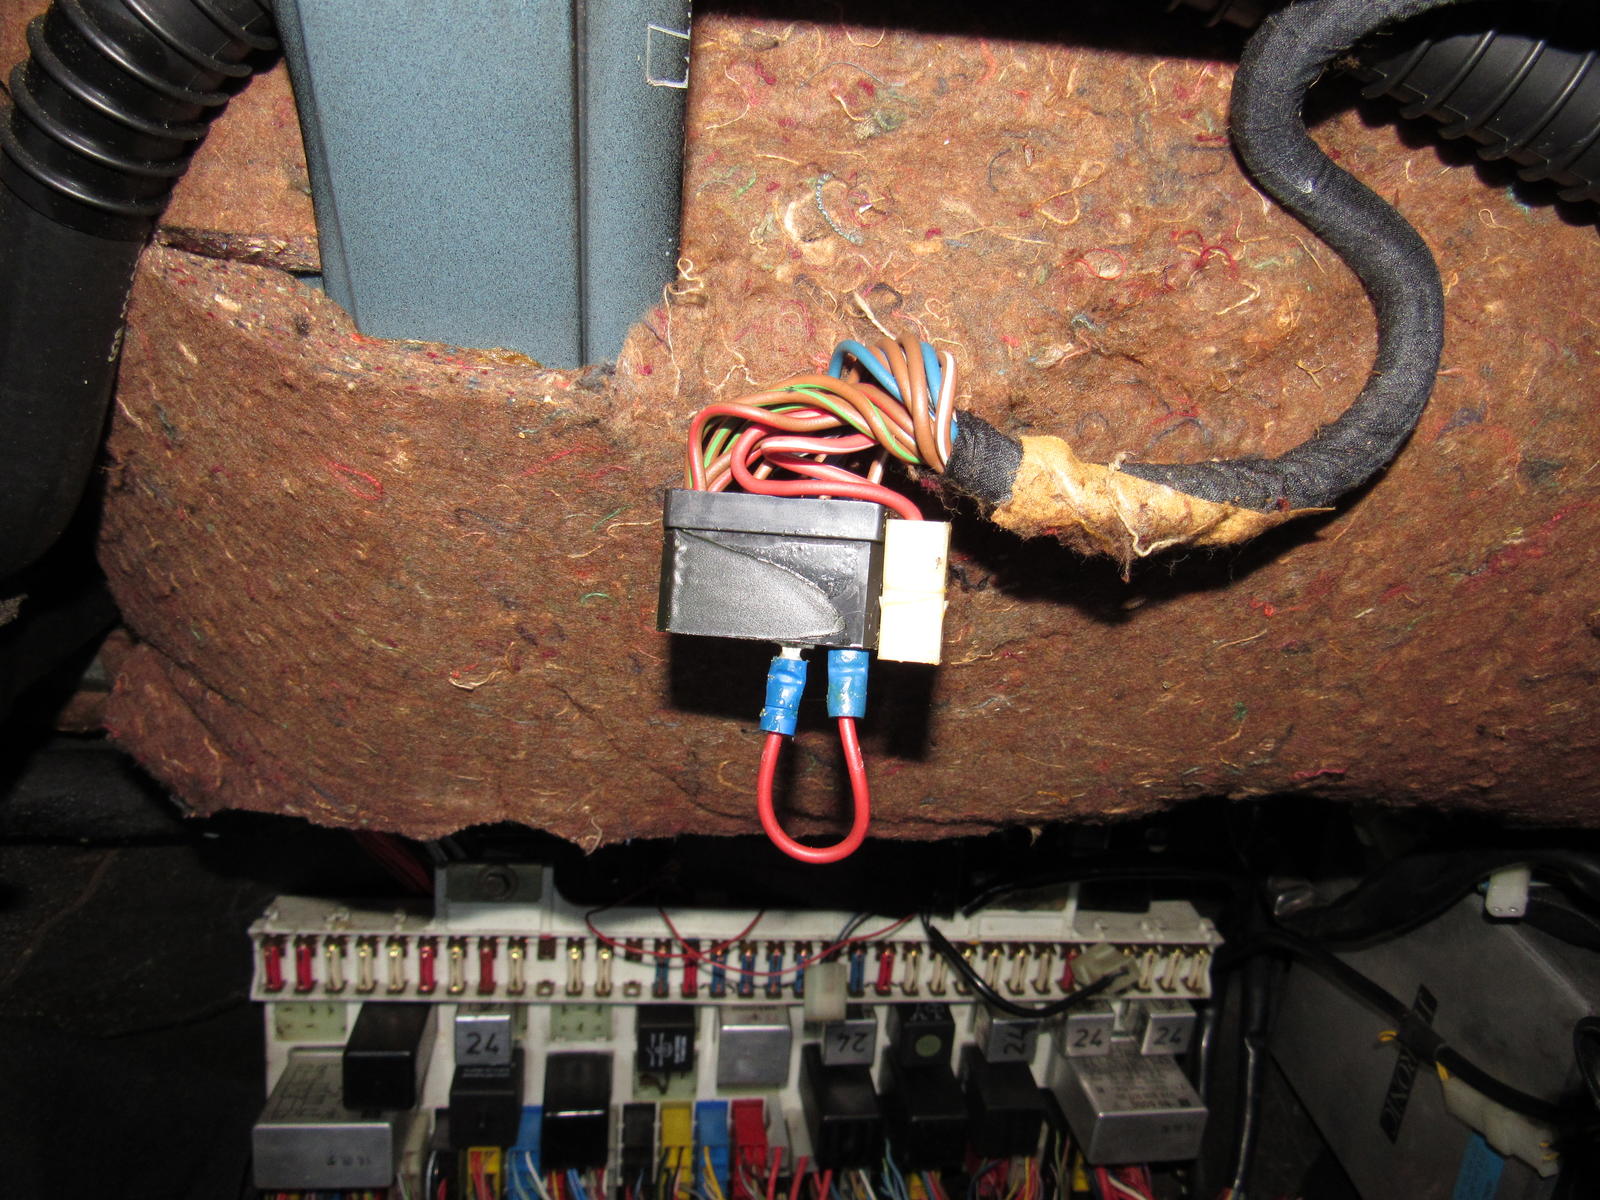
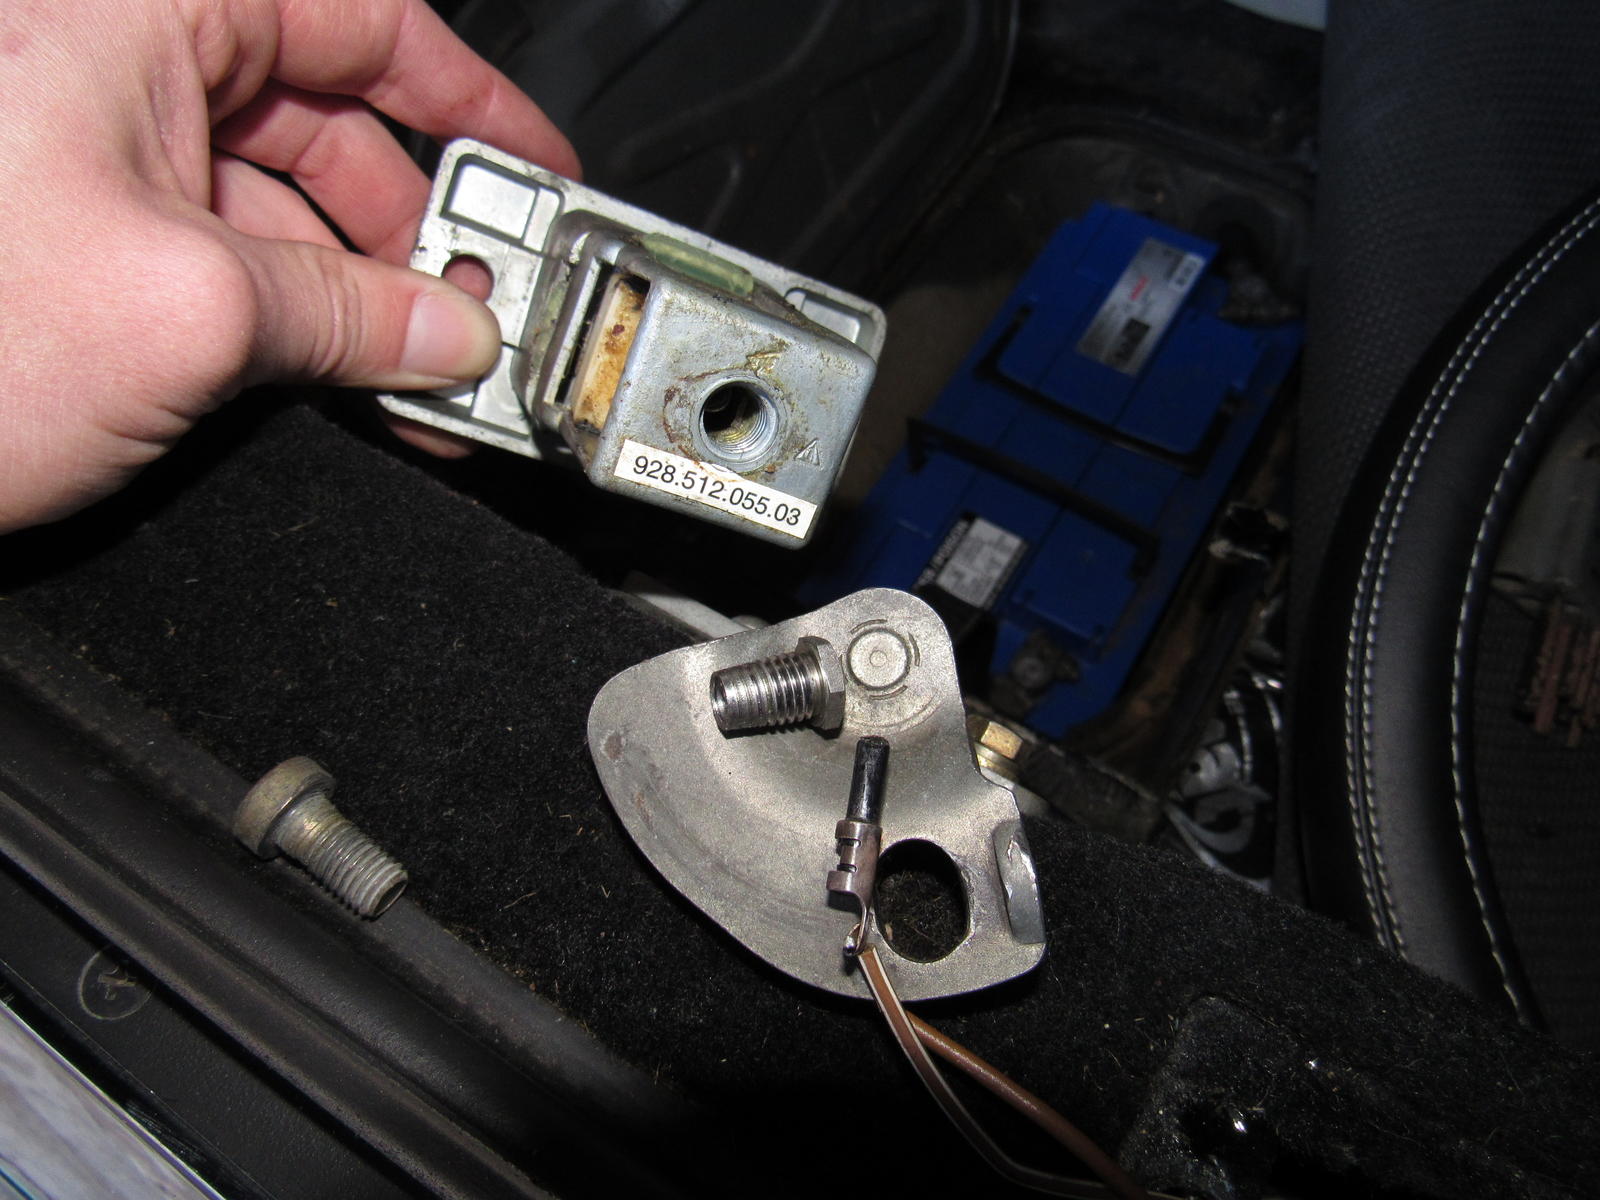
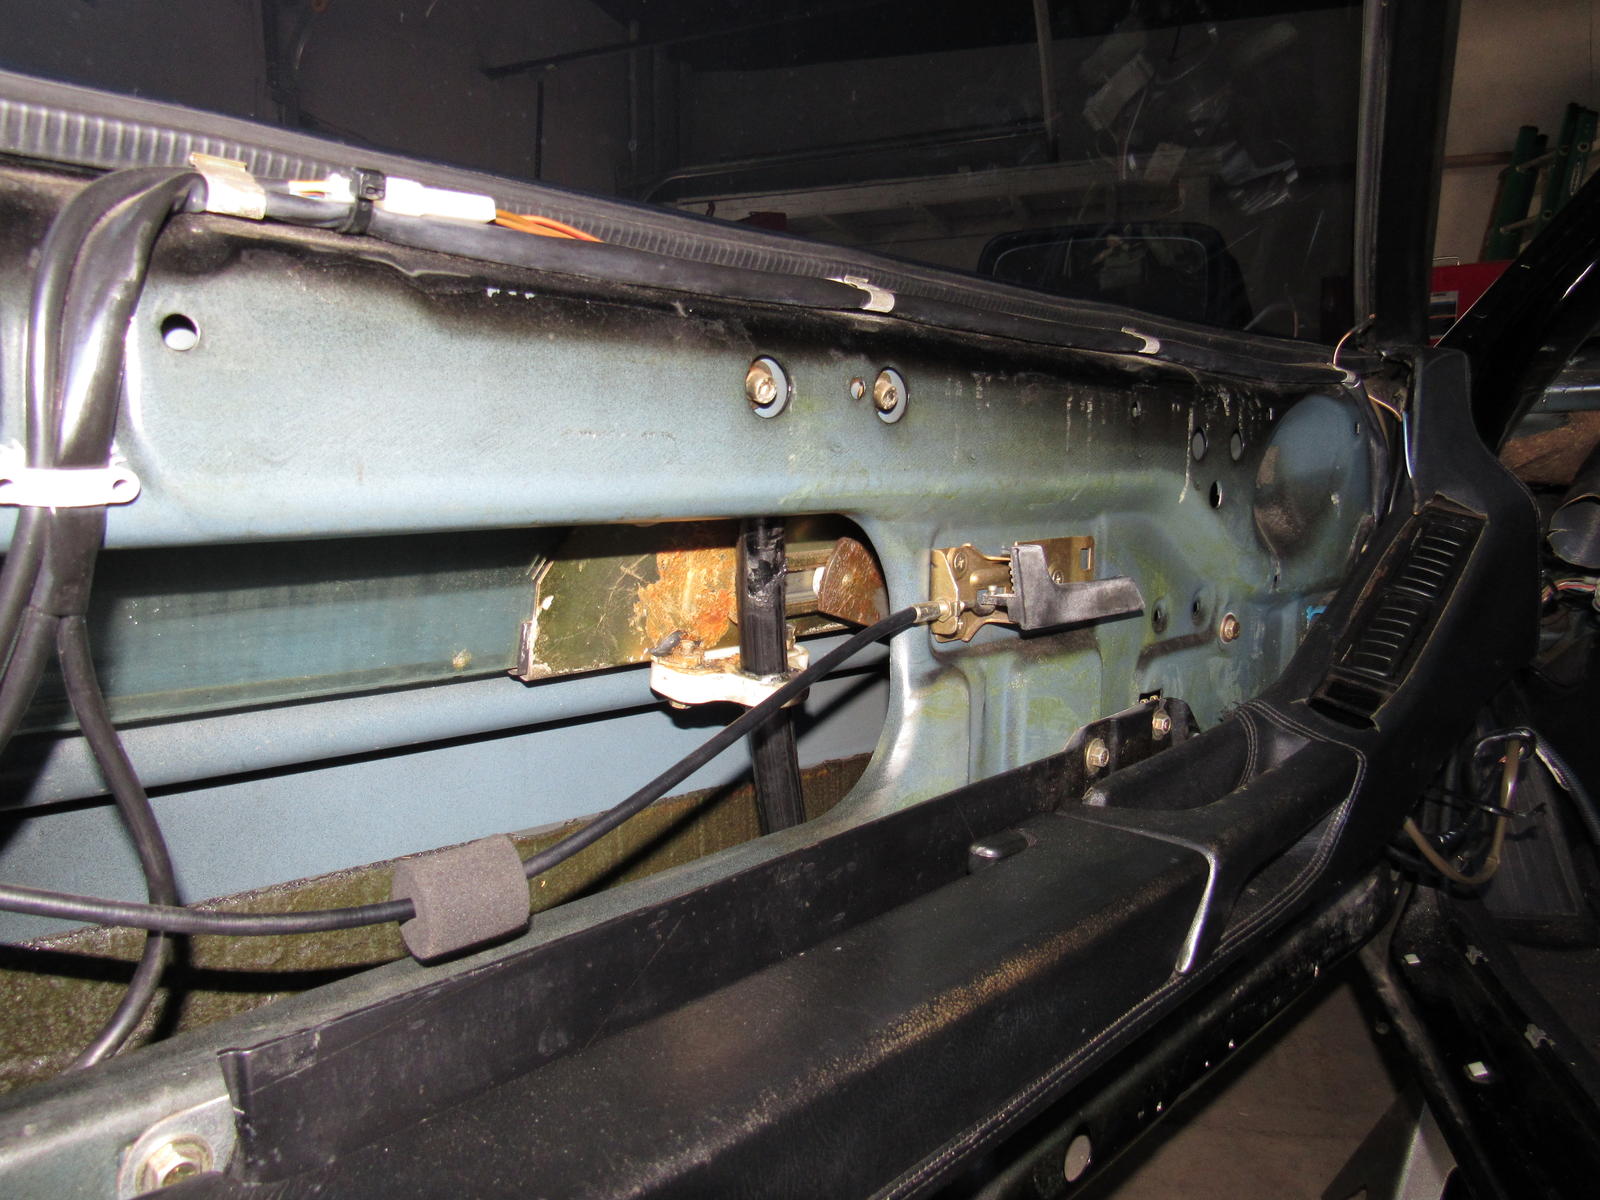
Now I found this behind the glove box. There is no corresponding connector and someone has jumped two connectors. Any ideas?
For mending broken plastic parts found on this car, what yields the strongest bond; crazy glue, epoxy, or I've even heard PVC cement might work?
The A pillars appear to be made from an expanding foam material somewhat like 'Great Stuff' used to seal cracks around the home. Mine are pretty crispy, not sure they can be saved. Curiously the left side is leather but the right is vinyl.
To answer my own question about the center HVAC flap. It is only attached to the vacuum pod on the right but it is symmetrical so provisions for mounting from the left means the same part is compatible with a reverse setup for RHD cars. It is hinged at the top and mine is broken.
Now I found this behind the glove box. There is no corresponding connector and someone has jumped two connectors. Any ideas?
For mending broken plastic parts found on this car, what yields the strongest bond; crazy glue, epoxy, or I've even heard PVC cement might work?
02-20-2017, 12:20 PM
#123
Nordschleife Master
I've had the best success with 2 part epoxy. The "long cure" stuff works better than the "5 minute".
I also prefer to glue some sort of metal reinforcement in. Depends on the situation. Plates over top, cut a groove and glue in a wire, drill holes and insert pins.
I also prefer to glue some sort of metal reinforcement in. Depends on the situation. Plates over top, cut a groove and glue in a wire, drill holes and insert pins.
03-23-2017, 06:35 PM
#124
Burning Brakes
Thread Starter
Over a month with no updates, I've been working 6-7 days a week. I took today off to catch up on things and mess with the car a bit.
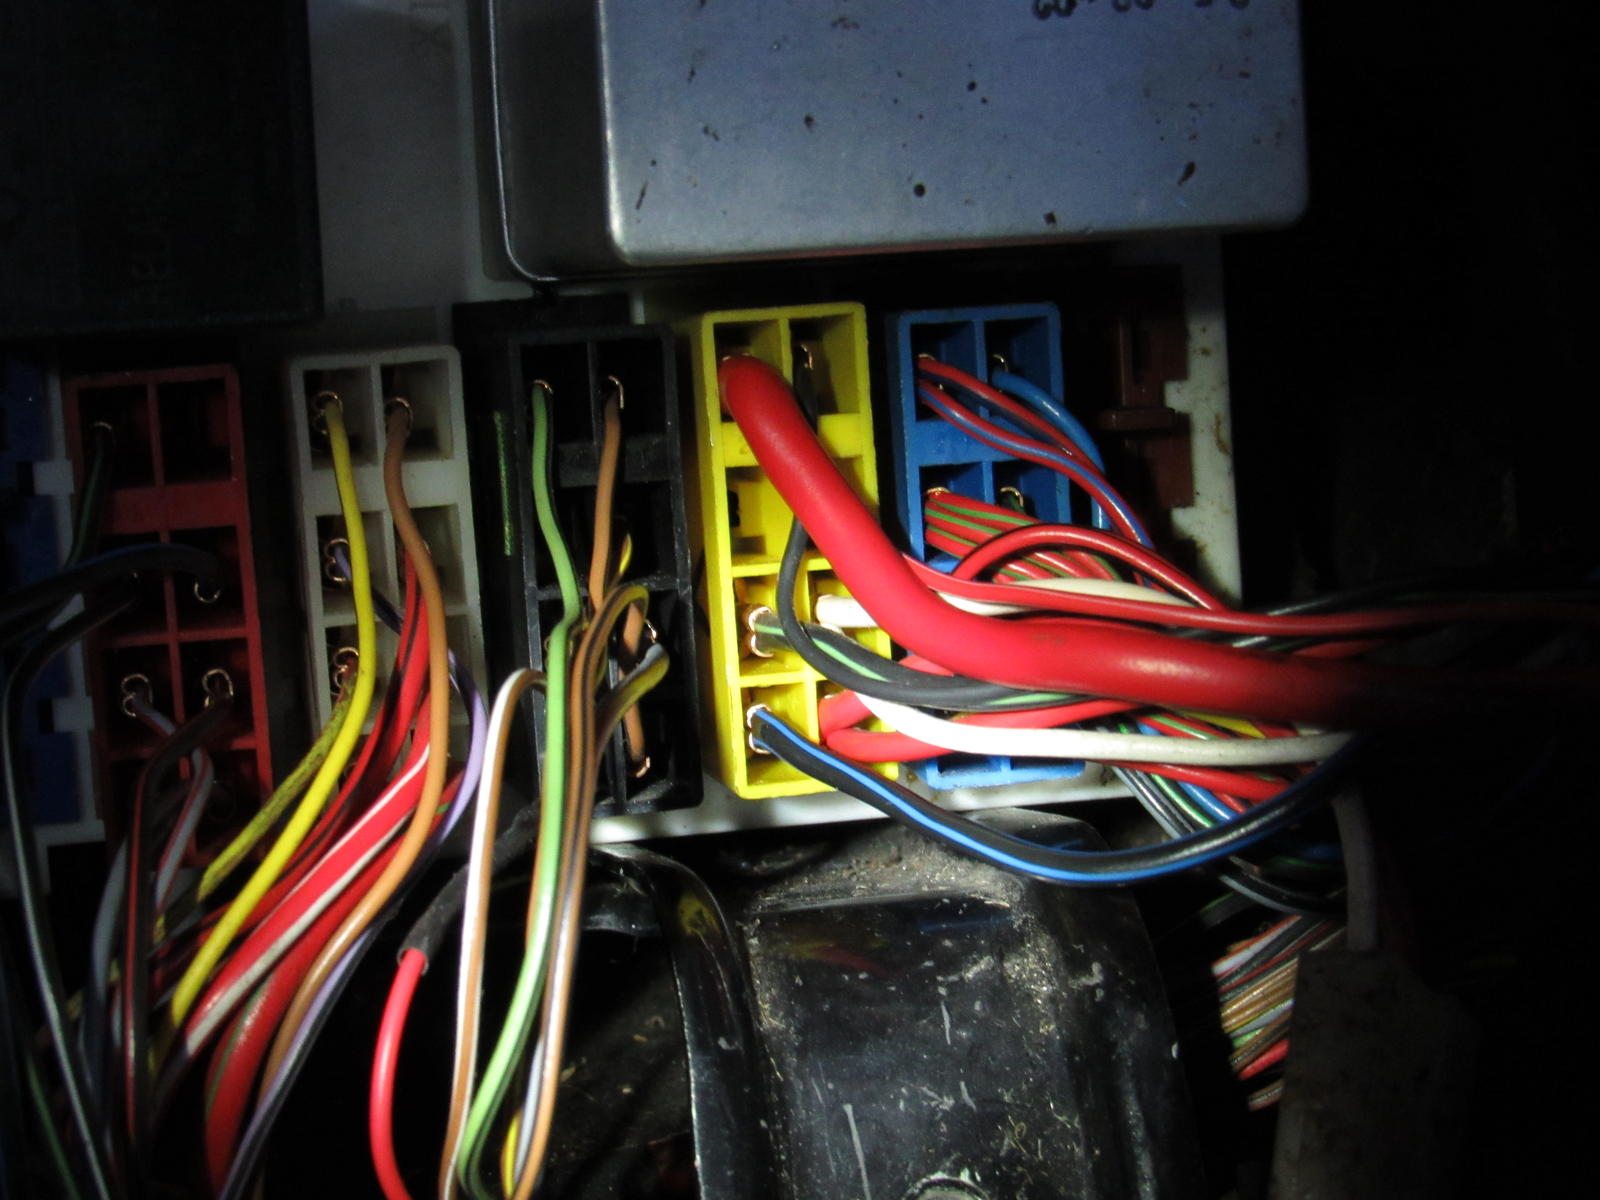
I'll begin with a major triumph!! I finally fixed the sunroof! It never worked since I bought the car and I have troubleshooted here and there ever since and completed a overhaul of the mechanisms. Power was not getting to the motor and the only thing I had not checked was the connection in the B pillar next to the speaker. I pulled the leather out and thankfully the connector is right there on the edge. I tested for continuity from the switch connector to this one and still had an open in the circuit. Ok so I trace the wires back to the CE panel where it ties in on the V connector. I pull it out and found the problem all along; the wire was inserted into the wrong position in the connector and there was no corresponding tab out of the CE panel. I switched the wire to the lower left position, plugged it back in and sunroof works! It operates slowly but this is with engine off and battery is probably getting low.
Black with blue stripe in wrong position:
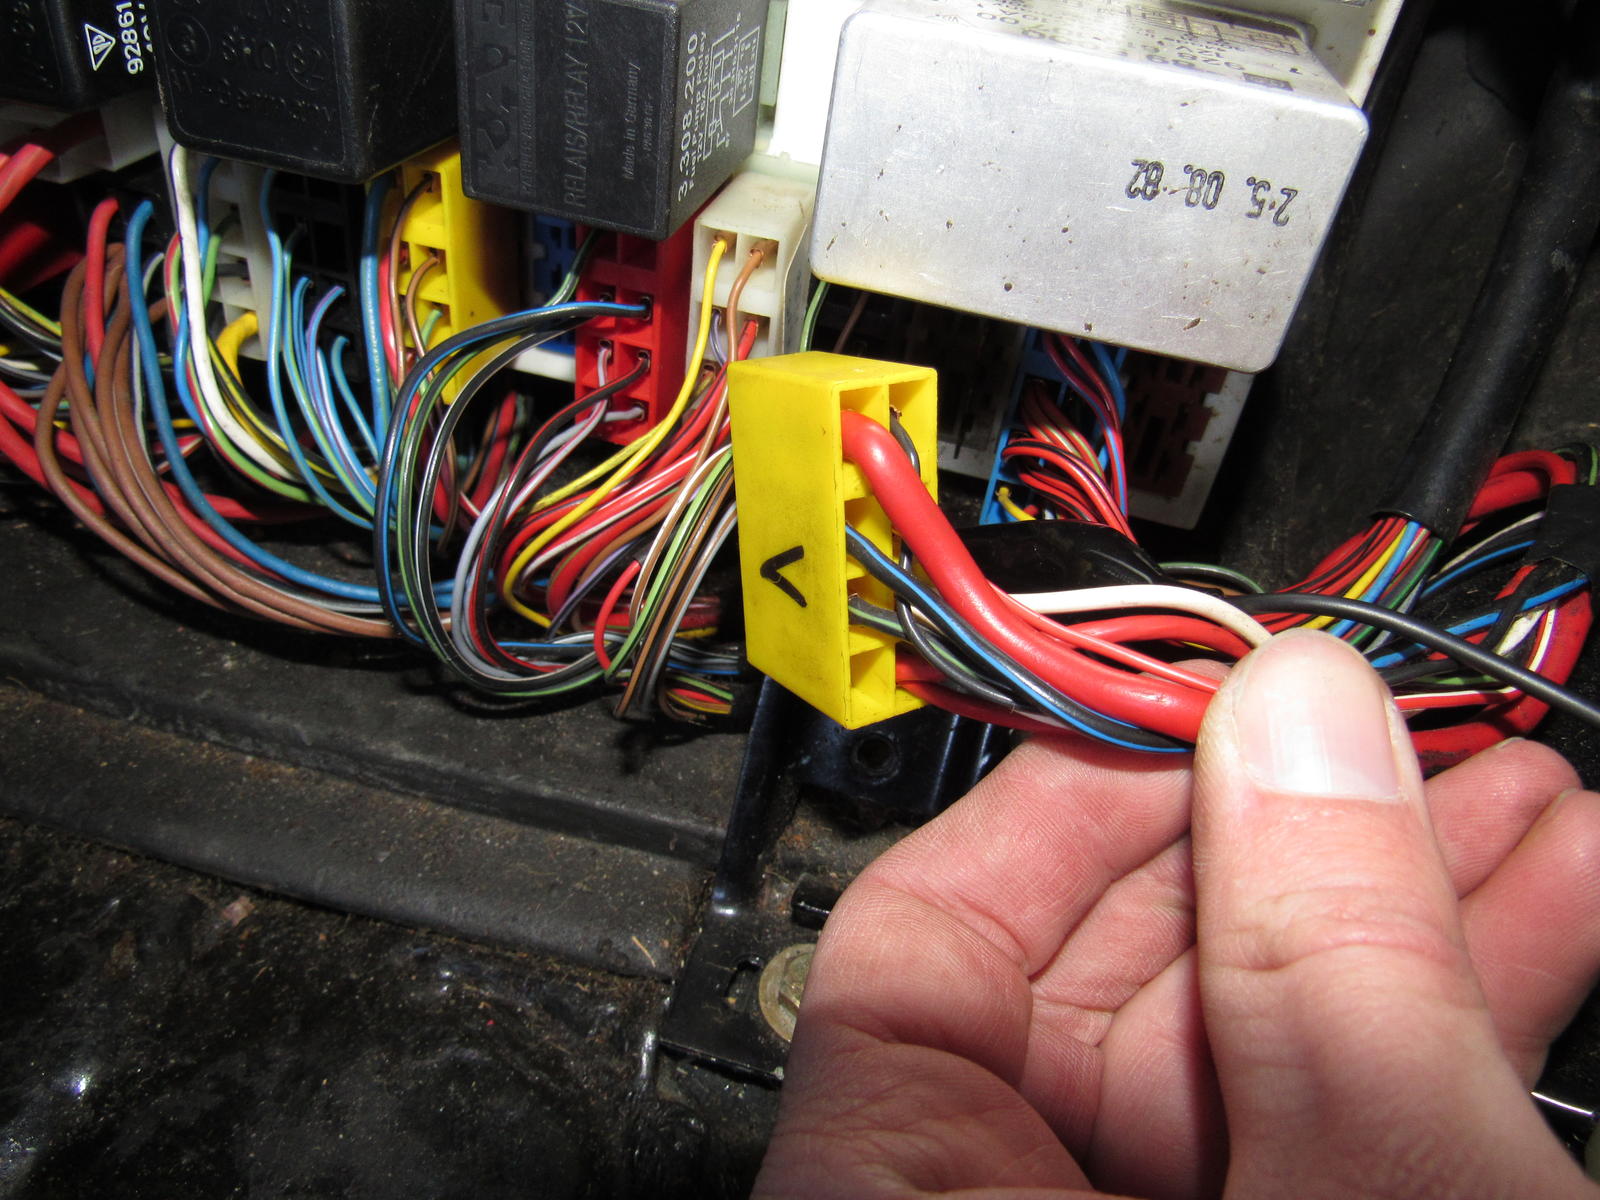
CE panel connectors:

Correct configuration of V connector:
I've stripped out the hatch moldings to recover in leather and found why the window defrost did not work. I am missing two connectors and one was loose. Has anybody repaired these? It seems to be a common fix in the automotive world utilizing a conductive epoxy. Only problem is I am missing two connectors, anyone have some saved from say, a shattered window?
I have to repair a broken pin switch from the rear hatch latch and if anyone has an idea to disassemble it, please chime in.
I see many assume that if the primer color is different from the body color it must be a repaint but my car has always been black according to window sticker and delivery documents in 12/1982. Anyone else have mismatched primer and body color from the factory?
I'll begin with a major triumph!! I finally fixed the sunroof! It never worked since I bought the car and I have troubleshooted here and there ever since and completed a overhaul of the mechanisms. Power was not getting to the motor and the only thing I had not checked was the connection in the B pillar next to the speaker. I pulled the leather out and thankfully the connector is right there on the edge. I tested for continuity from the switch connector to this one and still had an open in the circuit. Ok so I trace the wires back to the CE panel where it ties in on the V connector. I pull it out and found the problem all along; the wire was inserted into the wrong position in the connector and there was no corresponding tab out of the CE panel. I switched the wire to the lower left position, plugged it back in and sunroof works! It operates slowly but this is with engine off and battery is probably getting low.
Black with blue stripe in wrong position:
CE panel connectors:
Correct configuration of V connector:
I've stripped out the hatch moldings to recover in leather and found why the window defrost did not work. I am missing two connectors and one was loose. Has anybody repaired these? It seems to be a common fix in the automotive world utilizing a conductive epoxy. Only problem is I am missing two connectors, anyone have some saved from say, a shattered window?
I have to repair a broken pin switch from the rear hatch latch and if anyone has an idea to disassemble it, please chime in.
I see many assume that if the primer color is different from the body color it must be a repaint but my car has always been black according to window sticker and delivery documents in 12/1982. Anyone else have mismatched primer and body color from the factory?
03-23-2017, 07:20 PM
#125
Rennlist Member
Alex,
I used superglue on my AC head unit gear. It has worked fine. You might touch base with Nate (GT6ixer) on this forum. He can digital print one if he borrows your original. (If he can do it, have him print and extra one for me. I gave my extra to Benno for his car).
I might actually be able to find the rear glass defroster connections from the Stepson's original hatch glass that I still find pieces of inside the car. I'll look tonight when I get home.
03-24-2017, 10:36 AM
#126
Burning Brakes
Thread Starter
Alex,
I used superglue on my AC head unit gear. It has worked fine. You might touch base with Nate (GT6ixer) on this forum. He can digital print one if he borrows your original. (If he can do it, have him print and extra one for me. I gave my extra to Benno for his car).
I might actually be able to find the rear glass defroster connections from the Stepson's original hatch glass that I still find pieces of inside the car. I'll look tonight when I get home.
I used superglue on my AC head unit gear. It has worked fine. You might touch base with Nate (GT6ixer) on this forum. He can digital print one if he borrows your original. (If he can do it, have him print and extra one for me. I gave my extra to Benno for his car).
I might actually be able to find the rear glass defroster connections from the Stepson's original hatch glass that I still find pieces of inside the car. I'll look tonight when I get home.
I did not mention but I have removed the seats and I will say it is almost worth doing just to see what is under there. I found pliers, pens, loose change (including a 1983 penny jammed at the rear of the track), an earing, a dog collar also jammed into the tracks, the original oil drain bolt (a drain valve is fitted).
I have given the seats and center console to be re-dyed, steering wheel to be restitched, pod and dash to be repaired by Fibrenew. I will post results of course, should be 2-3 weeks.

 04-12-2017, 08:51 PM
#129
Burning Brakes
Thread Starter
I picked up a 30k mile transaxle but I didn't want to just swap it into my car and hope for the best. It was stored outside and upside down, I don't know how long but enough for the oil to drain out of the vent. The first thing I noticed is that everything was seized. Some light tapping on the shifter shaft freed it up but at this point I cannot move the 3/4 or 1/reverse shift rods. There is surface rust and gunk on the gears as well that prevent me from spinning the input shaft a full 360 degrees.
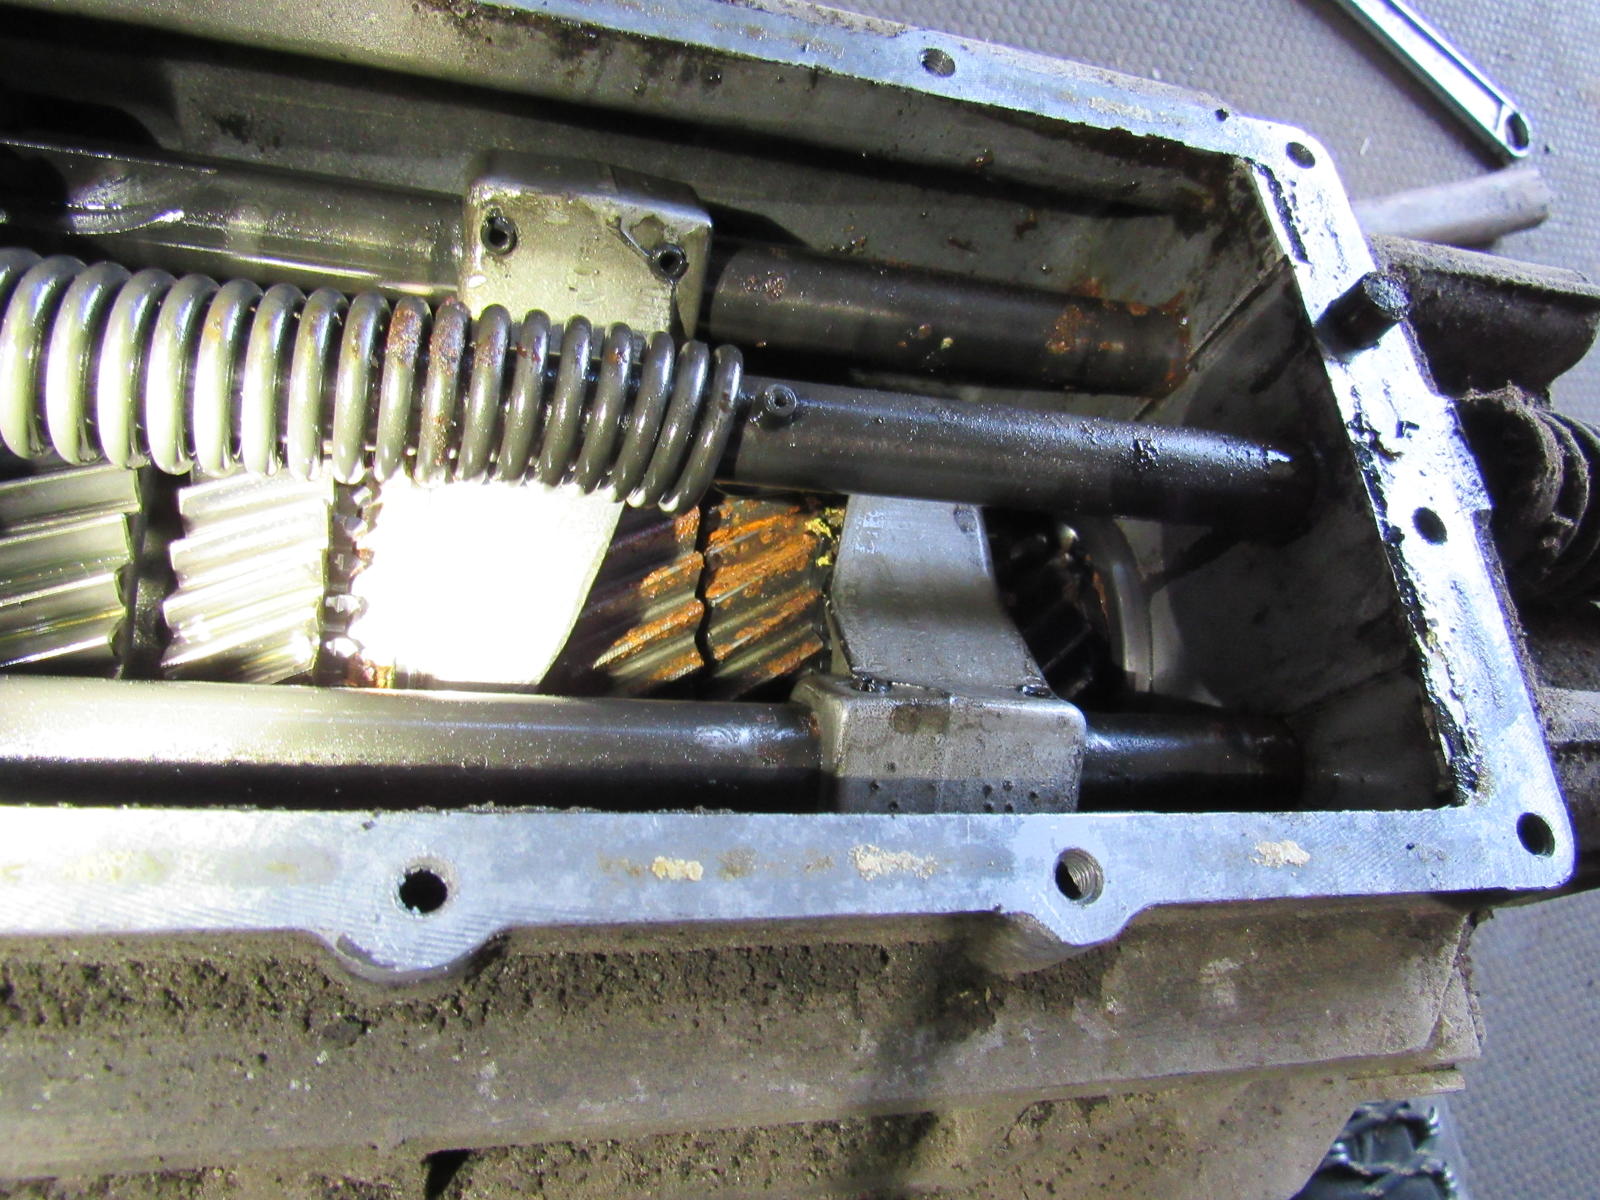
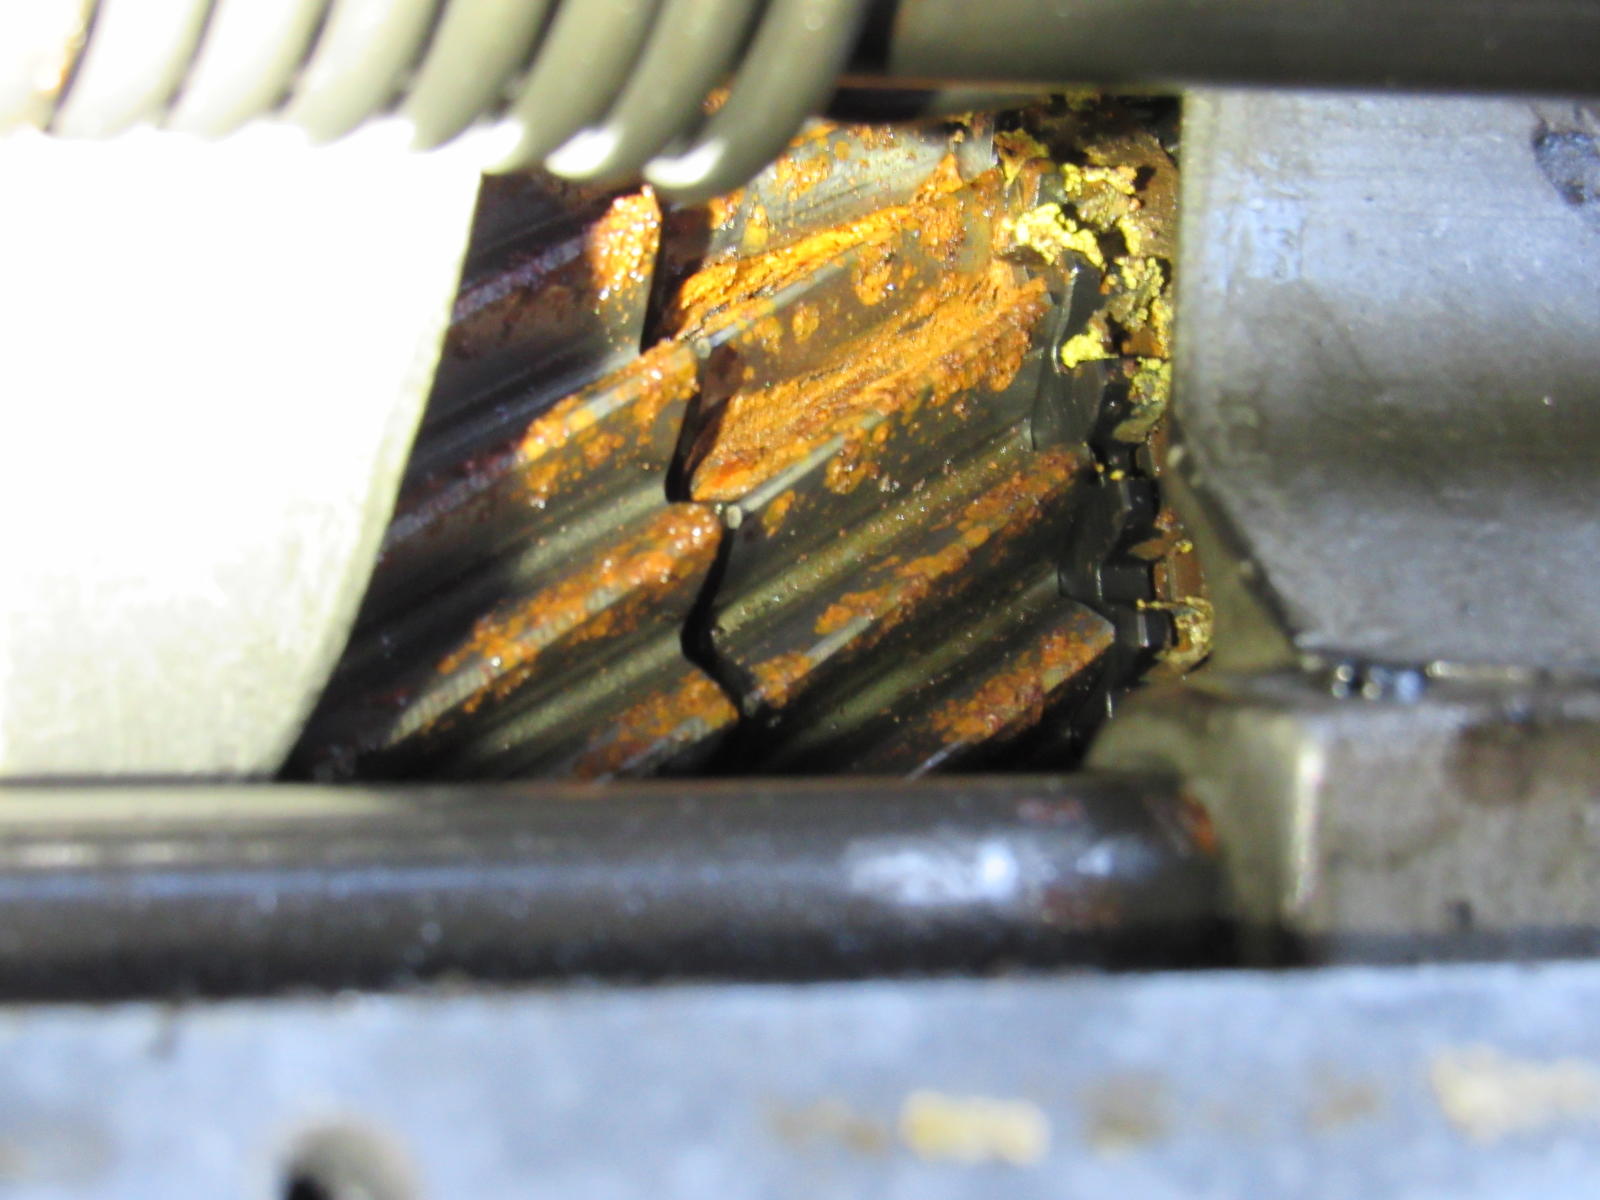
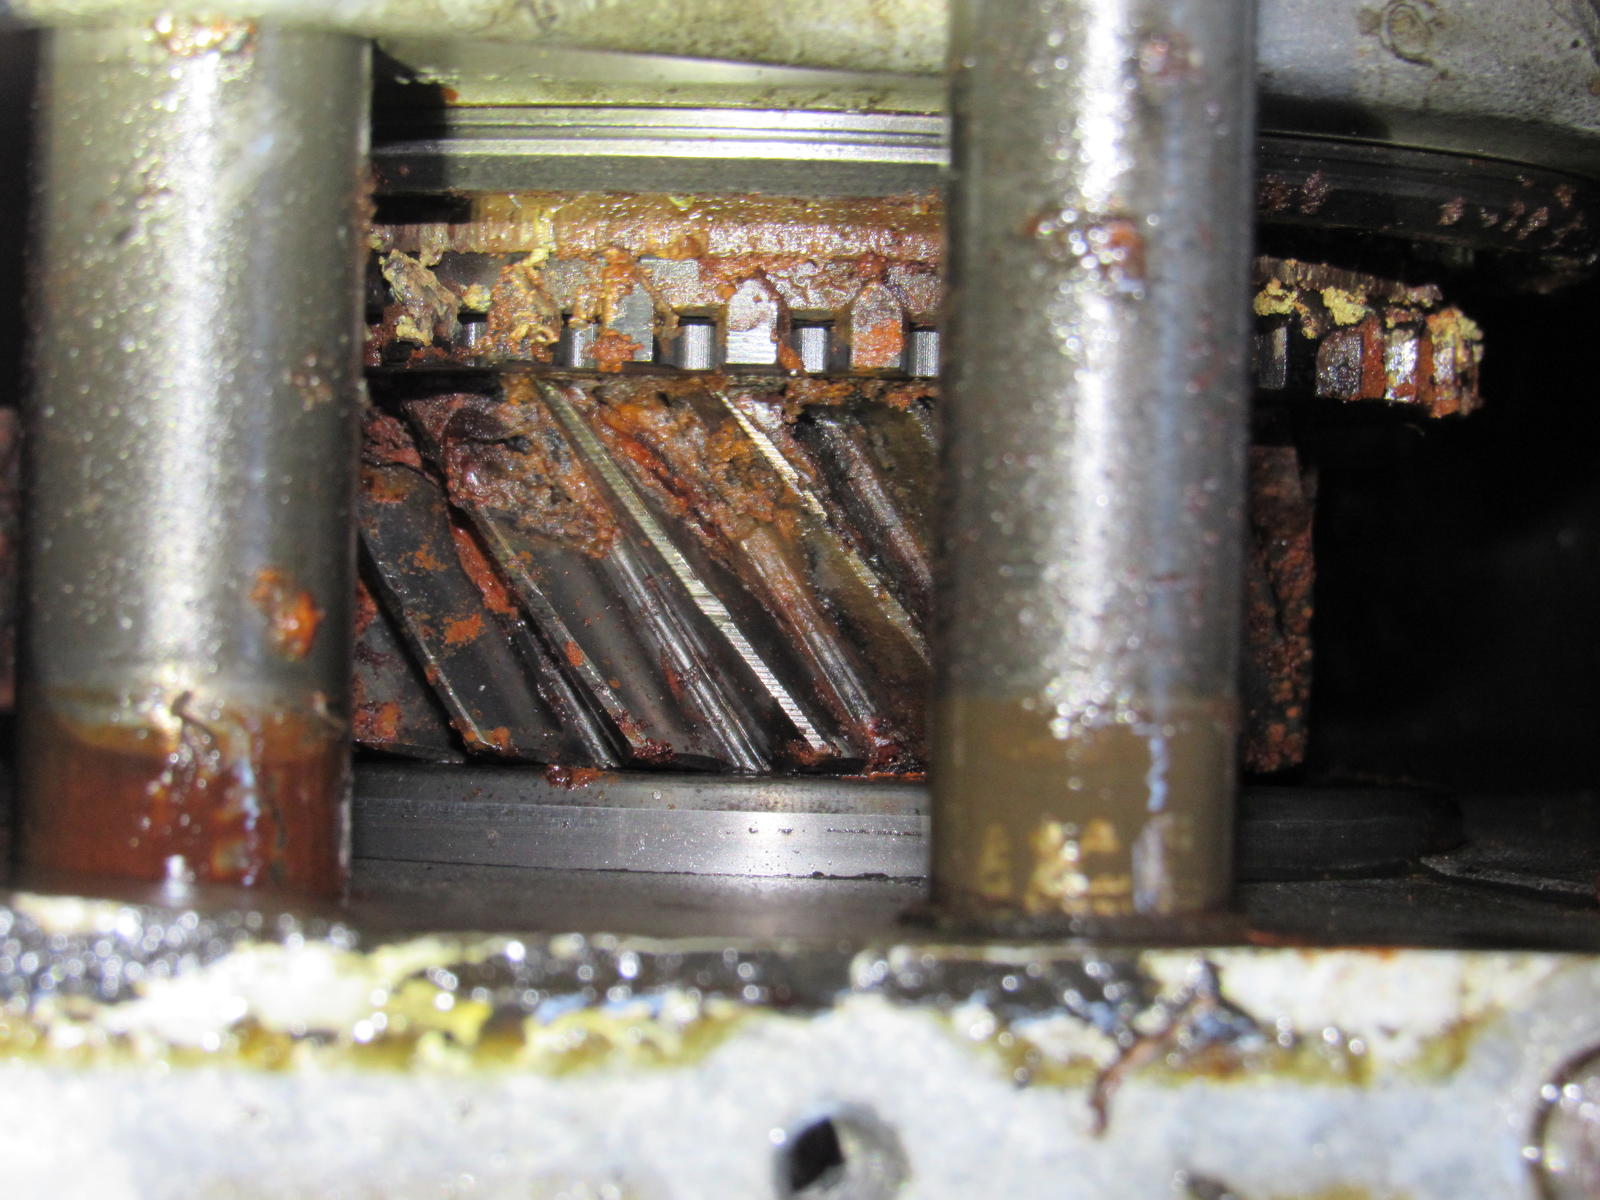
The reverse gear has suffered some damage.
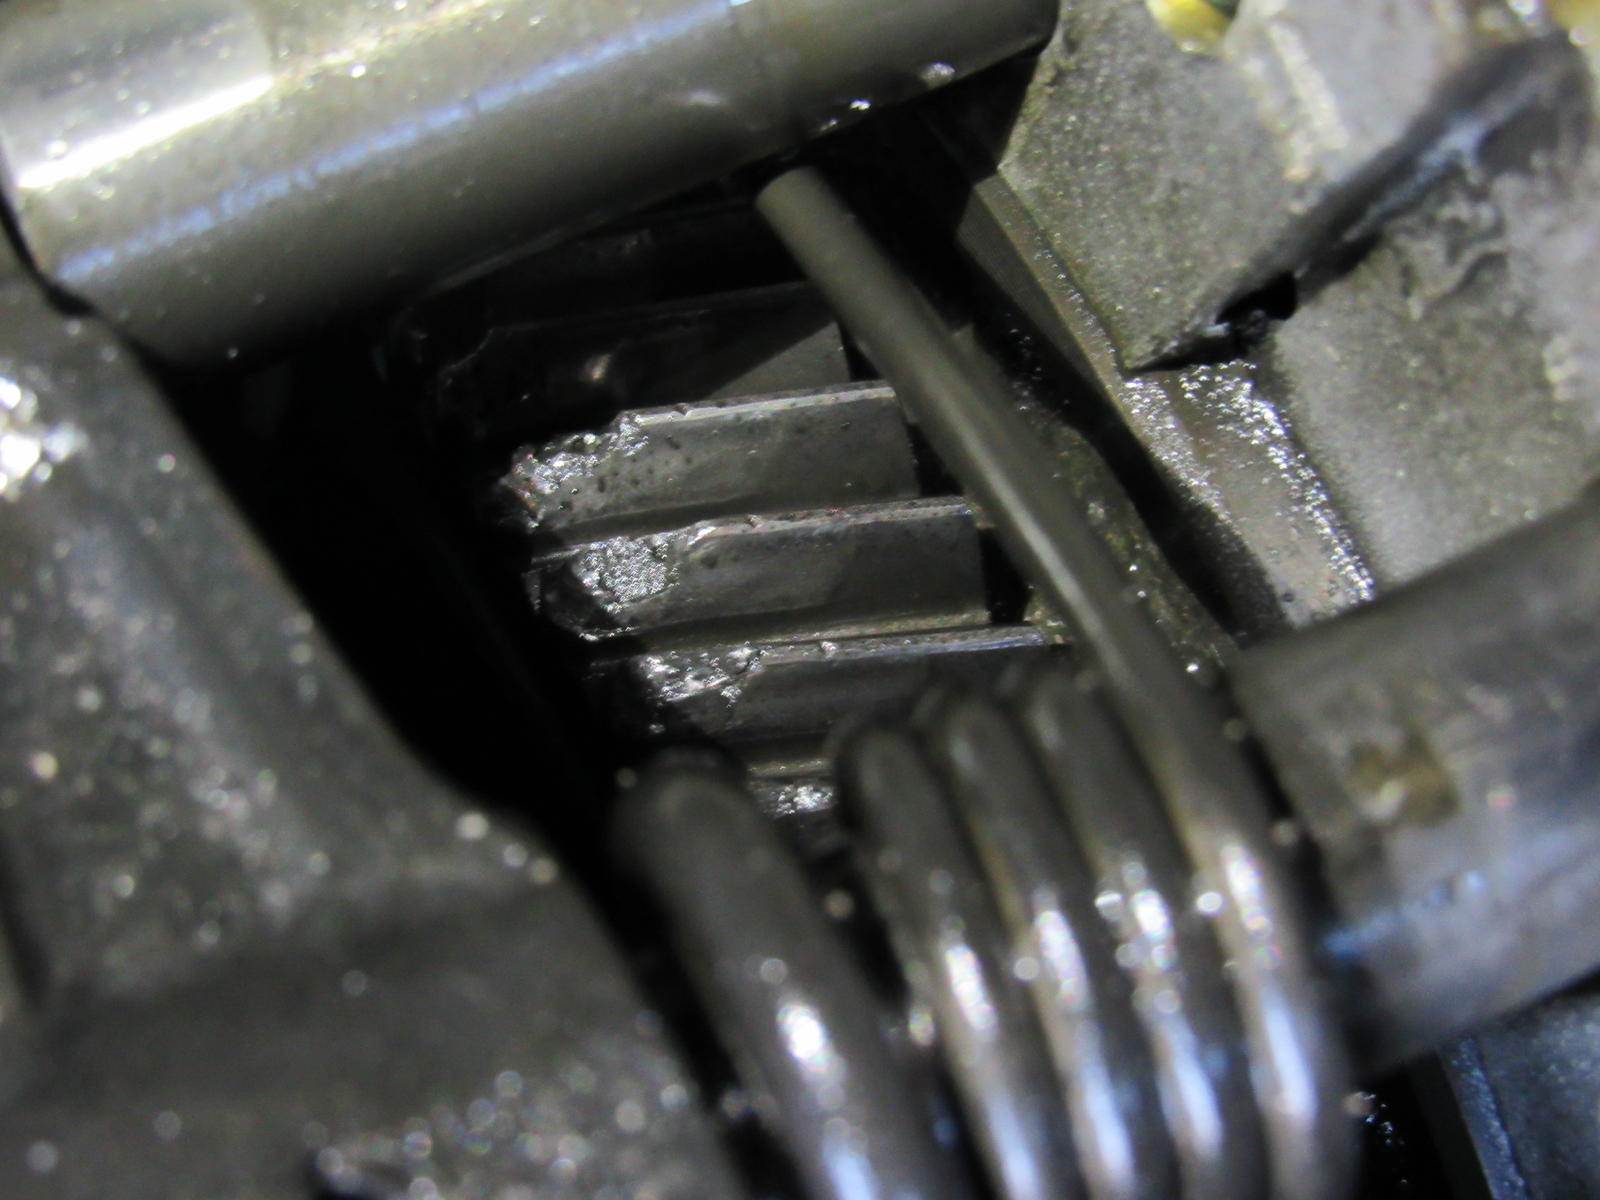
I think the gears could be cleaned up and the dog teeth are pristine. I'd like some opinions on whether this box is worth rebuilding or just keep it for spares?
The reverse gear has suffered some damage.
I think the gears could be cleaned up and the dog teeth are pristine. I'd like some opinions on whether this box is worth rebuilding or just keep it for spares?
04-13-2017, 03:24 PM
#130
Former Vendor

I picked up a 30k mile transaxle but I didn't want to just swap it into my car and hope for the best. It was stored outside and upside down, I don't know how long but enough for the oil to drain out of the vent. The first thing I noticed is that everything was seized. Some light tapping on the shifter shaft freed it up but at this point I cannot move the 3/4 or 1/reverse shift rods. There is surface rust and gunk on the gears as well that prevent me from spinning the input shaft a full 360 degrees.
I think the gears could be cleaned up and the dog teeth are pristine. I'd like some opinions on whether this box is worth rebuilding or just keep it for spares?
I think the gears could be cleaned up and the dog teeth are pristine. I'd like some opinions on whether this box is worth rebuilding or just keep it for spares?
04-15-2017, 02:41 AM
#133
Rennlist Member
The picture behind the glovebox show the connector for the Factory Alarm System . Someone pull the Hellabox and deactivate it with a bridge.
Cars with long keys have this unit. On my car I had so much false alarms so I deinstall it.
Cars with long keys have this unit. On my car I had so much false alarms so I deinstall it.
Last edited by Darklands; 04-15-2017 at 03:32 AM.

