Porsche 993: How to Replace Spark Plugs
Spark plugs can affect the performance of your Porsche 993. Keep it running smooth and strong with a new set.
This article applies to the Porsche 993 (1993-1998).
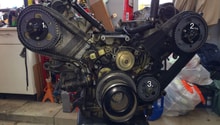
The normally aspirated Porsche 993's flat six utilizes a twin spark plug per cylinder design for maximum combustion efficiency. While this is a benefit to engine performance, it also makes some owners cringe when it is time for a spark plug change. As with the 993's valve cover gaskets, the lower spark plugs are easily accessed and replaced. Unfortunately, the upper spark plugs on each bank are tucked up out of sight and require the removal of the blower motor assembly, airbox assembly, clutch vent tube, and engine shroud. While the job is not necessarily difficult, it does take some time and a bit of patience when working in the cramped areas. For the do-it-yourselfer, this maintenance item is a no-brainer that can be accomplished in an afternoon and save you a few hundred bucks as opposed to taking it to the dealer or specialty shop.
Materials Needed
- 5/8" spark plug socket
- 3/8" & 1/4" drive ratchets
- Torque wrench
- Various length 3/8" and 1/4" extensions
- Universal joints or wobbler sockets
- 6mm Allen socket or T-handle
- 10 & 13mm wrenches and sockets
- 6 & 7mm nut drivers
- Screwdriver
- Floor jack & jack stands
- Feeler gauges or spark plug gap tool
- Anti-seize paste
- Penetrating oil
Step 1 – Lift and support the vehicle
The removal and replacement of the spark plugs requires work to be completed underneath the rear of the car. On level ground, use a floor jack to lift the vehicle and support it with jack stands.
(Related Article: How to Jack Up Your Porsche 993 - Rennlist.com)
Step 2 – Remove undertray and exhaust components
To best access the lower 6 spark plugs, the removal of the engine undertray and exhaust mufflers is required.
- Undo the 5 Phillip screws holding the engine undertray in place.
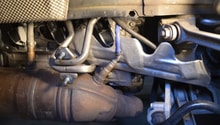
- Remove the exhaust tips using a pair of 13mm wrenches. With the fastener removed, spread the clamp using a small pry bar or pliers and remove the tip.
- With the tips removed, undo the 13mm fasteners securing the mufflers to the catalytic converter. Spread the clamps in the same way as done on the exhaust tips. Undo the strap on each muffler by using a 13mm wrench and 6mm hex socket (or two 13mm wrenches for pre-1996 993's). With the clamps and straps loosened/removed, remove each exhaust muffler.
- Disconnect the heater hoses from the heat exchangers and heater control boxes using a 6mm nut driver or socket on the hose clamps. With the clamps removed, additional force and wiggling may be required to remove the hoses from the car.
(Related Article: How to Replace Your Exhaust - Rennlist.com)
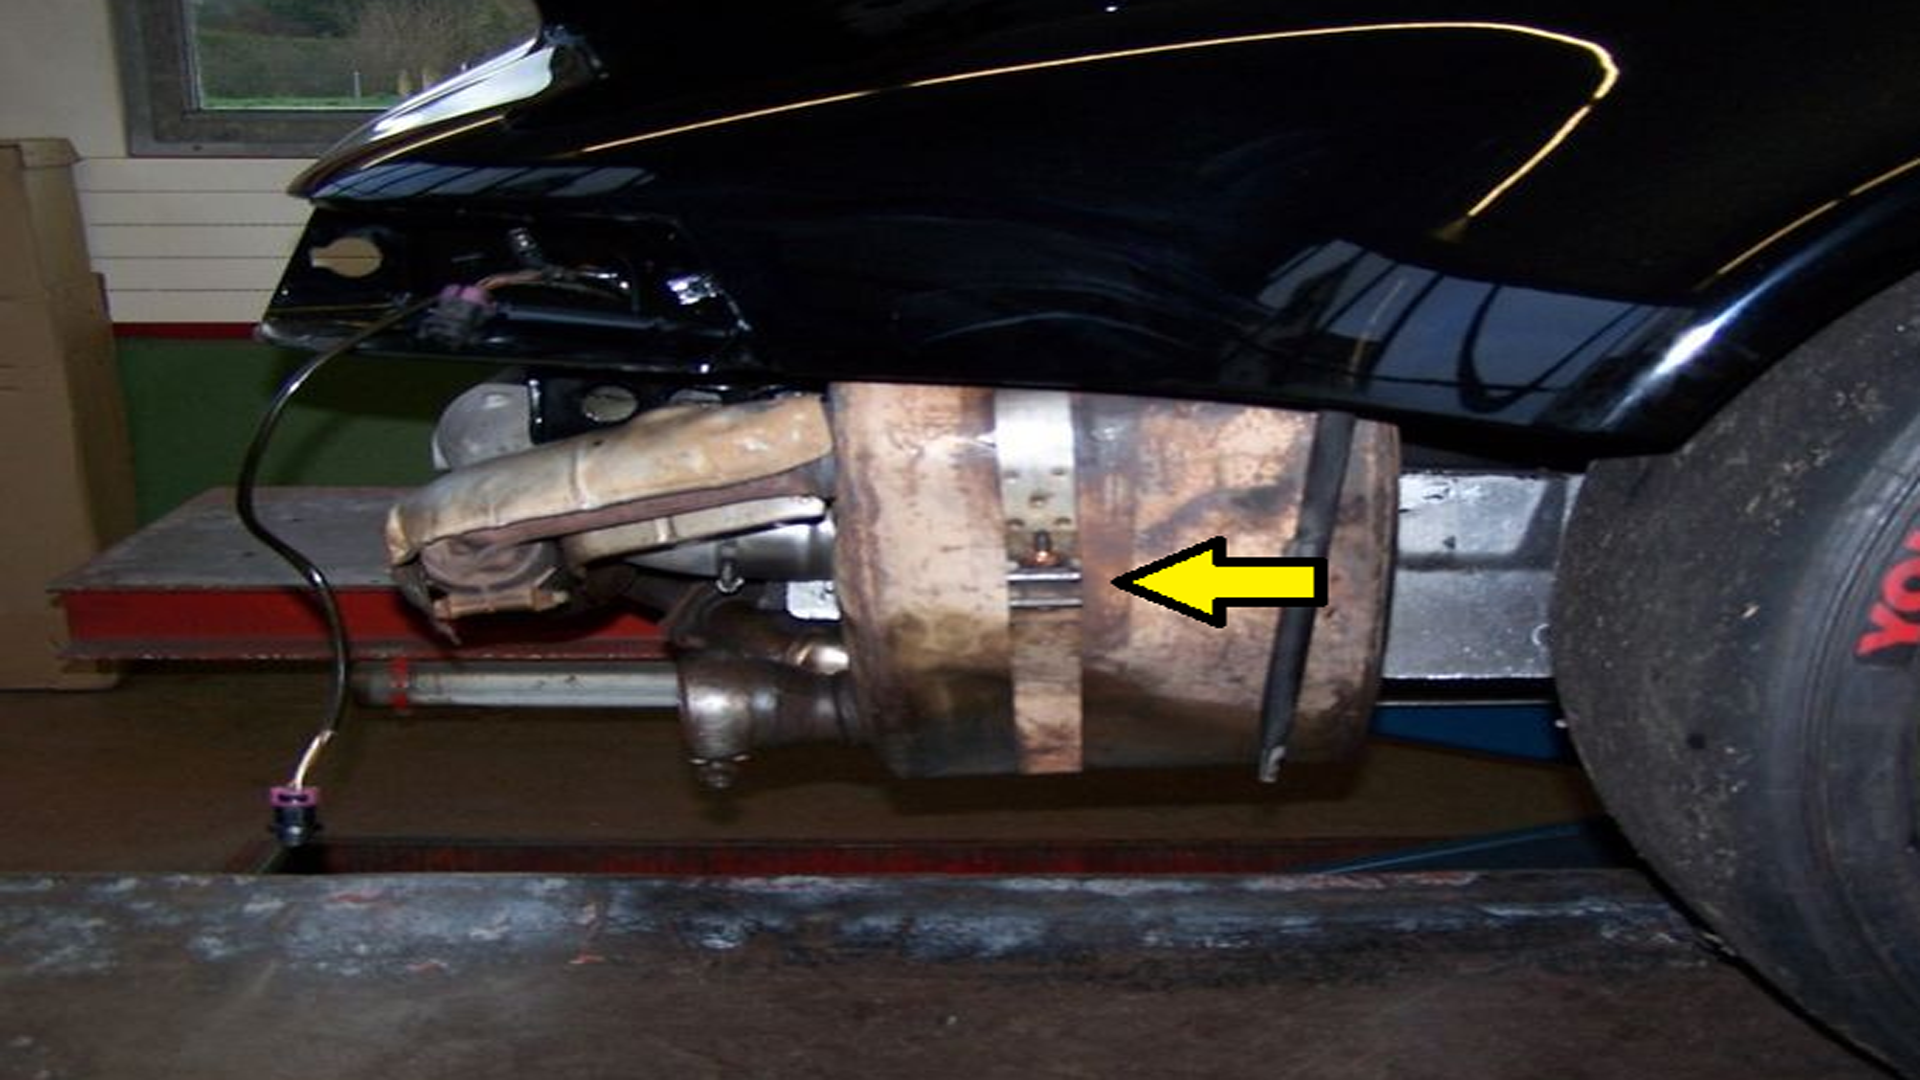
Figure 1. Muffler removal. 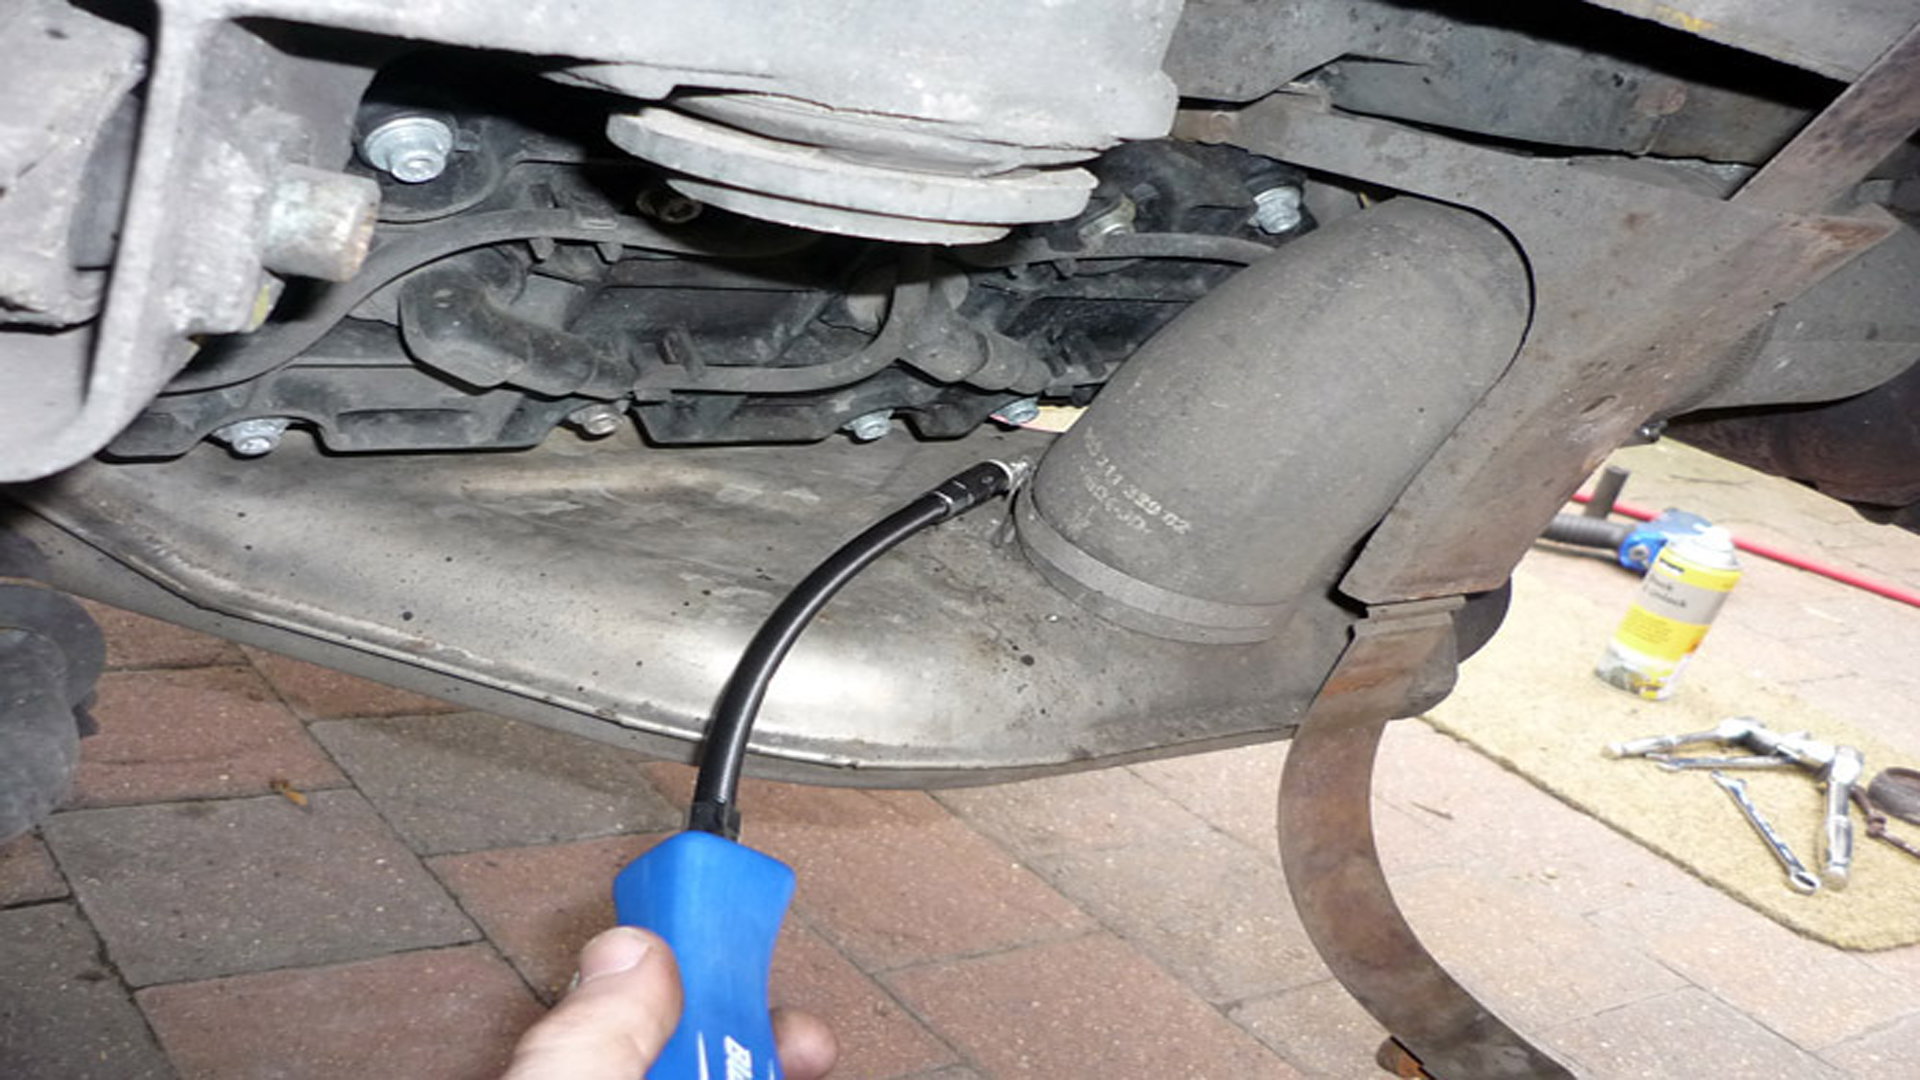
Figure 2. Heater hose removal.
Pro Tip
With the heater hoses removed, it is highly recommended that the holes in the heat exhcangers be covered. Use a a shop rag or an old towel to prevent tools or debris from being dropped inside.
Step 3 – Replace lower spark plugs
With the exhaust components removed, the lower spark plugs can be easily accessed.
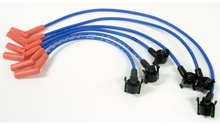
- Remove the spark plug boots from each spark plug.
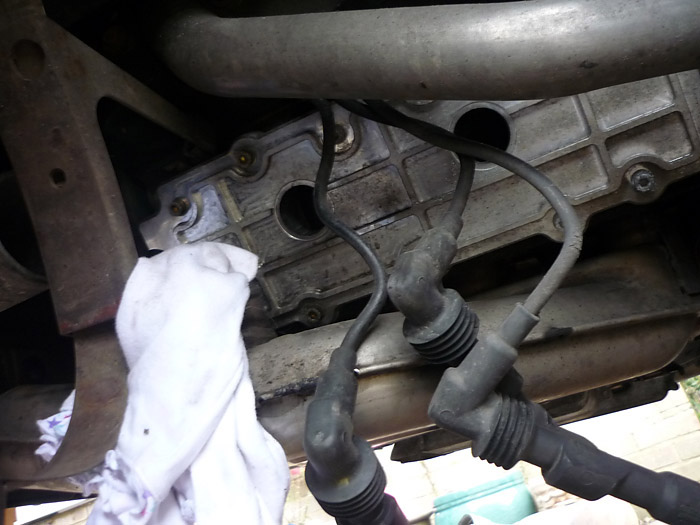
Figure 3. Lower valve cover with spark plug boots removed. - Using a spark plug socket, ratchet, and extension, remove the spark plugs. Spark plugs can have build-up that will make removal a bit difficult. If a spark plug feels gritty or tight when trying to remove it, apply some penetrating oil and slowly work the spark plug back and forth to avoid damaging the aluminum threads in the cylinder head. Patience is key here.
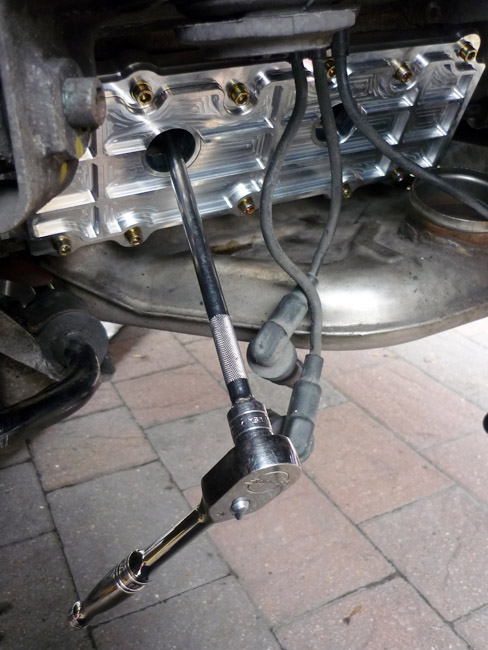
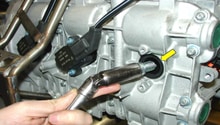
Figure 4. Spark plug removal. - Gap the new spark plugs using a feeler gauge or plug gapping tool. Whether you are using Bosch or Beru plugs, they should both already be gapped to .7mm (.028"); however, it is always best to check the gap prior to installation.
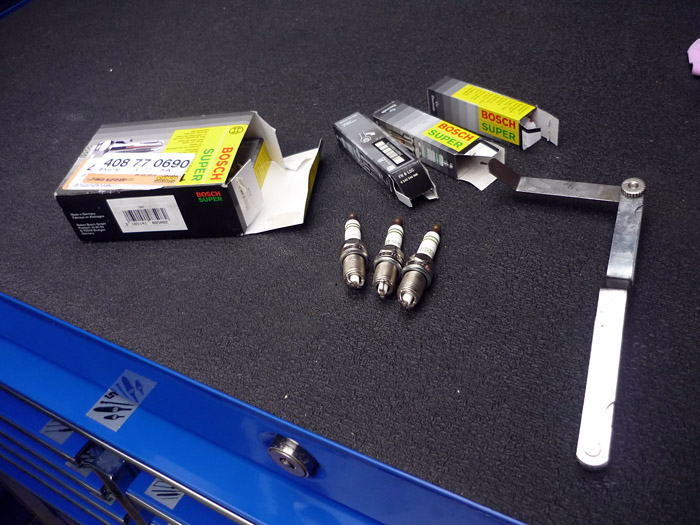
Figure 5. Checking gap on new spark plugs. - With the gap set, install the spark plugs into the cylinder head. A very small amount of anti-seize compound can be applied to the threads to prevent corrosion.
- Torque spark plugs to 22 Ft/lbs.
- Reinstall spark plug boots onto spark plugs.
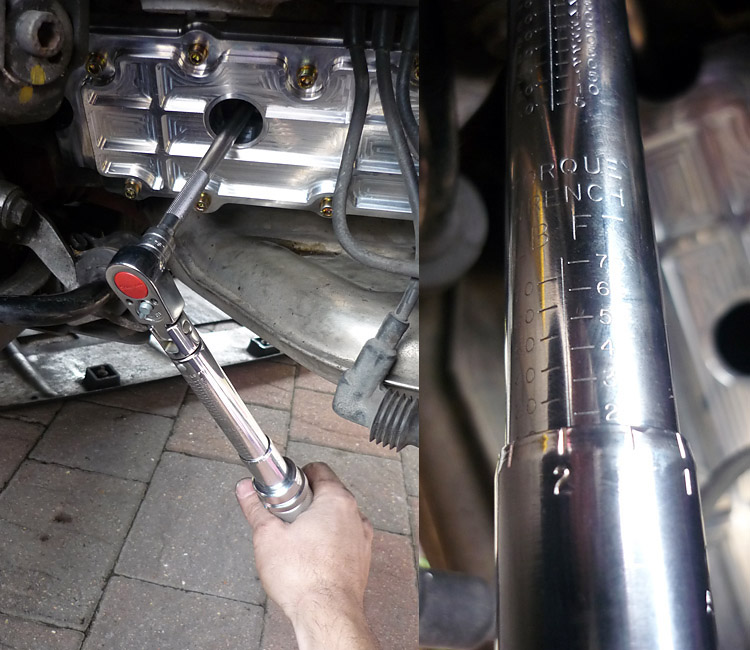
Figure 6. Torquing lower spark plugs.
Step 4 – Access left hand side upper spark plugs
Replacement of the upper spark plugs are a bit more in-depth and requires several components from the engine bay to be removed.
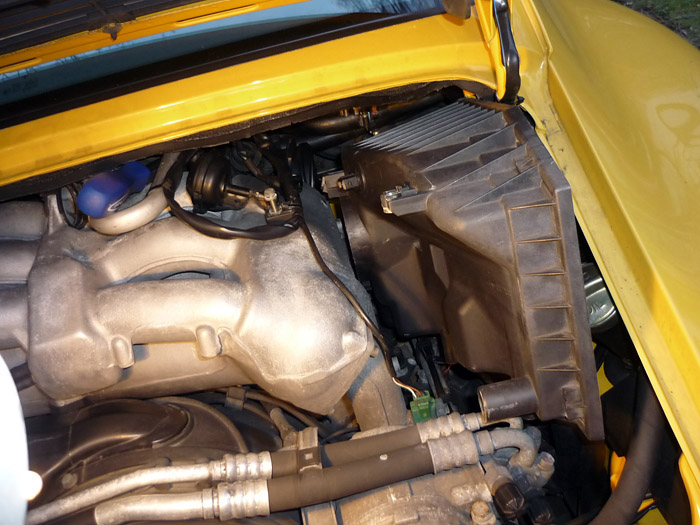
- Remove the blower assembly and heater ducts.
- Disconnect the two electrical plugs and small vacuum line as indicated by the three small circles.
- Separate the blower assembly from the ducts as indicated by the two red arrows. These ducts utilize a rubber gasket to attach to the blower assembly.
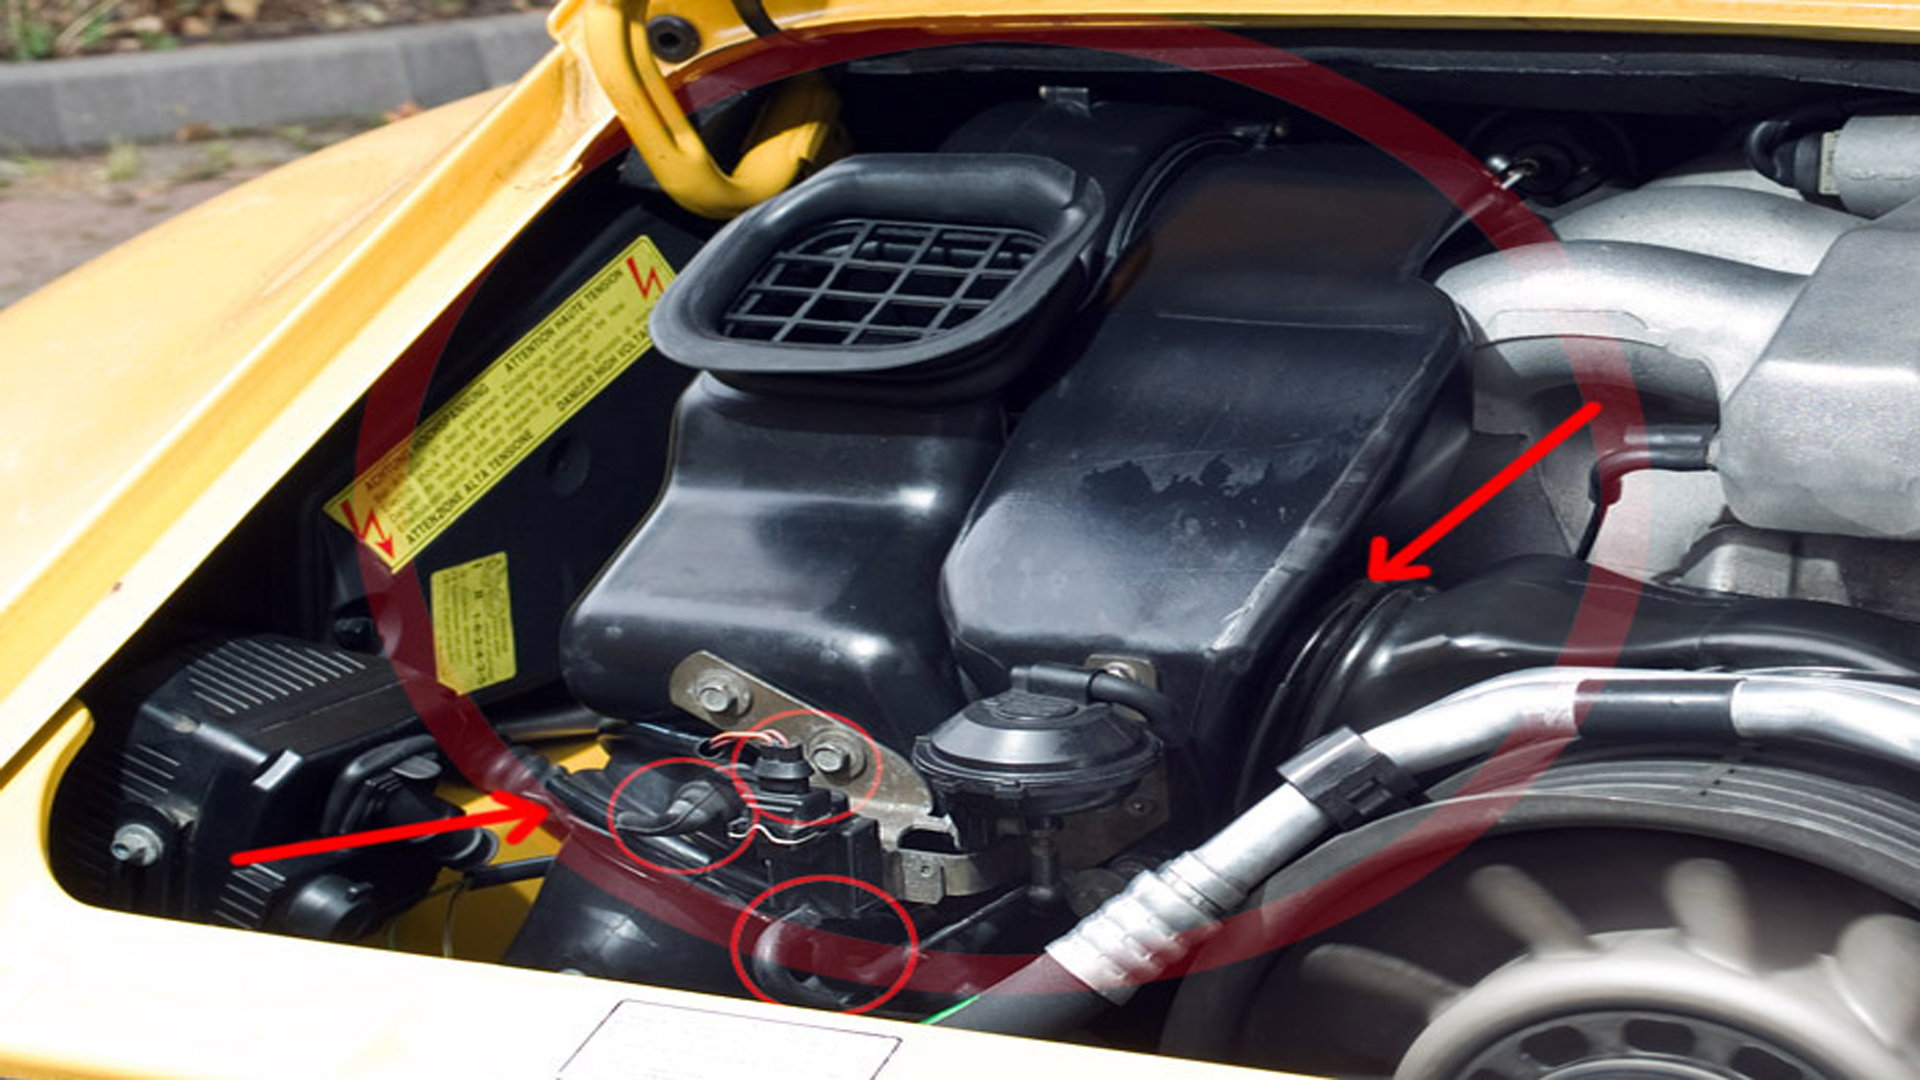
Figure 7. Blower assembly removal points. 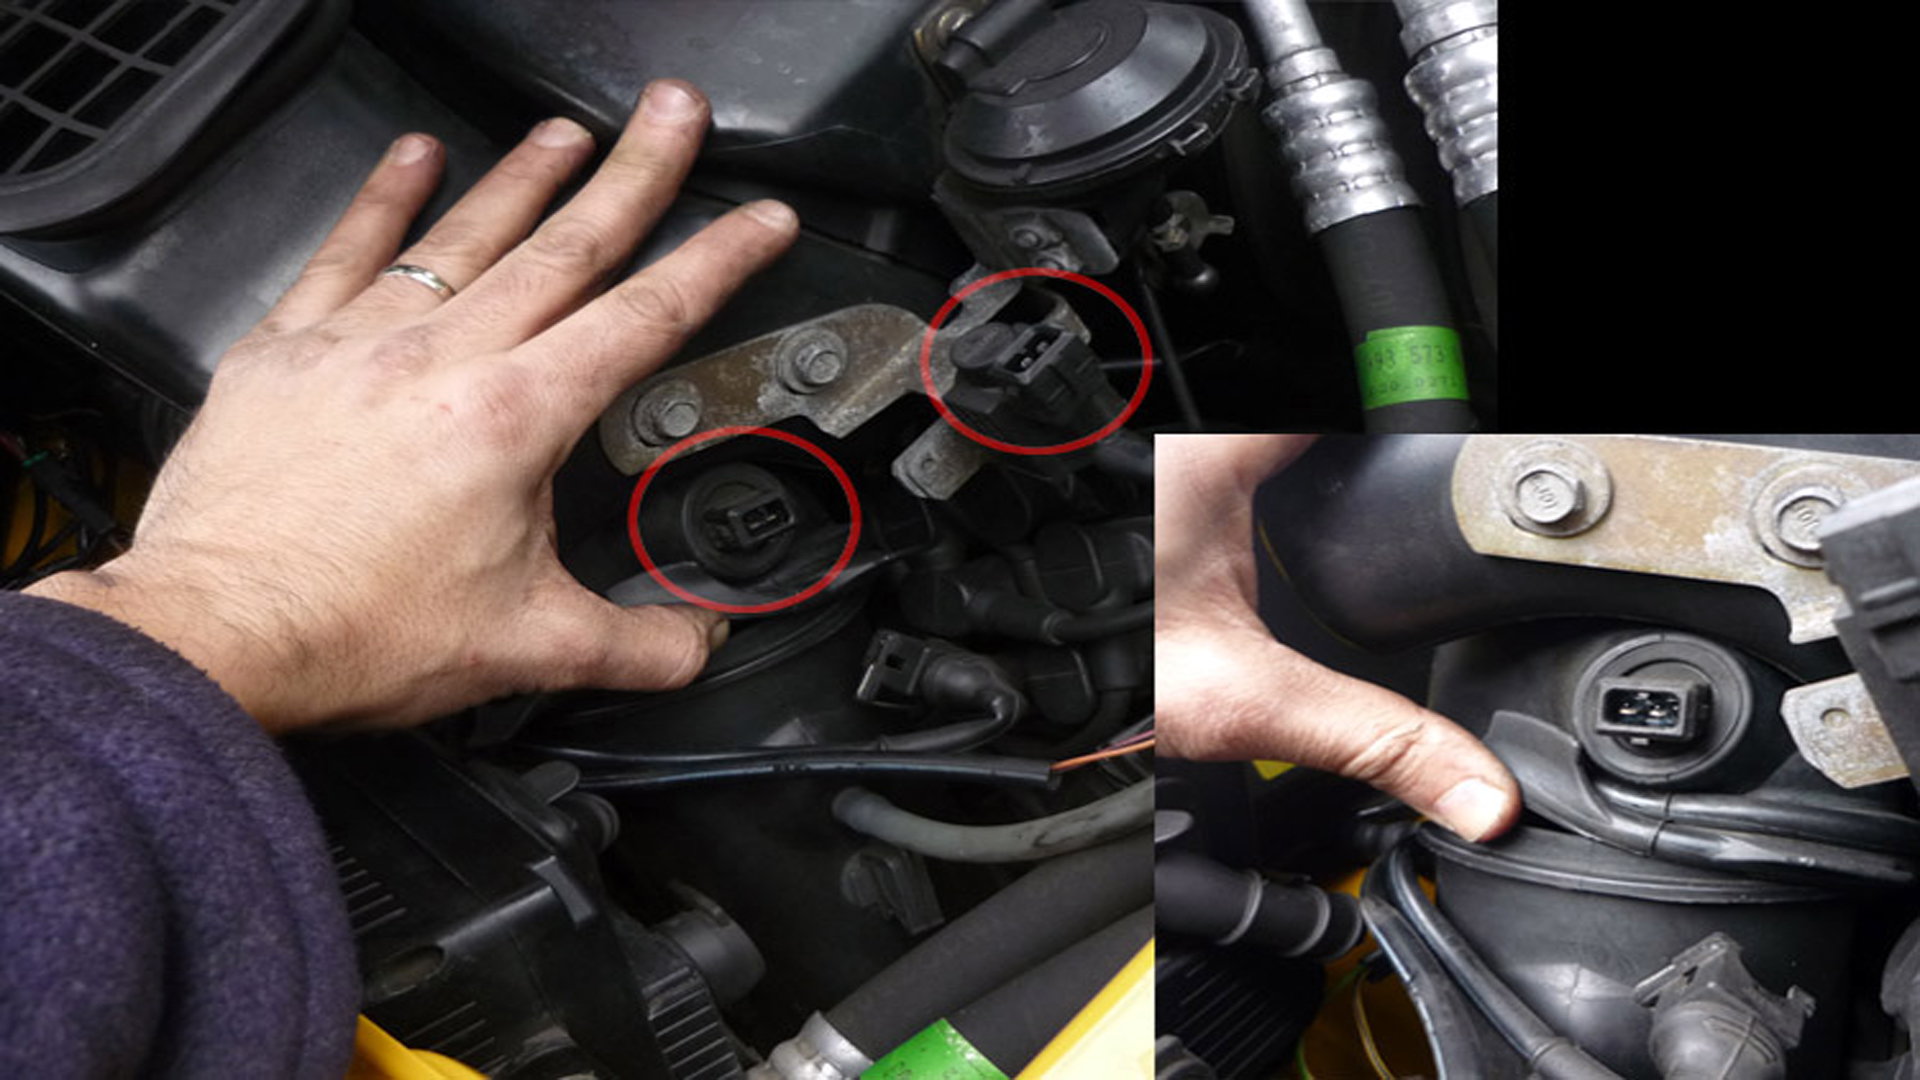
Figure 8. Closeup of electrical plugs and rubber gasket to ducting. 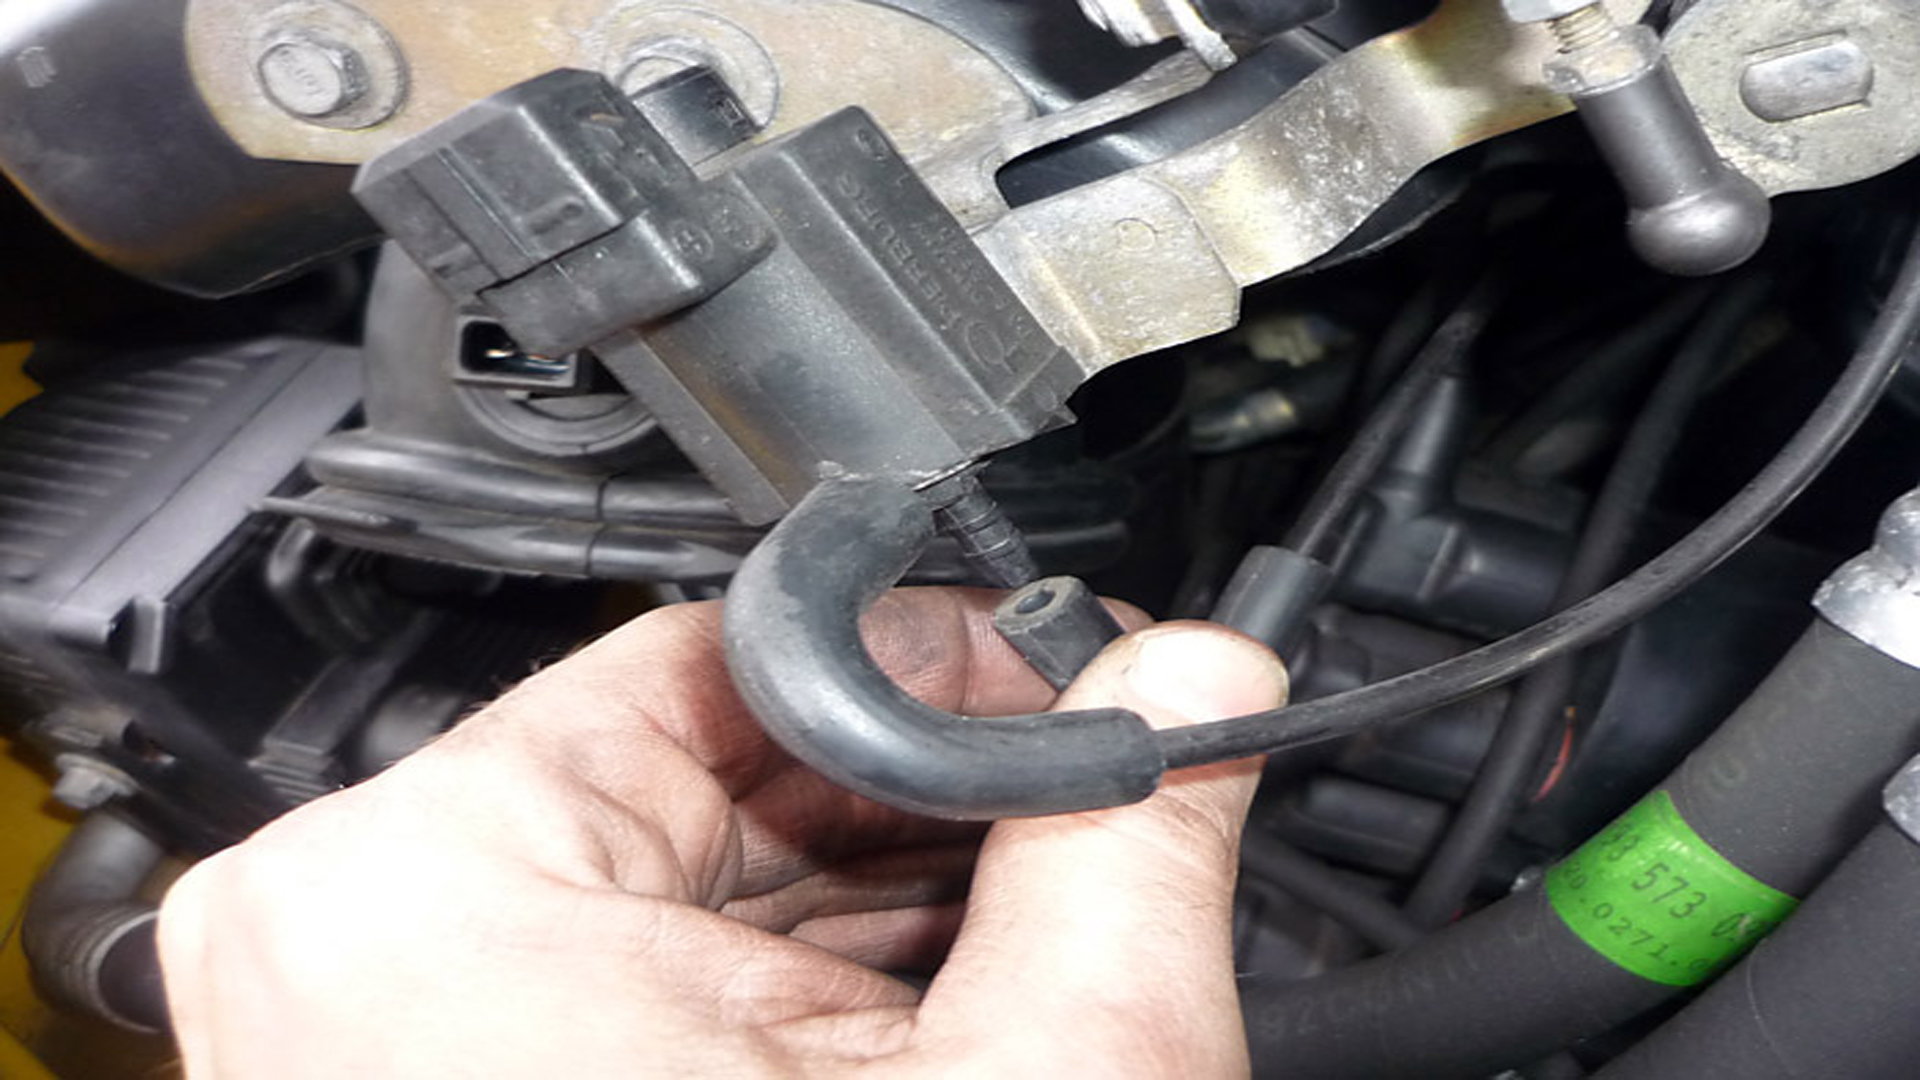
Figure 9. Small vacuum line underneath blower assembly.
- Use a 10mm socket to loosen the two bolts that hold the blower assembly in place. These do not need to be completely removed, just loosened.
- Disconnect the electrical plug (circled in red) located on the left side of the blower assembly by compressing the locking clips on each side of the plug and separating.
- The blower assembly can now be slid rearward and out of the engine bay.
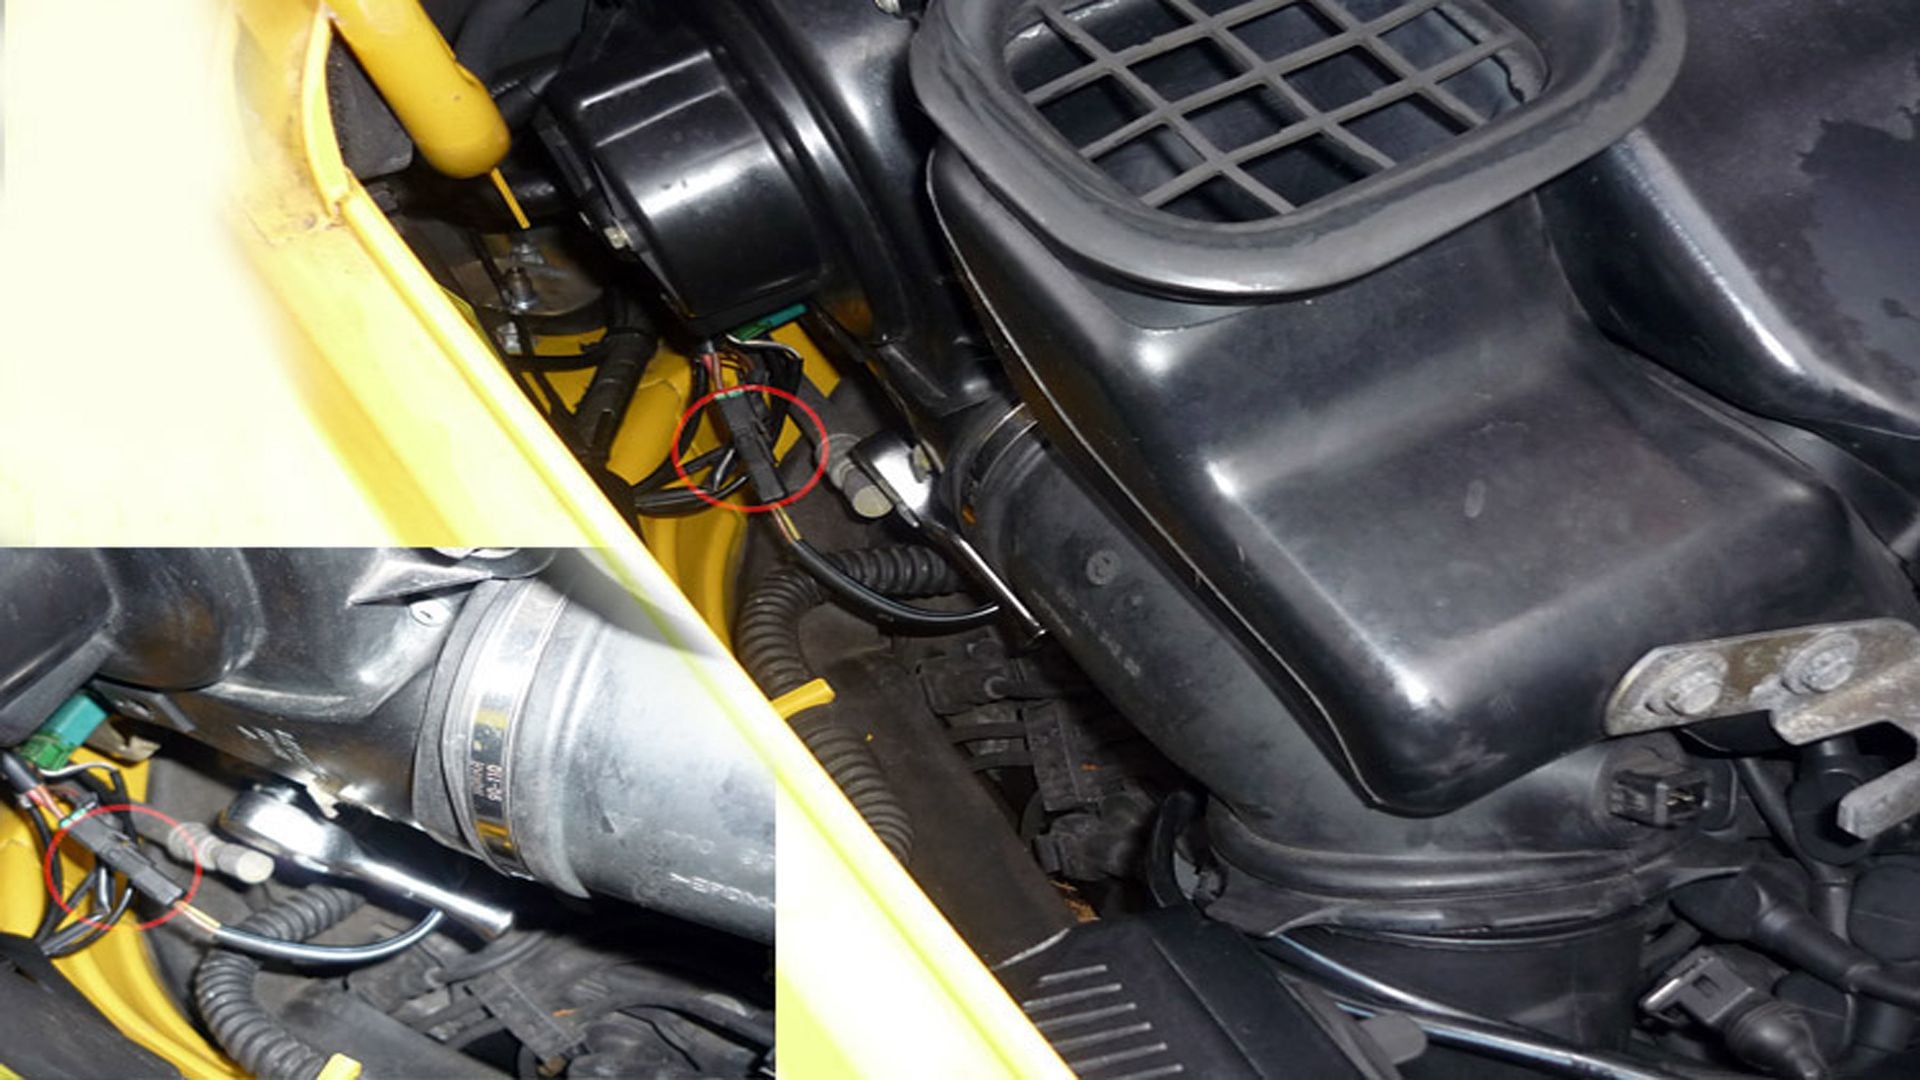
Figure 10. Loosening blower motor and disconnecting plug. 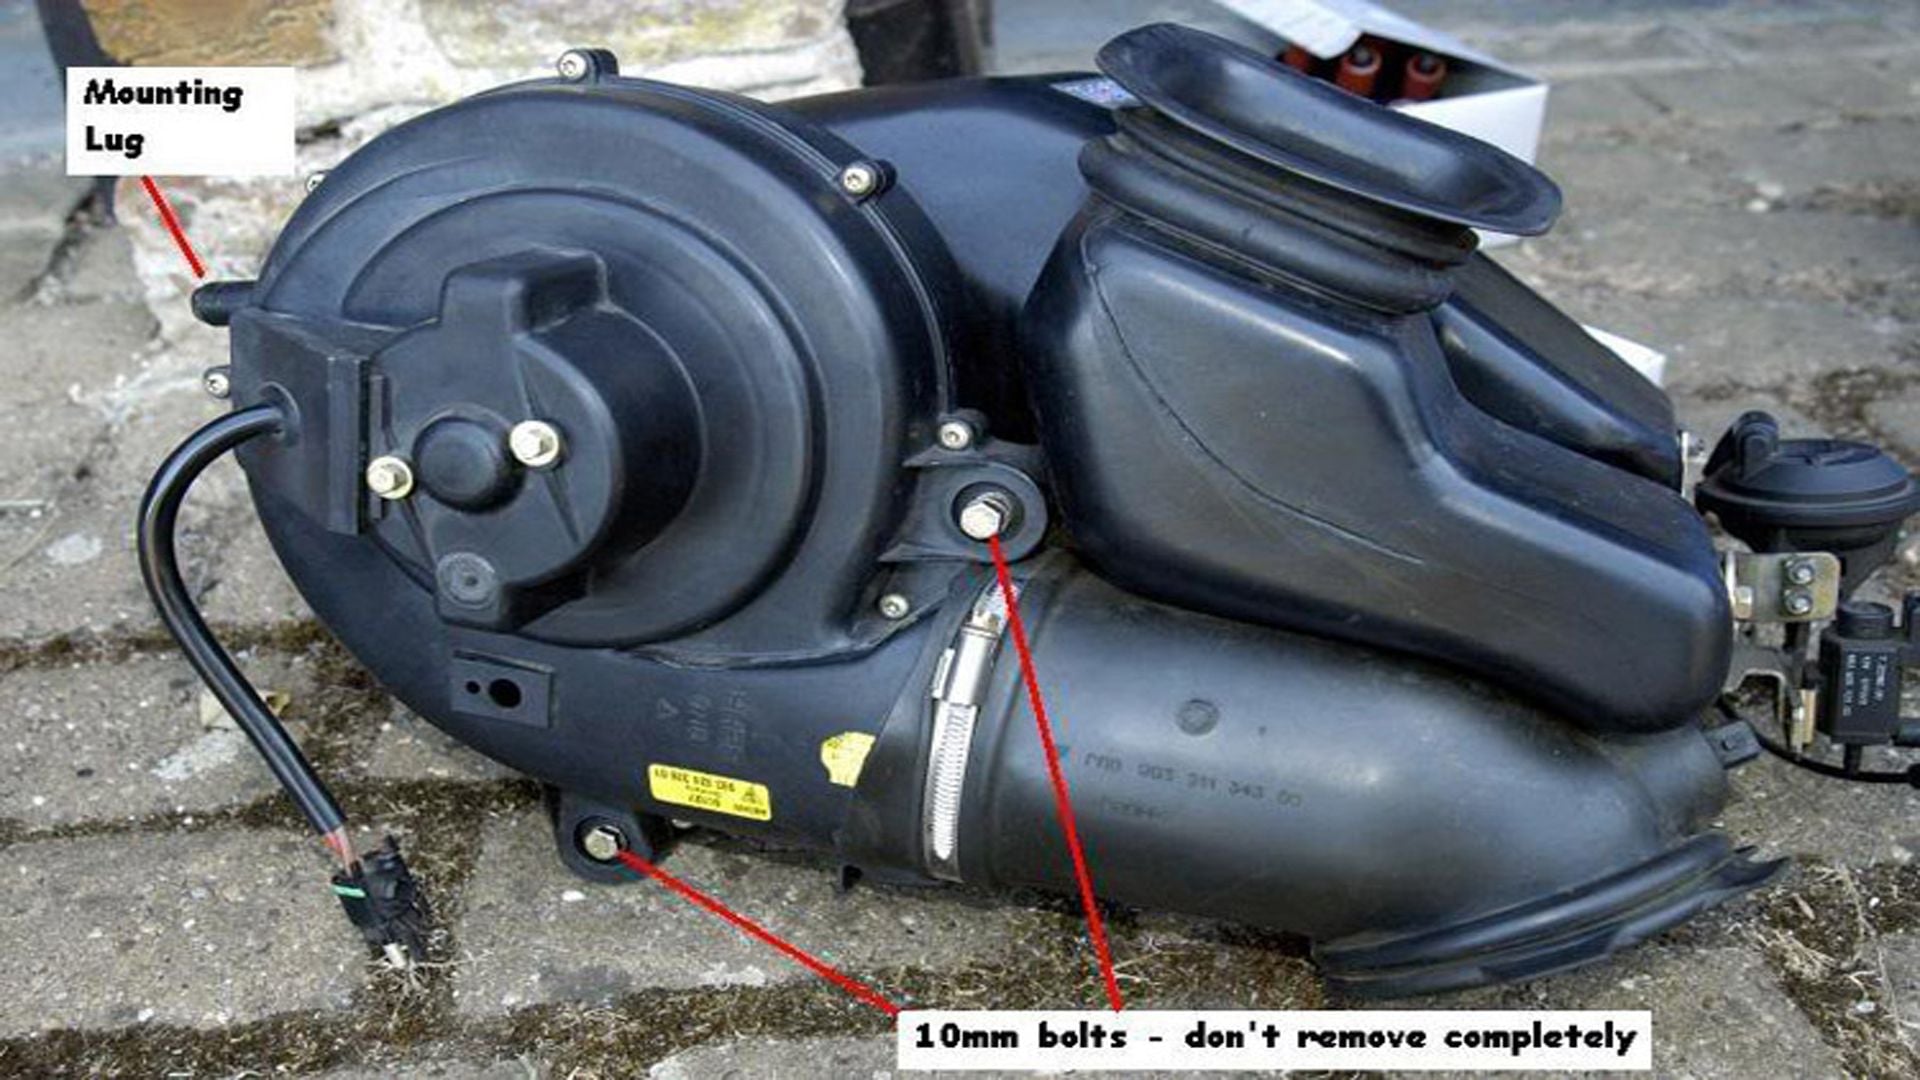
Figure 11. Blower assembly removed.
- With the blower assembly removed, there will be a plastic pipe still left in the engine bay. This can simply be slid off and moved out of the way for additional room to work on the spark plugs
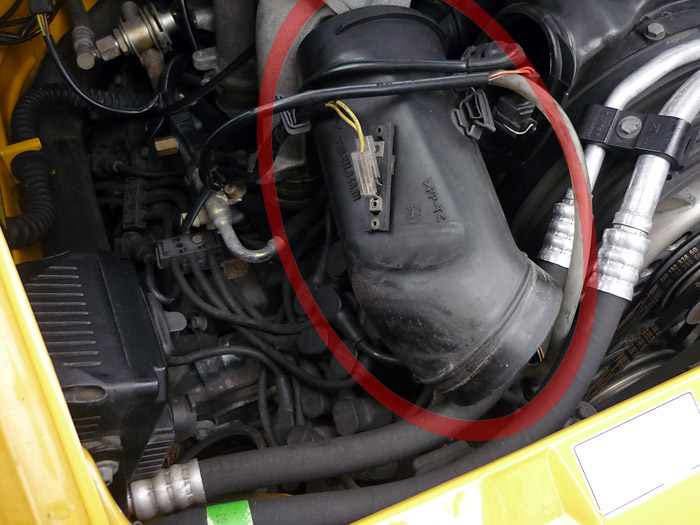
Figure 12. Plastic pipe removal. - The upper left hand side spark plugs can now be accessed. Remove the spark plug boots and spark plugs from the cylinder head. There is not a lot of room to work, so a combination of a spark plug socket, wrench, ratchet, wobblers, universal joints and extensions may be needed in order to remove and install the new plugs.
- With the proper gap set on the new plugs, install them into the cylinder head. Torque to 22 Ft/lbs. With plugs in place, reinstall the spark plug boots.
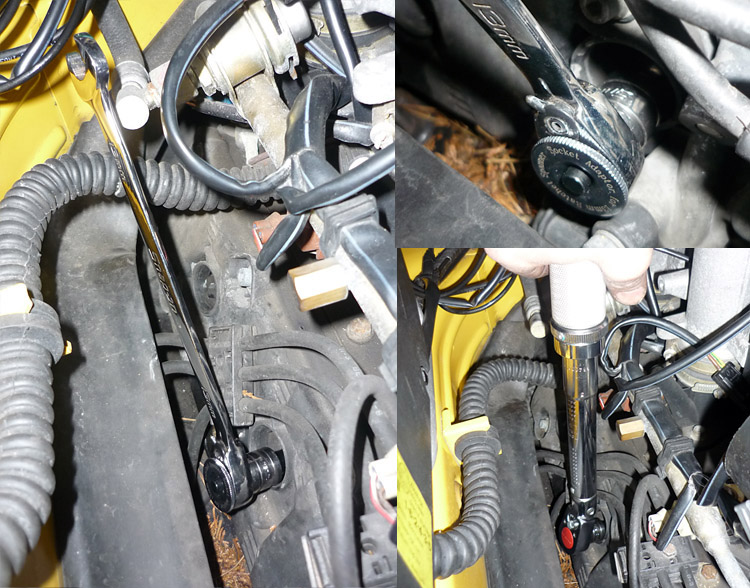
Figure 13. Replacing upper left side spark plugs.
Step 5 – Access right hand side upper spark plugs
- Remove the airbox assembly. Disconnect the clutch vent snorkel tube and two plastic airbox clips. Remove the left housing support bolt and air temperature sensor plug. Loosen the hose clamp securing the intake boot and mass airflow sensor (MAF) sensor in place. The airbox assembly can now be removed.
(Related Article: How to Replace Fuel Filter- Rennlist.com)
- With the airbox removed, two of the spark plug leads can be seen; however, #6 is positioned under the power steering pump and will require the removal of the engine shroud to access it.
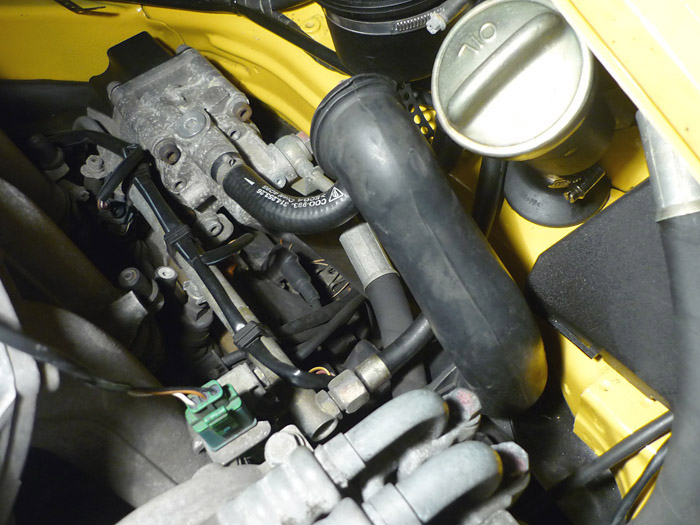
Figure 15. Right side of engine with airbox removed. - Remove the muffler (silencer) bracket. To do so, remove the hex head bolt using a 6mm Allen wrench (this also doubles as one of the three engine shroud bolts requiring an Allen wrench). Also, loosen the bolt securing the lower leg of the silencer bracket using a 13mm wrench. The bracket can now be slid out of place.

Figure 16. Underside of engine showing muffler bracket and shroud. 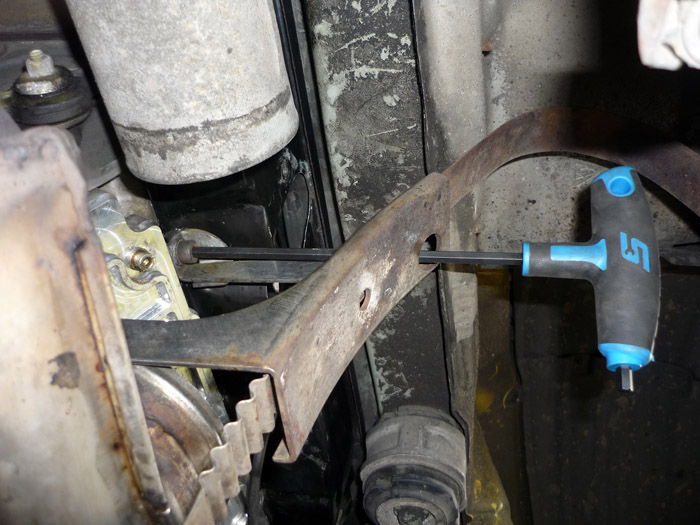
Figure 17. Hex bolt being removed with long T-handle. 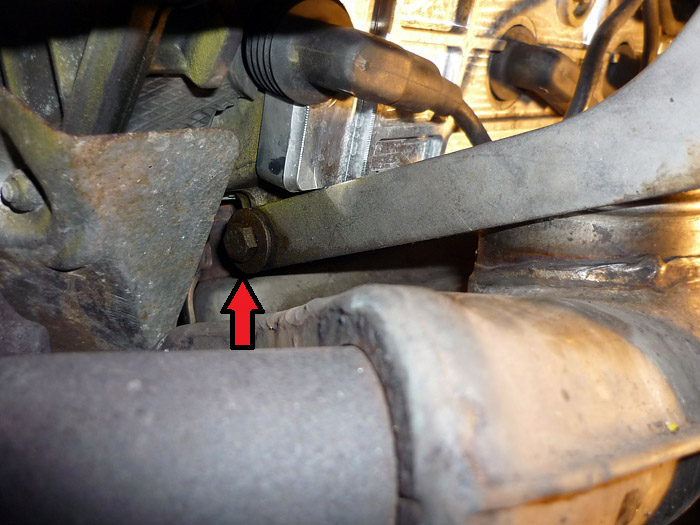
Figure 18. Lower leg bracket bolt. - Remove the two remaining 6mm bolts securing the engine shroud in place. The first of these is a bit tricky to access and may require a combination of extensions and wobblers to ensure the Allen key is securely in place to avoid stripping the bolt head. The final bolt is located underneath the spark plug wire leads. The shroud will be required to be pried up a bit and the plug wires moved to gain access to the bolt head.
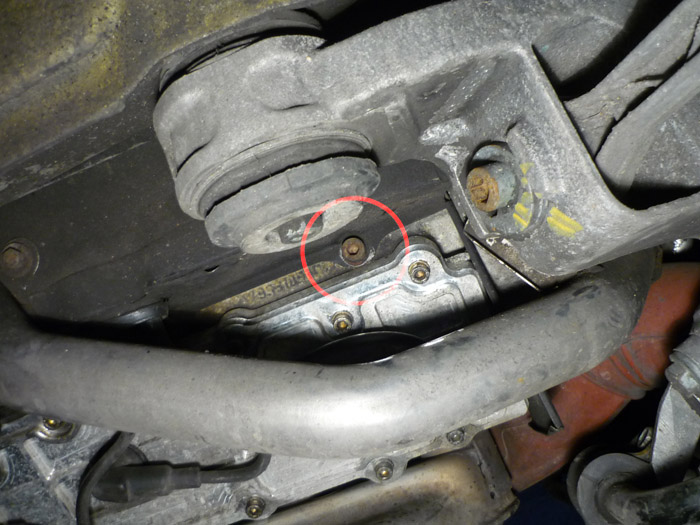
Figure 19. Engine shroud bolt. 
Figure 20. Shroud bolt underneath spark plug wires. - Remove the bolts securing the hard clutch vent pipe in place. There are three in total.

Figure 21. Clutch vent pipe bolt removal. - Back in the engine bay, undo the hose clamp securing the hard clutch vent pipe to the rubber vent tube.
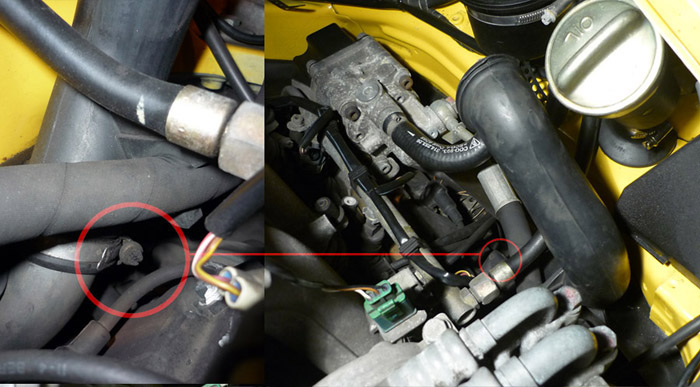
Figure 22. Separating clutch vent tube from clutch vent pipe. - Remove the rubber tube. Then underneath the car, remove the hard clutch vent pipe. The hard vent pipe will require a firm tug to break it free from the clutch housing and a bit of maneuvering to clear the suspension components.
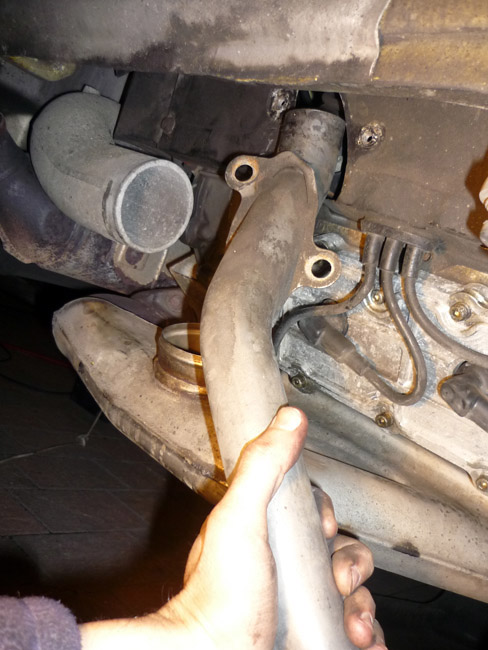
Figure 23. Clutch vent pipe removal. - With the vent pipe removed, the engine shroud has one final bolt holding it in place.
- With the bolt removed, the shroud should slide backwards and inch or two and then drop out of place.
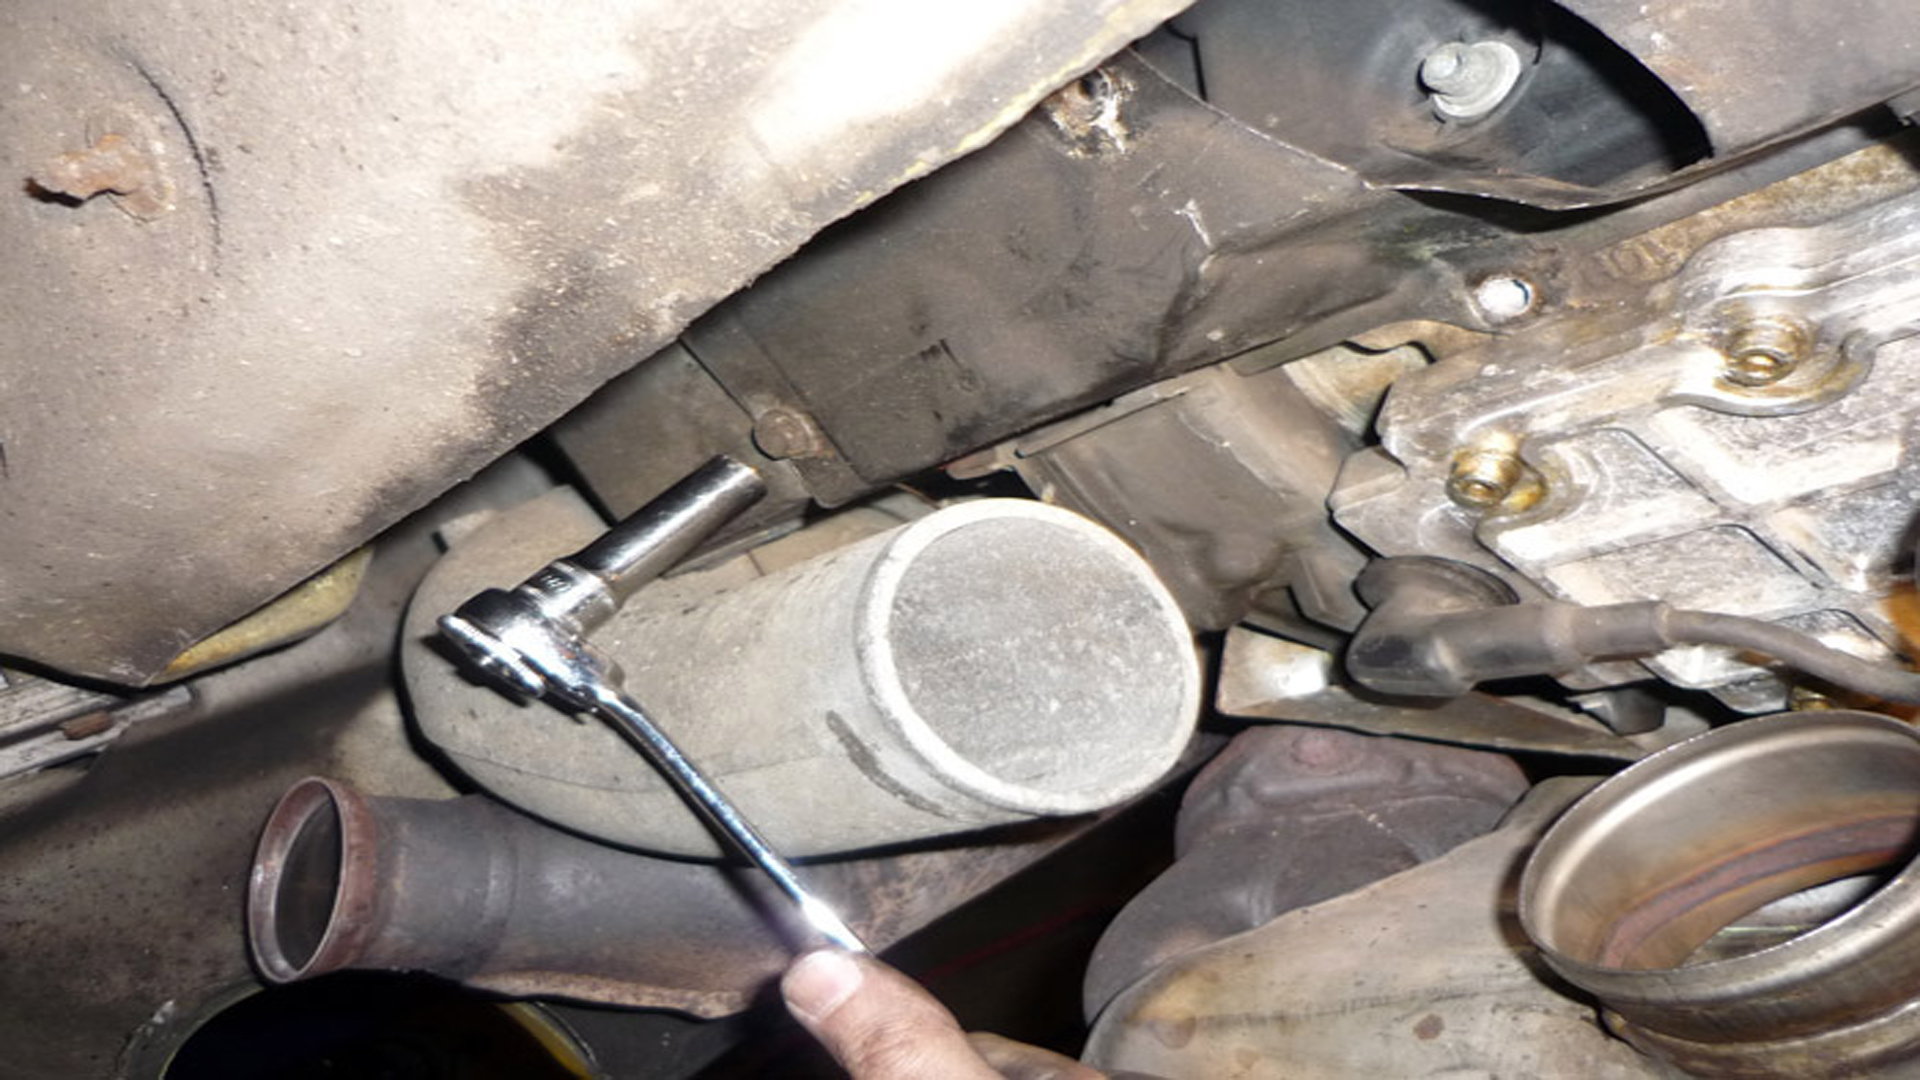
Figure 24. Final engine shroud bolt removal. 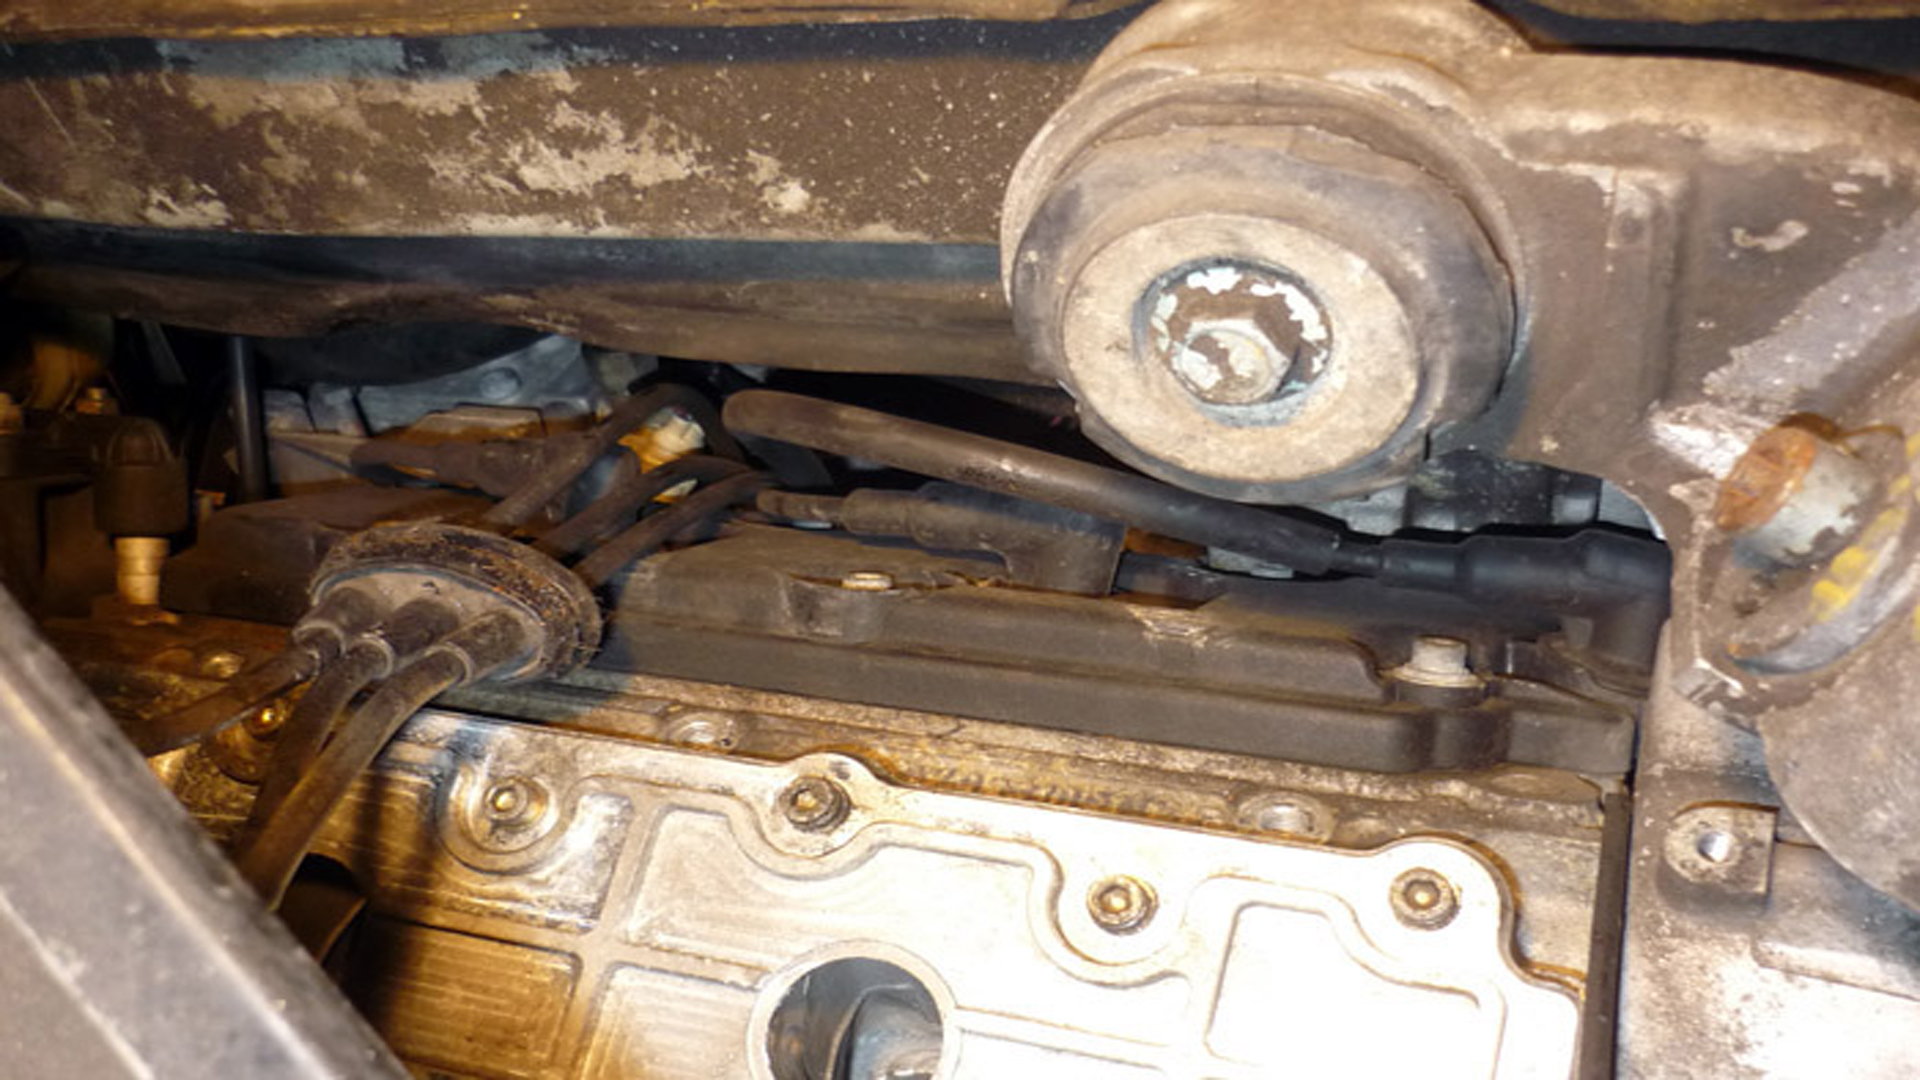
Figure 25. Shroud removed and spark plugs wires accessible. - Now that the engine shroud has been removed, the right side upper spark plugs can be replaced. With limited space, a combination of extensions and wobblers may again be necessary. Install new spark plugs and torque to 22 Ft/lbs. Reinstall spark plug boots onto spark plugs.
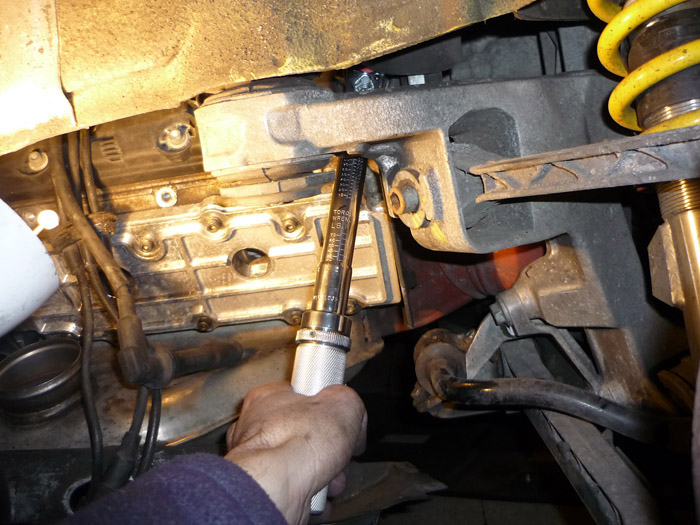
Figure 26. Replacing right side upper spark plugs.
Pro Tip
- Some owners opt to cut a portion of their engine shroud out as opposed to removing it. This can allow for quicker spark plug changes in the future.
- The engine shroud and clutch vent pipe can be removed while still attached to each other. Although, maneuvering the shroud out of place will be a bit more difficult.
Step 6 – Reassembly
Reassembly is the reverse order of the removal procedure.
- Install engine shroud.
- Install clutch vent pipe. Reattach rubber clutch vent tube to vent pipe.
- Install exhaust muffler bracket. Tighten all engine shroud fasteners.
- Reinstall airbox assembly, making sure the rubber sealing ring is positioned correctly between the MAF sensor and airbox housing.
- Reinstall blower assembly. Ensure all electrical plugs and vent tubes are securely in place. Attach vacuum line.
- Reinstall mufflers and exhaust tips. Muffler to catalytic converter torque :22 Ft/lbs. Exhaust tip torque: 22 Ft/lbs. Muffler strap torque: 16 Ft/lbs.
- Reinstall engine undertray.
- Lower vehicle off of jack stands.
Related Discussions
- Stuck Spark Plug in 993 - Rennlist.com
- Spark Plug DIY Notes and 90k service - Rennlist.com
- Labor Time to Replace Spark Plugs - Rennlist.com
- Best Spark Plugs for 993 - Rennlist.com