Porsche 928: How to Replace Fuel Pump
Replace the fuel pump on your 928 - and some other bits as well! It's one of the easier maintenance tasks you can perform yourself, in your own garage.
This article applies to the Porsche 928 (1979-1995).
A fuel pump is one of the most essentially important automotive parts. It serves as the heart of your vehicle's internal combustion system as it pumps the gasoline from the vehicle's fuel tank to the engine. Without it, you're not going anywhere. Follow these steps to replace a faulty fuel pump on your Porsche 928.

Materials Needed
- Floor jack(s) and jack stands (4)
- Wheel lug nut wrench
- Standard screwdriver
- 10mm socket
- Set of metric wrenches (7mm, 8mm, 10mm, 13mm, and 19mm)
- Bucket/containers for gasoline
- Fuel-rated gloves and goggles
- Cleanup rags
Preparation
You will be working with a very flammable, hazardous material. Work only in a properly ventilated area and have the proper protective gear for your eyes and skin! Also, we don't go into the details in this DIY, but you should plan on running as much fuel out of the tank as possible before starting the project. You will have to drain the tank at one point, so better to have to deal with as little fuel as possible. If your car isn't running, you can siphon the fuel into suitable containers.
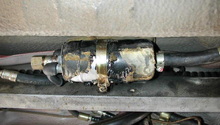
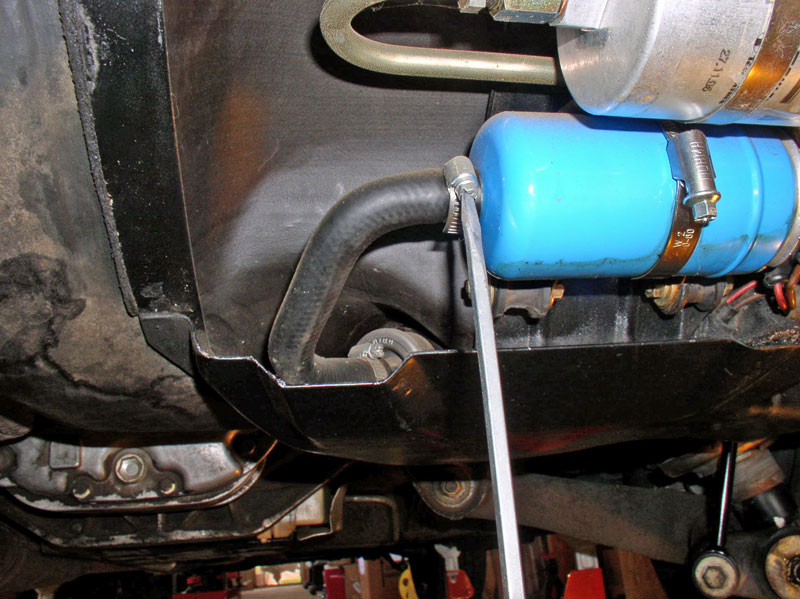
How many fuel pumps does your 928 have? Your 928 will have at least one fuel pump, maybe two. The most common is an "external" fuel pump that is mounted to the underside of the fuel tank along with an external (to the fuel tank) fuel filter – similar to what's shown in Figure 1:

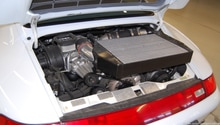
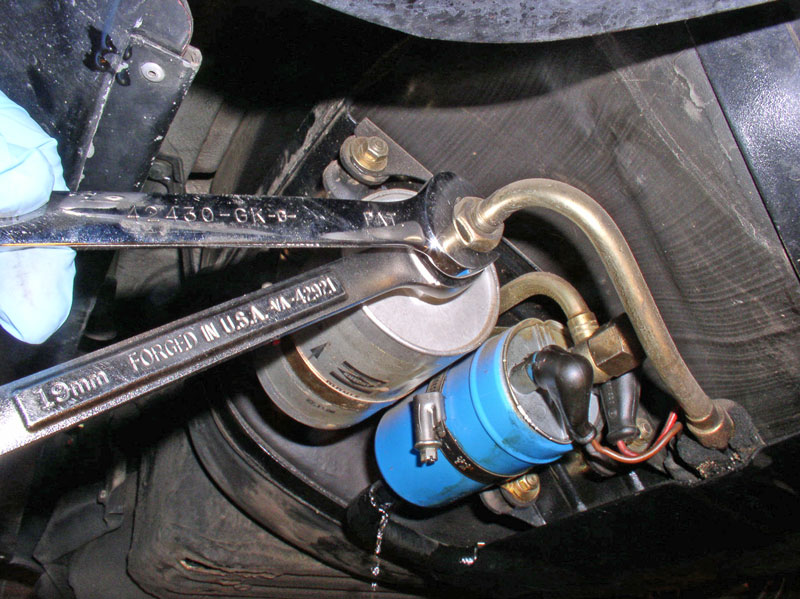
Other cars will have the external pump AND an internal pump. The internal pump is usually identified by two electric wires exiting the gas tank at the same point as the fuel hose that runs to the external fuel pump.
View Figure 2 for reference:

If you do have both types of fuel pumps, you should plan on replacing both at the same time. All of your hard work is for nothing if you replace the external pump, only to have the internal pump fail and potentially kill the new external pump in the process! So, for a bit more money, go ahead and replace both. If you don't have the internal pump, simply replace the external pump, the process of which is covered first.
Step 1 – Disconnect the battery
Disconnect the negative terminal of the battery.

Step 2 – Lift the car
Lift the car using the jack and jack stands. To give yourself some extra room to move while under the car and better lighting, remove the rear wheels after you have the car securely raised off the ground.
(Related Article: Porsche 928: How to Jack Up Your Porsche - Rennlist.com)

Step 3 – Remove the fuel pump cover plate
Remove the two (2) 10mm nuts that secure the fuel pump cover plate to the tank straps. There is one near the fuel vapor vent port pictured in Figure 5.

The other one is located at the other side of the tank near the rear bumper shock.

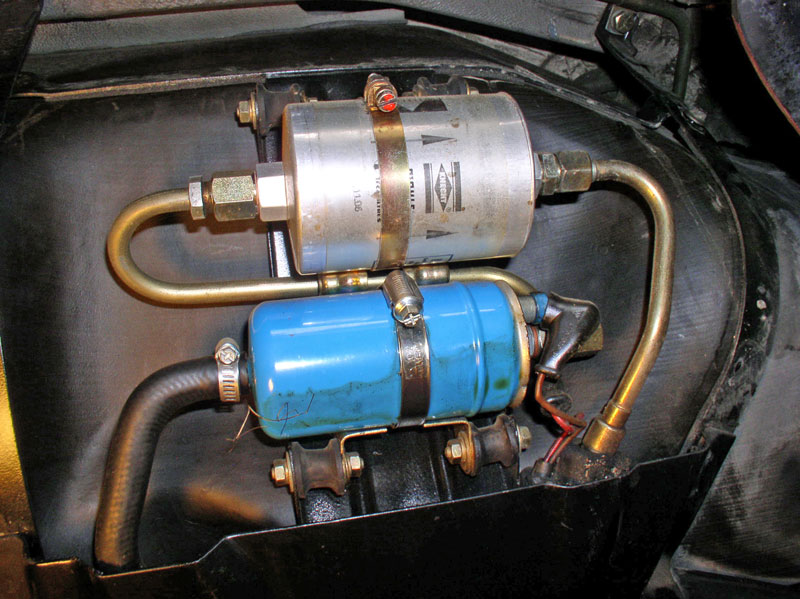
Pull the fuel pump cover plate off the studs and pull the cover rearward to remove. You will now see (’84 example shown here) the fuel pump (blue in this case) and external fuel filter exposed just under the fuel tank.
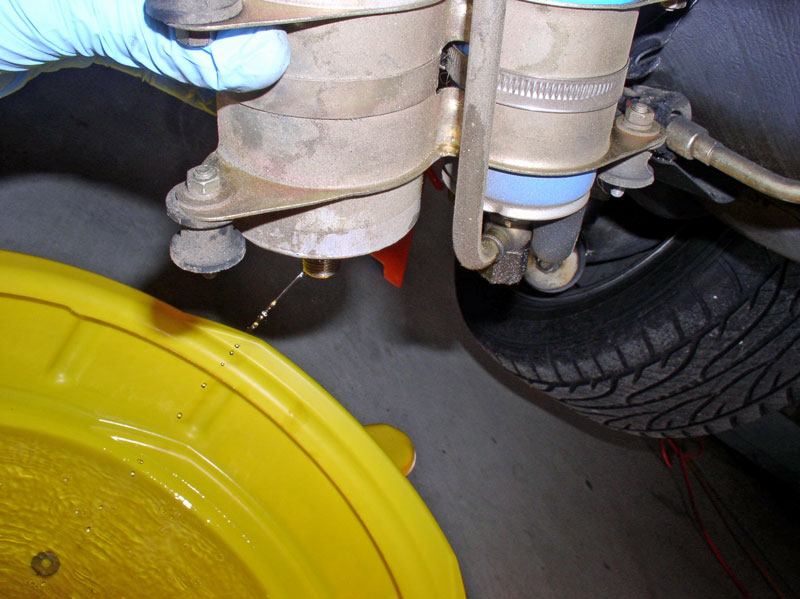
Step 4 – Drain remaining fuel from tank
Drain the remaining fuel from the tank by loosening the clamp at the rubber hose coming from the fuel tank.
Next, place a suitable container (safe for gasoline) for catching the fuel below the hose and pull the loosened hose from the fuel pump; direct the fuel to the container.

Step 5 – Disconnect the fuel lines from the fuel filter
Use 19mm wrenches to disconnect the hard fuel line running from the fuel filter.
Step 6 – Remove the fuel pump mounting bracket
Remove the fuel pump and filter mounting bracket next. You can remove the pump and even the filter from the car without doing this step if you want to, but it will be a lot easier to work on the mounting with it removed. You will also get a better view of the tank to check for leaks, etc.
You will only need to remove the OUTWARD facing 10mm nuts. There are four of them – two on the right and two on the left.

You will notice the bracket has slots that allow the bracket to slide on out when the OUTWARD nuts are removed as pictured below.

Tip the filter and pump over your bucket to drain any residual fuel.
Pro Tip
Remove both the external fuel pump and fuel filter while still fastened to the mounting bracket. Take the extra step and replace the filter at the same time you are replacing the pump. This will save you some potential work down the road, and if you've never replaced the filters before, now is the best time to do so! Also, removing the entire assembly with bracket gives you more fuel tank area to look-over for damage, leaks, etc.
Step 7 – Disconnect fuel pump wires
Remove the electrical wires from the fuel pump. The ground wire (brown) takes an 8mm wrench, and the power lead takes a 7mm wrench. This helps keep the wires from being attached to the wrong terminals.

You now have the pump and filter assembly, along with the mounting bracket, removed from the fuel tank.

Pro Tips
- Make sure to cap the hard fuel line you disconnected from the filter, so no dirt or dust enter the line.
- Before you begin installing the replacement pump (and possibly filter), make sure that you have all the parts you'll need on-hand and ready to go. Also, take this time to do a thorough inspection of the tank, lines and rubber bits. If you see anything cracked, missing, or otherwise suspect, do the right thing and replace.
Step 8 – Remove pump and filter from mounting bracket
Remove the old fuel pump (and fuel filter if you are replacing that as well) from the mounting bracket by loosening the clamps with a screwdriver. Once you loosen, the pump should slide out. Give the bracket a good cleaning and keep it handy for the next step.
Step 9 – Install new pump
If you've decided to replace the external fuel filter, hoses and perhaps the internal fuel filter, install them now. Once you have the other replacement parts installed, connect the new fuel pump to the filter/pump mounting bracket. Position the replacement pump and tighten the clamp to hold it in place.
The following steps to complete the installation are simply the reverse steps to remove.
- Reconnect fuel pump wiring - Using your 7mm and 8mm wrenches, reinstall the ground (brown) and power (red) wires to the fuel pump.
- Remount fuel pump bracket - Position the mounting bracket with your new fuel pump onto the retaining slots on the tank, and tighten-down the outside nuts with your 10mm wrench.
- Reconnect fuel lines - Use your 19mm wrenches to reconnect the hard fuel lines to the fuel filter and pump. Then, reconnect the black fuel hose running from the tank to your fuel pump and tighten the hose clamp with a screwdriver.
- Replace the cover plate - Reposition the fuel pump cover plate and reinstall the 10mm nuts to hold it in place. Tighten-down.
Pro Tip
Consider starting the car up before replacing the cover plate. This will give you a chance to view the new pump and any other parts you've replaced while they are in use. Check for leaks.
Related Discussions
- 1986.5 Fuel Pump - Rennlist.com
- 928 Fuel Pump Rebuild? - Rennlist.com
- Cheaper Fuel Pumps - Rennlist.com
- In-tank Fuel Pump - Rennlist.com