Porsche 928: How to Remove Fuel Tank
If you've been pulling your hair out trying to stop a fuel leak or have attempted patches that never worked, it may be time to consider removing the fuel tank entirely to do a more thorough inspection, and possibly even a replacement. Read on to learn how even a newbie can safely remove the fuel tank from their 928.
This article applies to the Porsche 928 (1979-1995).
Discovering you have a fuel leak is not a good feeling. It may start with a noticeable smell of fuel or a drip on the garage floor. In the worst case it can be dangerous, and in the best case you can easily locate the leak and eliminate it with a patch or repair. But in some cases you won’t be able to locate or repair the leak without removing the tank from the car entirely to identify the source of the problem and determine if you will need to replace the fuel tank. In the following article, the preparation work and step-by-step instructions for safely removing the fuel tank from your 928 are provided.

Materials Needed
- Phillips screwdriver
- Jack and jack stands
- Lug nut wrench
- Ratcheting wrench: 7mm, 8mm, 10mm, 13mm, 19mm sockets
- (2) 19mm box or standard wrench
- Allen wrench: 6mm
- Bucket or container to store gasoline
- Towels or rags
- Goggles and gloves (must be fuel-safe materials)
If you are removing the tank yourself, the cost is $0. A replacement fuel tank will run $500 - $1,500. Although not covered in this particular How-To, you will also need to consider purchasing other replacement parts that are recommended to be replaced when re-installing a fuel tank in your 928.
Preparation
It almost goes without saying that you should only begin work on a fuel tank that is empty. Run your 928 engine normally to remove as much fuel from the tank as possible. Firstly, it is far safer with less fuel around, and secondly, it will save you some time later as you will have to drain any left-over fuel from the tank before safely removing it. To burn-off as much fuel as possible, just run the engine until the low fuel light comes on. From there, you'll have to determine just how much gas you have left in the tank. One method is to monitor closely when the RED Low Fuel light comes on during normal driving and refueling cycles, note how much gas the tank would take on a fill up, and do some math to gauge how much fuel is left in the tank when the light comes back on. It may not be an exact science, but you should be able to get within a gallon, if not ounces, if you do the math correctly.
Pro Tip
Whether you are replacing your 928 fuel tank or simply repairing and re-installing, you should order any replacement parts ahead of time to minimize down time (if that's important). The rubber parts on the fuel system are critical for safety and reliability, and given the age of these cars, it's better to be safe than on fire!
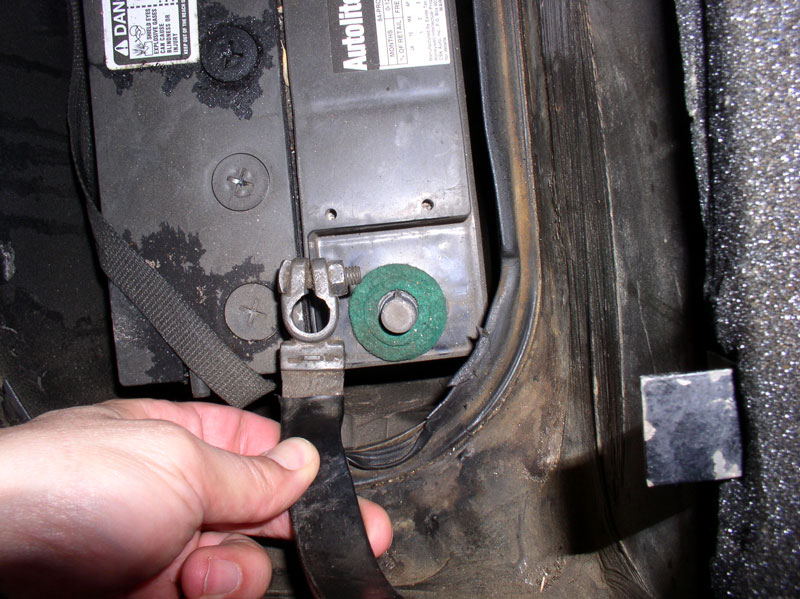
Step 1 – Disconnect the battery
Disconnect the negative battery cable.
Step 2 – Raise the car
You will want to get the car up as high as you can, so that you have room to drop the old fuel tank down and move it out of the way safely. A lift is best, but jack stands will do.
(Related Article: Porsche 928: How to Jack Up Your Car - Rennlist.com)

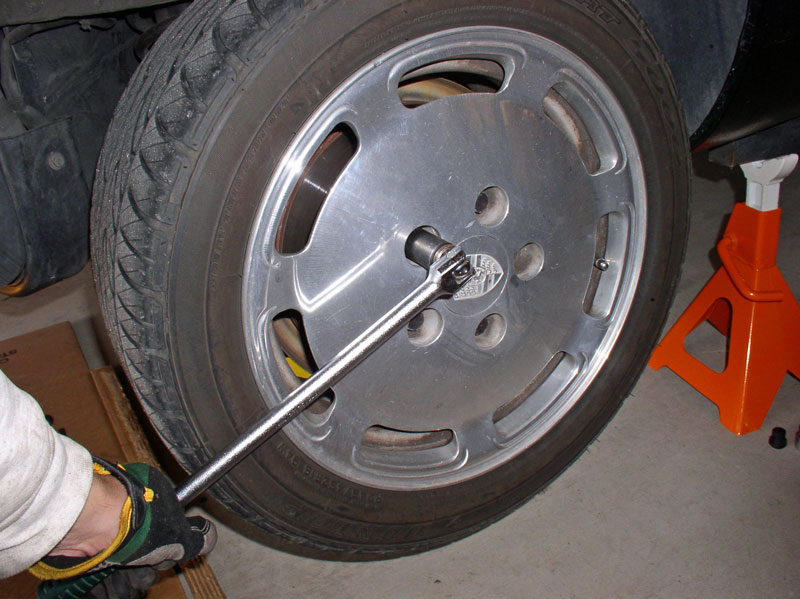
Step 3 – Remove the rear wheels
All of your work will be at the rear of the car – removing the rear wheels will give you more room to work comfortably, and lighting will be a bit better.
Warning
- Working with highly combustible liquids and even vapors requires taking special precautions to avoid tragedy. It goes without saying that you should be protecting your skin and eyes by wearing appropriate fuel-proof protective gear. But you should also be working in a well-ventilated area (outdoors is best) and you may even want to wear a mask if the fumes are strong. And certainly don't perform this project where there are any open flames such as heaters or sparks that might ignite fumes. You not only should be careful with liquid fuel, but beware of vapor build-up in enclosed areas as well!
Step 4 – Remove the fuel pump cover plate
Use a 10mm socket to remove the bolts on each side of the cover plate. Pull the plate off.
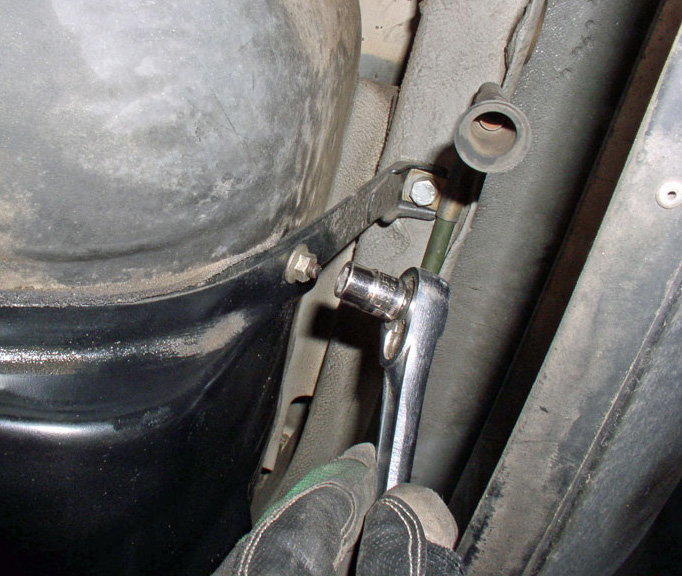
Figure 4. Removing first bolt. 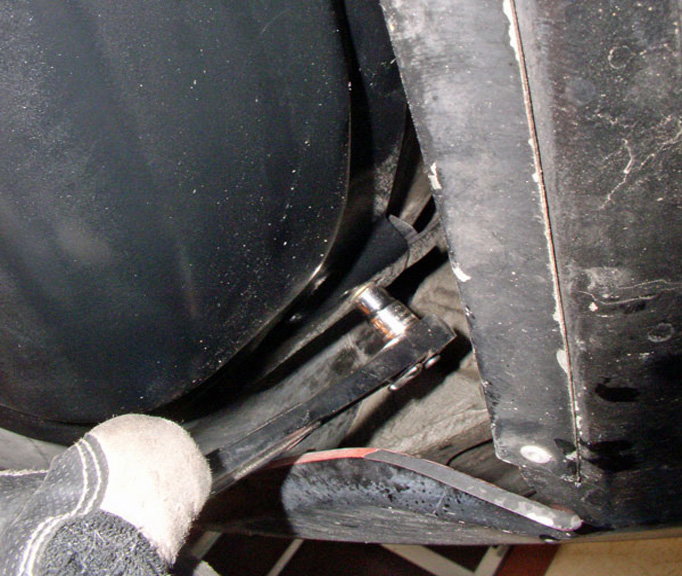
Figure 5. Removing second bolt on the opposite side. 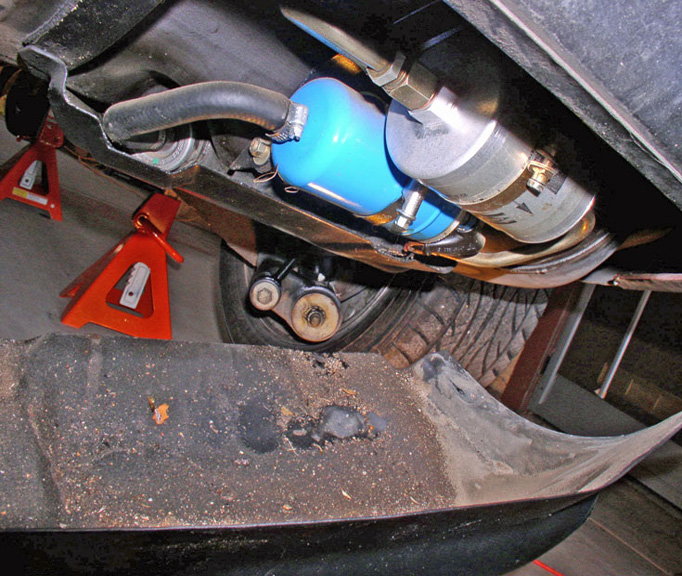
Figure 6. Cover plate removed.
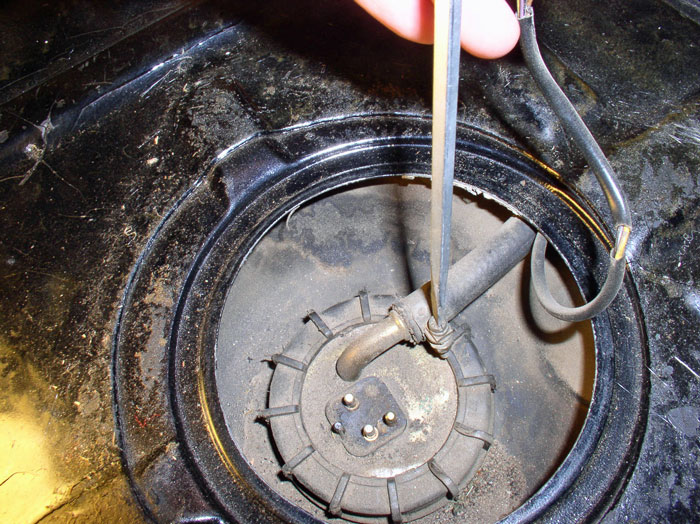
Step 5 – Drain remaining fuel from the tank
Loosen the clamp at the rubber hose coming from the fuel tank as shown in Figure 7. Place a suitable container for catching the fuel below the hose and pull the hose from the fuel pump, directing the fuel to the container
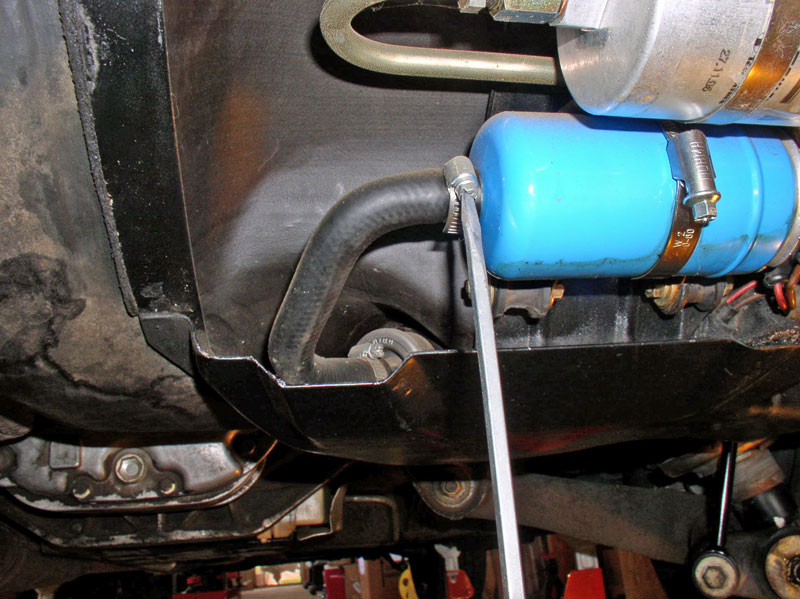
Figure 7. Rubber hose clamp. 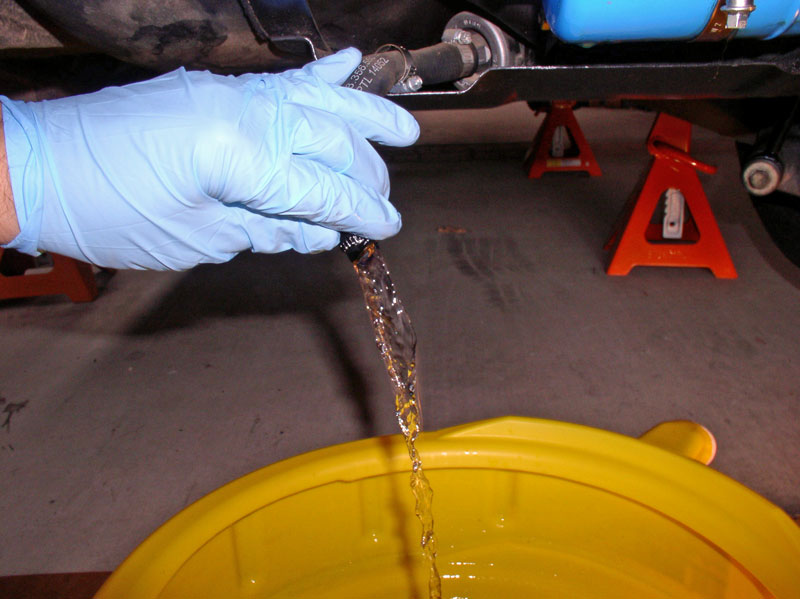
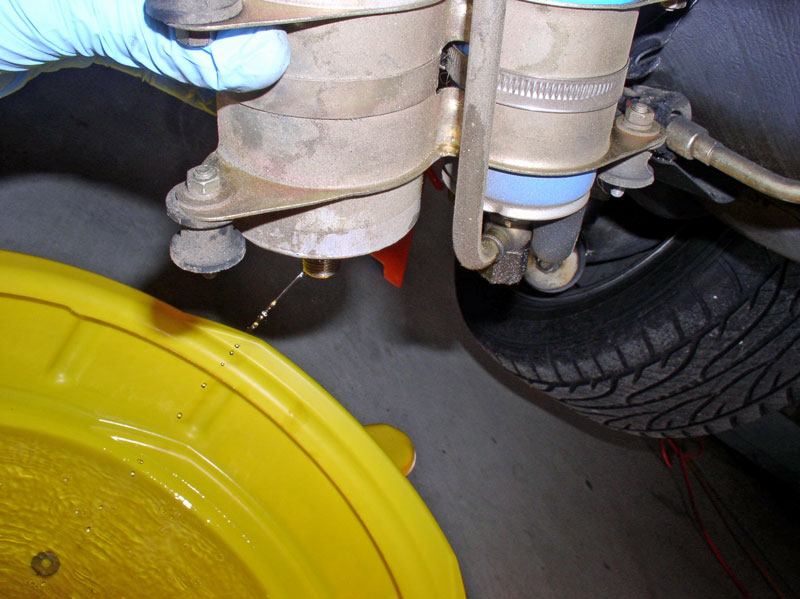
Figure 8. Draining and catching fuel.
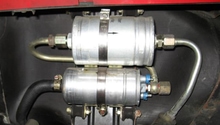
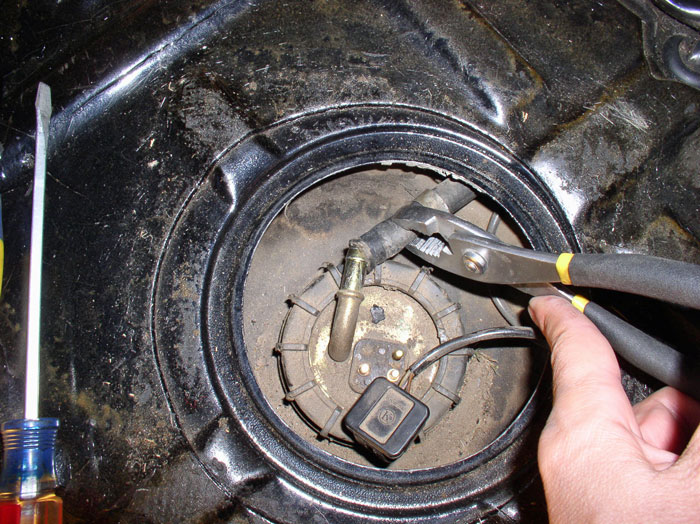
Step 6 – Remove the fuel pump and external fuel filter
Now that you've drained the remaining fuel from the tank, you'll need to remove both the fuel pump and external fuel filter. There is a bracket holding both to the fuel tank.
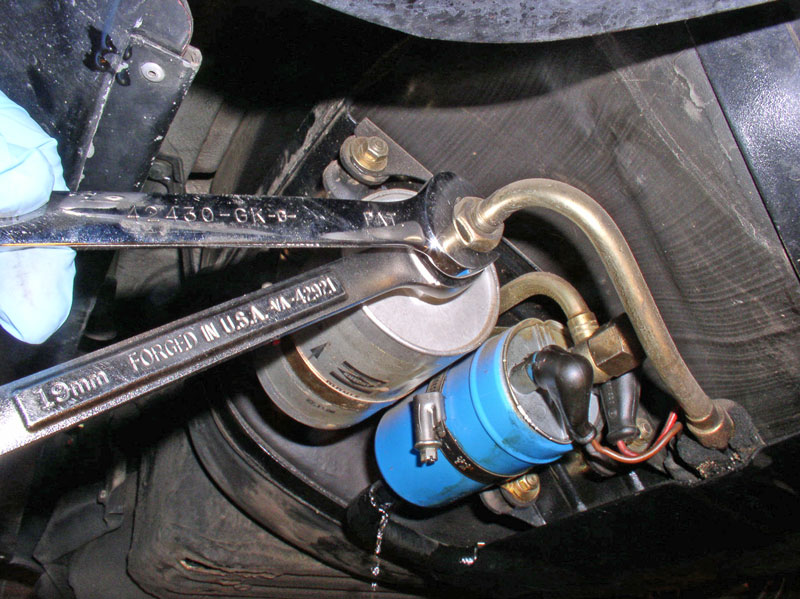
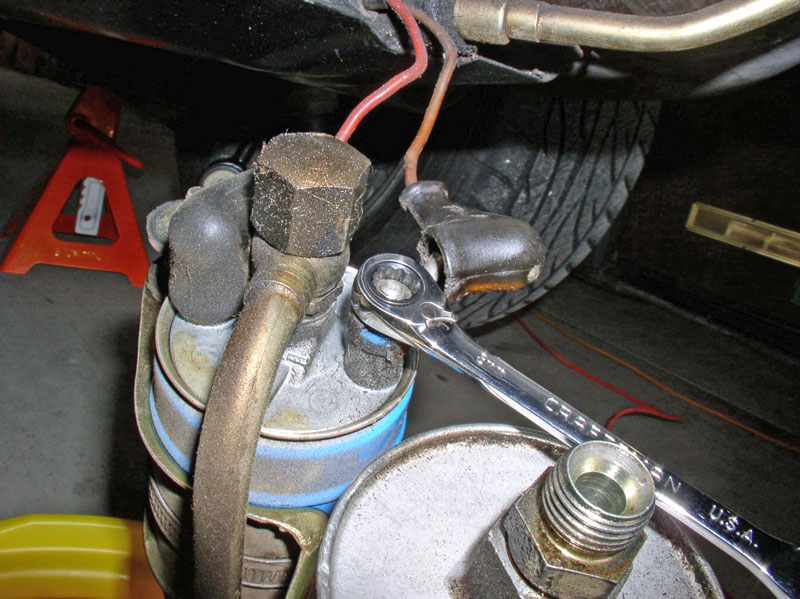
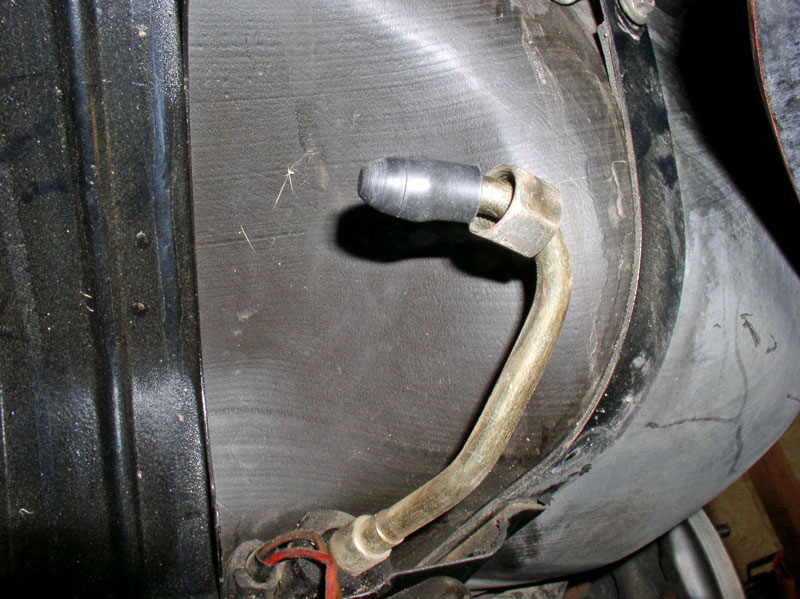
Figure 9. Disconnect the hard fuel line from the “Exit” end of the external fuel filter. It takes a 19mm wrench to loosen the nut and a 19mm wrench to counter hold the nut on the filter side. 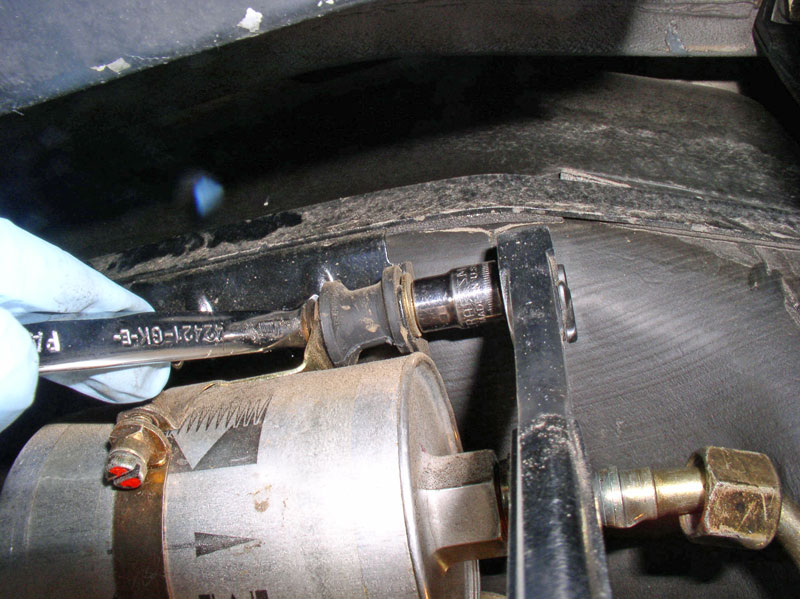
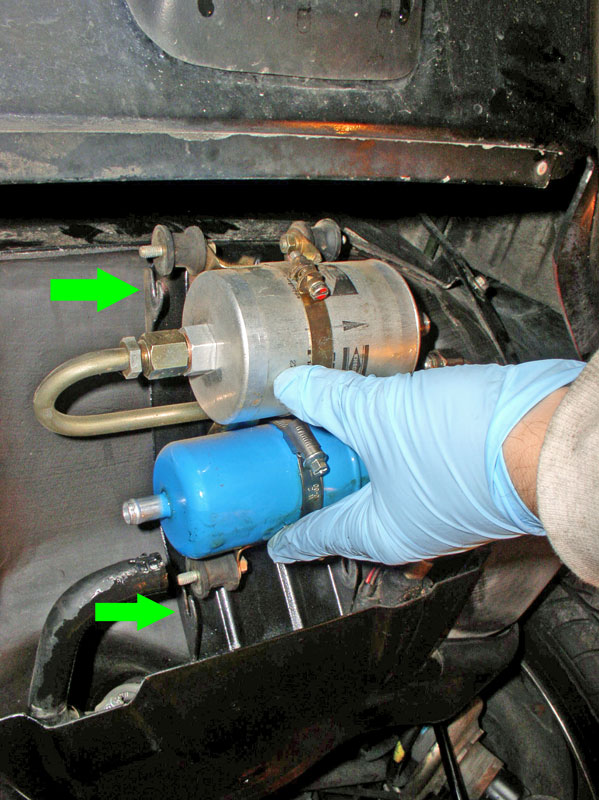
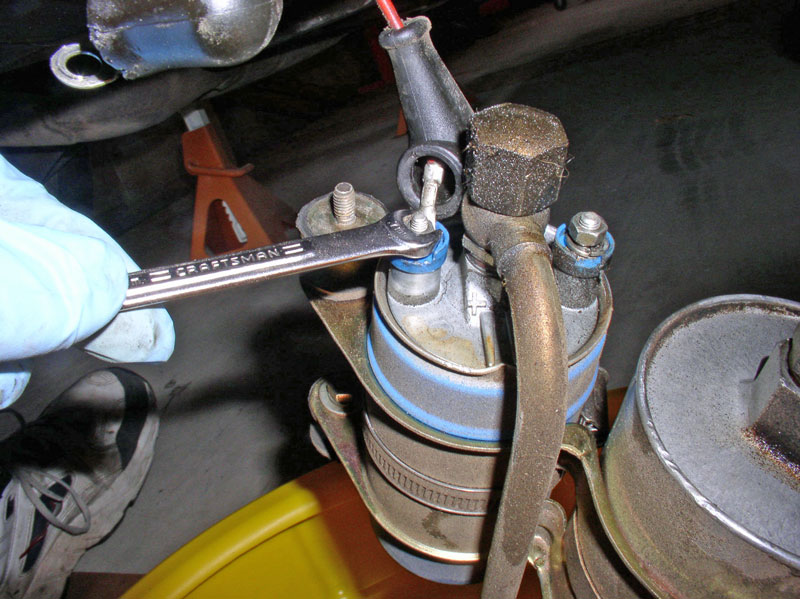
Figure 10. You will only need to remove the OUTWARD facing 10mm nuts. There are four of them – two on the right… 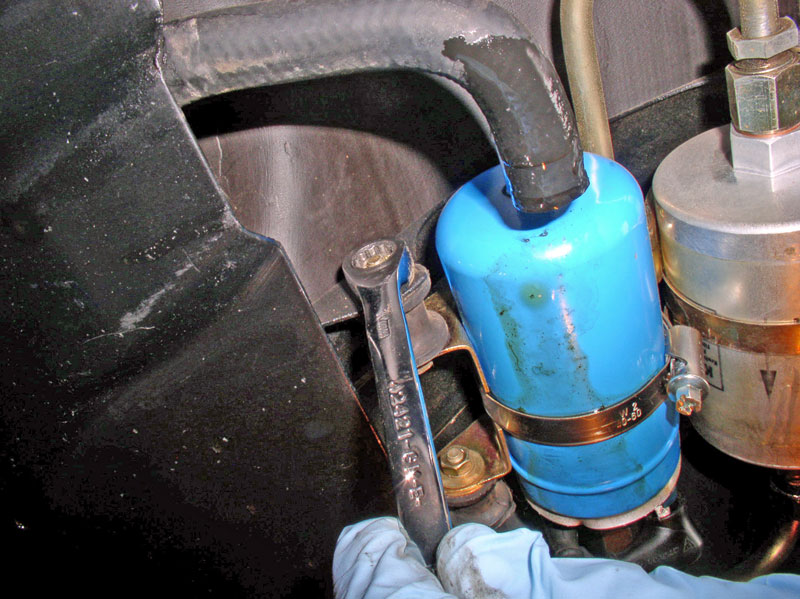
Figure 11. ...and two on the left.
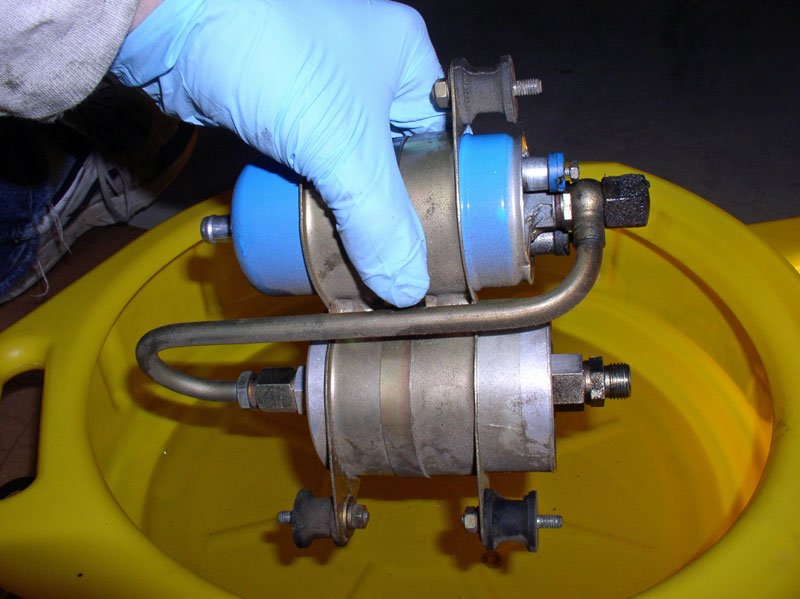
You will notice the bracket has slots that allow the bracket to slide on out when the OUTWARD nuts are removed as pictured in Figure 12.
Tip the filter and pump to drain any residual fuel.
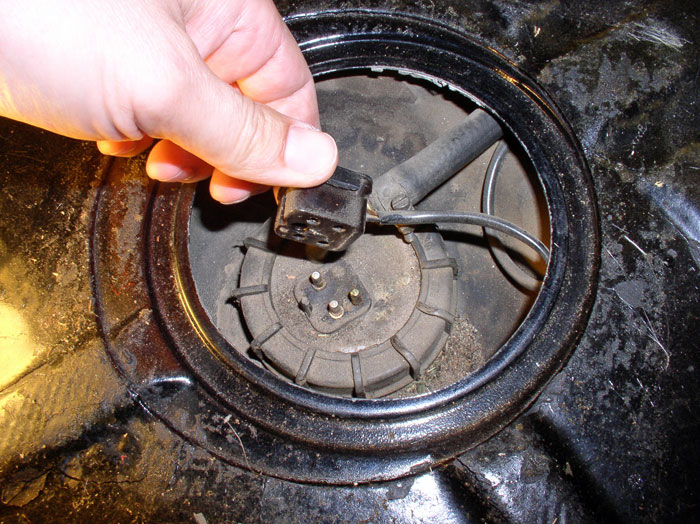
Remove the electrical wires from the fuel pump. The ground wire (brown) takes an 8mm wrench.
The power lead takes a 7mm wrench. This helps keep the wires from being attached to the wrong terminals.
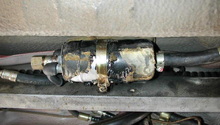
The assembly should be fully detached at this point. Here’s what it should look like from the rear side exposing the bracket.
Cap the fuel filter side to prevent dirt from entering the filter unless you are replacing. Also cap the exposed side of the fuel pump.
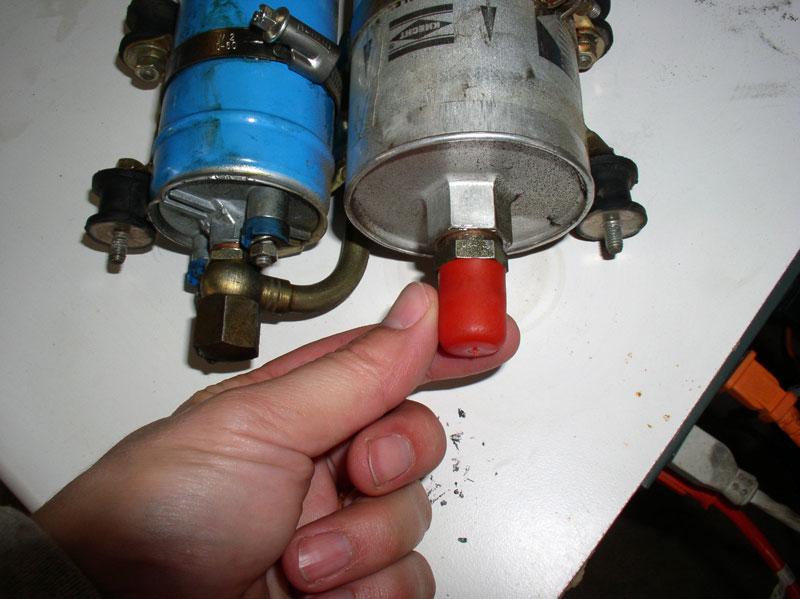
Also cap the hard fuel line at the “Exit” side of the fuel filter as shown.
At the wheel well, remove the 10mm nut that secures the plastic cover over the wiring harness and fuel line.
Loosen the clamp on the vent hose at the compensating tank using a screwdriver.
Step 7 – Remove fuel level sending unit
In the hatch area, pull up the carpeting and any protective layers to expose the fuel level sender access port. There is a plastic cover that you should be able to pry up from the floor to expose the sending unit below. Unplug the connector.
Loosen the fuel return line hose clamp with a standard screwdriver.
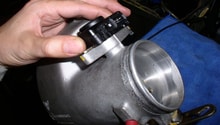
To remove the fuel return hose, you may find it easier to do so if you first loosen the fuel level sending unit plastic nut, using something like an oil filter wrench.
As you remove the fuel return hose, you may want to clamp-off or cap the line as there may be residual fuel present.
Step 8 – Detach fuel tank from fuel filler assembly
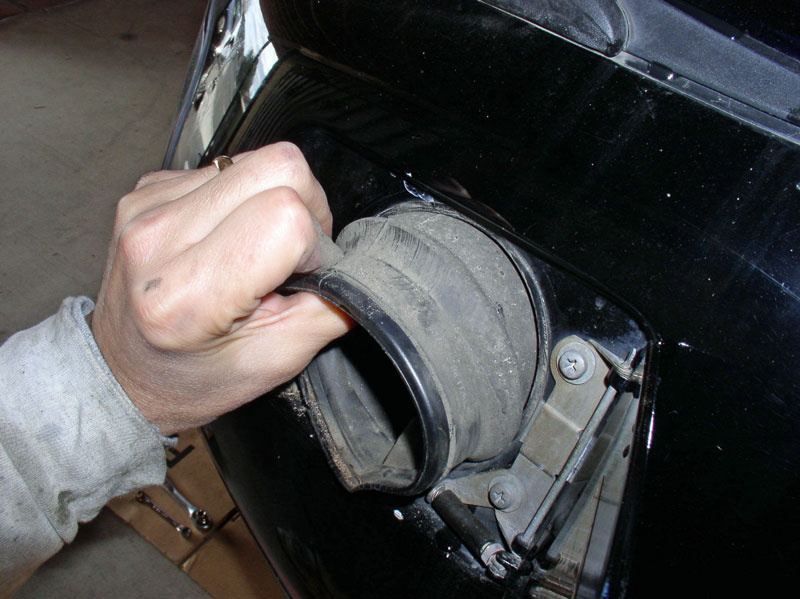
Move to the outside of the car, open the fuel filler door (you may also want to remove this entirely) to expose the tank filler opening and rubber grommet.
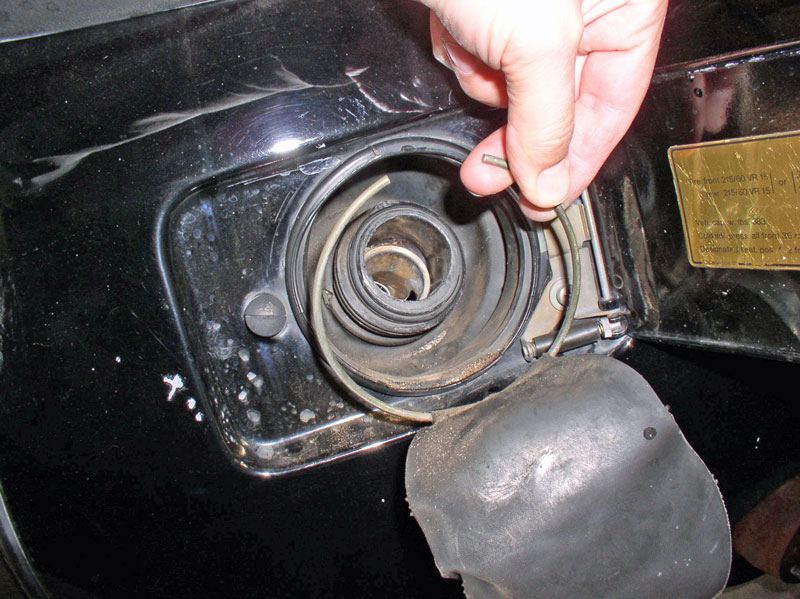
Figure 24. Pry out the retaining ring with a screwdriver and remove. 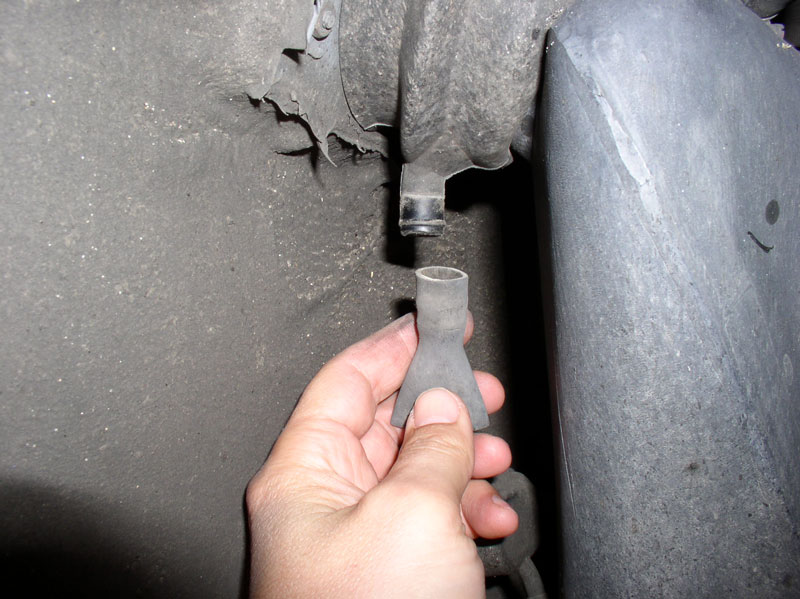
Figure 25. Under the wheel well behind the filler opening, pull off the drain hose.
The next step takes two hands – one to pull the rubber grommet from the filler opening, and the other to reach around to the other side to separate the grommet from the fuel tank.
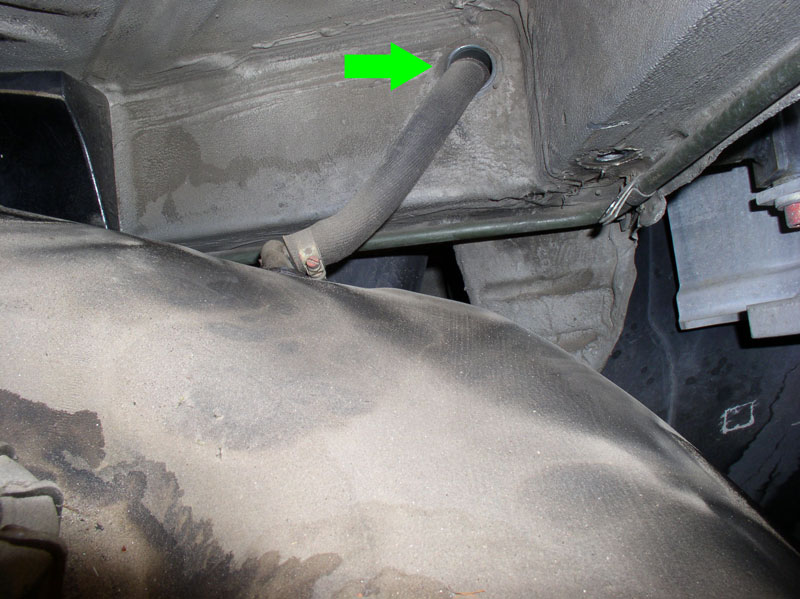
Step 9 – Disconnect the vent hose
The following procedure leaves the vent hose intact vs. cutting the hose (an option). The vent hose is routed through the body framing so the tank cannot be removed unless the hose is disconnected or cut. If you are replacing the hose, cutting it may be the easier approach; cutting the hose will reduce the risk of breaking the plastic connectors on the fuel tank while you’re wrestling the hose off these connectors. When the grommet is removed, you will see the 6mm Allen head bolt that secures the fuel tank filler to the body of the car, and you’ll notice the hose clamp for the larger vent hose to the left. Loosen the vent hose clamp and slide the clamp back. We won’t be disconnecting the hose just yet. Dropping the tank a few inches first should provide enough room to get your hand in there to grasp the hose and disconnect it.
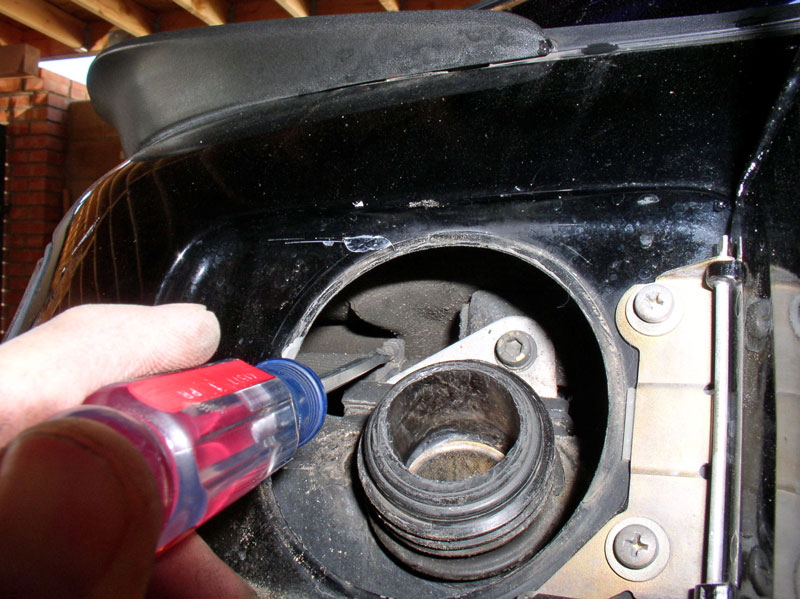
Figure 27. Loosen the vent hose clamp and slide the clamp back. 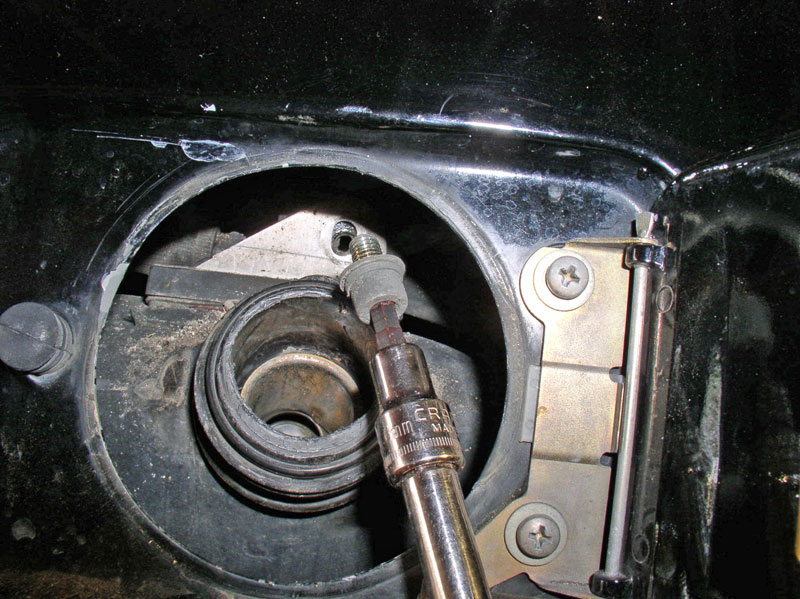
Figure 28. Remove the 6mm Allen head bolt.
Step 10 – Remove the fuel tank strap
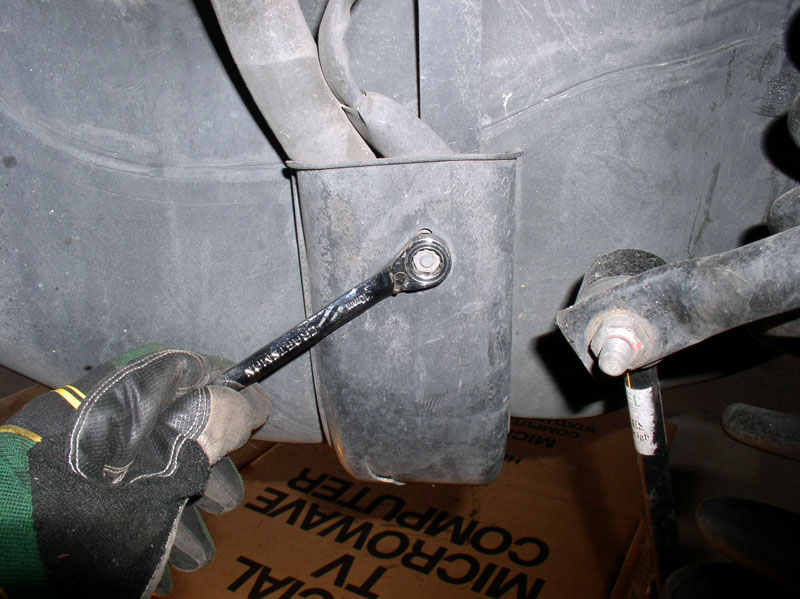
Remove four 13mm fuel tank strap bolts which are holding the fuel tank in place.
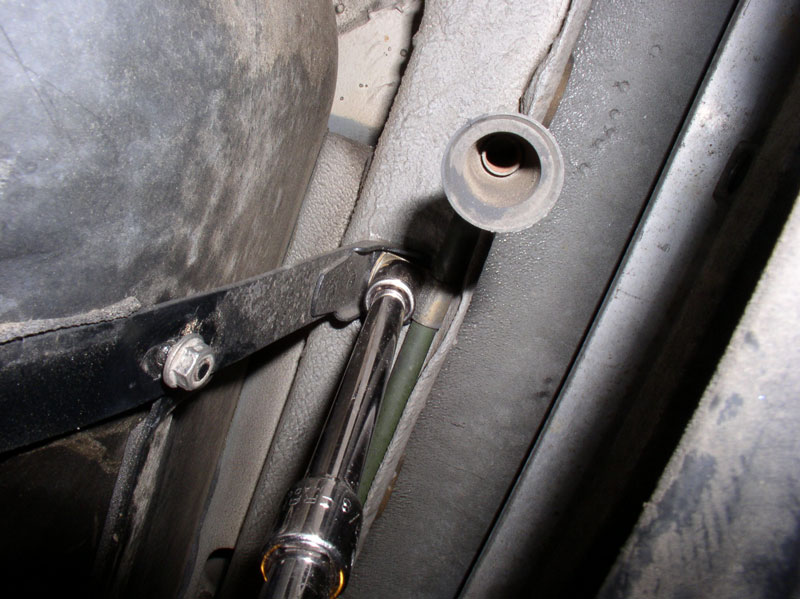
Figure 29. One is located at the rear near the vapor exit port as shown above. 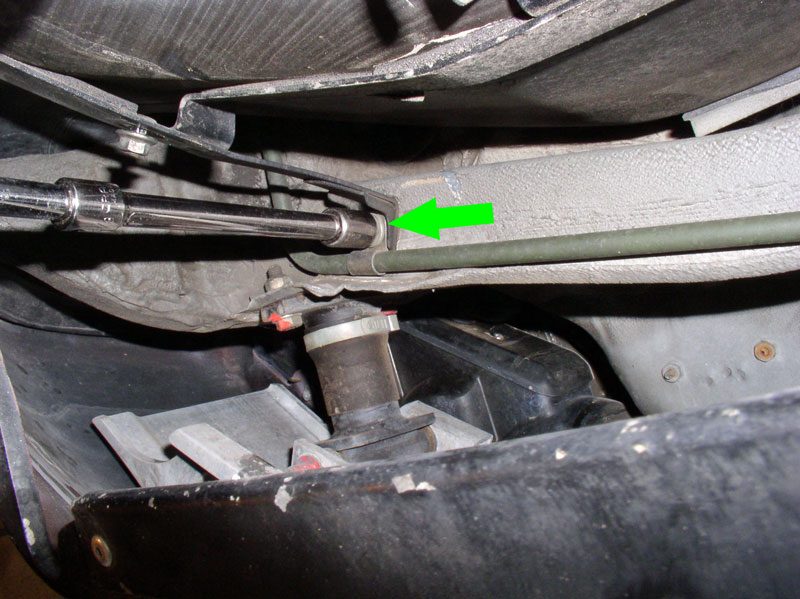
Figure 30. The other rear bolt is located near the left rear bumper shock. 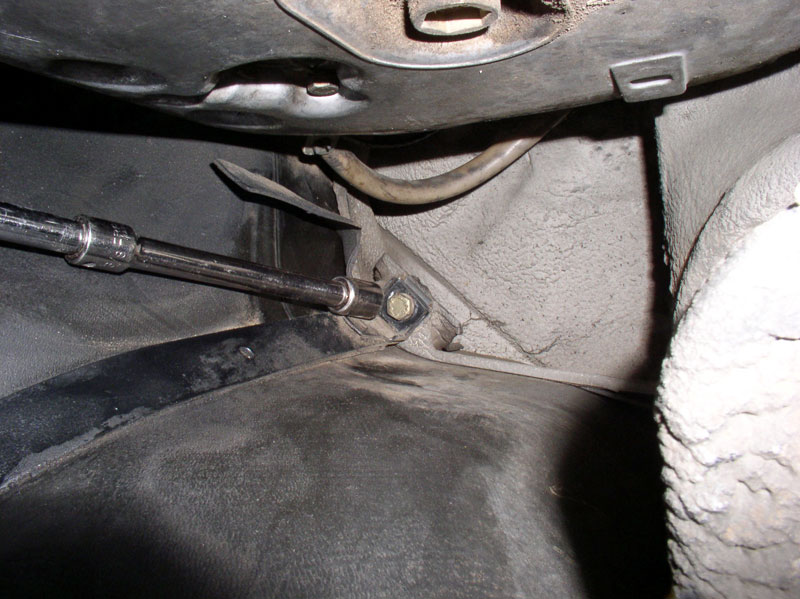
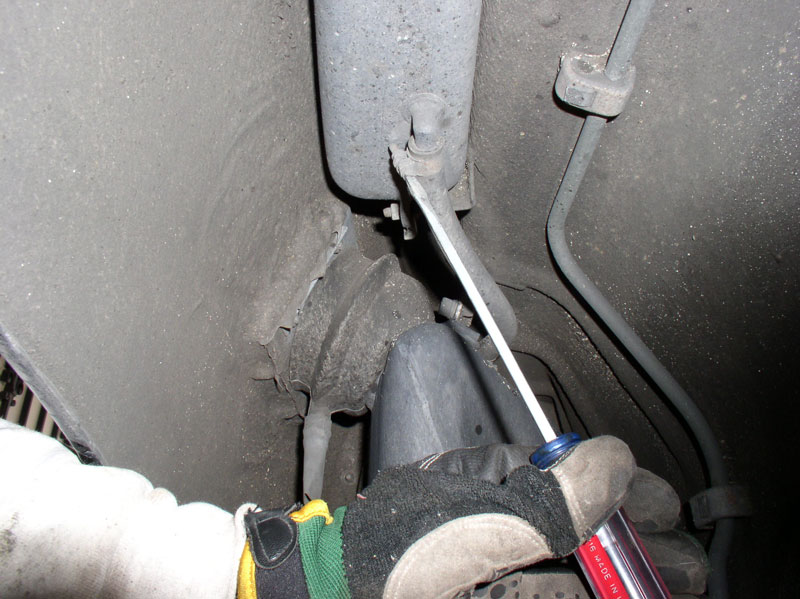
Figure 31. Another one on the forward side of the tank just in front of the transmission. 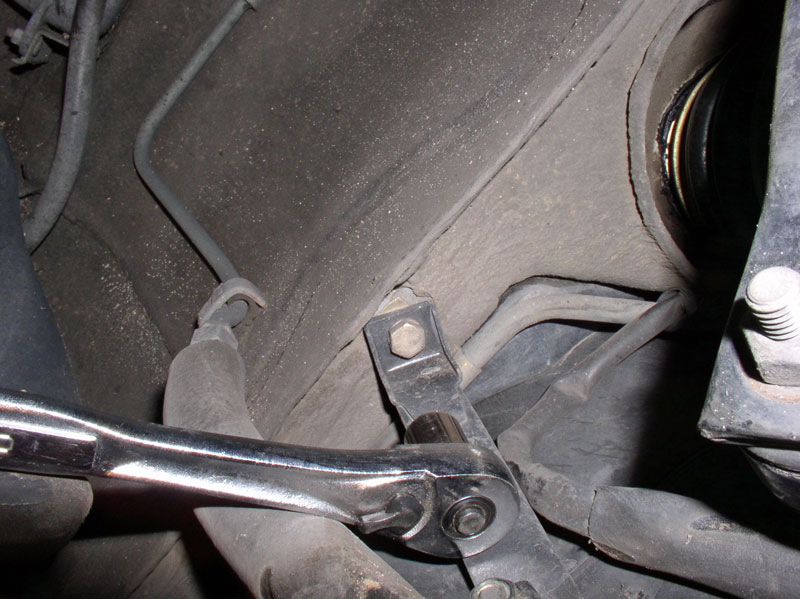
Figure 32. The last one located at the rear wheel well near the rear shock.
With the four bolts removed the tank strap should pull down easily. The fuel tank is very light when all the fuel is emptied and the pumps, filter, and brackets are removed, so you may not need to support the tank. Of course, you can put some blocks or a milk crate just beneath in case it does "fall", but the vent hose will prevent the tank from dropping completely free.
Step 11 – Remove the vent hose
With the tank strap removed entirely, you should be able to pull the fuel tank down slightly to one side. Now go back to the filler opening and reach in to the vent hose connection. Wiggle/twist the hose to release it.
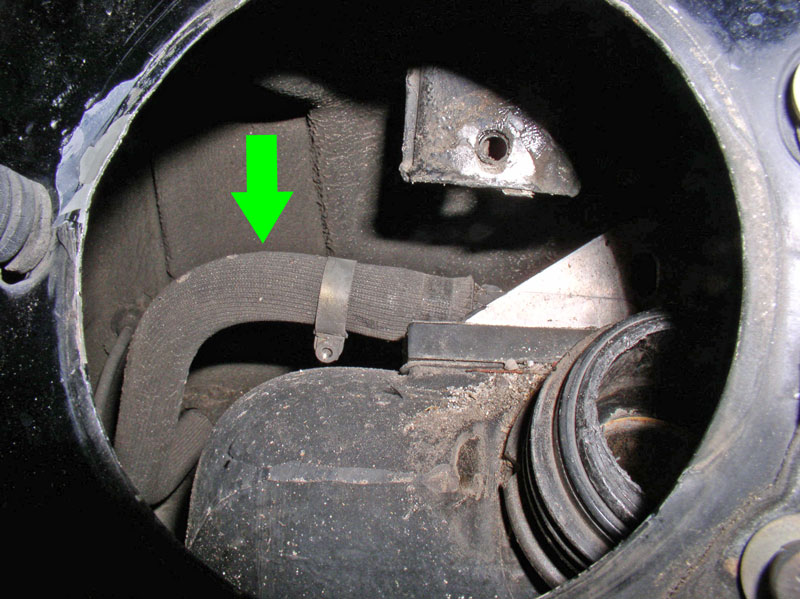
If you choose to cut the hose, you can do so at the port where the hose exits the frame at the tank, as indicated in Figure 35. If you are saving the hose, you can pull it through to the underside of the car from the same spot.
Step 12 – Drop the fuel tank to the ground
The vent hose was the only remaining connection to the car, so with the hose either cut or pulled-free, the fuel tank should easily drop to the floor. Be prepared with some protection on the floor for any additional fuel drips or spills coming from the tank.

You can now pull the tank away from under the car and inspect, looking for holes, cracks, or other problems. If you are replacing the tank entirely, you are now ready to tackle the installation.
Related Discussions
- 84 928 Fuel Tank Removal - Rennlist.com
- Loose Fuel Tank Components - Rennlist.com
- Fuel Tank Cleaning - Rennlist.com