When you click on links to various merchants on this site and make a purchase, this can result in this site earning a commission. Affiliate programs and affiliations include, but are not limited to, the eBay Partner Network.
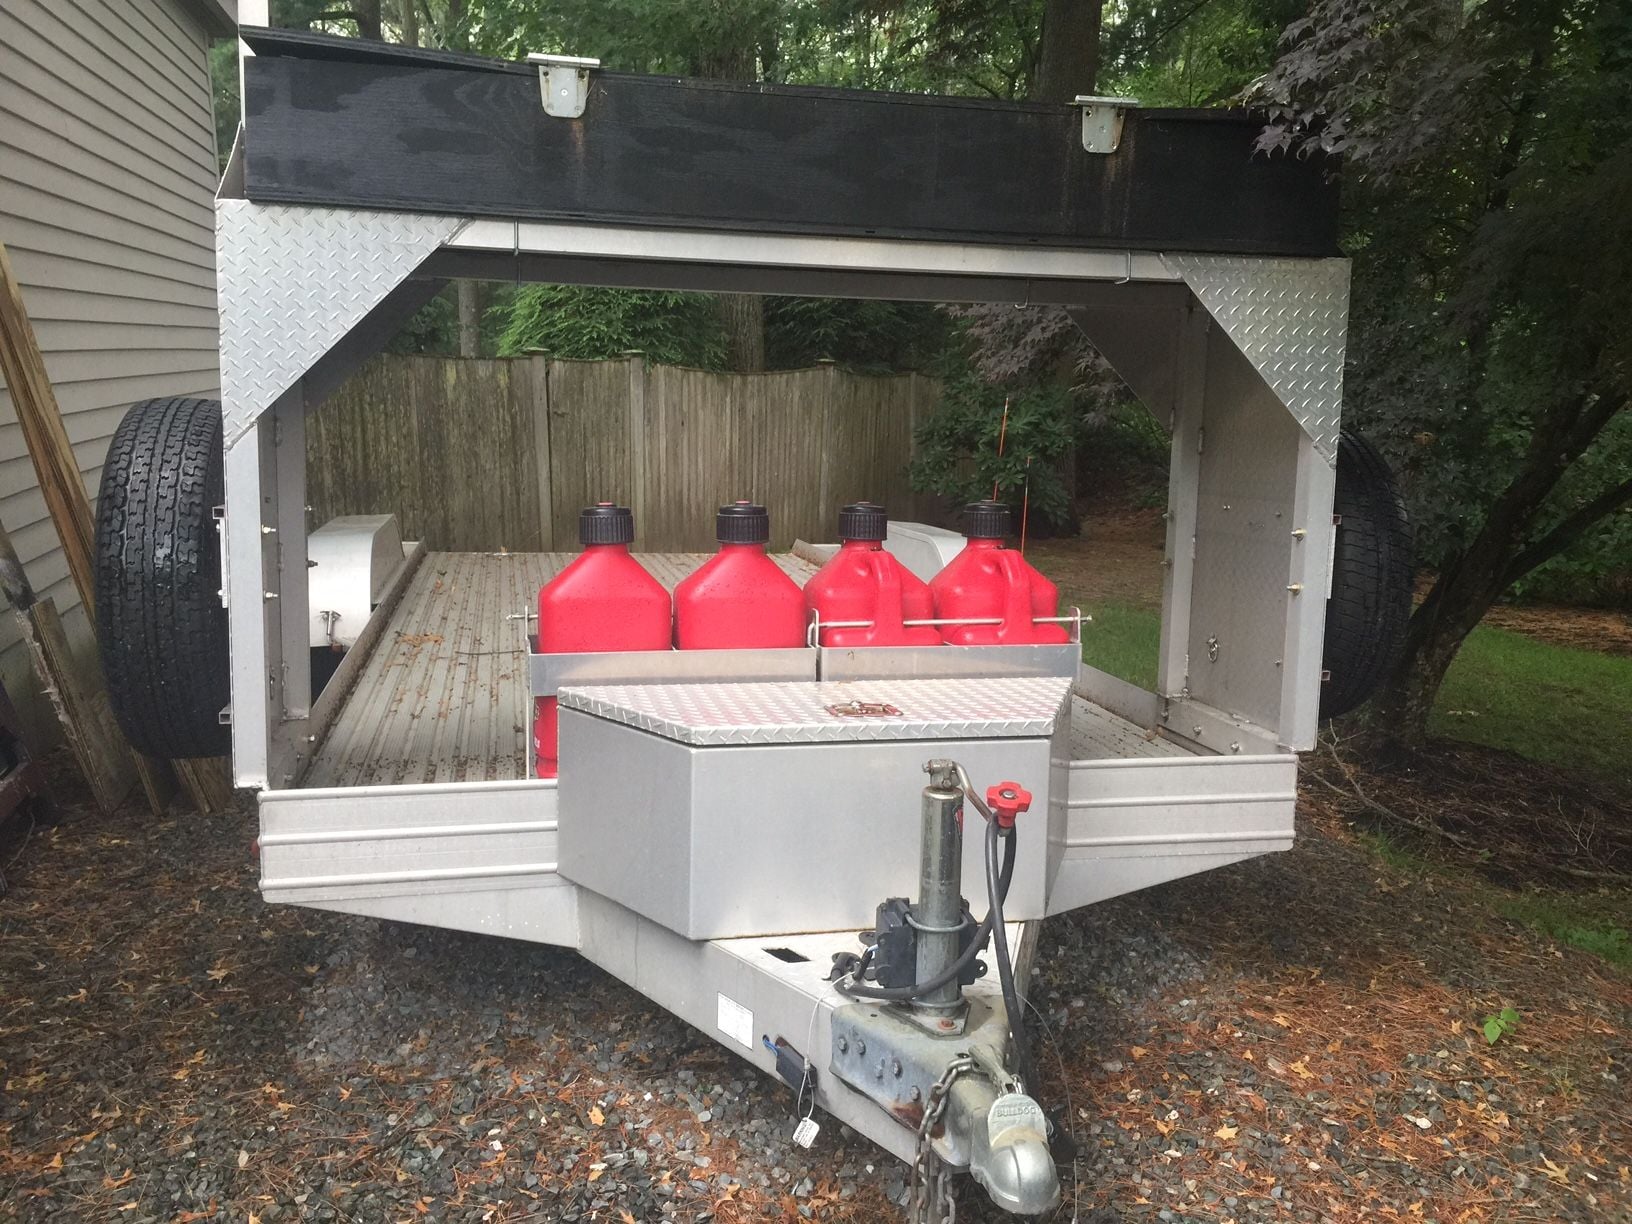
On second thought, I think there is room on the front of the trailer for the fuel jugs.
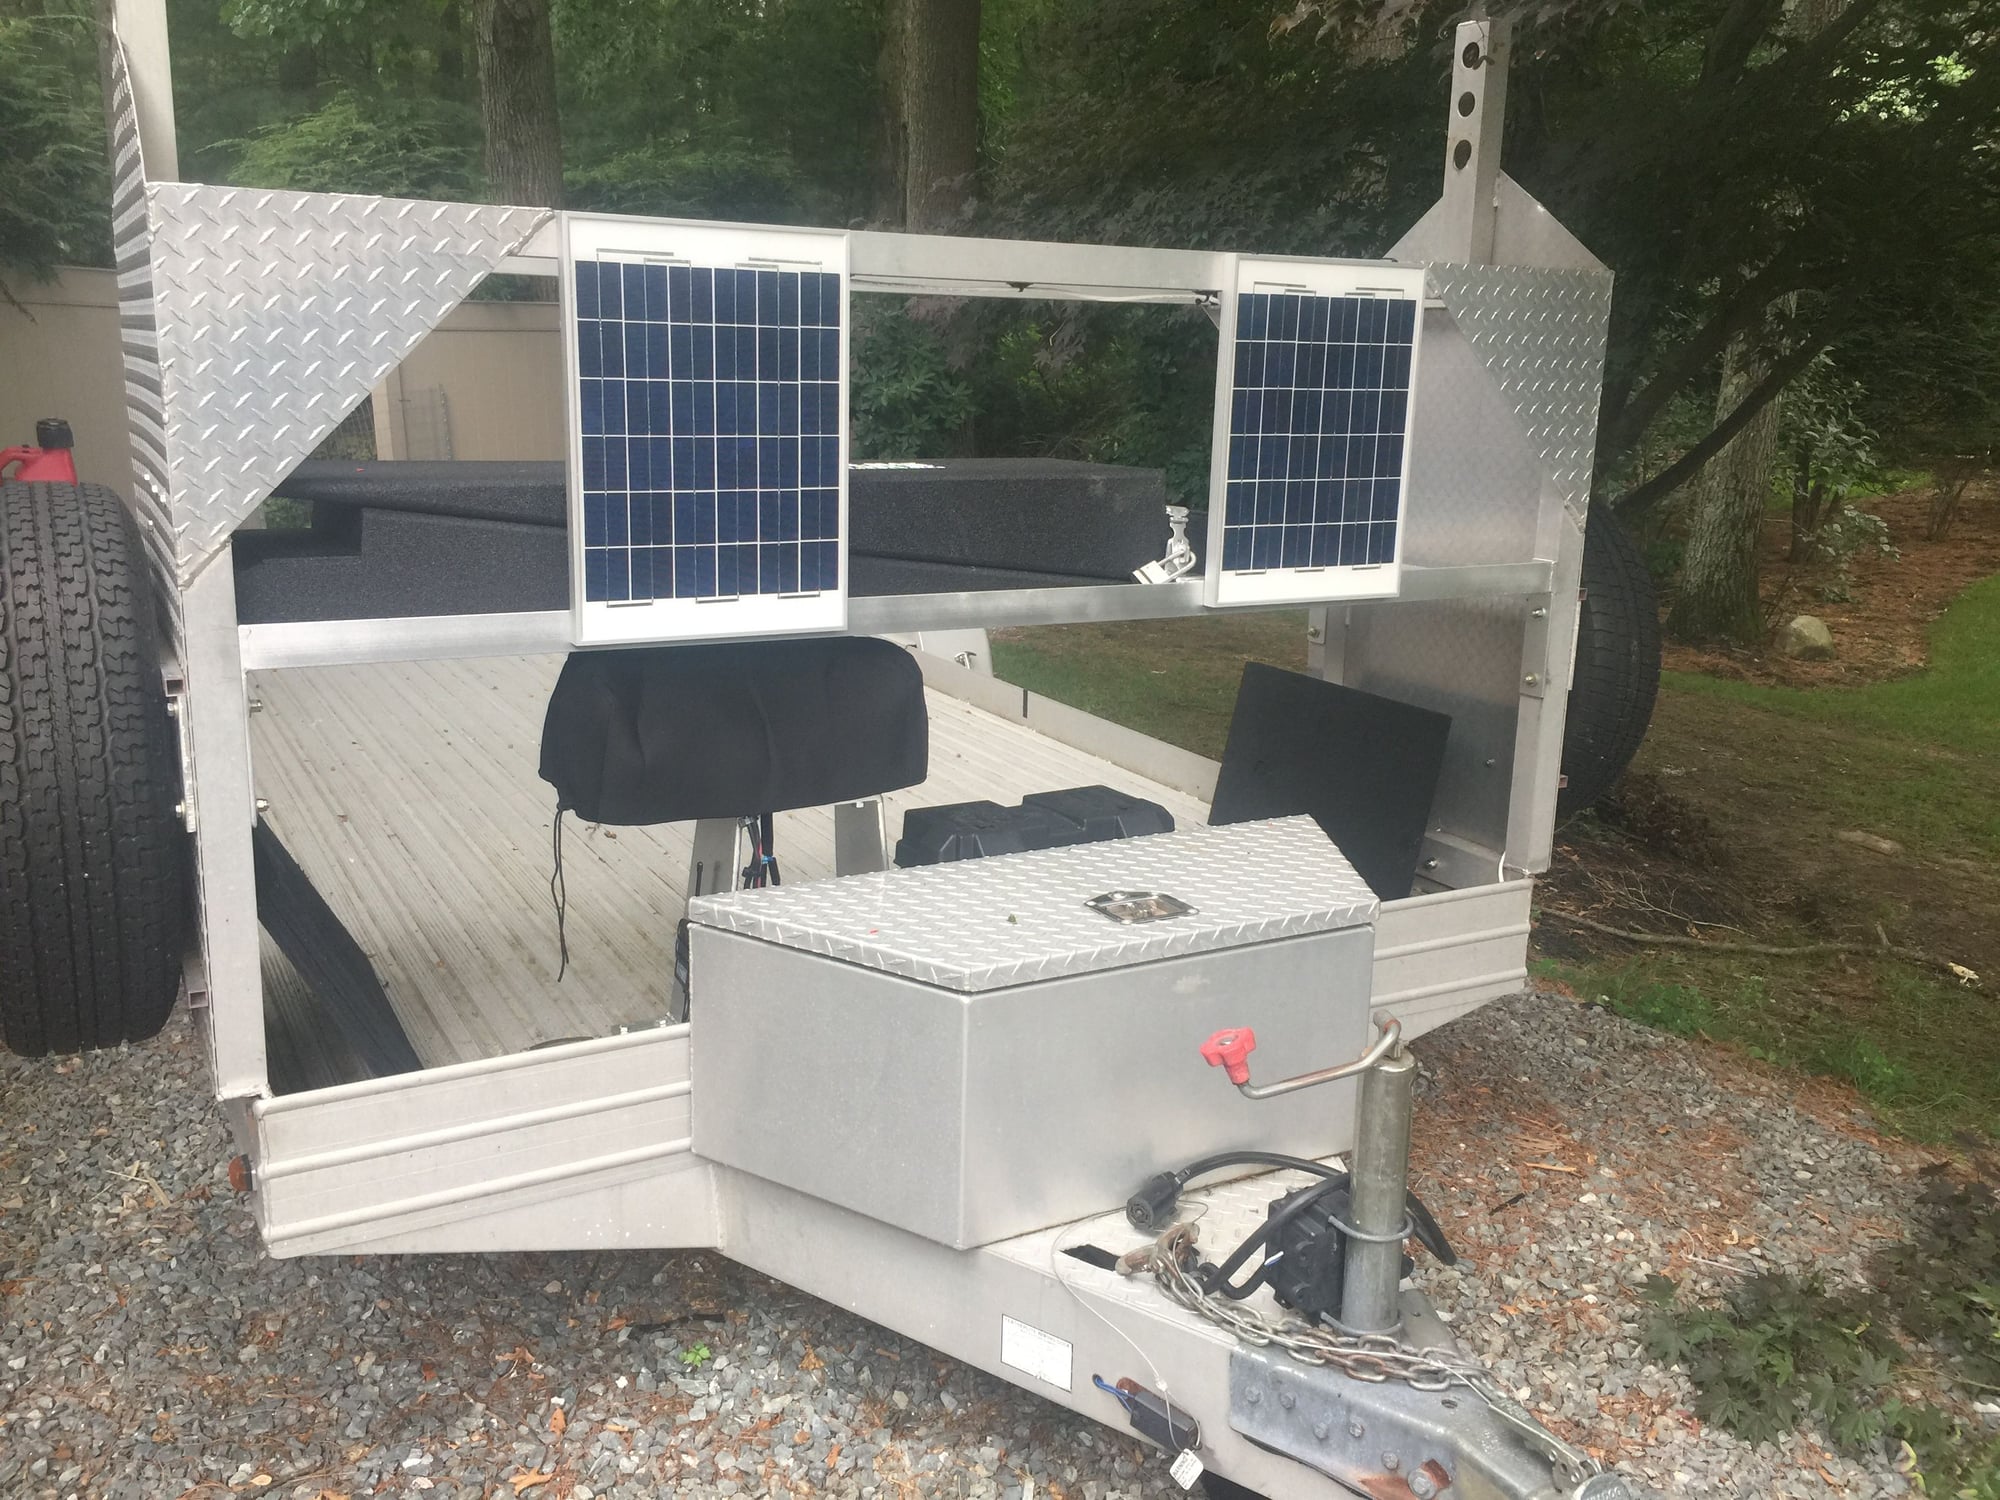
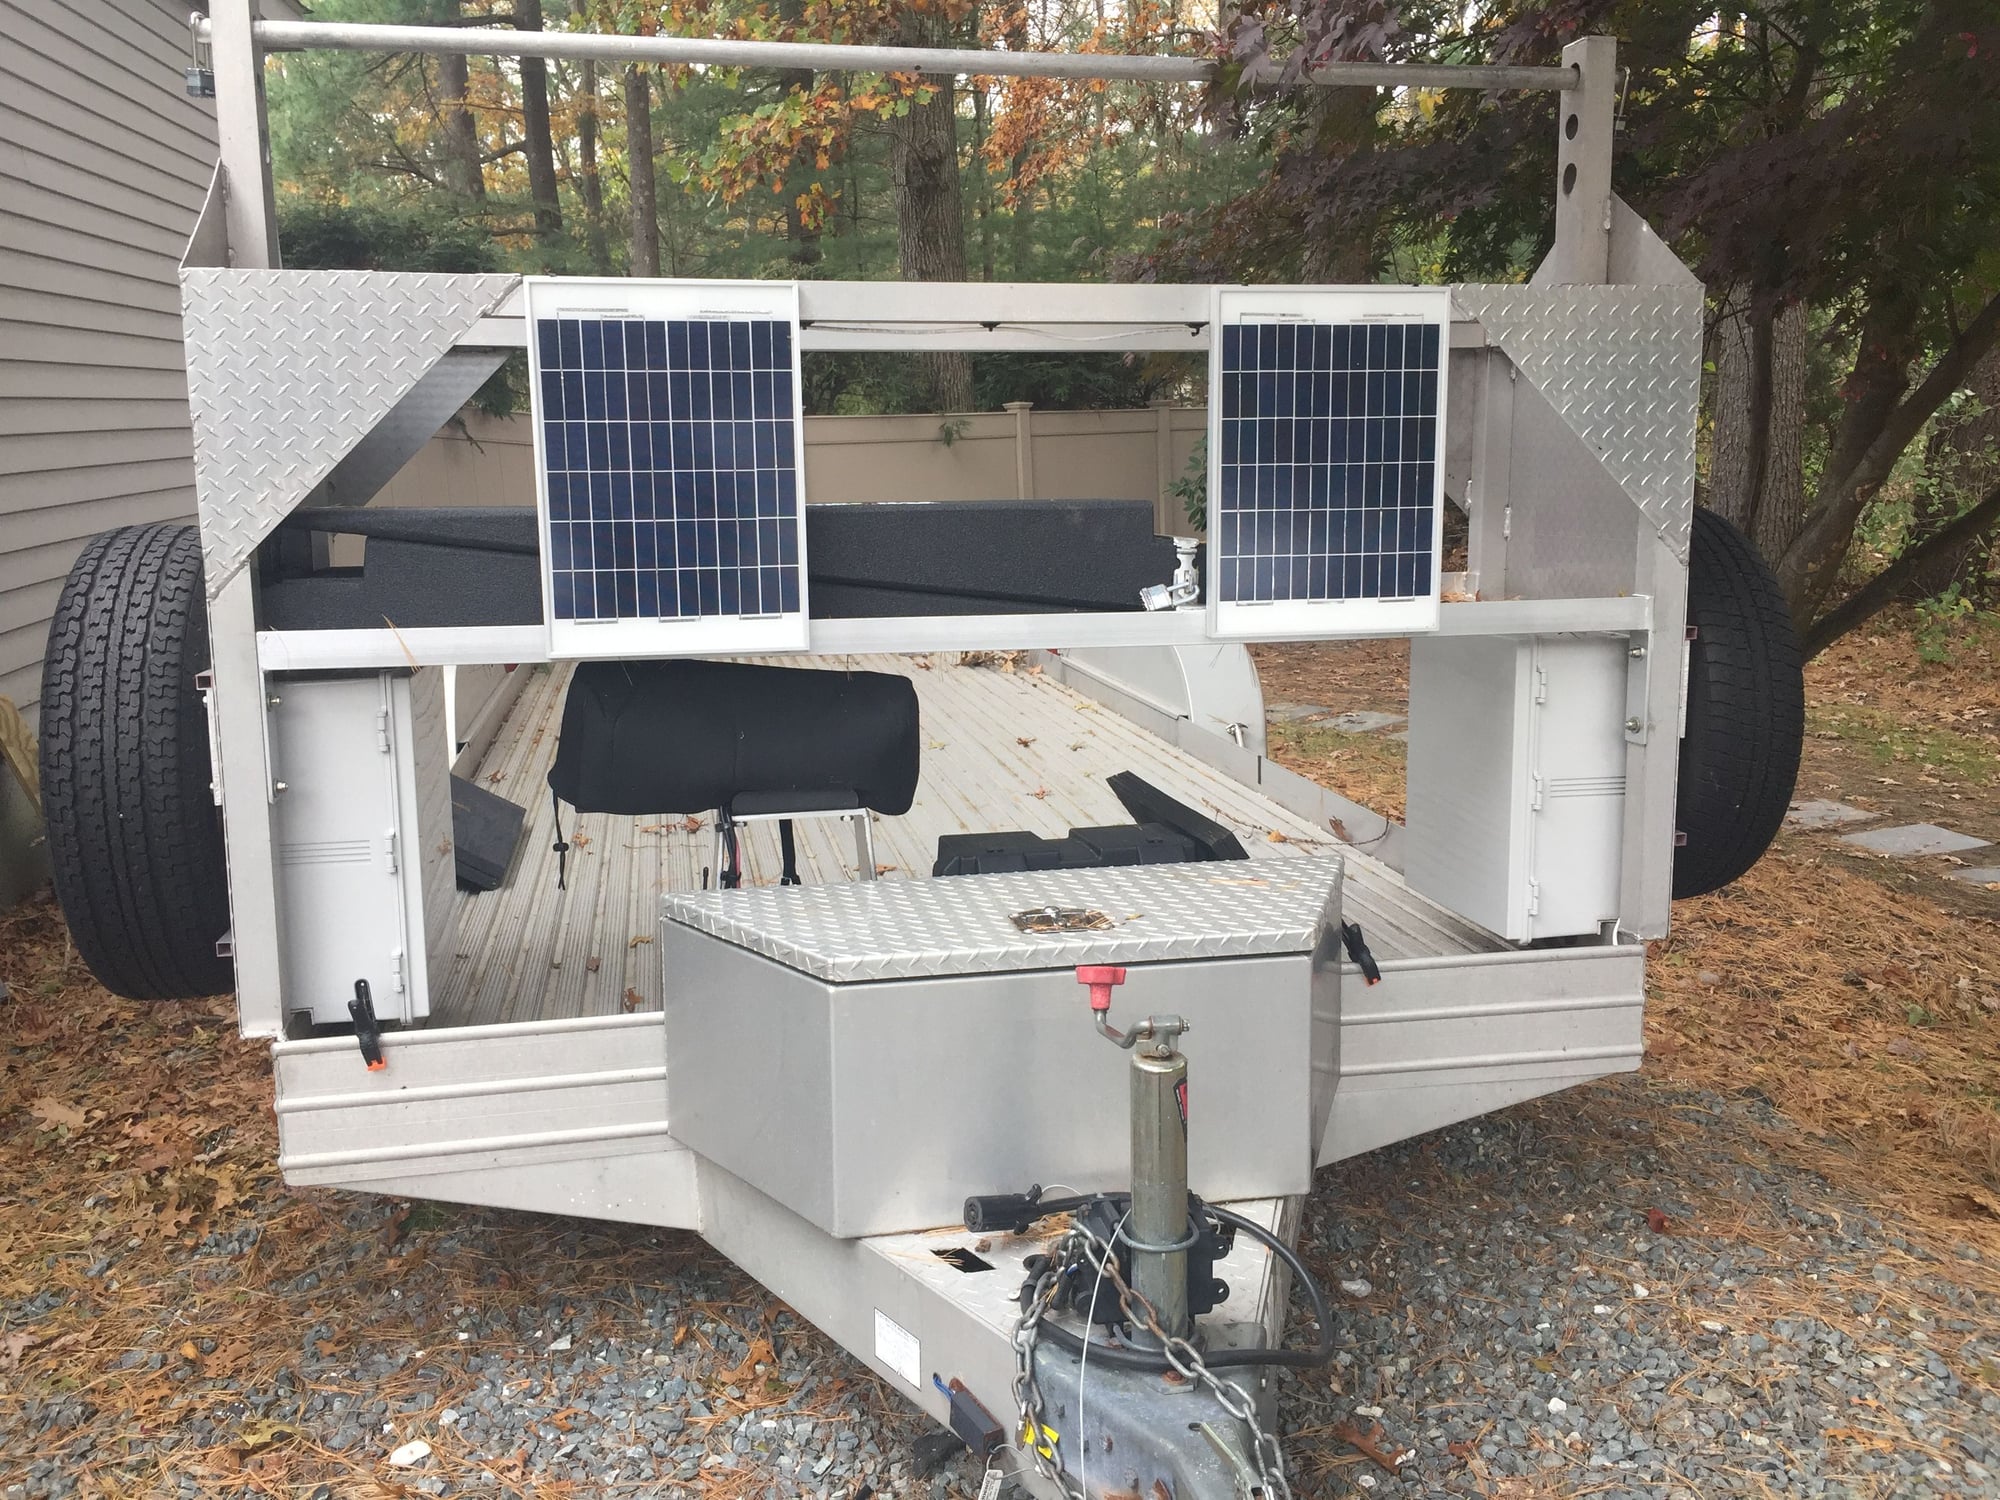
Total width of the dual jug assembly is 21" which is exactly the width of each front face of the trailer on either side of the tool box. That clears the entire deck for the winch, battery if needed, etc.
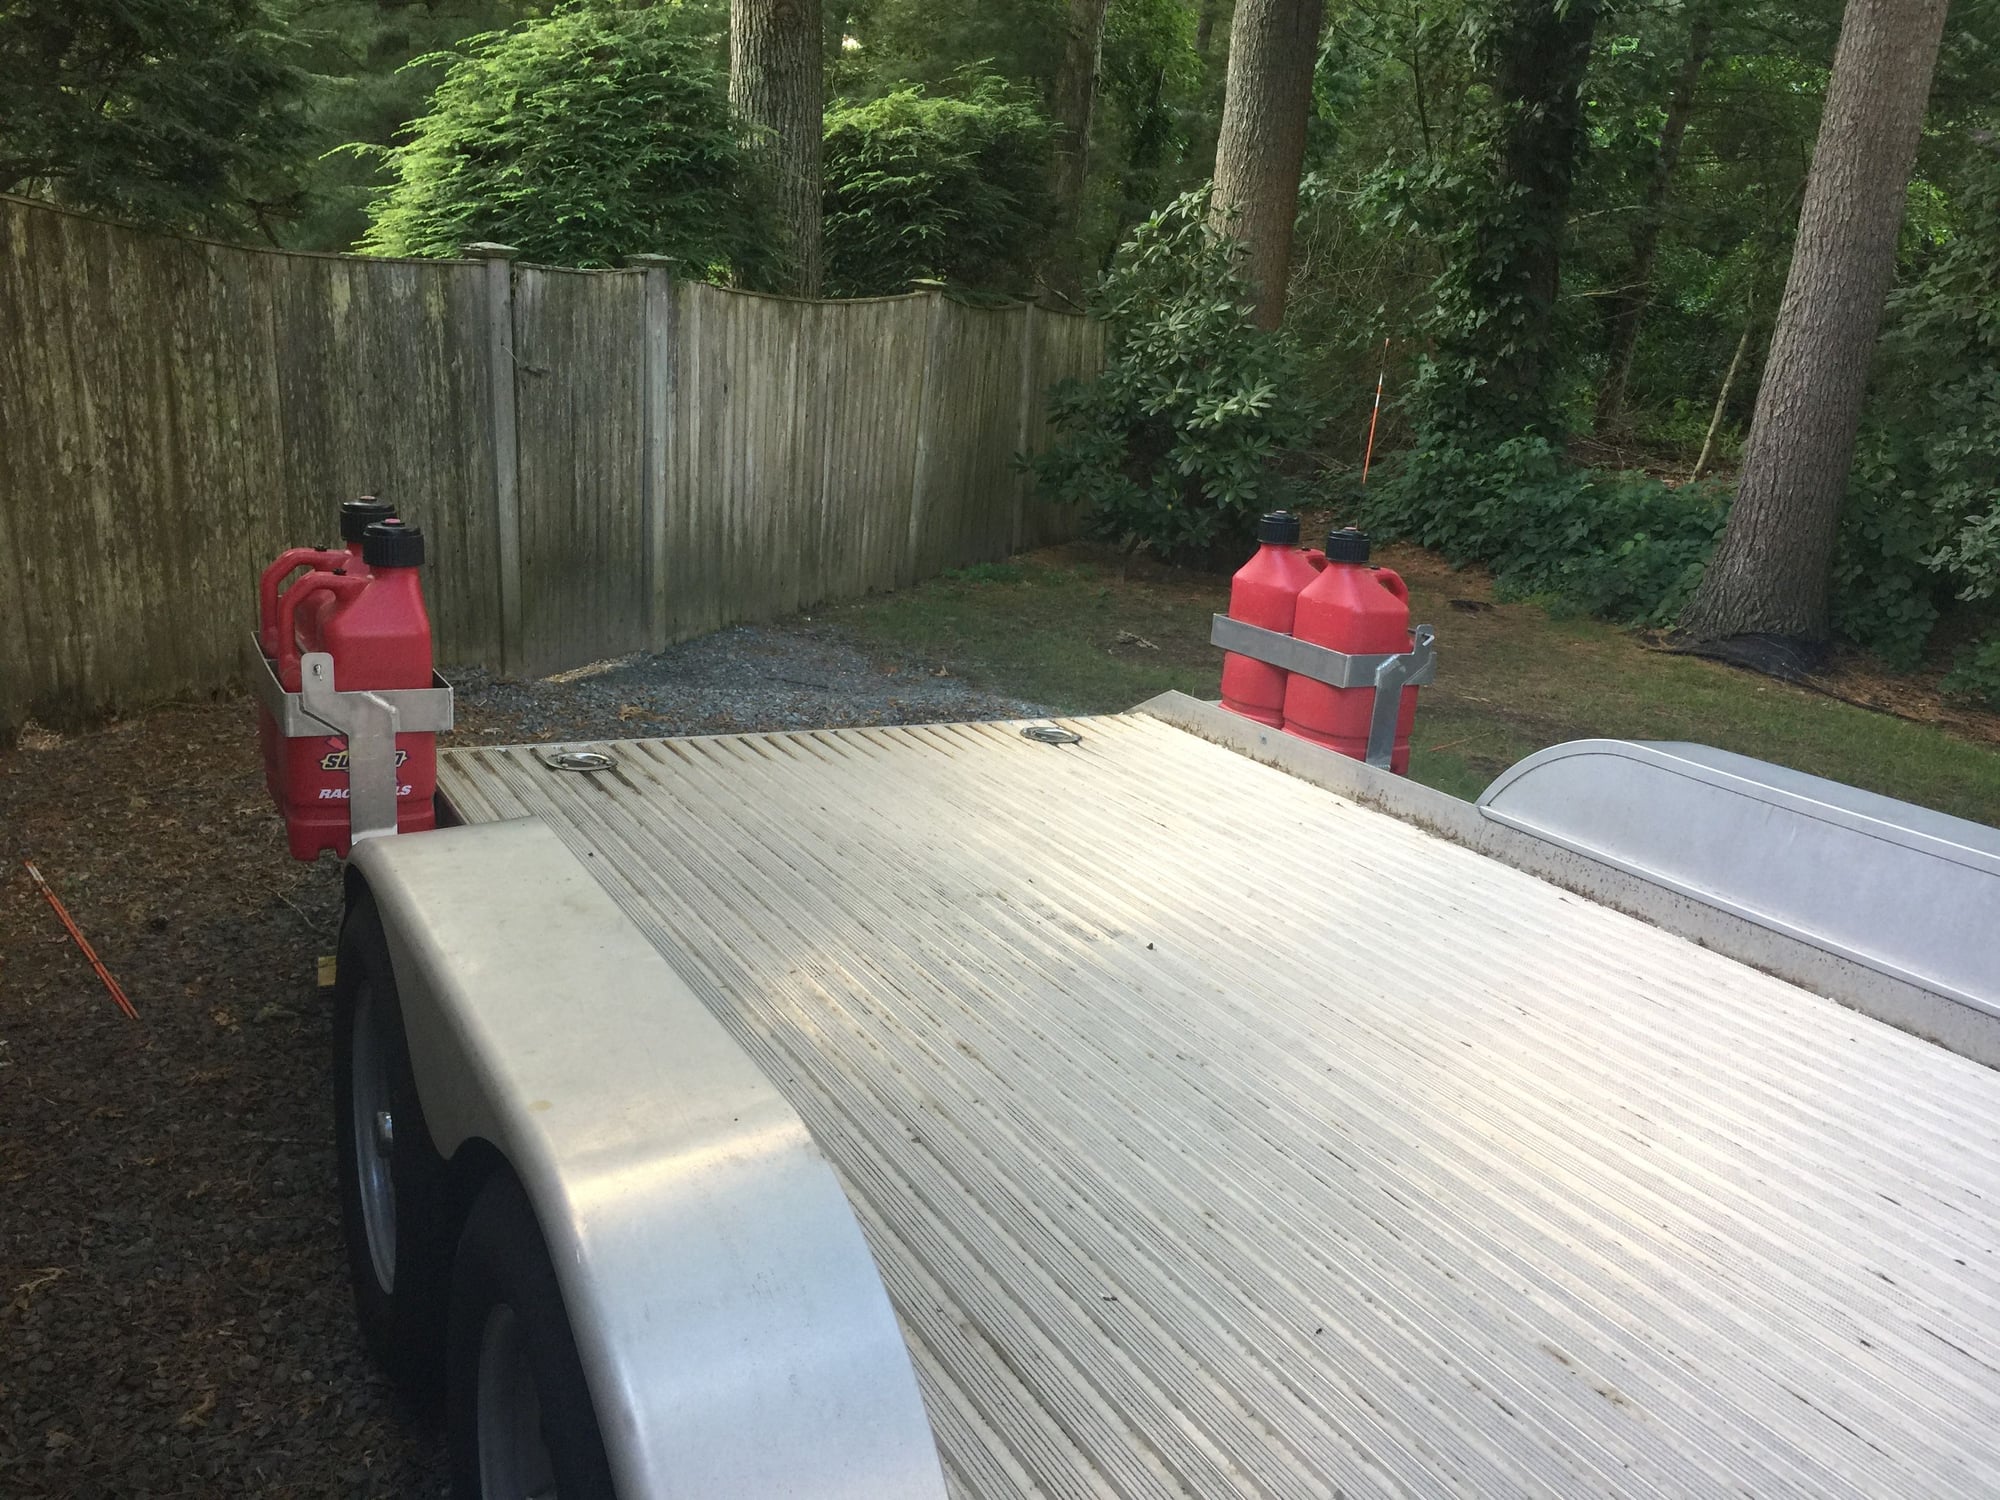
I measured quickly, and even at max turn angle in reverse, the truck bumper should be clear of the fuel jugs.
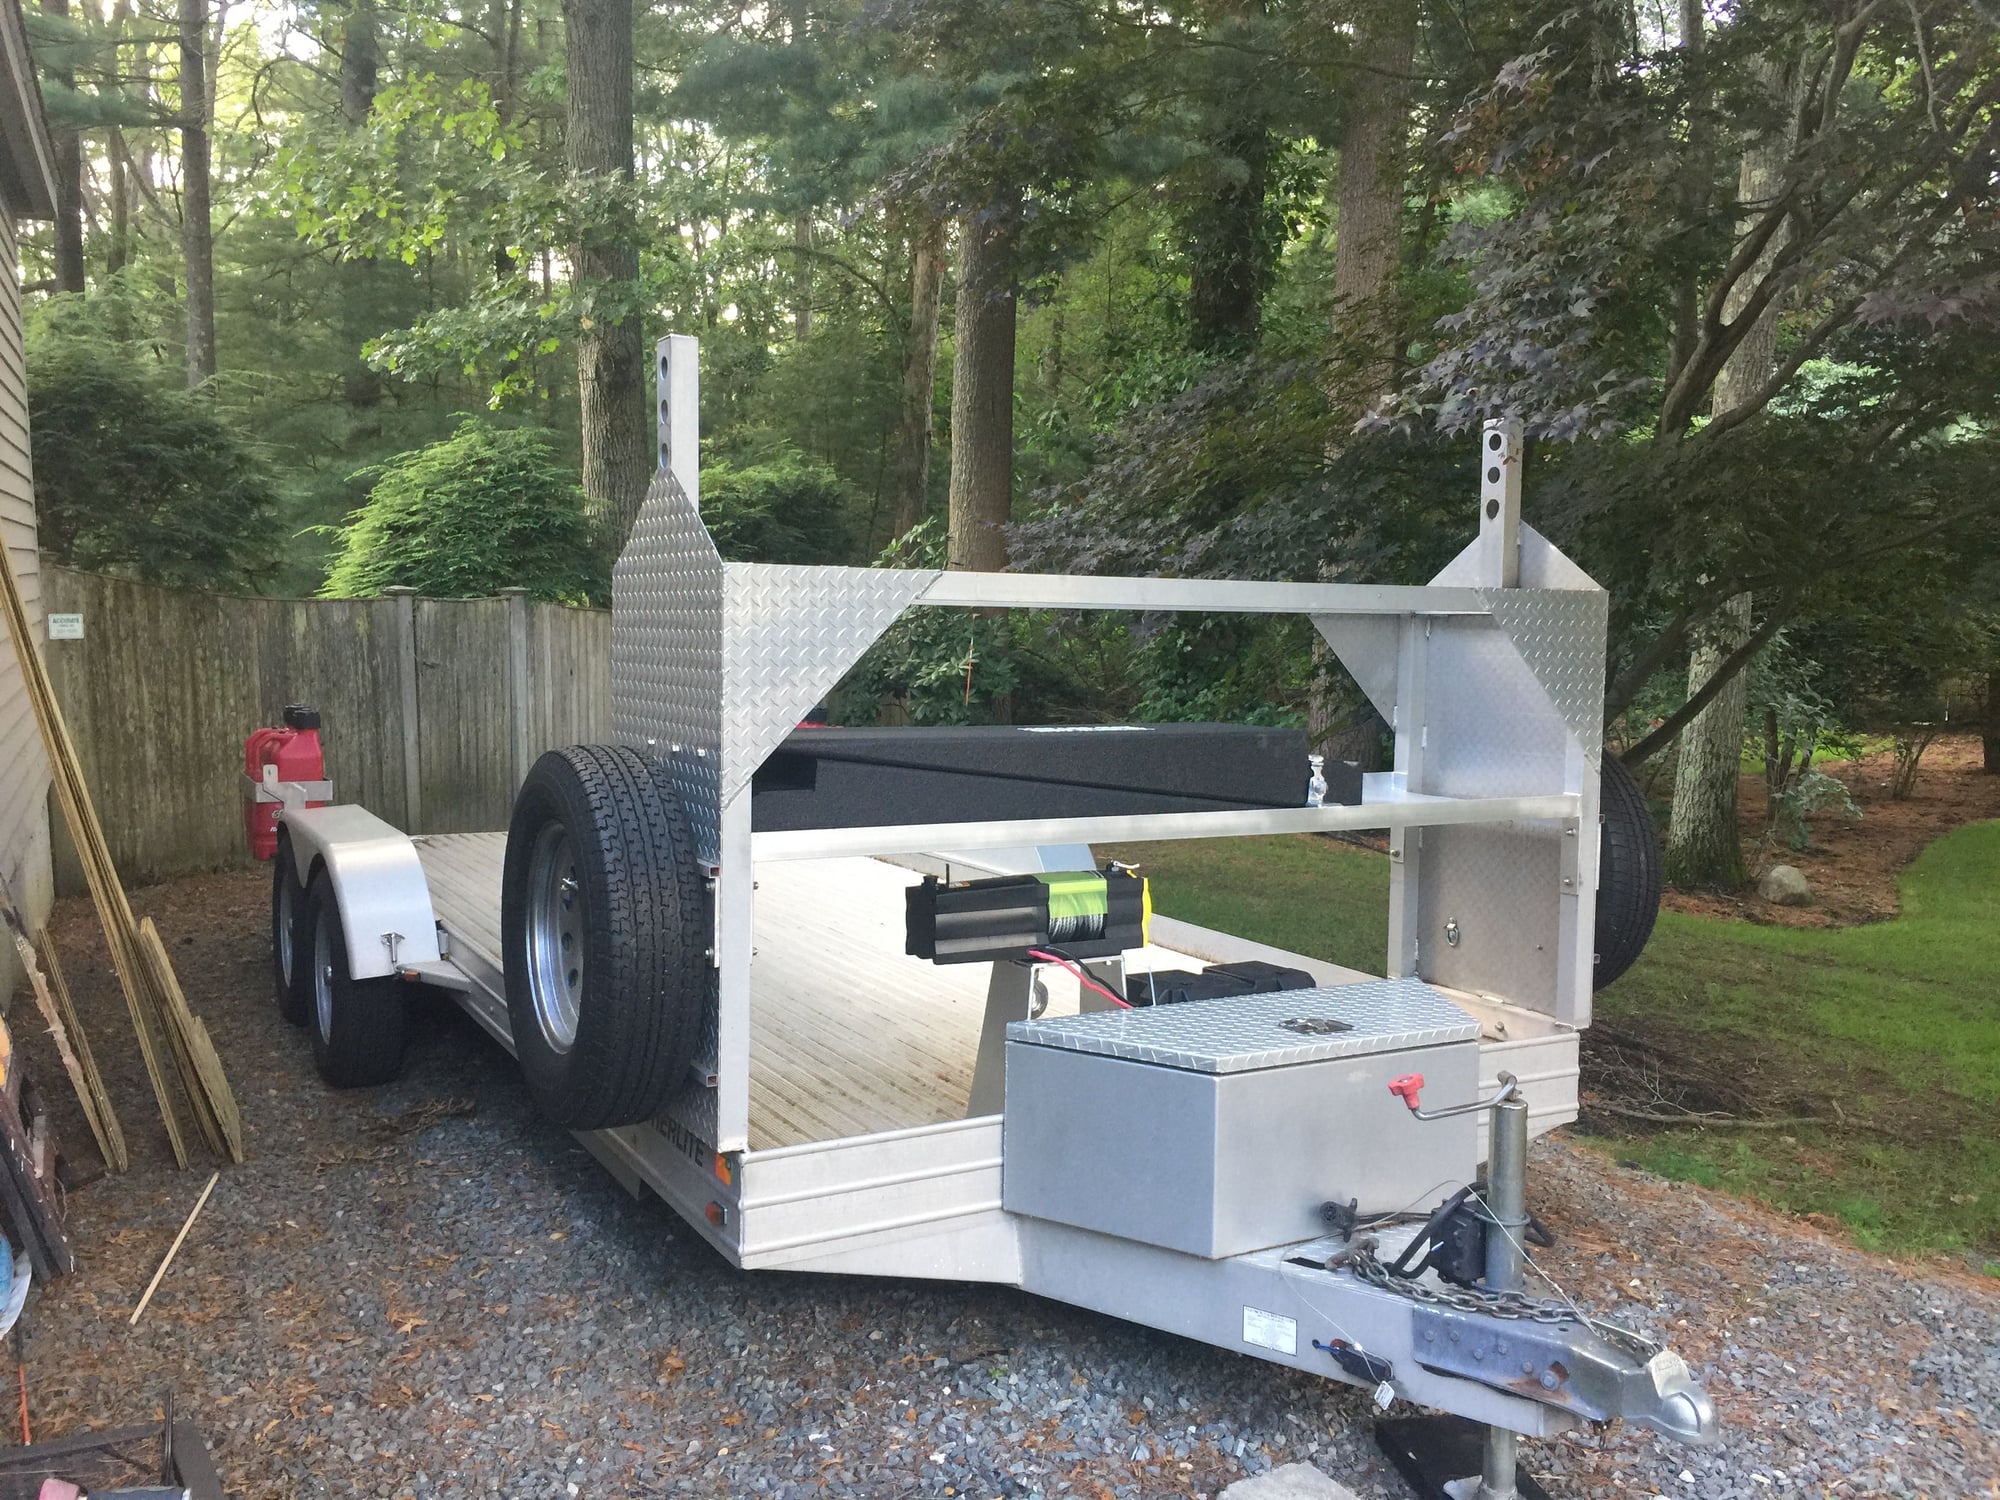
Just returned from the metal shop with my modified trailer:
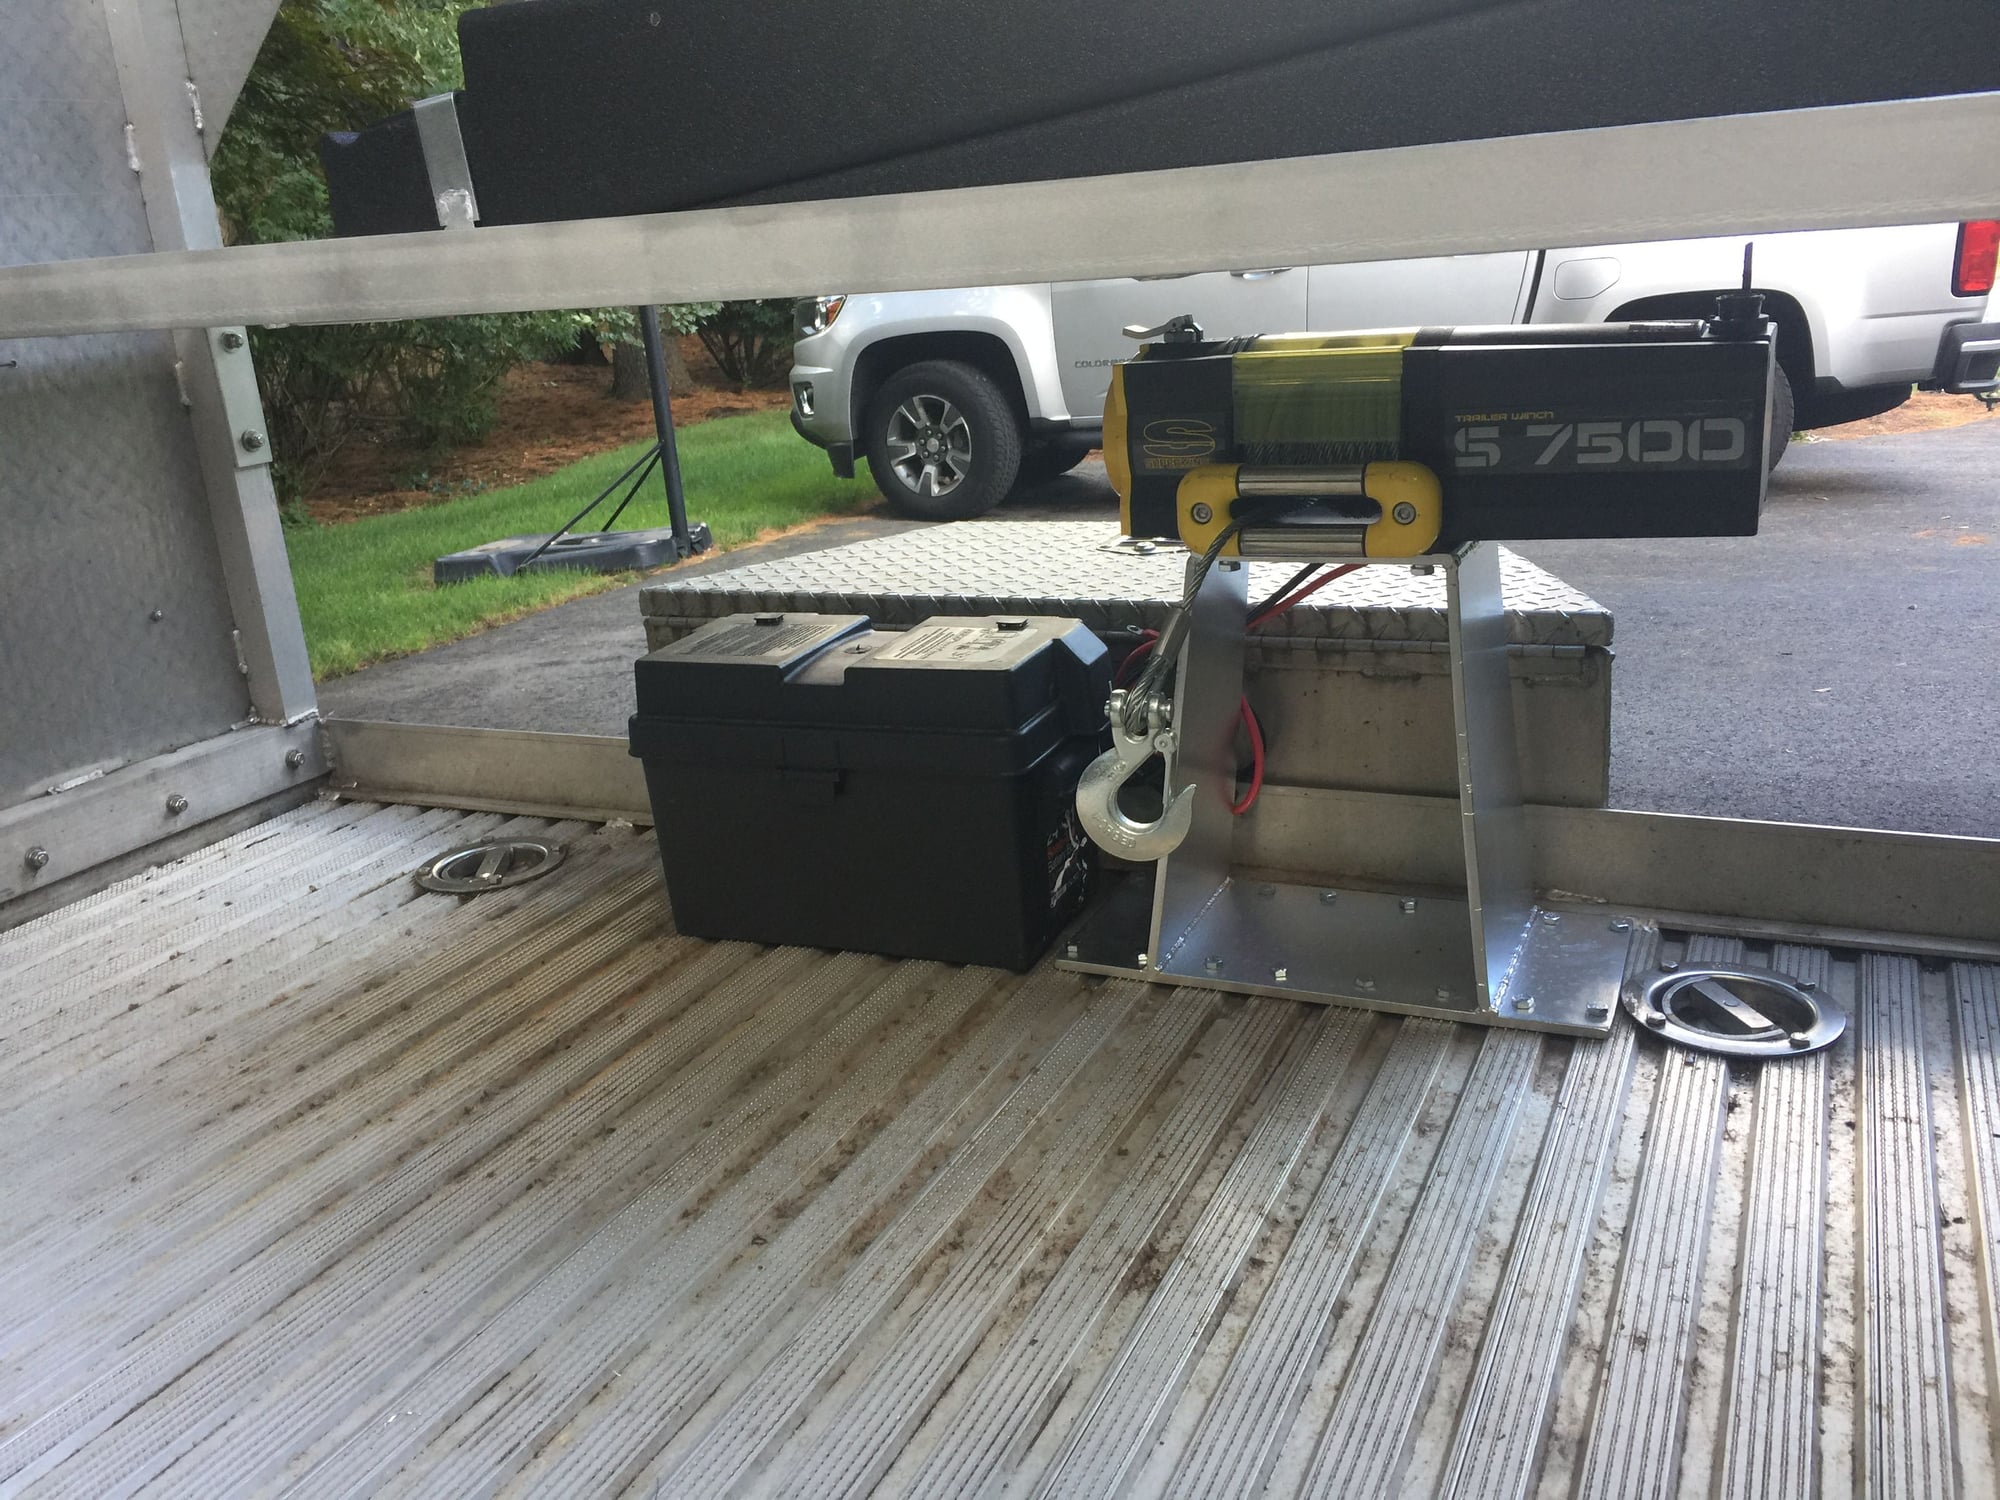
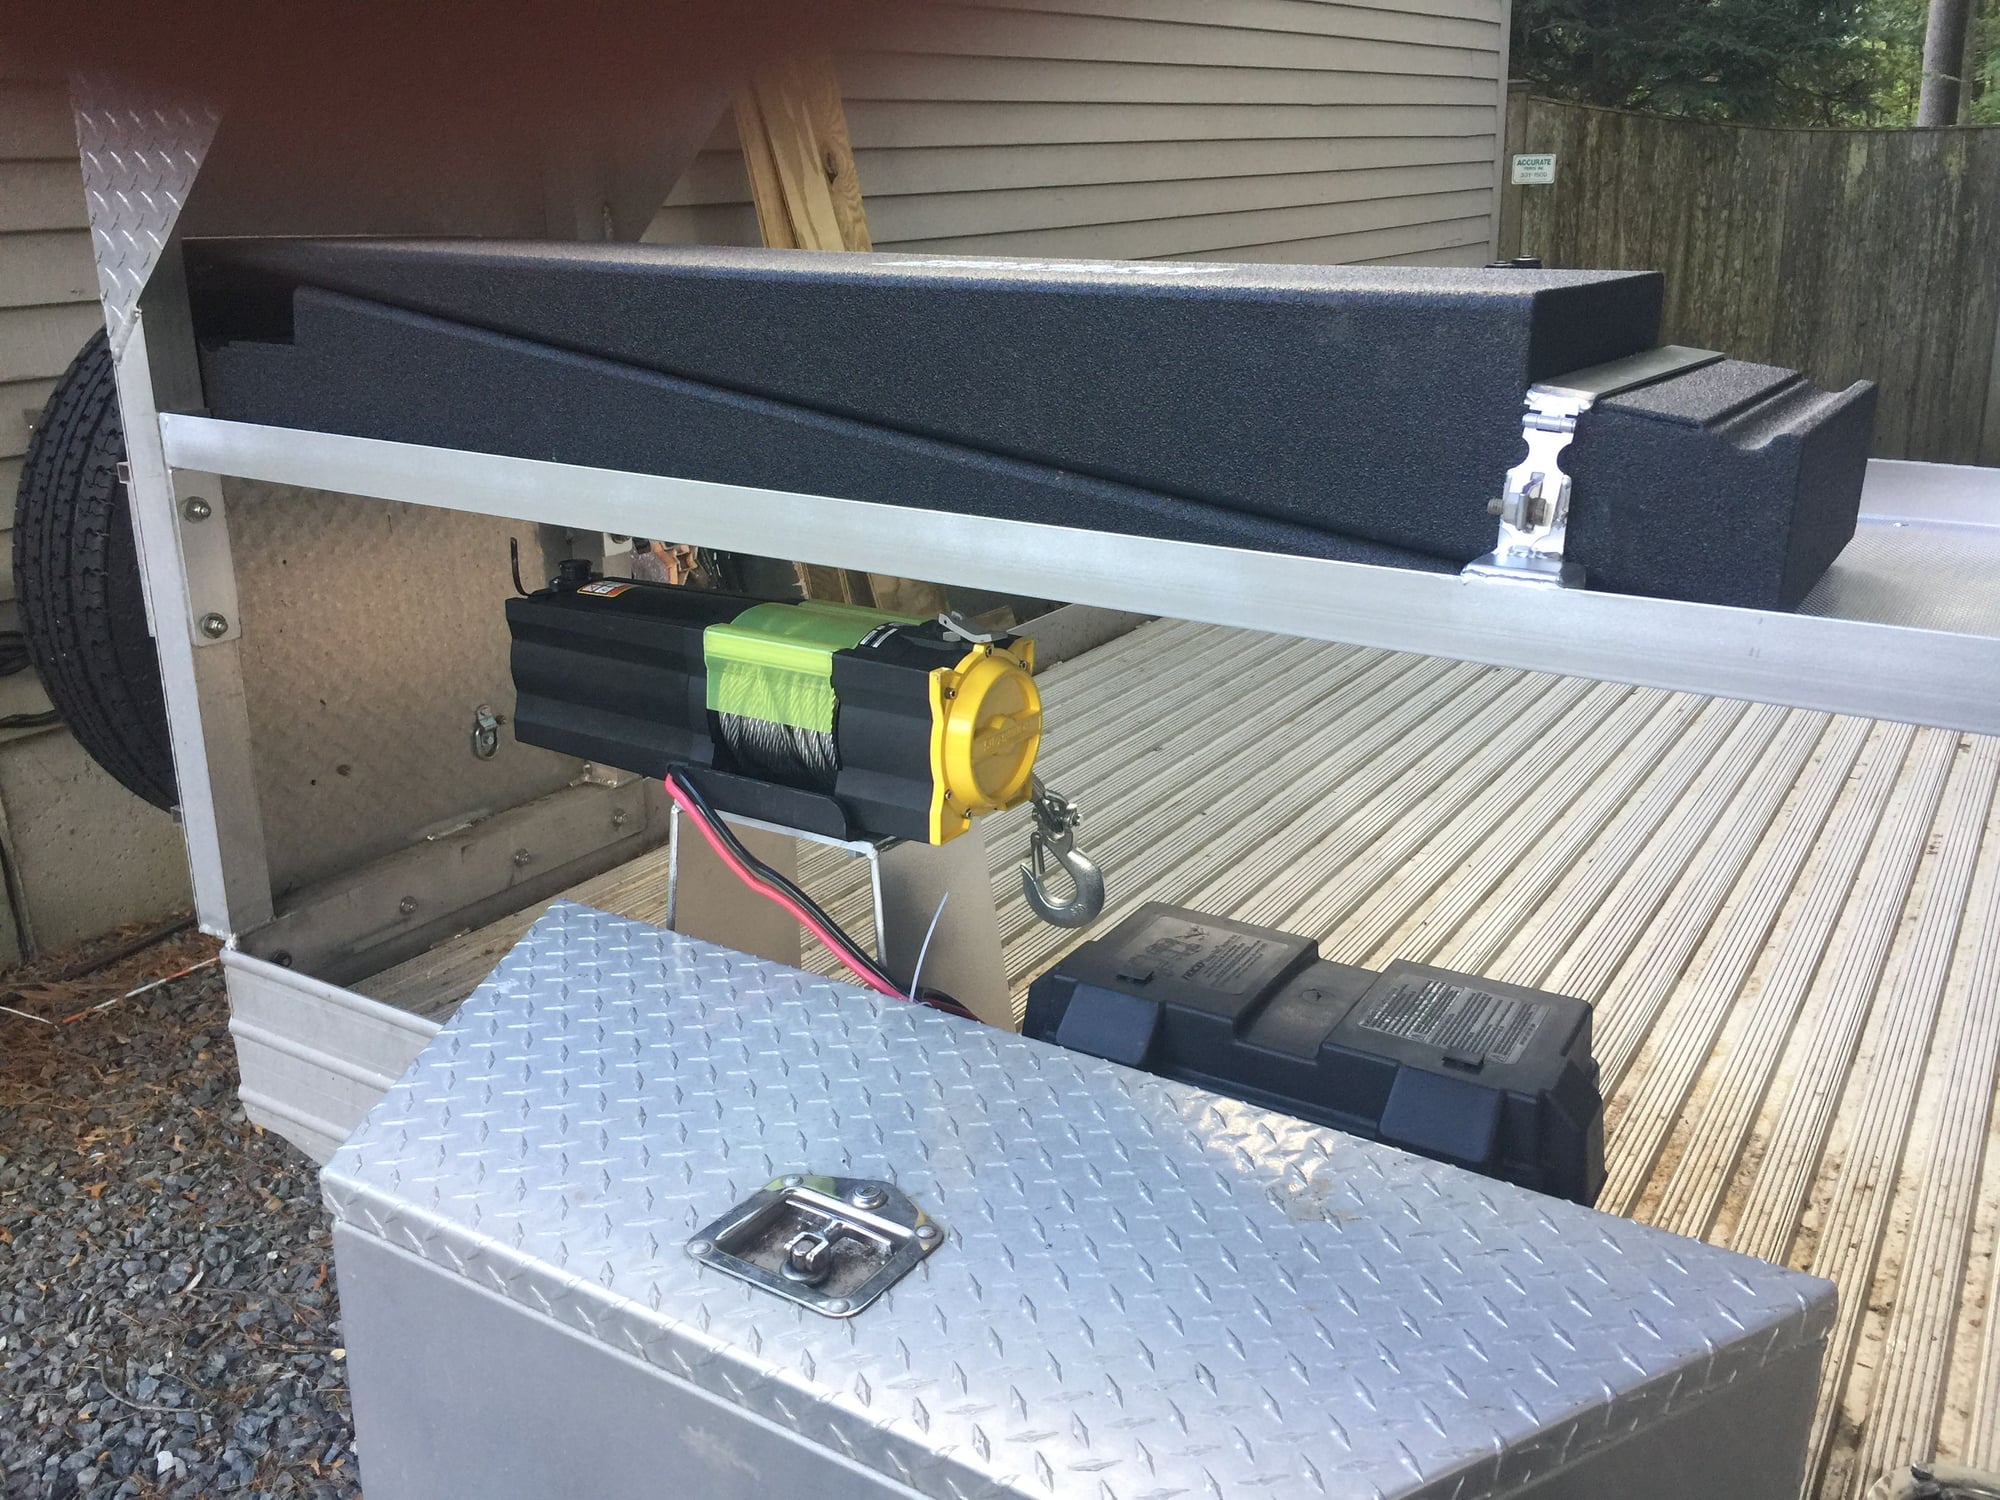
1)Fabricated and mounted winch platform and winch.
2)Mounted battery box
3)Already installed Group 31 deep cycle marine battery in box
4)added shelf to tire rack with custom locking hold downs for Race Ramps.
5)Moved and reinforced fuel jug holders to rear sides.
Still todo - wire winch, add RF remote, replace winch line with synthetic.
I have all the parts, just need some time.
Lastly, add solar panel somewhere to charge the battery.
Excellent setup!!! You can put the solar on the top of your box storage.
I really wanted to put the panel there, but the area is awkward.
I have room for a single 8x28 panel which I cant find or two 9x14 panels which I also can't find. Any leads appreciated.
The other good spot would be on the upper front left and right between the top of the tire rack and shelf; essentially covering the triangular reinforcements. This area is 20" high and there are 20w panels available at 19"x13"; perfect. Nonetheless, they will be angled vertically which is far from optimal, but with 2x20w panels I should be fine.
I'll also need to find a good waterproof charge controller.
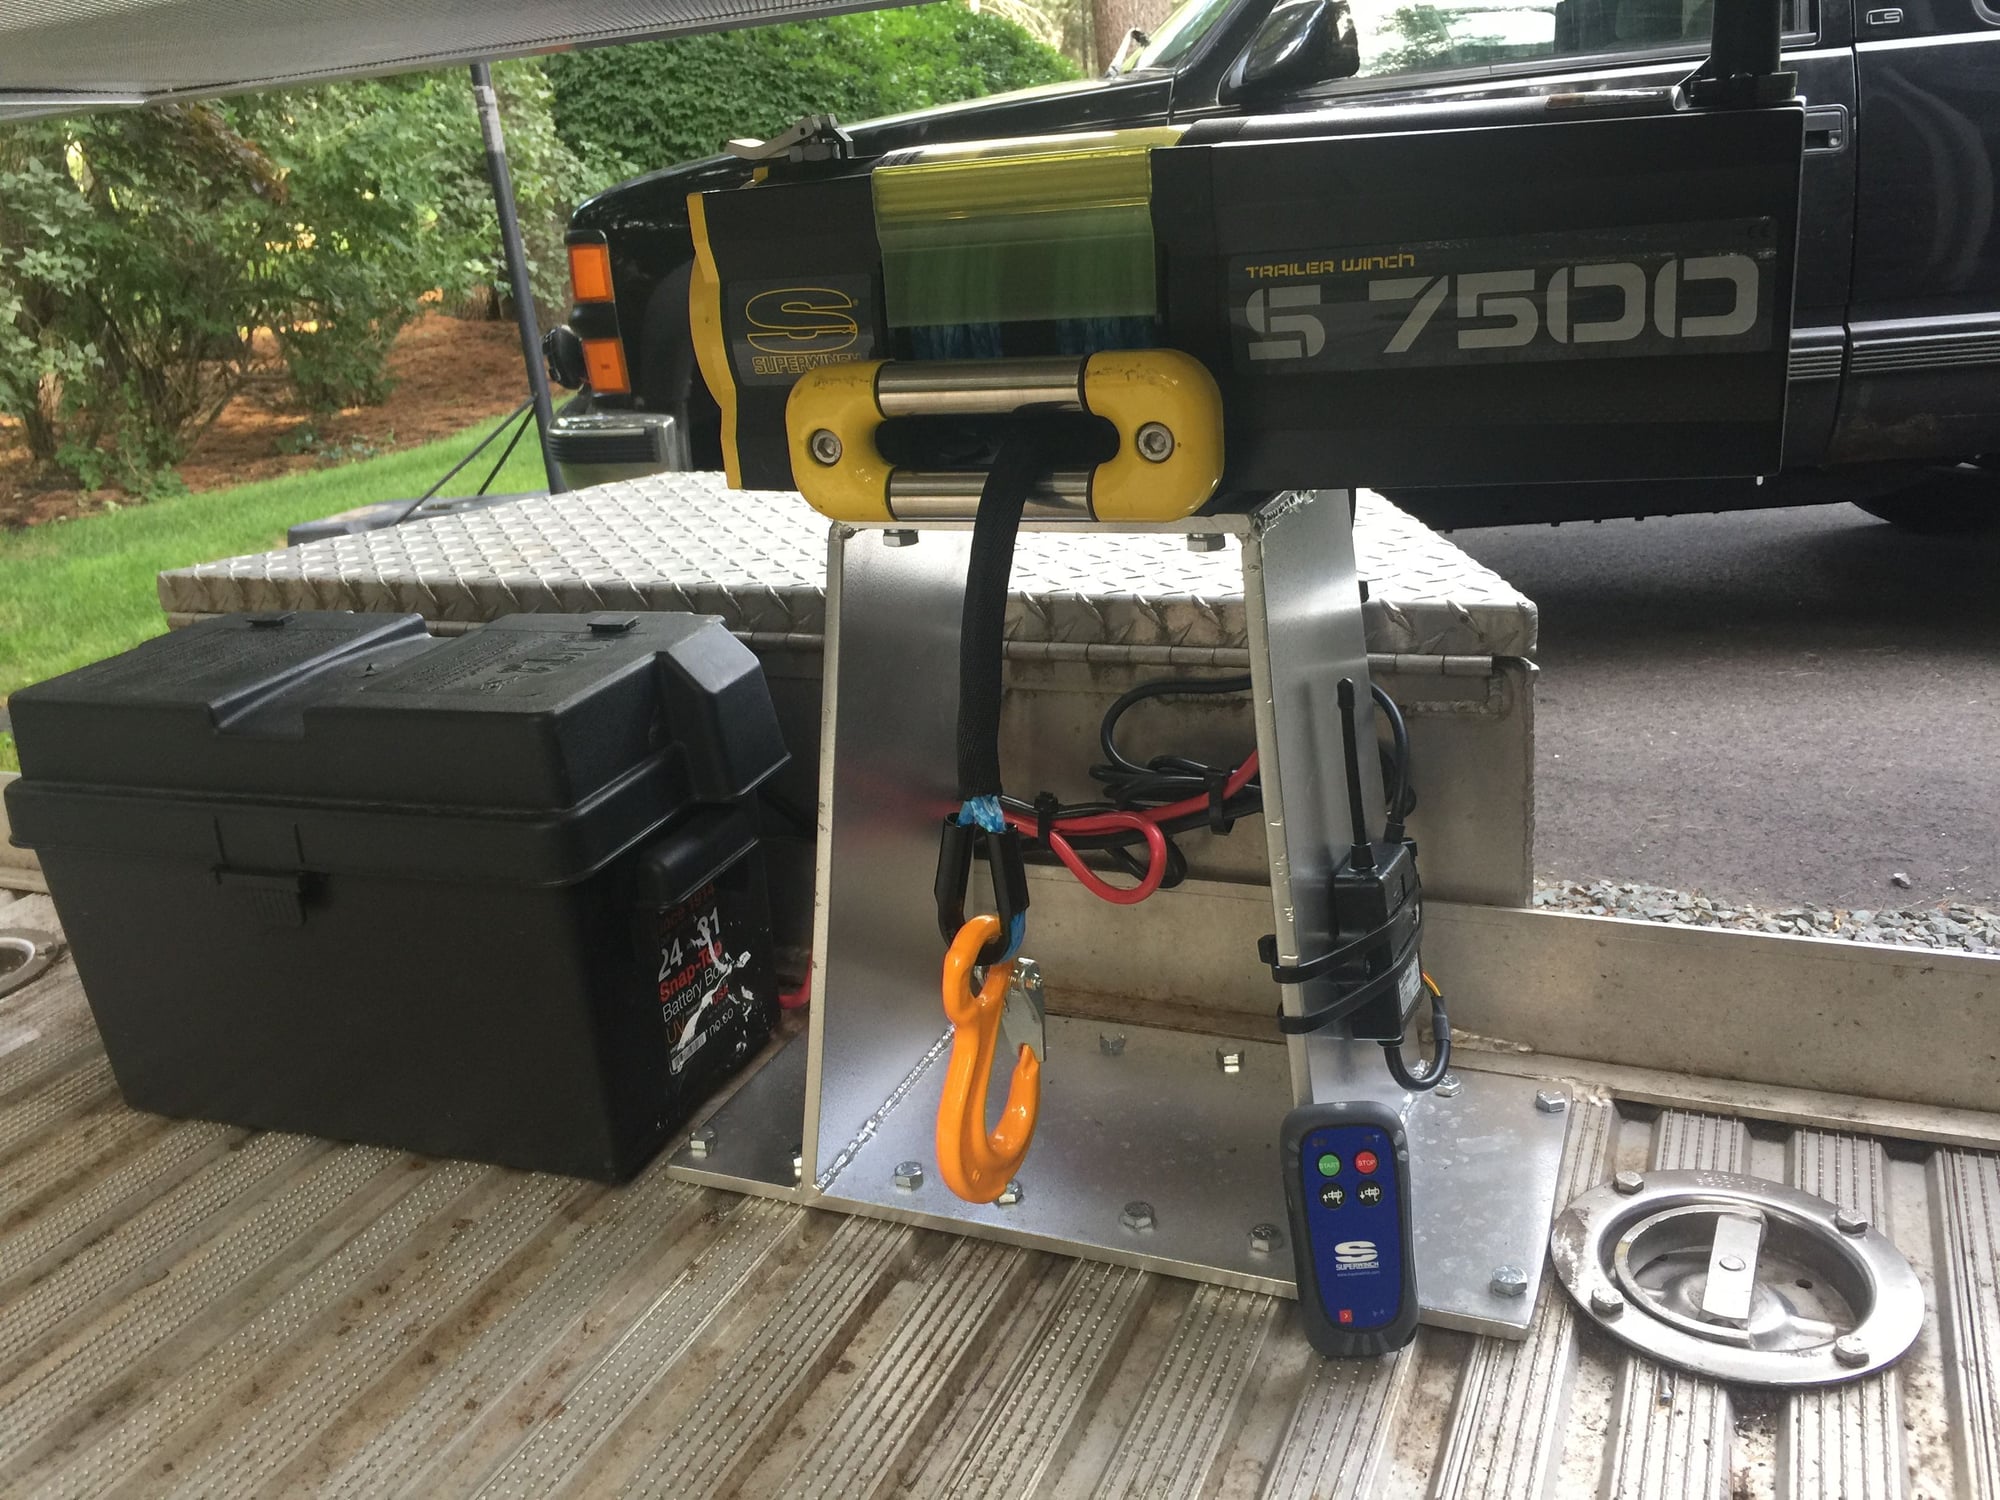
Have you considered using the Superwinch kit that hard wires the winch to your trucks battery? I have been using that approach for years and it has worked really well.
Winch and battery wired; RF remote receiver installed, Steel rope removed and synth rope spooled up; Ready to go! (Getting cold feet on Solar - not needed - let's see how much charge I use - I have a 105aH battery - should be plenty for a few events).
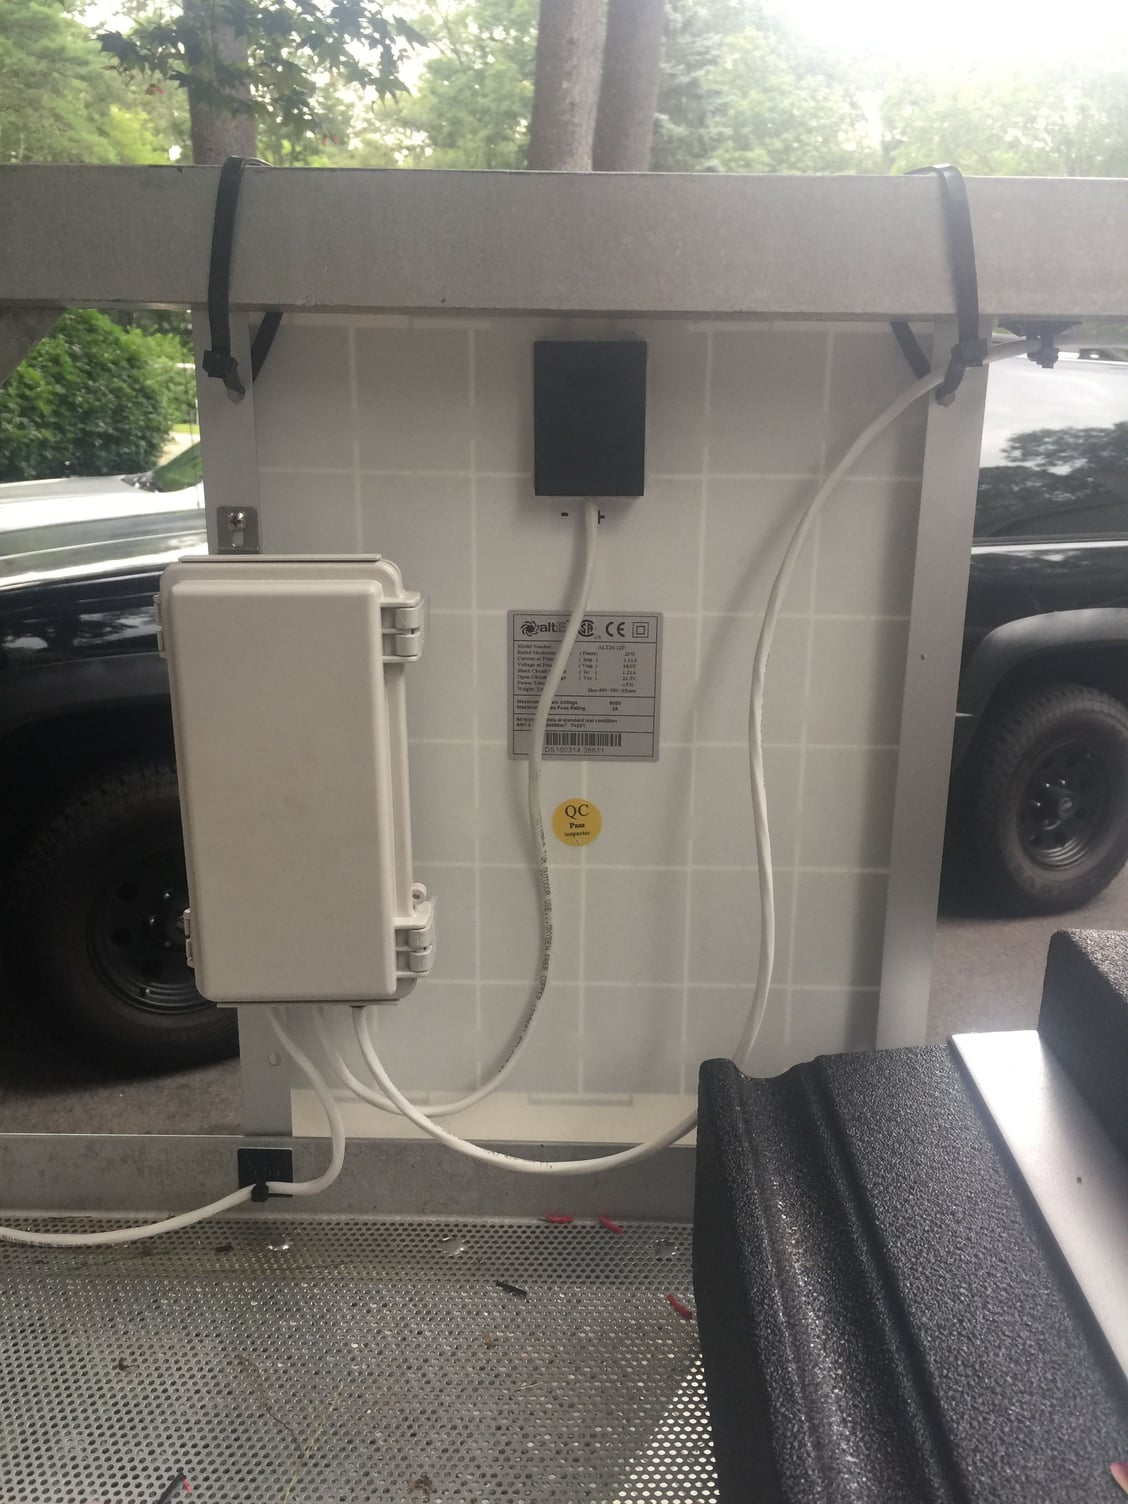
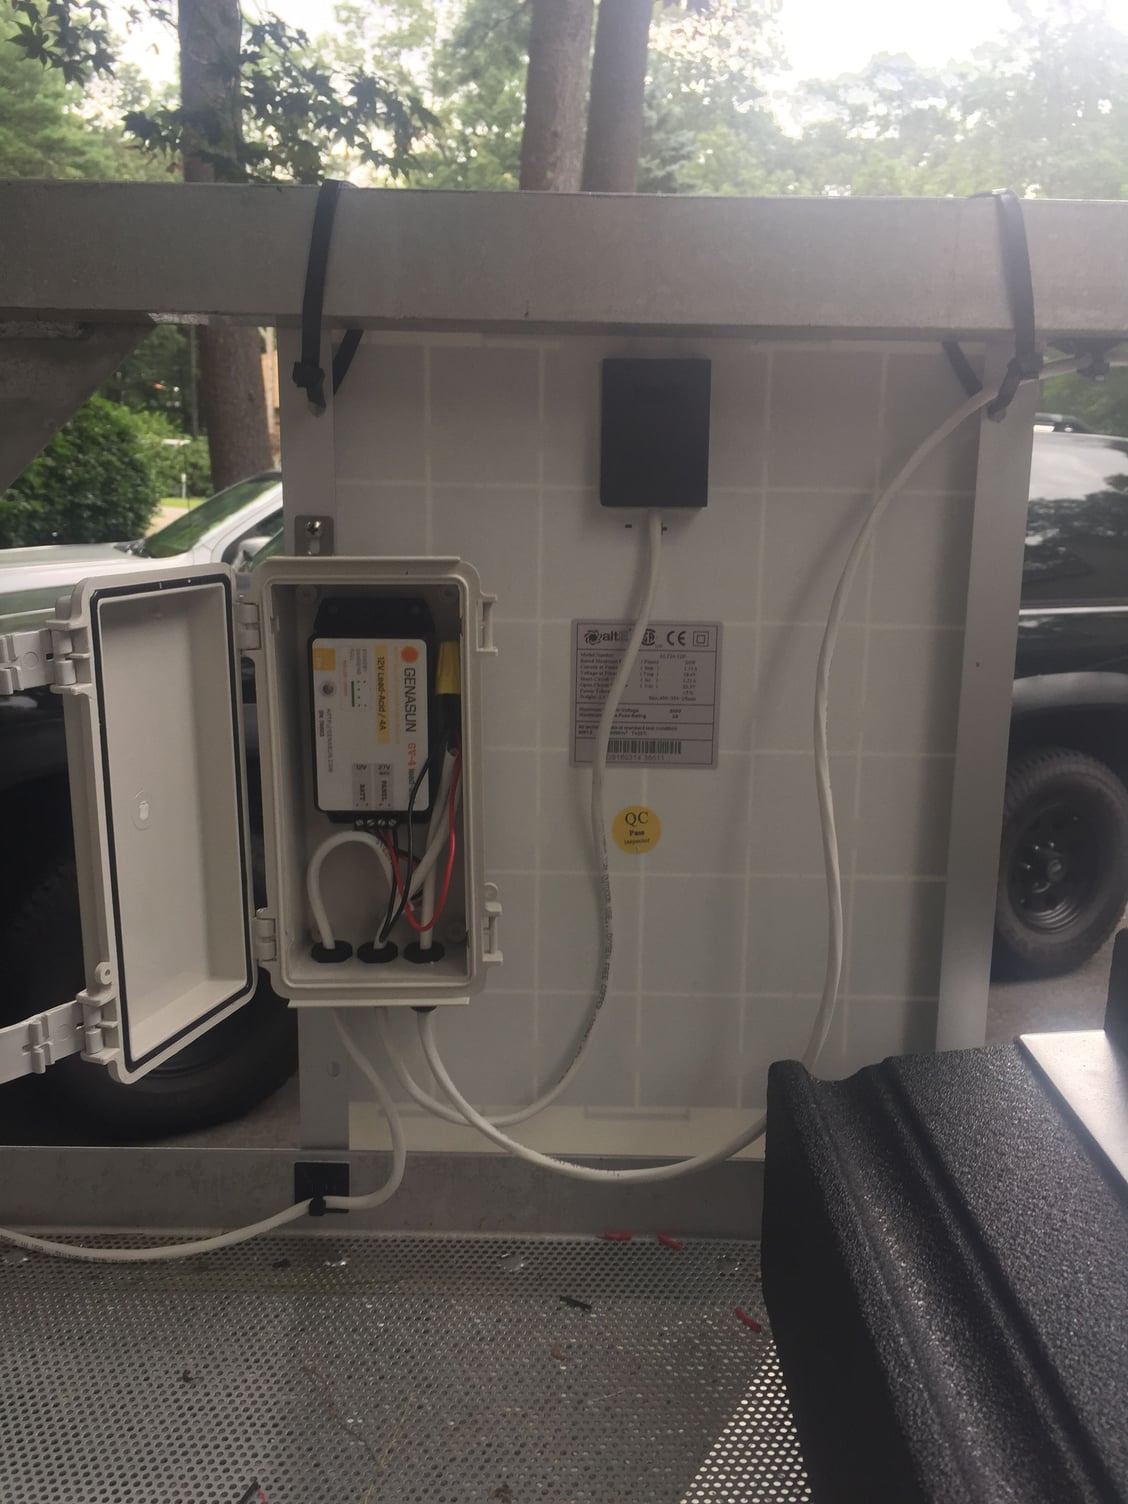
I've now added solar charging to the setup. See attached pics. Vertically mounting the panels has added some wind resistance and from a solar perspective is a bad angle, but in my driveway it is due east facing, so it will charge all morning. Today is very overcast, but I did see the charge controller activate when the sun poked out and I have picked up about 0.1V of charge even in these conditions.
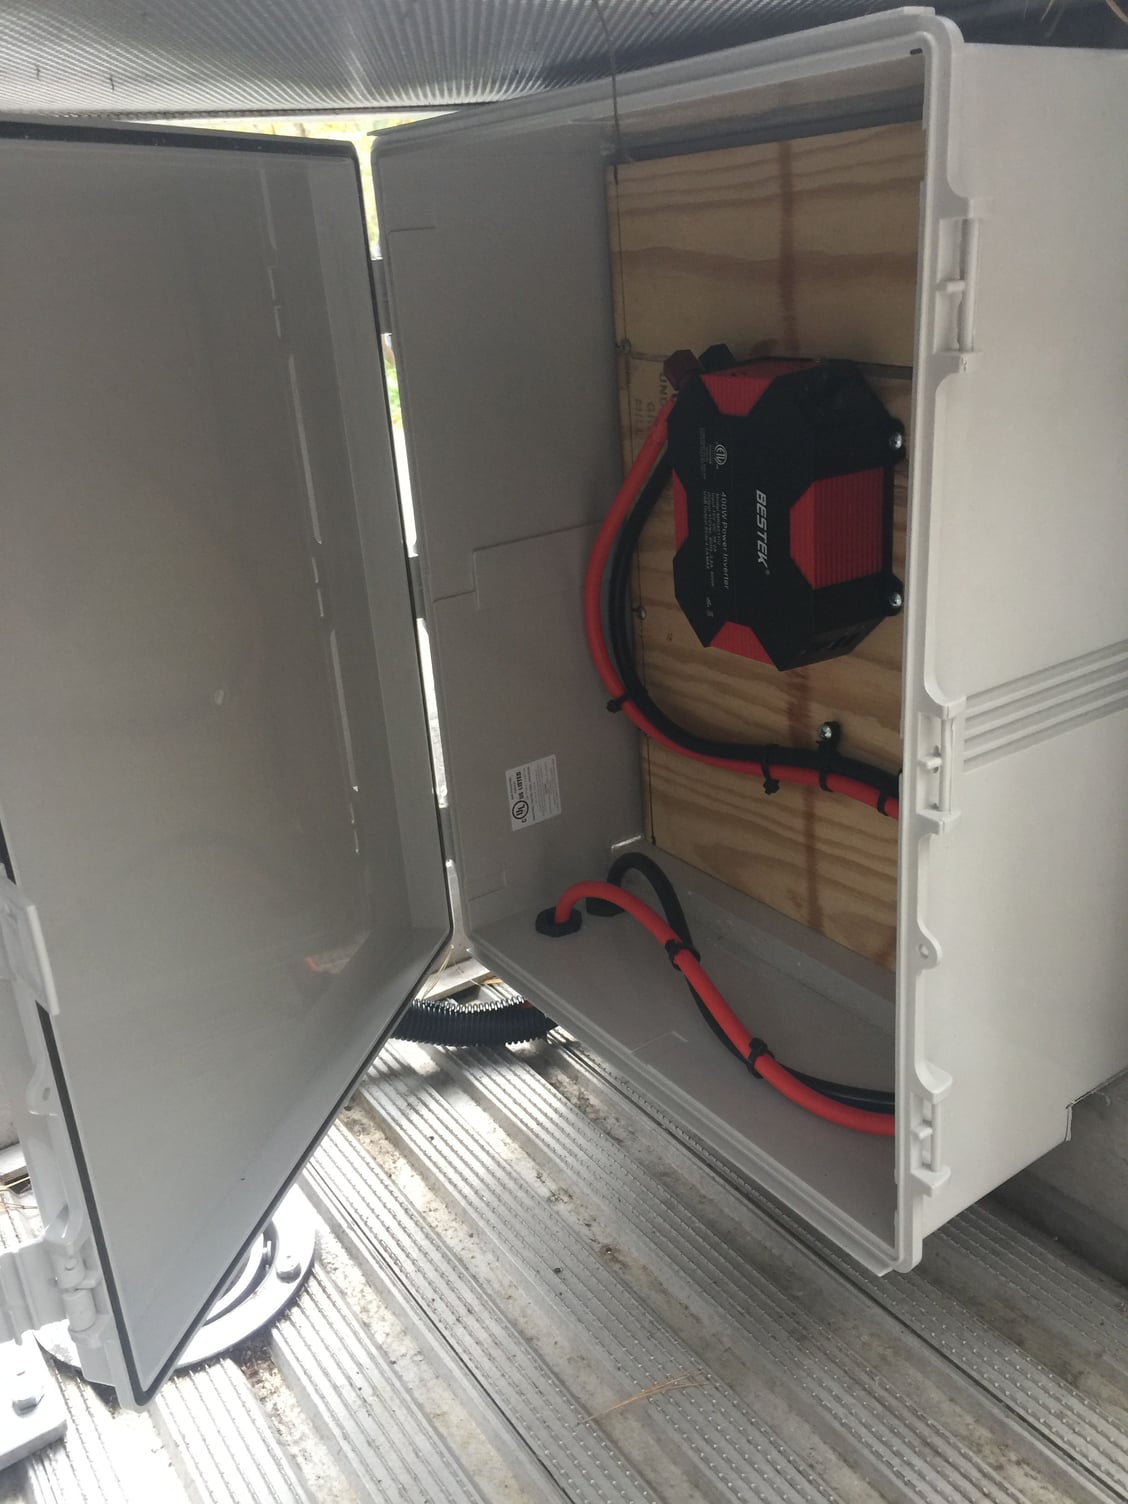
As shown, I mounted the charge controller in a small NEMA box to weatherproof it.
NEMA enclosure for charge controller
Charge Controller
20W Panels from Alt-e store - mounted vertcally, east facing.
Update: Solar works great. Brings battery back to a full charge after a few days (after using winch a couple of times).
Since I now have a big battery on the trailer (Group 31 - 105AH) and a charging system, what else can I run?
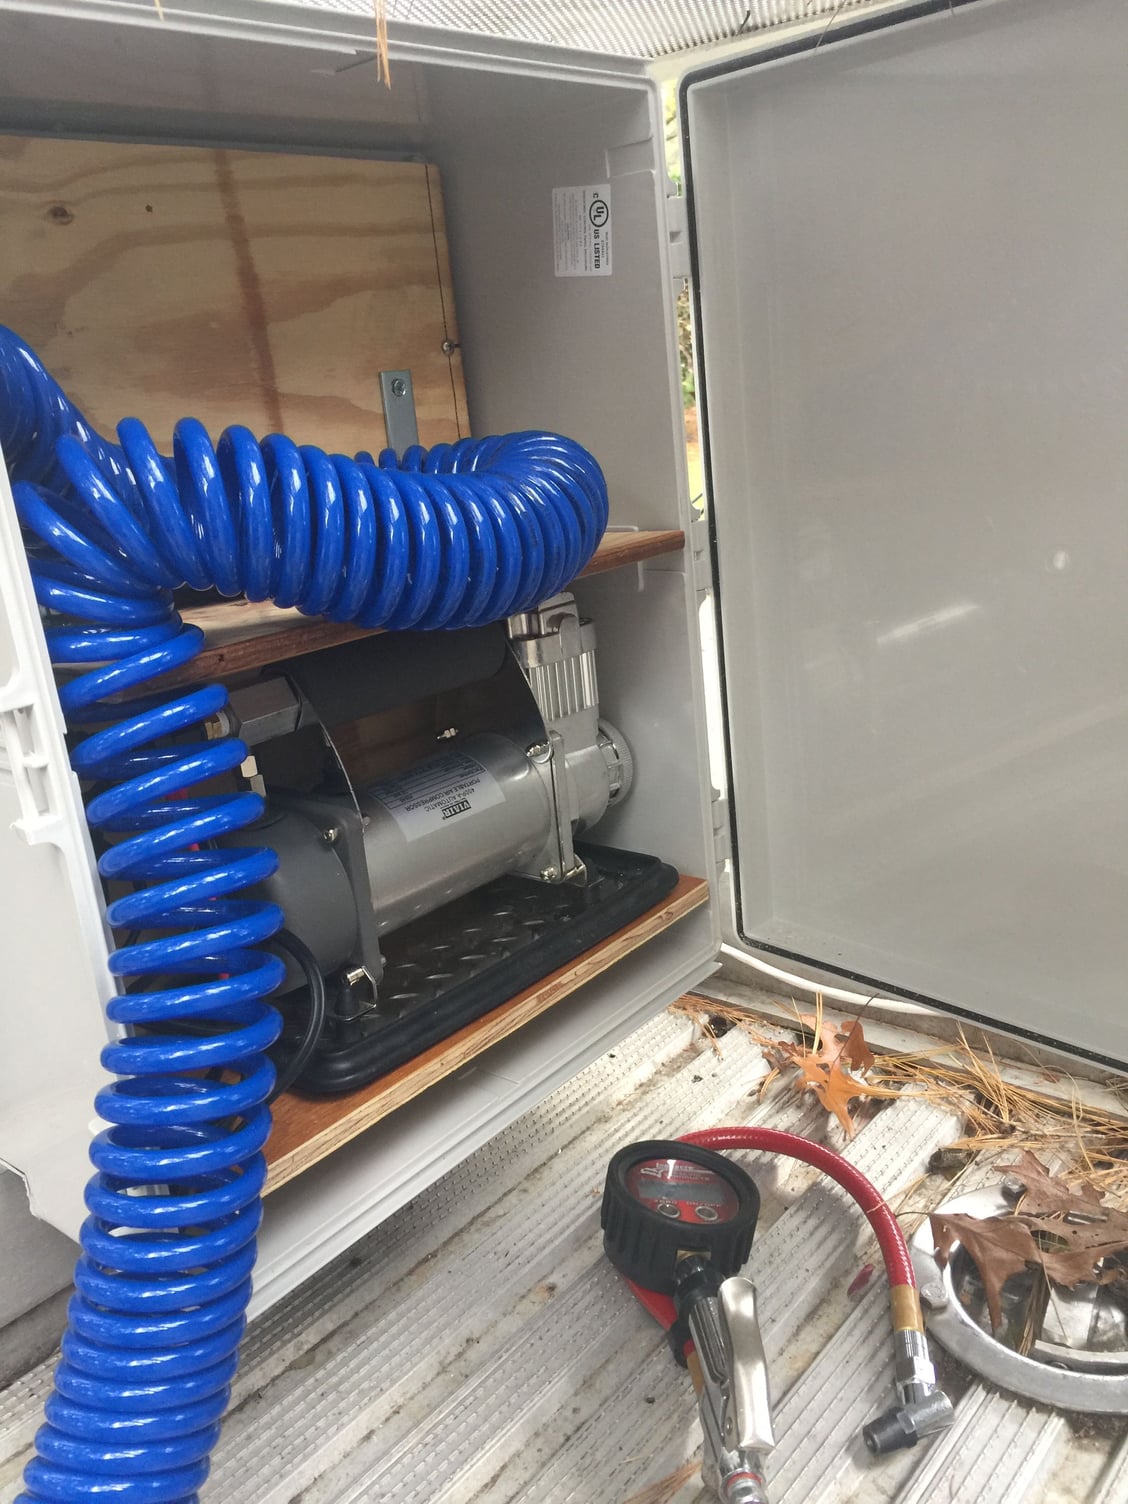
Built in air? See this:http://www.viaircorp.com/oba/oba-medium/
Now that the season is over up here in New England, I thought it was a good time for a small trailer project before it cooled down too much and started snowing!
So, I took on the task of adding an on board air compressor and inverter for 120v power.
After much searching, i found some weather sealed plastic NEMA boxes which would fit (with some mods) under the tire rack.
They needed a little modification to fit properly, I notched out the bottom and reglued the notched bit to forrm a bit of a kerf for the box to sit on elevated a bit from the trailer deck.
I also screwed 1/2" plywood to the interior for a mounting surface.
I used cable glands to route power wire to each box. 4AWG for the inverter and 8AWG for the compressor.
You'll see this in the below pics. I used a slightly modified ViAir 400p with 50' urethane hose for the compressor and a small 400W inverter. I had both of these on hand, but if this works out, I will upgrade both to units more fitting this application.


 07-12-2017, 04:50 PM