When you click on links to various merchants on this site and make a purchase, this can result in this site earning a commission. Affiliate programs and affiliations include, but are not limited to, the eBay Partner Network.
Would you drive this car any further? (metal pcs in oil filter)
2001 986 2.7 with 150k miles, I've only had the car for 500 miles.
Before purschase, I had Porsche workshop do PPI during which they also changed oil filter (not oil), I cut it open by myself and saw small amount of metal flakes. That filter had been in the car for atleast 6k miles and for that mileage I thought it to be fine.
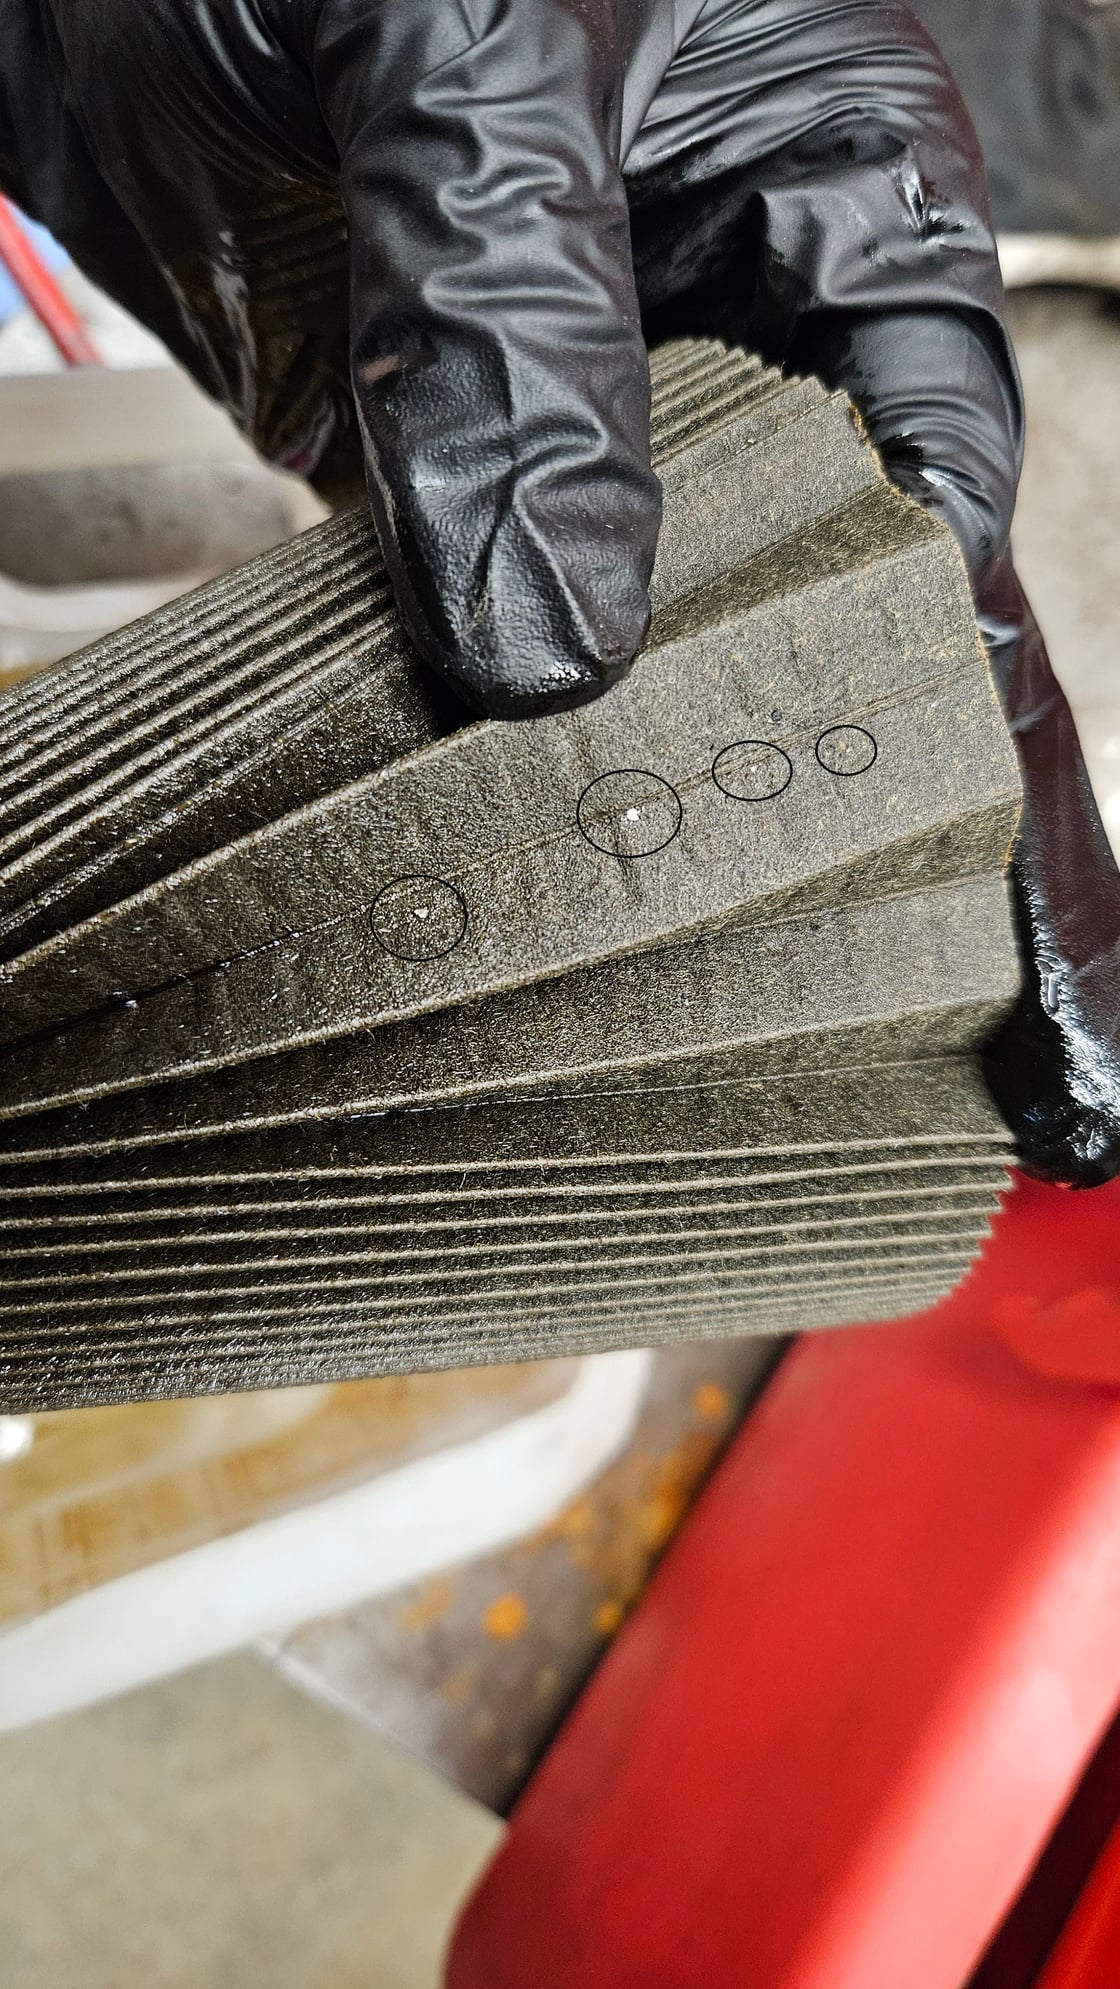
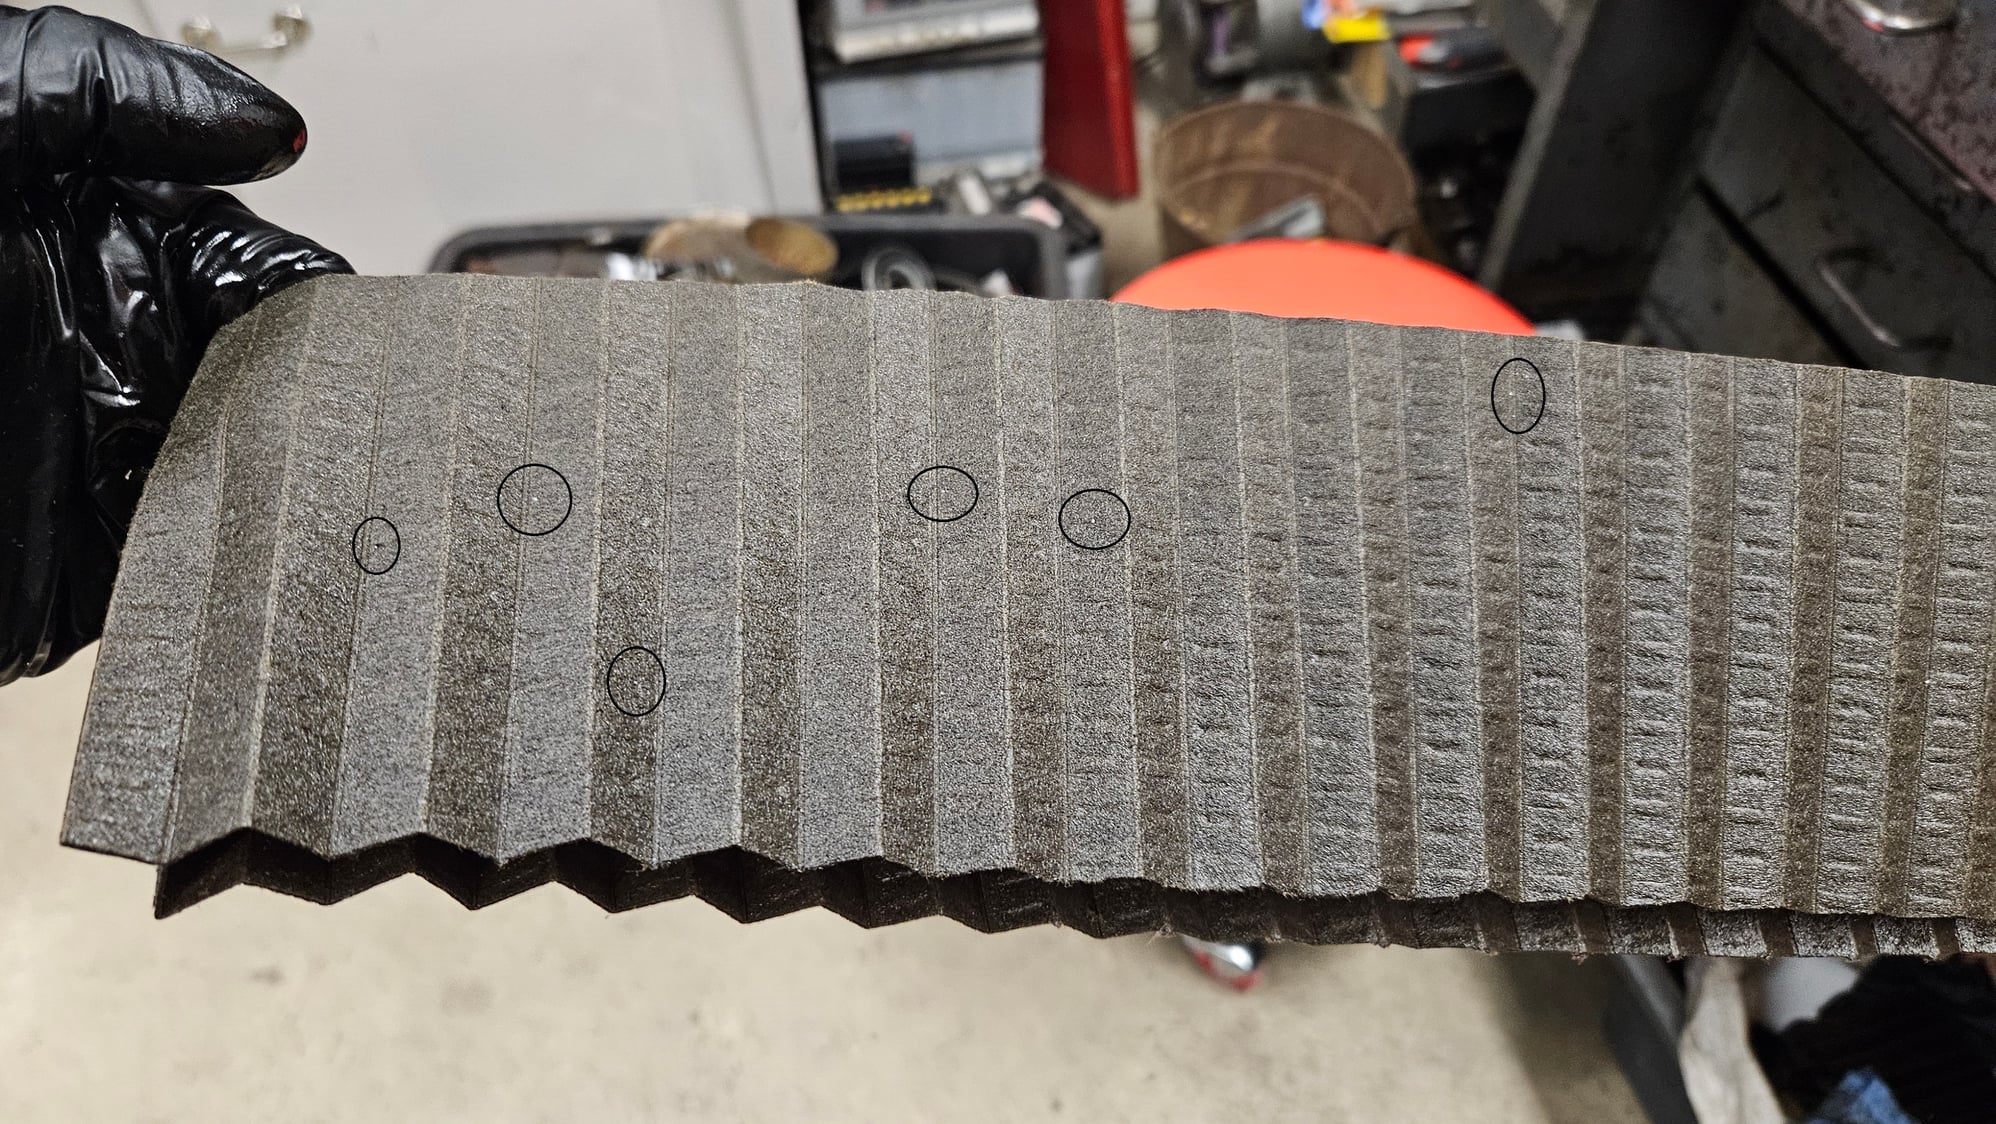
Yesterday, 500 miles later, I changed filter again and changed oil. See the cut filter below, biggest chunks are caught on picture, there were also smaller flakes easily seen by eye but couldn't get them to show on picture.
Since PO didn't know if or when IMS bearing was changed, I knew I was in for it's replacement + RMS + clutch set + flywheel + drive shafts.
Question is, would you dare to drive it another 1-2k miles to tackle all the jobs in winter.
Perhaps check with a magnet to see if they are ferrous (which could be IMS bearing) or aluminum (look aluminum to me) or non metal. Also, get a magnetic drain plug.
Question is, would you dare to drive it another 1-2k miles to tackle all the jobs in winter.
Don't stress, most long term Rennlist members have seen much worse. The amount of silver flakes in your filter shouldn't be alarming, just concerning - time to investigate and makes some changes. In the meantime, one of the easiest steps is moving to an engine oil with higher counts of Moly such as Driven DT40 or LiquiMoly 5W40 with the addition of a bottle of Ceratec. But before you do, I would recommend dropping the sump and inspect for any FOD or metal in the oil.
If you want to know more on how to identify the different types of metal found in the filter or sump of an M96 engine, I encourage you to watch Jake Raby's "What in My Oil?" series. You have to be a Rennvision member to watch, but worth it.
Here are pictures of the filter from my 2000 base shortly after I bought it. https://986forum.com/forums/boxster-...look-like.html
After another 10,000 KM the filter was cleaner if I remember correctly. So, IMHO, don't worry about the metal that you see. What I find more worrisome is if you have a lot of small dark brown plastic chips, indication that the cam chain tensioner pads are wearing. Again in my opinion, people should worry more about the cam chain tensioner pads and less about the IMSB.
Again in my opinion, people should worry more about the cam chain tensioner pads and less about the IMSB.
I agree, we shouldn't 'worry' over IMS bearing failure. That would really taint the whole ownership experience if you feel like you can't even drive the car far without the fear of being stranded on the side of the road. But...
IMHO, ignoring worn Variocam cam adjuster pads won't lead to catastrophic engine damage unlike a failing IMS bearing. You can monitor the health of the wear pads using a Durametric or similar scan tool, but aside from inspecting the filter and UOA, there is not much you can do to monitor the health of a IMS bearing. You have to take proactive steps to change it out like during clutch service.
Believing the myth that "if it (IMSB) hasn't failed by now, it will never fail", will only lead to disaster.
... IMHO, ignoring worn Variocam cam adjuster pads won't lead to catastrophic engine damage unlike a failing IMS bearing.
If you check the rebuild videos done by Man in a Garage you will learn that his 996 that had a broken IMSB... didn't have a broken IMSB, rather the tensioner pads had fallen apart. There are other stories of IMSBs being blamed for other failures, including the engine in my 2000 Boxster S which in reality had a spun rod bearing.
Sorry to veer this off topic, but in a situation where the cam adjuster pads need to be changed, are there any "while you're in there" items to tackle?
If you do it with the engine out, like I do, you can verify the clutch, IMSB, RMS, AOS, replace all the vacuum lines and the vacuum reservoir etc. For the pads themselves you only have to remove the cam covers so I change o-rings on several parts... oil scavenge pumps, spark plug tubes, chain tensioners (referred to as adjusters in the Katalog) and a few others. You can change the timing chains between the camshafts also.
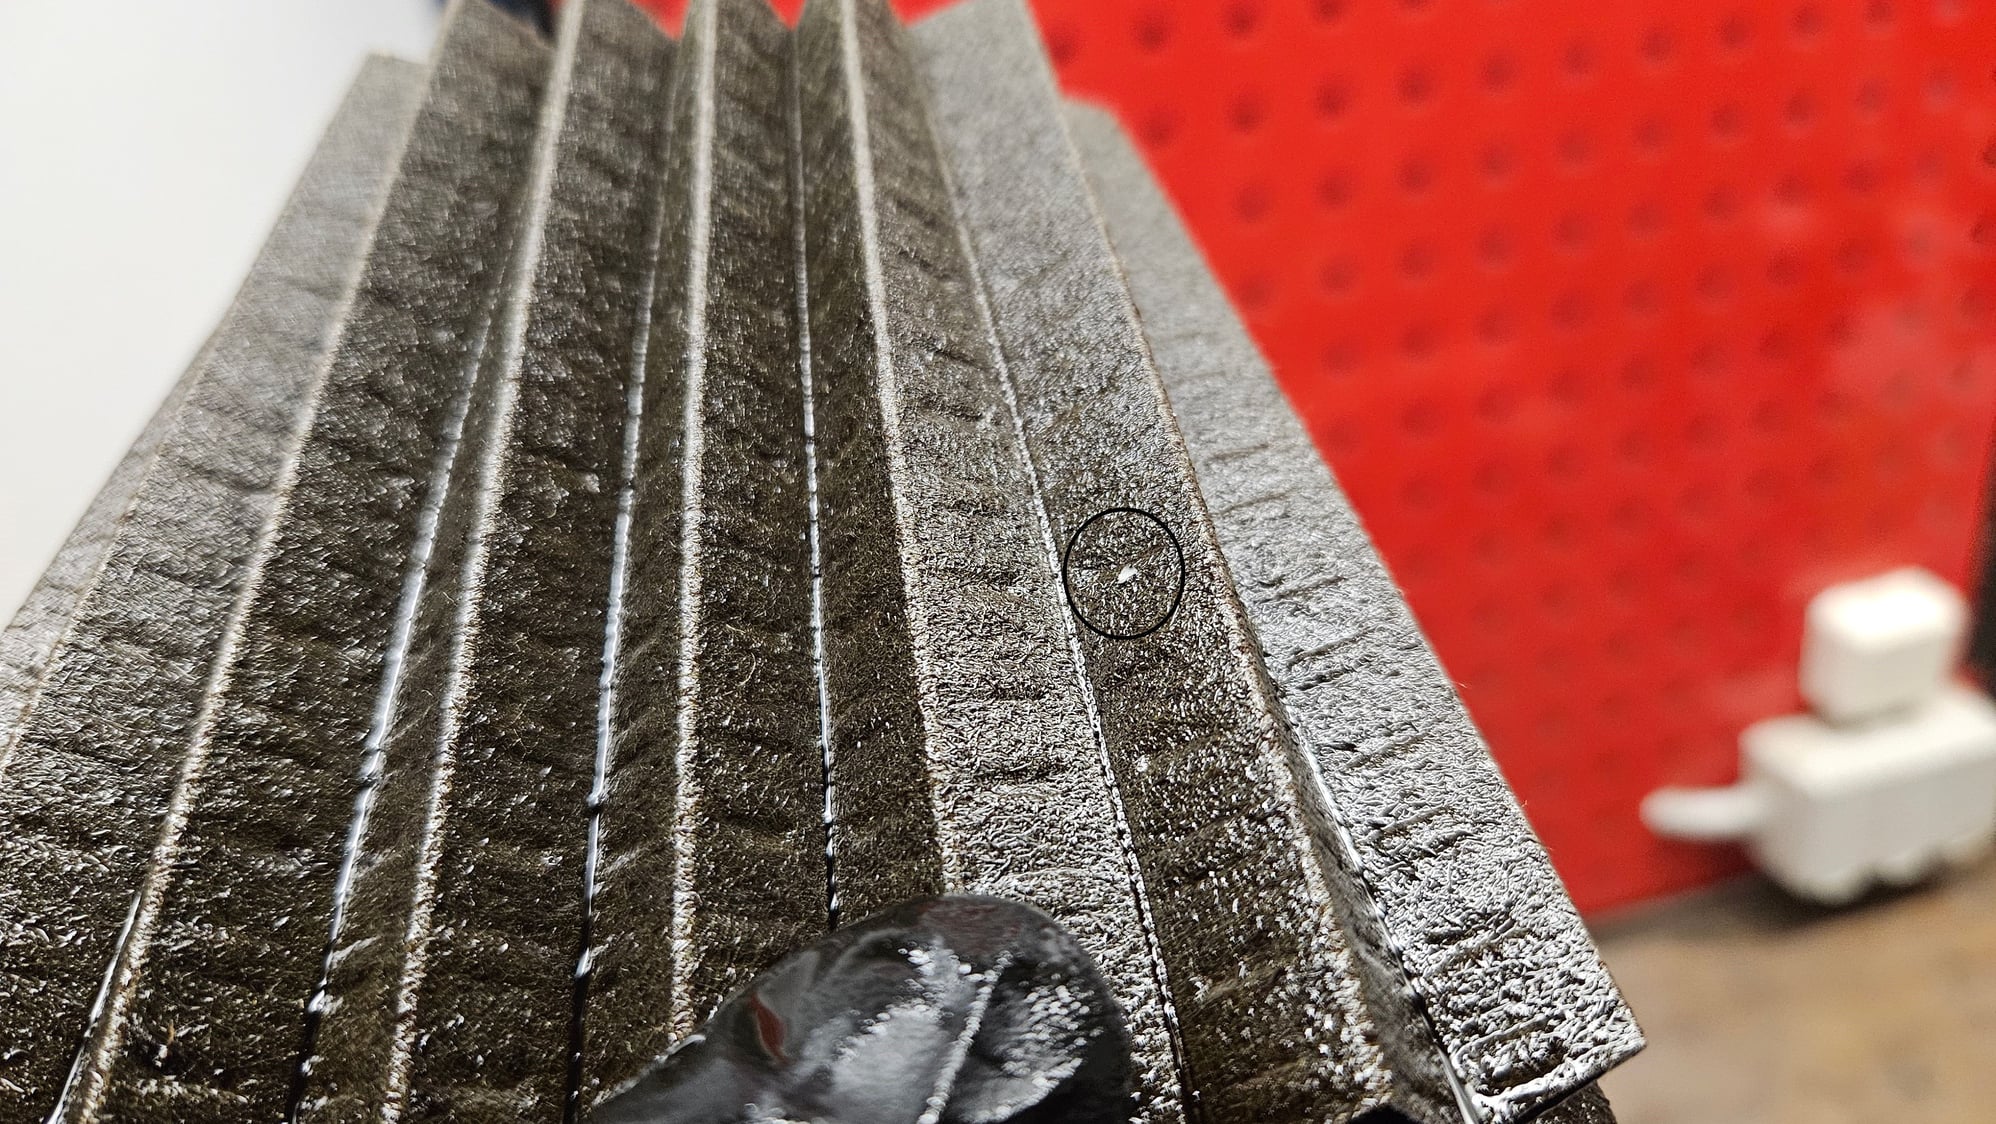
Little update, the larger metal shavings seen on pictures were indeed non-ferrous, most likely aluminium. Magnet only picked up some very small bits which didn't seem too alarming. Thanks to all your inputs I figured - the engine needs to come out, there is just too much work to make sence any other way. I have large service pit + ceiling winch right above, which should make things easier.
For now, I guess I'll enjoy the ride till winter.
I have large service pit + ceiling winch right above, which should make things easier.
For now, I guess I'll enjoy the ride till winter.
Agree with @elgy , this is not like working on your 924, a service pit is great for general maintenance on the 986, but not great for removing engines on the Porsche Boxster or 911 which are "dropped" (hate the sound of that. lol) or lowered from the bottom of the car. I recommend a four post lift, (Max Jack should give you the right amount of clearance) along with a lift table which actually can be sourced inexpensively at Harbor Freight. The Bentley Service Manuals are a good guide for knowing the correct steps to lower the engine safely.
Again, I recommend running an engine oil with higher levels of molybdenum not found in the average Euro spec oil. Driven DT40 - LiquiMoly with Ceratec - MOTUL 8100 X-cess.
A bit off topic and getting ahead of myself, but idea being:
1) drive car over service pit
2) undo all accessories from engine
3) attach winch to engine and pick it up enough to relieve stress from engine mounts
4) undo mounts
5) lower engine + gearbox to the bottom of the pit (winch cable goes through car)
6) detach winch, roll car off the pit
7) winch engine back up from the pit
8) remove gearbox from engine
9) attach to engine stand
I might make a post about it how it turns out.
That would work... except... if I remember right you are not supposed to put weight on the rear wheels after all the suspension support structure has been removed, which has to be done to lower the engine. Could you install the car on jack stands at one end of the pit with just the rear of the car over the pit, drop the engine as you suggest, trundle the engine along the bottom of the pit on a furniture dolly, then lift the engine out ot the pit?
Good point, didn't realise that. Definitely doable the way you described or possibly support the car's rear jack points on 2 metal car dollies and move it that way.

 06-17-2024, 05:01 AM