When you click on links to various merchants on this site and make a purchase, this can result in this site earning a commission. Affiliate programs and affiliations include, but are not limited to, the eBay Partner Network.
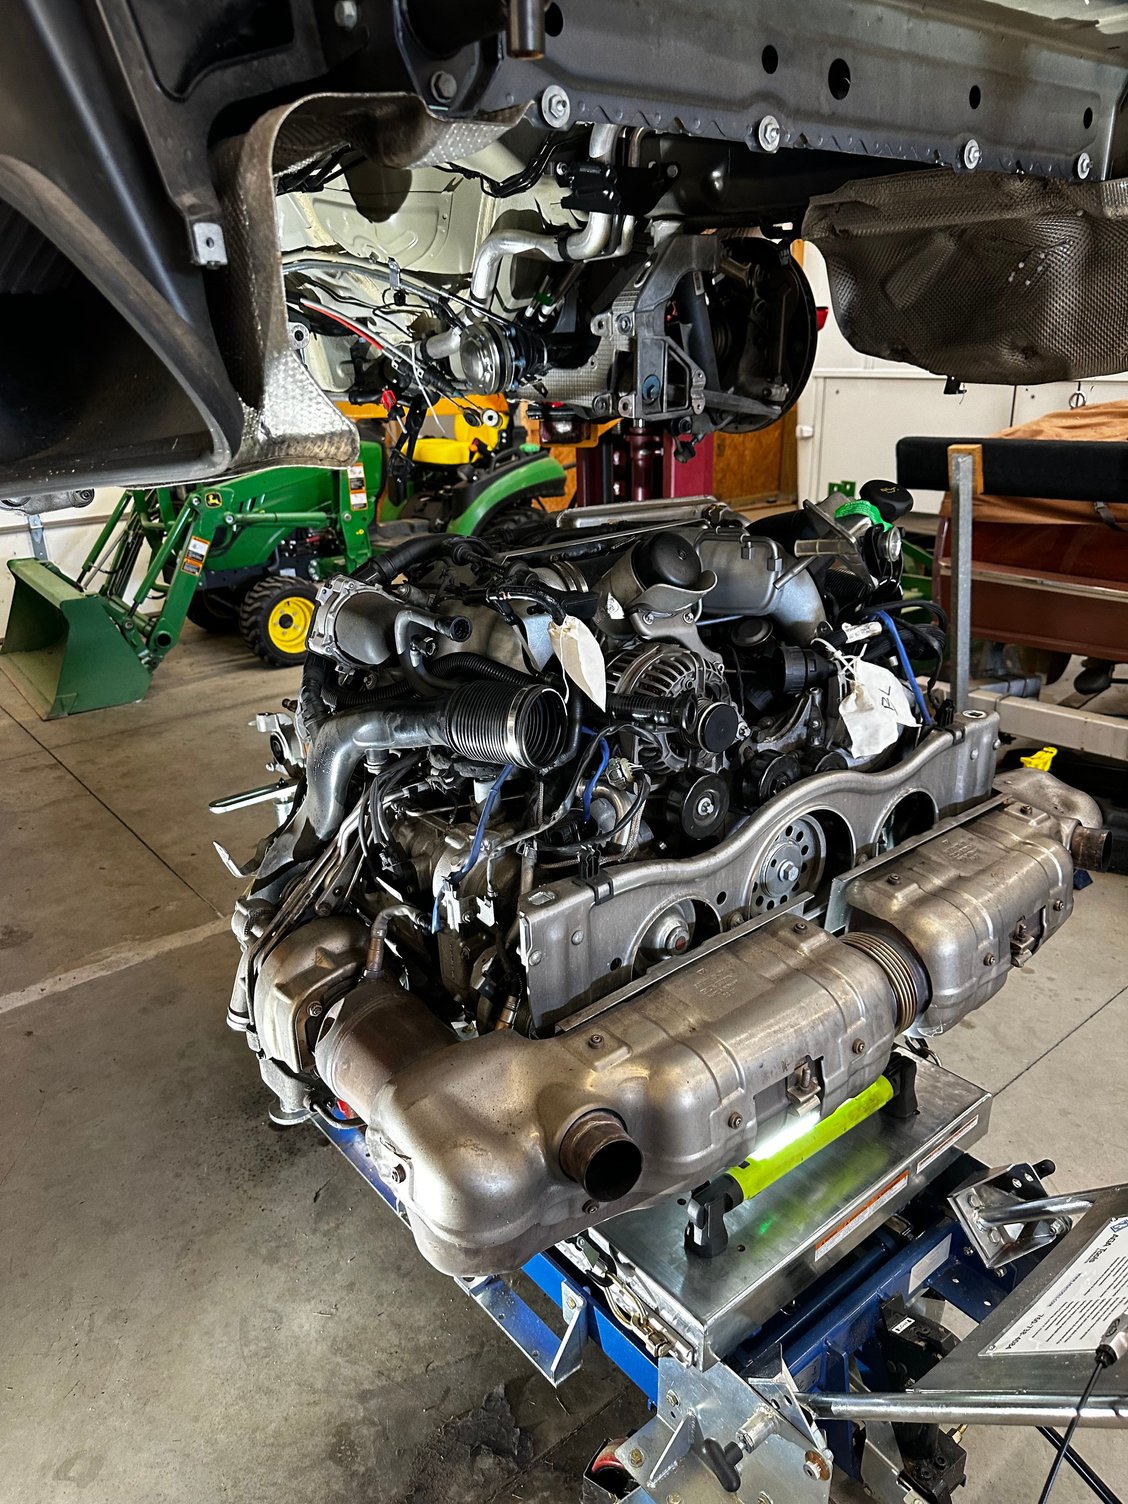
I finally bit the bullet! My engine/transmission package is out and in my workshop. I've owned the car since new, but months after taking delivery I got sent on a 4 year overseas assignment, then retired (and moved) as well as took up traveling the country in a motorhome ... so the poor Porsche only accumulated 13,000 miles in 16 years.
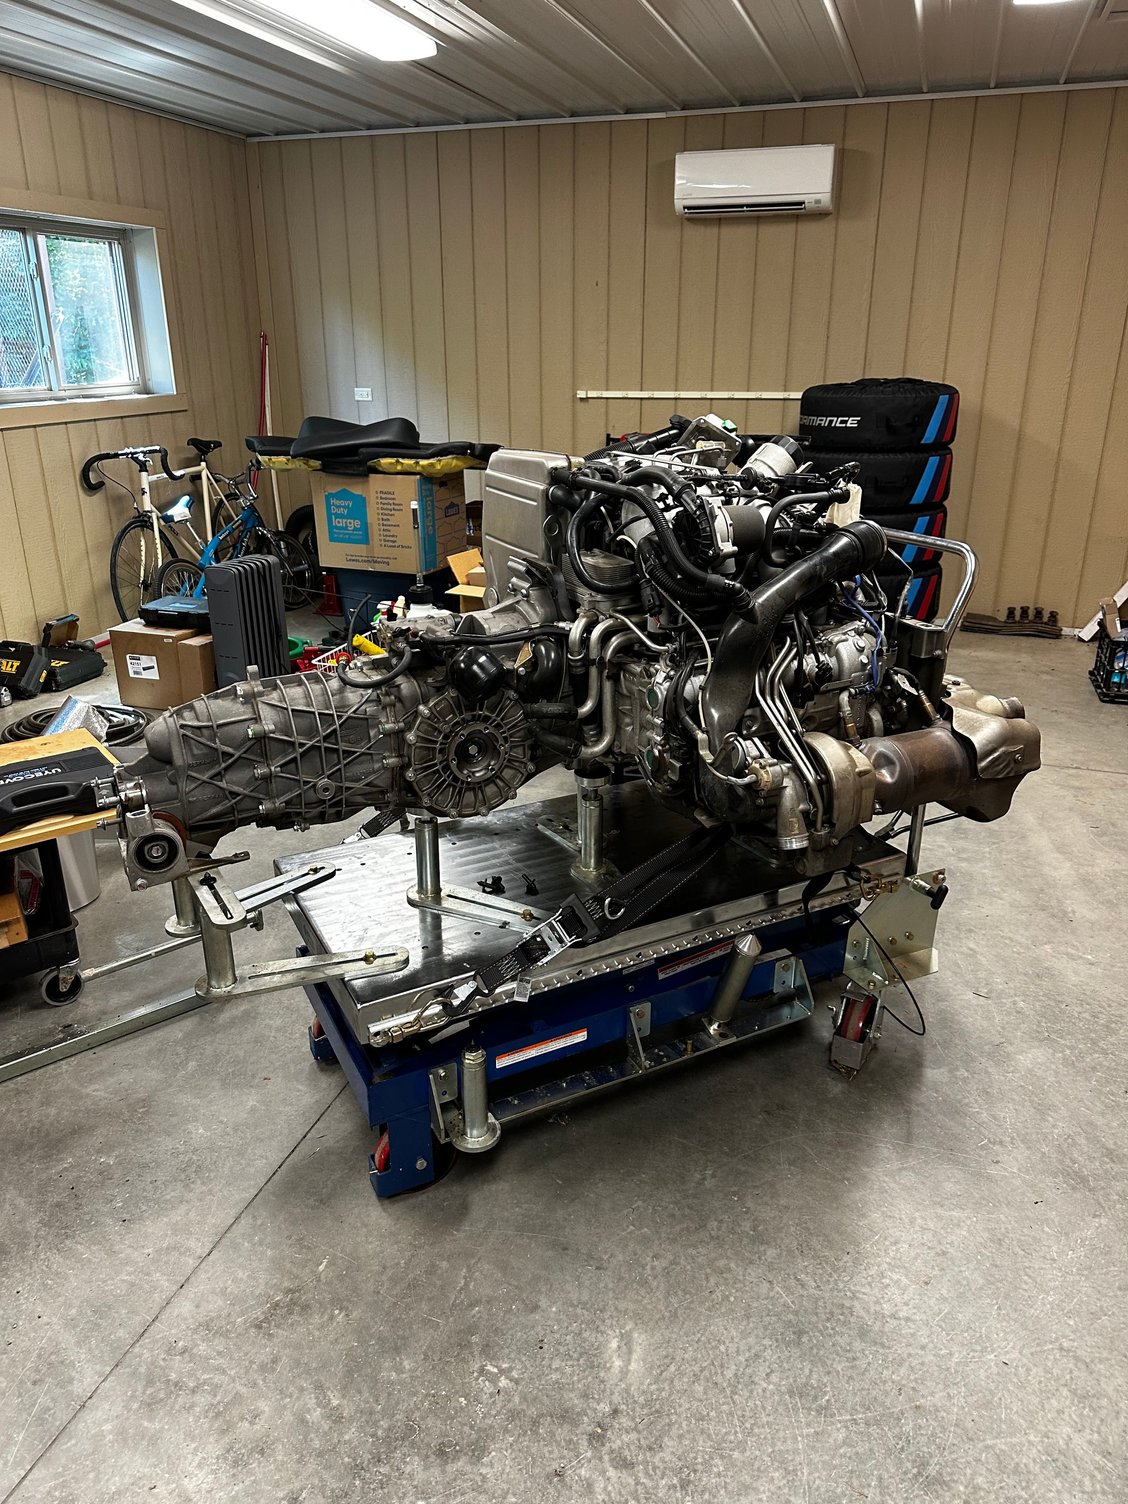
After months of trepidation, I finally decided it's time ... I have a fairly well equipped workshop, an auto lift and an AGA hydraulic table, plus I've been around, torn down, rebuilt cars all my life, so let's go! Removing the unit was actually very satisying, I followed the WM and did it a couple of hours at a time, when I ran into an issue I stopped and researched what I should do ... the the next day it probably took 30 seconds to clear the issue. The only problem was the PS/clutch hydraulic tank. There was a problem with "a tank" issue at the dealer before I took delivery, I always thought that meant the oil tank but I'm now convinced it was this hydraulic tank. The return fittings were gouged and jammed into the tank, plus some evidence of leakage in the area under the tank ... my list of new parts includes a replacement tank and the 2 return lines! The workscope started with a goal of fixing a starter/power cable issue, pinning the coolant pipes and doing anything else which falls into the "do it while it's out" category. That included a host of things which might have aged out and probably need attention after 16 years, this included: new hoses, belt, plugs/power packs, thermostat, gaskets, o-rings, etc, etc. I do plan to remove the transmission and will probably replace the clutch ... there's been the wet dog smell of burning clutch material a few times! If I do that I will probably replace the clutch actuation system - slave and master cylinders, plus accumulator - just stay ahead of any pending leaks. However, I will stay with the original factory design, and not switch to the GT2 hardware, I want to keep the vehicle "as original". Yes, the clutch system is "different", not my idea of a perfect clutch ... the lack of pre-travel caught me out for a long time.
Anyway, while I've been aware of another issue I should address - the camshafts and the potential for them spinning - I've tried to ignore all the stories and hoped I would forget about it. But now, after successfully removing the engine with very few issues, I've decided I should add the camshafts to my workscope. I've read (and re-read) all the cam related posts on this forum - especially the one by lliejk - I've started on the path to get the cams out and pinned, significantly adding to the complexity of the overall task. Like iiiejk, I want to ensure I set up these cams as perfectly as possible when I re-install them. I'm looking for some feedback on lessons learned for this process, what works and, maybe the most important, what doesn't work? My plan would be to use the Baum B9661KIT tool to lock the cams, while I torque (torque and angle) the front bolt with a second pair of hands holding the 30mm wrench on the cam flats. Is this the right tool to use, do any of the other options work better? What else could catch me out? Appreciate any help anyone can provide.
BTW, while the engine is out, if you could locate the position sensor solenoids on the driver's side and passenger side and snap a photo of them on the engine, I'd sure appreciate it.
I don't have any specific lessons that stand out. I shared a lot of my thoughts in that thread.
Yes, you need the special timing tool to do the job, and a wrench to keep the camshaft in place as you torque down the cam bolt (don't rely on the timing blocks to lock in the cam, you need some counterforce.
For me, the most critical part was getting TDC set correctly. This is the basis for the timing to come later, setting the actual timing was super easy with the tools, but if you don't have TDC set properly, you're timing will be off.
Also, do the coolant pinning & the sharkwerks metal fittings as well while ur at it.
Please PM if you ever want to connect and have questions.
I assume you mean the cam position sensors? I have a busy schedule for the next few days but will stop by the workshop and get a couple of pictures. Yes, I'd already researched Protomotive, they seem a good outfit to go to for the pinning.
Moxie - thanks for your response. I don't have a time schedule to work to and am taking my time. I agree, it's been a very satisfying project to this point, working to the WM is a great discipline ... something I enjoy. I used to work in program and engineering management for military and commercial jet engines, there you don't do anything until you've researched the issues every which way and have multiple options (and all the parts) before you go forward.
I've done the pros and cons of the coolant fixes and I've flip flopped between welding and pinning so many times I'm dizzy. Right now I'm in the welding camp, using new BBI billets welded in by Tarrett. But I will install the Sharkwerks fittings, they're already ordered. My son will help hold the camshaft as we torque the cams, he's also a detailed aerospace engineer!
BTW, while the engine is out, if you could locate the position sensor solenoids on the driver's side and passenger side and snap a photo of them on the engine, I'd sure appreciate it.
I was over in my workshop this morning, here's some pictures of the LH (driver's side) and RH (pass side) cam sensors. The unit is still "dressed" so I was concerned I might not be able to see them ... not the case! Not sure how much detail you were looking for, so I've included several.
Cheers! LH side LH side LH side RH side RH side RH side
Thanks NC! These are perfect. I've heard that people have changed them pretty easily but I had not seen any photos of them installed up close. I may feel around the engine bay and see if it is possible for me to replace them.
Much appreciated!
Sam T.
Just take your time, and as Moxie said, make sure you are at a good starting point (TDC). It's been a while, but I remember reading and re-reading the cam installation parts of the shop manual and watching one video in articular of cams being re-installed (part of an engine rebuild if I remember correctly) several times to make sure I had a good idea of what needed to be done. I really made sure the slots of the tool and the cam slots were seated nicely, probably spending the most time on the tool setup more than anything (I was lucky and the P-car shop manager lent me the actual P-tool).
One thing I wish I had done (just as an added sense of security) was mark the cam housing with the cam positions before popping them out. Every other car I have worked on has marks to help align cams, and in retrospect, I wished I had made my own, just to give me one more point of reference when re-assembling everything.
While the cam pinning was the most daunting task, like any mechanical task, it can be done successfully if you take your time and make sure you understand each step. While it's been a while, let me know if you need any advice and I will be glad to help where I can.
Ed
Ed - thanks. Your detailed description of your journey has been my inspiration this far ... and also the reason for my intense planning around doing the cam work. My regret is that I didn't do a Durametric scan of the cam performance before starting the process. My list of new parts (and the associated $$$) is growing daily. I understand the attention to detail involved around the TDC/cam alignment process ... to the point of it becoming an obsession. Rest assured, I'll probably go overboard on this. But I'm having fun!

 05-27-2024, 07:26 PM