When you click on links to various merchants on this site and make a purchase, this can result in this site earning a commission. Affiliate programs and affiliations include, but are not limited to, the eBay Partner Network.
Keep in mind that it's on a roll, so the pattern repeats down the roll, not across it.
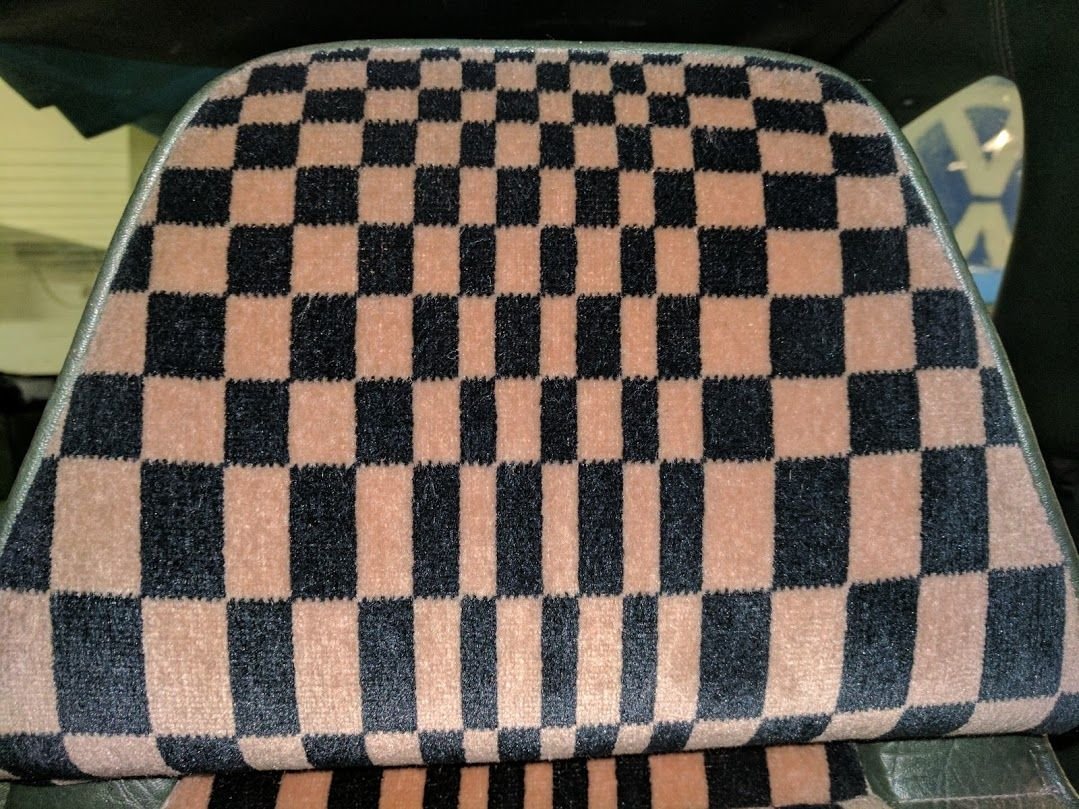
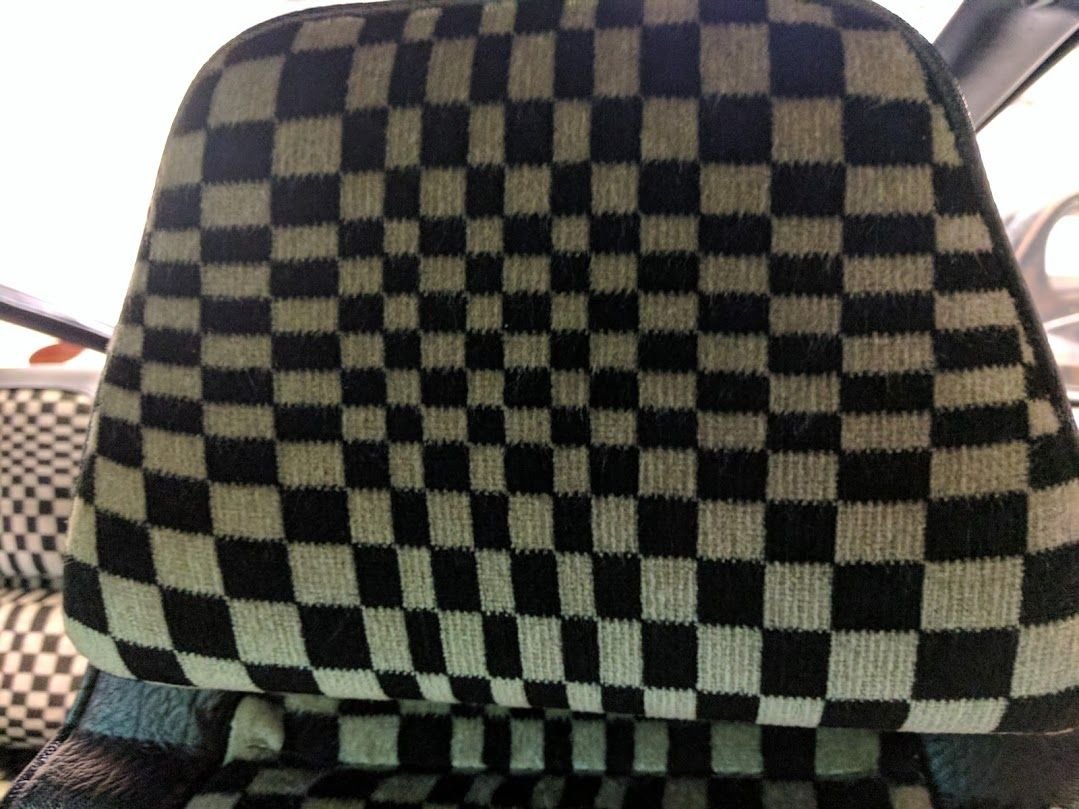
Actually, Shawn, I think it repeats both ways. The repeat line is up the middle and across the middle of the large blocks. In between those lines the pattern is not symmetrical, so I doubt that there is a formula that will match the actual pattern. I think maybe it was done by hand and maybe by Wolfgang as mentioned above.
What I plan to do is take what I think I have learned about the pattern and draw it to match what I am planning for a pair of 928 Sport Seats. I will need the pattern to repeat in a way to match the 928 cushion sections as I have modified them as shown in the Sport Seat in my Avatar, from four to five. I don't remember the dimension of the changed width of the cushion section, but when I figure that out I'll be able to decide the size of the pattern repeat, but on the diagonal, since, as I mentioned, I think I'll put the pattern on at a 45 degree to the usual. That should put the center of the small blocks in one cushion and the center of the large blocks in the next, and so forth. I think I'll also put a square in the middle of the large blocks rather than the four corners.
It is doable Jerry. Indeed, Paul Champaigne figured it out with his pascha laser cut leather seats - remarkable things of beauty. He had to have figured out the pattern, because they look perfect.
Looks like th top three lines of that equation were inadvertently cut off by the camera/scanner. I think I ca reproduce them though. Shouldn't take long.
I can't seem to be able to make heads or tails of the formula, but here is my first stab at a version of the Pascha to fit what I have in mind. It takes a long time to color in all the blocks.
As my wife weaves (she happens to be setting up a project on her largest loom this evening), I'd be really interested in getting the pattern so I can pass it along to her.
With the pattern (and pattern means exact threads on a matrix, not measurements), I might be able to convince her to work on custom projects... A really high-res photo of the authentic fabric would probably be good enough to create a pattern.
Last edited by Ed Scherer; 10-17-2017 at 12:02 AM.
I find it interesting how the paper with just the lines on it doesn't really do much, but when you start coloring in the alternate blocks the darn thing literally comes to life.
This first pattern of mine is based on a simple progression from the center of the small blocks to the center of the large ones, based on tenths of an inch, as follows: 1.5, 3, 3, 3.5, 4, 5, 6, 7, 8, 9, 10, and 5.5. The 1.5 and 5.5 simply straddle the center lines so they result in blocks that are 3 and 11 respectively.
The pattern repeat for this one is 6.6 inches, but I find that is is an inch off. I am redrawing it to be 5.65 inches repeat and based on the following segments, again in tenths of an inch: 2, 4, 5, 6, 7, 8, 9, 10, and 5.5. I think this will result in a bit larger looking small block group and slightly smaller large block grouping.
I also find that putting the pattern at 45 degrees seems to result in the pattern having much more visual life.
If you translate that into inches(x) and inches(y) for each block in the 20x20 numbers matrix I can drop that into the CAD file as parameters and pretty quickly generate an image (PDF or EPS) or Gerber for the actual fabric plotting if that's what it takes.. Post,share it as an excel file and none will be lost in translation. Column(n) widths, Row(n) heights. Or formulas for each.
Let me try again. When I said before that 5.65 is the pattern repeat, that is not correct since that is only half of the pattern in one direction. That 5.65 part of the pattern and the reverse of it together make the pattern repeat in one direction. Then the same goes for the other direction. X and Y as it were.
My pattern is devised to have the center of a small square in the center of the pattern and the center of a large square at each of the four corners, but with the pattern set at a 45 degree angle the corner large squares actually end up in the middle of each side of the pattern. It could be drawn to have the apex of four squares, respectively, in each location, but I decided not to do it that way since it would not look symmetrical.
But, now I see the problem. My measurements are on the oblique since I am turning the pattern 45 degrees and drawing it so that the pattern will match my 5 cushion sections in my seat design. I think that is part of the reason that my small blocks are turning out so small in my first pattern effort.
So, for the X and Y of the pattern when viewed upright, rather than at my 45 degree orientation, the measurements from the center out from the small square are as follows, in tenths of an inch:
1.42 (this is from the center of the small square in the middle to one of its sides)
2.84
3.55
4.26
4.97
5.68
6.39
7.10
3.905 ( this too is from the center of the large square in the center of that grouping out to one of its sides. Double it for its full size.
Then reverse the order for the other side of the pattern and use the same pattern for the 90 degree direction of the pattern.
I don't know what is meant about the 20 by 20 notation.


 10-16-2017 | 12:54 PM


 A really high-res photo of the authentic fabric would probably be good enough to create a pattern.
