When you click on links to various merchants on this site and make a purchase, this can result in this site earning a commission. Affiliate programs and affiliations include, but are not limited to, the eBay Partner Network.
Guys, guys, guys... removing the tie rod is NOT necessary. It's also not necessary to put spring compressors on the spring while the strut is still on the car.
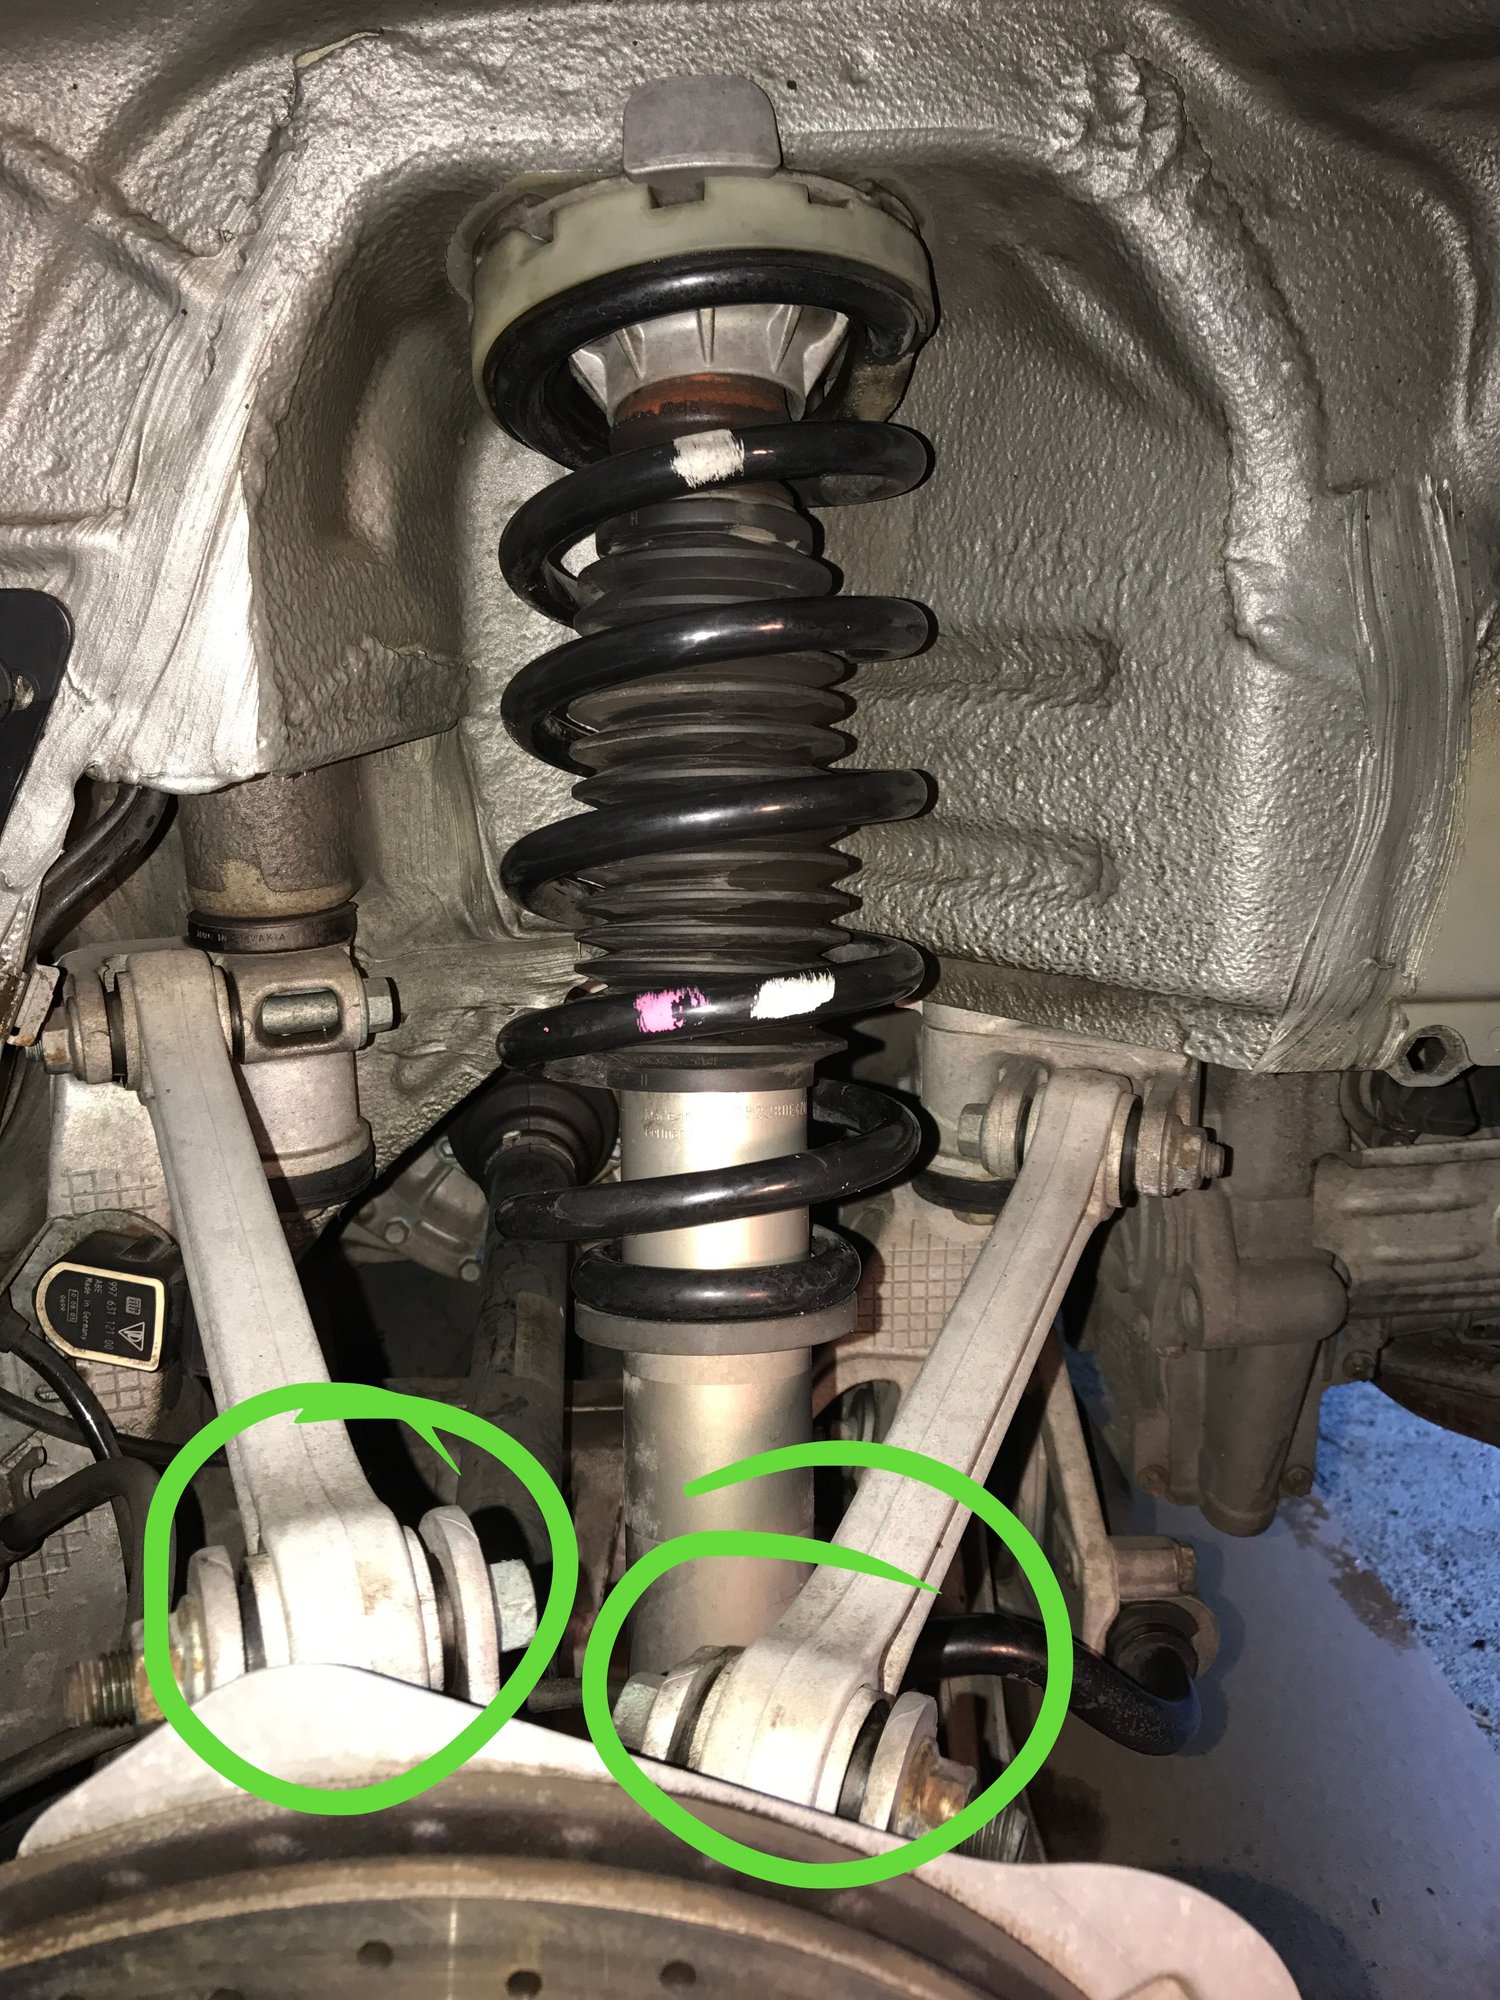
Just loosen the inner control arm bolt (control arm to frame) and the whole hub will be able to drop low enough for you to remove the strut from the knuckle.
I second that. I also find it a bit dodgy to apply the spring compressor to a McPherson strut still attached to the car. The beauty of the McPherson strut is that you can remove the whole thing from the car and work on it on the bench.
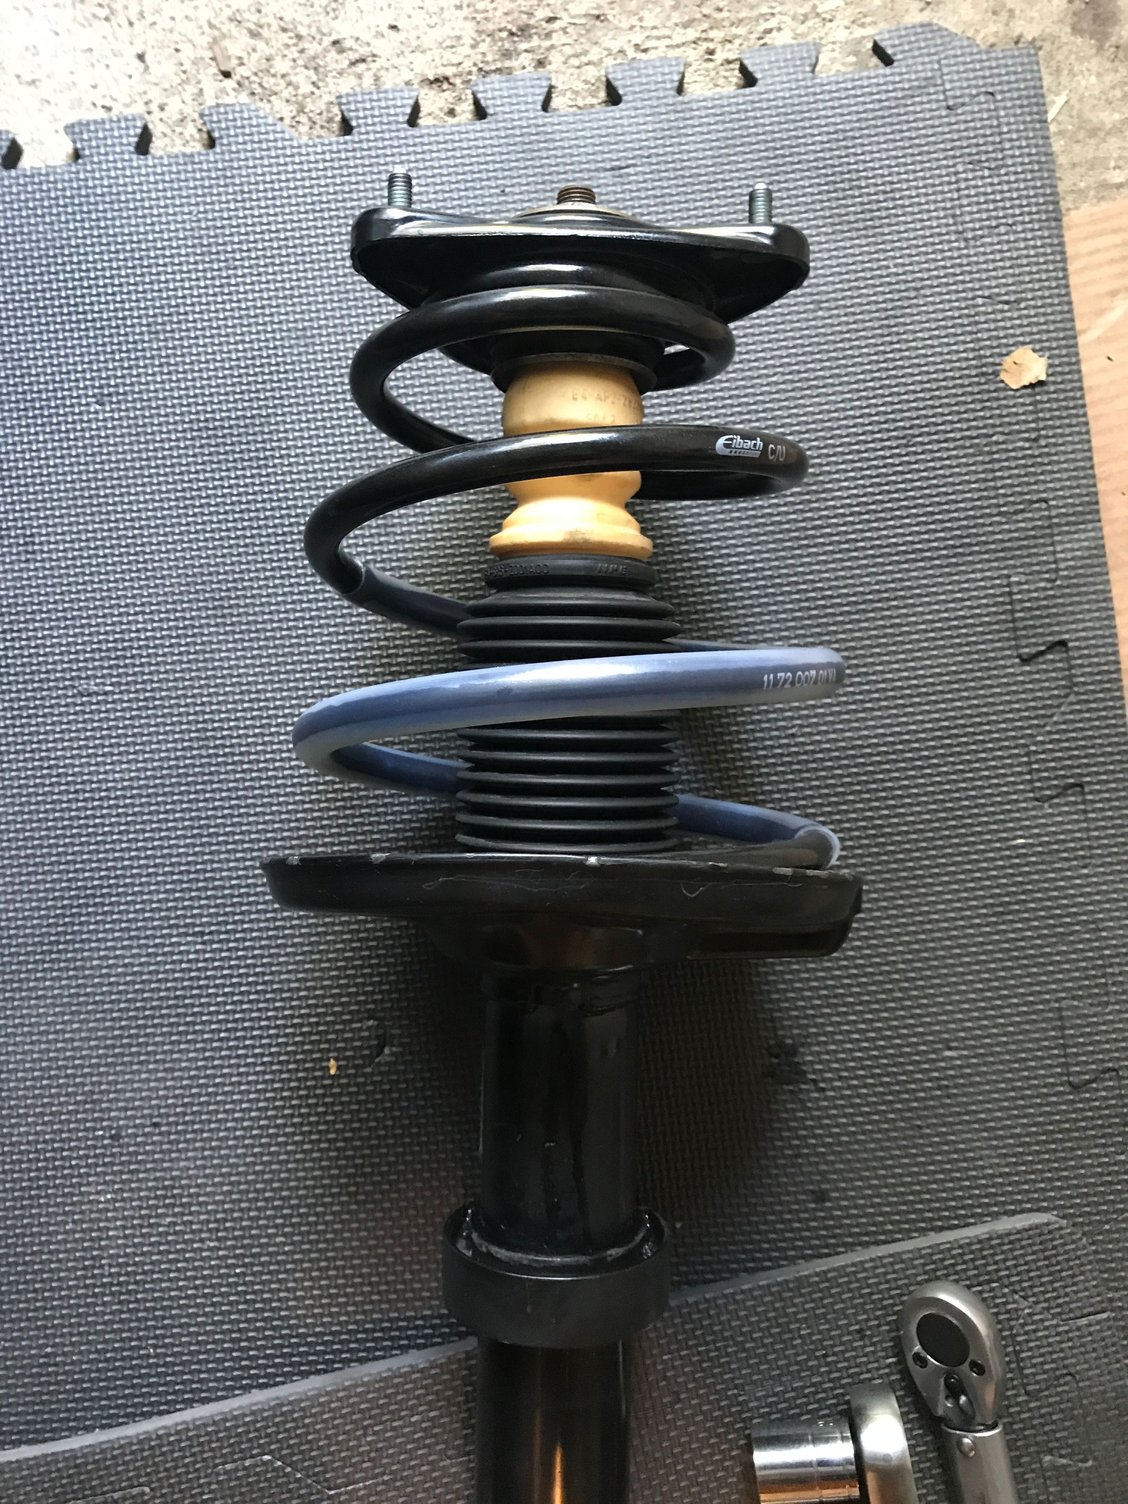
I installed Eibachs on my PASM equipped 997.1 C4S a couple months back. I had to take the extra step of loosening the front axle nuts and disengaging them from the upright.
I did remove the ball joint, but that was a snap with a ball joint tool (the type that looks kinda like an oil derrick). The inner bolt on the lower control arm is not eccentric, so it can go in and out without affecting alignment (but when installing lowering springs one should align afterwards anyway).
My first go around on the front I ended up removing the strut, upright and lower control arm almost altogether. I think on the other side I loosened but did not remove the lower control arm.
By comparison, the rears were much easier, not having to loosen the axle nut. In fact, I even bought a massive 3/4" torque wrench to get the appropriate 350 ft lbs torque on the front axle nuts. My 1/2" ran out at 250 ft lbs.
Guys, guys, guys... removing the tie rod is NOT necessary. It's also not necessary to put spring compressors on the spring while the strut is still on the car.
Just loosen the inner control arm bolt (control arm to frame) and the whole hub will be able to drop low enough for you to remove the strut from the knuckle.
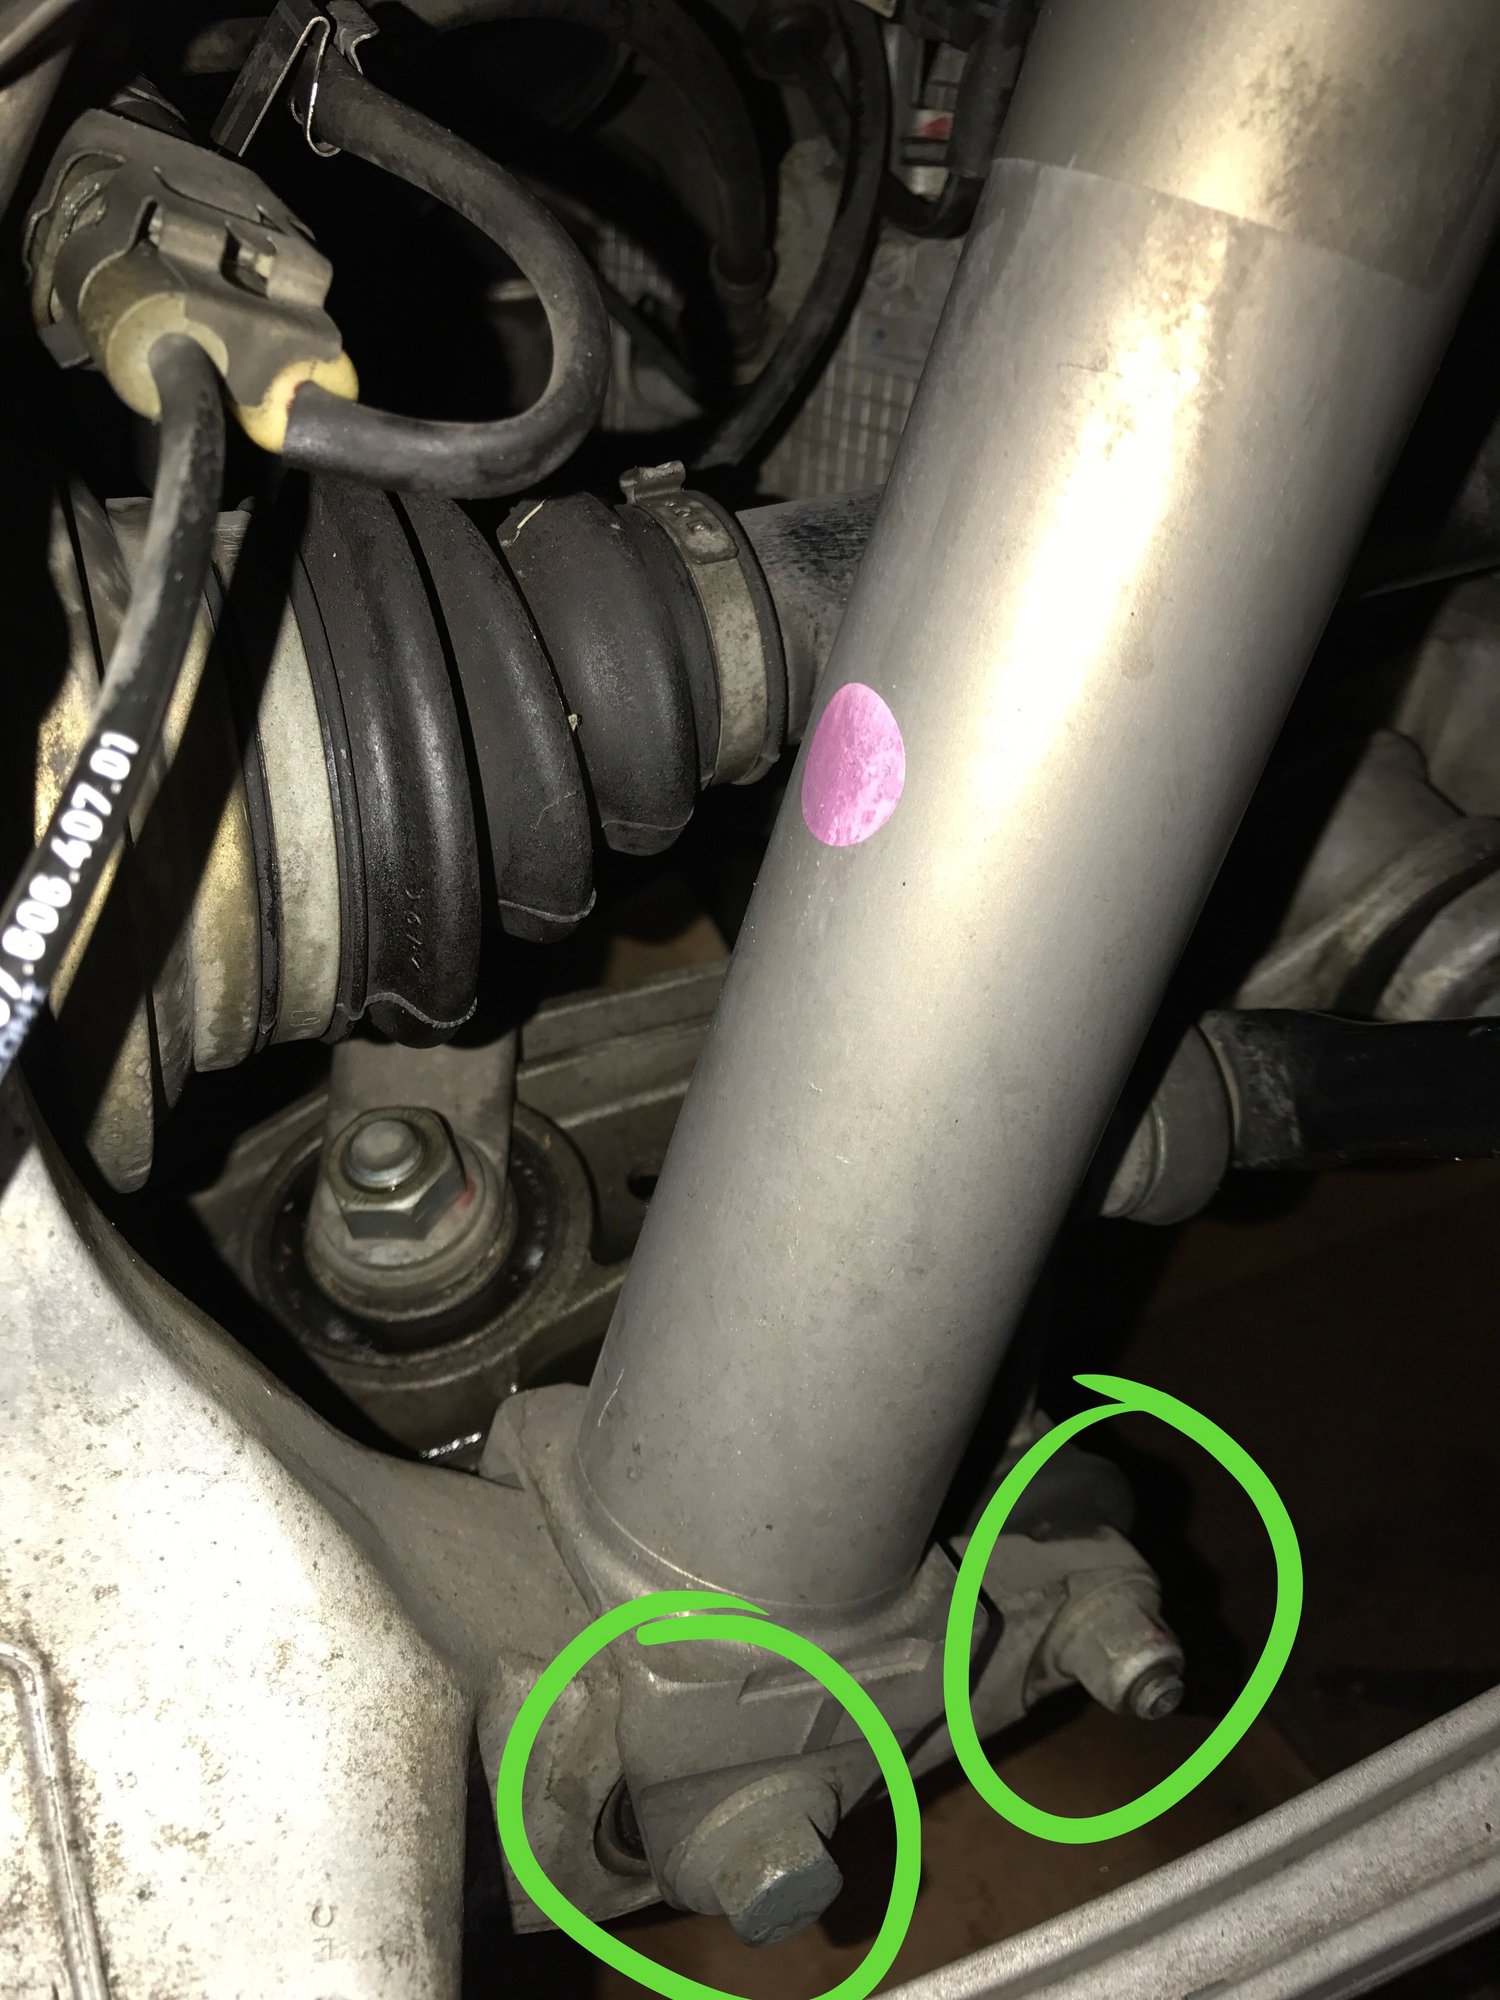
I think you are right. I debated this but I couldn't find any instructions on it. It also didn't seem like I could get enough clearance to get a torque wrench back on the nut.
Removing the tie rod really gave no extra clearance. It just allows you to manipulate the wheel carrier a bit easier.
Net result is the fronts dropped from from 4 1/4" rim to fender to 3 5/8", or 3 finders to 2 fingers.
I will do the rears on Friday and would love any tips. I don't see any good instructions for the rears. Some posts say they are easier, others are they are harder. One thing is for sure: the Rennlist How To post is officially for ****. https://rennlist.com/how-tos/a/porsc...springs-386611 I need to write a new one when I'm finished.
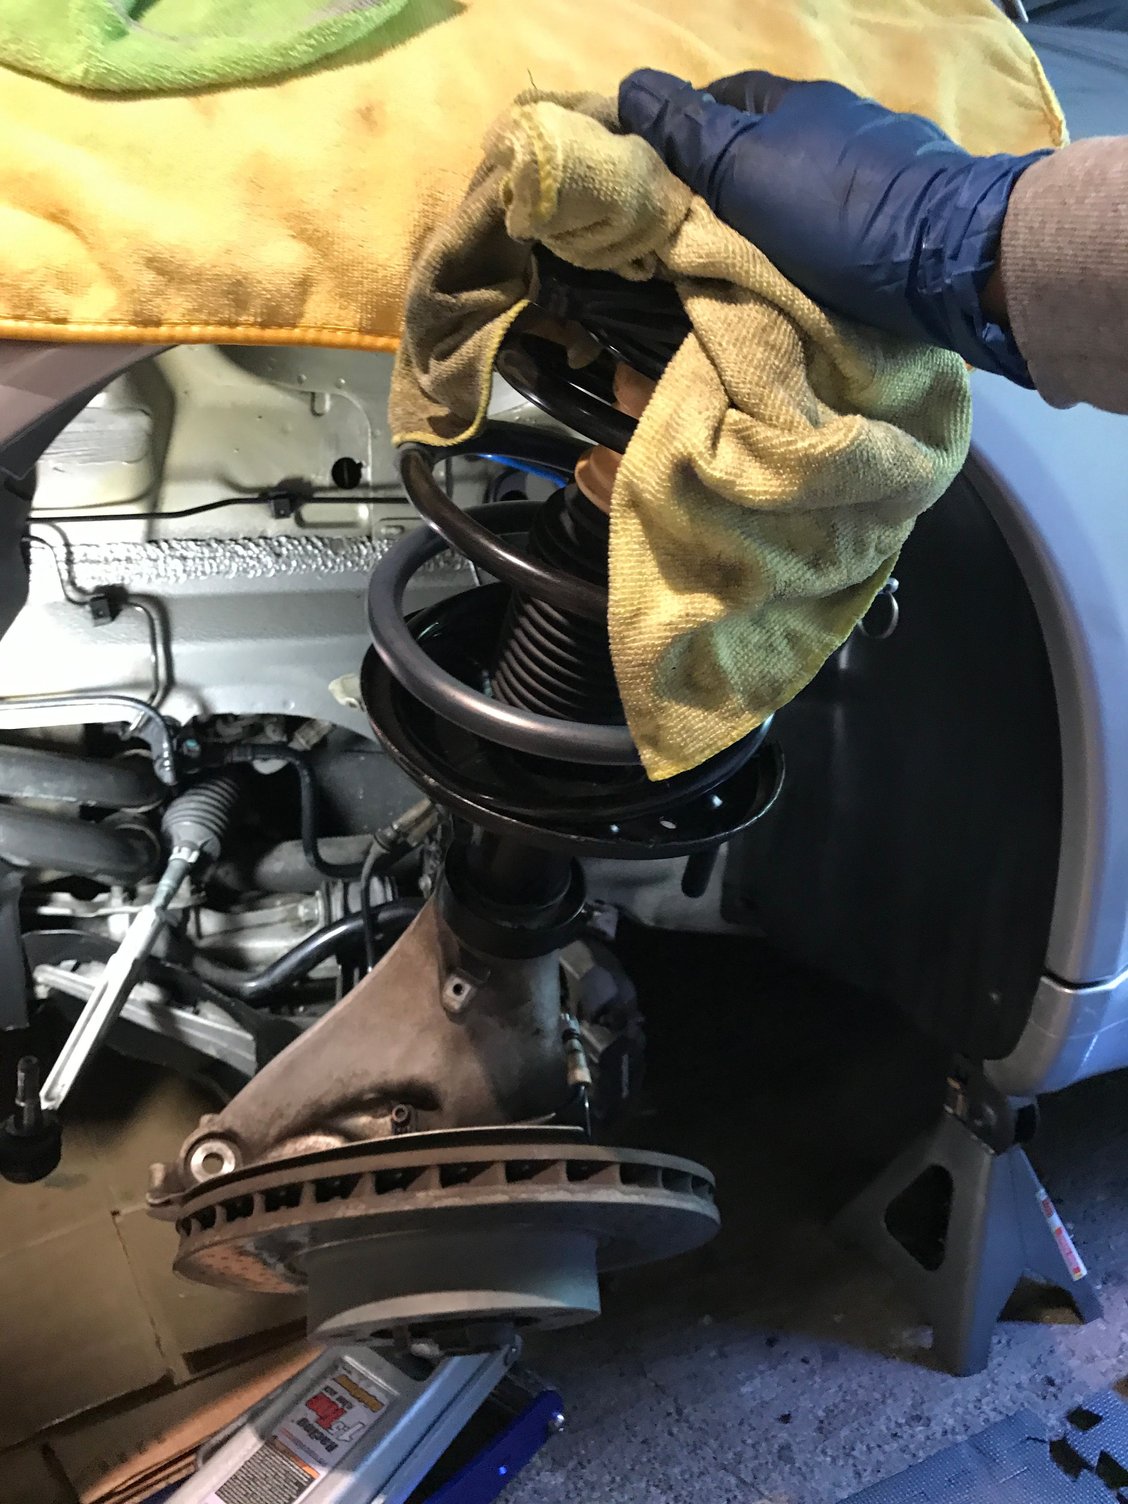
As for the fronts, compressing and contorting the springs was at least 50% of the time.
Standard spring compressors really don't work for these springs. The How-To instructions for this job either need to include where to buy the right type of spring compressor, or skip the compressors and follow @Derek Zoolanders advice and loosen the lower control arm.
The Rennlist How-To also said they used 3 75lb zip ties instead of compressors. DO NOT DO THAT. VERY DANGEROUS. I had 2 spring compressors on and 2 175lb zip ties supplementing. As soon as I backed off the spring compressors the zip ties snapped.
I had a couple soul crushing moments in the process. First, I sheered another strut bolt. Amazing. I accidentally set my torque wrench to 32lbs instead of 27lbs and it sheered right off. I can't believe how brittle they are.
And of course it was right as I was finishing the first strut so I had to pull it all apart again and head back over to my local Porsche dealer to get a new one. Luckily they exchanged it with no questions.
The second issue was right as I was finishing the next strut. The tie rod bolt started spinning as I was torquing it and I didn't have pass-through socket wrench or the T40 Torx bit to counter the nut. Off to Harbor Freight again I went.
I will do proper writeup on lessons learned when its all over.
The difference between 27 and 32 foot pounds is not significant enough to cause a bolt head to break off. Even the cheapest hardware store galvanized mild steel bolt should be able to handle that kind of torque.
When working on my car, I have had three or four bolts/studs of varying sizes break. This makes me a little concerned about the quality of hardware that Porsche uses.
That was my thought. I was shocked how fragile those studs are. I'd be interested to understand the physics of the strut mounts. They must not have any torsional loading to have such low torque and light nuts/studs.
My Tekton torque wrench imploded an hour later so that might have contributed to the story.
I've got the back deck ready to start on the rears. Likely won't get to those until this weekend.
Until then the car looks like a cartoon speed buggy with 4x4 rears and lowered fronts ;-)
Guys, guys, guys... removing the tie rod is NOT necessary. It's also not necessary to put spring compressors on the spring while the strut is still on the car.
Just loosen the inner control arm bolt (control arm to frame) and the whole hub will be able to drop low enough for you to remove the strut from the knuckle.
I believe I unbolted those upper links on the chassis side, not the upright side. You don't wanna unbolt the side with the eccentric bolts, but th ones with just regular bolts.
Got the rears installed today. That was one tough project. Net result is the fronts dropped 5/8 of an inch (4 1/4" rim to fender gap to 3 5/8")and the rears dropped 1 inch (5" rim to fender gap to 4"). I think its perfect. The ride seems a little firmer but not by much.
The rears settled by 1/4" after I took it for a drive around the block but the fronts have stayed consistent. I'm not sure if it will settle any further.
The rears were easier to install than the fronts but took 2x as long . I'm not sure why the official work order on this job has the fronts at 4hrs and rears at 2.
The strut came out no problem once I loosened the upper control arms at the chassis and lower control arm at ball joint. It takes a lot of manipulation with the jack on the wheel carrier to get the drop link off and strut and control arms back on. Once you find the right technique it's pretty easy but it takes lots of trial and error.
I will take some photos and do a proper write up tomorrow. Its beer time now.

 08-02-2017, 07:52 PM