When you click on links to various merchants on this site and make a purchase, this can result in this site earning a commission. Affiliate programs and affiliations include, but are not limited to, the eBay Partner Network.
Maybe I'm misunderstanding the use of the chisel method you describe; do you ride the chisel on top of the steel sleeve (inside surface) while taking out the cut piece, or under it? Imagine a chisel wider than the cut. I cut two relief lines in the bore about 1/4" apart, peeled it back a little (towards the center of the bore) then put a narrow chisel between the steel and the bore and struck down, forcing the chisel into the work (aluminum) and scaring it. If I used a wider chisel that got under the folded back "tab" I made by cutting and bending back the "lip" of the steel sleeve, but was wide enough the sides of the chisel rode against the inside face of the steel sleeve, the chisel would never make contact with aluminum and couldn't damage it (the aluminum bore).
Please let me know if this is the method you use?
I tried running the chisel under the sleeve (between the sleeve and the aluminum bore), which cuts into the aluminum. Maybe that's my problem?
Last edited by Otto Mechanic; Jun 10, 2017 at 10:44 PM.
After spending $140 on the Elephant tool I'm thinking I've done enough damage to both my wallet and these a-arms so I'm planning to visit a local machine shop on Monday.
If I get motivated (and can accept the risk) I'll give the cutting/peeling method another shot tomorrow, but there's really no way I'll be able to grind an accurate curved face on a chisel, I'm just not that good.
Thanks,
10-4.
Direct stress at the bore you're working on is lessened due to the compliance of the bushing, I wouldn't even sweat it if you nicked 'em.
I'm really not getting how this is being such a difficult sob. After reading your post some 20 minutes ago I remembered I had a set in the garage that need those bushes removing. I just got the first set out, probably 15 minutes tops.
All I can think of is that your steel sleeves are totally corroded to the aluminum bore, but even then hitting the steel sleeve would loosen the bond for sure. As you can see on mine the only visible corrosion was in the gap between the two half-sleeves inside the bore, not an issue.
Direct stress at the bore you're working on is lessened due to the compliance of the bushing, I wouldn't even sweat it if you nicked 'emT
Thanks for the support T, I certainly "nicked 'em", at least at the lip outside the bore, maybe even a little bit into the bore.
I should explain; my experience is with airframes (C-141 Starlifters). We never allowed anyone but Master Machinists to work on the plane and every ten years we had the whole thing magna-fluxed looking for cracks. I'm maybe a bit paranoid about cracks because of that.
I don't think I did anything that can't be fixed, but I don't want to go much further either.
All I can think of is that your steel sleeves are totally corroded to the aluminum bore, but even then hitting the steel sleeve would loosen the bond for sure.
Mike -
I think you're right about the corrosion (galling I think it is). Striking them hasn't helped at all (like I said, I tore the vise off my bench striking them).
I think they're pretty well bonded in after 30 years. They may not be salvageable.
If it's worth anything, the car was from Florida. It's very likely the combination of age and sea salt has made this operation impossible.
I sincerely appreciate the advice from everyone on this board. No joke.
I'd also like to mention that the design intent of the Elephant Racing tool is sound, and that it should have worked. That it didn't is only a testimony to how difficult it is to restore these cars.
I believe it would be unethical for me not to provide an opportunity for you to counter my review of the Elephant Racing Split Bushing extraction tool I recently purchased from your company, which I posted on the Rennlist.com website under the heading of 944 water cooled Porsches. ( https://rennlist.com/forums/924-931-...l#post14247719 )
I wrote:
I think you're right about the corrosion (galling I think it is). Striking them hasn't helped at all (like I said, I tore the vise off my bench striking them).
I think they're pretty well bonded in after 30 years. They may not be salvageable.
I believe this is a true and correct analysis of the problem. I don't find you or your company at fault in any way.
The part is 30 years old and has suffered the "slings and arrows of outrageous fortune". It is no fault of yours. I tried your solution and it didn't work. You should be aware of this problem and that is the sole reason I write you on the subject.
If you can improve your technique it will benefit the community of people involved in restoring these cars and that is the only reason I write you. I certainly appreciate the efforts you've made to make these cars "restorable" and I only wish you the very best in that effort.
This was my mentality:
If you go too slow, you waste a few minutes.
If you go too fast, you waste a control arm.
For me, cutting into the arm a little bit didn't scare me because I was putting in new rubber bushings with new metal liners, and a little cut in the aluminum wouldn't affect anything. I'm not sure if your poly bushings are going to be moving around in the aluminum control arm or not - maybe they stay fixed with the arm and simply pivot on the shaft, in which case, a little nick on the control arm wouldn't affect anything.
Once you cut like 80% of the way through, it should get weak enough that you should be able to use an air chisel and collapse it in on itself at that weak point. If it doesn't work, then you can try cutting deeper.
Last edited by FRporscheman; Jun 12, 2017 at 02:48 PM.
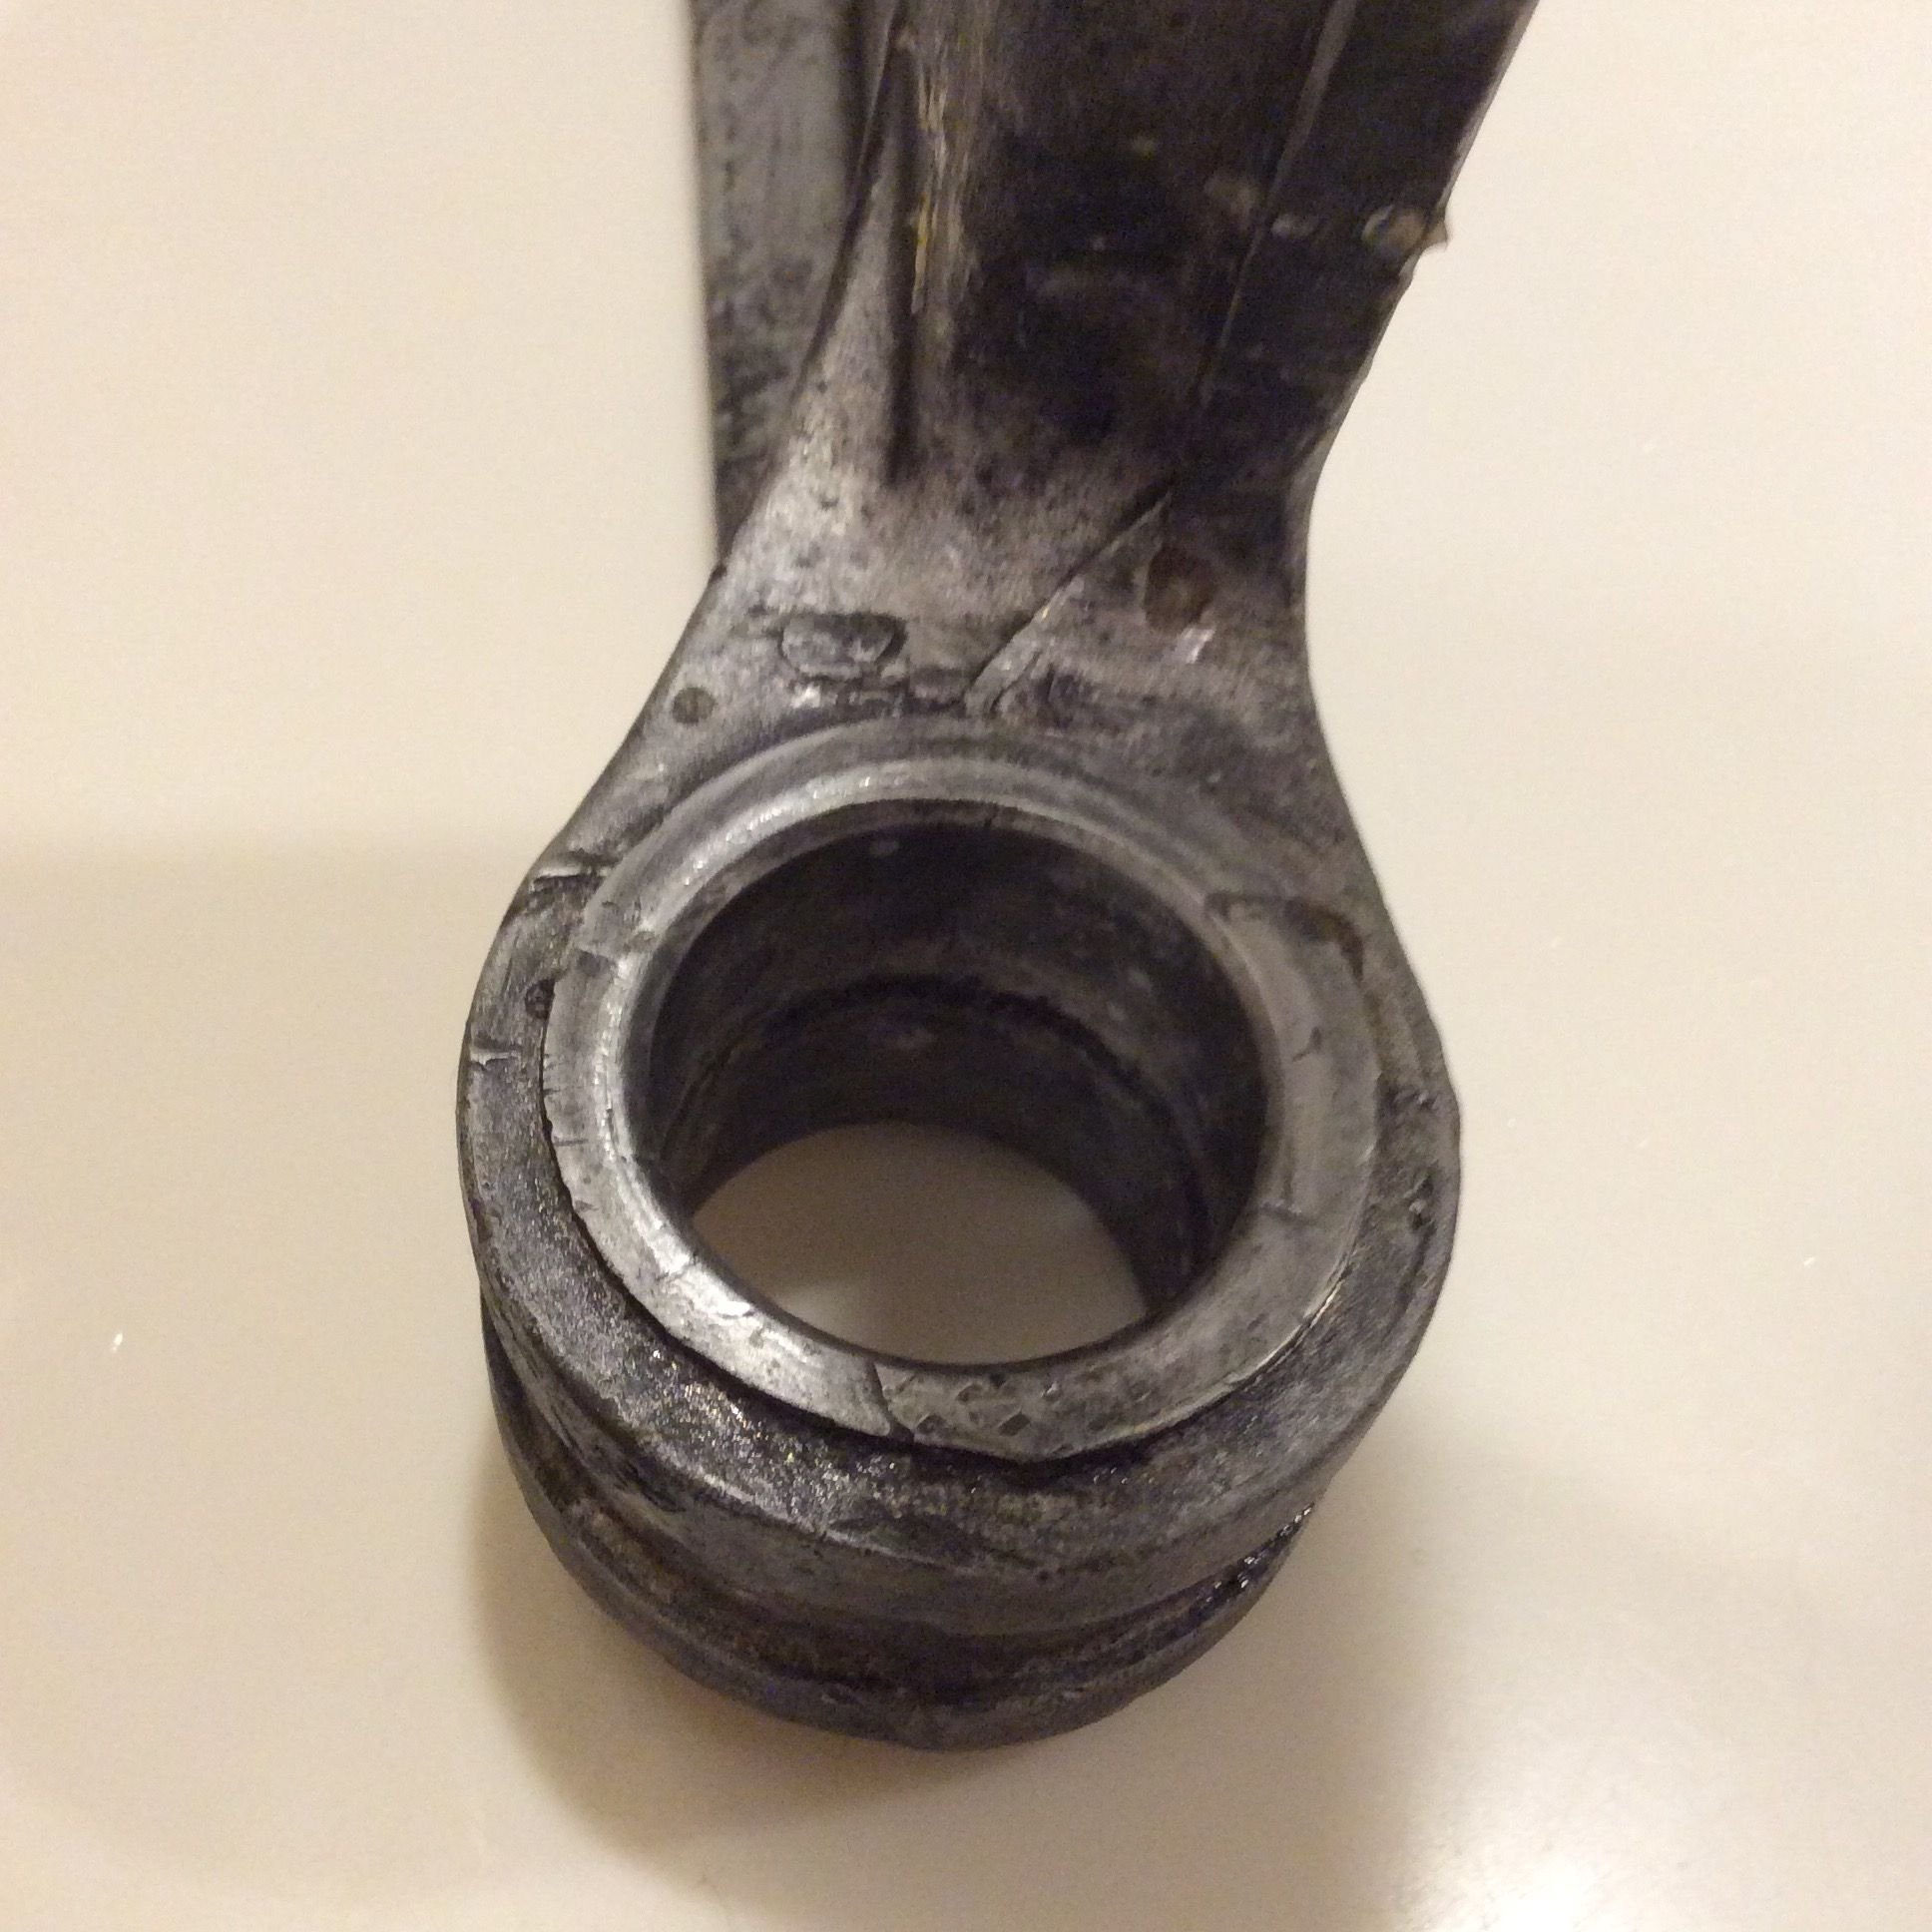
This is what they look like when they come out. The top one was cut through all the way, curled in, and popped out. The bottom one was not cut through all the way, collapsed in, and taken out with a little more work (I forget if I used an air chisel or just a screwdriver). HTH
I'm trying to find a local shop with a hydraulic press to get them out (along with the Elephant tool I now own). If that doesn't work, I'll fall back on the "slow and steady" approach you suggest.
Like I said earlier, I've already used the HS approach to cut two grooves about 1/4" apart on the outer face of the bushings, then cut a partial groove on the interior face of the bushing. When that was done I tried a small flat screw driver as a chisel to "peel" out the interior section as you describe, but after only a quarter inch or so the driver worked into the aluminum and I stopped. I don't think I did any damage, certainly none that can't be repaired with a TiG welder, but I decided not to go further.
I could order a press, but I'm moving shops and would rather not have to move the press so I'm looking for a local place that can do it for me.
PS: This project has been one surprise after another. If I didn't have the time pressure of having to move shops it wouldn't annoy me, in fact that's one of the reasons I enjoy doing these restorations; it's always a new challenge. It's just that right now I don't have the luxury of sitting back and scratching my head; I really need to get this car on the road ASAP so I can move it to my new shop in Paso Robles.
PPS: I found out that I can't really tell when I've cut through the steel and into the aluminum by just looking at it; the color of the metal doesn't change enough for me to recognize it. I deliberately started by cutting through the "lip" of the bushing that's outside the bore and went right through the steel. It was only the groove in the surrounding metal that let me know I'd gone all the way through the steel.
Because of that, I can't trust myself to get close enough in the bore of the bushing to peel it out without risking the bore. I figured a nick at the top (close to the "lip") wouldn't be a disaster since I could still get a TiG head in that deep to fill it, but a nick near the center of the bore would be bad and I'd likely lose the arm.
So I took the arms to the closest thing I have to a local machine shop, really an auto repair place that has a press. They wouldn't touch it, said they didn't want the liability. They suggested another shop that I won't be going to because I have a real machine shop I use that's further away.
I got the arms to a real shop today and they were able to get the bushings out with a press. I took the Elephant tool with me and though the fellow was reluctant to use it he decided it might be simpler than cutting the "ears" ("lip", whatever) off the bushings so he tried it. It worked on the first two but the hooks bent trying to get the bushings out of the second arm so now it's a very expensive paperweight.. He ended up using an air chisel to cut off the lip then removed the sleeves with a hydraulic press.
I hadn't done enough damage with the hacksaw to need it filled, he suggested a TiG welder would more than likely make things worse. He charged me $50.
So the lesson I learned was not to bother spending $140 on the Elephant tool and not risk the arms with a hacksaw, just take them to a competent machine shop and have them do it. I would have saved a badly bruised thumb and a fair amount of angst. My new shop will have a press anyway.
Last edited by Otto Mechanic; Jun 14, 2017 at 02:21 PM.
9 Vehicles Porsche Helped Engineer that Aren't Porsches
Slideshow: Long before engineering consulting became trendy, Porsche was quietly helping other automakers build everything from supercars to economy hatchbacks.
9 Features and Characteristics That Only Porsche People Understand
Slideshow: Some brands build cars. Porsche builds traditions, obsessions, and a few habits that stopped making sense decades ago but somehow became part of the charm.
This Builder Is Turning Heads With Its Slantnose 911 Creation
Slideshow: A small Polish tuner has reimagined the Porsche 911 Slantnose for the modern era, blending 1980s nostalgia with widebody tuning culture and serious performance upgrades.
Porsche 911 GT3 Artisan Edition Pays Homage to Japanese Culture
Slideshow: Porsche has created a Japan-only 911 GT3 Artisan Edition that blends track-ready hardware with design cues inspired by traditional Japanese craftsmanship.
Porsche Reveals Coupe Variant of the Electric Cayenne With a Fresh Look
Slideshow: Porsche's latest electric Cayenne Coupe blends dramatic styling with supercar acceleration, turning the brand's midsize SUV into a 1,139-horsepower flagship.