When you click on links to various merchants on this site and make a purchase, this can result in this site earning a commission. Affiliate programs and affiliations include, but are not limited to, the eBay Partner Network.
I completed my project several weeks ago....waiting to get turbo back from rebuild before I can test new alternator. Agree with Tom, project took most of the day grinding and test fitting. This project does require patience..something I struggle with.
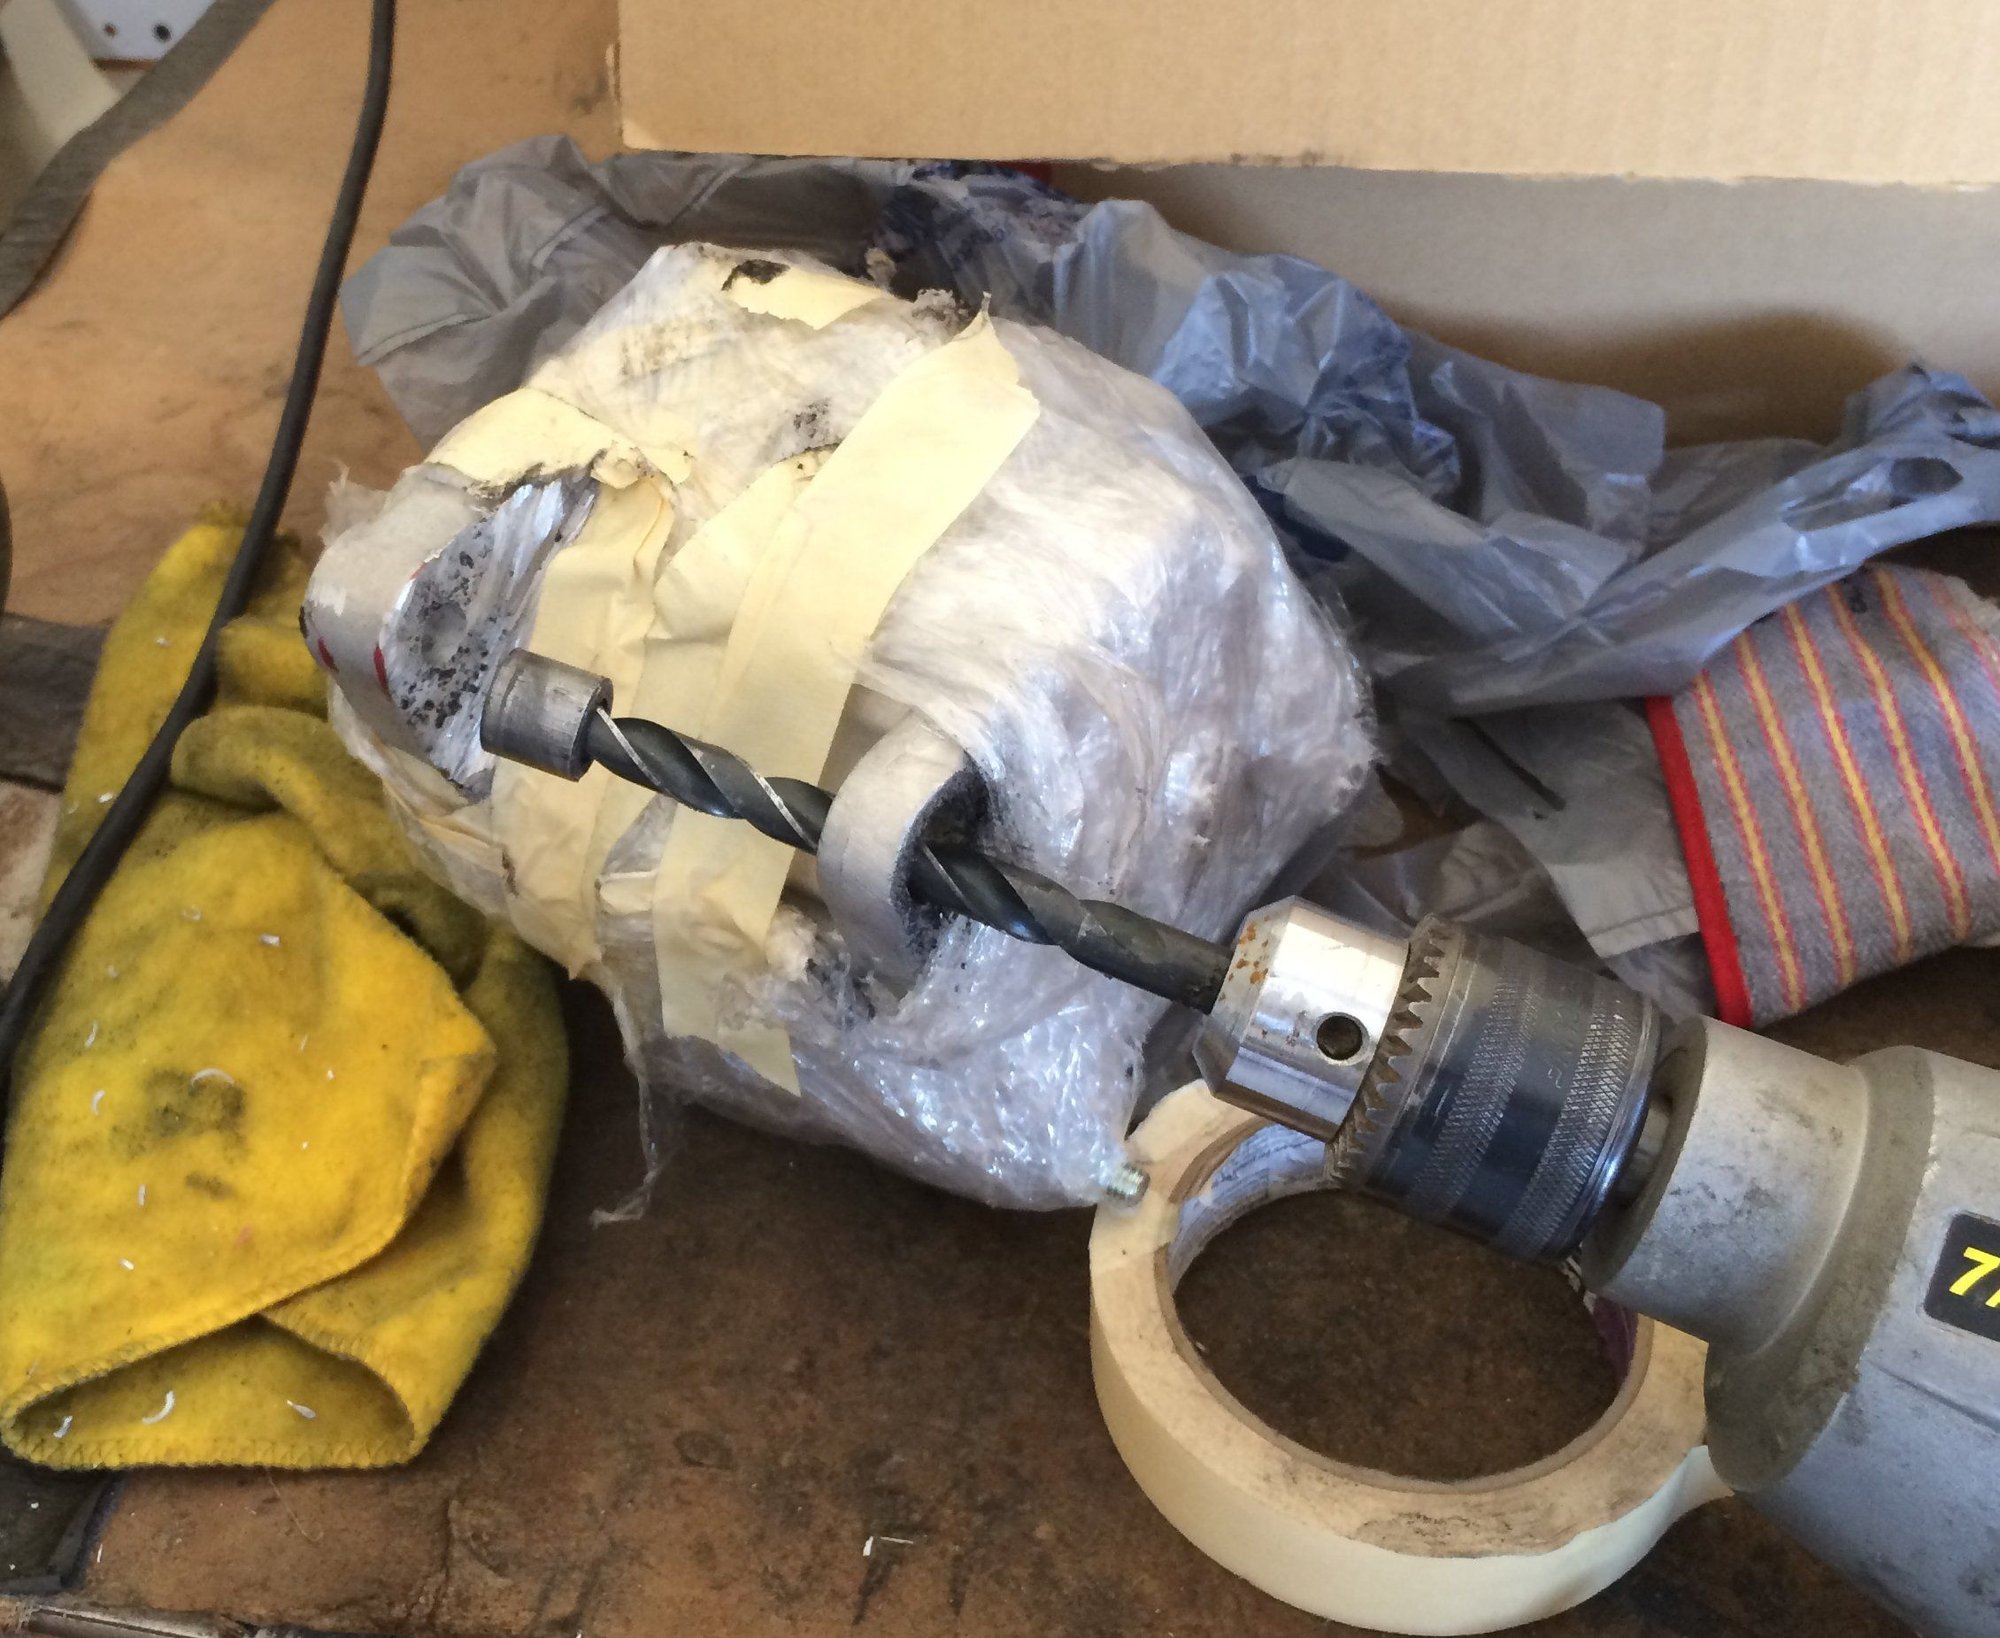
I tried to drill and tap the back side ear but the bushing came out, so I just went with the nut and bolt method.
When I got close to final measurements, I tried this and is worked pretty well
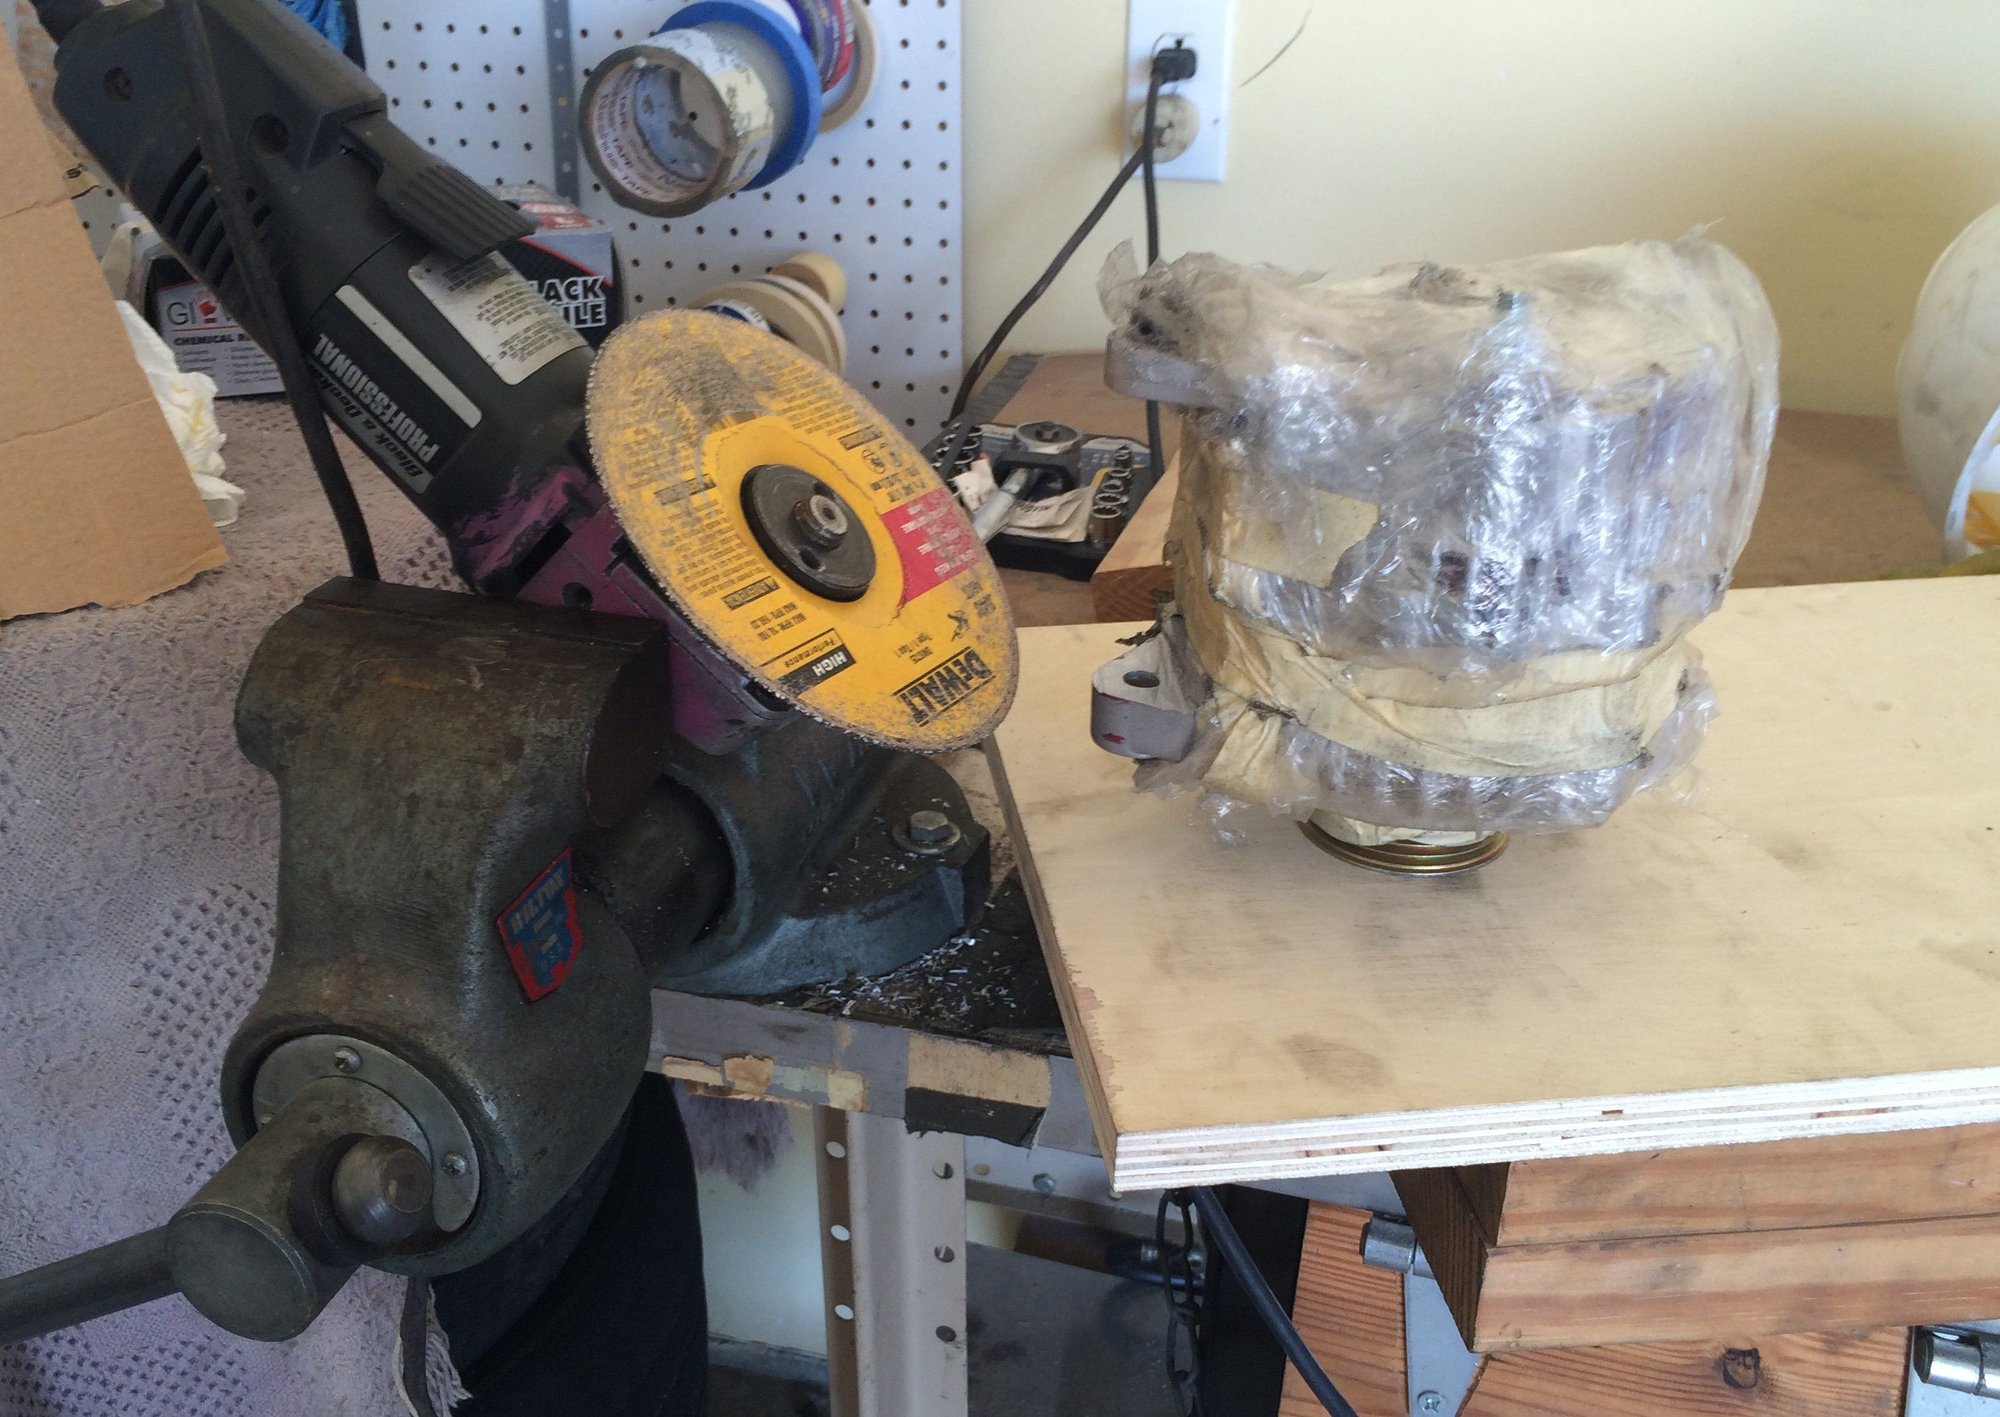
I locked the grinder in the vise and used the old alternator to set the height. This gave me a pretty level grind on the ears.
That's pretty much my experience as well -- started up with the needle just over 14. By the time I got the multimeter on the battery it was 14.05. Then drove around a couple miles and it was right where is always was before on the gauge at about 13.8. The extra room is fantastic -- put a new turbo in at the same time and it's so much easier to get the j-boot on without that big bulky alternator right in the way!
Well, shoot. Took the car out today and noticed the gauge was sitting at 12v with the car running. I tested at the battery with a multimeter and it showed 12.3 with the motor off, and 11.9 with the motor running, so something's up. Will have to investigate tomorrow after the car cools off. Fingers crossed it's something simple... It's been raining a lot lately so I haven't been driving much over the last couple months, and it's been sitting on a battery tender. Now wondering if that fried something.
It's an easy mod, I had my Nissan alt go bad after it was completely soaked in water in a detailing accident , ordered a new one and swapped my modded housing to it and right back up and running. The new alternator was so cheap I didn't bother just ordering the voltage regulator which is what was damaged by the water. Could have hunted around for the regular for even cheaper but I was in a hurry. Still couldn't be happier with mine
The only thing I'd like to address shortly is how close the positive terminal comes to my LR m-tune pipe. I'm sure theres a rubber boot for this alternator that could be added easily. Anyone have a solution for it?
It's an easy mod, I had my Nissan alt go bad after it was completely soaked in water in a detailing accident , ordered a new one and swapped my modded housing to it and right back up and running. The new alternator was so cheap I didn't bother just ordering the voltage regulator which is what was damaged by the water. Could have hunted around for the regular for even cheaper but I was in a hurry. Still couldn't be happier with mine
That's good to hear, thanks. I'd be happy to do the same but I tried to order another alternator from the eBay guy just now, and it said it isn't accepting offers from me. No idea what's up there...so left them a phone message...
That's good to hear, thanks. I'd be happy to do the same but I tried to order another alternator from the eBay guy just now, and it said it isn't accepting offers from me. No idea what's up there...so left them a phone message...
Tips for taking it apart... leave the pulley on. Remove the long bolts holding the halves together. Stand the alt up on the pulley face and remove the back housing and regulator in one piece from the front half. Swap regulators on the rear housing and install in reverse order. There's a small pin hole for pushing in the spring loaded contact with a paper clip. Take your time.
Last edited by mahoney944; 03-02-2017 at 01:53 AM.
Very helpful tips, really appreciate that! The eBay guy wrote back and confirmed I was blocked by mistake, so I'll soon have a replacement if it turns out I need one.
Well, I've all but concluded the alternator or its voltage regulator went bad. All connections look good. The blue sense wire should be grounded when the key if on with motor not running, but instead it basically floats disconnected (mega-ohms to ground). As a result, the alternator warning light (hiding under the 10 on the volt gauge) does not go on when I turn the key on with the motor off -- as it should to confirm it's working. Manually grounding the blue wire, however, does illuminate the light -- confirming it's connected and not burned out. My best guess before removing it, is that the voltage regulator is shot. New on is on it's way, so we shall see...
Edit: by the way, after inadvertently blocking me on eBay, the guy from California Alternators and Starters (LAlectric) has been great to deal with. He's already got parts on the way!
Last edited by Tom M'Guinn; 03-03-2017 at 09:49 PM.
Tips for taking it apart... leave the pulley on. Remove the long bolts holding the halves together. Stand the alt up on the pulley face and remove the back housing and regulator in one piece from the front half. Swap regulators on the rear housing and install in reverse order. There's a small pin hole for pushing in the spring loaded contact with a paper clip. Take your time.
With the 4 bolts removed, the halves don't want to come apart. They spin, but won't separate. Do I need to release the brushes using the pin hole to get the halves apart? Just pry harder?
Ok, I got it. Didn't realize the stator remained with the back half when you separated. I'll do a tutorial when done in case it helps others. In the meantime, at first blush it looks like the regulator, rectifier, and stator are all part of one big unit. See pictures below. So I hope to just swap in that whole unit from the alternator...
The only thing I'd like to address shortly is how close the positive terminal comes to my LR m-tune pipe. I'm sure theres a rubber boot for this alternator that could be added easily. Anyone have a solution for it?
Sorry, missed this question first time around. Did you see the rubber boot I listed in post #90 of this thread? It works pretty well...
Ok, I got it. Didn't realize the stator remained with the back half when you separated. I'll do a tutorial when done in case it helps others. In the meantime, at first blush it looks like the regulator, rectifier, and stator are all part of one big unit. See pictures below. So I hope to just swap in that whole unit from the alternator...
That what I meant when talking about the rear half and regulator is one piece. Your picture shows it much better. And Yes just swap that whole piece out and reassemble. This is where you'll need to use a paper clip to hold in the contact as you reunite the two parts. See the small hole on the spring loaded contact? Push it in then insert the paper clip to hold it in place while you install the back half.
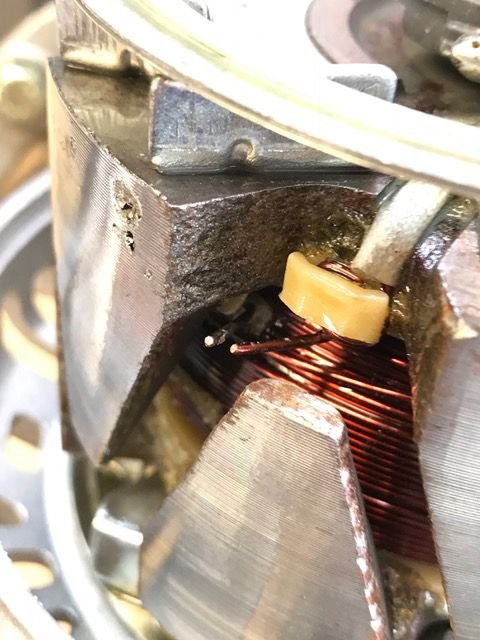
Well I swapped the new regulator/rectifier half onto the old regulator and took it to Autozone for testing before I went to the trouble of installing. It failed. I took it apart again and did what I should have originally and tested the ohms on the rotor winding. Result -- open circuit. Sigh... And after looking I can actually see a snapped wire in there. I tried to solder it together but can't trust it that way. Unfortunately, at this point I'm going to just get another alternator and grind it. In the long run, that's going to be less effort and more reliable than trying to cobble together all these parts.
Thought I'd post this short video. The new/good rotor ohms out at about 1.8 ohm, meaning it's good. For those without a multimeter handy, here's an even easier way to test it. When I tried it on the old/bad rotor, there was no continuity at all between the brush contacts and, of course, failed this test...
Here's a close-up of the broken rotor winding. I soldered those wires together and the rotor worked, but the solder broke half way through its first test, so I'm giving up on that rotor. At some point I'll do a more complete write-up on how to disassemble and test these quest alternators, since I can do it in my sleep now...
I am almost done grinding mine, but it doesn't spin very nicely now. I'm not sure if I messed it up somehow or if it started that way. It seems like the internals wobble a little and there's one spot in its revolution where it catches and has more resistance. It will spin a couple revolutions if spun hard, but not nearly as smoothly as the stock one.
Does that sound normal for new and it will loosen up/wear it as its used, or does it sound damaged?
Did you grind it without covering the housing? Sounds like some aluminum may have gotten in there and bunged it up. Not sure what brand you have, but I have an LAlectric. Same as Tom's. Mine spins very easily by hand. You could try blowing it out with air. If that doesn't work, you might have to take it apart and clean it out.

 07-24-2016, 10:32 AM


 , ordered a new one and swapped my modded housing to it and right back up and running. The new alternator was so cheap I didn't bother just ordering the voltage regulator which is what was damaged by the water. Could have hunted around for the regular for even cheaper but I was in a hurry. Still couldn't be happier with mine
 And after looking I can actually see a snapped wire in there. I tried to solder it together but can't trust it that way. Unfortunately, at this point I'm going to just get another alternator and grind it. In the long run, that's going to be less effort and more reliable than trying to cobble together all these parts.
")