When you click on links to various merchants on this site and make a purchase, this can result in this site earning a commission. Affiliate programs and affiliations include, but are not limited to, the eBay Partner Network.
Removing navigation DVD from the retaining bracket
I was having problems with my Nav DVD and needed to remove it, so I could send it off for repairs.
Everything was coming apart just fine, until it came time to slide the Nav DVD out of the retaining bracket. My service manual says slide the Nav DVD system out of the retaining bracket then disconnect the wires in the back. I slid the Nav system forward, and it stopped just a few inches from coming out. There was not enough slack in the wires to allow the system to come out all the way. I had to slide the Nav system back into place then slip my fingers behind the retaining bracket to disconnect the wires. Difficult to do if you cannot see what you are doing and are unfamiliar how the clips work. I wanted to post what these connecters look like and how to disconnect them. Therefore, this is more of a FYI then a DIY.
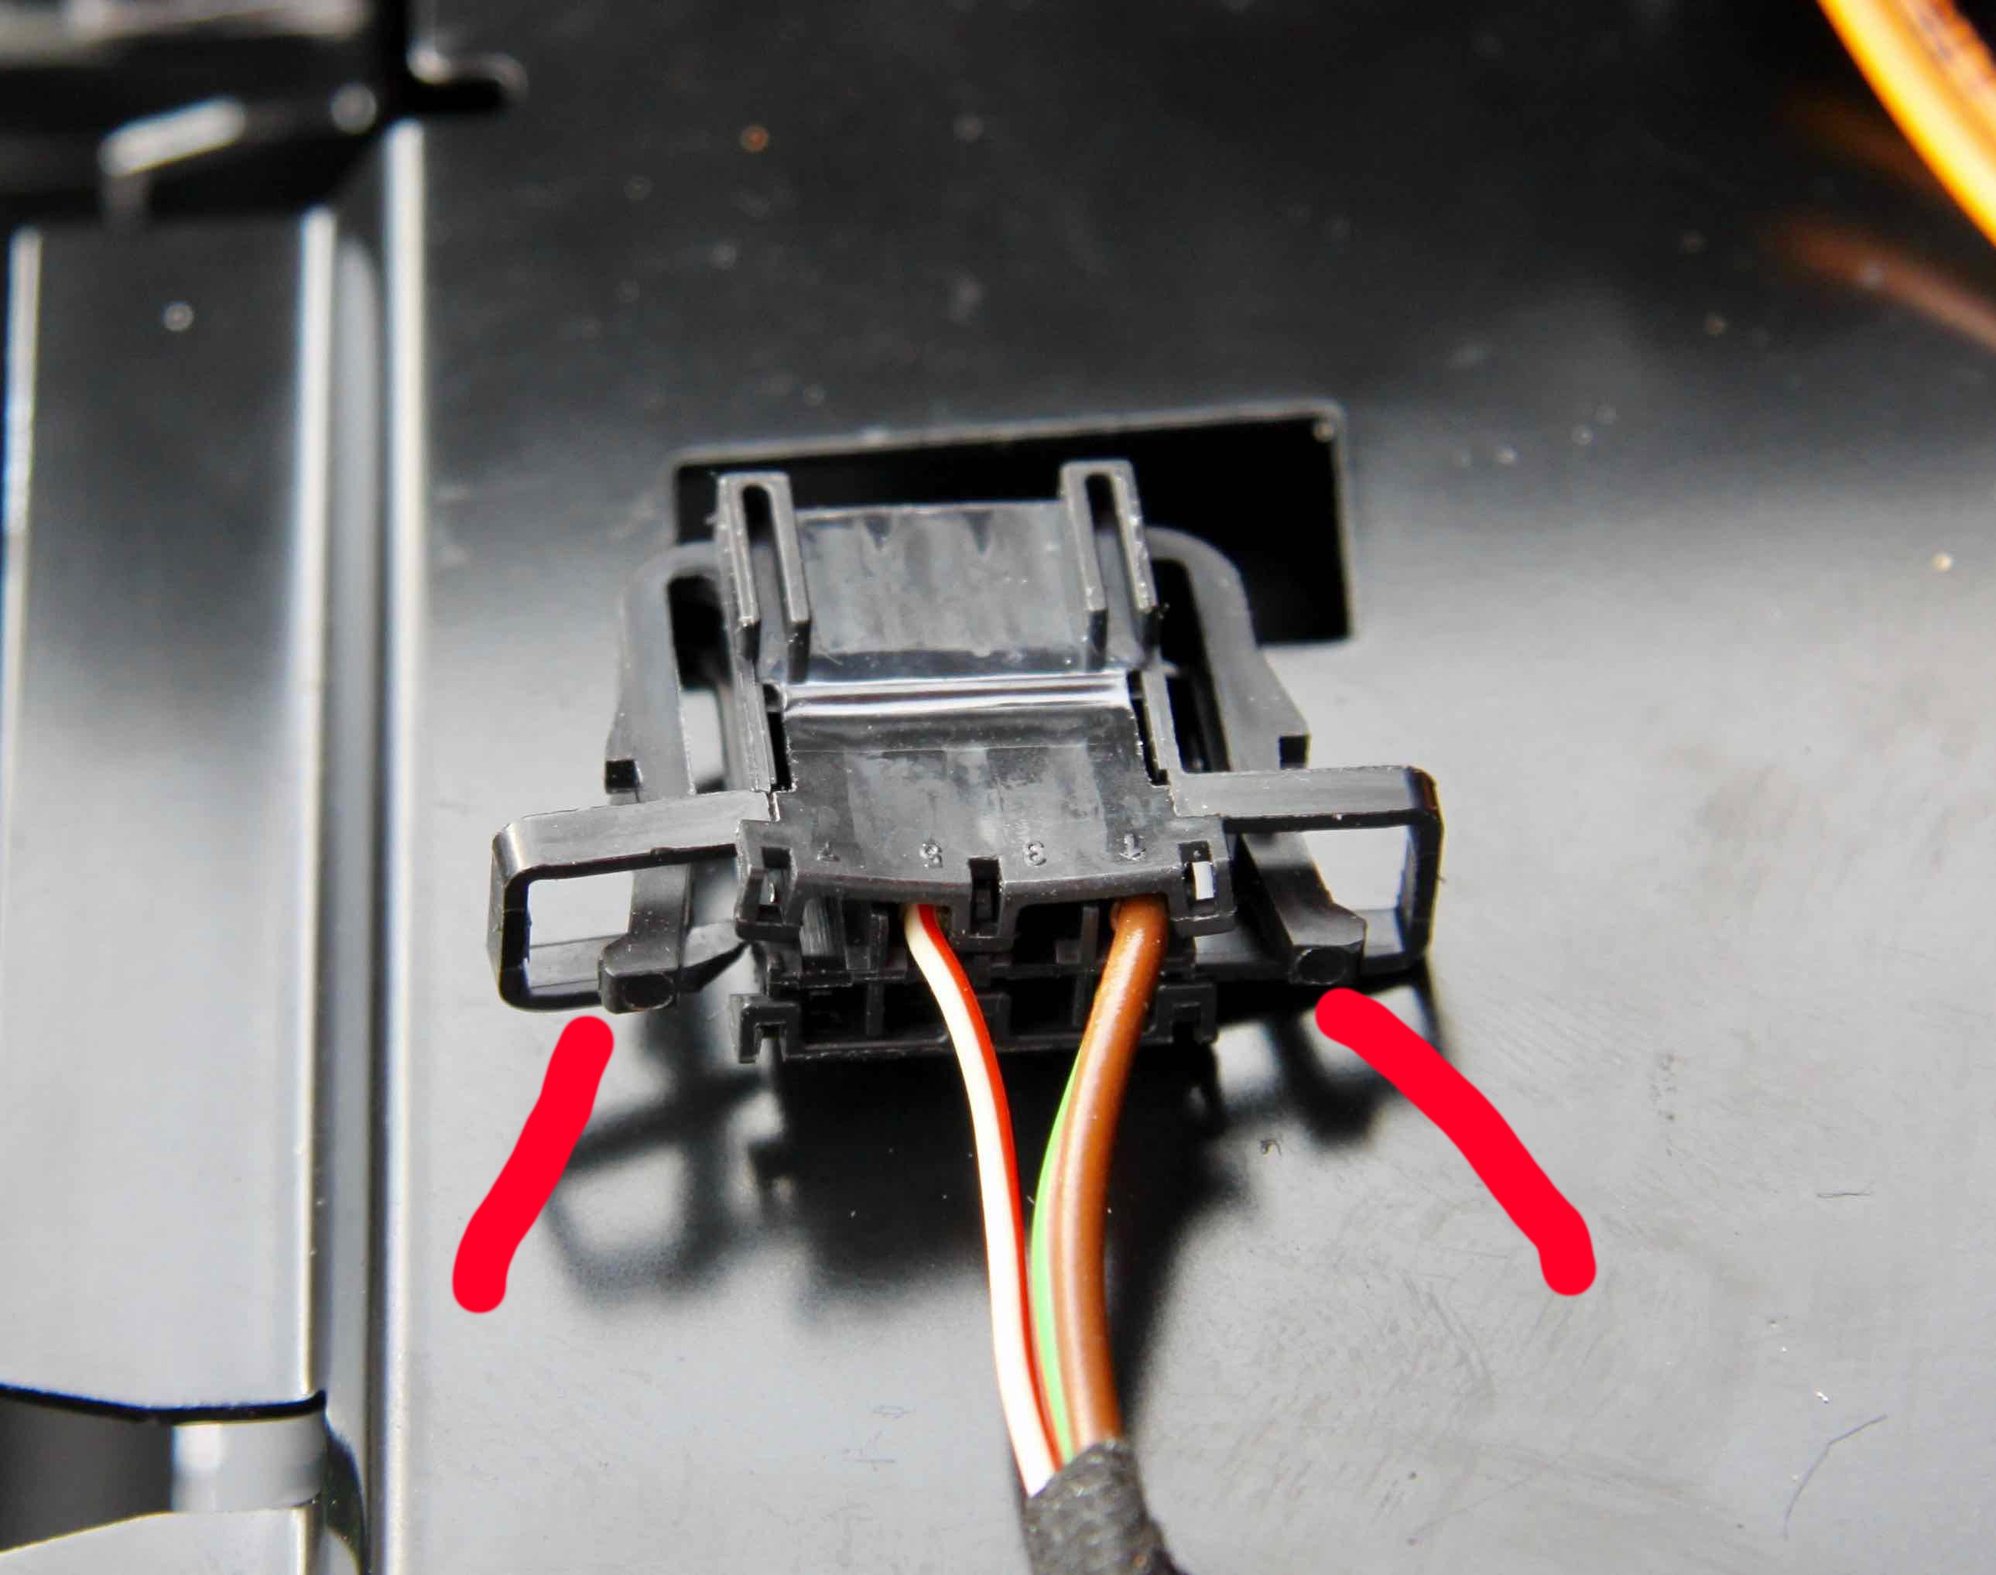
Below is the retaining bracket for the DVD navigation and the three wires that connect to the back of the navigation system. Nav system is not present; it was mailed off to the repair shop.
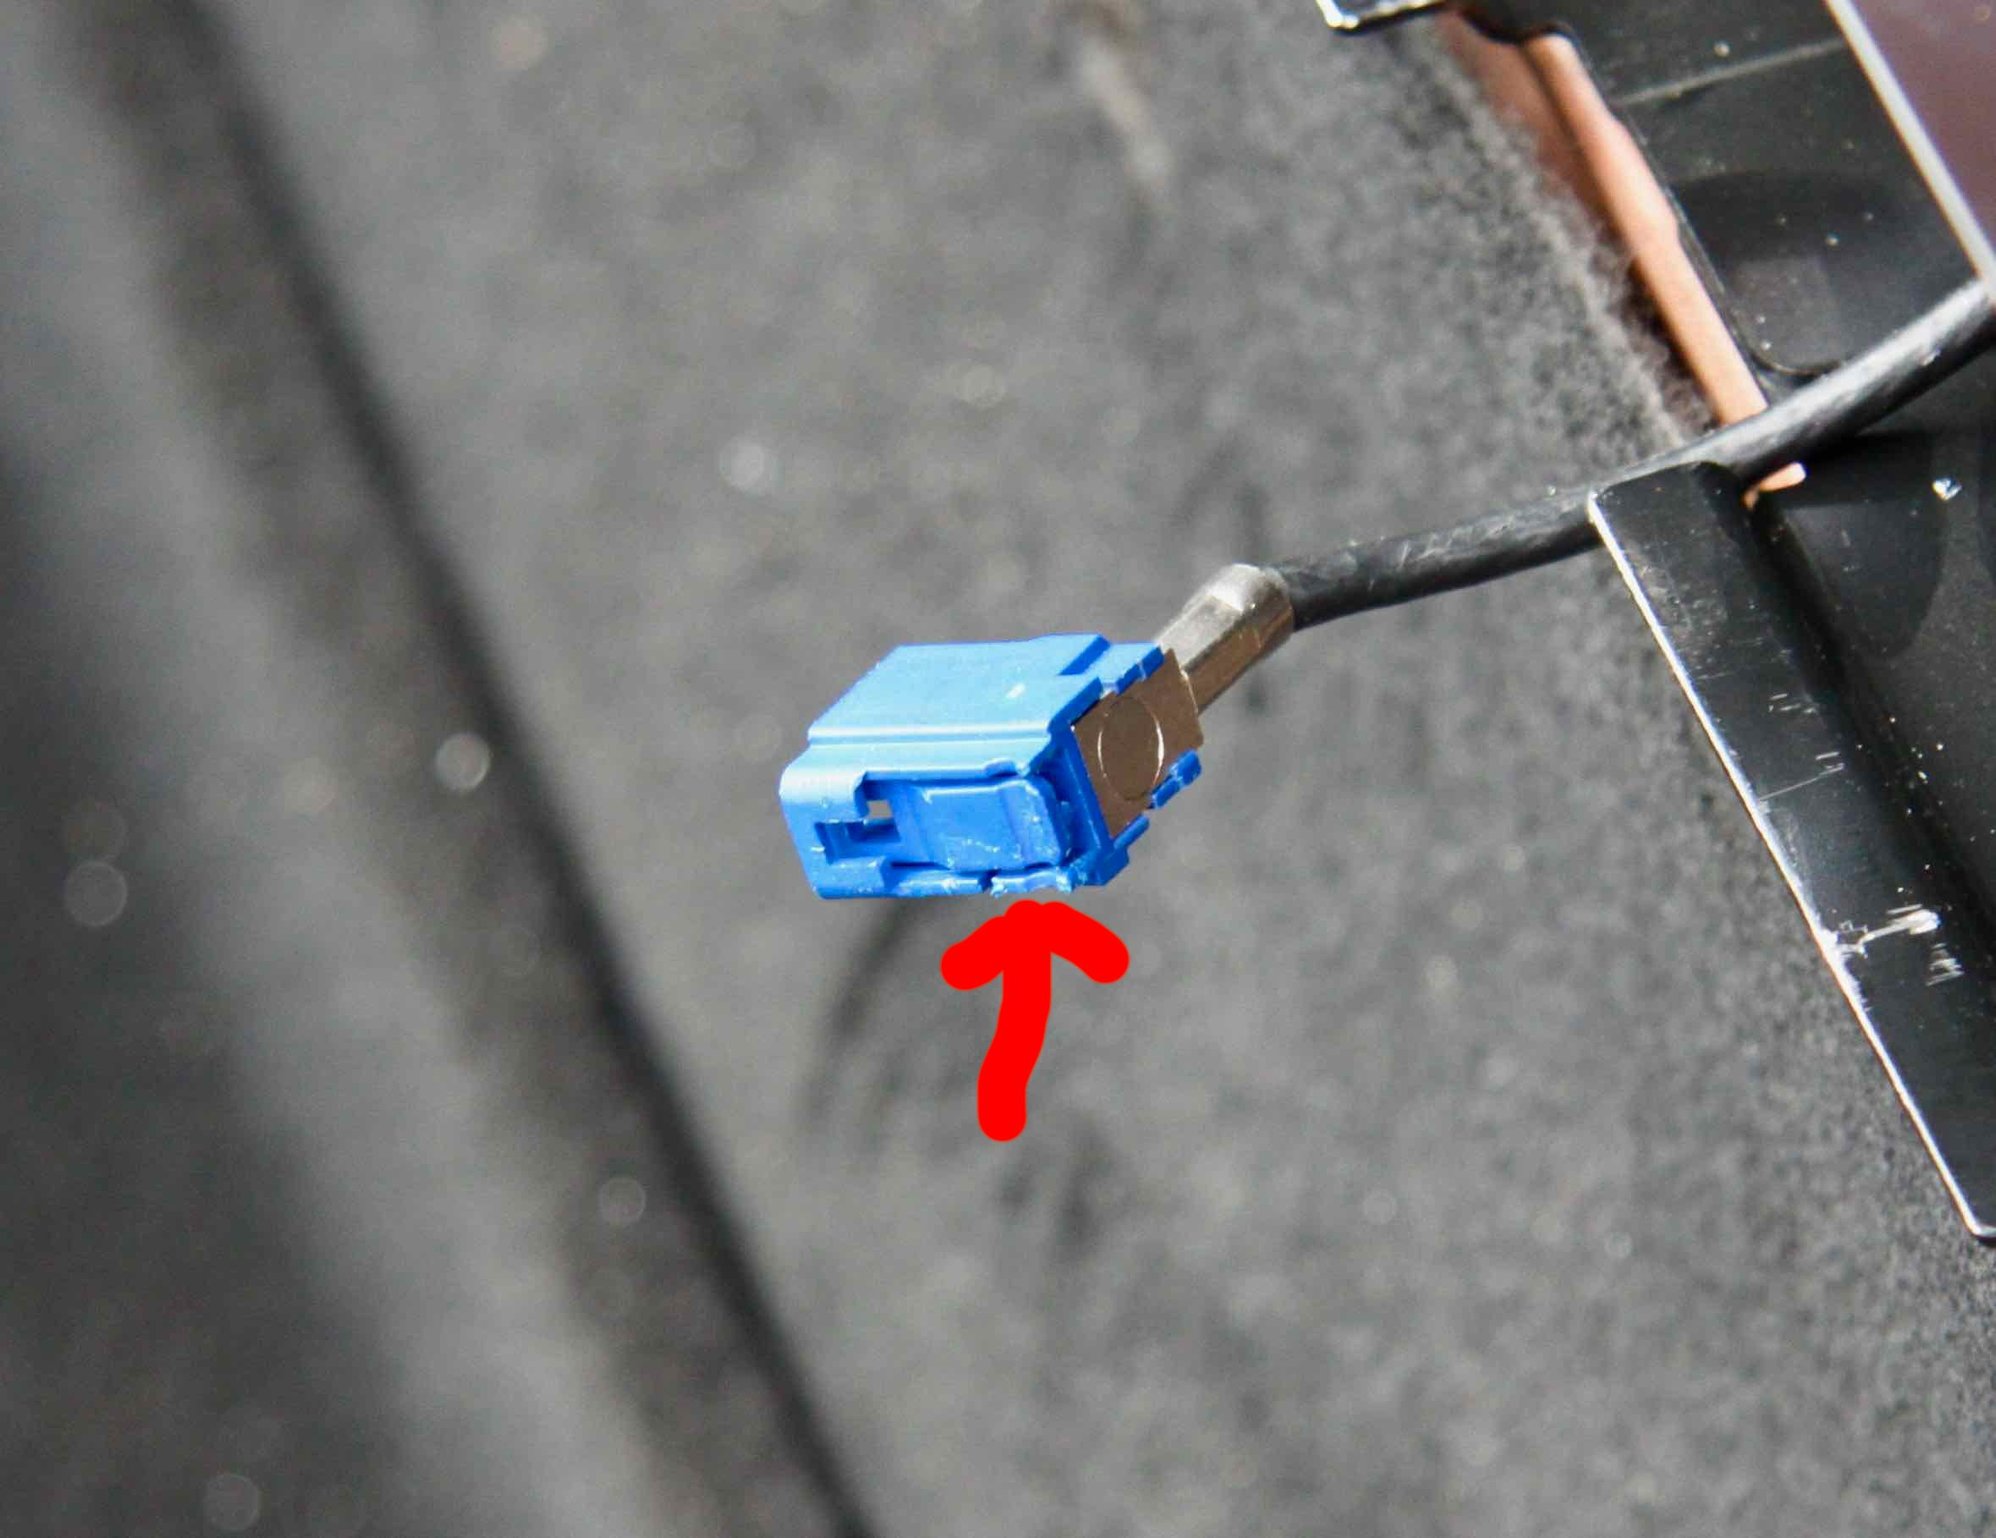
Below is the GPS connection. If you are at the front of the car facing the back, this wire is on the right of the nav system (or drivers side). Push in on the tab at the end of the orange line. The clip at the base of the nav system then pivots up and the connecter slides off.
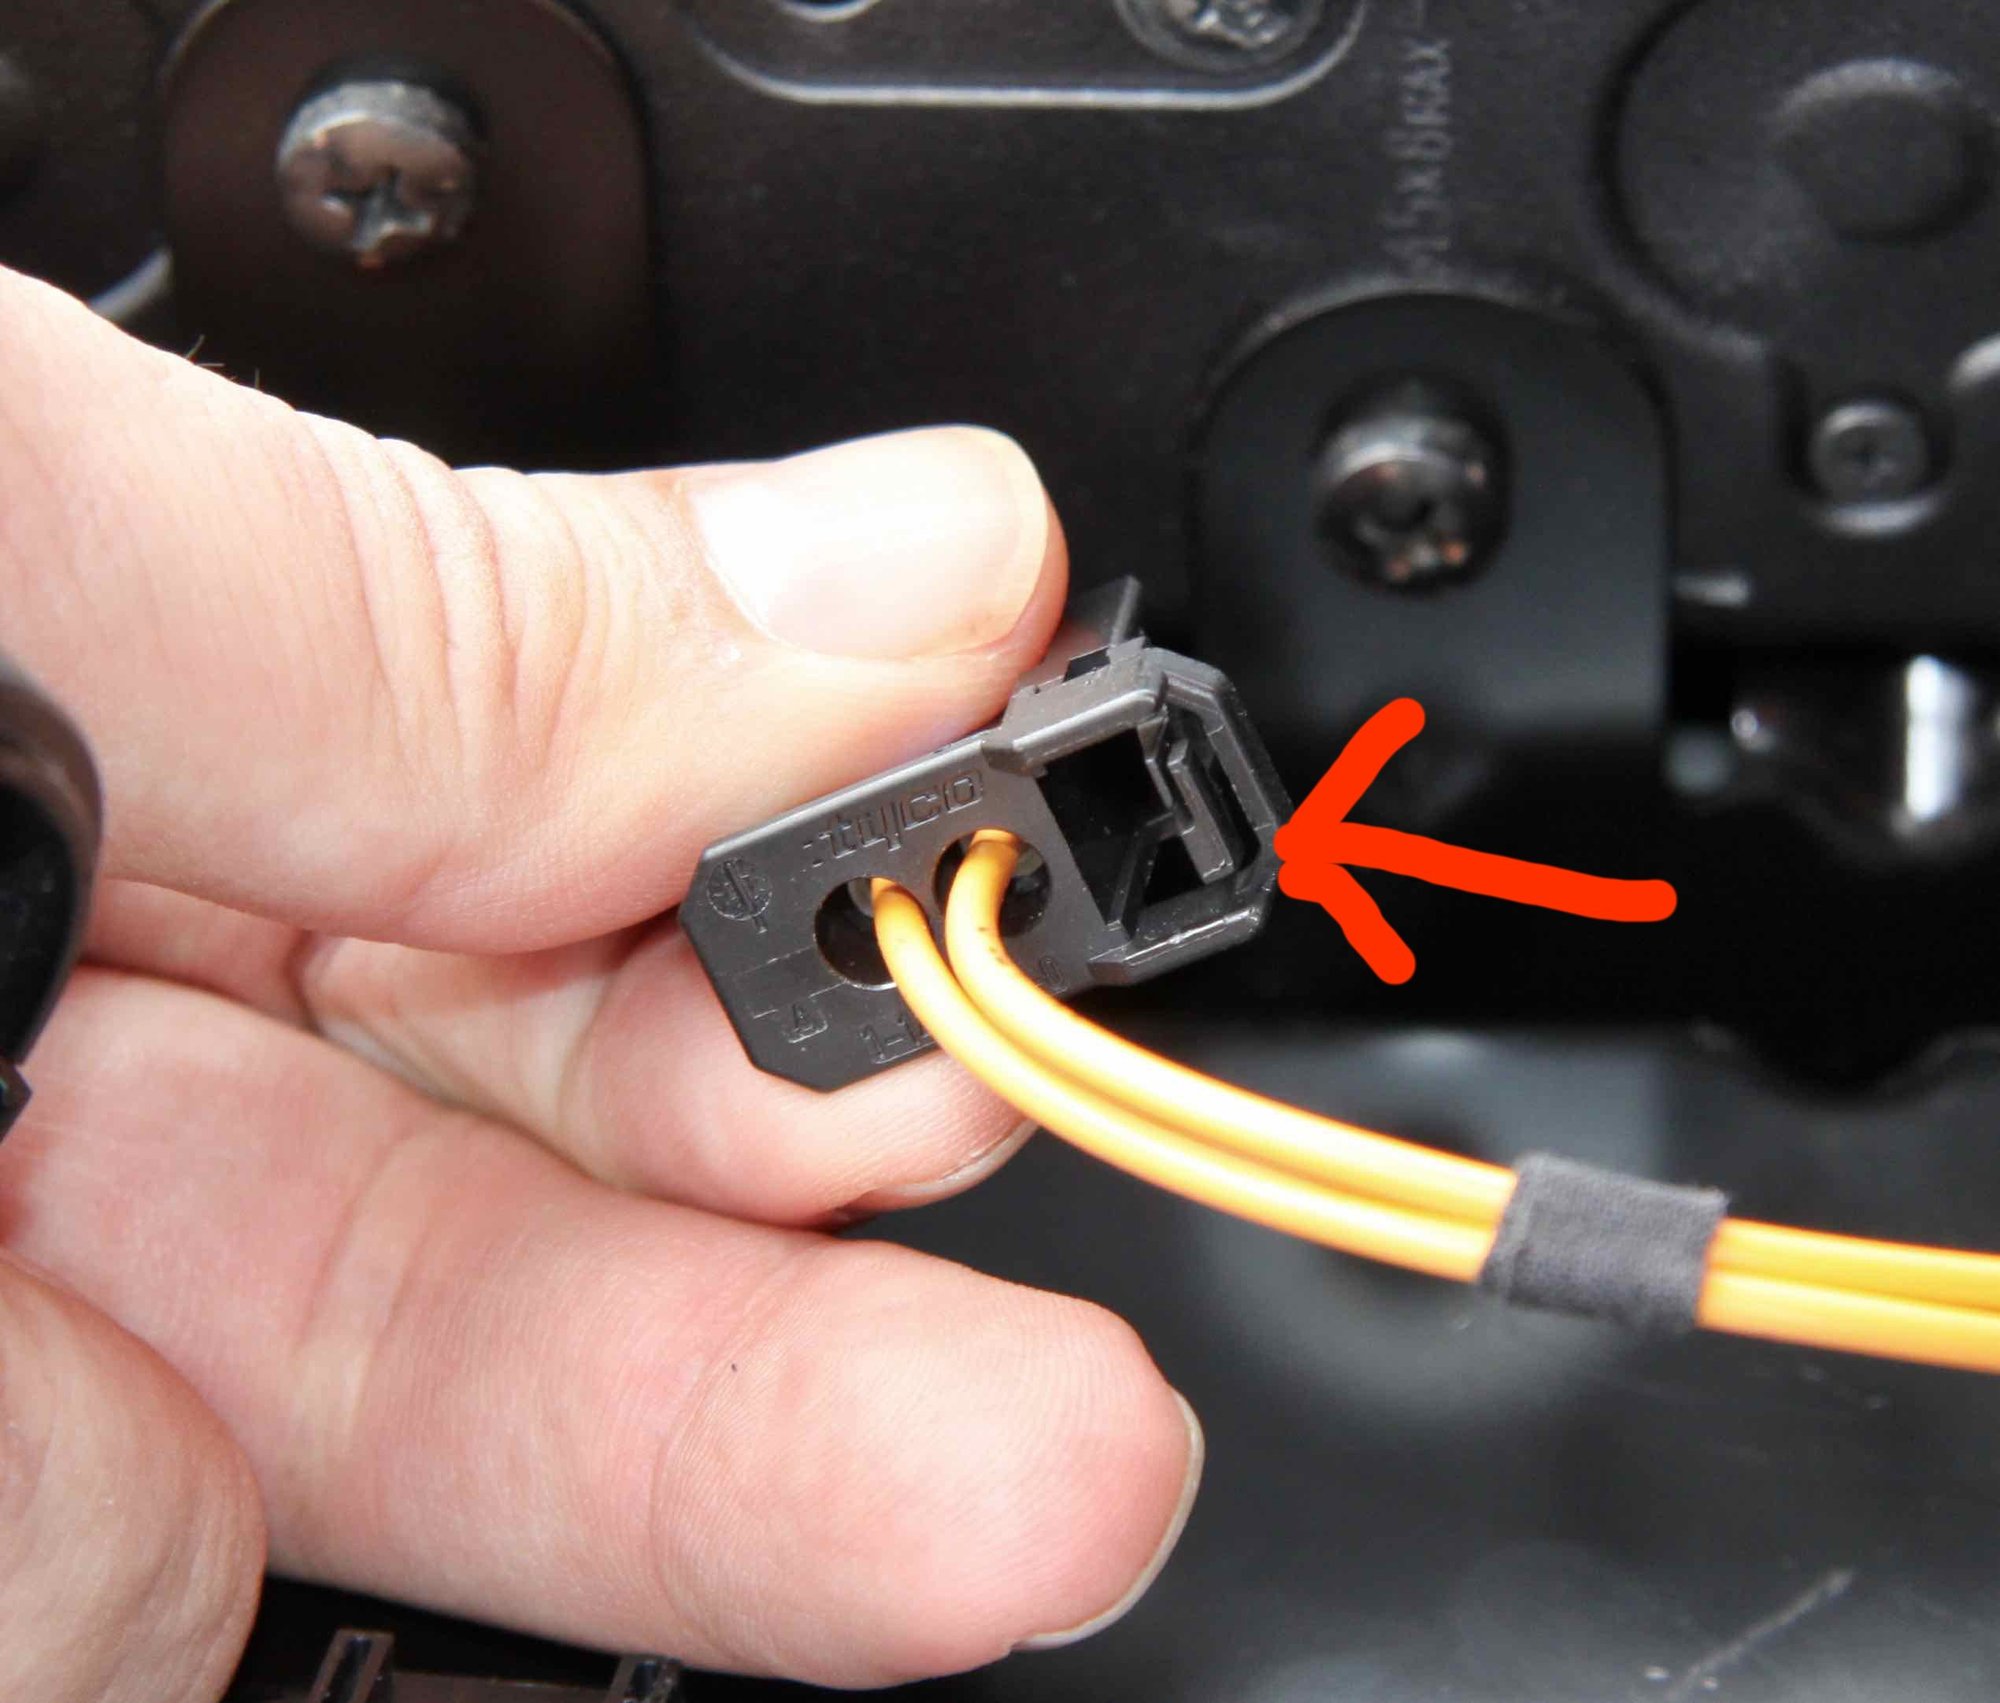
Below is the middle connecter; I have no idea what it does. However, if you want to disconnect it just push inward on the two tabs (at the end of the orange lines) and pull back.
Last but not least, the wire on the passenger side of the Nav system. If Porsche gave you a project that took 20 steps, 19 steps would be easy, and at least one step would drive you nuts. German engineers have not failed us; they have done the same here with their three wire connectors. On this one, you push in on the tab and pull back on the wire. What makes it tricky is there is little space behind the nav bracket and it takes a bit of fiddling with both hands.
On removing some of the connecters it helped to slide the Nav system forward just an inch or two. This gave me a little more room to maneuver my fingers. However, the down side was, when you pushed in on the tabs and pulled back on the wire, often the nav system would be pulled back too.
If you have enough slack in your wiring were you can pull the Nav system all the way out, this job is easy, and the above photos wont be needed. On the over hand, if you get stuck like I did, hopefully this will help. I tried looking up images of these connecters on line. Most the pictures I saw were not at the right orientation where I could discern how they disconnected.
Why my Nav system needed fixing? When I was driving on a straight road, the nav system was spot on. When I drove on a curvy road, the nav system had me all over the place. I sent it to Becker Auto sound in NJ (since I'm on the east coast). The unit is on it's way home. I can't wait to reinstall it, and test it out. I e-mailed Becker Auto Sound, explained my issues with the nav, there guess was the gyro was not working.
300 bucks for the repair. I know a Garmin would be less, but I wanted to keep the original system functioning.
ronvanr,....I know this is an old post of yours however I want to thank you for taking the time to post this as it was a big help to me today. Thank you!
Last edited by carrera S; 02-08-2020 at 11:13 PM.
Reason: Grammar
Why my Nav system needed fixing? When I was driving on a straight road, the nav system was spot on. When I drove on a curvy road, the nav system had me all over the place. I sent it to Becker Auto sound in NJ (since I'm on the east coast). The unit is on it's way home. I can't wait to reinstall it, and test it out. I e-mailed Becker Auto Sound, explained my issues with the nav, there guess was the gyro was not working.
300 bucks for the repair. I know a Garmin would be less, but I wanted to keep the original system functioning.
Good afternoon. I have a 997.1 cabrio from 2007. After a service at Porsche dealer, the GPS stopped working. They cannot explain what happened,, but my suspicion is the PIWIS by some failure caused this, since the map on the Navigation unit shows the position of the car in Porsche center. I tried all resets (pressing 1,4,8, disconnecting the PCM fuse for 24 hours) but without success. Took out the particle filter and inspected the two connections under the antenna, and they look quite normal. One is a blue Fakra connection that is for data, and the other is an antenna cable. I suppose the Fakra cable must connect to the charts DVD, the other one goes with the bundle of cables in the cabin and I suppose connects with the PCM. The clock of PCM is supposed to receive the exact time from the satellite, and stopped doing so. It is difficult for me to believe that it is the antenna itself that doesn't work. In my sail boat I have 3 GPS antennas and in spite of getting saltwater and sometimes other kind of harsh treatment, they never stop working. Would appreciate some comments about this.
I know this is several years late and I'm reviving an old thread, but a big THANK YOU to OP ronvanr for showing the picture of that MOST connector. Today, I was trying to remove the DVD unit to change the date on my wife's car and I stumbled upon the same difficulties as you and couldn't even visualize the plug and get my thumb into that tight space back there. Fortunately, I didn't just yank on the plug with pliers! I wasn't aware of a tab that you have to depress to release it.
On a related note, I discovered a couple of tricks along the way and hope this helps future DIYers on removing the DVD nav for the stupid date/year issue (cannot adjust date on a Nav-equipped 997.1) that plagues 997.1 cars due to some federal GPS updates:
1) as noted on another thread, two orange tabs need to be depressed to free the DVD unit out from the bracket. Looking at it head on, the left tab is accessible. The right tab is semi hidden due to a plastic cover. To easily depress that tab, use a paint can opener (the kind with a little 90 degree hook on one end for lifting lids off).
2) it's easiest to have a second person helping out. using the picture that ronvanr showed, I was able to use my index finger and depress the tab, while my wife used a pair of needle nose pliers to gently pull it out from the socket. I think I know why Porsche used this method now. It requires less force to unplug and plug in vs a friction-based connection, and the audible click upon replugging it confirms proper placement.
3) turn on car to accessories and adjust the date as the system will now say "navigation system error" At this point, I turn off the car and turn it back to accessories to see if the date is saved. plug back in the MOST connector and push the DVD unit back in the bracket.
That's it! My wife's 997 now shows the correct year and is "up to date" after months of staring at 2003.....

 02-11-2017, 01:40 AM