When you click on links to various merchants on this site and make a purchase, this can result in this site earning a commission. Affiliate programs and affiliations include, but are not limited to, the eBay Partner Network.
Well, my straightforward shock replacement has turned into a nightmare.
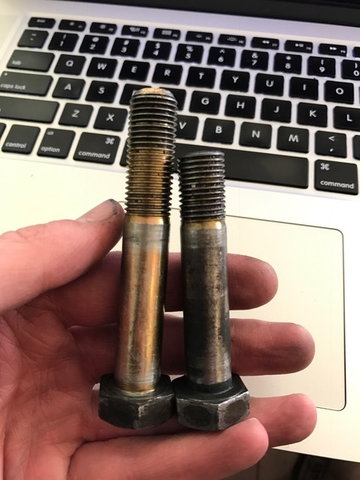
Replaced the left shock no problem. Moved over to the passenger rear side, removed the bottom bolt to find that the last 1/3" was broken inside the trailing arm.
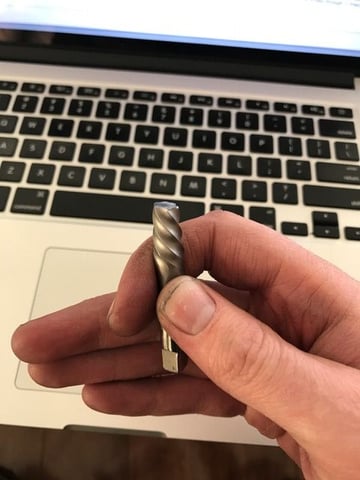
Drilled a hole through the center of the remaining bolt that was stuck deep inside the trailing arm. Proceeded to slowly back out using an extractor bolt and it snapped right off....Flush with the bolt that is stuck in the trailing arm. Now I'm really in trouble as the extractor is much stronger than the original bolt and can not be drilled through (I tried).
Any suggestions? I'm worried I may be looking for a new trailing arm...
Unfortunately it is recessed about 1/2" into the trailing arm hole. Completely flat in in there. I could potentially fill a socket with weld and try to back it out with a breaker bar.
I have used grinding bits with a Dremel to grind thru broken off extractors before, but smaller ones. Not sure you could reach, and if so, it will take a lot of bits and a lot of time...
Beyond me why they didn't just bore that hole all the way through before they fitted the threaded steel insert. Better still not even have a threaded insert, just a steel sleeve and a locknut on the other end.
I think your only option is to get a used arm, they are cheap and plenty. GL
People would bring the same dilemma to my dad’s shop. That’s a tapered extractor, so it’s only biting over a small section of the bored hole. He would use his pneumatic chisel, with a pointed punch substituted for the chisel attachment. Catching the back edge of one of the extractor’s flutes the pneumatic tool would quickly and easily rattle the extractor back an 1/8 of a turn releasing its grip. Obviously, the deeper the extractor is in the threaded hole, the less advantageous the angle is to get a bite on the broken tool. So, YMMV.
Your idea of using an old socket or other like things to contain the weld is also workable. My dad had made up tiny wire feed weld heads that could easily get down into such a confined space and provide a complete quality weld.
If you can take the suspension component into a well-equipped machine shop. The machinist might take pity on you and fix this.
see if you can find a local "electrical discharge machining" EDM shop.
they can nuke any bolt out of any hole.
used one such shop once to remove the stub of a 944 coolant jacket bolt that snapped off the same way.
Did some research on the EDM option and that would require taking the trailing arm off and bringing it to the machine shop. At that point, I'd be more inclined to replace with a gently used arm where I know the thread hasn't been compromised.
As for my awful predicament.. I ordered a "rescue bit" as my last resort. Apparently these eat up EZ out taps. Should arrive later this week. In the meantime I"ll keep working it with my dremel and carbide grinding bits. Best case scenario I can grind away the extractor and the bolt. Worst case the thread is ruined and its off to Ebay for a new arm. Really hoping to avoid that level of disassembly.
Not necessarily...some have the ability to do it "in car" provided there is sufficient access for the tool.
I had the car with the broken coolant bolt towed to the EDM shop and they nuked it out right there.
Not necessarily...some have the ability to do it "in car" provided there is sufficient access for the tool.
I had the car with the broken coolant bolt towed to the EDM shop and they nuked it out right there.
Good to know. Maybe this will be my backup last resort
Not to be Debbie Downer, but I took a block to a shop to have a broken bolt removed via EDM, and they melted away a good size chunk of the surrounding metal -- they tried to weld it back but it was never right after that. Don't get me started...pick a good shop... As for hardened extractors, they should be outlawed for this reason.
Is that a blind hole, or is there anyway to get at it from the other side?
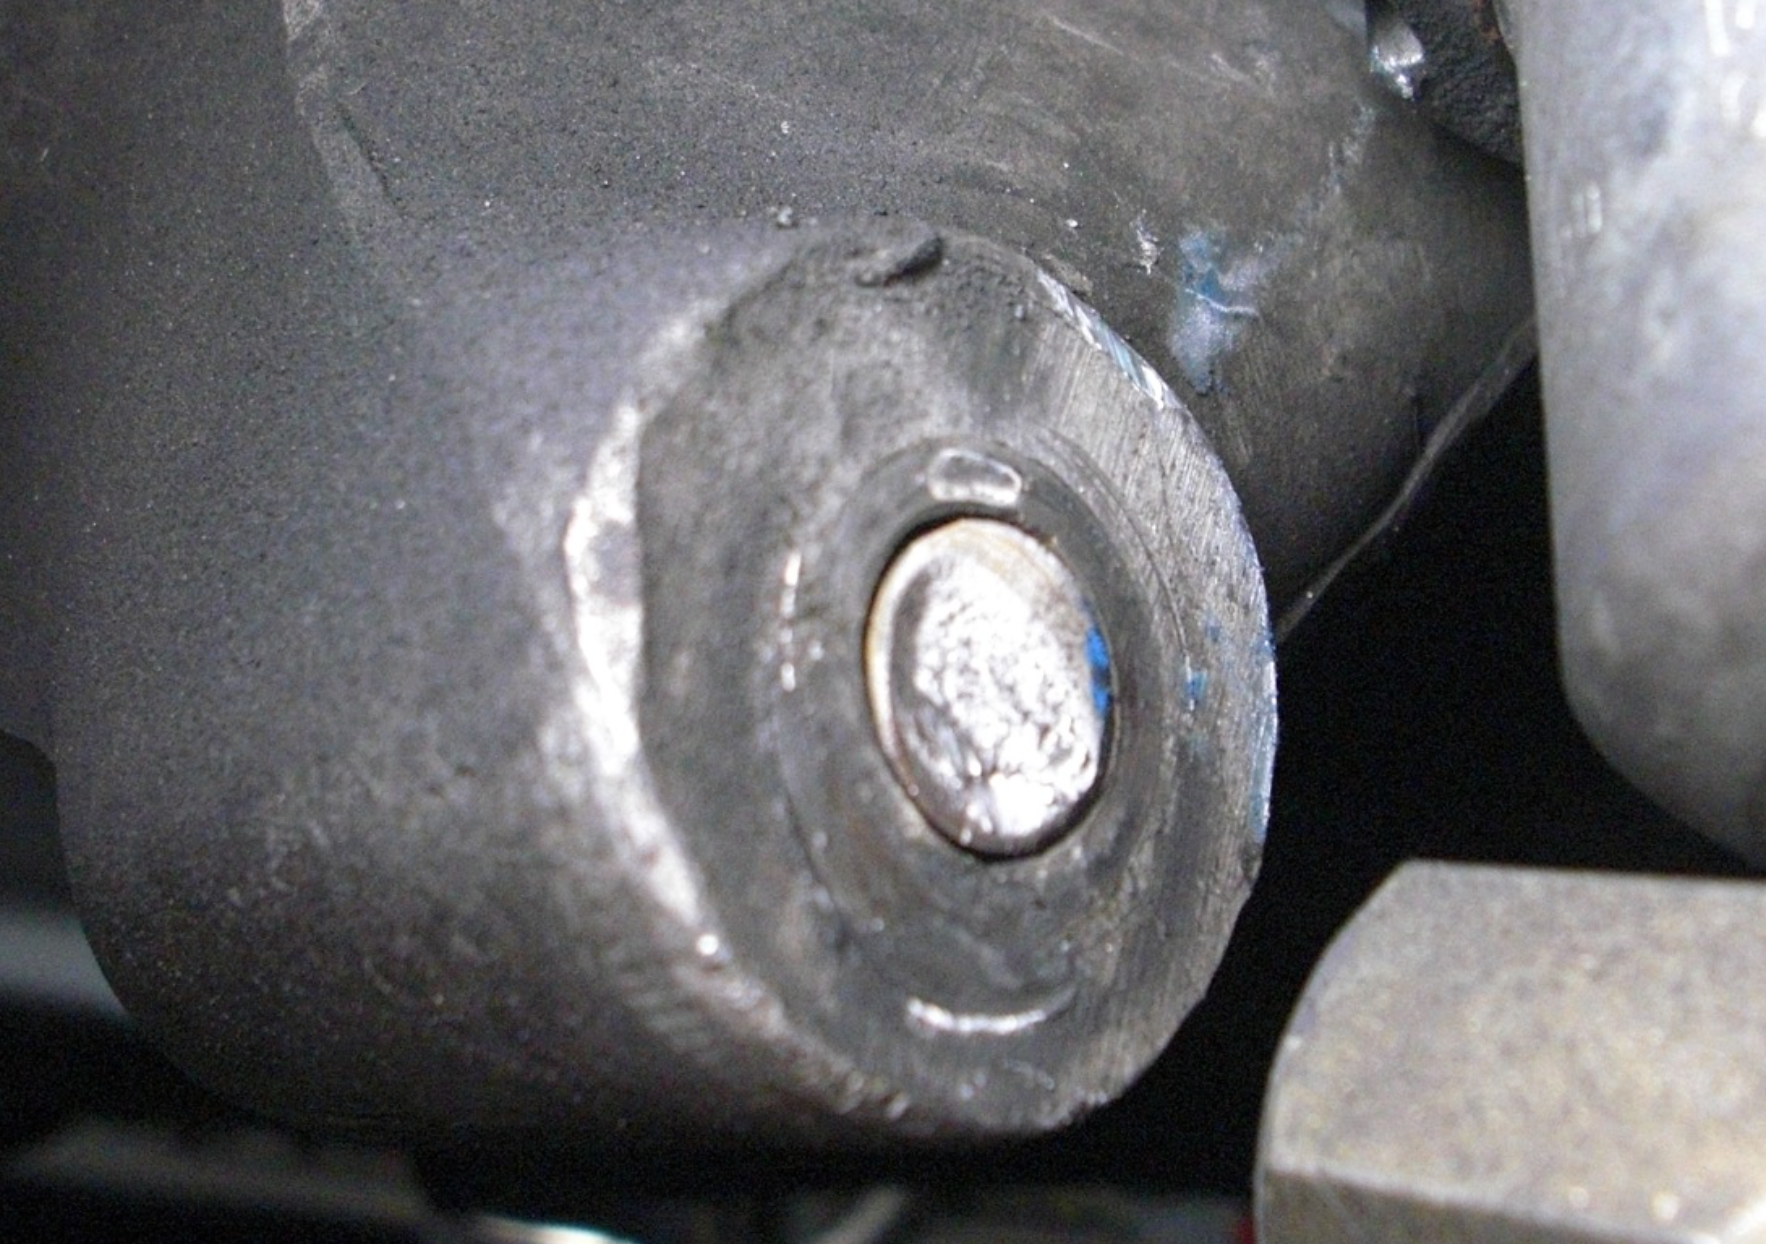
Unfortunately it's a blind hole. Here's a shot from another rennlister that had a similar problem. Mine is the same except it's about 3/4" into the hole, not flush - and now I have a broken extractor flush in the center of the bolt. In his case, they welded a nut to the end and backed it out with a breaker.
Maybe get a cobalt drill bit in the size needed to heli-coil those threads, and just drill the whole mess out. Then install a heli-coil. I've have great luck with cobalt bits on things like this.
I think if the thread is in rough shape that's what I'll have to do. First step is grinding out the EZ out as I haven't come across a drill bit that can bite through it. Surprisingly the dremel and a lot of patience is starting to make some progress. I'll be able to work on it more on Tuesday night. Will keep you guys posted.


 01-29-2017 | 04:45 PM