When you click on links to various merchants on this site and make a purchase, this can result in this site earning a commission. Affiliate programs and affiliations include, but are not limited to, the eBay Partner Network.
great timing.
I have the car on the lift to change out the oil lines and replace the sender. Now I am wondering if it is leaking from this screw adapter or the sender..
I will try anything to not have to take that adapter out.
Clean up wasn't too bad, started with degreaser and progressed into PB Blaster on the nook's with small dremmel rotary (bristles not wire).
The green loc-tight was a hassle. Tried heat, but between the harness and my PS oozing ATF from the connection at the reservoir...I didn't push it real hard.
I had read various methods online to break it down including acetone, or super glue solvent from the hobby store -- no luck, ended up just slowly picking it out as Greg had mentioned.
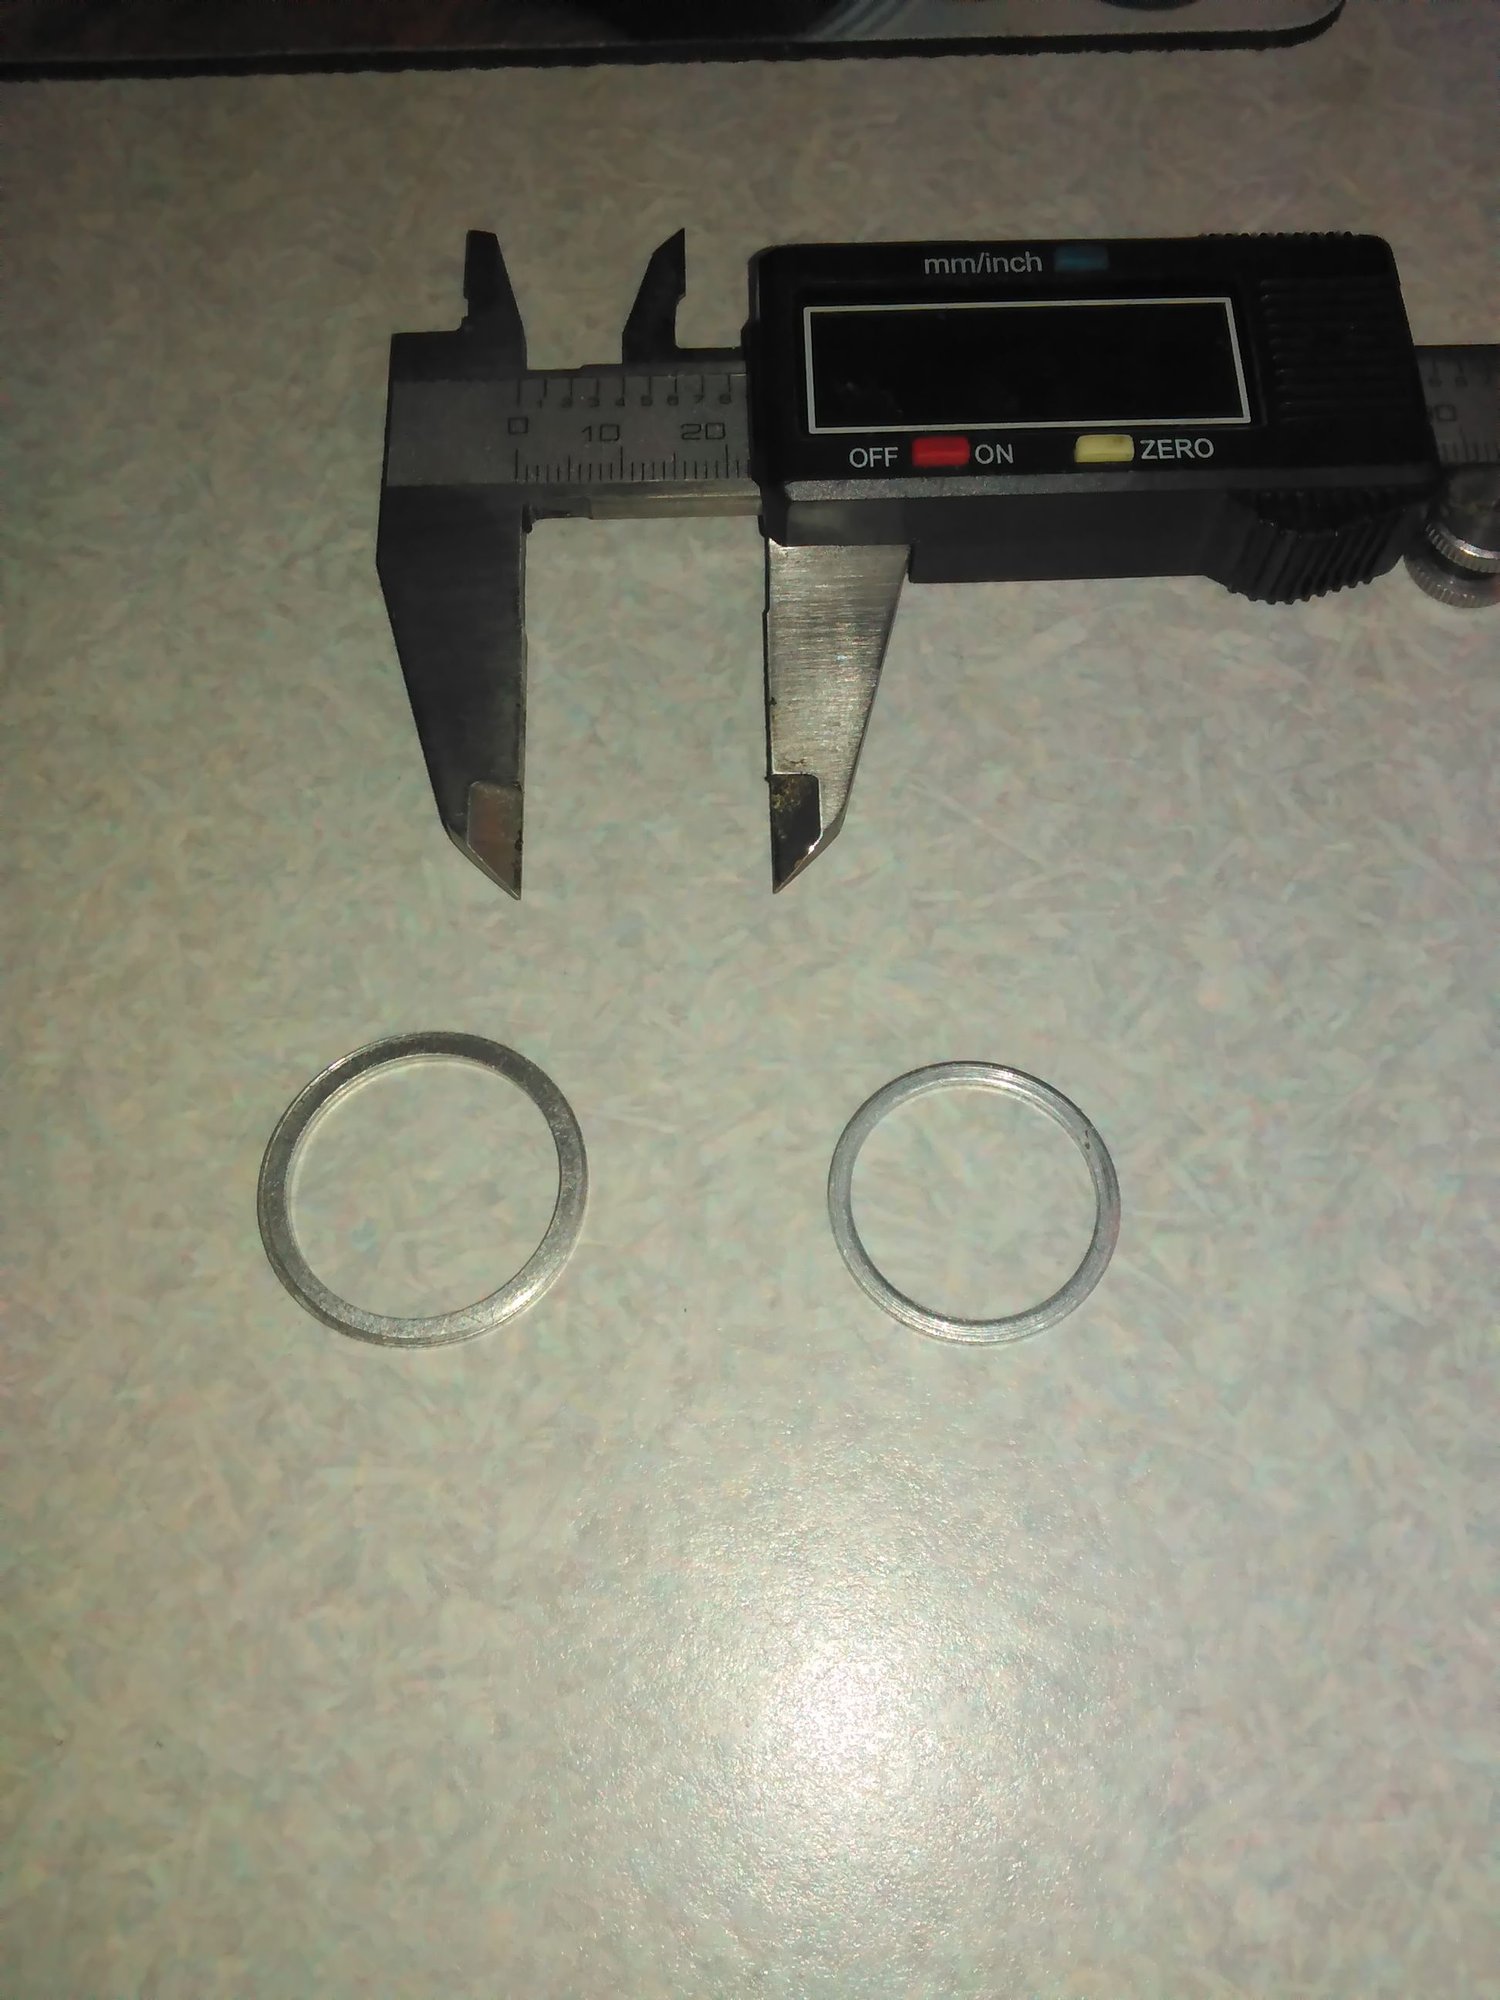
One thing to add would be if you remove the bosses from the radiator you will want smaller aluminum crush rings, they are 20 mm, instead of 23 mm.
I bought that same oil line set when I had my 86.5. but I could not see why that set would not work on a 87 -89 S4. the S4 lines are way more money too.
Finally getting the car assembled FWIW.
The only thing I would add would be the fact that I had to delete the rubber puck that holds the two lines together to route them correctly. The angle was such that the puck was pinching the upper line.
Maybe someone can correct me here if there is way to do it on an S3 and still keep the puck intact.
The lines need to be adjusted a bit, especially the lower one. Rotate the fitting that goes to the block so its not kinking your line. Also I would put the puck back on if you can as it will keep the lines from rubbing the frame and other bits in the area.
The lines need to be adjusted a bit, especially the lower one. Rotate the fitting that goes to the block so its not kinking your line. Also I would put the puck back on if you can as it will keep the lines from rubbing the frame and other bits in the area.
The pic was not the finished priduct, but yeah, the position is not perfect.
This is best positioning I can get, the new lines are somewhat shorter then the stock ones that came off. Let me know if I'm missing something.
Hey guys, a couple of questions please...and thanks ahead of time.
I just pulled, what I assume are the original, oil cooler lines.
Not bad, but pretty messy -- even with the oil drained.
What I noticed was that the replacement set I bought are, in fact a little different. The old set appear to be slightly longer (maybe 1.5 cm), and the new set have a rubber block that holds the lines together. All the fittings are still identical to the old set.
The new set have part number 928-107-037-05. Is this correct for a late 86?
Second, the upper (return?) port on the engine block has a defect on the lip. The lip is slightly inset on both ports, which I assume is to hold the crush ring, but the upper one looks like some casting flaked off around the edge. The fitting still threads fine so I assume this is not a big deal right?
Third, it looked like the fittings...that go into the block and the radiator, had blue lock-tight on them. Is this correct to use as I put it back together?
Any anti-seize, or other products as I go, with the cooler line hardware?
I will be tightening by using counter-held wrenches, approximately the hand torque of fuel line connections...sound correct?
Hey Crumpler, did you make new air tubes out of metal or something from your airbox to the front? I have an early '86...and what you got there looks pretty nifty...would be interested to learn more....
Hey Crumpler, did you make new air tubes out of metal or something from your airbox to the front? I have an early '86...and what you got there looks pretty nifty...would be interested to learn more....
Hey Noobie, thanks, it was a one off project from a couple of years ago. The welds were out sourced.
I have a long standing aluminum fetish.
This was the thread that talked about it:
I spent a couple of hours messing with the clocking of the fittings at the block until I came up with positioning I liked. In my case the lines were a bit too long so I had to clock the fittings to give the lines some gentle radius curves.
Replying to an old thread, hopefully someone's there...lol
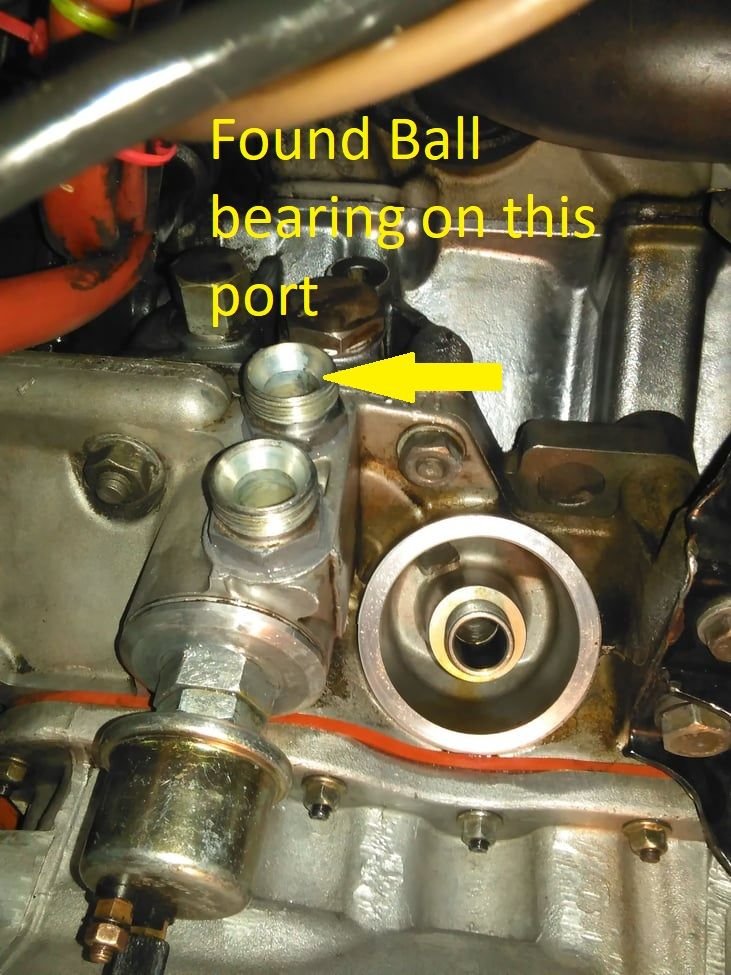
I was changing out the oil cooler lines on my 88, noticed a ball bearing on the top line of the oil pump...can't find any documentation on this, anyone know anything about it?
it sounds like someone may have tried to shut off the oil bypass,
At this point I would order all new parts for the oil thermostat and the springs,
and other assorted parts,
replace everything that goes into the oil quadrant, make sure you remove everything from the block as well.
NOTE its possible someone may have installed the parts backwards,
so use the WSM to correctly position the springs and pressure pistons and T stat
it sounds like someone may have tried to shut off the oil bypass,
At this point I would order all new parts for the oil thermostat and the springs,
and other assorted
i replaced these parts myself years ago, when pursuing a different problem. I remember replacing the spring loaded assembly to be a huge PITA, exciting remembering a considerable vocabulary I hadn�t used in a while.
It�s always interesting but a little cringeworthy to read an entry from your younger self.
That set up changed a few years ago.
I ended up using metric to -AN fittings and ran lines to stand alone oil cooler. I was never real impressed with unit inside the radiator.

 11-29-2016, 02:17 PM