When you click on links to various merchants on this site and make a purchase, this can result in this site earning a commission. Affiliate programs and affiliations include, but are not limited to, the eBay Partner Network.
Thank you for sharing this write up Philooo. If you or anyone has more DIY tech articles with this level of detail; check out the below link - we will review the submission and if published on our site, we will give you 10% off and a credit. Please let me know if you have any questions!
Thanks for the write up, i'm going to be replacing my caster/control arms soon so I needed the torque specs as the manual isn't very clear on the values for each as its all text rather than images.
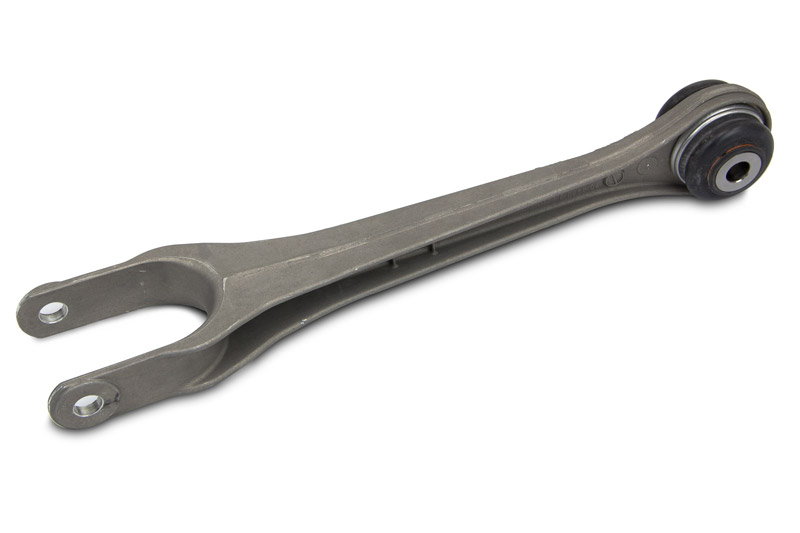
These are what i'm replacing: one in the front, one in the back (part is the same L+R/F+R)
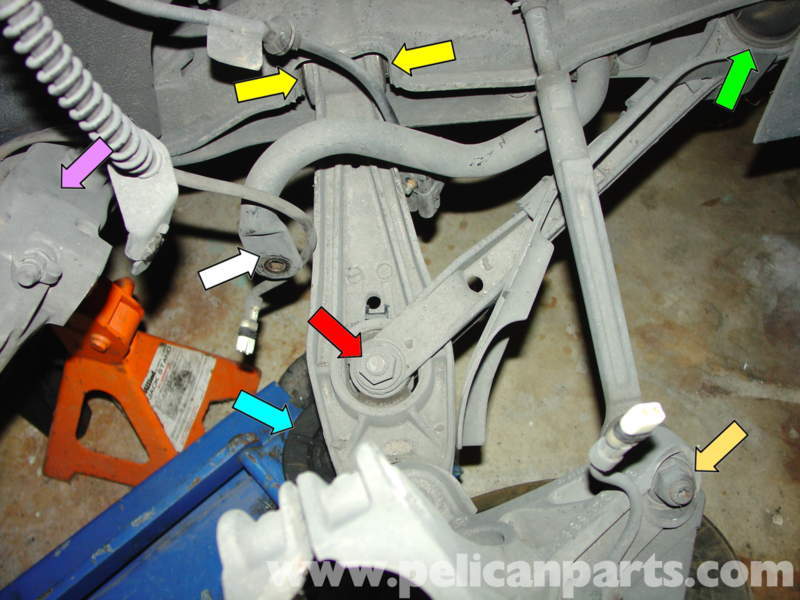
Does anyone know the torque value of the bolt in red:
Hope Pelican Parts don't mind me using their image as its a good one!
Anyone have any input on confirming the diagram above? Genuine replacement control/thrust arms arrived this week and would like to put them in this weekend
I have made this diagram myself and tracked the car a couple times after the change and up to these day everything is still tight, it's been a couple years now so I would say these value are correct
read my later post I think I added
"About the torque I decided to go with the following value (see first attachment for the number cross reference)
1 - 74 ft lb
2 - 118 ft lb
3 & 4 - 48 lb
5 - 74 ft lb
I added some thread locker (blue one) on all screws I removed as it seems there was some on there before. The only one I did not remove fully is the screw #2 so I could not put thread locker back on it.
and not on the first picture but the lug nuts that link the swaybar to the suspension link : 63ft lb"
It is a pretty easy and fun DIY, but I did not change the caster control arm.
If you do, keep in mind that the bushing in the main control arm, is known to weaken over time, so if you do the work, you may want to think about going the extra mile and replace that one. It is certainly a big pain to do but steering feedback would certainly be greatly improved. tough choice.
Thanks for that! It is a tough choice but seeing that the caster arms are more straight forward I might stick to those for now. If it was the coffin arm then it would be an easier decision.
Great thread. Search is great! Just want to confirm this is applicable for both 987.1 and .2's. I have a .2 and it looks just a little different. It could be the angle of the picture. Thanks!


 11-08-2016 | 08:29 PM