When you click on links to various merchants on this site and make a purchase, this can result in this site earning a commission. Affiliate programs and affiliations include, but are not limited to, the eBay Partner Network.
Yeah, I'm hoping I don't have to do the rotors. Pads definitely look super easy. Though, how do I go about compressing the pistons without removing the calipers? Will a C-clamp reach in there?
Watch the video in the above links. It's pretty straight forward. Van did a great job to show all the steps.
(you might be able to reuse your olds ones, but they're glued to the pads.)
All you need is a small metal putty knife and slide it between the damper and the pad. It might take a little effort, but not much and you can easily separate the dampers from the pads
No need to buy new ones unless that are damaged
Many also don't bother with using the dampers at all
Yeah, I'm hoping I don't have to do the rotors. Pads definitely look super easy. Though, how do I go about compressing the pistons without removing the calipers? Will a C-clamp reach in there?
All you need is a pair of channel locks. As Van's vid shows, put the channel locks on the brake pad tab / ear and caliper and compress. That will push the piston back into the caliper. On the outside of the caliper use some cardboard to protect the caliper finish.
Yeah, I'm hoping I don't have to do the rotors. Pads definitely look super easy. Though, how do I go about compressing the pistons without removing the calipers? Will a C-clamp reach in there?
I used a small C clamp to compress the pistons (one side at a time) and the pads slid right out.
What was the exact figure for a Porsche service center to replace the front and rear rotors?
I don't remember exactly because I didn't bother writing it down. It was around 500 for just the front pads, 600 for just the rears, around 1000 for rotors and pads in the front and 1200 for rotors and pads in rear I think.
I don't remember exactly because I didn't bother writing it down. It was around 500 for just the front pads, 600 for just the rears, around 1000 for rotors and pads in the front and 1200 for rotors and pads in rear I think.
Awww hell no!
I am definitely planning on trying to do this myself as well. I hope to be just skilled enough to not mess it up.
+996 on channelocks for spreading the pads
I use a small piece of an indoor/outdoor carpet scrap to protect the caliper
I like the idea of using tape. Good idea Slakker
Okay, so I pulled the front wheels off and the pads look to be at least 5mm. No cracking in the rotors and they spin freely. Is it possible something just tripped the sensor for some reason? The light is no longer on and when I search for messages it says there are none.
I like the cardboard idea but I just wrap the jaws of my channel locks with gorilla tape to squeeze the calipers.
A cheapo brake spreader is $6 on Amazon...while I am a diehard fan of using the wrong tool for the job, it's just not worth tearing a dust boot to save $6.
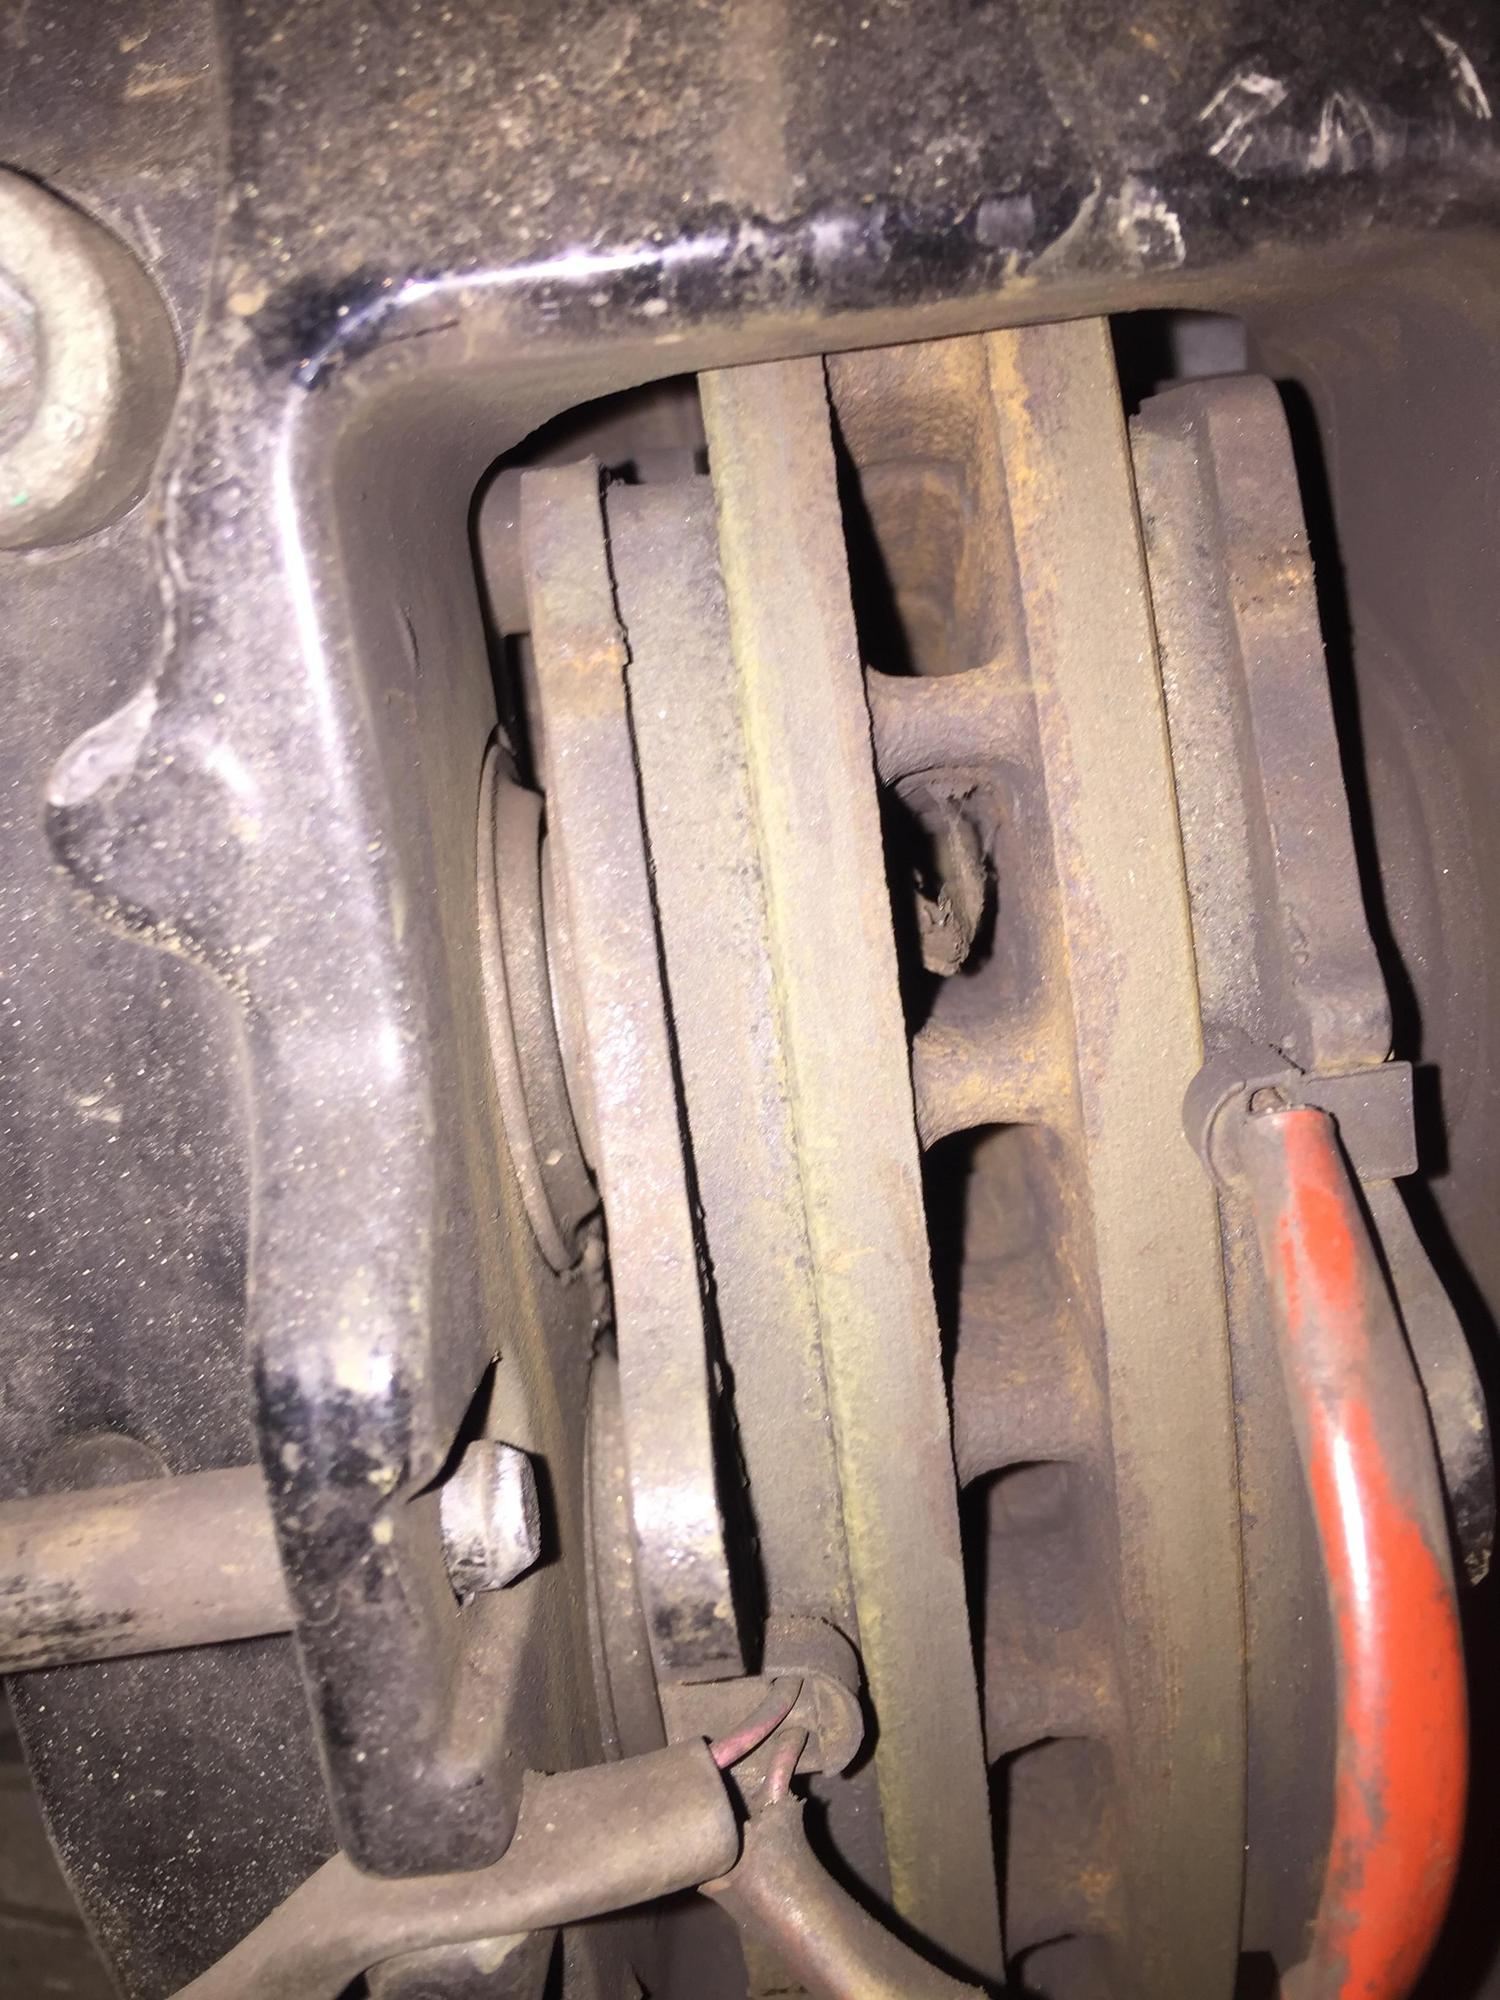
I think your culprit is in this picture. If you look at the right side, the wear sensor is at the end of the red wire. Looks to me like the right side pad is worn just thin enough that the sensor is touching the rotor, which is what causes your light to go on. I'd just replace the rear pads and move on. This should be a cheap & easy DIY job: rear pads and a sensor.
We have a Rennlist sponsor who starts out very cheap on his parts, then gives another 10% off if you use the promo code RENNLIST. www.warehouse33auto.com
I believe the short requires the sensor to be touching the rotor..........
get new sensors when you acquire your pads.
Exactly. You will continue to get intermittent brake pad wear warning light until the sensor is completely worn down (the wire inside cut into two), then the warning will turn solid.
A cheapo brake spreader is $6 on Amazon...while I am a diehard fan of using the wrong tool for the job, it's just not worth tearing a dust boot to save $6.
A new top hat for a Boxster is $22. I'm just sayin. :P
Dust boot? I'm just squeezing the pad back to the caliper.
 11-07-2016, 12:56 PM