When you click on links to various merchants on this site and make a purchase, this can result in this site earning a commission. Affiliate programs and affiliations include, but are not limited to, the eBay Partner Network.
Hi Landseer! Very good point. I have thought about changing the rack input U-joint when I do the MM/OPG based upon age.
While removing the old (+) battery cable, I got a good look at the rack input U-joint. It looked surprisingly good, and felt tight. However, that was just me putting my hand on it. I will have my wife turn the steering wheel while I closely watch the U-joint.
Either way, the joint is getting removed for inspection and/or replacement in the forseeable future.
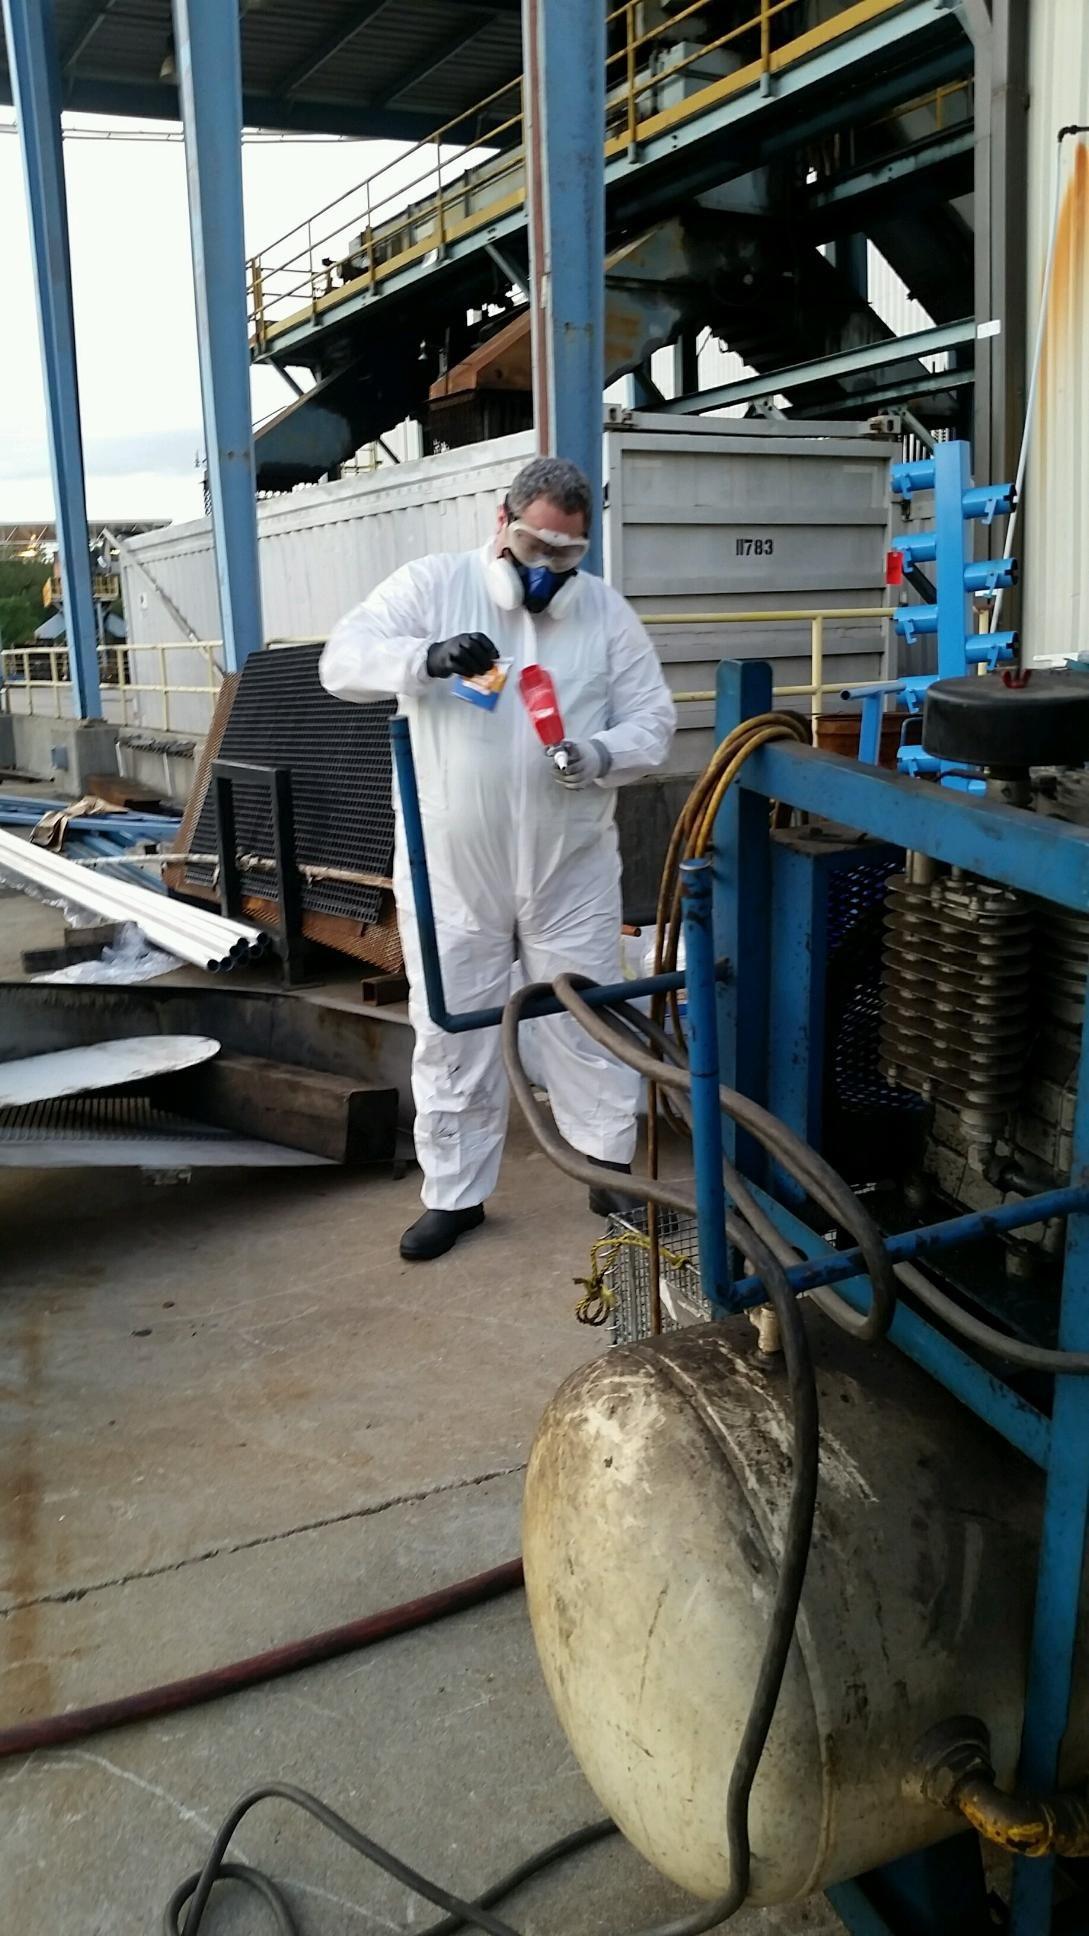
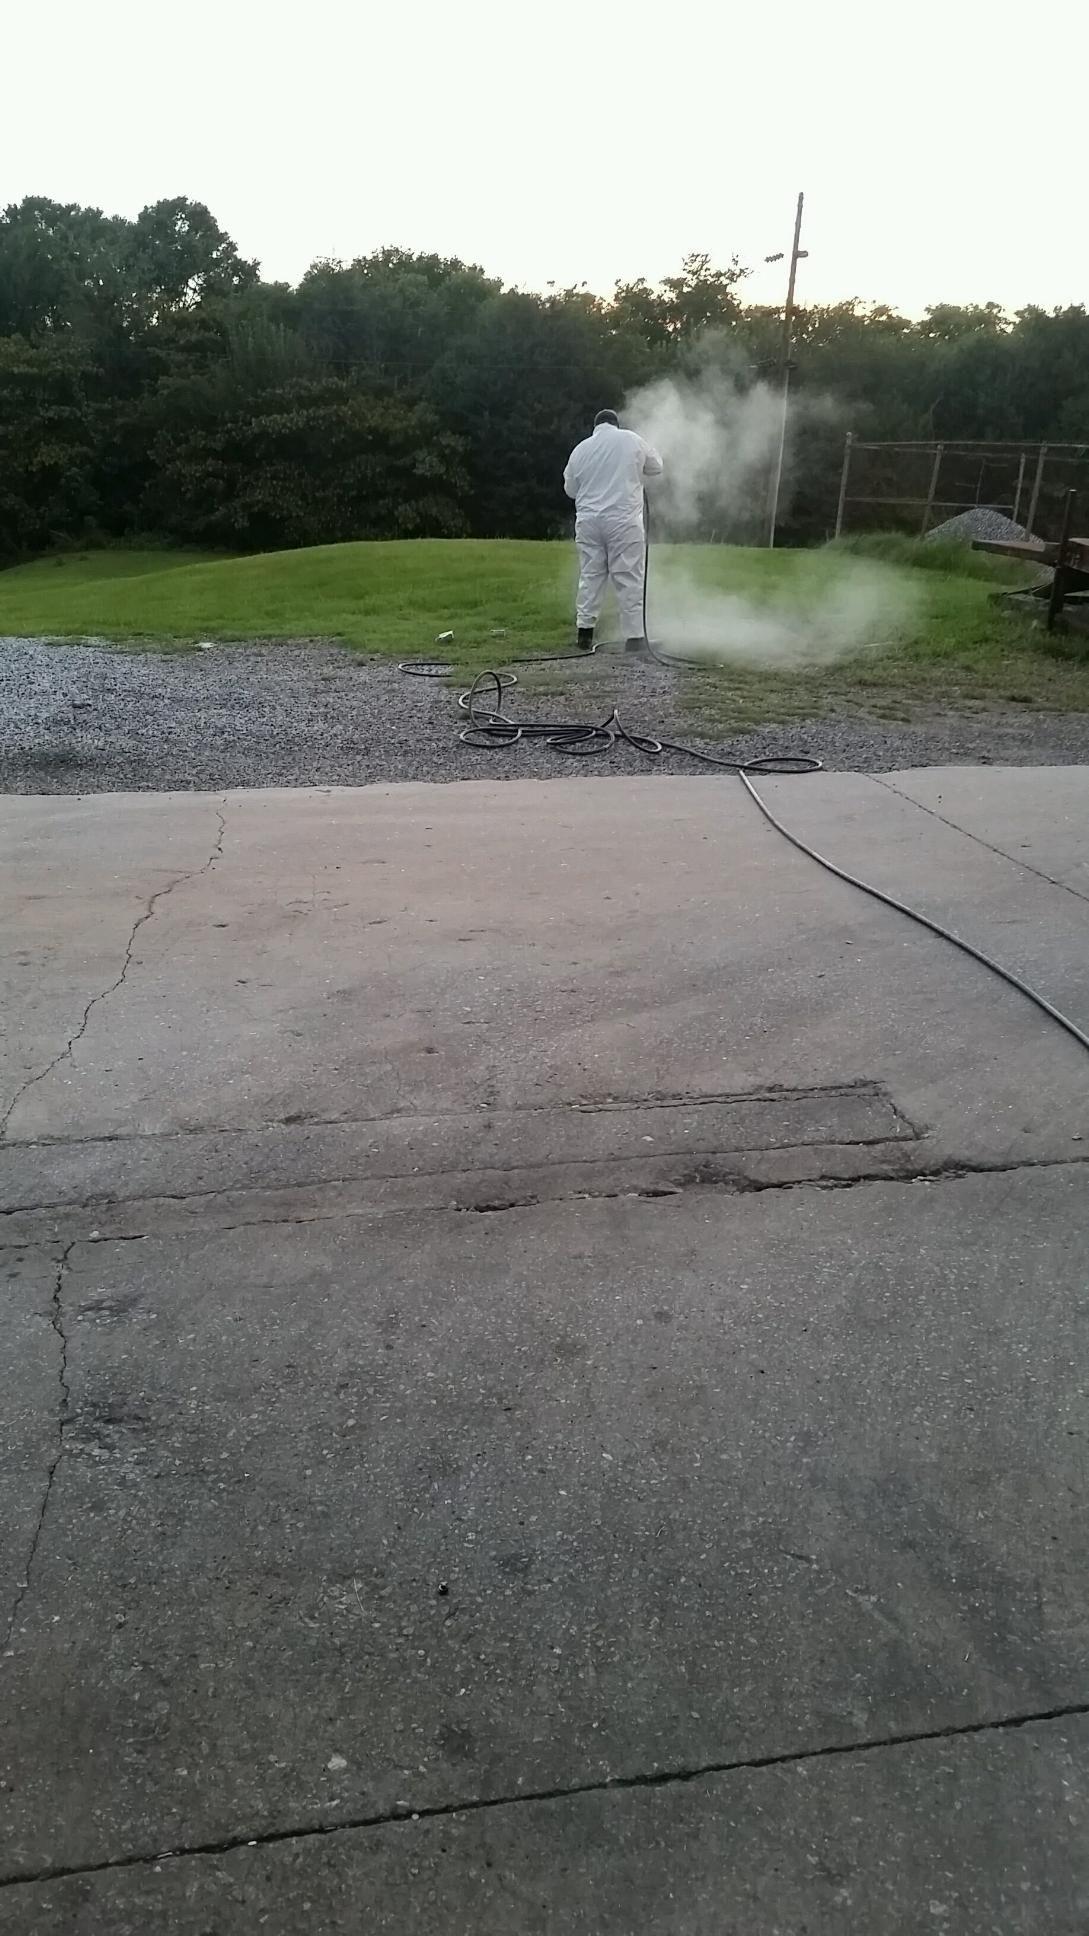
I finally got a chance to do some baking soda blasting on the calipers last night!
I covered the pistons with two layers of duct tape to protect the seals on 1 front and 1 rear caliper. I spot blasted the corrosion in the corners of the calipers. They cleaned up well down to clean aluminum. I may hit them again just to be sure. I had to quit a little earlier than expected because I made an unholy mess in the Tool & Die washbay.
I will set up with better ventilation and try again later.
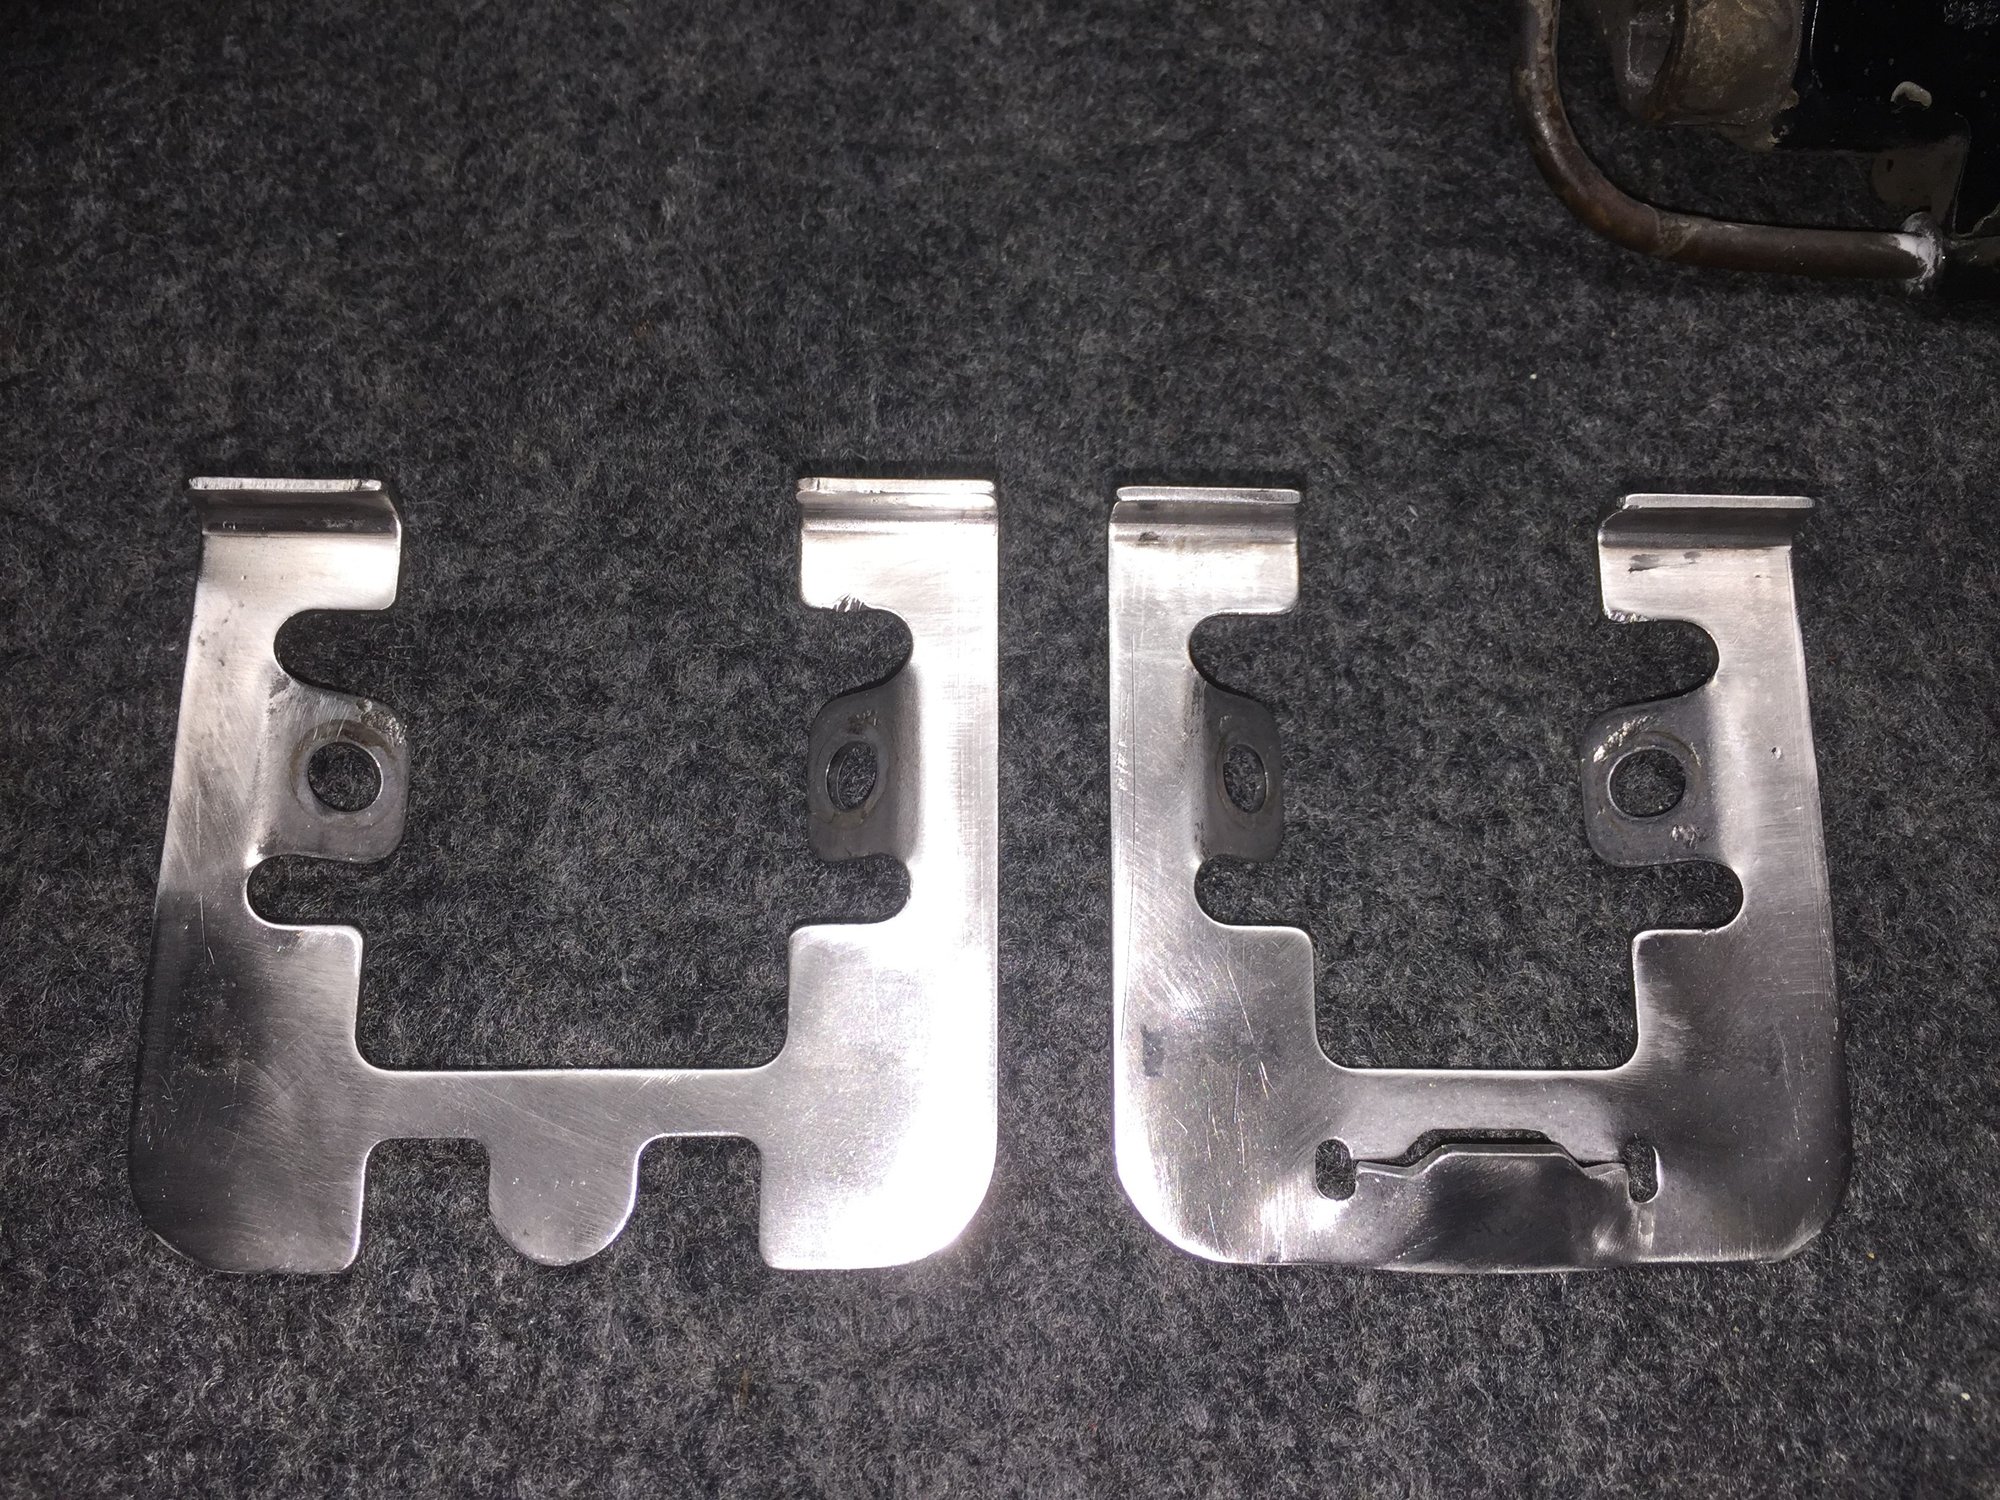
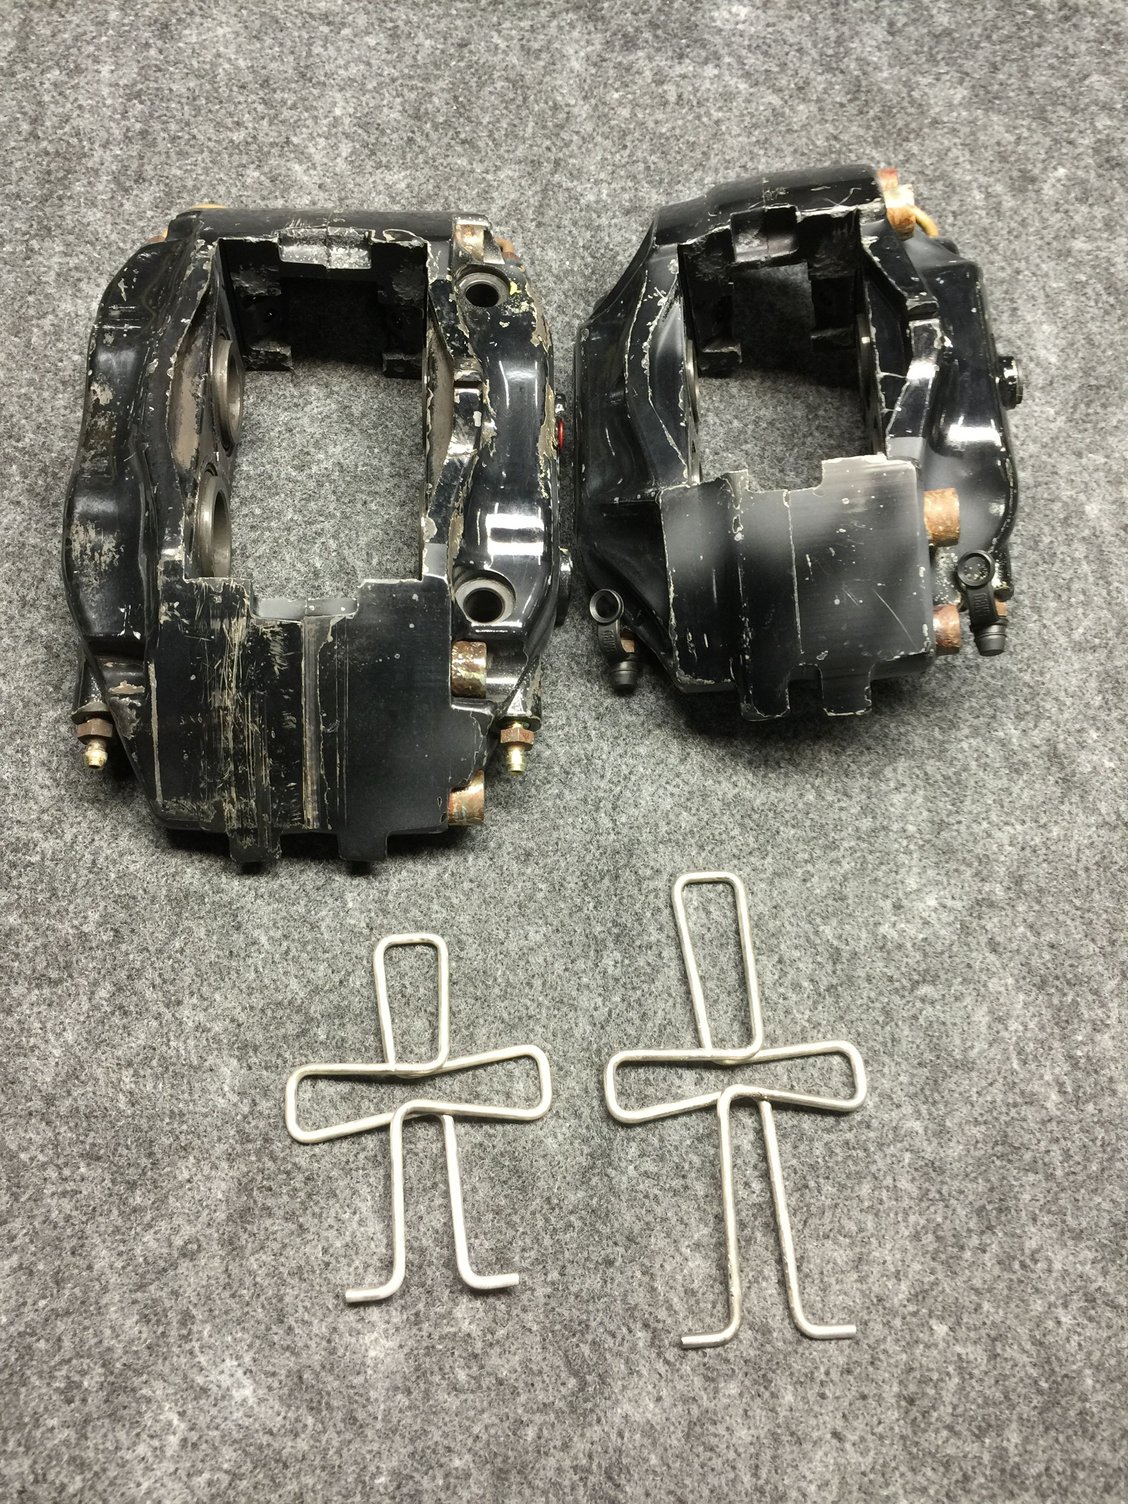
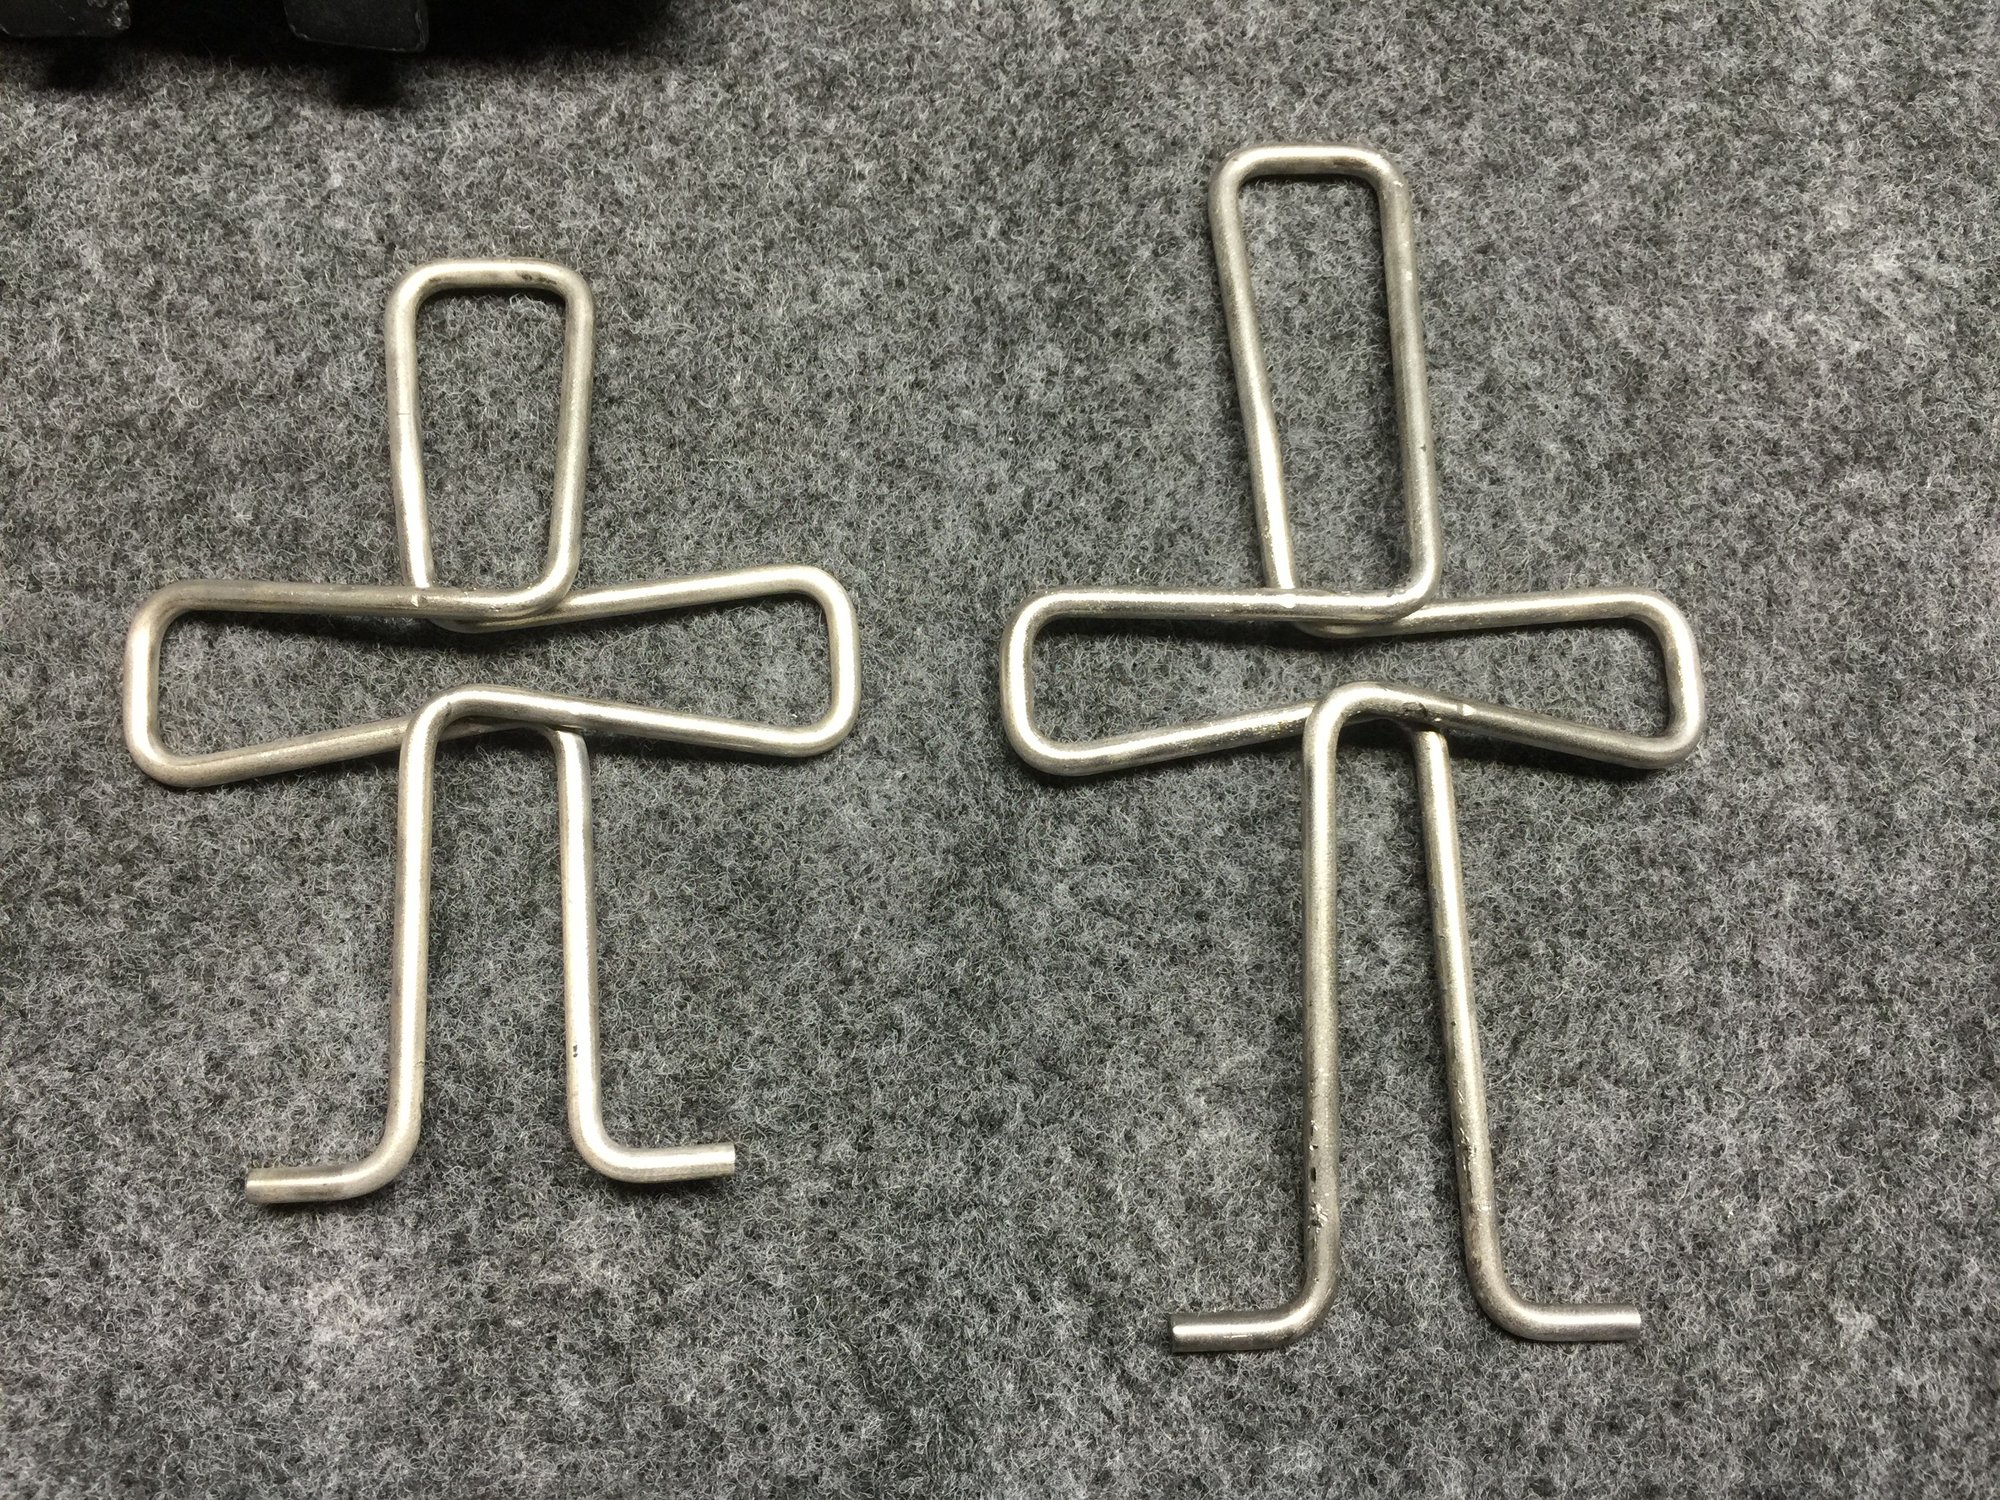
I also blasted the caliper spring plates. This is after I cleaned them with the green roloc disc. For the other 2 caliper's spring plates, I may skip the roloc and just baking soda blast them.
We shall see...
Got the calipers scrubbed and rinsed with hot water. Also did the pad springs. Note, I still have to finish scrubbing that front caliper with mineral spirits and a toothbrush.
All in all, they turned out well. However, this is a good temporary solution. I will seal the bare aluminum with sealant as recommended earlier in this thread. Down the road, when I have to replace the rotors and pads, I will probably disassemble and strip the calipers.
Thanks for your input here dr bob. I've just recently finished replacing my front bearings, following the steps in the wsm, and was worried about the small amount of movement still present in the wheels. Glad to hear it is normal. I am still hearing some chattering from what sounds like the front drivers side wheel when driving slowly over a very uneven patched road, but it could be something else that is loose. My paranoia keeps telling me it is the bearings.
Not trying to hijack your thread, just playing along at home and doing a lot of the same to my car at the moment. After replacing the front bearings, rotors and pads I still had a rattle on the front drivers side. I was convinced it had to be the bearings and was fixated on those. The info in this thread confirmed I had done the bearings correct, so I started looking around. I found one of the upper control arm lock nuts had loosened itself off...glad I found that! I'm gonna start checking everything around me when I'm in a project, that was too close. Great thread Seth, very helpful with all the pics and experienced advice being contributed. Keep it up, thanks
Whoa, good catch Oldewoodupes! Not a hijack at all, I appreciate the information. I will check my control arms closer.
Thanks! You are quite welcome for any and all information or chuckles you get from this thread. I am relatively confident in what I am doing, but will ALWAYS be open to advice from others.
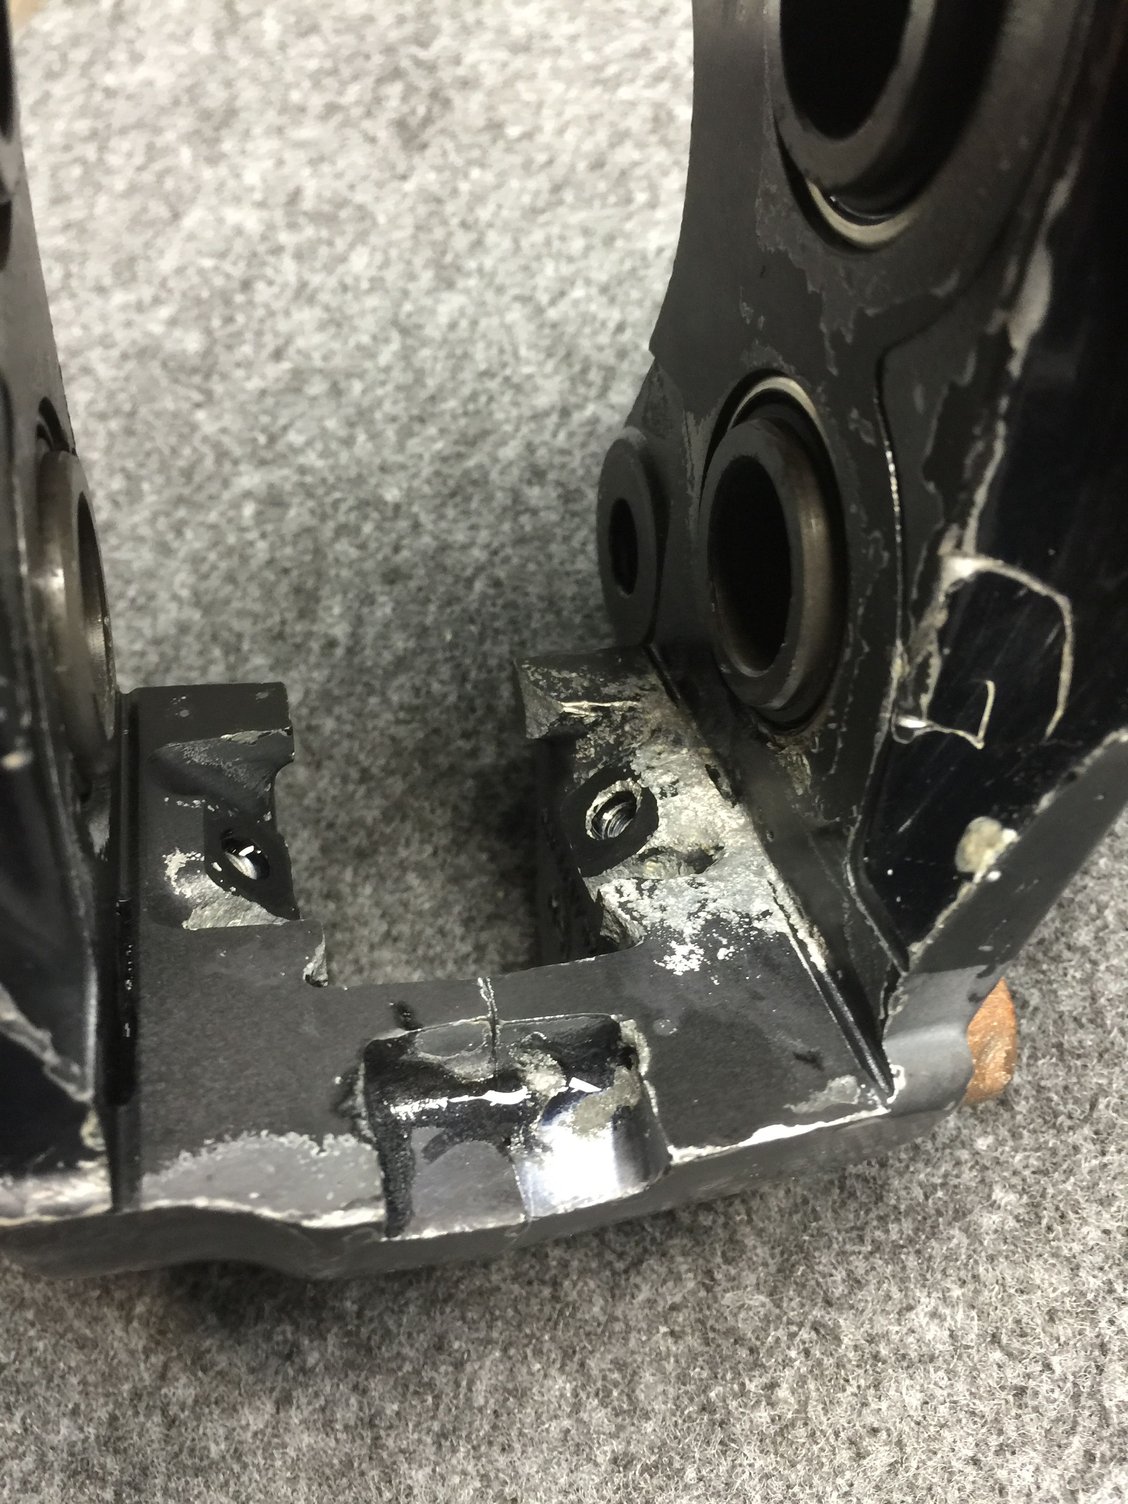
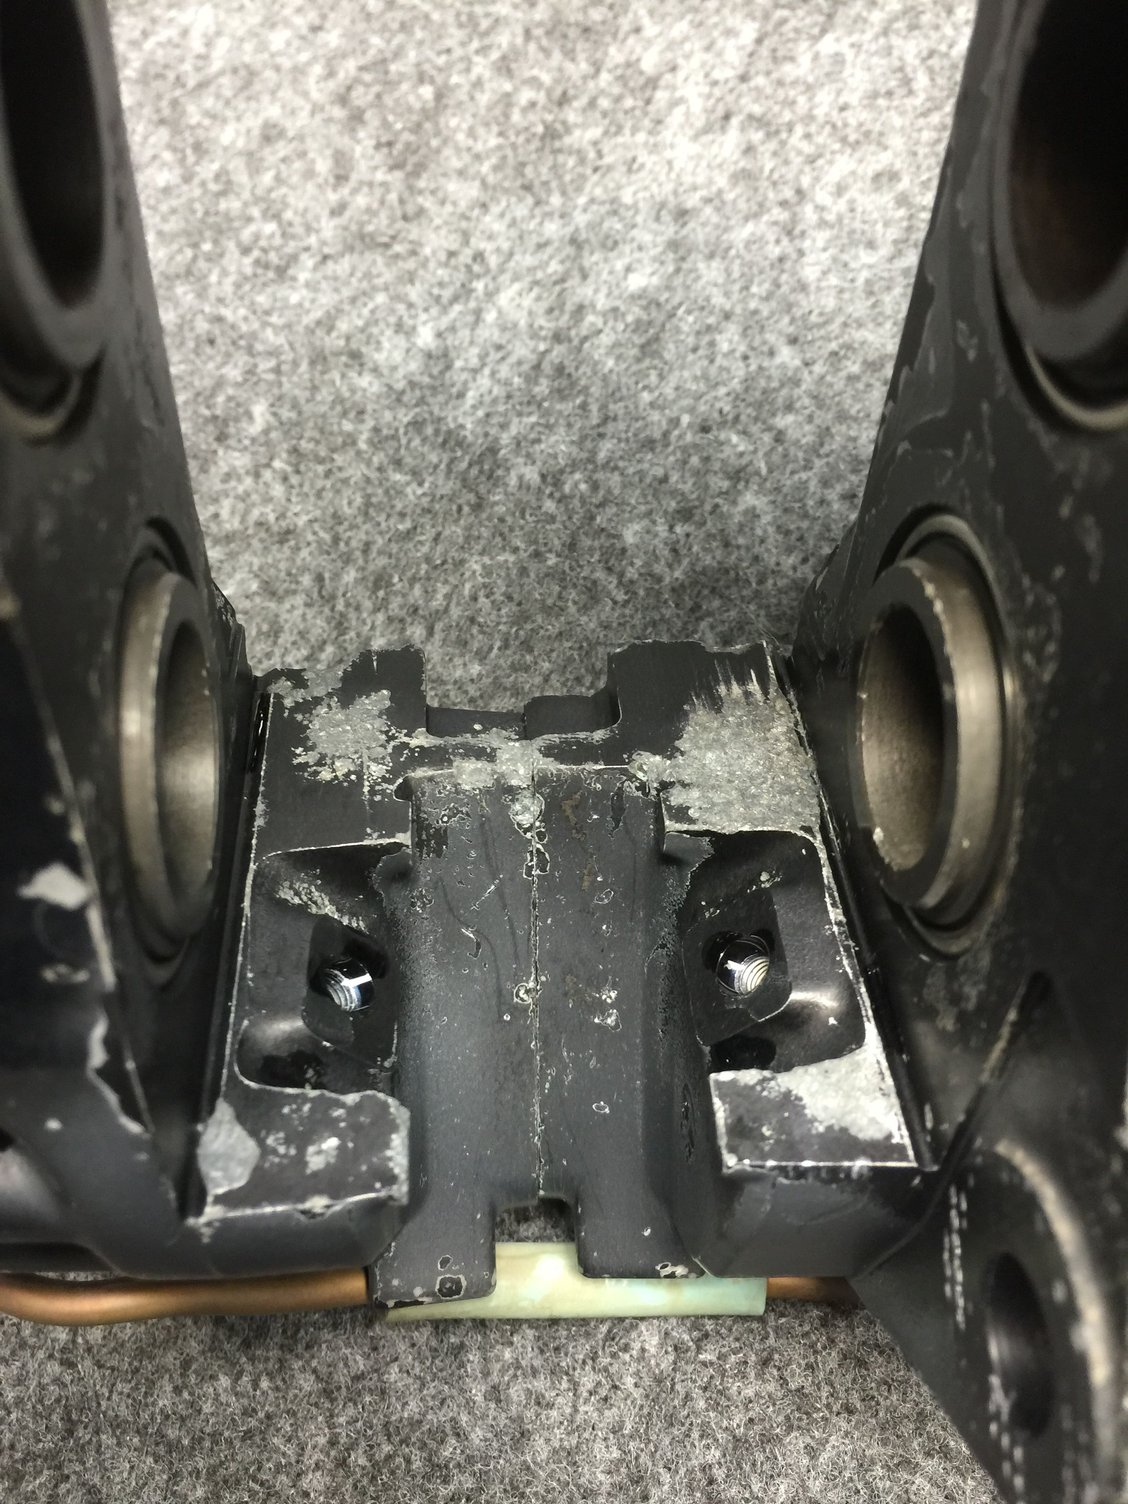
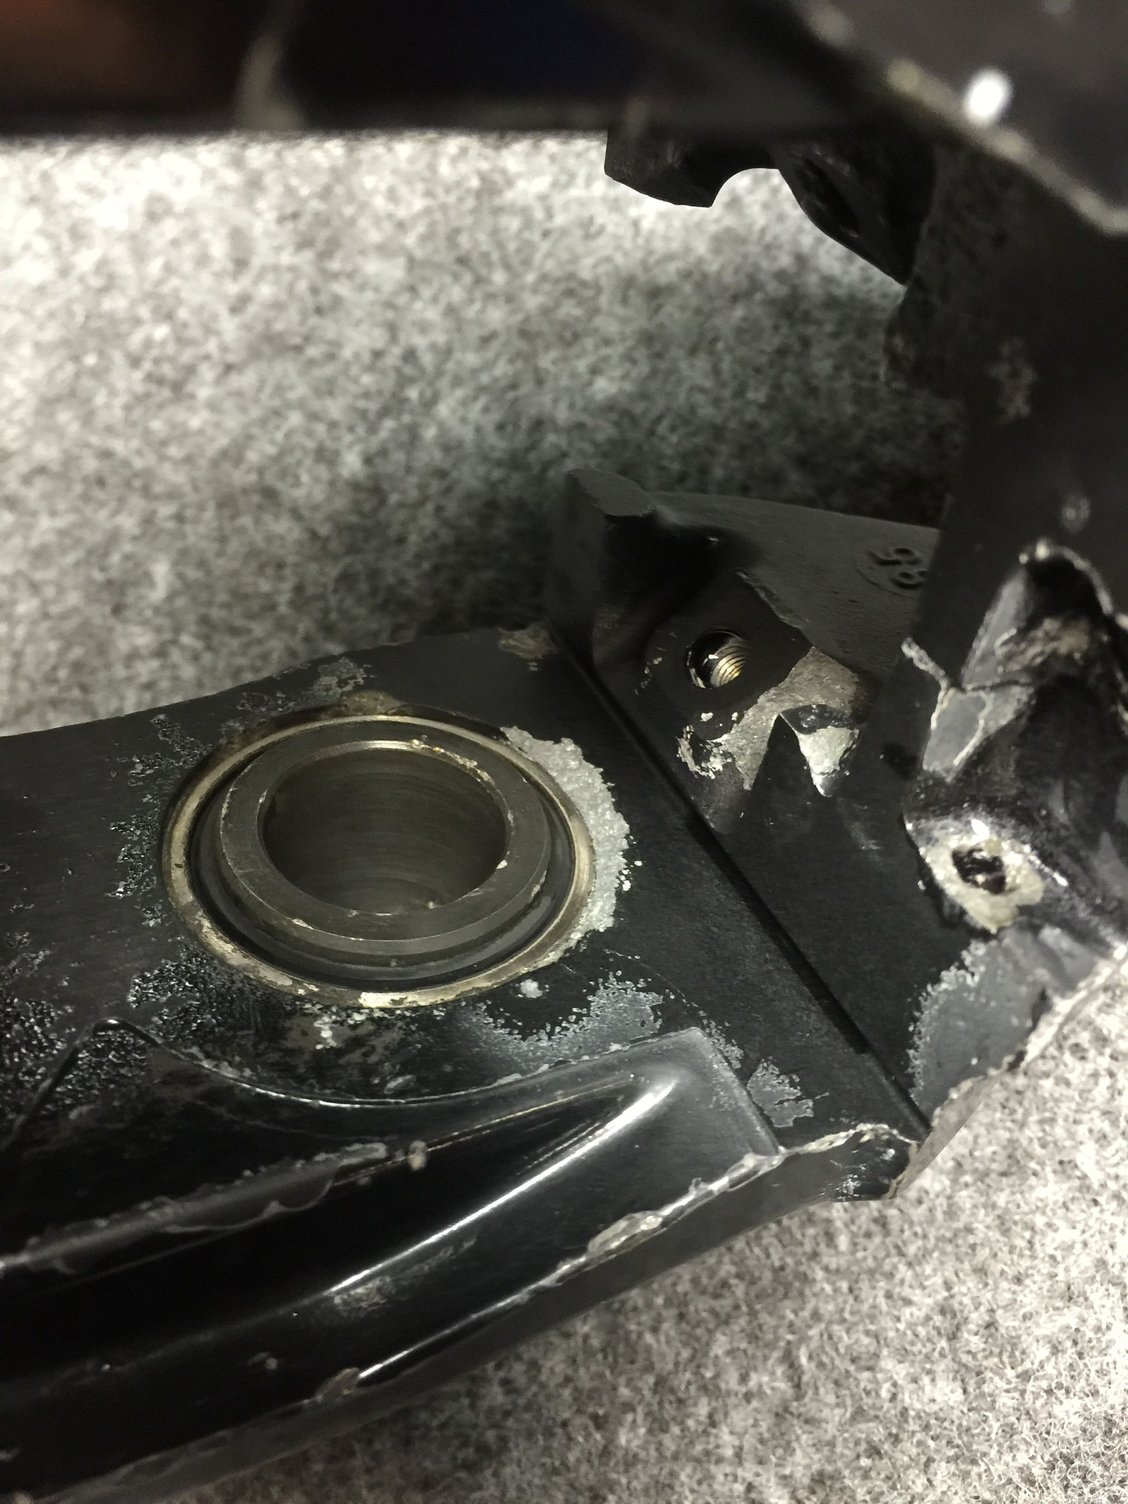
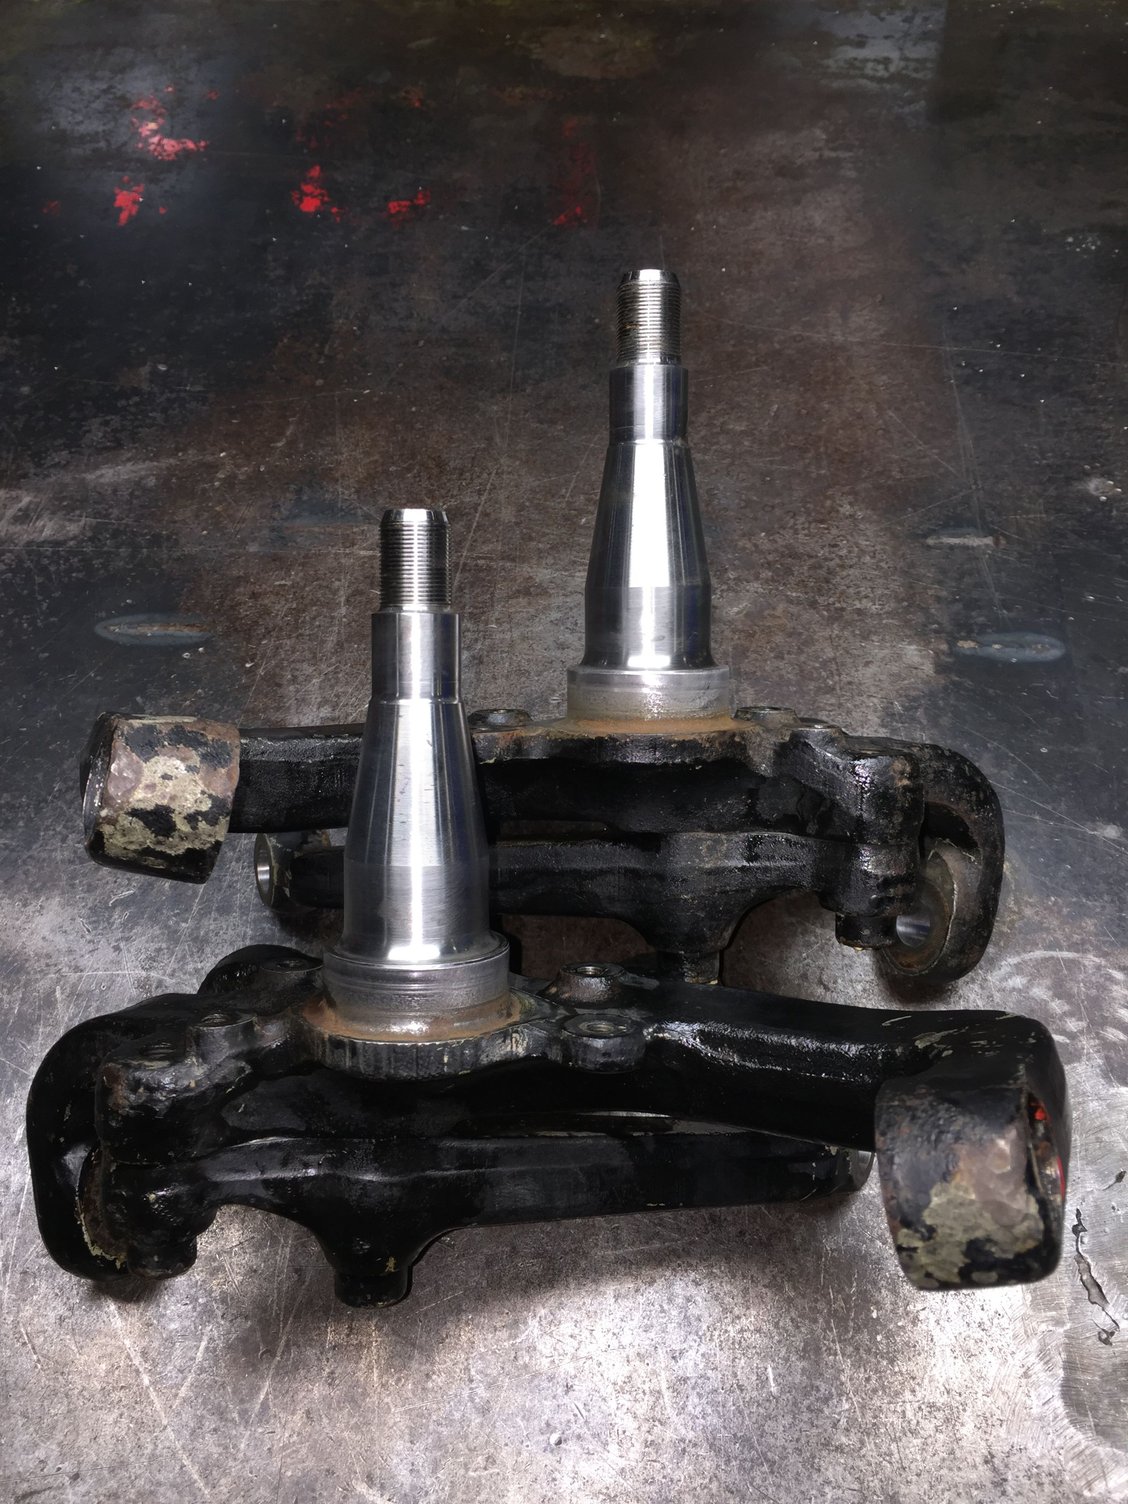
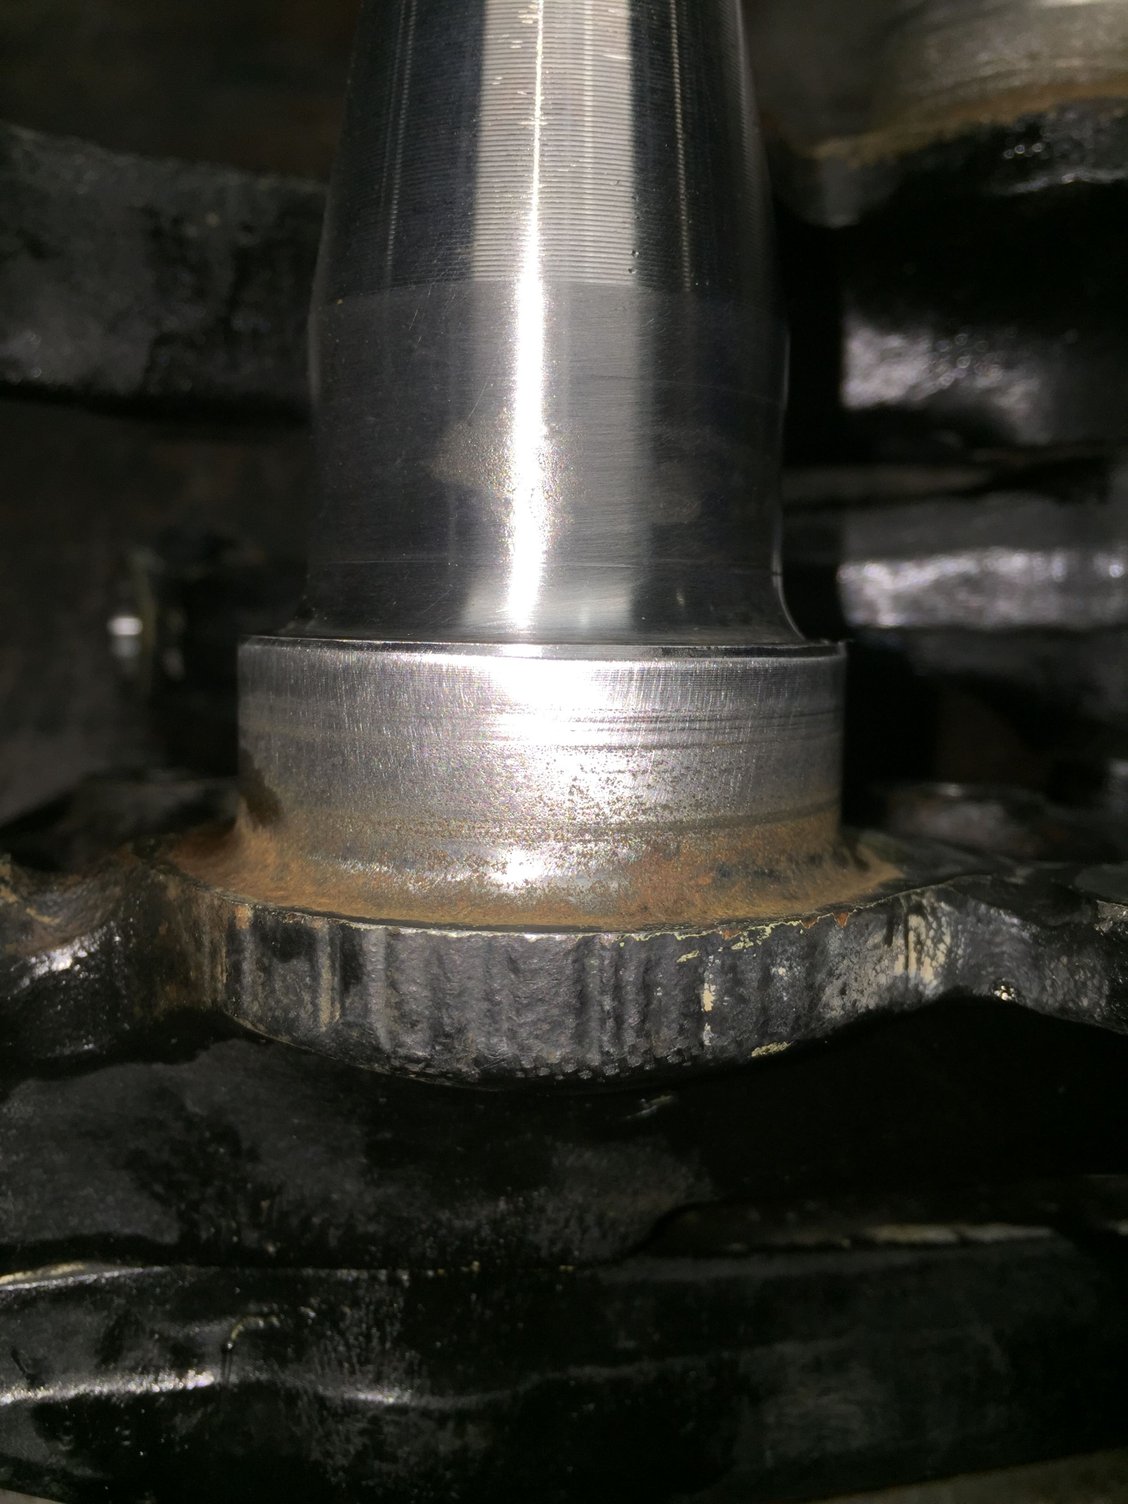
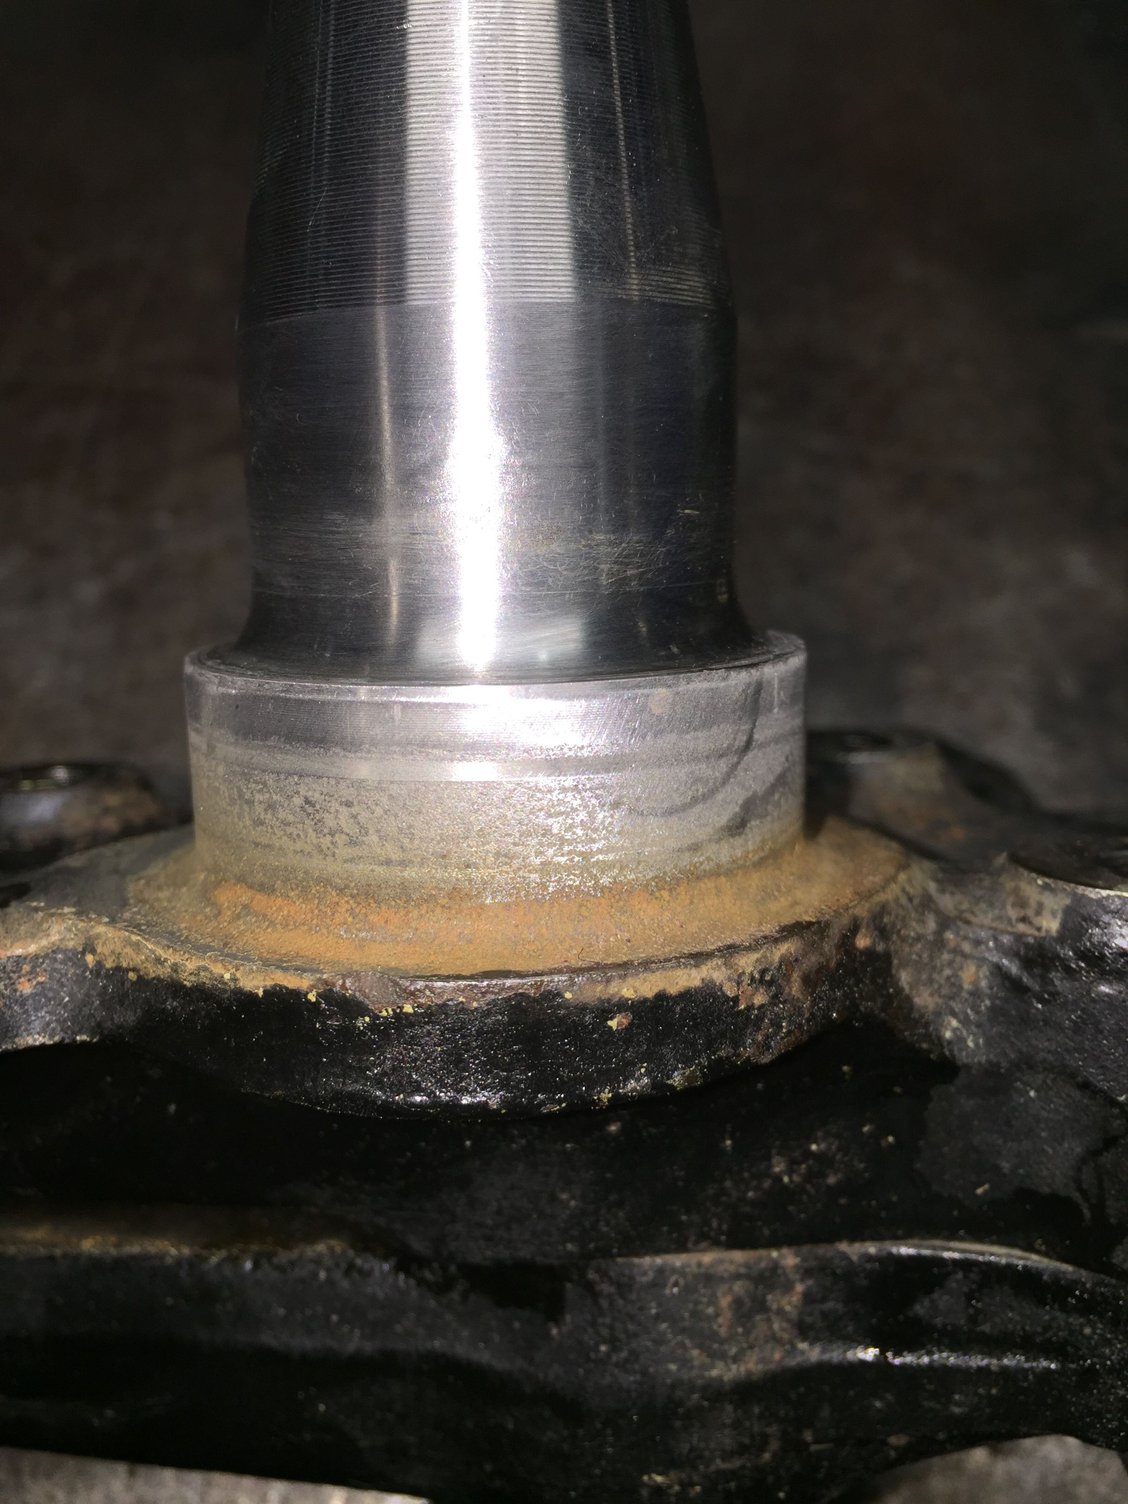
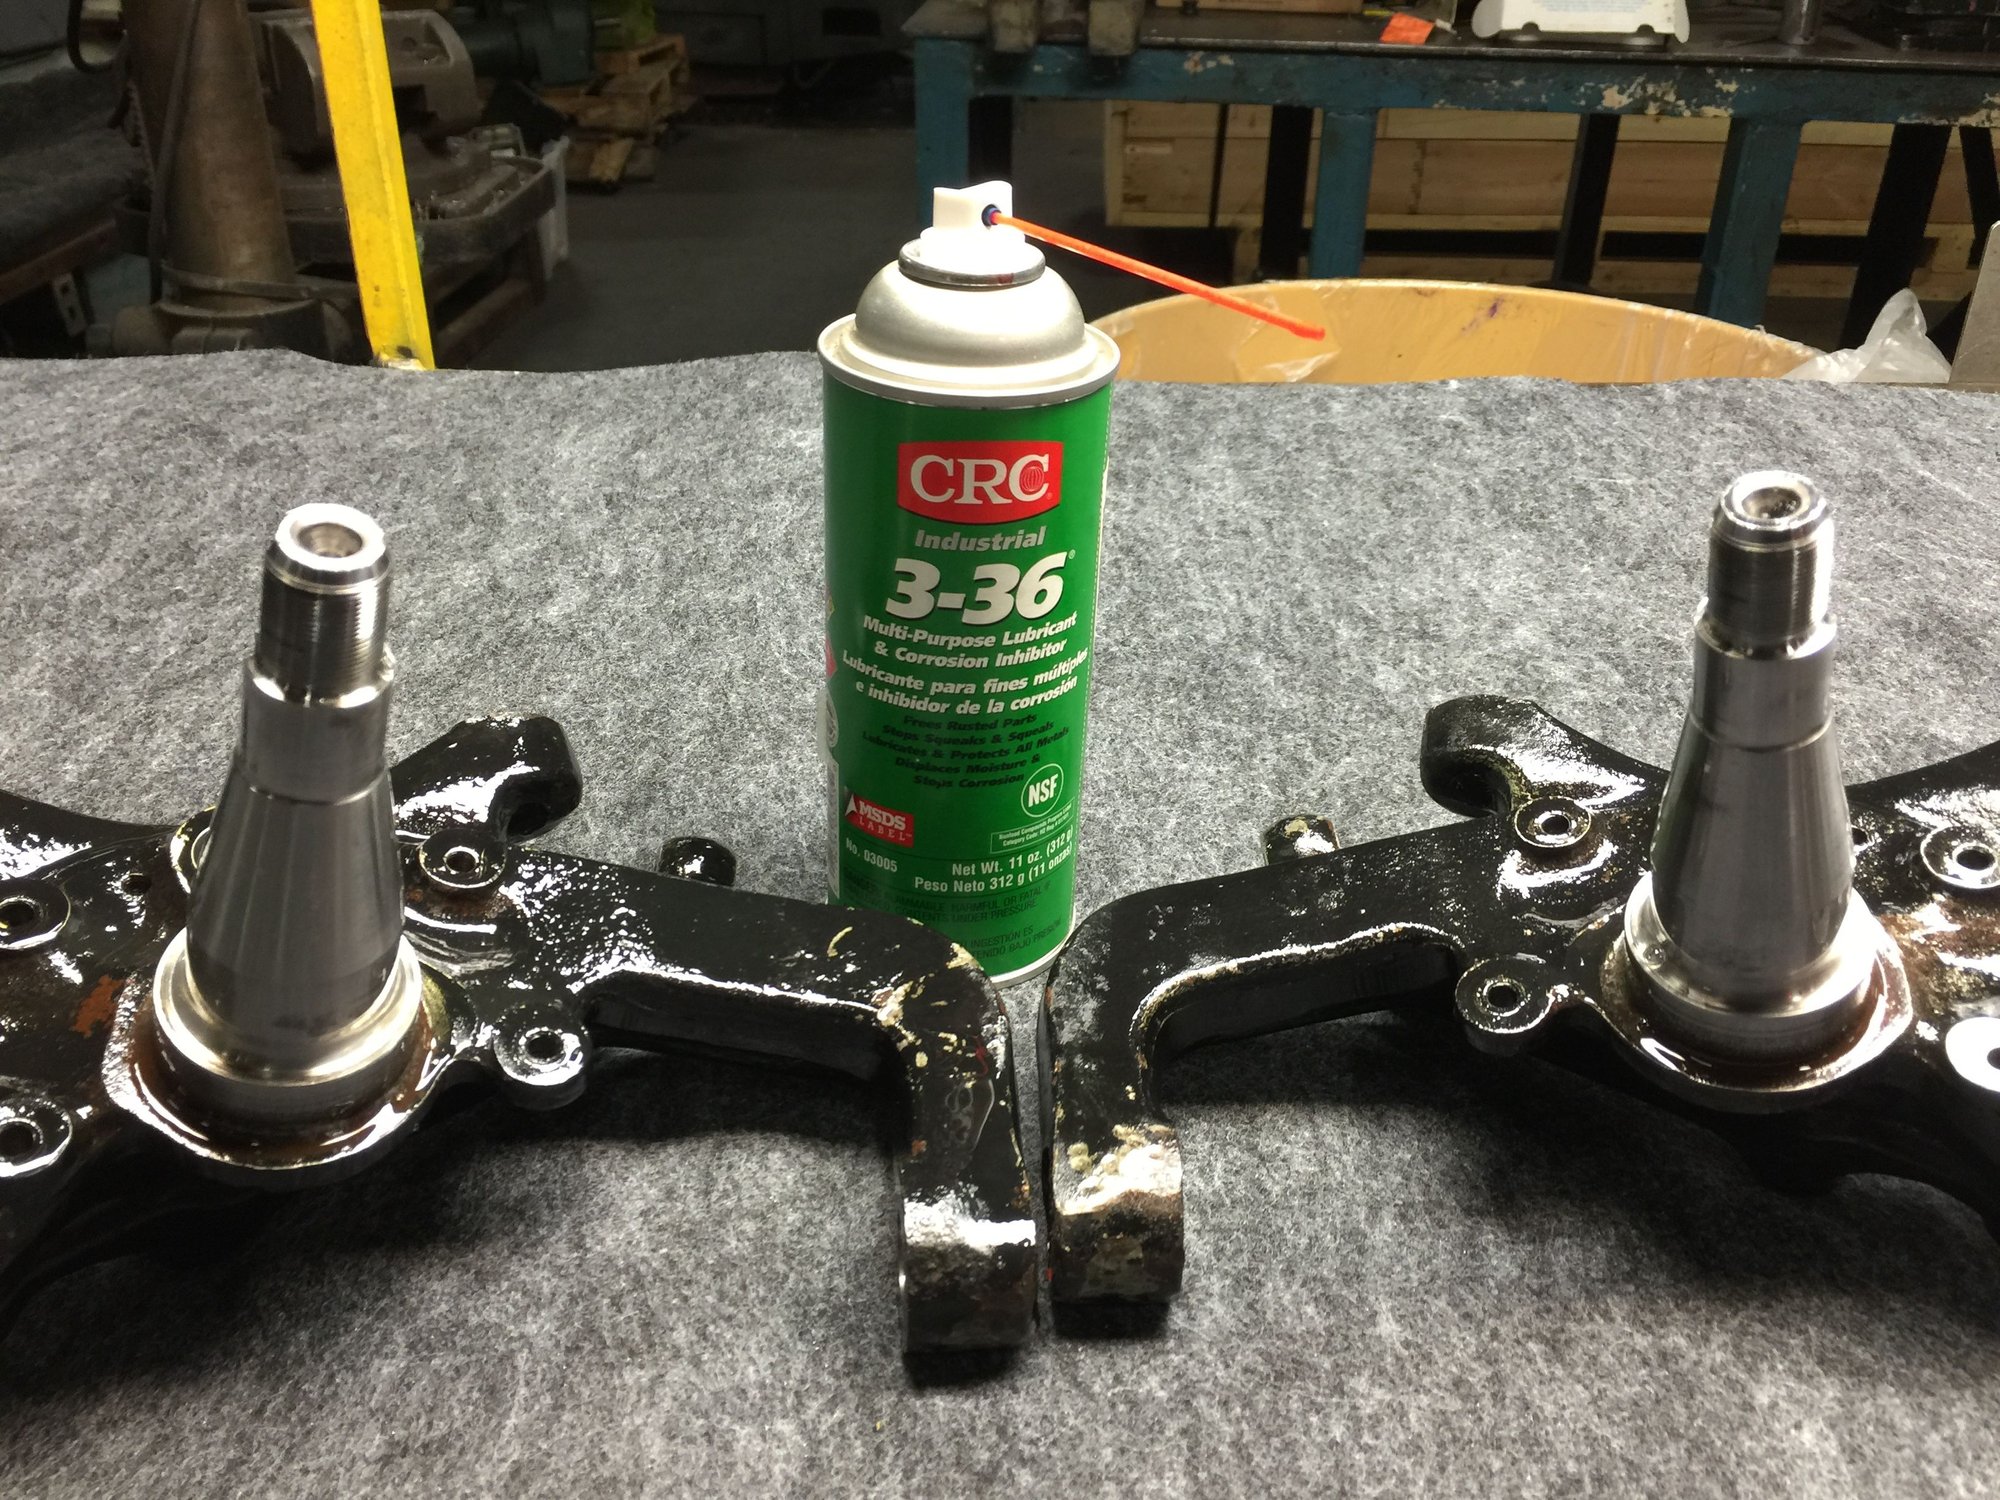
I was able to finish cleaning up the steering spindles tonight. They have been scrubbed with mineral spirits and a tooth brush. I have cleaned the tapered joint holes and ABS sensor holes with red scotchbrite and contact cleaner. I also used red scotchbrite to clean most of the rust from the rear of the sealing surface for the hub seal. The rust was clogging the 400 grit sandpaper.
As per WallyP's instructions, I worked the sealing surfaces in approximately a 25 degree angle with 400 grit sandpaper. After a thorough rinse with contact cleaner, all machined surfaces and holes were sprayed with corrosion protectant. I will clean the protectant off just prior to reassembly.
Yes, I know the spindles are ugly. However, they are functional. That matters to me.
I finally got a chance to do some baking soda blasting on the calipers last night!
I covered the pistons with two layers of duct tape to protect the seals on 1 front and 1 rear caliper. I spot blasted the corrosion in the corners of the calipers. They cleaned up well down to clean aluminum. I may hit them again just to be sure. I had to quit a little earlier than expected because I made an unholy mess in the Tool & Die washbay.
I will set up with better ventilation and try again later.
I also blasted the caliper spring plates. This is after I cleaned them with the green roloc disc. For the other 2 caliper's spring plates, I may skip the roloc and just baking soda blast them.
We shall see...
Seth K. Pyle
Nice photos Seth.
I'm also in middle of caliper refurb. I think level of corrosion pitting on mine is not as much as yours, but I'm also planning to use aircraft anti-corrosion paste on the surfaces behind the new plates.
Your caliper plates have cleaned up beautifully. Did they need straightening after removal given the corrosion build up pushing them out? I bent all of mine using drastic techniques to get the old plate machine screws out (grinding or chiselling heads then punching plates off what remained). What was your method for getting the screws out? It must have worked very well to preserve the plates? In the end I found welding a nut on the shafts was a great way of removing the old screws, and I think this could have worked with the screws intact and dropping a large nut on the heads.
Sorry it took so long for me to reply. Work has been a pain in the kazooie. I have read and am following your caliper thread. Mainly to shamelessly steal your ideas.
What specifically do you mean by 'aircraft anti-corrosion paste'? Am I to assume this is something different/better than conventional antiseize? My plan has been to seal the corrosion with high temperature RTV. However, I am open to suggestion...
None of the spring plates seem badly bent. I may have to gently tweak one or two a bit. The plates were noticably pushed out by the corrosion while still installed in the calipers. This probably explains why my brake pad backing plates look like they were installed with a hammer.
However, they straightened out by themselves when removed.
My method for spring plate screw removal required a strong heat gun, patience, and violence with a hammer and chisel. Please refer to posts #29 and #35 for photos and description of my method.
I am keeping your idea of welding a nut to the screw in mind, as I still have two more calipers to do.
A gentle reminder that most common RTV compounds use acetic acid as the curing agent. Might not be a big deal, but... I'd look for an electrically-safe RTV if you really want to go down that path.
Most of the protective coatings, including the POR-15 that Wally recommends, will be much better for the duty than any consumer RTV. Even plain old Rust-Oleum is better. There are some handy DupliColor high-temp caliper paints, including prep and primer products, that will make the calipers look a lot better.
re: your comment about future disassembly: Be aware that the mating surfaces are bare aluminum. Unless you plan something interesting that requires straight-on access to the bores, for instance, you'll do as well not to spend time splitting the calipers. I took mine apart to replace the bolts, but that's really more easily done one at a time especially if your painting includes the bolts. The original assembly was done finished then bolts, so the bolts aren't painted. There are good reasons to paint the assembly, mostly to seal the ends of the bolts and stop corrosion in the bolt threads where water and road salt accelerated corrosion around the bolts.
Rather than RTV, I may take WallyP's suggestion and get the POR-15 kit and just coat the corroded areas.
What I meant by future disassembly was remove the calipers and disassemble the pistons and seals for a proper rebuild. I would like to avoid splitting the caliper halves if at all possible.
Good point about corrosion in the caliper half bolt threads.
Due to various issues, I have been away from the Red Witch project for a bit.
Last night, I was able to get a bit of work done. I disassembled the driver's side front wheel hub and bearings.
On these bearing races, there was noticeable scoring. New bearings and races are in hand, and I will be picking up a toaster oven this week. Other than that, the hub cleaned up nicely.
No photos of this one, as it looks just like the passenger's side hub.
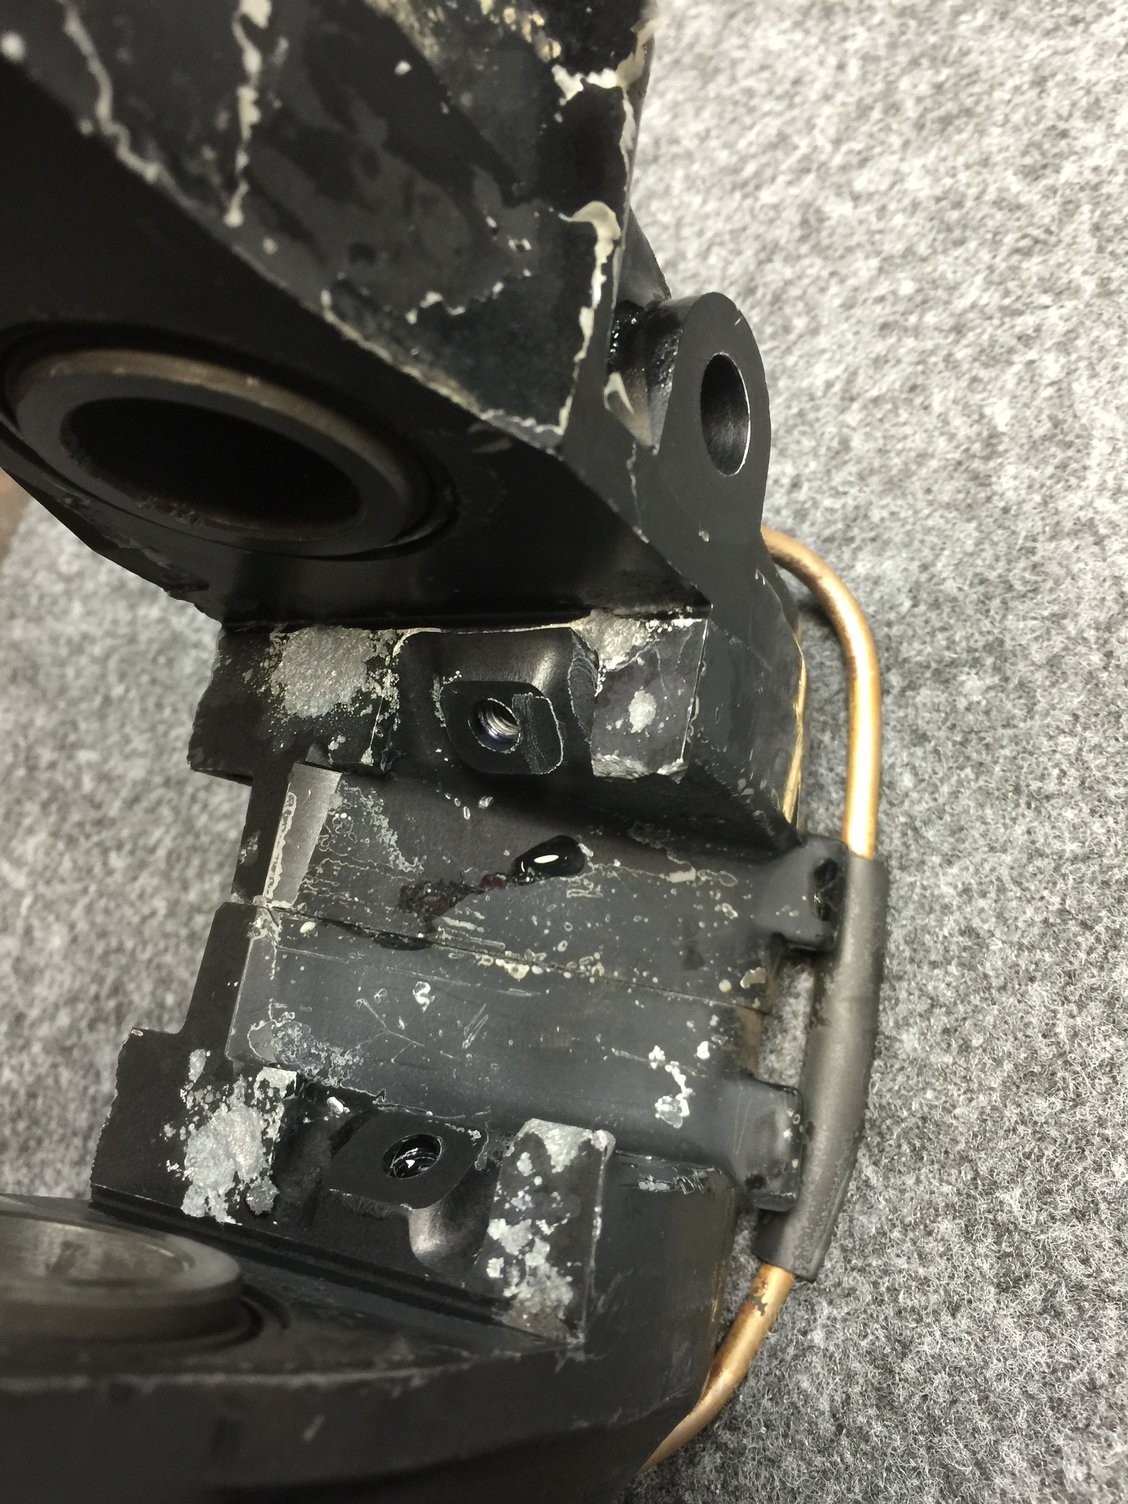
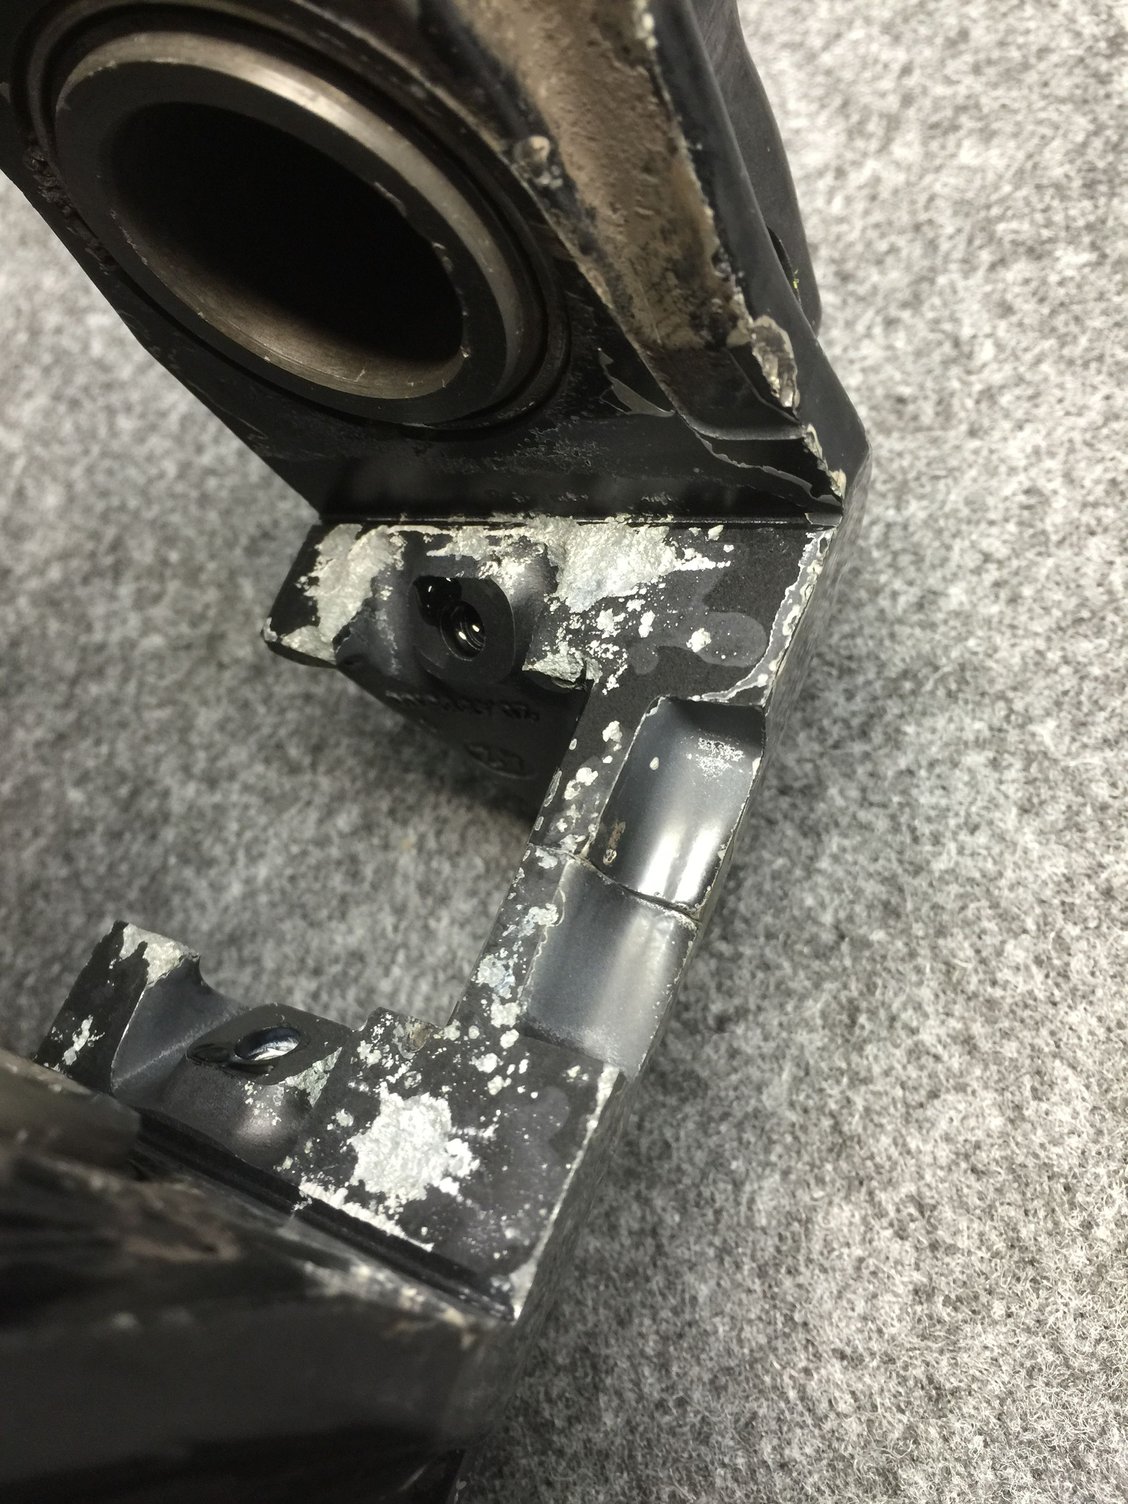
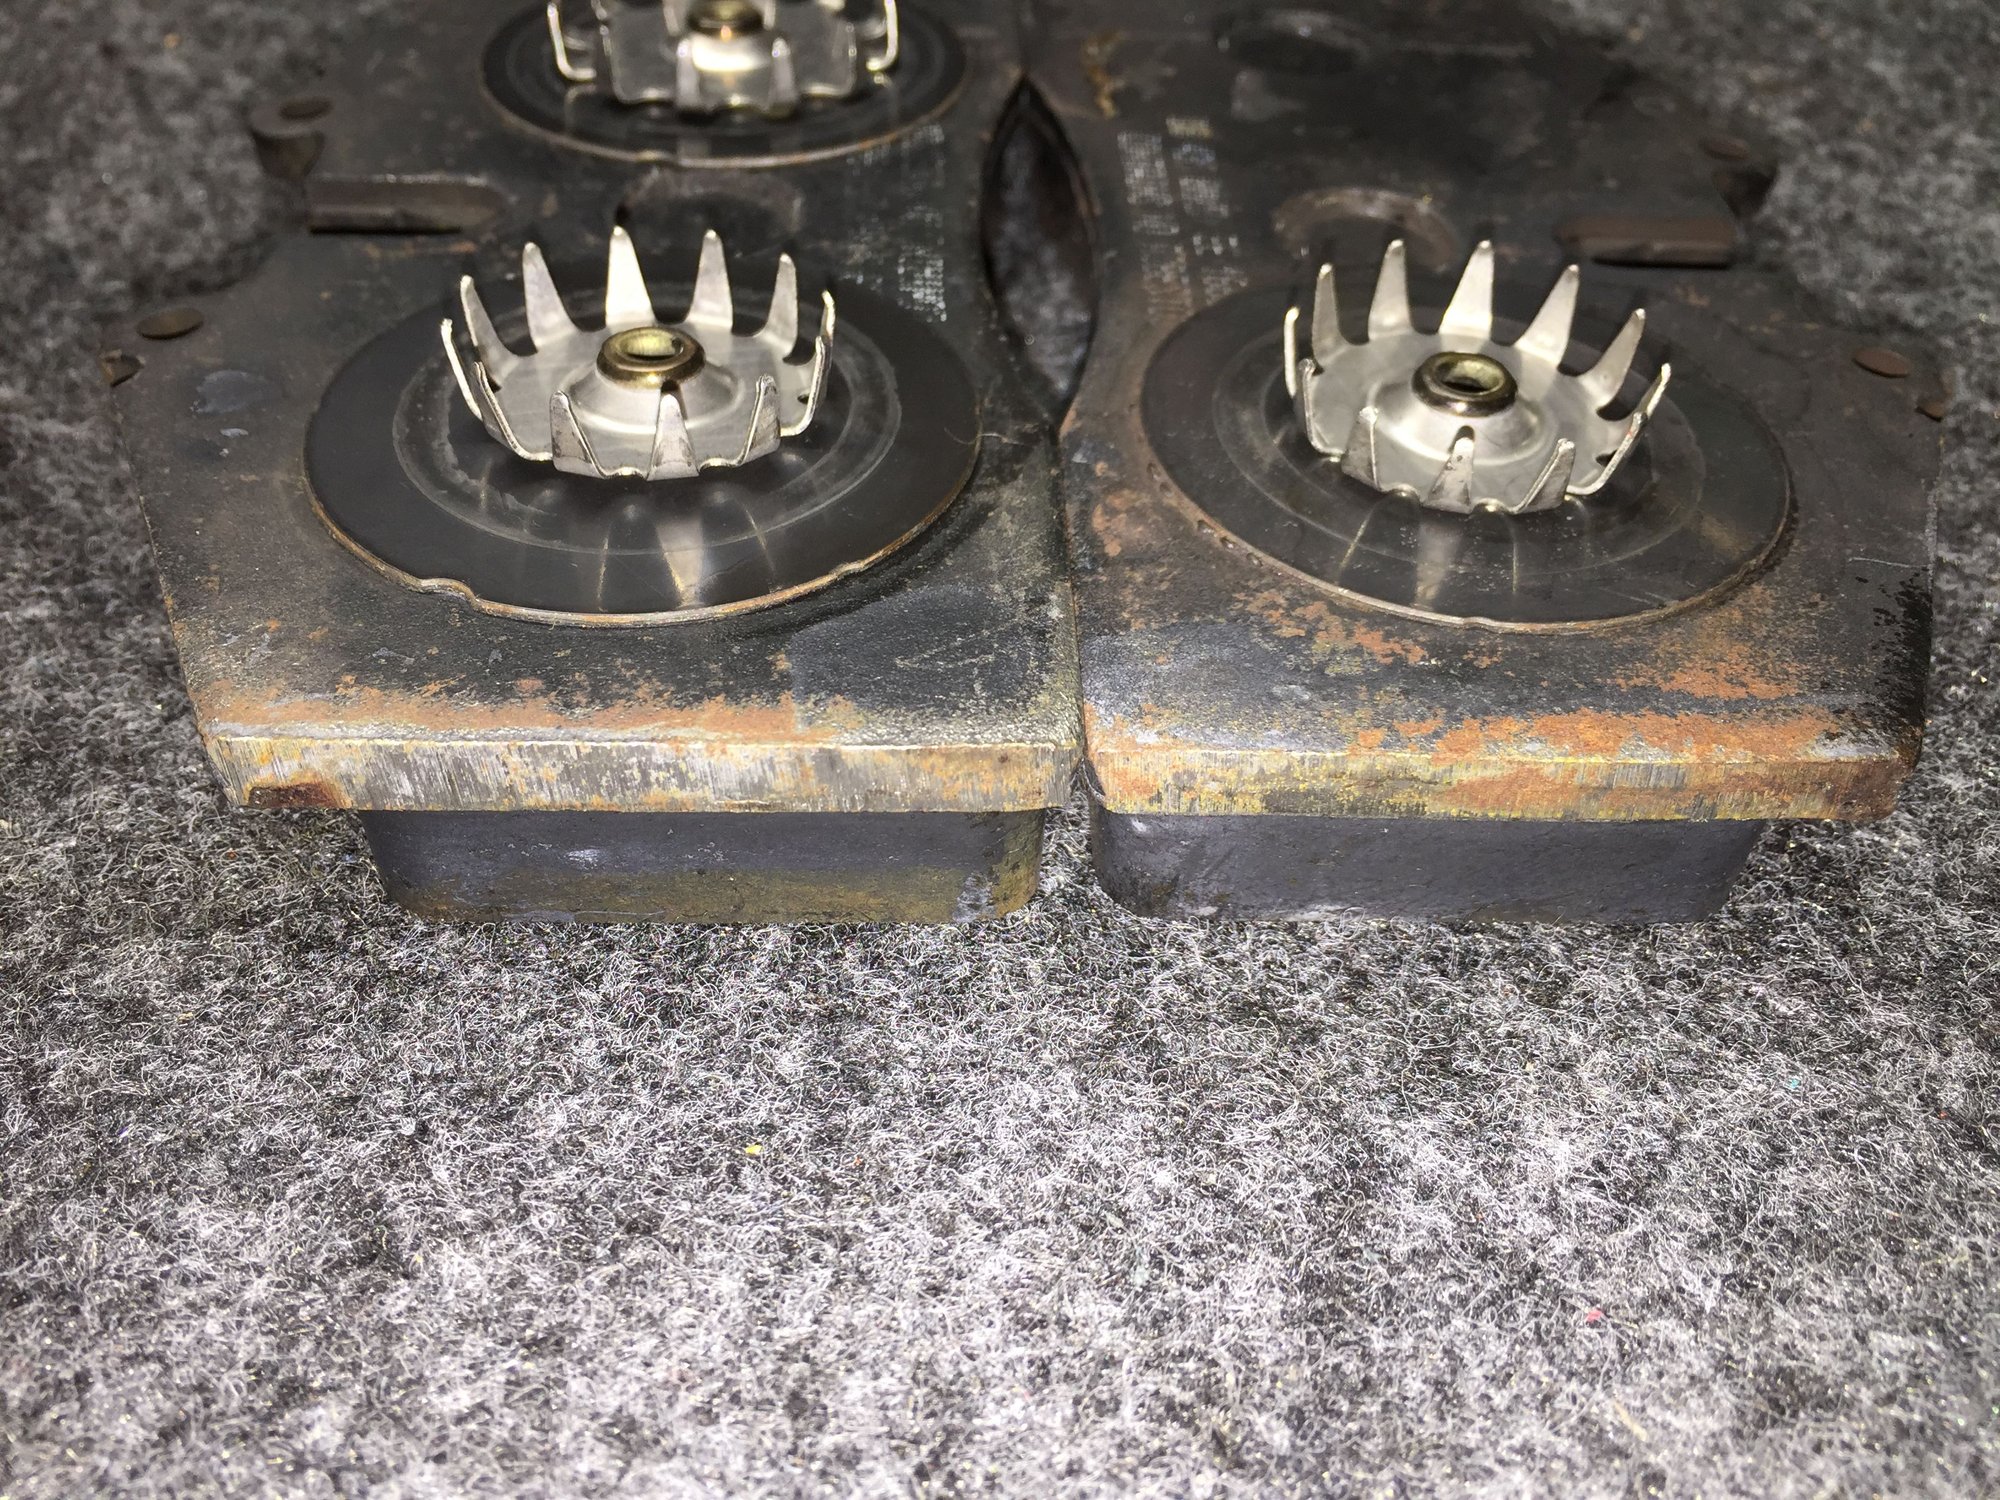
Tonight, I started on the driver's side front brake caliper.
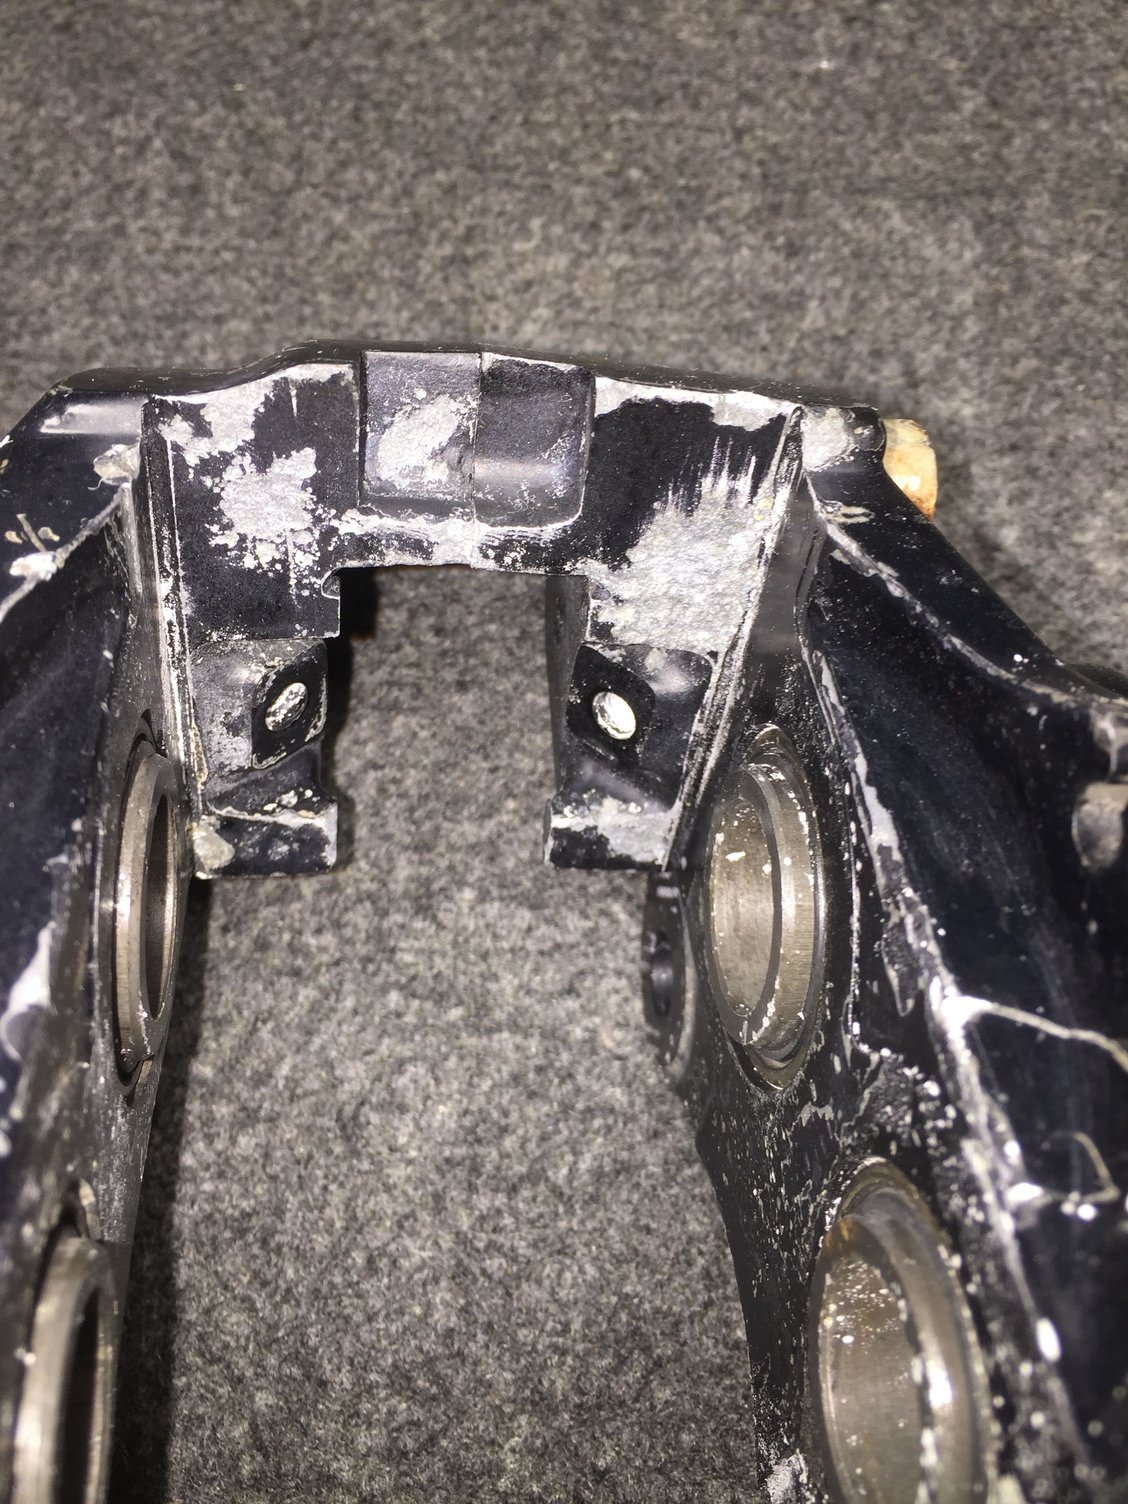
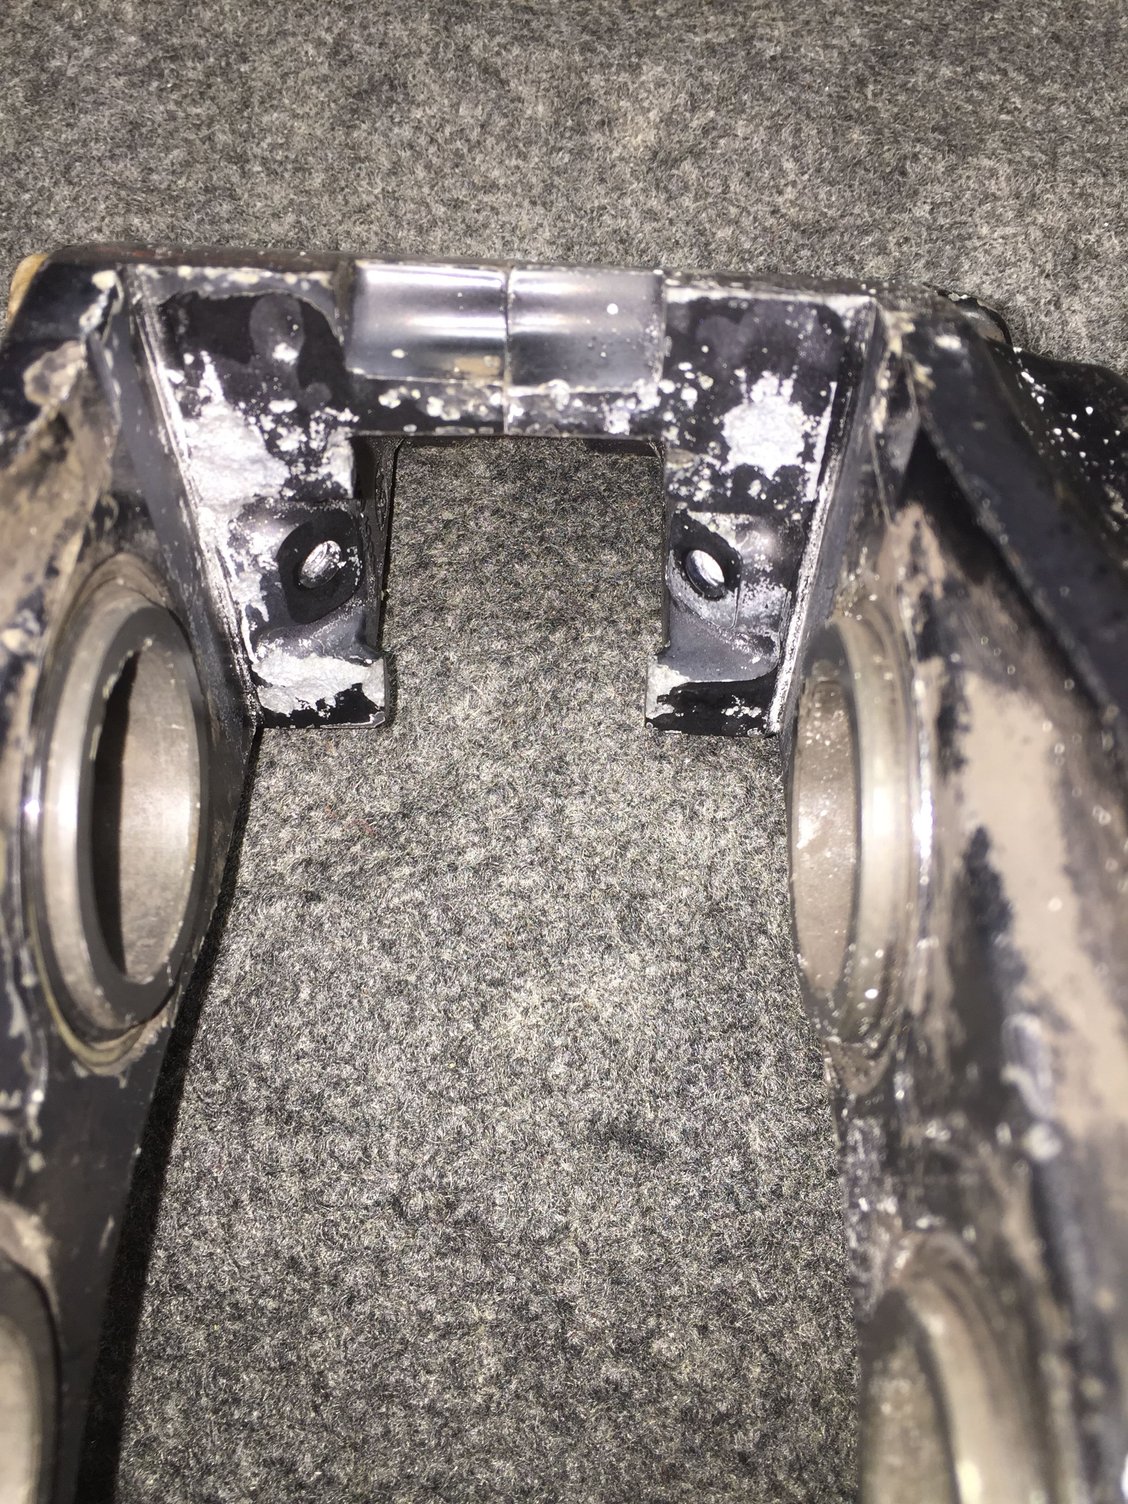
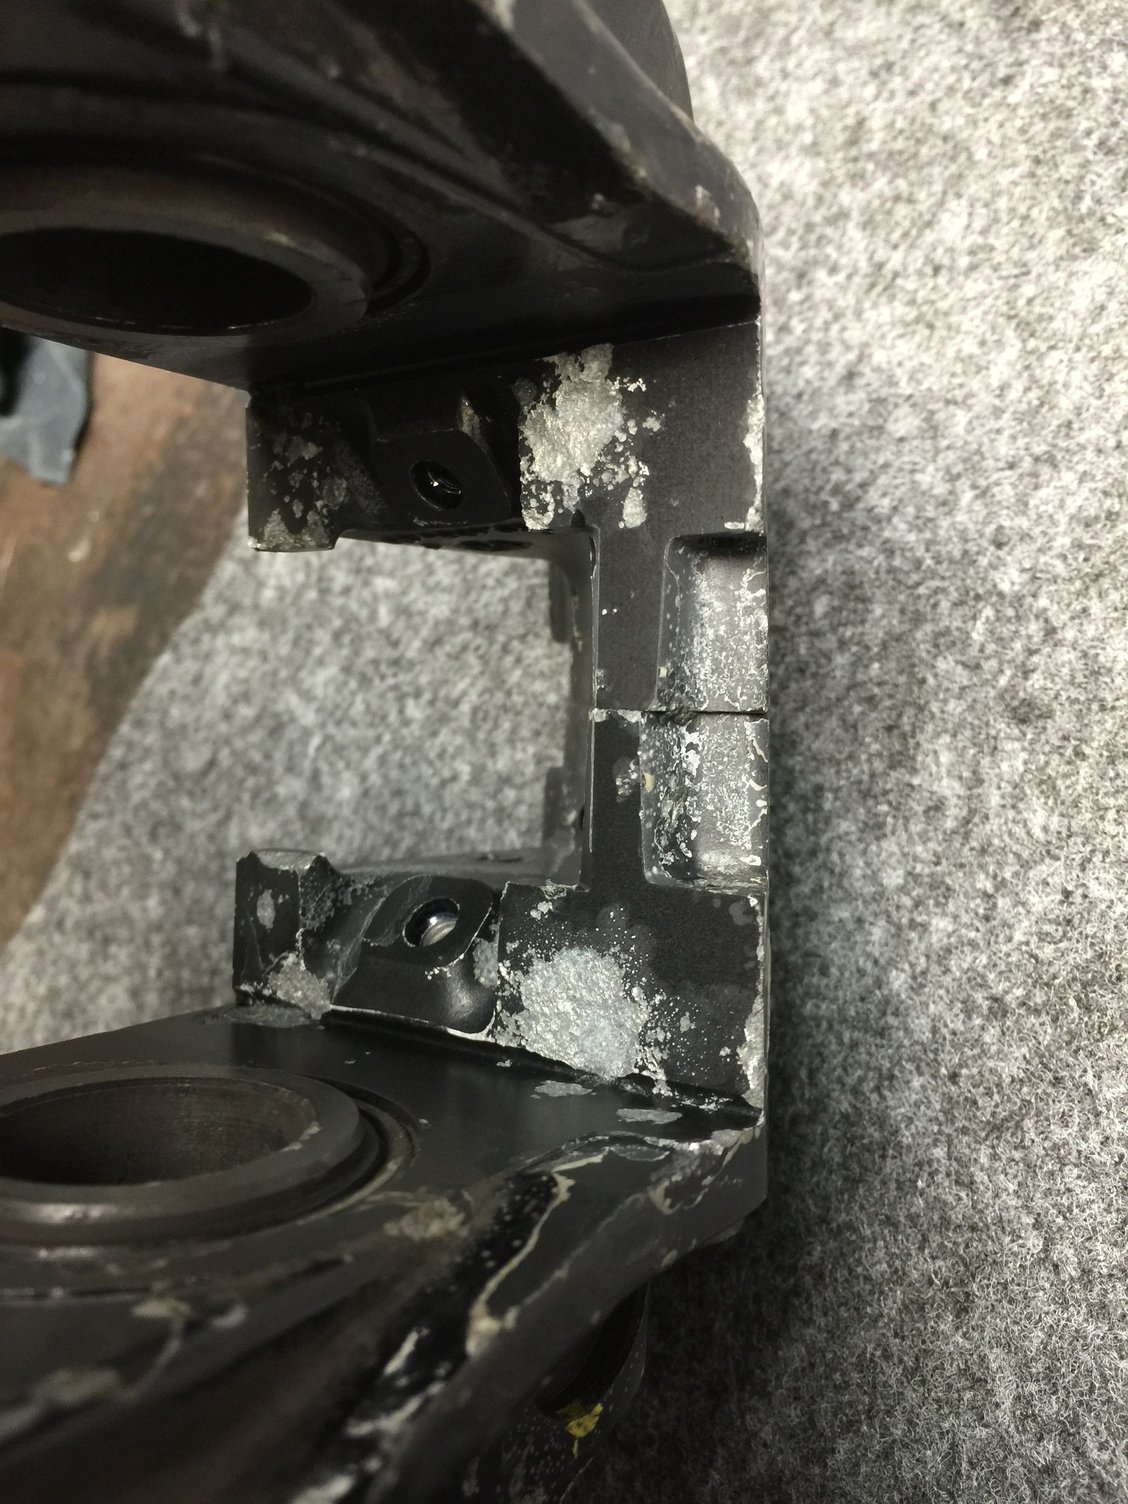
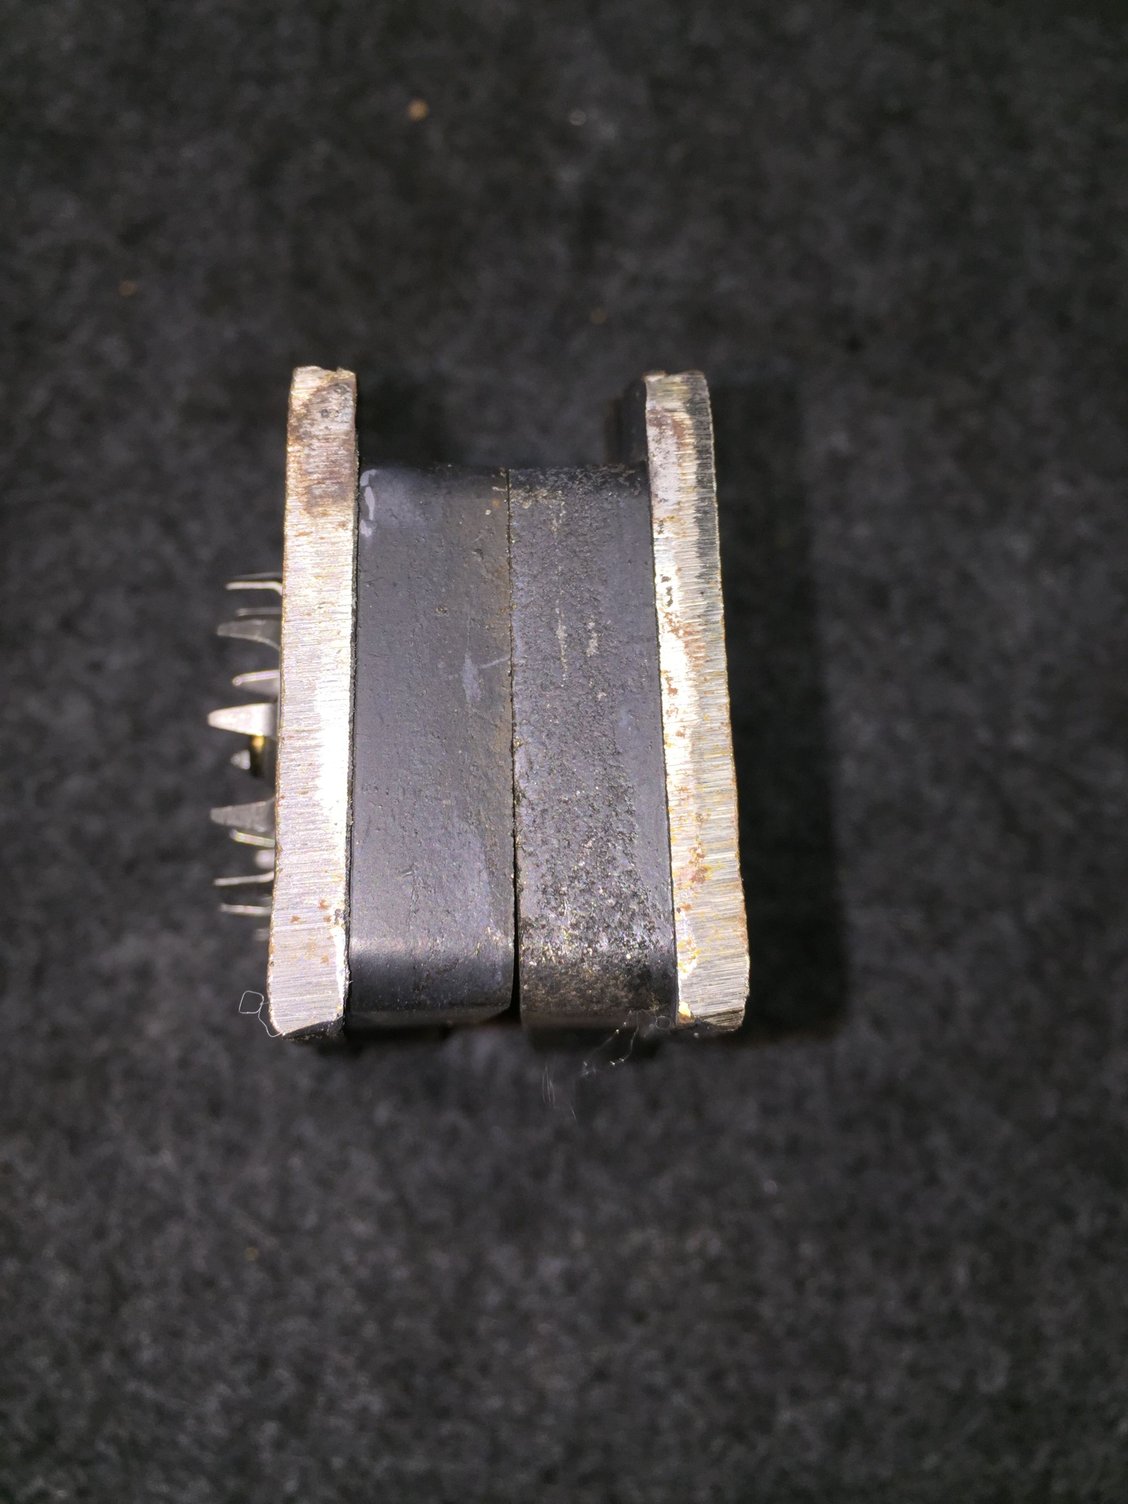
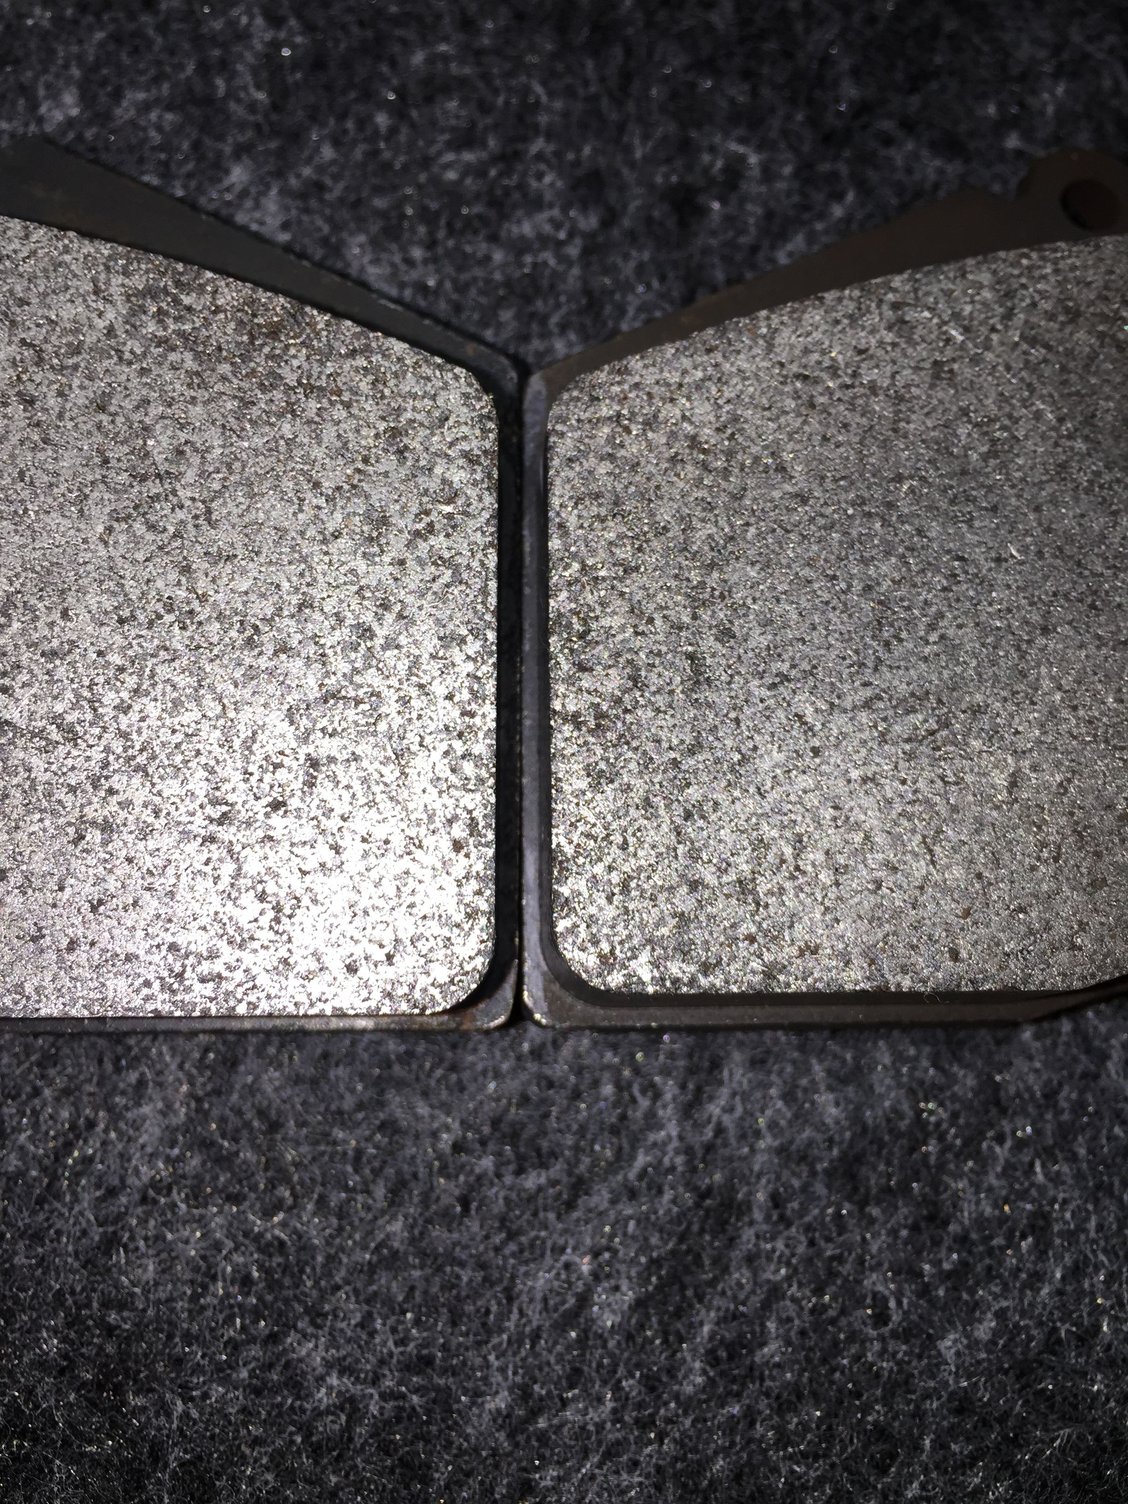
Right off the bat, I think I have a problem. A mechanic sometime in the past has ground the edges of the metal backing plate for both brake pads. I am assuming this was done due to the corrosion behind the spring plates. I am not sure how much material was taken off, but it was more than just a skim.
I will compare these pads to the passenger's side front pads. They were not ground on.
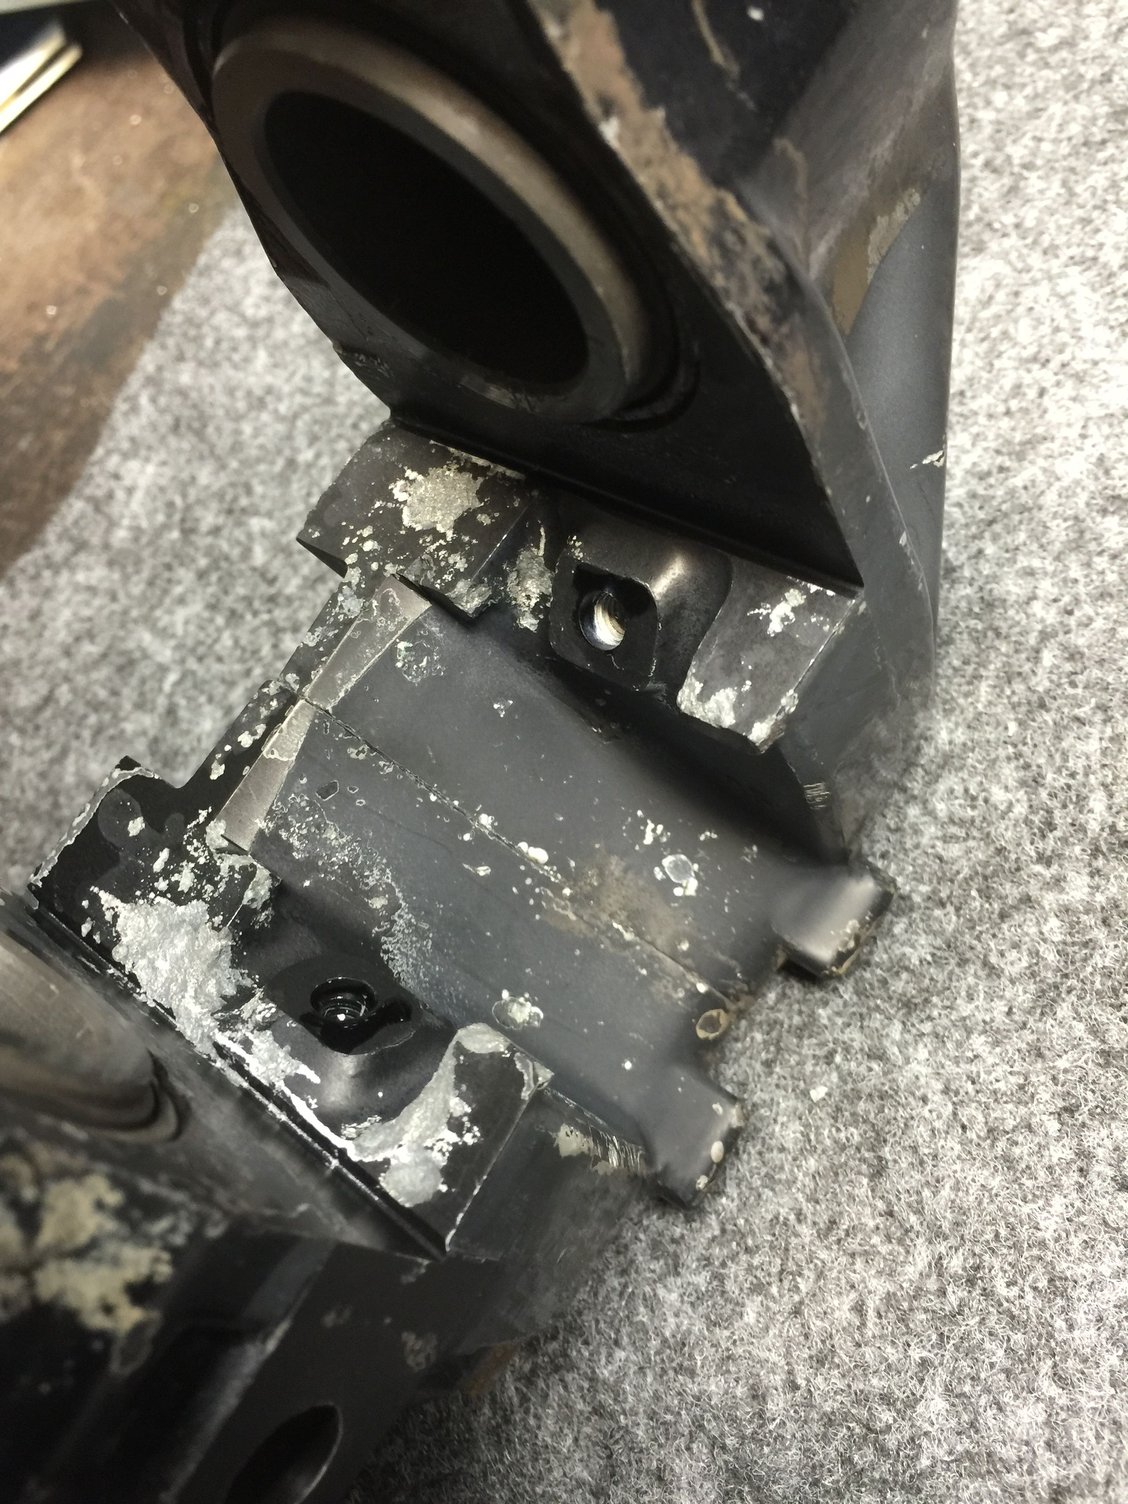
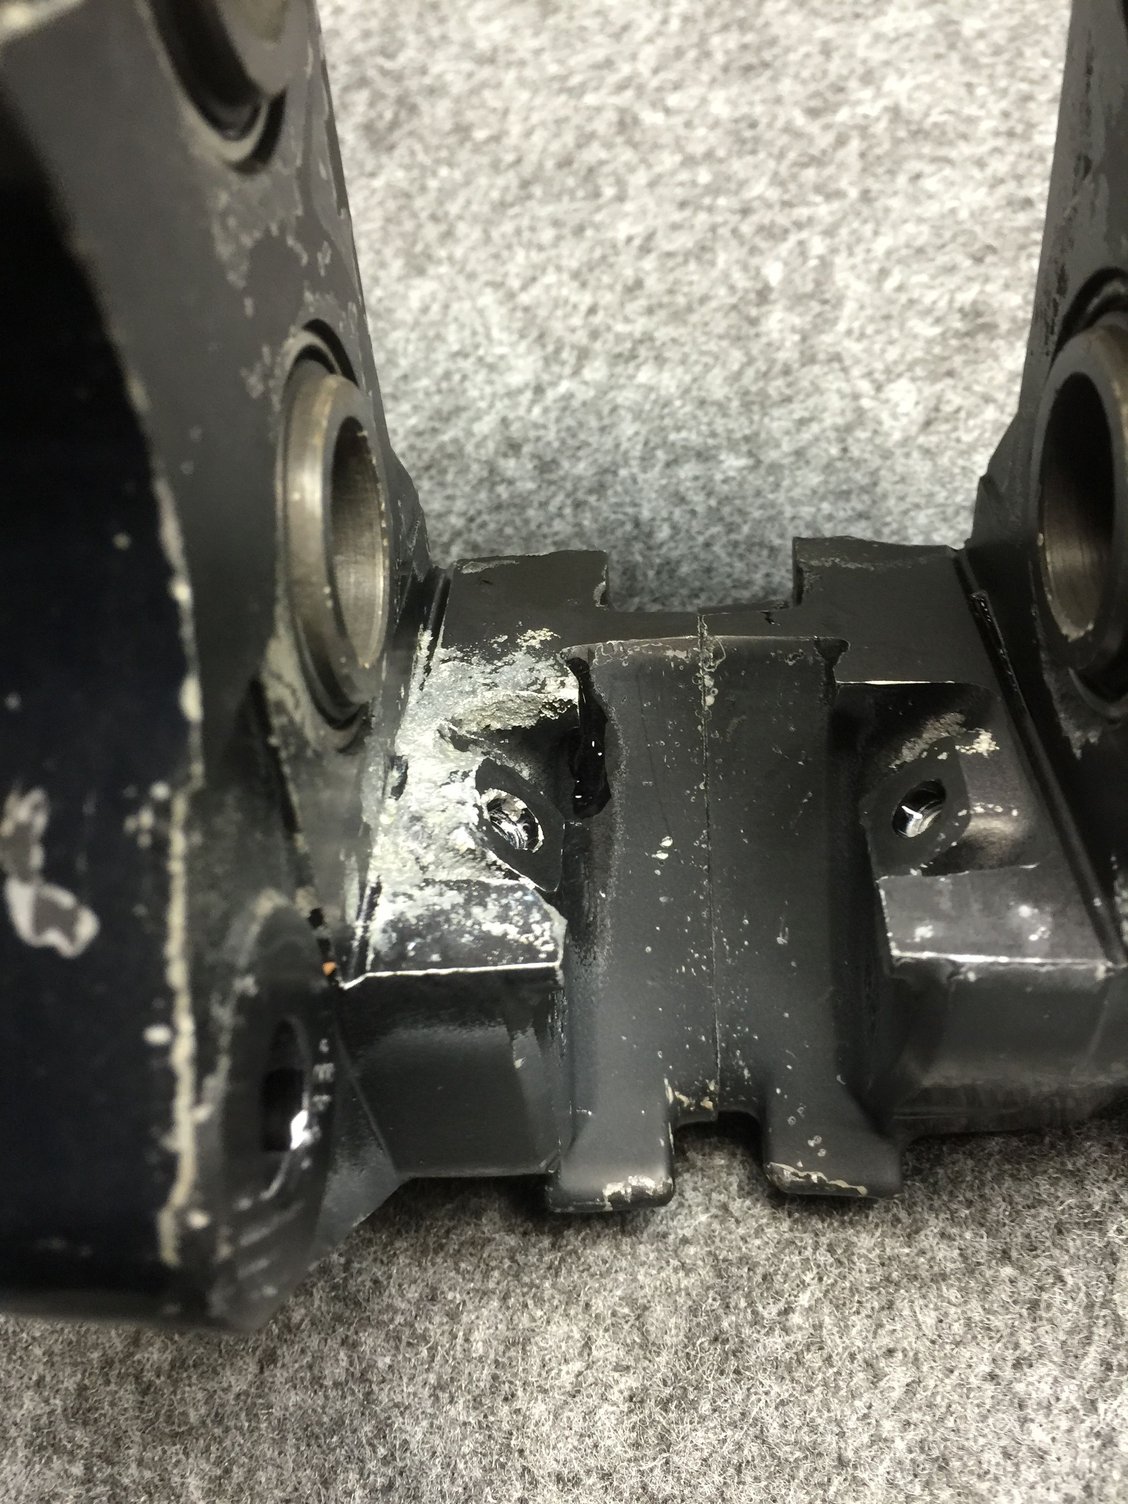
So, here is my problem. I believe these pads will now be too loose in the caliper. I have pulled the spring plates and am cleaning the corrosion out. Once all is reassembled, there will be too much clearance between the pads and the spring plates.
Am I correct in this thinking? Is this really a problem? Do I need to start shopping for a new set of front brake pads?
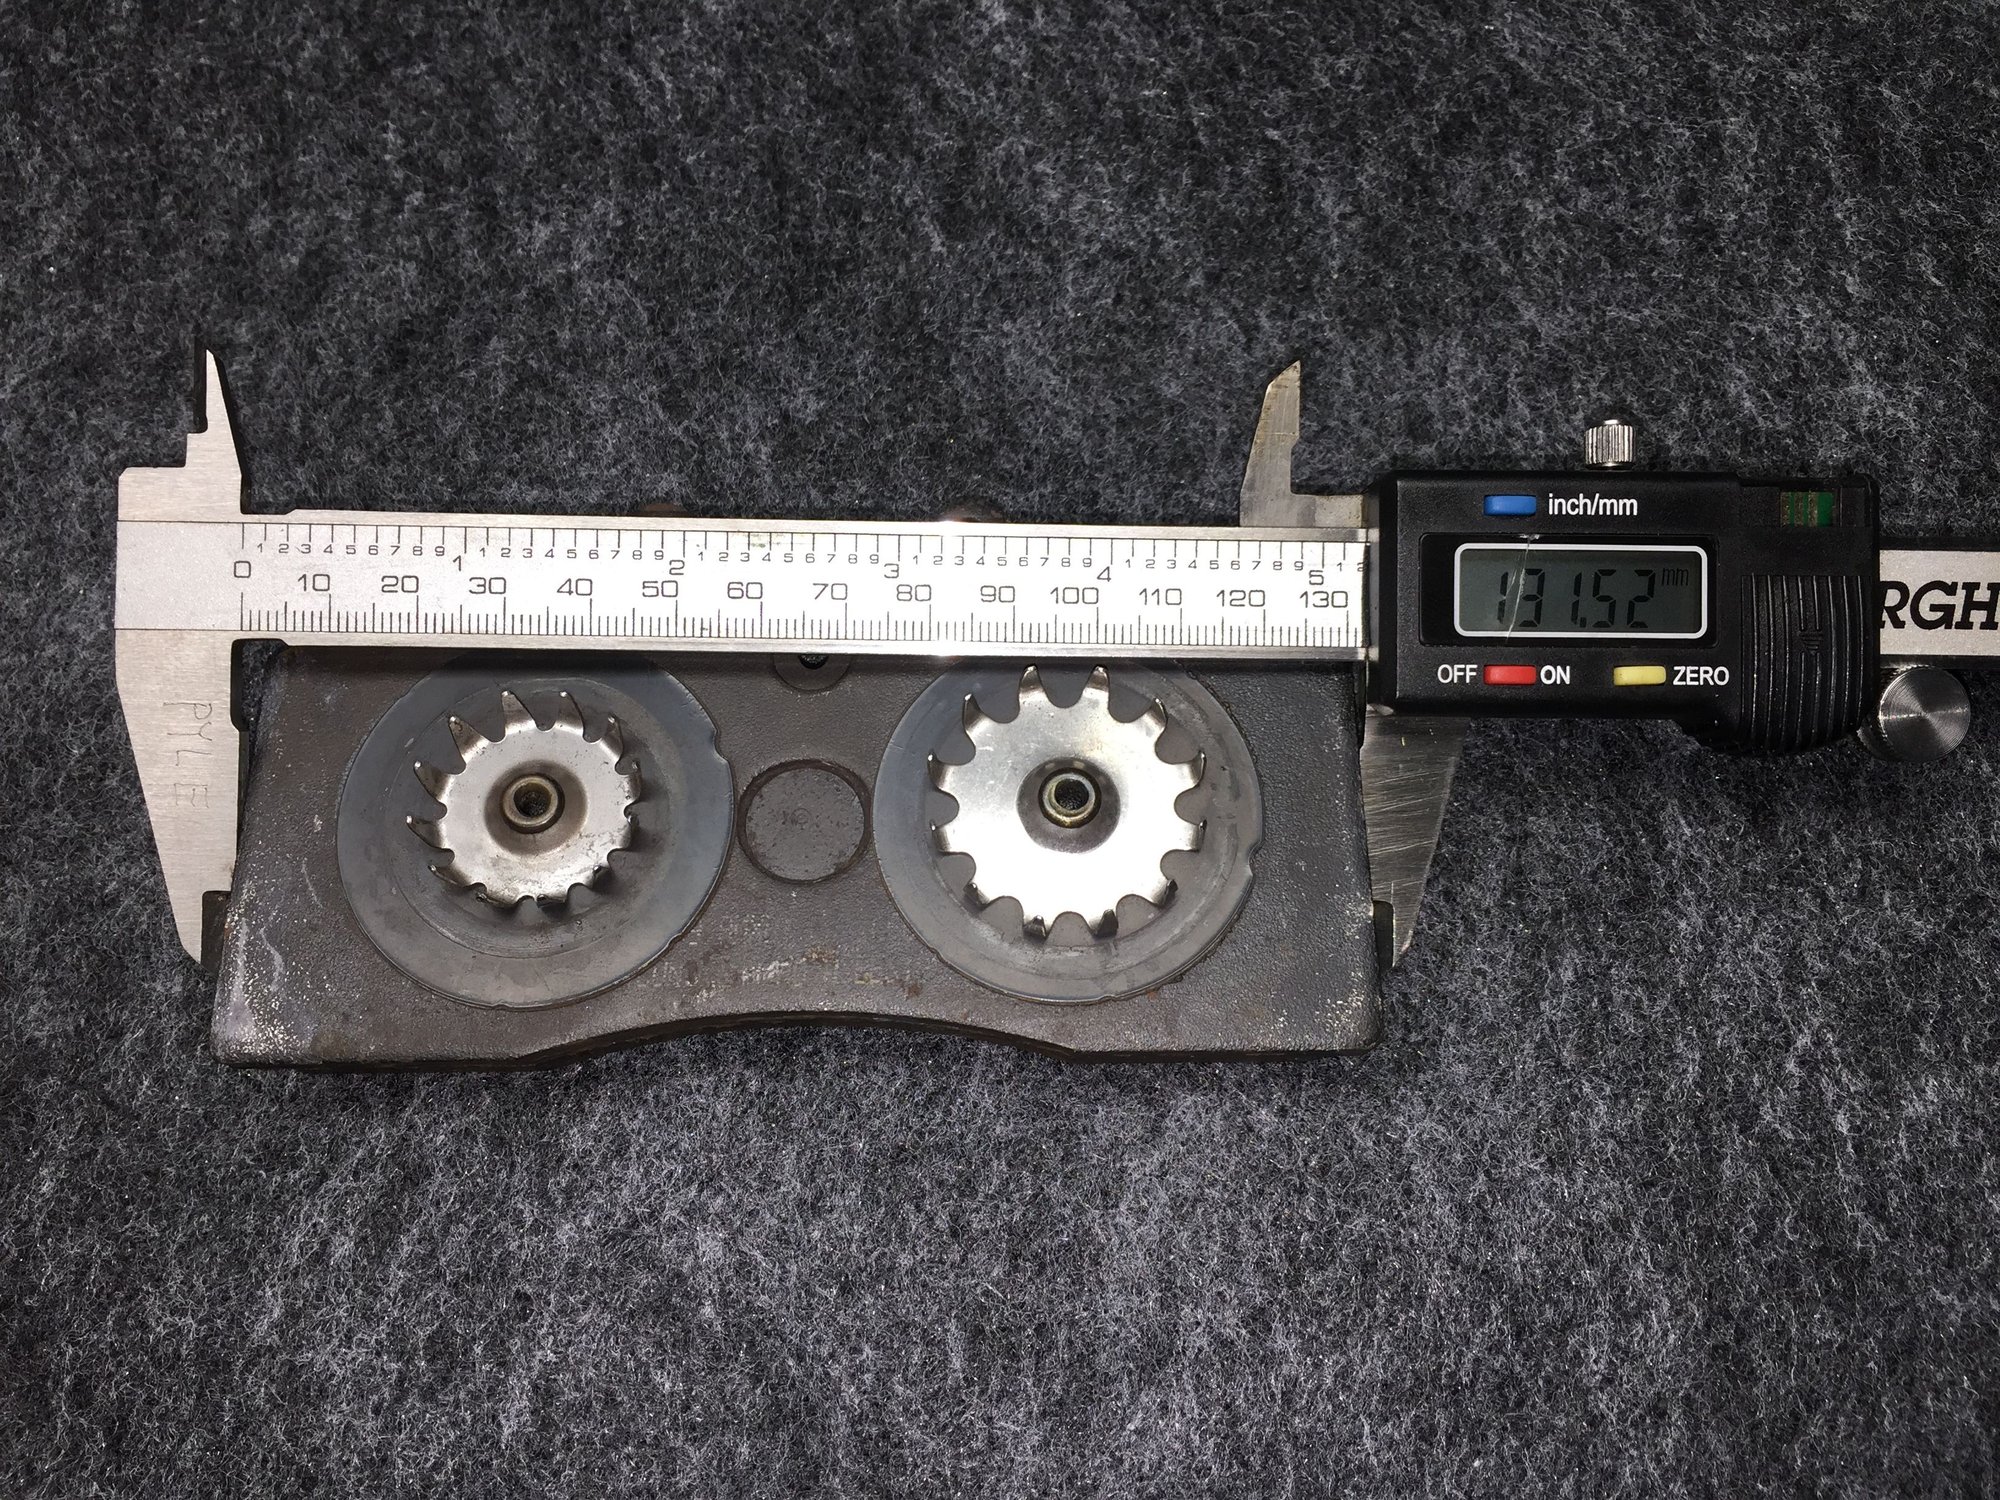
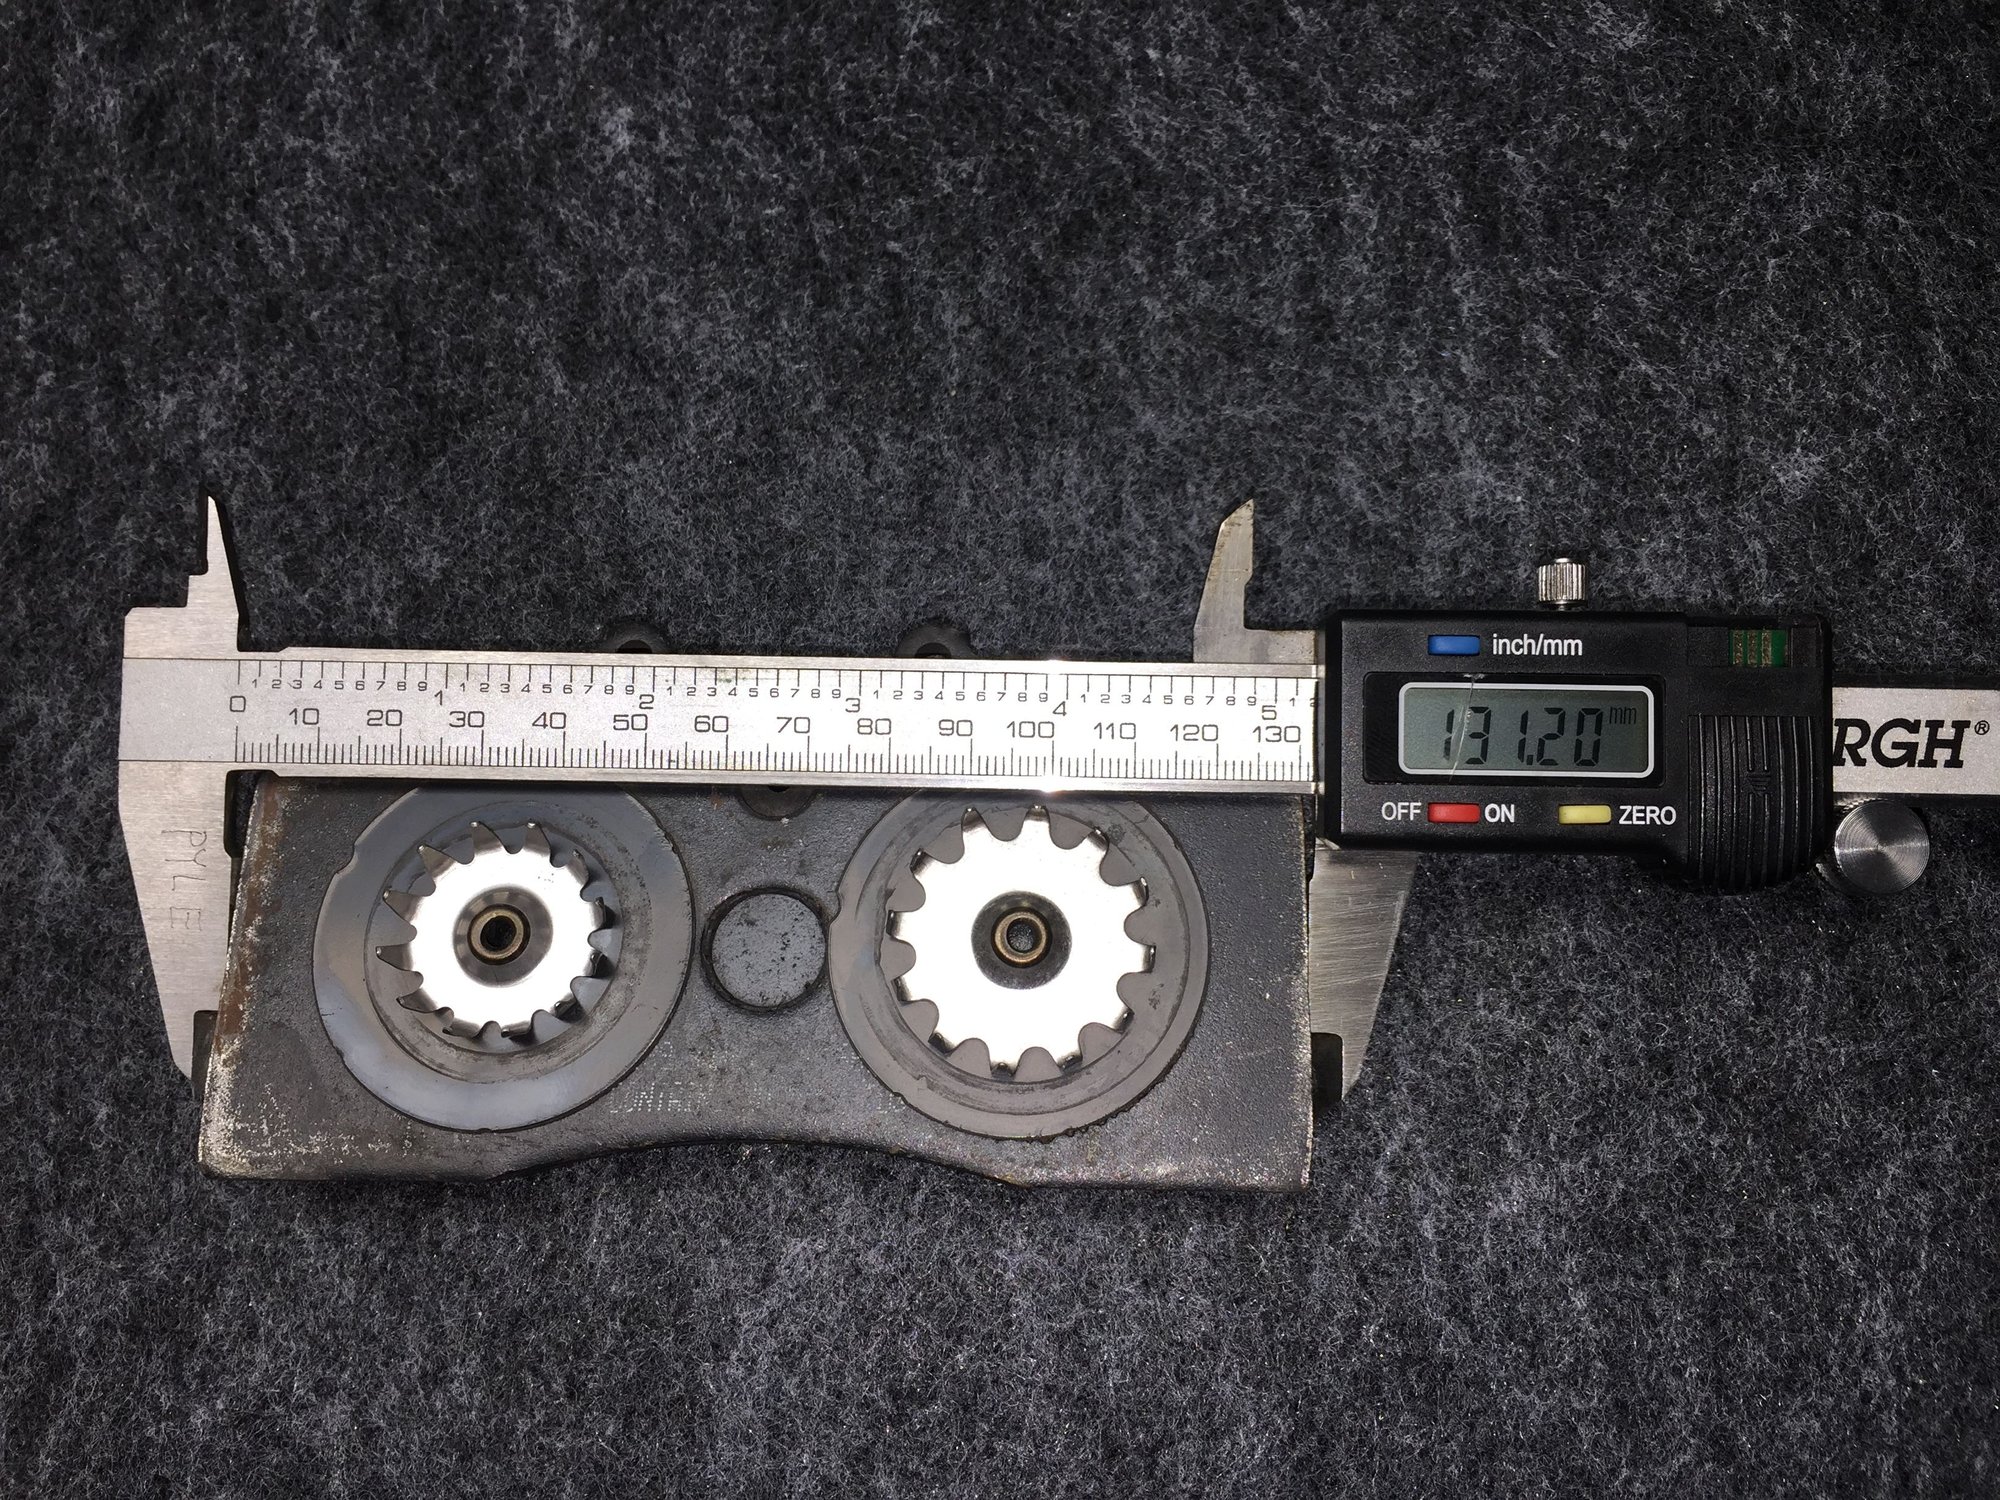
I might be OK on the driver's side pads. I have compared them to the passenger's side pads. The margin between the edge of the friction material seemed about the same. Measuring by calipers showed a 0.32mm difference. I don't think that will be an issue.

 08-21-2016, 09:50 AM