When you click on links to various merchants on this site and make a purchase, this can result in this site earning a commission. Affiliate programs and affiliations include, but are not limited to, the eBay Partner Network.
This info below is 15 years too late to help the original poster, but perhaps it may help someone in the future. I recently removed my lower dash and took the mechanism apart --
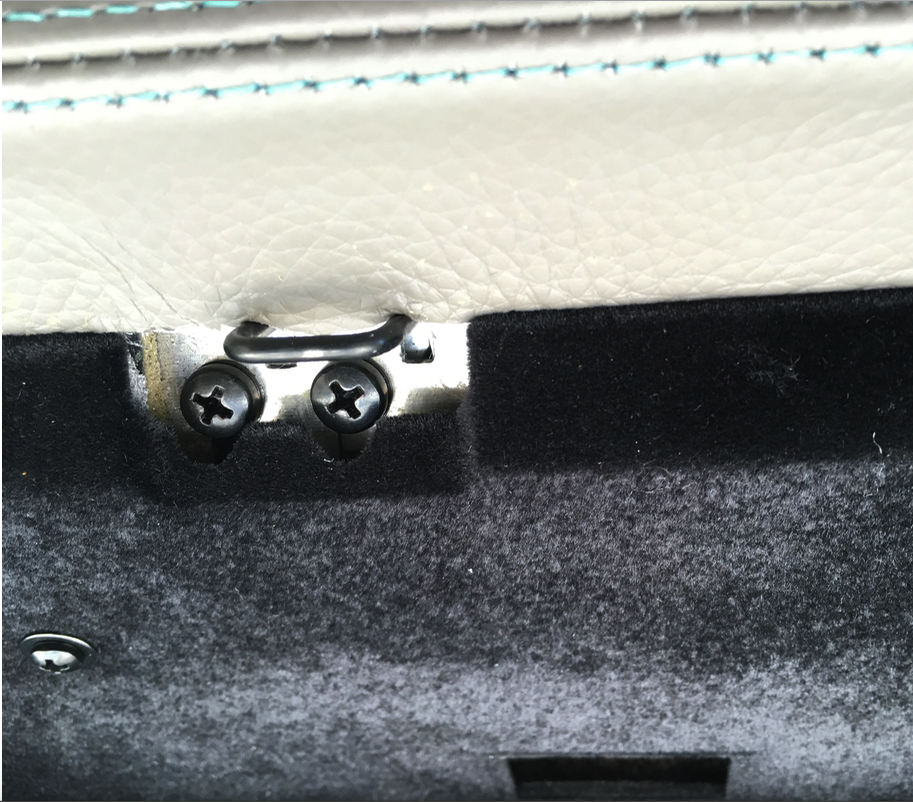
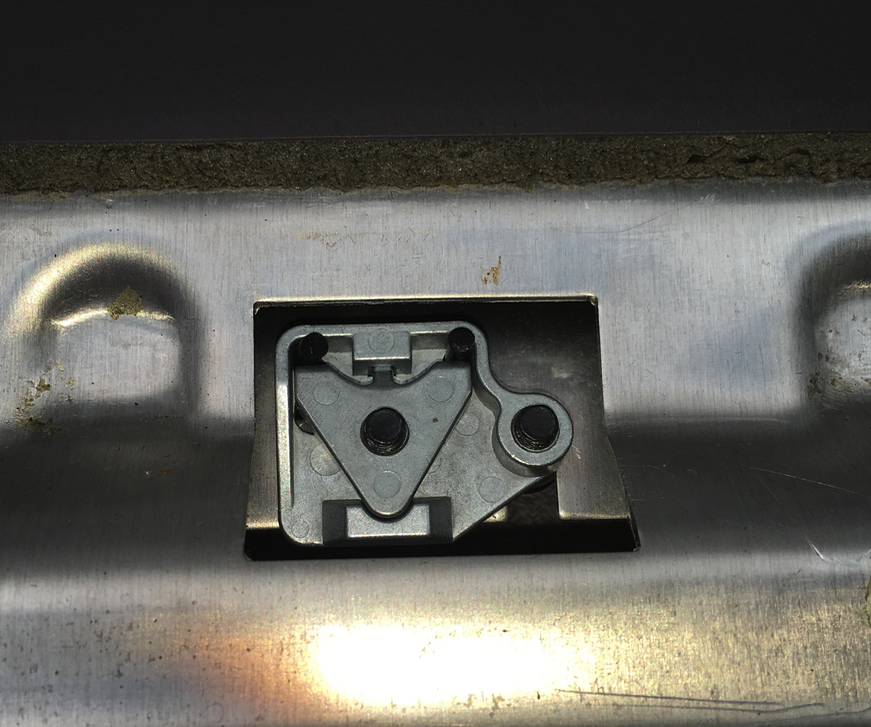
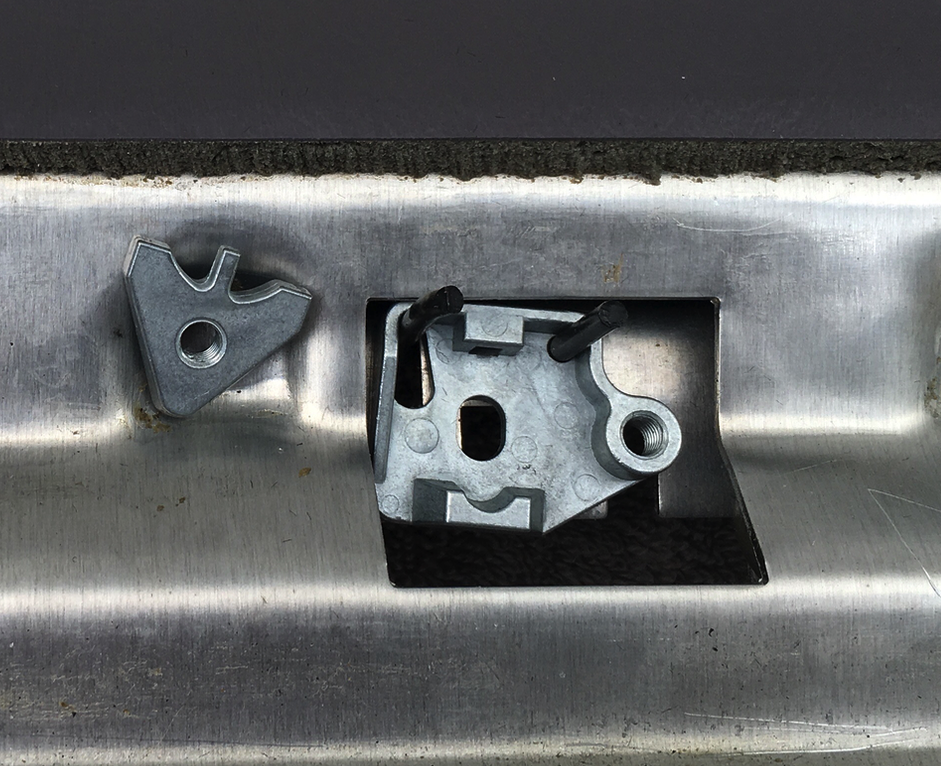
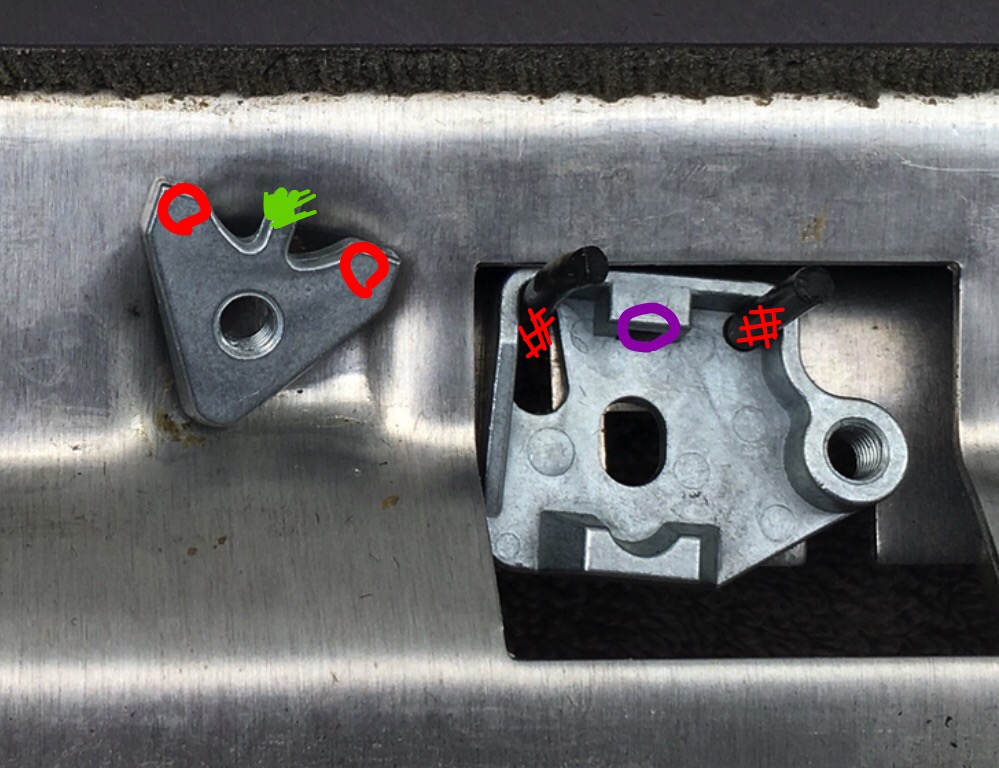
Below you can see a picture of the front side of the latch and a picture of the back side of the latch. The third picture shows the back side of the latch again, but also shows the locking mechanism that holds the black U-latch in place.
The mechanism is, in my uneducated opinion, needlessly complex.
Anyways, if the black U-latch is pulling out, then perhaps the metal triangle piece / mechanism is not aligned properly. Obviously diagnosing this is about 10000x easier if you remove the lower dash first --- which is a PITA because you need to remove not only the radio and the CCU but also the cages into which they slot.
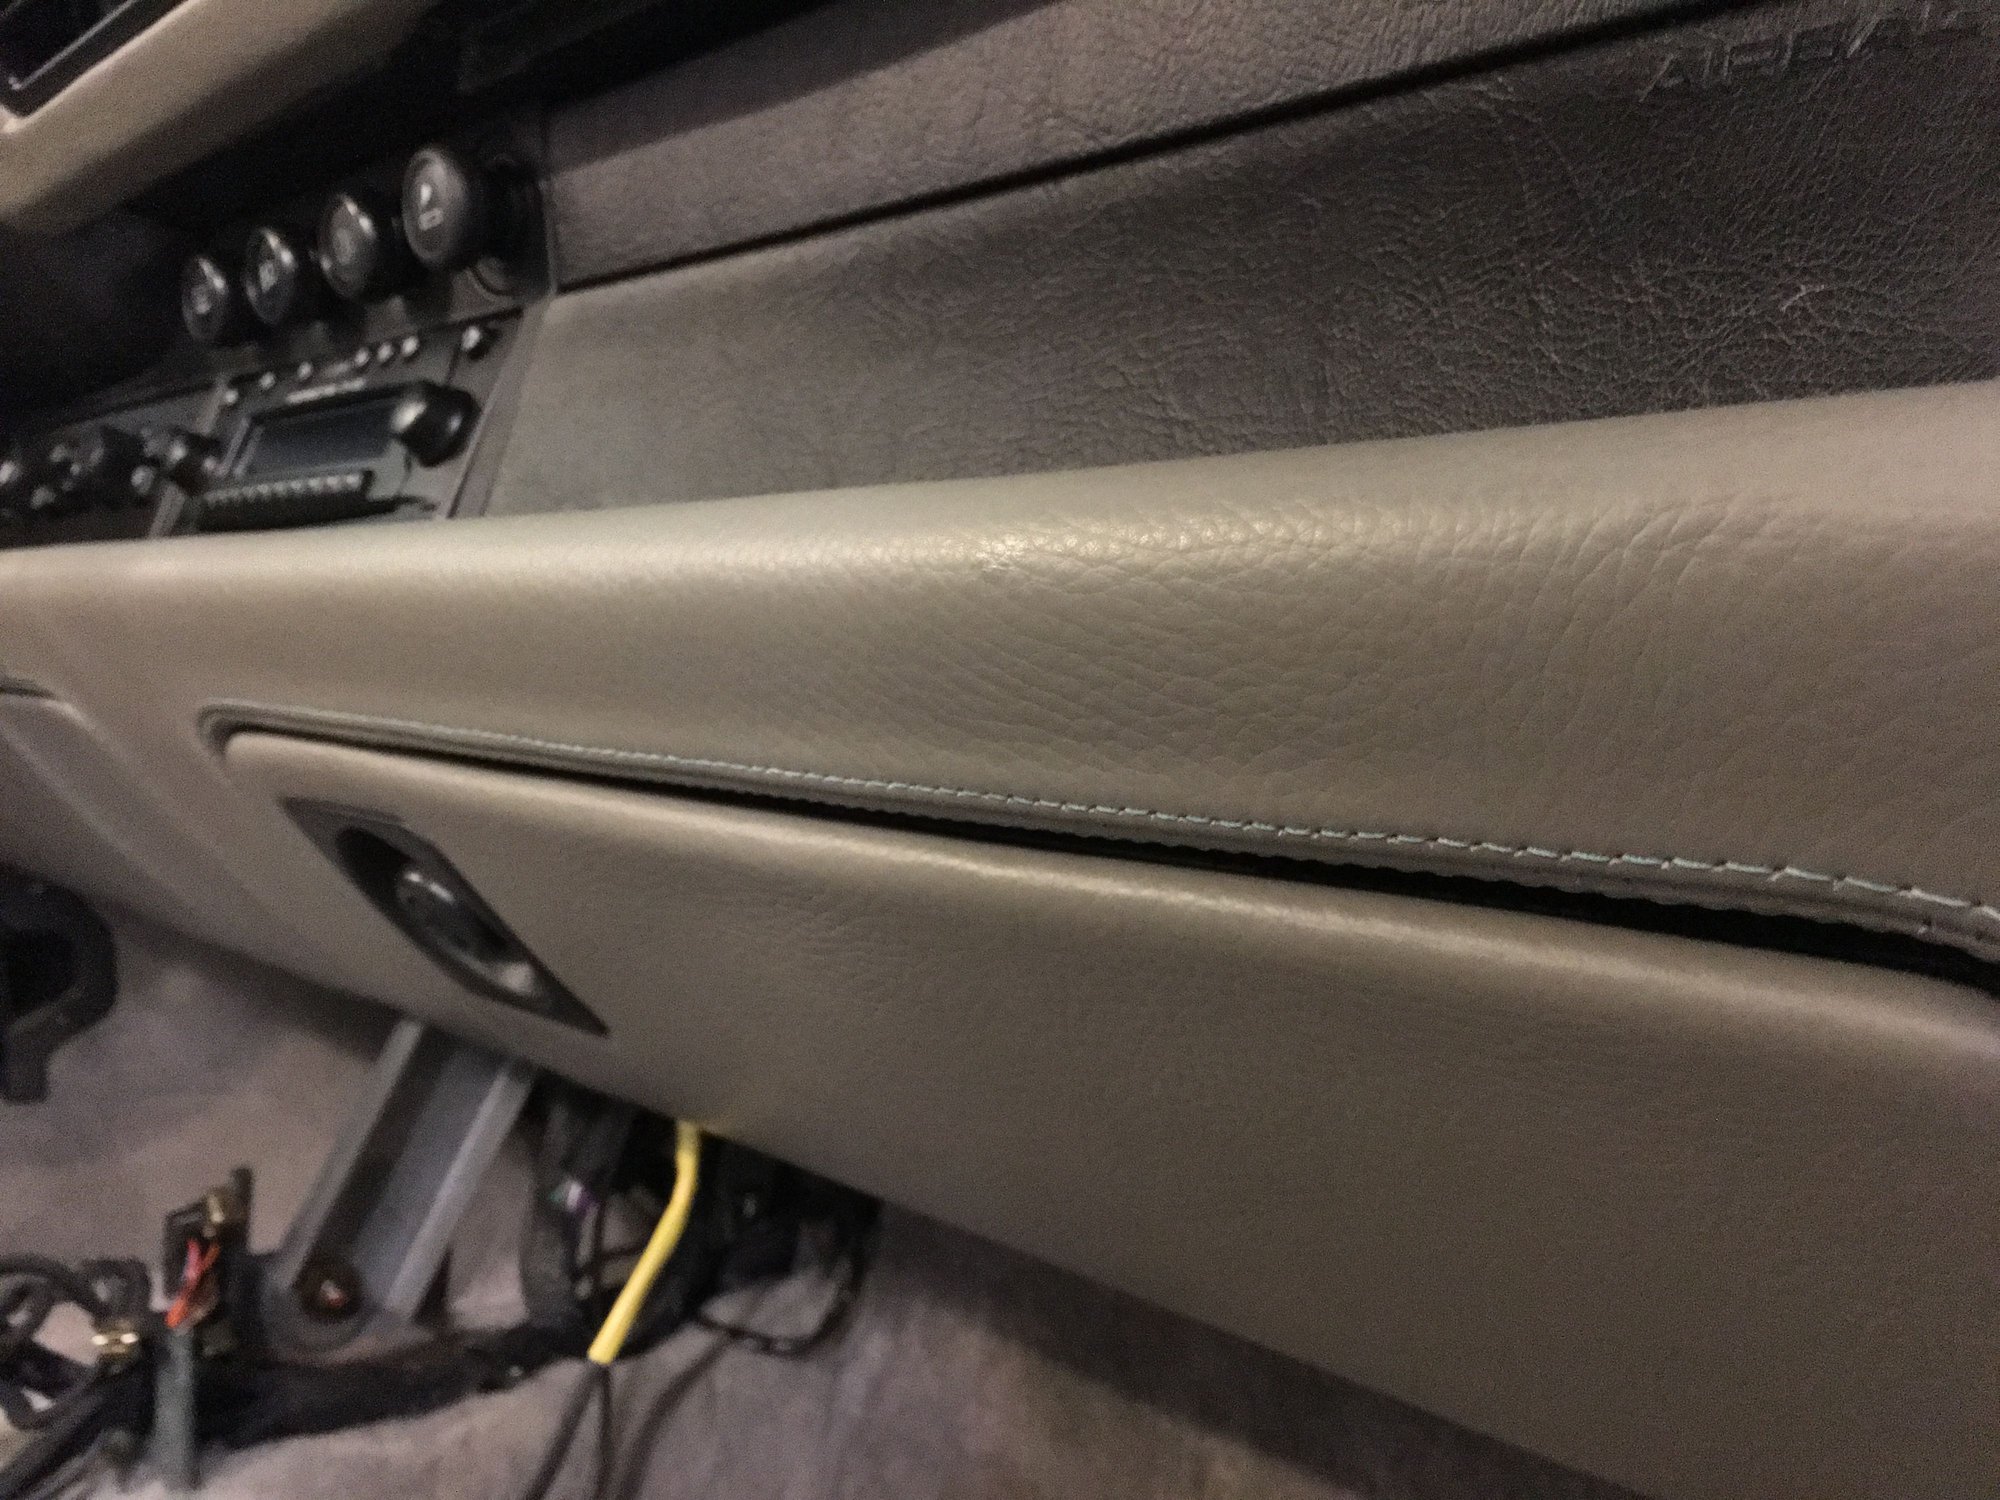
ABOVE - front side of the glovebox latch. The left screw holds the whole shebang to the glovebox, while the right screw secures a metallic triangle piece in place which jams the black U-latch into position. The mechanism is more clear from the back side.
ABOVE - this is the back side. The right screw holds the mechanism in place. The left screw holds the metallic triangle piece in place which jams the black U-latch into position.
ABOVE - with the triangle metallic piece removed, you can see how the U-latch slides into a slot.
Last edited by Jlaa; 08-12-2016 at 02:04 AM.
Reason: re-typed my explanation to make it more clear.
I came up with a different solution. I coated the ends of the U shaped part with soft solder - apply with propane torch. With persistence you can reinsert the U part in the holes; it will be tight. When the two screws are tightened it seems there is better purchase on the U and all is good. At least for now.
My latch mechanism into which the screws tighten must be shot. 90k miles, I suppose that's reasonable, no matter how I position the U and tighten it won't stay shut, so I'll have it addressed at the 90k service.......
caveat - I'm no engineer but this has to be the stupidest design ever, I'm surprised it came from Porsche
Thanks for reviving this thread. I have the same issue in my 69,000 mile C2S. I instinctively found the two screws and tightened previously to no avail. Looks like I need to try some loctite, or buy a new clamping piece. It's part no. 40 in the parts catalogue, part no. 964 552 637 01.
+993 on the great photos and explanation Jlaa, thanks!
You are welcome. Frankly speaking I don't see how the clamping device (the triangle - part #40) can possibly get worn. The pictures that I posted are the pieces from my own car at 53,000 miles. The pieces looked new.
It might make sense to inspect part #39 carefully. You can see from my photos that part #39 has non-uniform slot (the slot is wider on one side) through which you can slip the U into. The U is also supposed to have a bend on one side (on the left in the backside pictures) to prevent the U from pulling out. I can imagine if #39 is misaligned then the U could potentially pull out of wide end of the slot. That said I am not experiencing the problem so I cannot say with absolute certainty.
To get access to 39 and 40, though, you do have to pull off the lower dash. It is kind of a PITA but after you do it once, it is straightforward and not a big deal. Just remember to pull out the cages into which the CCU and the radio sit or else you will never be able to get the nuts that hold the lower dash back in place. I feel applying glue or solder from the front side, while quite clever, addresses the symptoms of the problem but perhaps does not address the root cause of the problem, which can only be diagnosed from the rear of the glovebox assembly.
Heck, if you pull out the lower dash assembly, think of it as an opportunity to recover it (and the upper dash, which is easy to remove) in leather. :-)
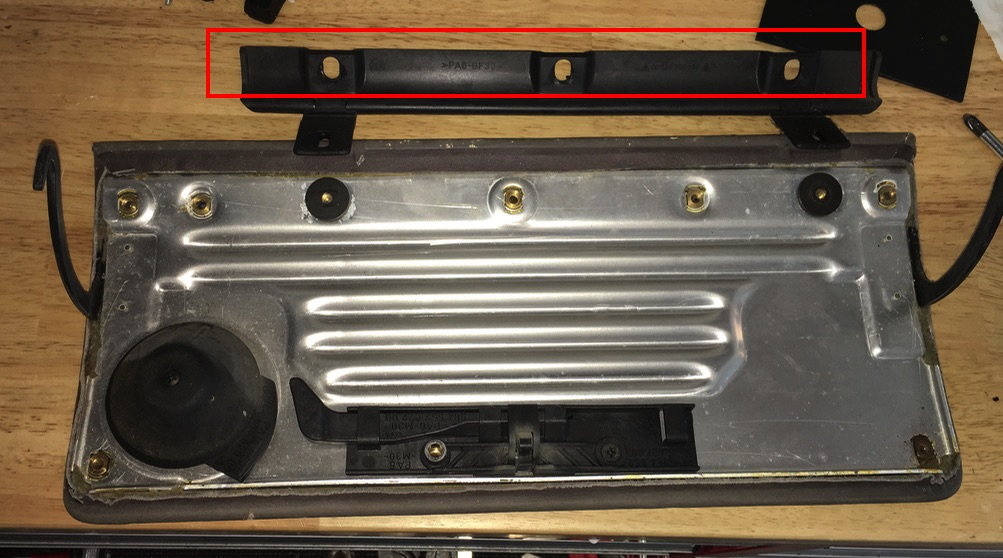
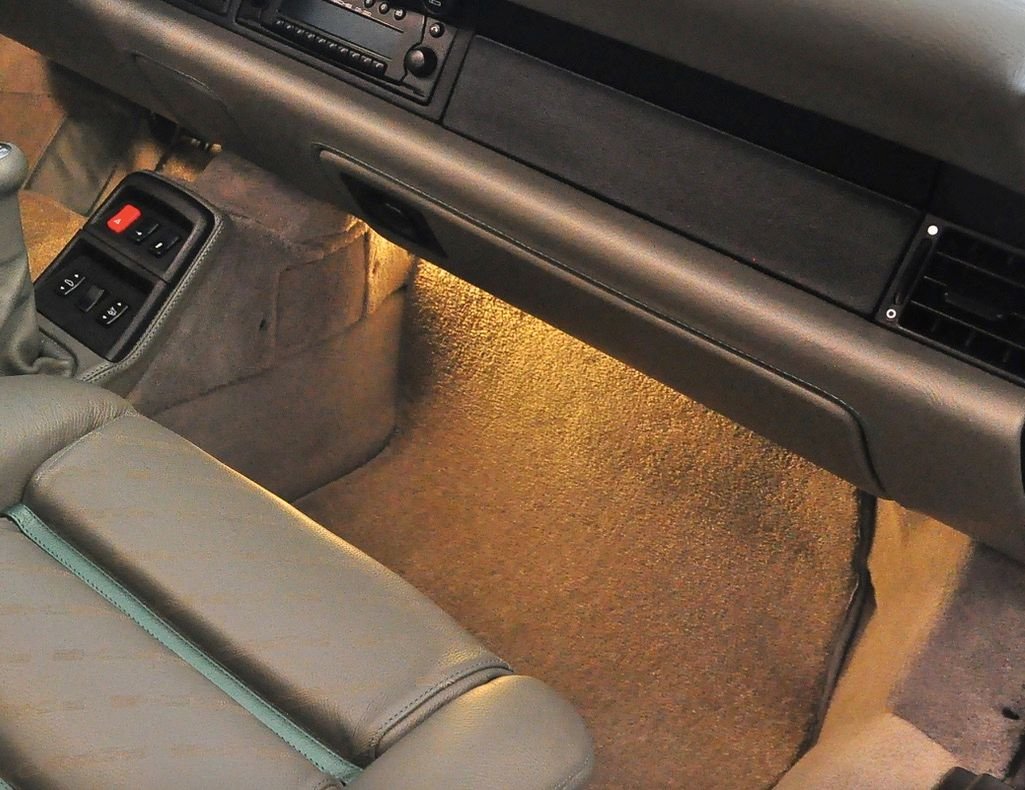
I did find though that one way to reduce tension on the U and make the glovebox lid close in a uniform manner is to adjust the 3 screws on the bottom of the glovebox lid..... the three screws holes I have highlighted below. I found that if a loosened the three screws below, then shut the lid, that the glovebox lid would close easily and in uniform way because the loose screws below would not be forcing the lid to apply tension against the U. Then I tightened everything up.
Last edited by Jlaa; 08-12-2016 at 11:28 AM.
Reason: grammar
BTW - You can see the before and after results in terms of glovebox lid alignment after fiddling with the three screws at the bottom --- fiddling with those three screws equalizes the tension exerted against the U across the length of the lid.
Just a little input. Finally ordered new mount/locking plates for glove box. Wasn't looking forward to dropping dash to get to it. Ended up removing door, then all Philips screw from felt covered glove box liner. Wedged a nut driver enough to access, and fix latch. Although I ordered a new one, I need it fix before this weekend. I bought grade 8.8 5mmx16mm hex head machine bolts. Hated trying to tighten the philips screw. Took old aluminum locking latch, struck the ends with a flat punch. This distorts/elongates the ends that cam up on U-shaped latch. Not smooth anymore. Roughed up area (red) on U-latch so cam has purchase. Ground down (green) tab, which goes into (purple) area of mount. Mine seemed to inhibit the plate from locking u-latch. Little longer bolts (OEM is 12mm length) help avoid pulling threads (which my constant tightening of philips did) out of locking plate. Long winded, I know. But moral of story? Easy 15-30 min job to (I'd say a permanent) fix the latch. I'll have a new assembly if it does fail. Which will surely happen this weekend (MRLS), if it is going to fail. :-)
Also thanks "Jlaa" for the insight, that helped me try and get this done.
Never had this problem, Ran the wire from the radio head into the glove box. Plugged in a 40 Gig ipod in to the cord. Threw it in the glove box about 10 years ago, closed the door and haven't had much need to open the glove box since.
this has got to be one of the dumbest designs on the entire car. i revisit mine every 2 years to 'adjust' its pretty annoying. i will try this next time mine flies open. thanks for posting the photos they are very helpful
Old thread that helped me fix the glove box latch problem on my 993TT. Replacement of the parts did it for me. Rennlist is such a valuable source of information...
I find myself in a similar predicament: my **** will not rotate and thus I cannot get the glovebox open. Here's a short video.
Do I continue to "pull" to 'pop' the u-hook / door loose?
Side note: the plastic **** had crumbled, so I ordered 964-538-061-000-1C-OEM and replaced it prior to putting the car in winter storage a few months back. The glovebox WAS working, but I must have incorrectly tightened the mechanism.

 08-11-2016, 11:02 PM