When you click on links to various merchants on this site and make a purchase, this can result in this site earning a commission. Affiliate programs and affiliations include, but are not limited to, the eBay Partner Network.
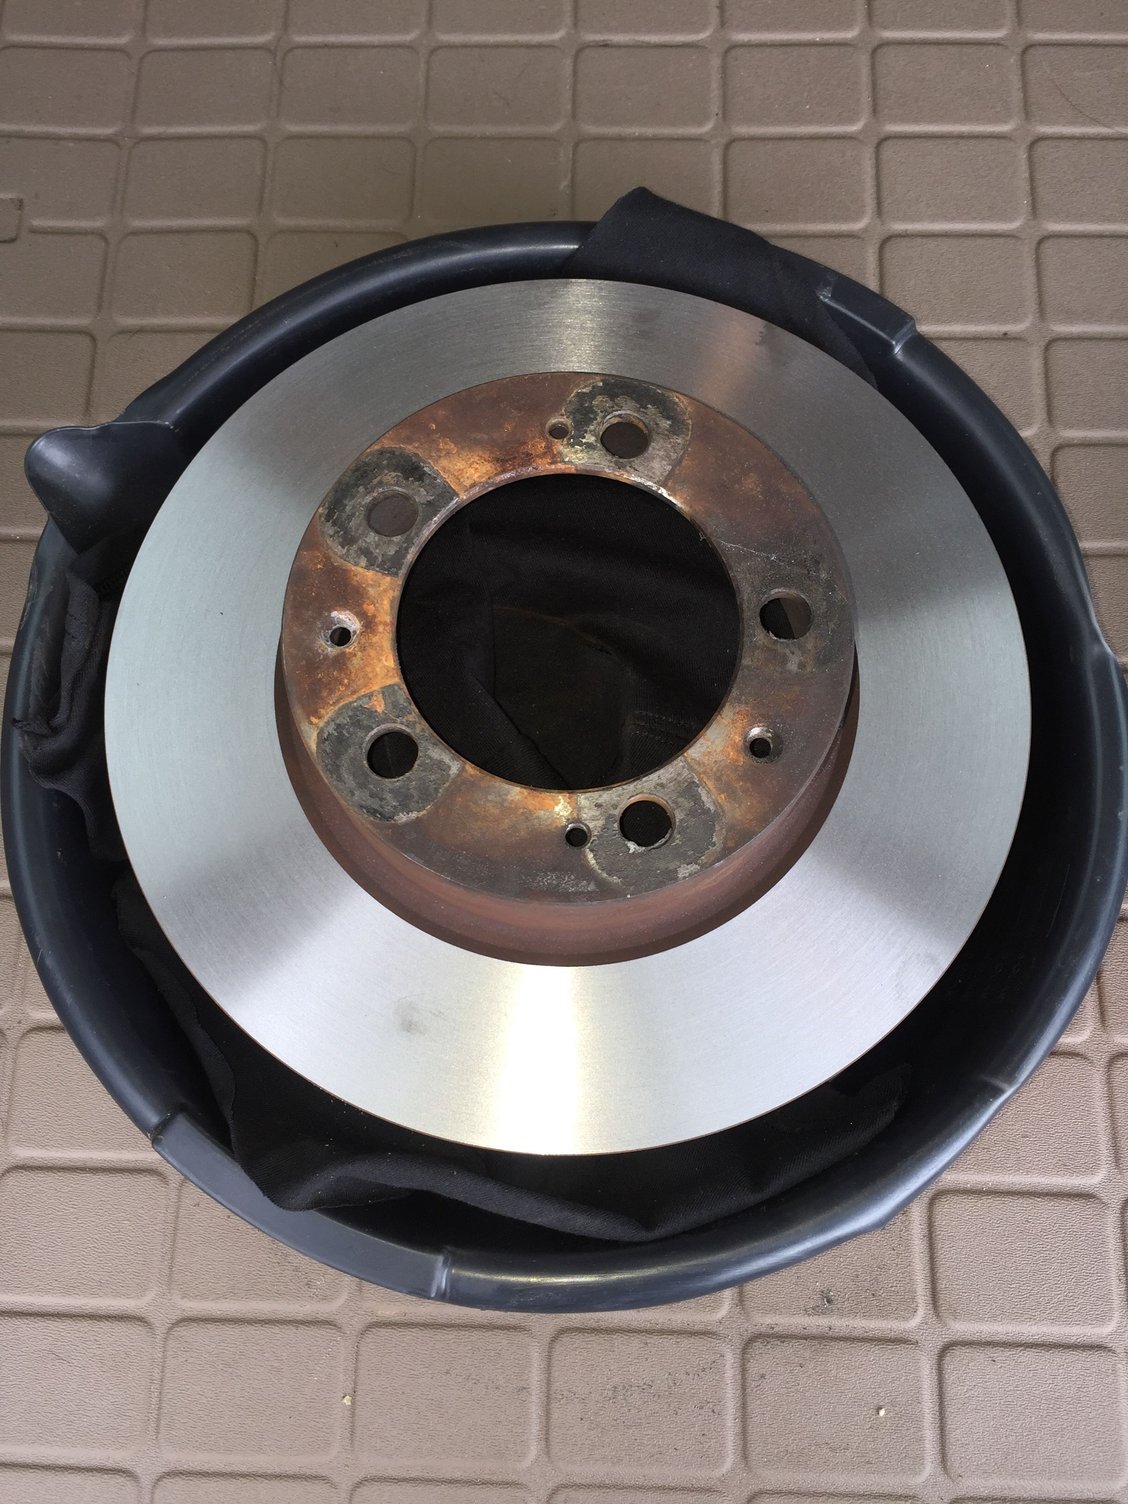
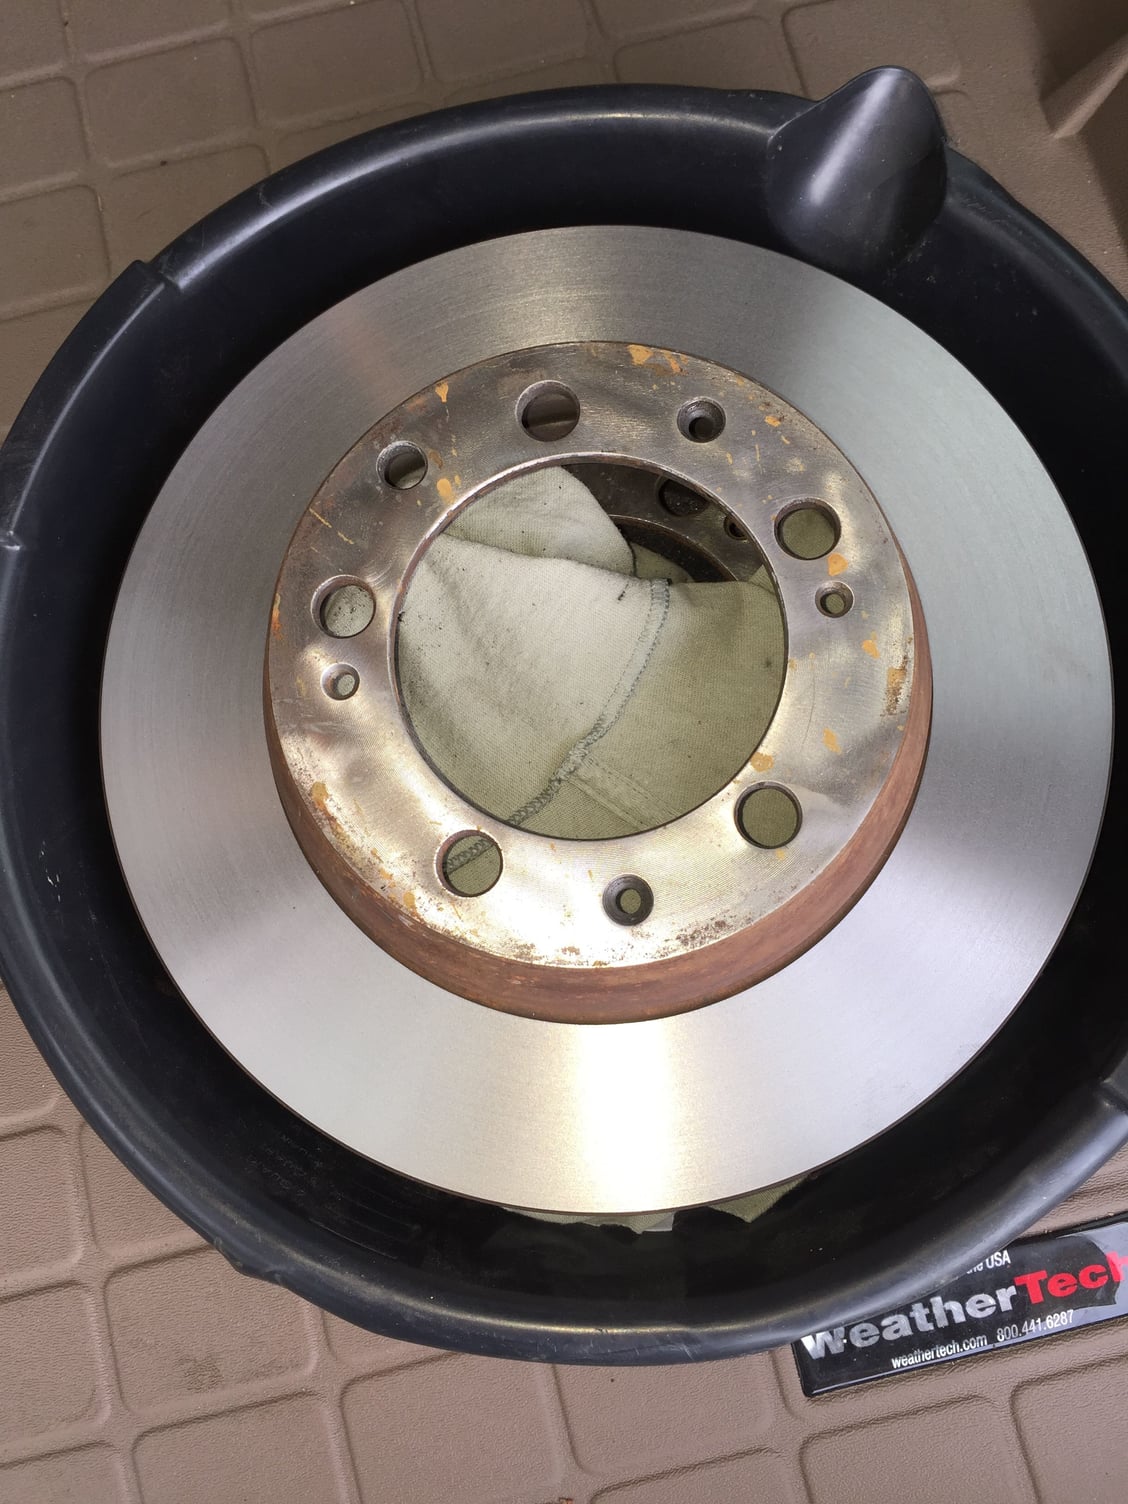
Picked up my brake rotors today! Original shop couldn't turn them because of an issue with their brake lathe. So, off to O'Reilly Auto Parts. They are the only other place in town that turns rotors.
NAPA stopped doing machine work years ago.
So, $40 later, I have four freshly turned rotors. Surface finish looks good. Just to be safe, I am going to put a set of calipers on each rotor to see where they are. The rotoes are now on their way home to be pickled in preservative oil. It will probably be a month before the Red Witch is ready for the rotors to go back on.
Front
Rear
I am off work and now finally get to work on the Red Witch!
My goal for today is to finish disassembly of the front end. I want to inspect the tie rod ends and ball joints. Tie rods were replaced in 1997 or so. Ball joints have never been replaced.
This can go one of four ways:
-ball joints and tie rods OK, relube and install new boots
-tie rods OK, need to replace lower ball joints
-tie rods OK, need to replace lower ball joints and get rebuilt upper control arms from 928intl
-the whole damned mess needs to be replaced
Given my luck, I have a nasty feeling I know which way this will go.
Good stuff on the rotors. Glad they trued up nicely.
On pickling and appearance-- Some new rotors are coming with a sprayed-on zinc coating that limits future corrosion. The last set I put on the car came with that coating on two, the other two not coated. I trundled on down to the local marine products store and found a spray-can of my favorite CRC Instant Cold Galvanize, at marine store prices. (of course, I later found a similar product at Home Depot for less than half...) Anyway, all the non-friction surfaces that can rust were sprayed, including the areas inside the hat and the fins. Then the exposed part of the hat was painted silver to match the wheels with Duplicolor Wheel Silver, including a couple coats of clear over the silver. Friction surfaces were masked for this. Since you plan to store the rotors, consider just plastic-bagging them after all the finishing instead of oiling them. That way you'll be sure that there's no oil to contaminate the friction surfaces when you go to use them. Brake-Clean will remove the spray zinc and the paint, so use appropriate caution.
Ball and roller bearings should have one interference-fit race and one line-fit race. The "interference-fit" means that the outer races are pressed (or driven for those doing this at home) into the hub. The "line-fit" means that the race should slip onto the spindle by hand, with no detectable looseness. It is standard and desirable for the inner races to gradually rotate around the spindle in service.
The spindle surfaces where the seal rides need some work. They should not be polished - the ideal sealing surface is what you get by lightly sanding the surfaces at about a 25* angle using 400-grit wet-or-dry finishing sandpaper.
My preferred bearing adjustment method is still the way that they are installed on the assembly line. At final assembly, tighten the nut firmly but not hard, with a wrench or tool, turning the hub as you do so. This ensure that the bearings are seated, and thins the grease film. Stop turning the hub and loosen the nut a half turn or so. Tighten the nut as tightly as you can with your fingers only - no tool. Check for free play - there should be virtually no detectable free play. There will also be no bearing pre-load, unless you are King Kong (or Mark). Lock the nut in place and recheck.
Dr. Bob, thanks for mentioning painting the hat/vane area on the rotors. That's a pet peeve of mine. You see an otherwise beautiful, well detailed car, but the brake rotor hat and to a lesser degree, the vane area have tons of surface corrosion that really detract from the overall appearance. At a minimum spend a Saturday removing, cleaning, and painting the hat sections that show through the wheels.
dr bob: Yep, I am very glad the rotors trued up with a minimum of machining. One good spot in this wonderful tale so far.
As for the pickling, that is just to keep the machined surfaces from corroding until I can install the rotors. I have sprayed them down with WD-40, then sealed them in 2.5 gallon zip-loc storage bags.
Excellent advice on the cold galvanizing compound, that makes sense. Your before and after pictures are quite compelling.
However, I am still on the fence as to whether I am going to refinish my rotors. At this point, with the suspension work I am doing, I will worry about the rotors when it comes time to reinstall them.
I am kicking around the idea of masking the friction surfaces with duct tape, then bead blasting the rusty surfaces of the rotors. We shall see.
WallyP: Thanks for the heads-up, that is some good information. I have learned things to that effect over the years. I had learned that you wanted the inner bearing race tight on the spindle, but not an interference fit.
I did NOT know about sanding the seal surface on the spindle. Thanks! I usually kiss them with crocus cloth. I will follow your method in this case. Question: 25* from the centerline of the car, or 25* from the centerline of the spindle?
As well, I will use your method of adjusting the bearings, as well as following the WSM. I had learned not to preload the bearings, but I am used to having castleated nuts and cotter pins for adjustment. This is a bit of a change for me.
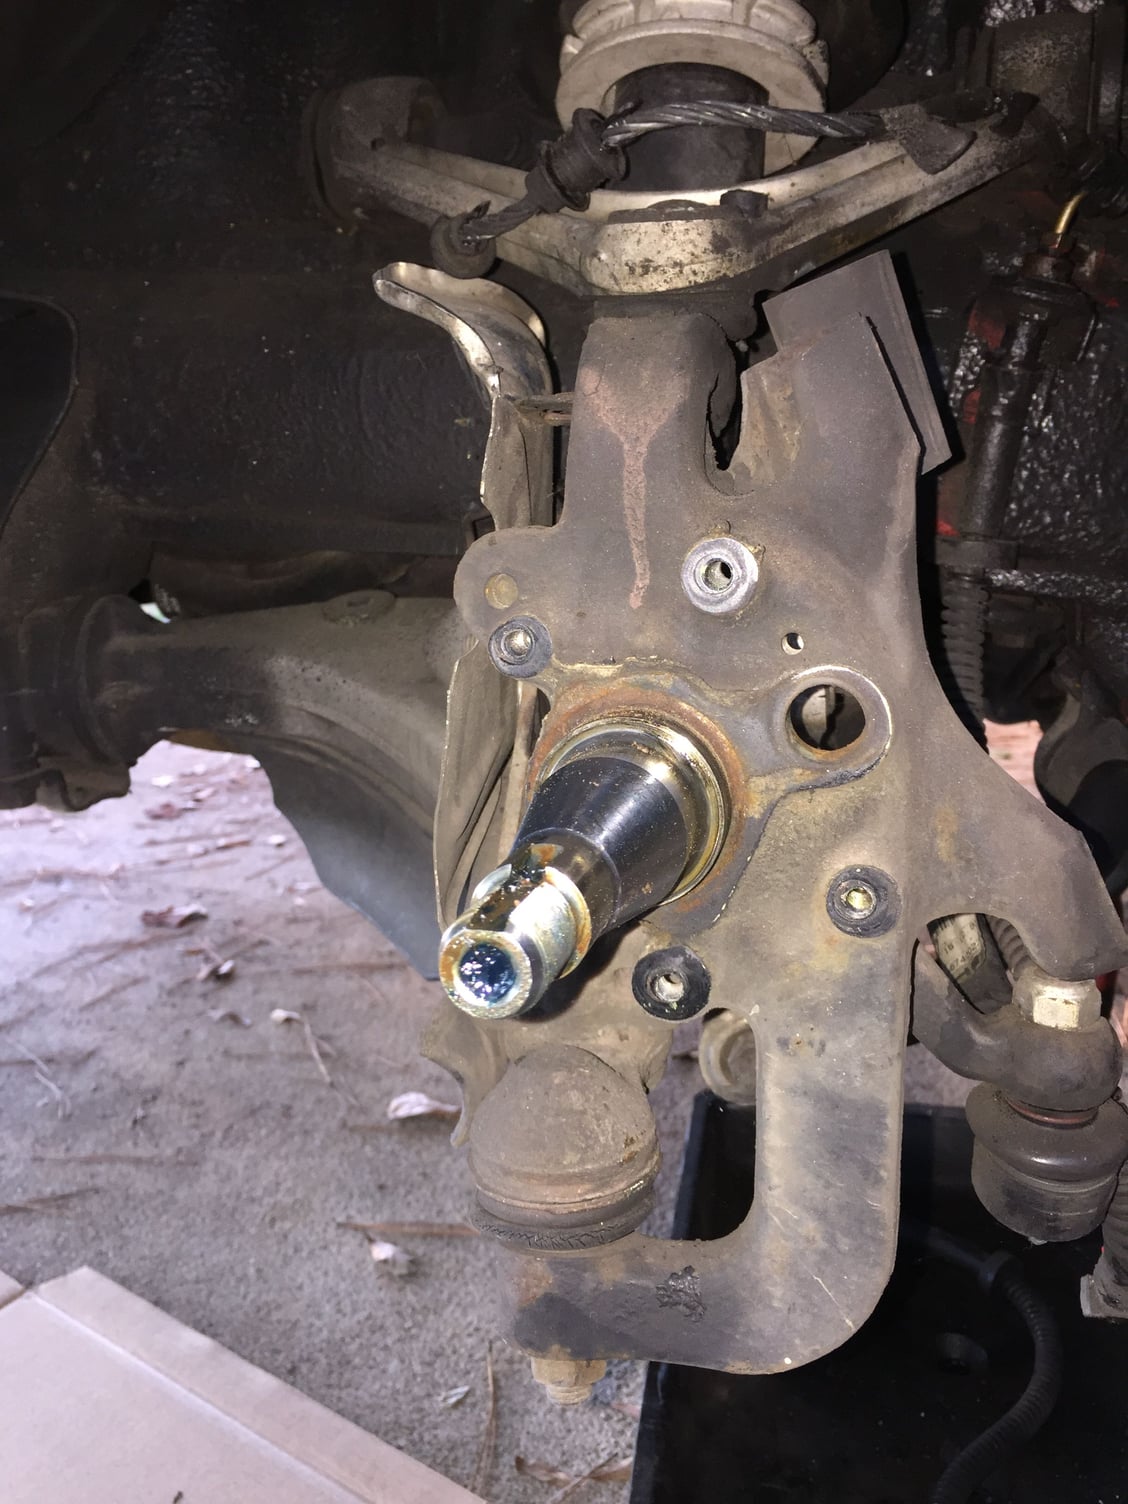
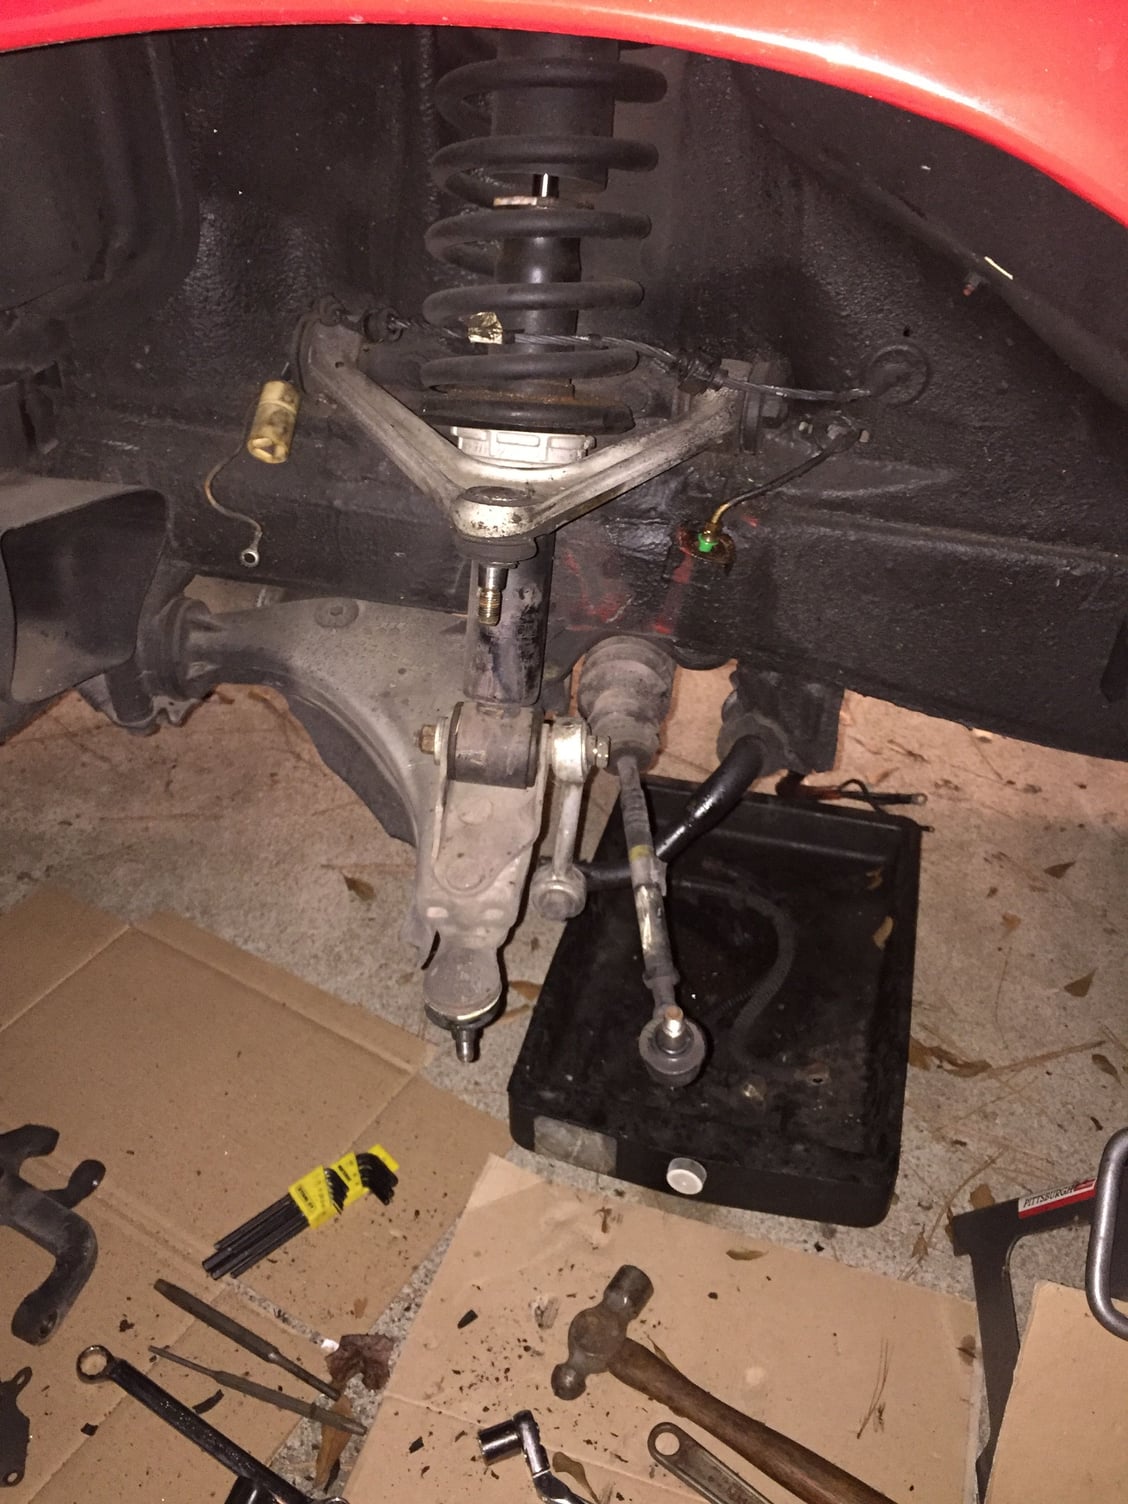
Finally got the front end apart this evening. You are not supposed to notice that I promised to do this last evening...
On a good note, I found no more damage or severe wear.
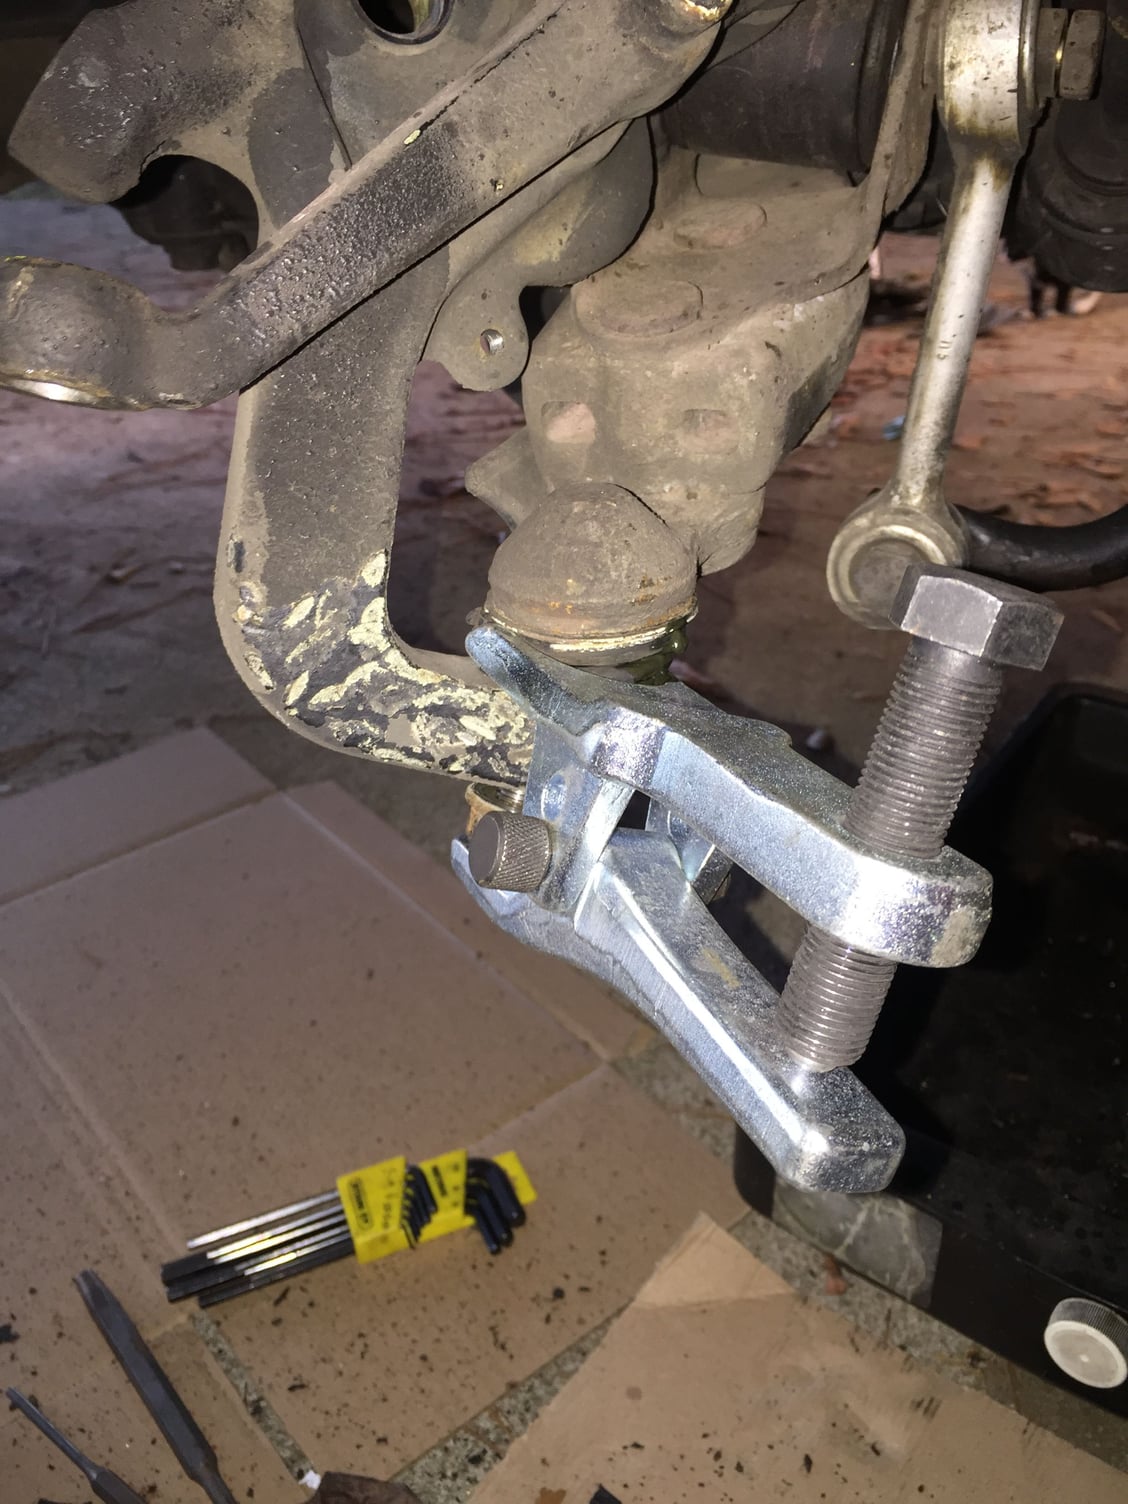
I removed the driver's side hub and bearings, then removed both side spindles. The passenger's side came off with just the use of a percussive tool. IE: smack the hell out of the boss with a hammer. The driver's side required tension from my ball joint spreader tool, and lots of percussive action.
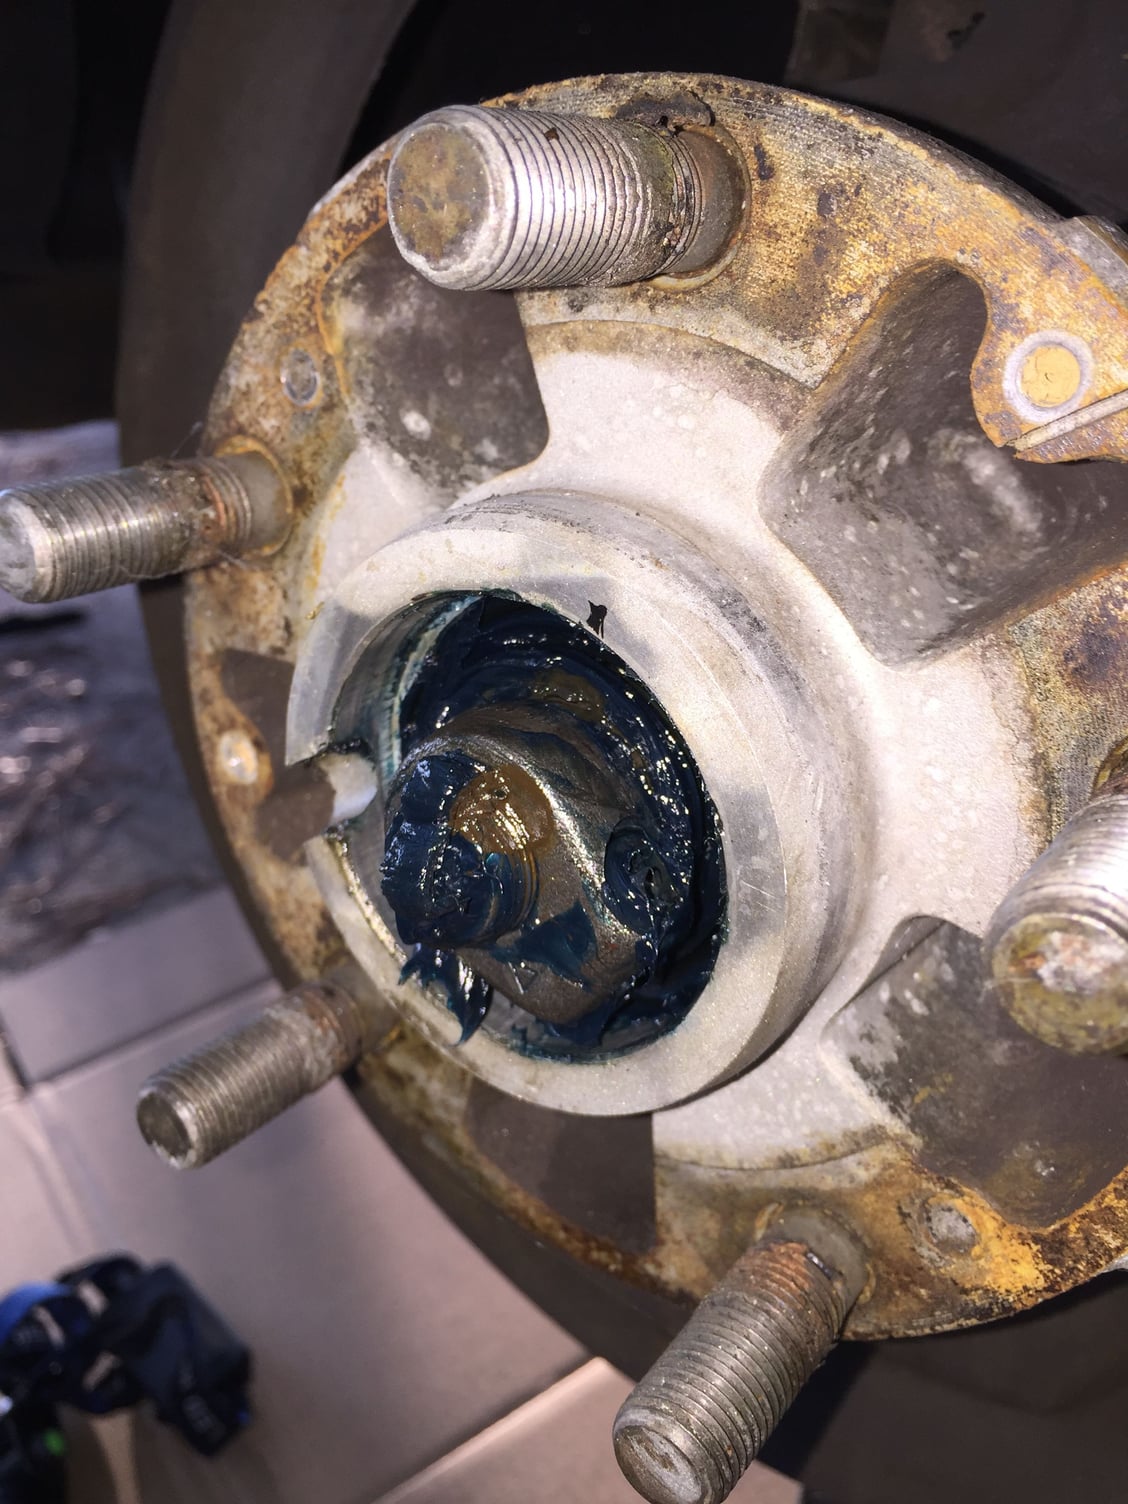
The outer bearing washer would just turn with a screwdriver, and there was no noticeable play in the driver's side wheel hub. I have not yet disassembled the hub to remove the bearings.
All the tie rod ends and ball joints are serviceable.
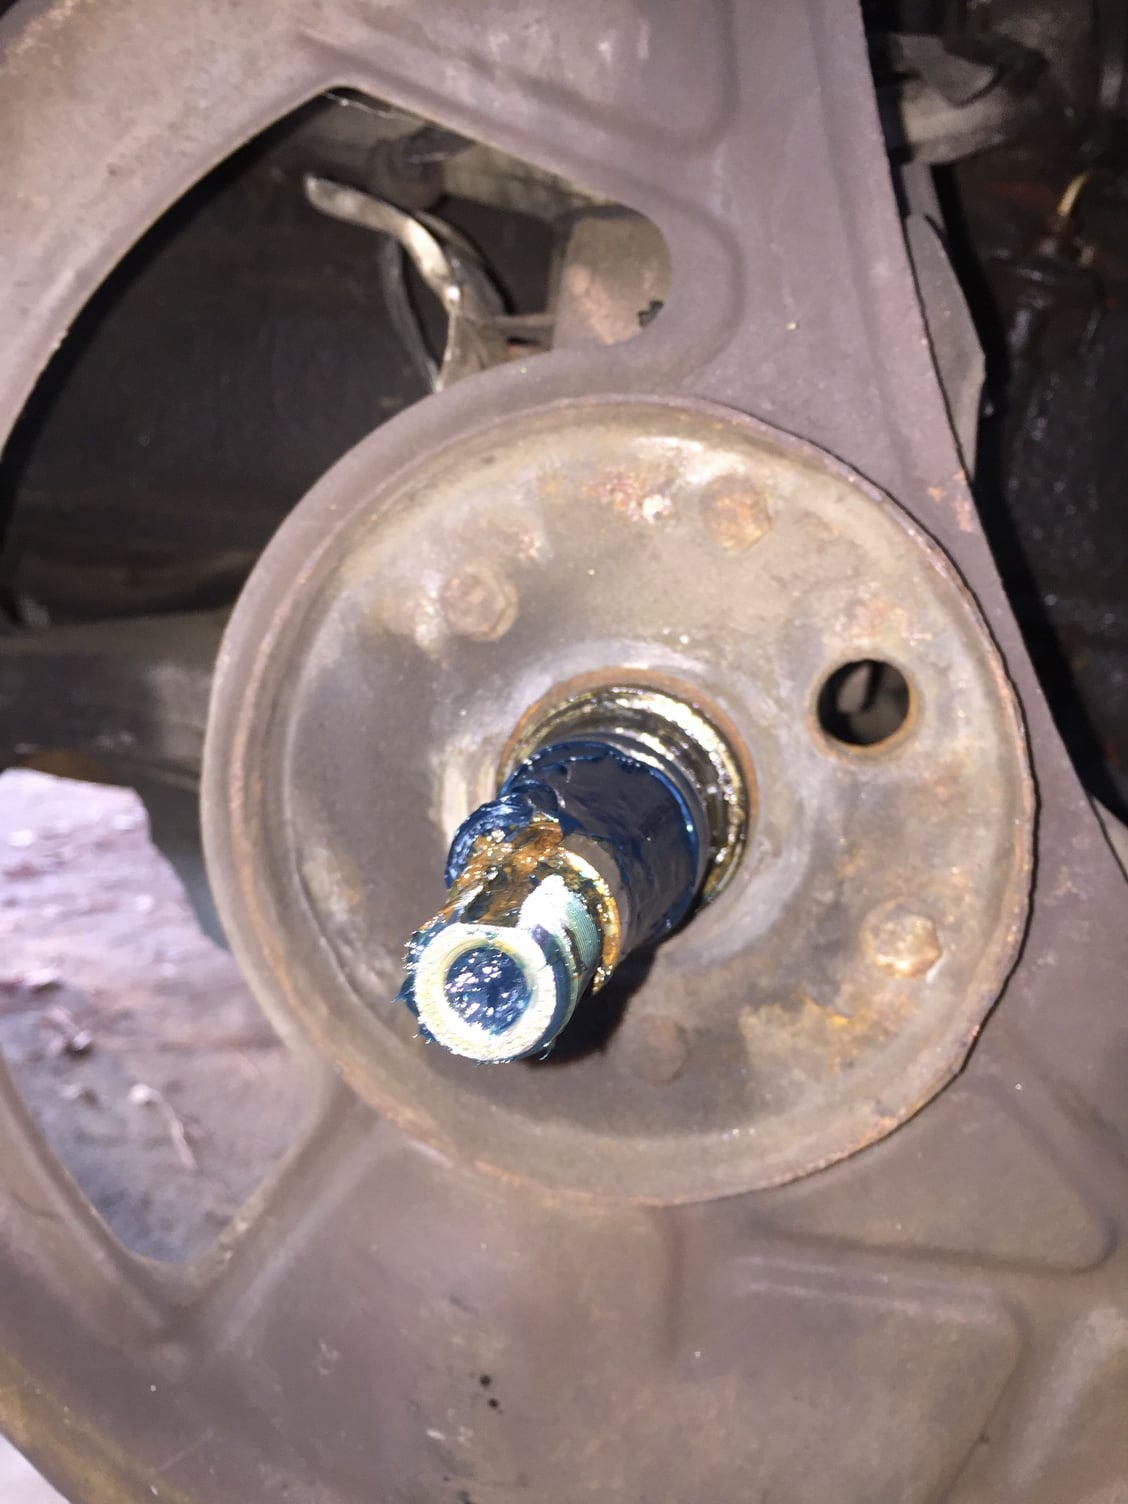
Both outer tie rod ends are very tight. The boots are not torn. The joints were full of grease.
The inners are more loose. I had read someone mention that they replace the inner tie rod ends when they won't support their own weight. These don't. They don't drop like a rock, but they fall.
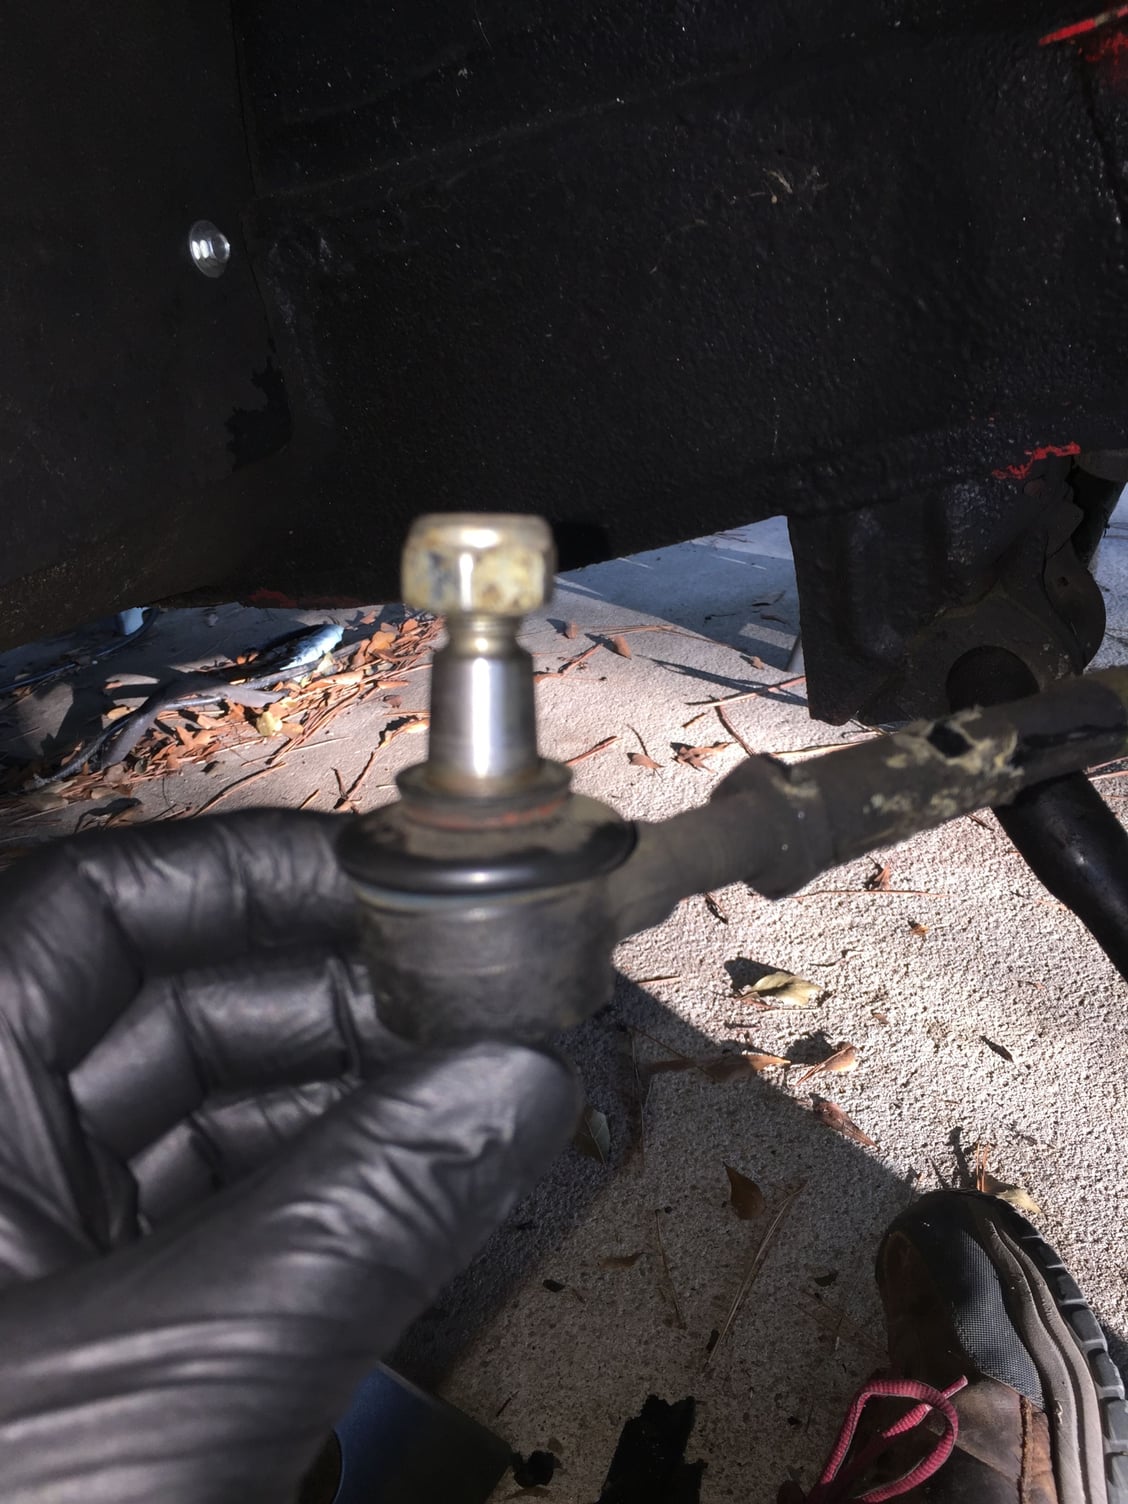
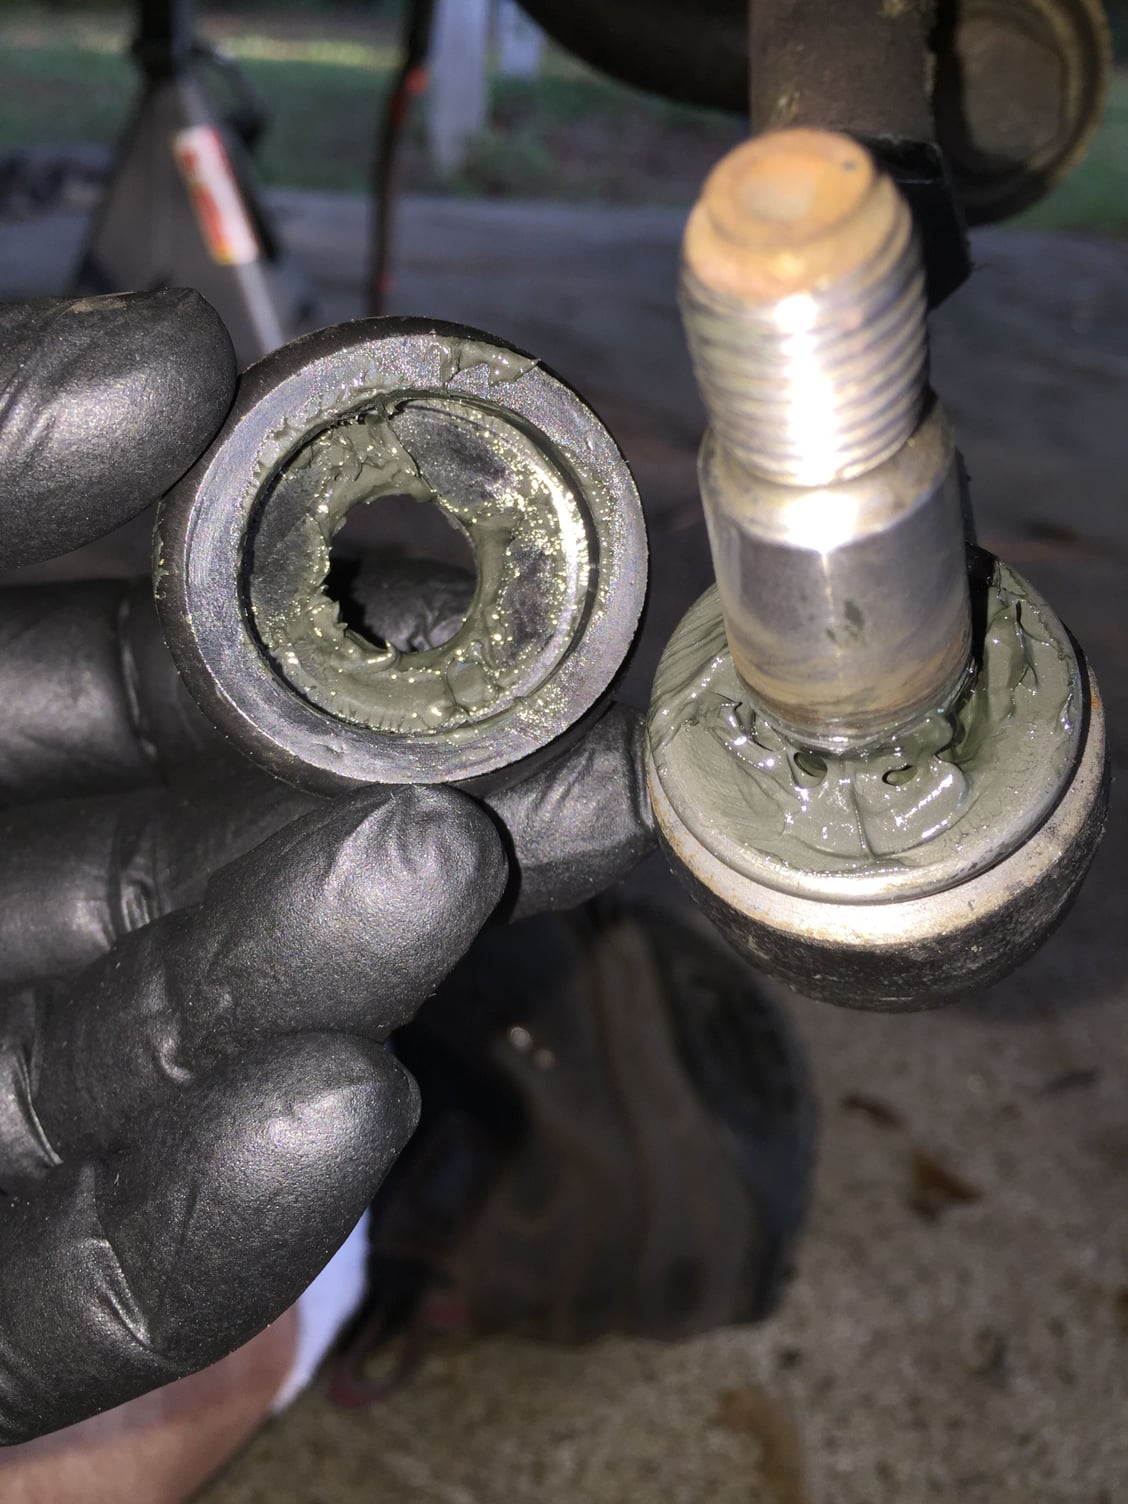
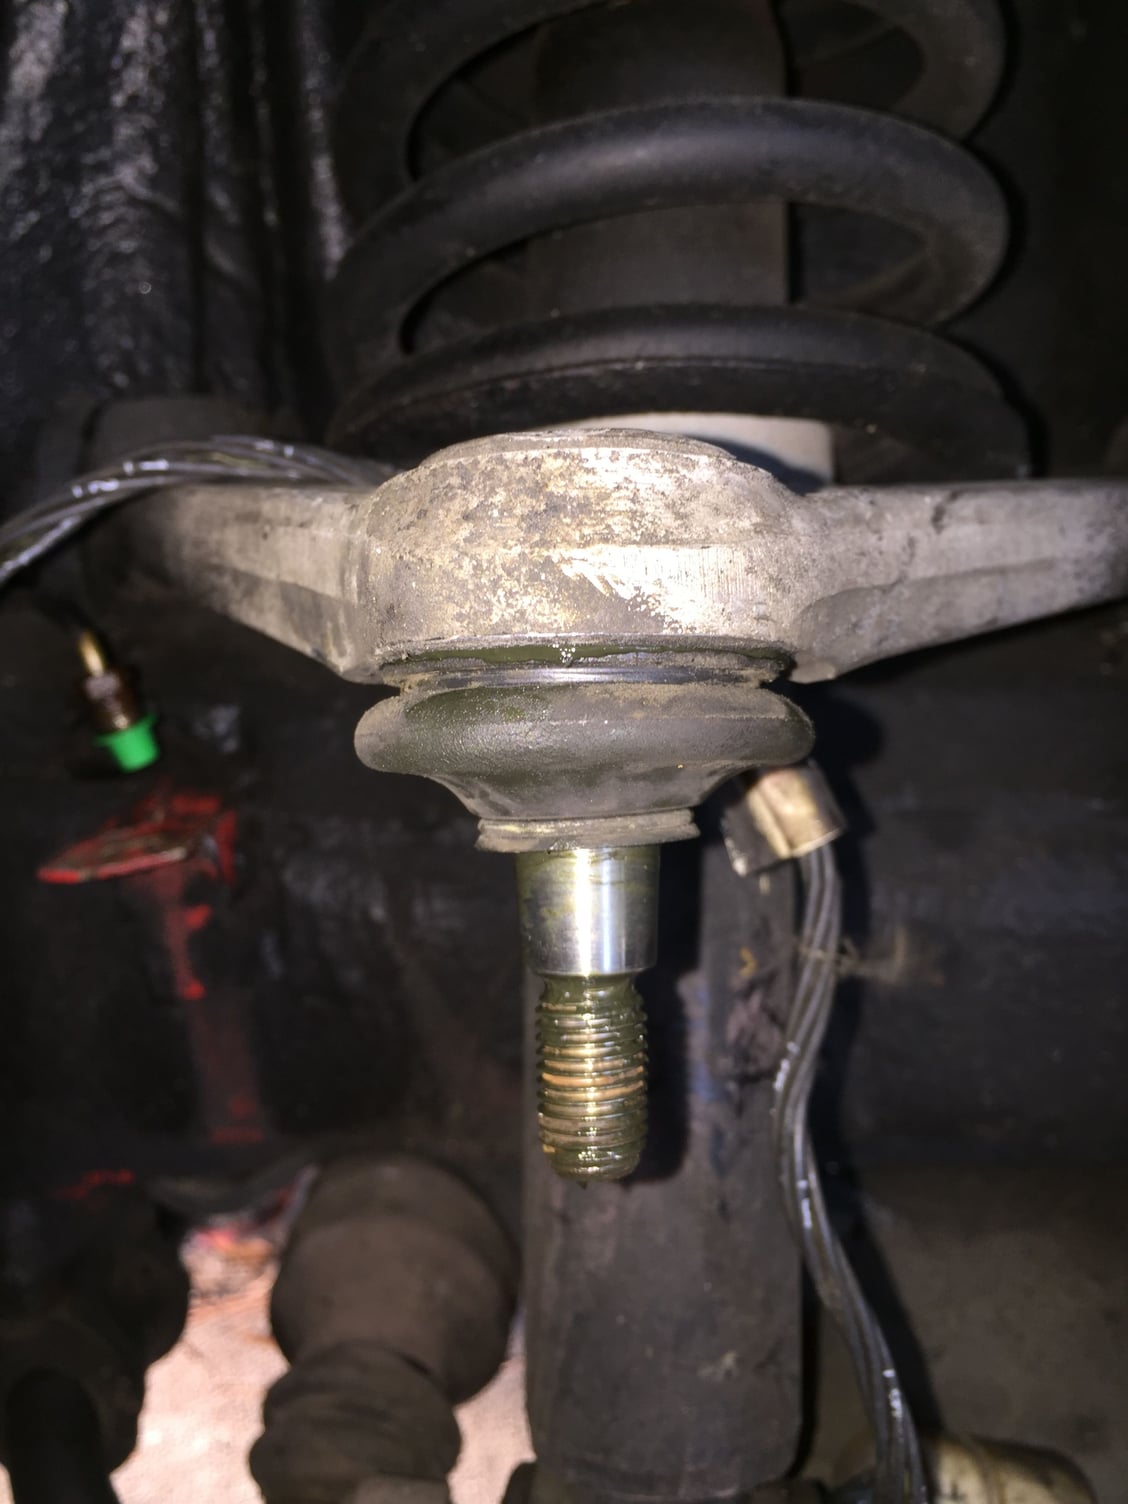
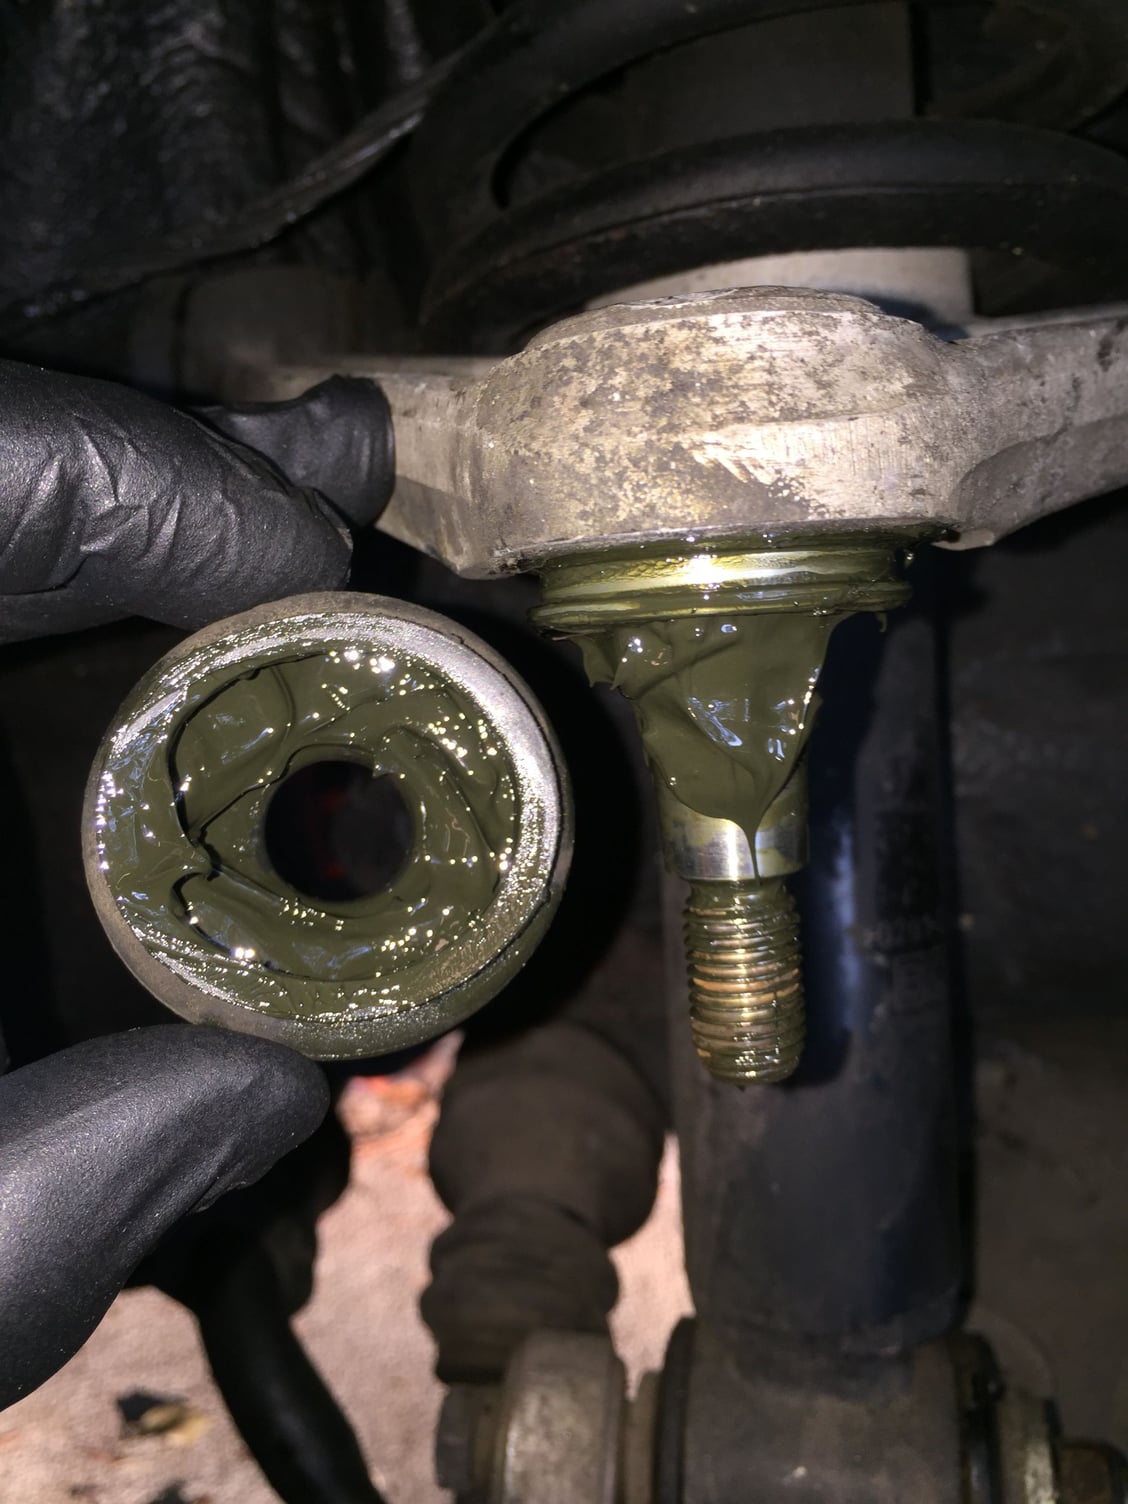
The upper ball joints are loose in the radial plane, but have no axial play. The driver's side joint is looser than the passenger's side. By loose, I mean it doesn't take alot of effort to move it. However, neither are floppy. They stay where you move them to. The upper boots were starting to crack. However, both joints and boots were full of grease.
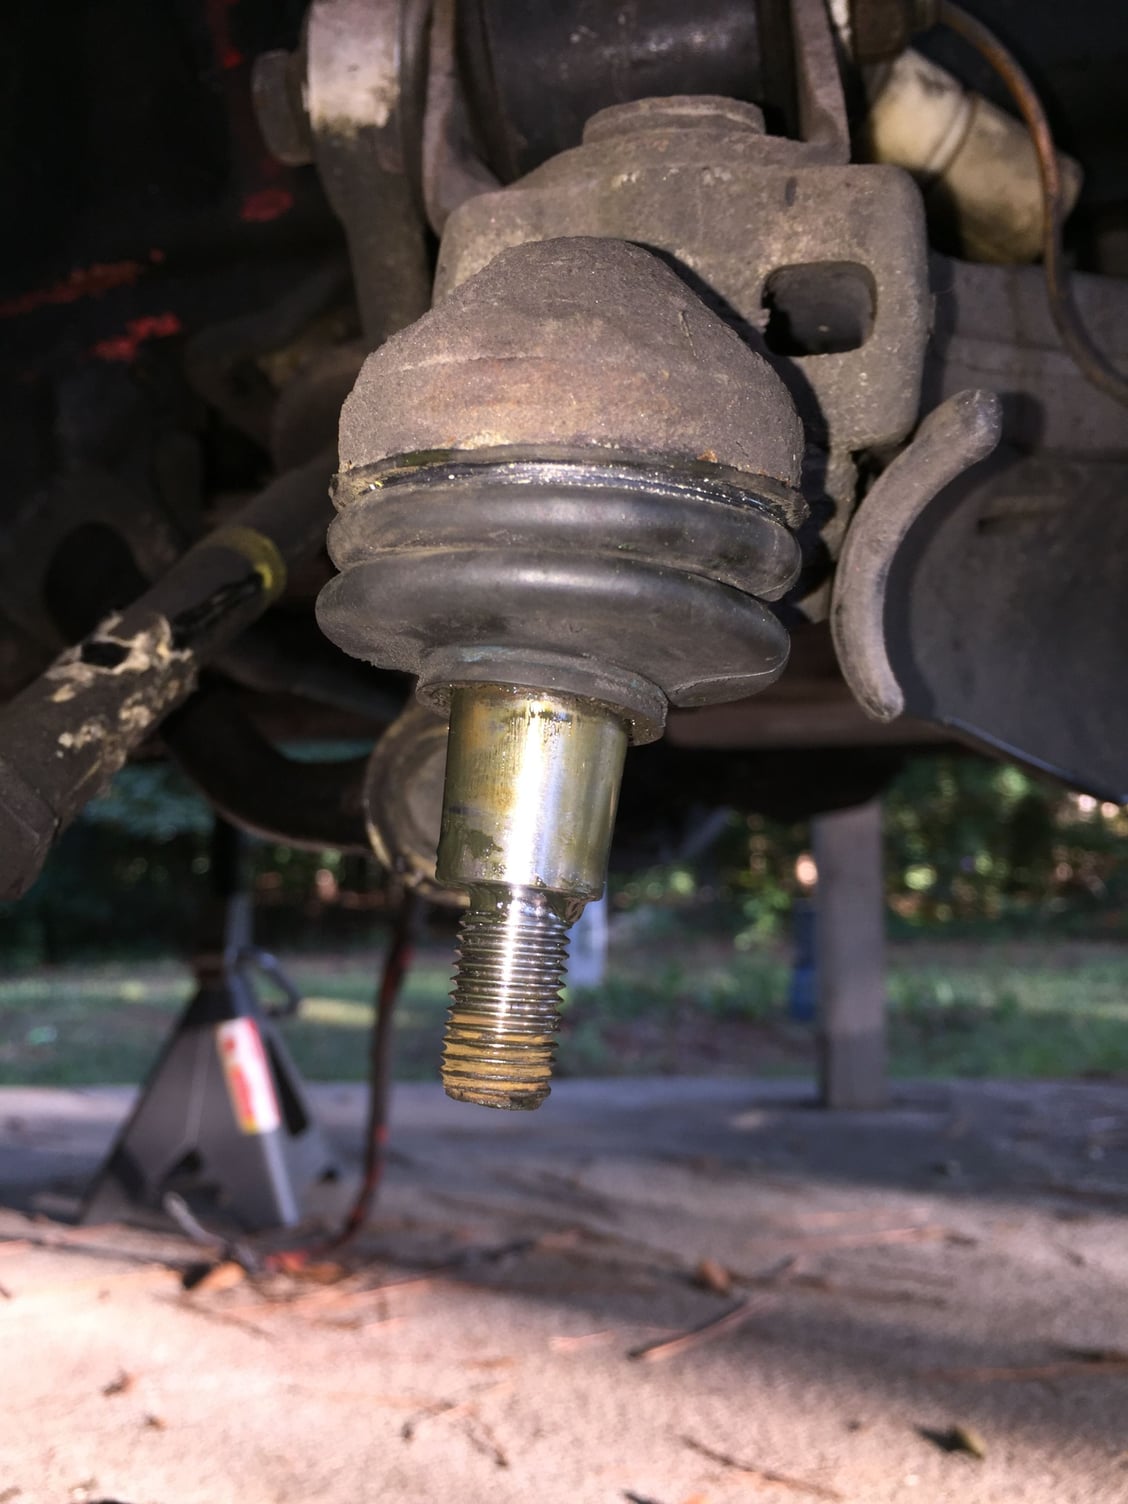
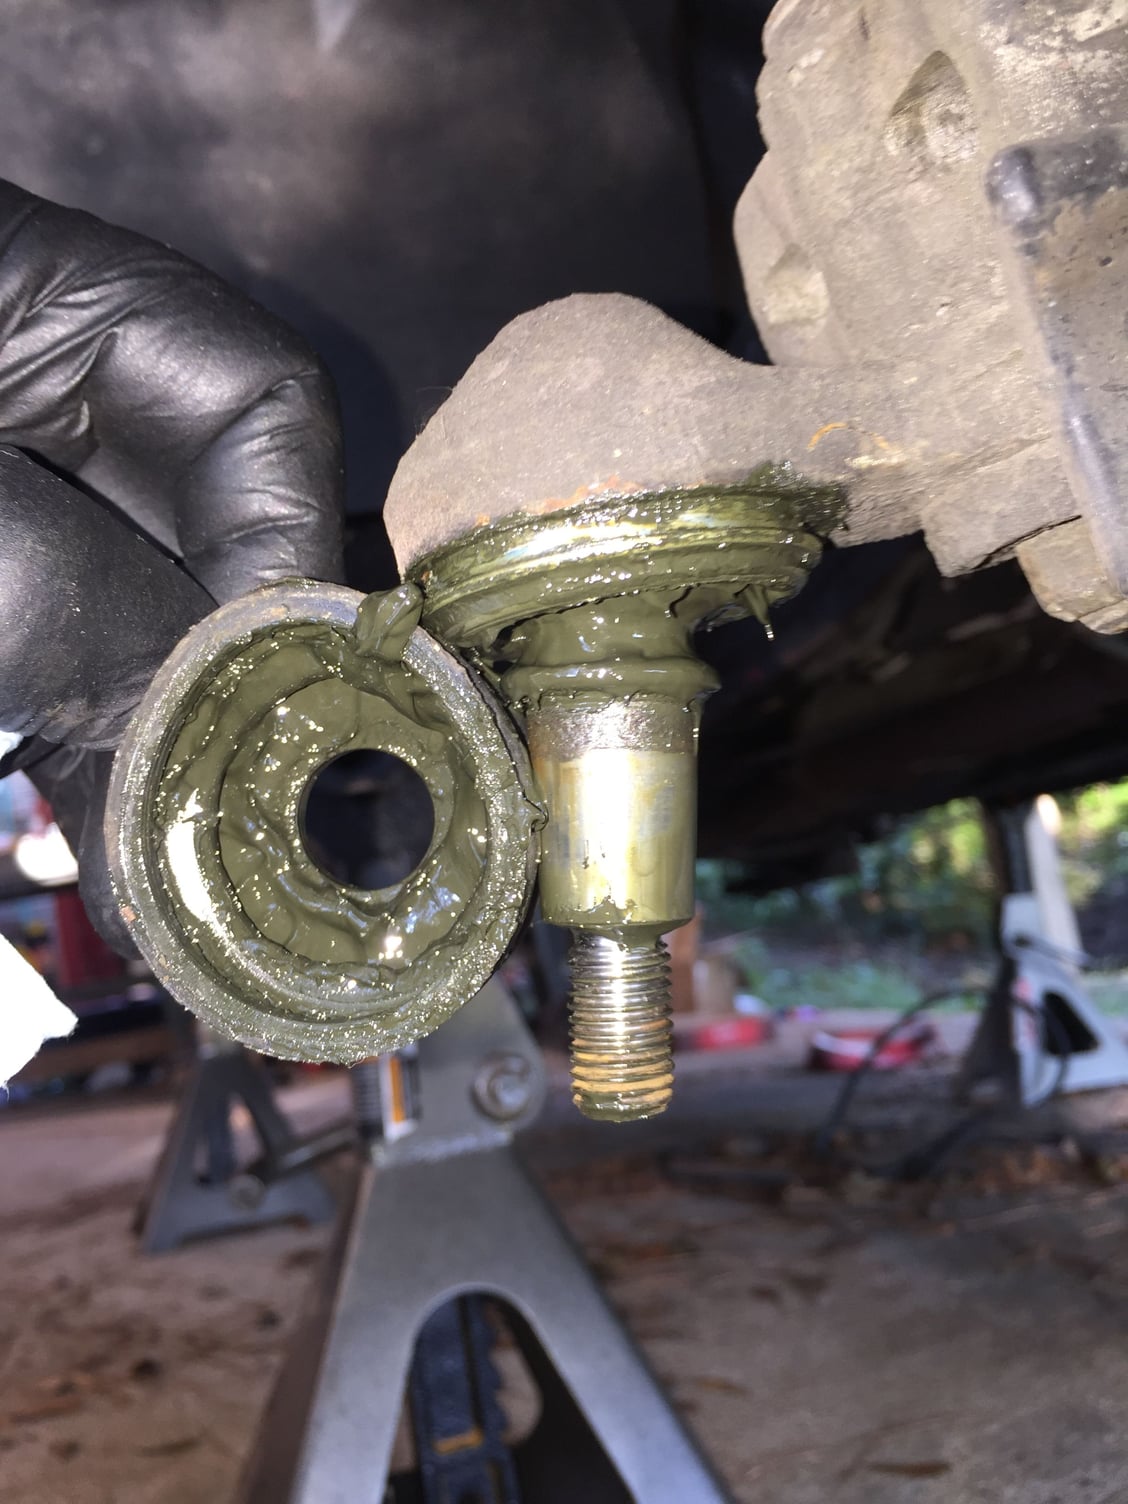
The lower ball joints are somewhat loose in the radial plane, but have no axial movement. It takes a little bit of effort to move the joints, and they stay where you put them. Both boots were starting to crack. However, both joints and boots were full of grease.
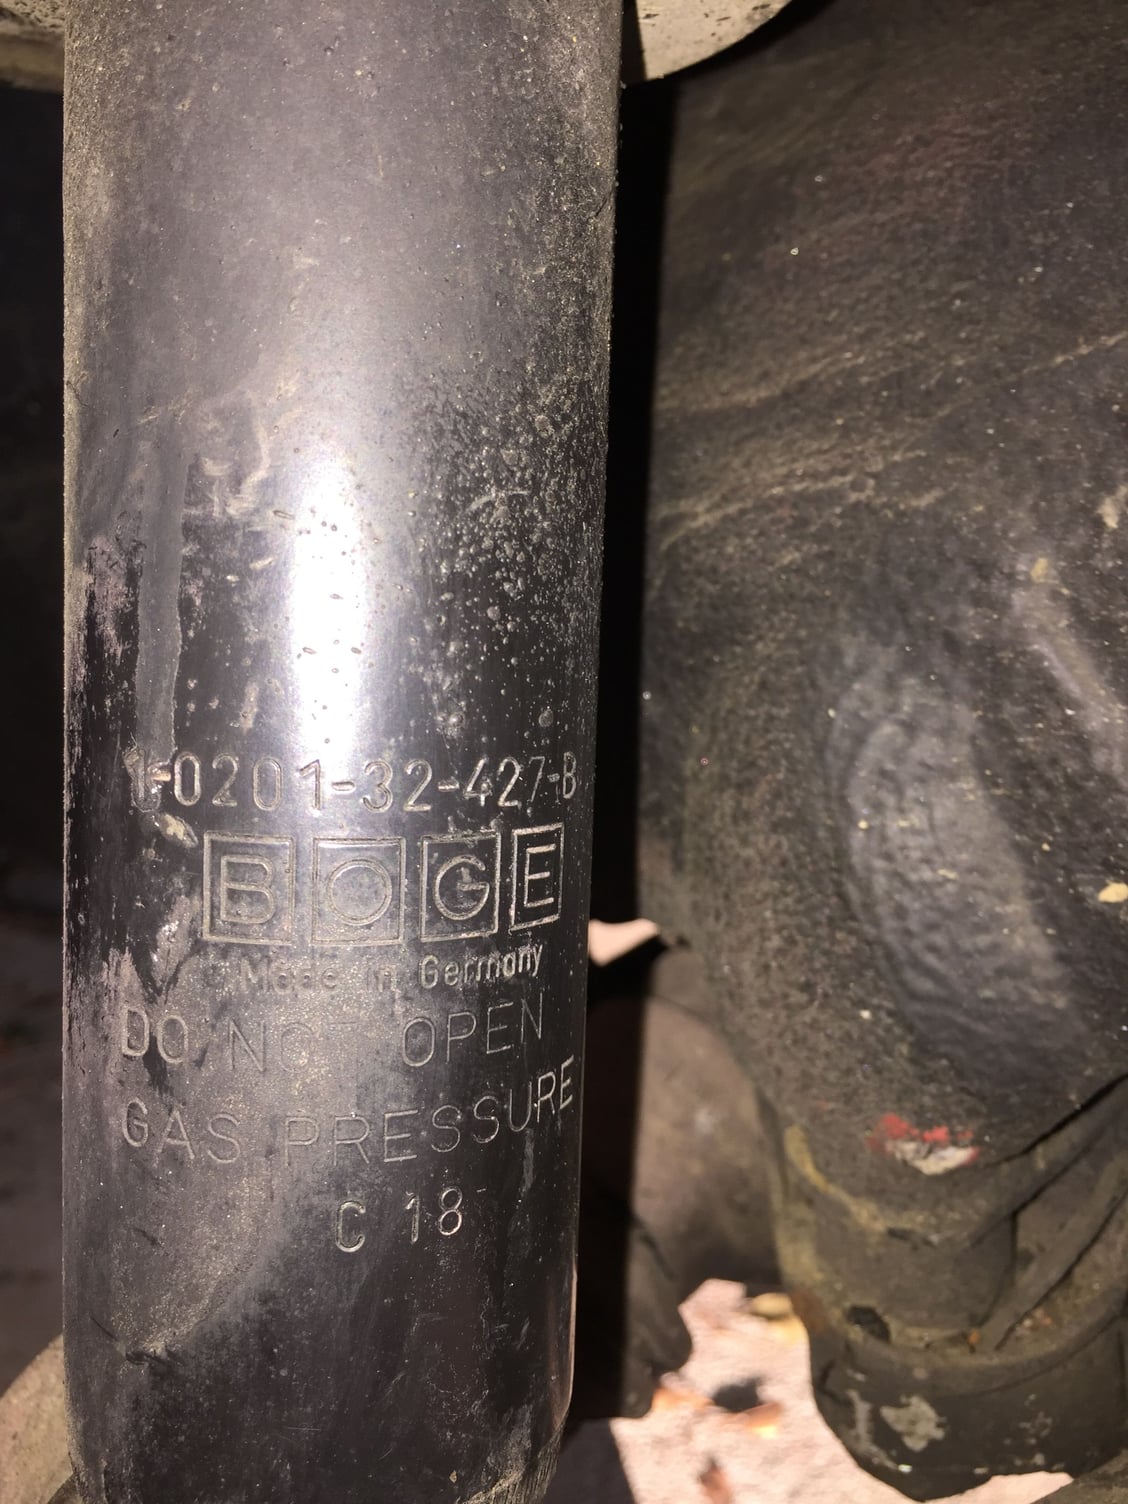
As I was disassembling, I got a good shot of the Boge front shock information:
Both upper control arms still felt springy in terms of bushing rotation. If that makes any sense to you. I could not check anything on the lower control arms due to the pressure from the shocks.
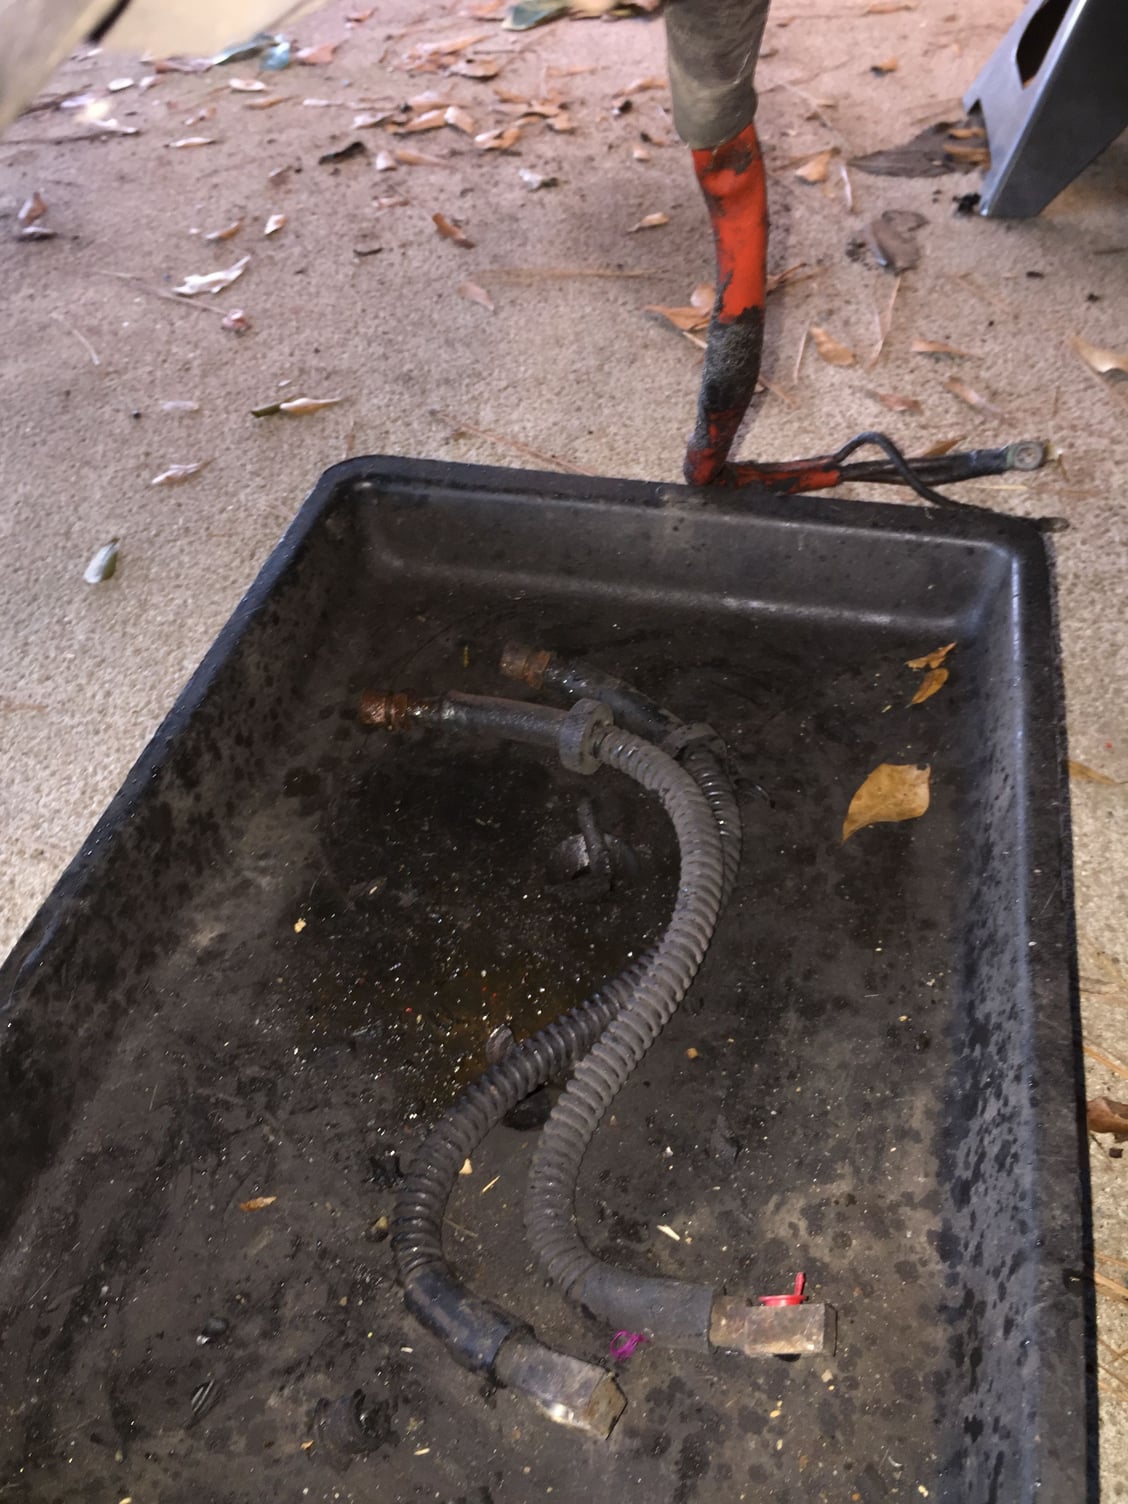
On a good note, I got the driver's side front brake hose off and the nut freed up on the hard line. It was touch and go for a few moments. The nut did not want to separate from the hardline. I held the line in my hand and gently worked the nut back and forth a tiny bit. Finally, with a little 'pop', the nut started turning independently of the hard line. I continued turning, lubricating it with AeroKroil. This nut actually turns better than the passenger's side. I can move the nut up the tube away from the flare, as well. Two dead brake hoses in the drain pan, two more to go.
I am hoping this photo represents the last of the disassembly for the front end:
This is my plan for the front end:
-match mark and remove the outer tie rod ends from the inner ends
-remove the torn steering rack boots
-clean the outer tie rod ends
-clean the upper and lower control arms with mineral spirits and a toothbrush
-clean as much old grease out the upper and lower ball joints as possible
-pack as much new grease as I can into the upper and lower ball joints, and new boots
-install the new ball joint boots
-install the new steering rack boots
-pack as much new grease as I can into the outer tie rod end joints and new boots
-reinstall the outer tie rod ends, lining up the match marks to preserve alignment
-thoroughly clean both spindles in the heated parts washer at work, followed by a scrubbing with mineral spirits and a toothbrush
-reinstall both spindles
Now, before you consider me to be too much of a fool, I know the ball joints need to be replaced. The tie rod ends were replaced in the late 90's. The ball joints have never been replaced, the Red Witch has 168,*** miles on her.
However, all components are serviceable for the moment. I am planning on MM/OPG in the fall at some point. Much better access to the upper control arm mounting nuts with the cross member, rack, and MM's out of the way.
I am going to reassemble the Red Witch as she is, and start laying in parts for the fall:
-rebuilt upper control arms from 928 Intl.
-new lower ball joints
-new inner and outer tie rod ends
-new sway bar mounting bushings
-new Delrin steering rack mounting bushings
-anything else I can think of
looks like its also time to service the shocks,
you probably need new bumpers,
new white flat washers and probably the dust covers look for cracks in them
"I did NOT know about sanding the seal surface on the spindle. Thanks! I usually kiss them with crocus cloth. I will follow your method in this case. Question: 25* from the centerline of the car, or 25* from the centerline of the spindle?"
25* from the edges - the scratches should almost run around the surface. The goal is to keep enough lubricant on the seal lips to minimize wear. If the surface is polished, the lubricant on the seal lips goes away, and the lips wear away/melt away. When the lips wear enough, lubricant can get in the interface again, but now the interface is loose enough that there will be slow leakage.
Along the same lines, you should never install a lip seal dry...
Hi Stan!: School me on front shocks, please. Are you saying they should be serviced based upon age or do you see something specific? I will put some search-fu into this, but can you give me a quick and dirty synopsis on shock servcicing? I think I know what the bumpers and dust covers are, but what is the white flat washer?
WallyP: Thanks for the clarification! That makes sense. And also explains why none of the spindle seal surfaces on my previous vehicles have been rusty. They have always had a little grease that has seeped out of the seal. I will definitely start sanding from now on.
As for installing the seal, I definitely know about that. Grease seals get lubricated with whatever grease the system uses. Oil seals usually get lubricated with petroleum jelly. I am not as comfortable with the oil or lube staying on the seal in a thick enough film for start up as the petroleum jelly. Just me.
Got it, Stan. I had to do a couple of searches in Rennlist to figure out what the white plastic washer was. PET doesn't call it out as white or plastic. I finally figured out it is the washer that sits under the bump stop, item #4, part number 91133351100.

 08-12-2016, 10:15 AM