When you click on links to various merchants on this site and make a purchase, this can result in this site earning a commission. Affiliate programs and affiliations include, but are not limited to, the eBay Partner Network.
Seth remove the spacers then clean them up as well as the mating surfaces.
adjust the E brakes,
tighten the adjusters till they stop the rotors then back off 3 clicks /
NOTE you may have to use 2 smaller screw drivers to push the spring off the star wheel then turn the adjuster .
you should have the brakes set at 3 clicks on the handle.
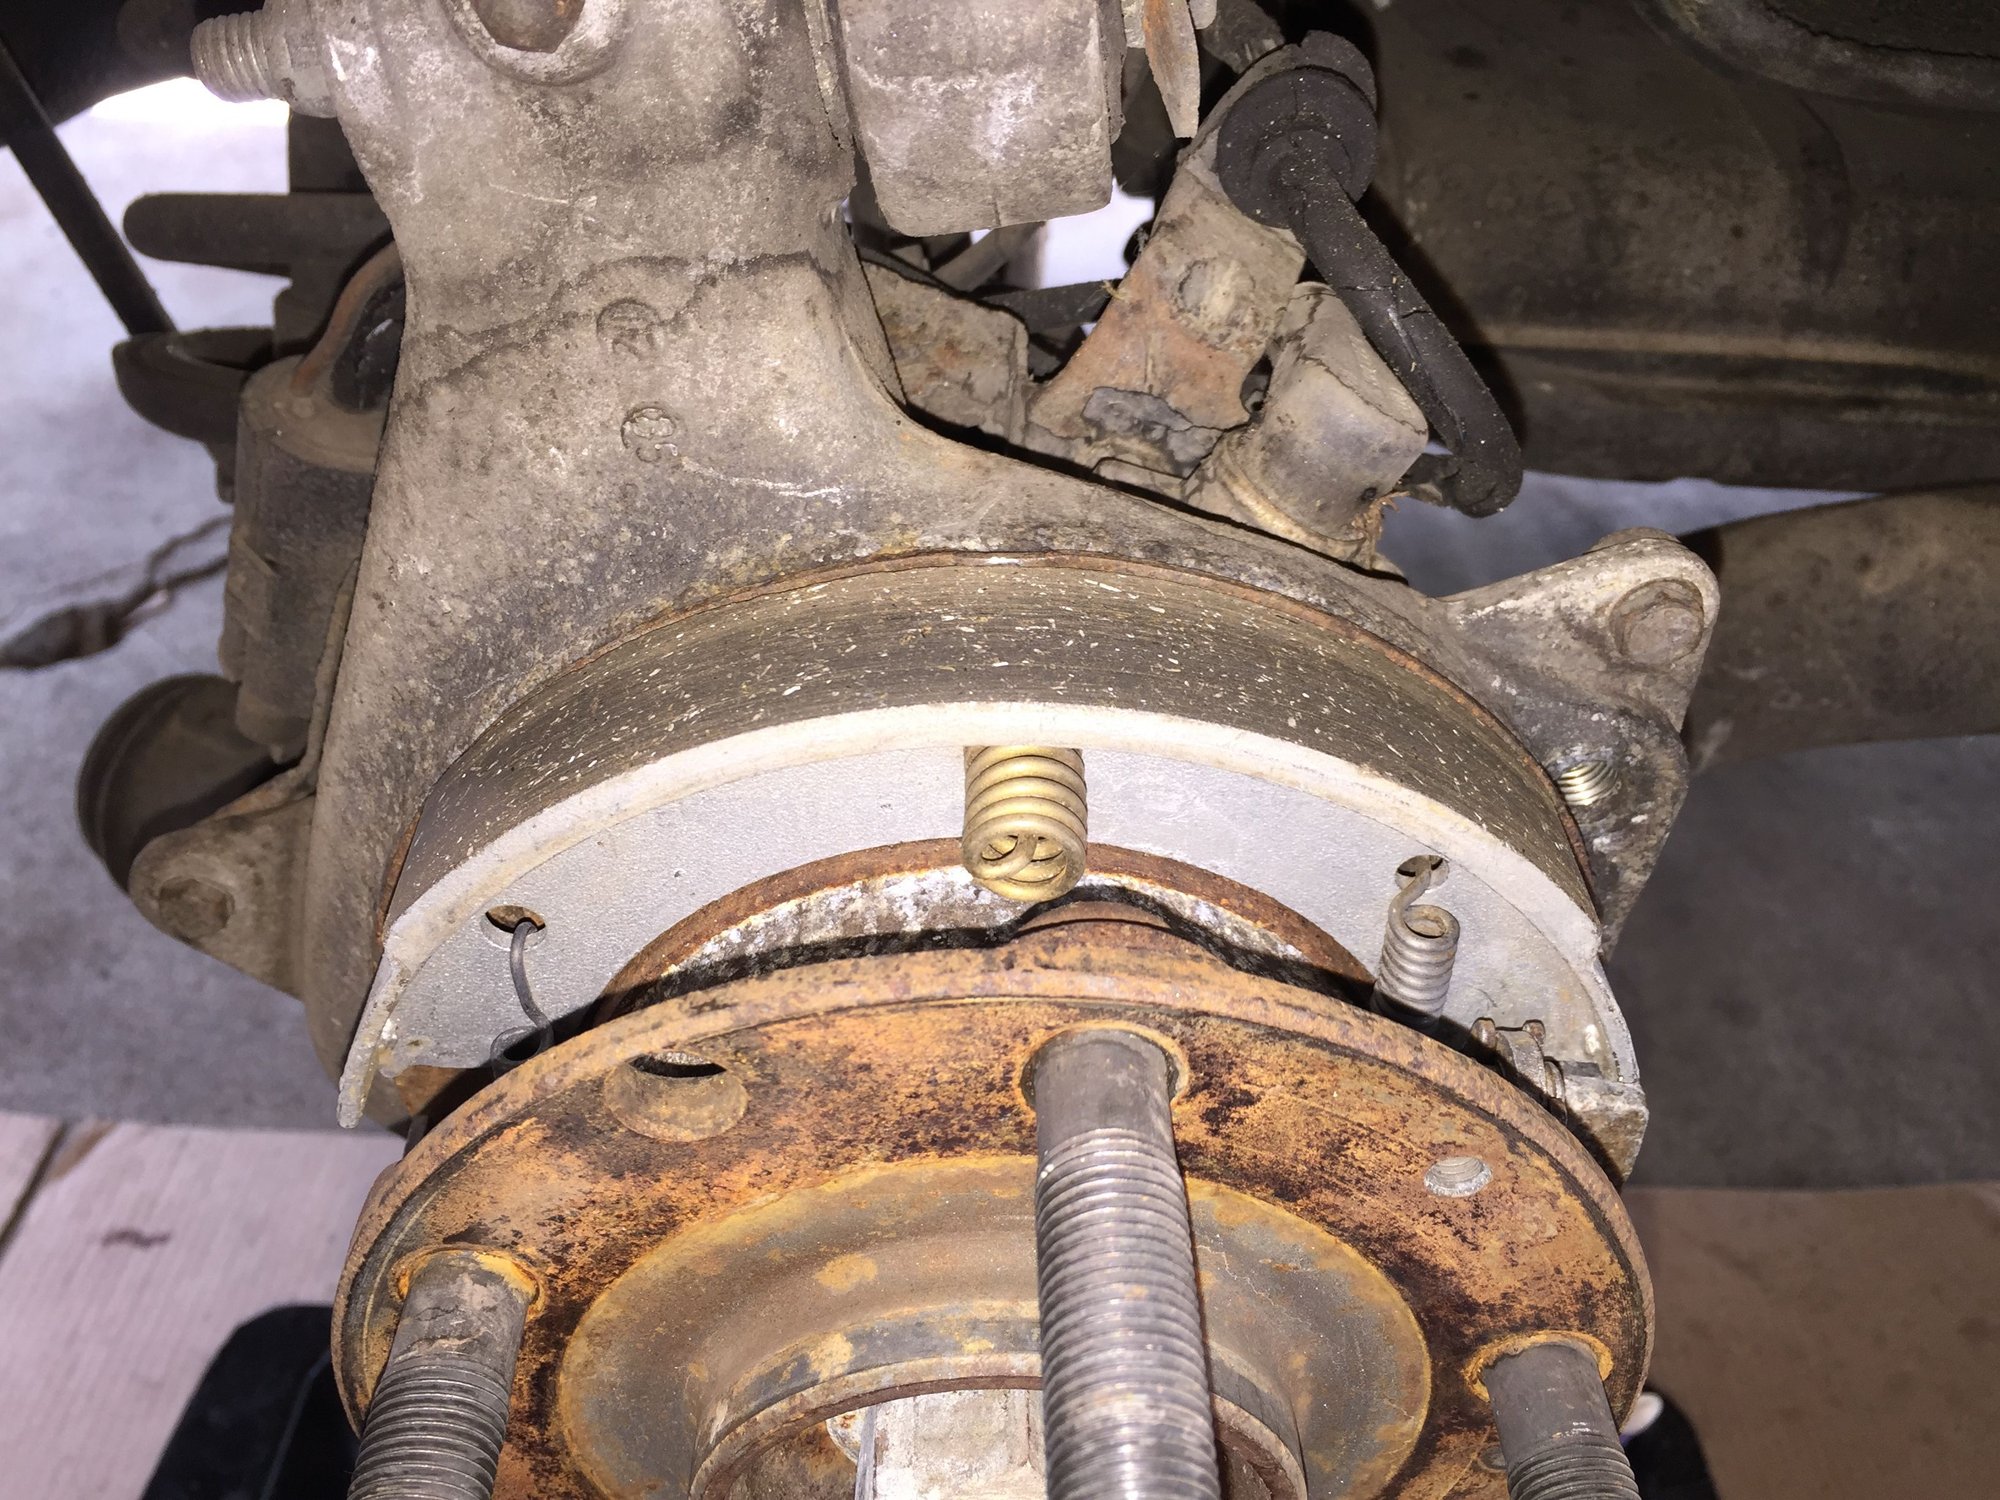
NOTE with a drop light and mirror make sure to inspect the E brake shoe retaining springs ,
these will be visible on the back side of the hub,
the spring should hook onto the ridge if not then the spring can fall into the rotor and damage the shoes
Recommendation, if you do remove and clean spacers...be sure to re-torque wheels after a short jaunt. Just put my seven slots on with spacers, since we have a funeral Friday (no, the wife didn't find out how much I've spent on these two car...so, it ain't mine...lol) and it just looks "classier" with the polished manholes.
Anyhow...
After a shakedown run for the suspensions, oh the joys of changing tires, re-checked the lugs (something I always do) and got a good snug 1/4 inch turn on the rears. My spacers were clean and lightly lubed around the inner flange. This was the first time I'd ever removed the spacers, which were firmly attached before removal.
Hello Brian! I follow that practice anyway. I am pretty OCD about torquing lug nuts and such. I follow a 3-step tightening sequence, then check final torque 10 minutes later. Then, in a day or so of driving, I check final torque again.
I especially do that on my vehicles that have aluminum rims. When I had steel rims on my S-10, the lug nut torque didn't drop much over a couple of days. After adding the N90 SS Monte Carlo rims, I definitely had to retorque the lug nuts. However, once they had been retorqued, that was it.
I expect similar out of my Porsche.
I will be cleaning the spacers, rotor hubs, and backsides of the wheels. I will put a very thin smear of anti-seize on all.
With the transmission hopefully no longer an issue, I turned back to the rear wheel spacers.
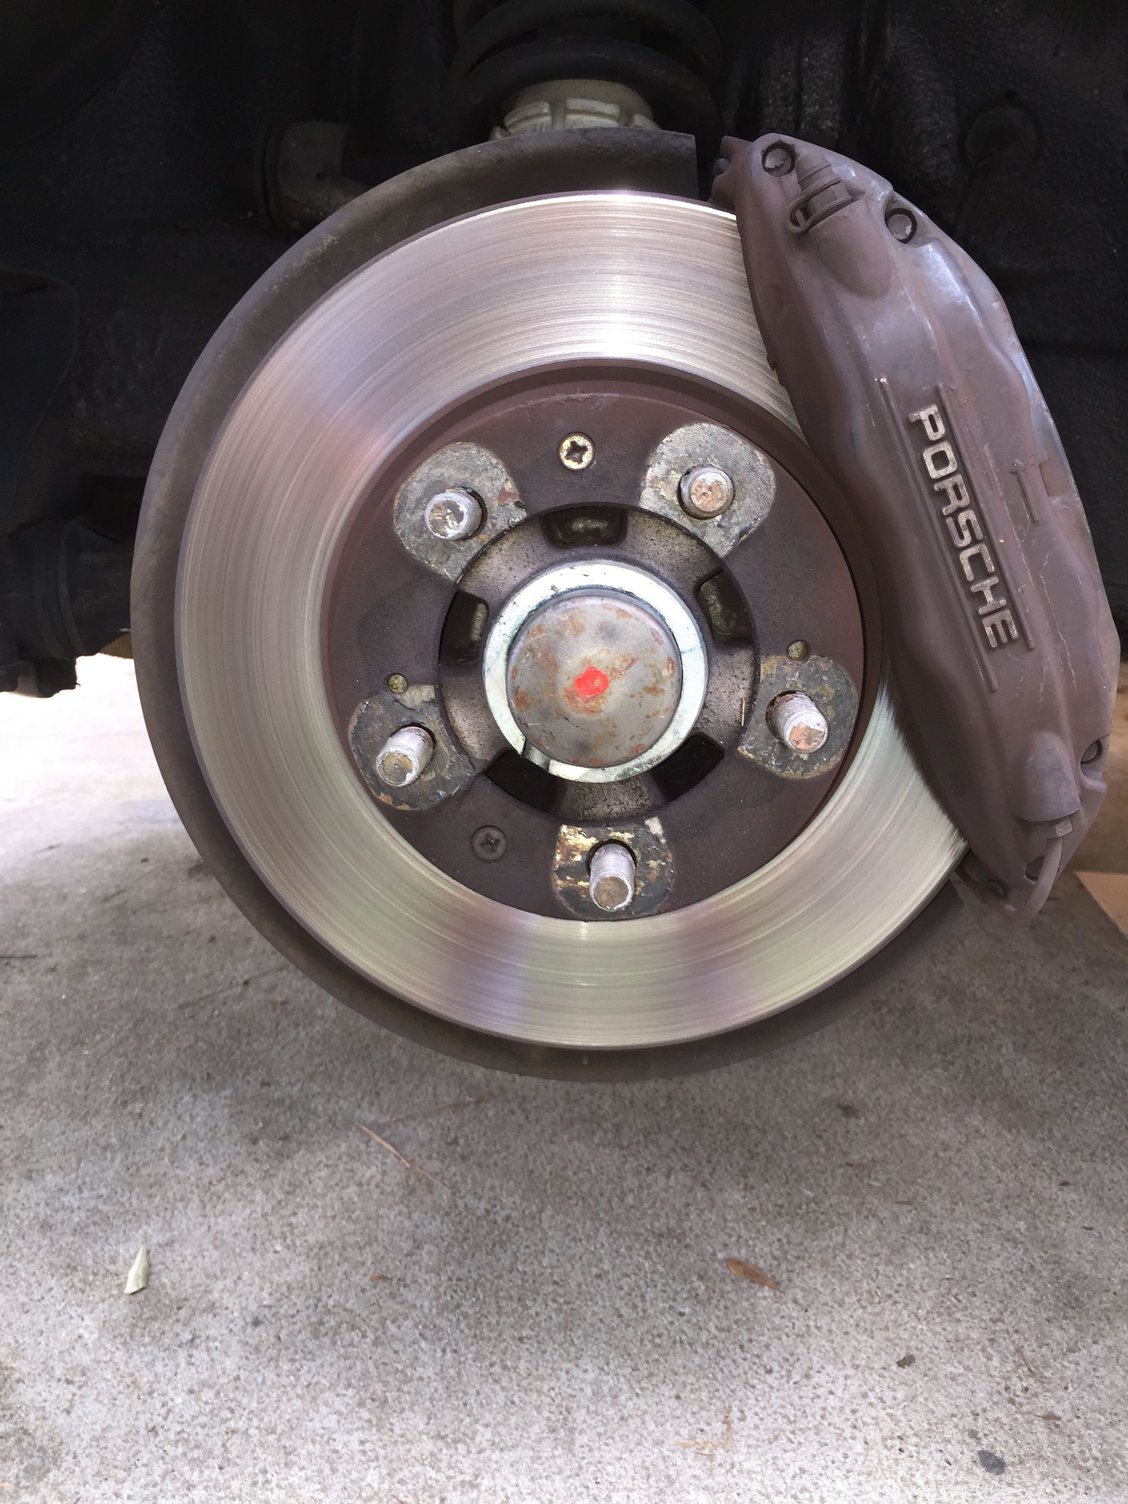
They came off with very little effort. There was very little corrosion, though no residue of any kind of anti-sieze. They are definitely a Porsche item. I found part number 477501701 and date codes from the third month of 1985 on the backsides of them.
I ran the spacers through the heated parts washer at work, then gently cleaned the front and rear mounting surfaces with a green fine roloc pad. I will install them with a very thin layer of anti-seize on the mounting contact points. I plan on cleaning the wheel mounting points and the same on the rear brake rotors.
Takin Stan's advice, I started adjusting the E-brakes. Very good advice, as the Red Witch needed it. If I pull hard, I could get 5 clicks out the the handle. I belive the driver's side E-brake was far looser than the passenger's side.
After loosening the cable at the E-brake handle, it only took me a few tries to figure out what I was doing on the passenger's side shoe assembly. I tightened them until the rotor would not turn, then backed them off 3 notches.
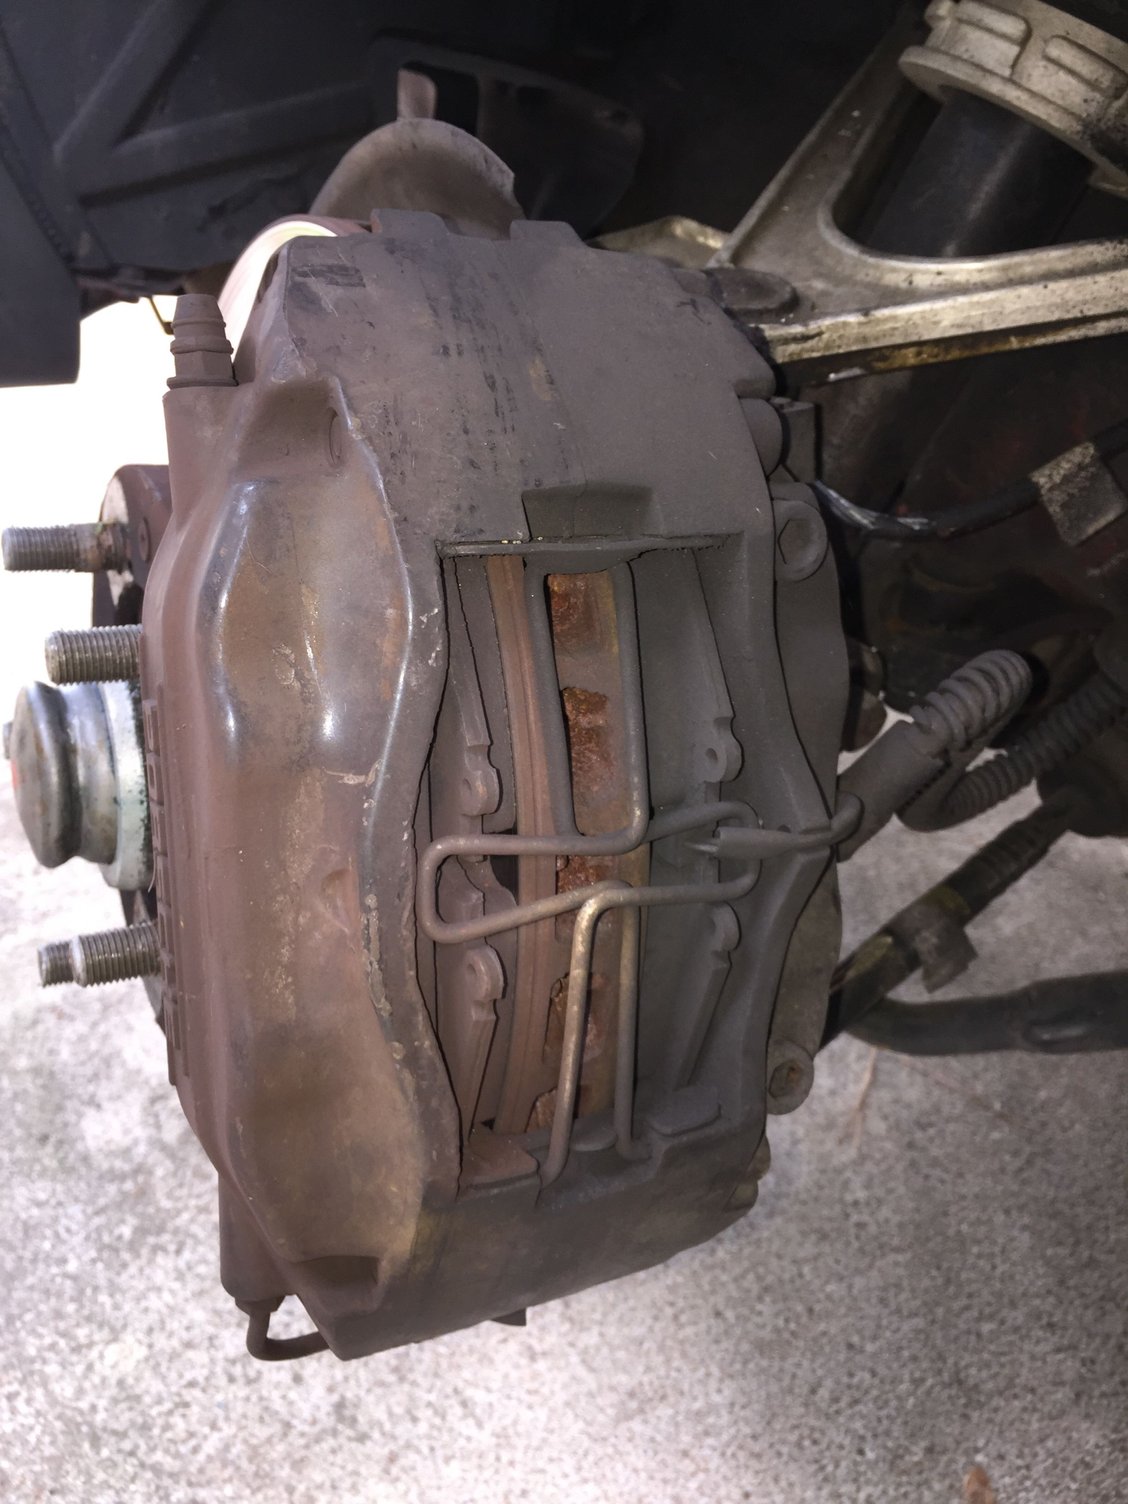
The driver's side did not go nearly as well. No matter how I tried, I could not manipulate the screwdrivers to move the spring and turn the adjuster. In a fit of desperate rage, I removed the caliper and rotor for a better look see.
Aha. The adjuster wouldn't turn anymore because it was turned all the way in.
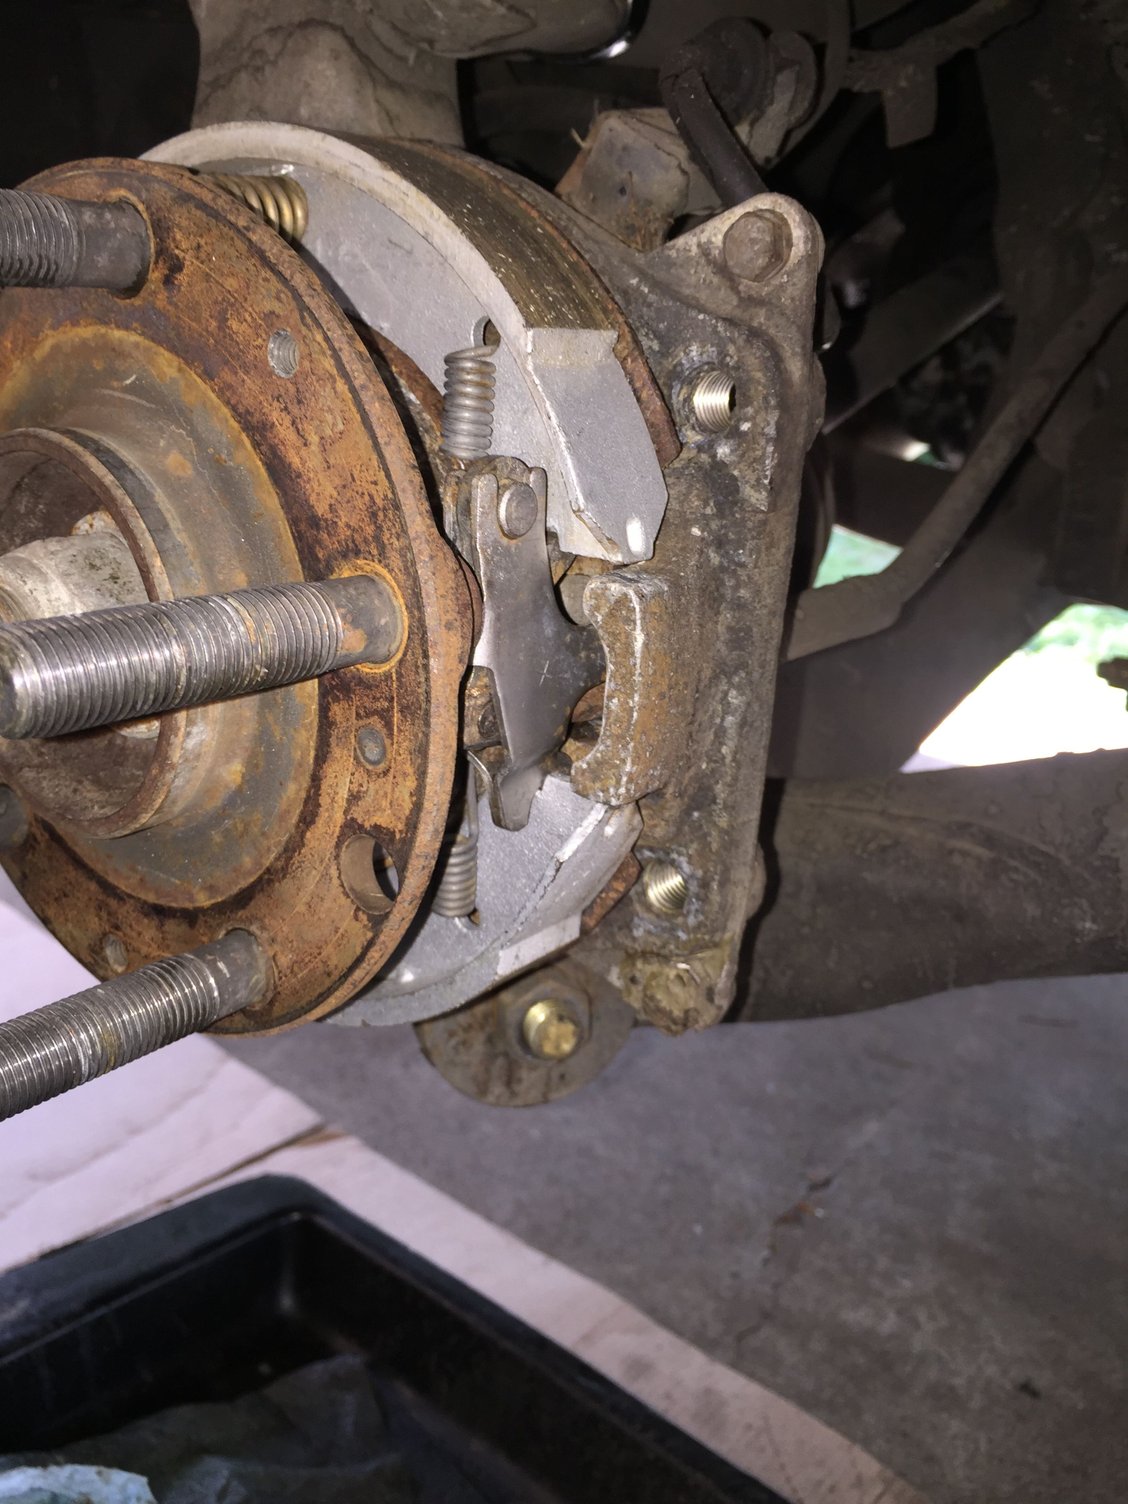
I took this as an opportunity for some clean and inspect. I zip tied the caliper to the top of the rear suspension to keep it from going anywhere. I then did the same to the passenger's side. Both sets of shoes look OK, with adequate meat left on the lining. The adjusters were a little crusty, but the working surfaces had anti-seize on them. The mounting springs look OK. I plan on sitting down with a toothbrush and cup of mineral spirits for some good cleaning of both sides of the E-brakes.
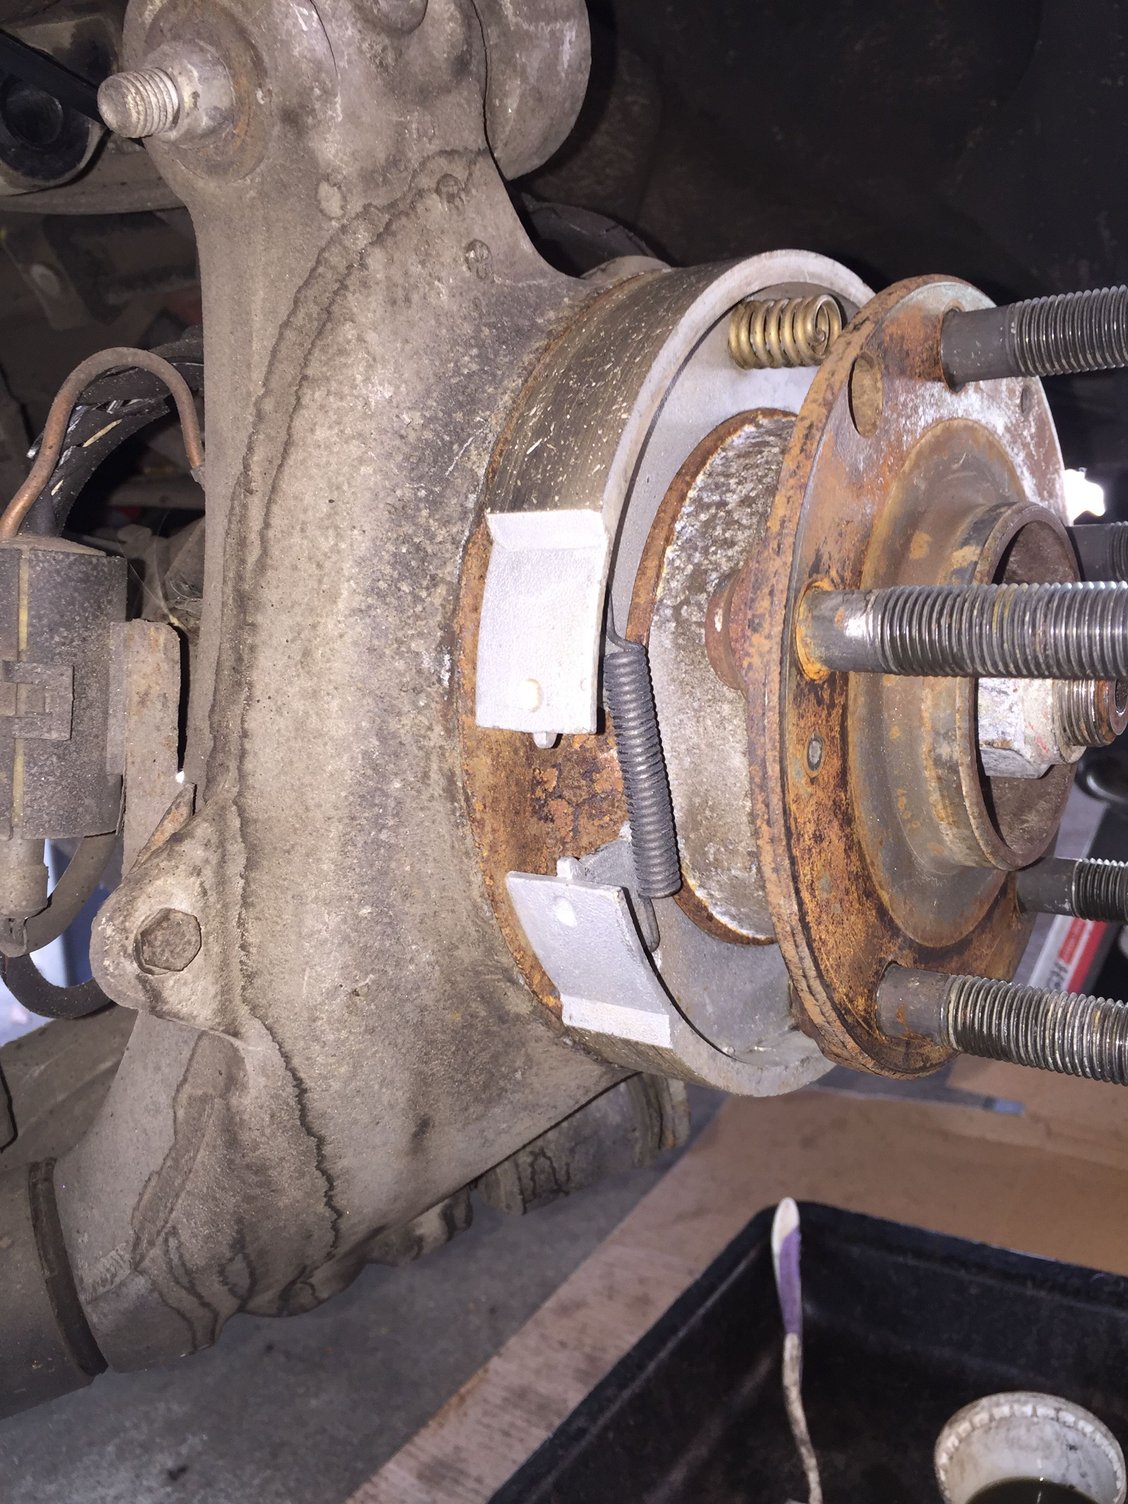
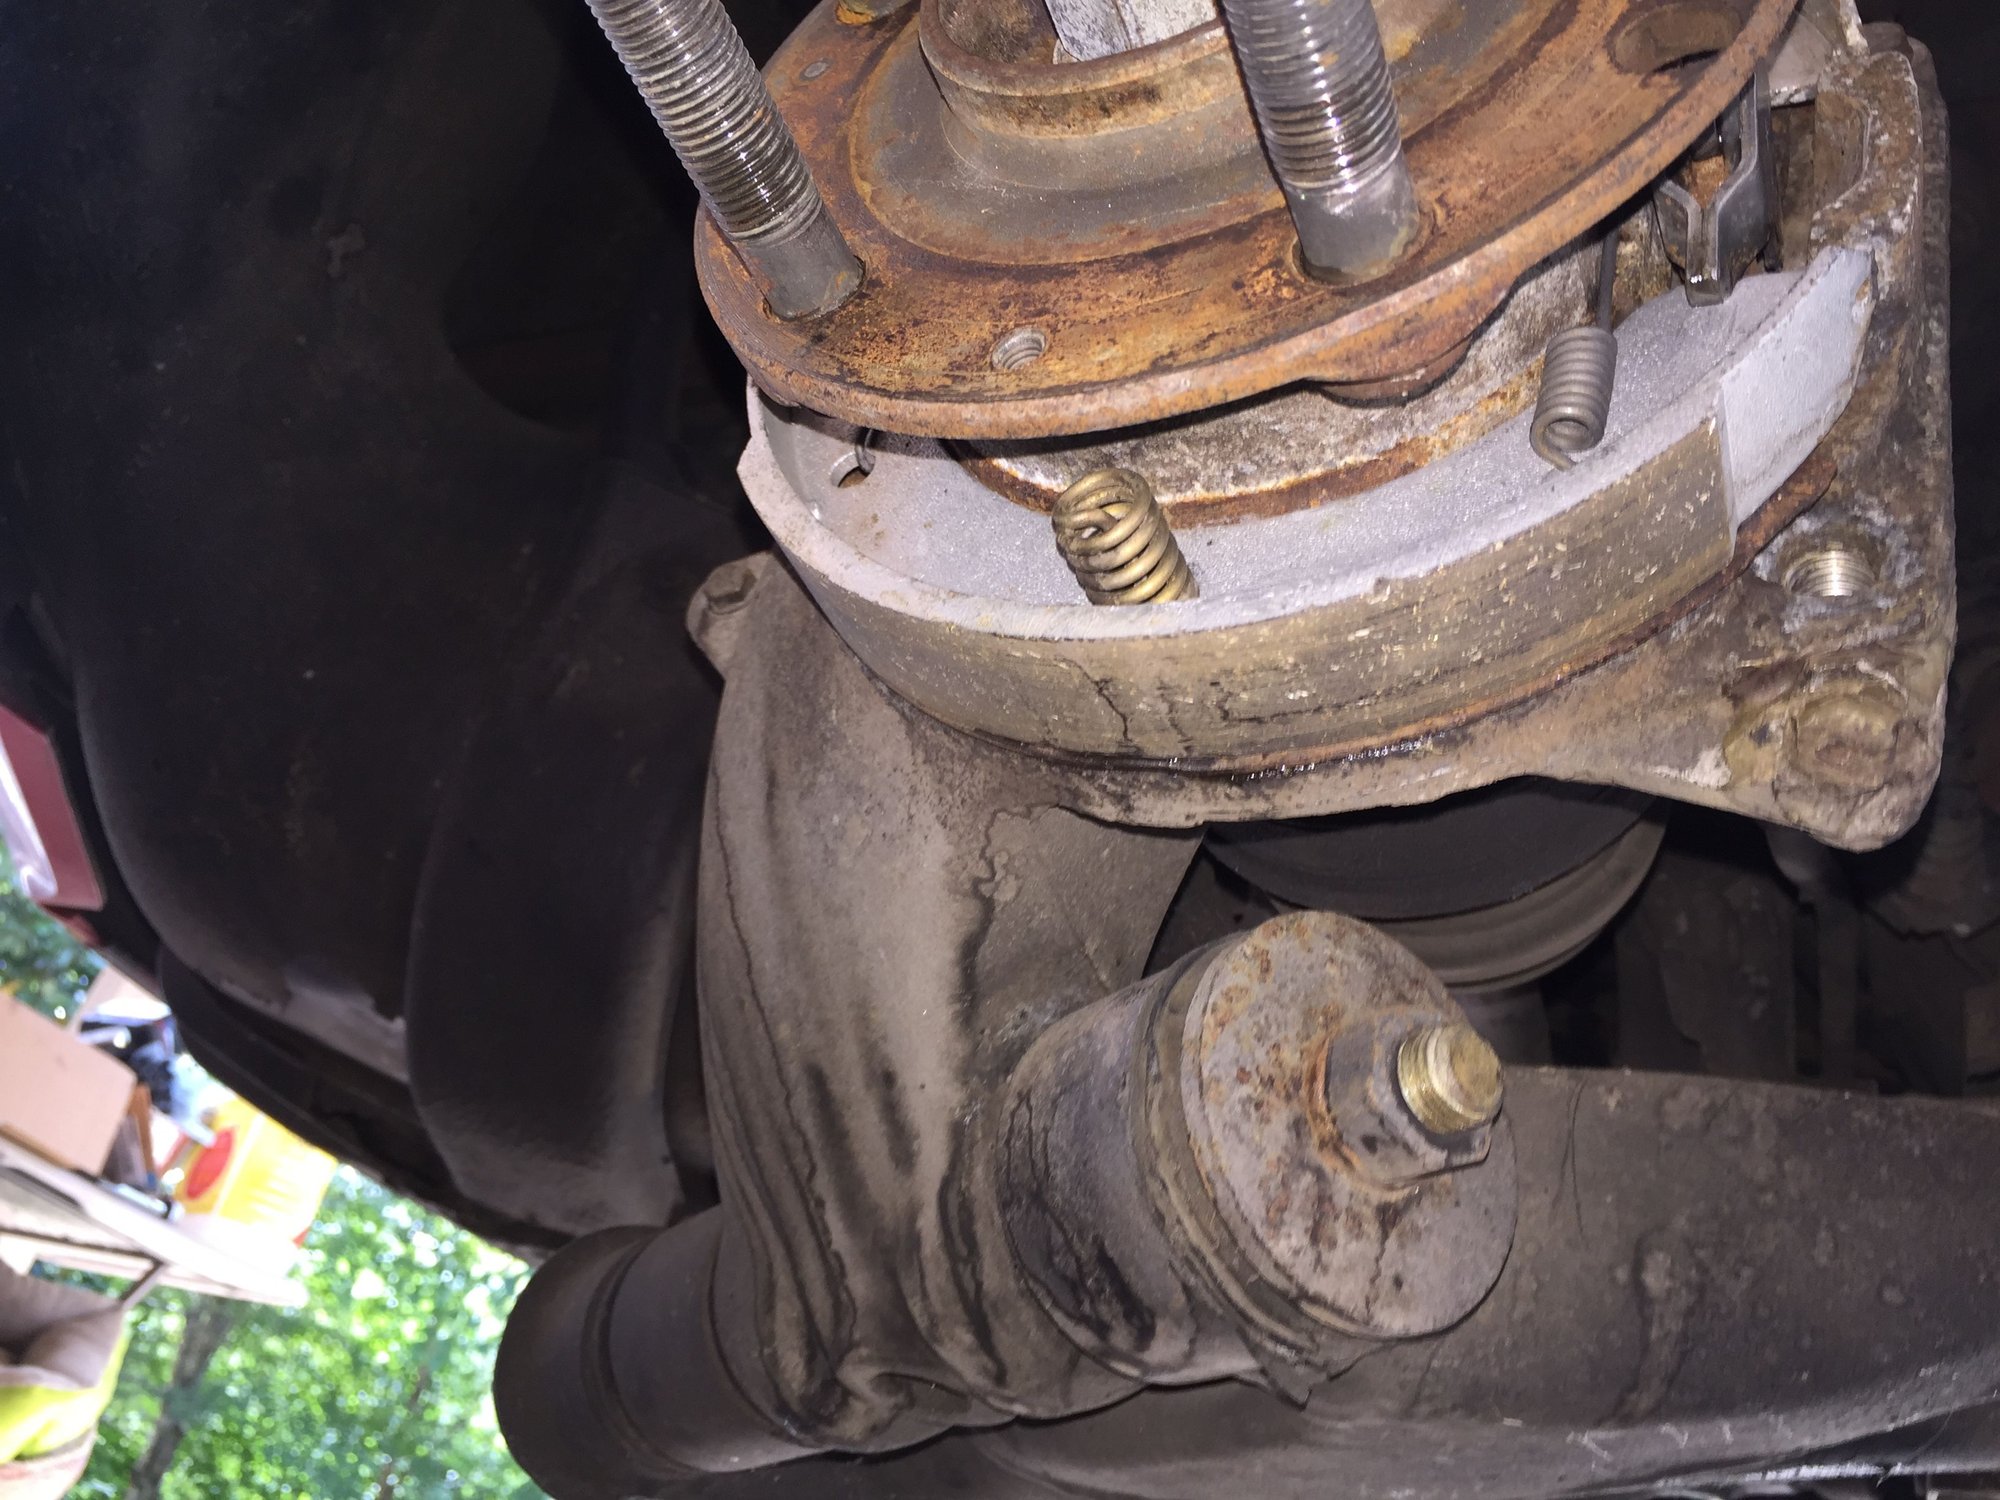
The rotors, adjusters, and all mounting hardware have come to work with me tonight. All will get cleaned in the heated parts washer, then I will work on the rotors with red scotchbrite. The drum surfaces on the inside of the rotors have some light surface rust. As well, I want to clean off the front and rear mounting surfaces.
So the rear rotors, adjusters, and all mounting hardware took a bath in the heated parts washer.
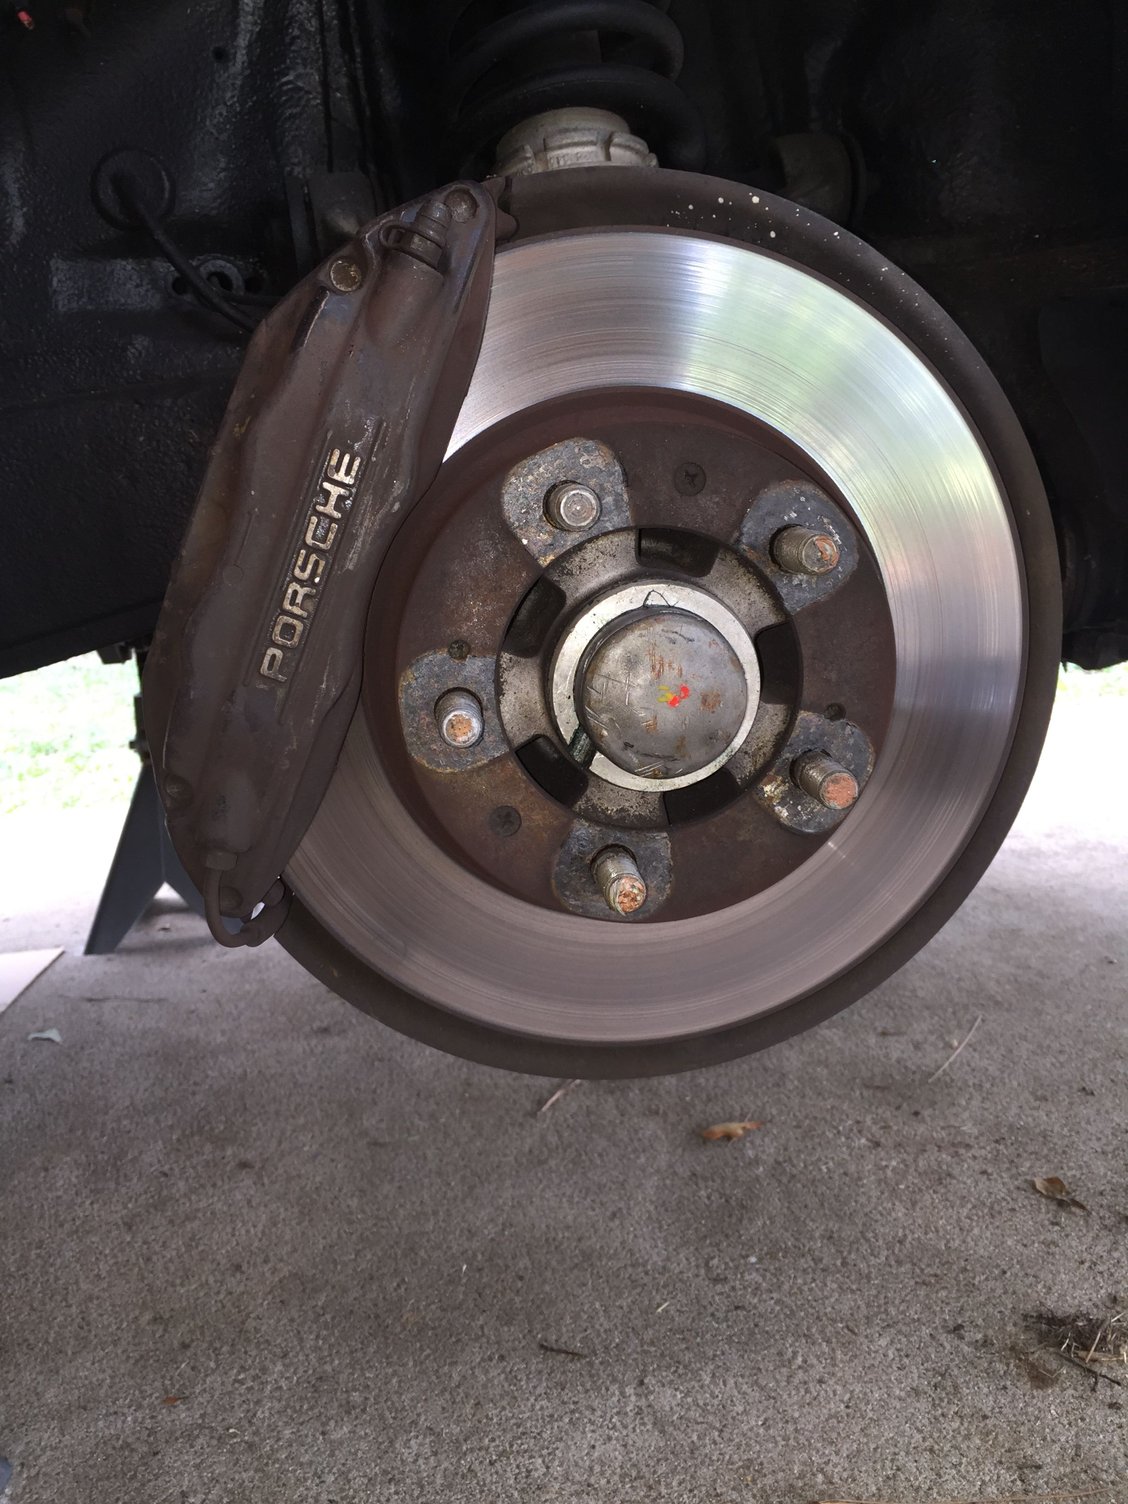
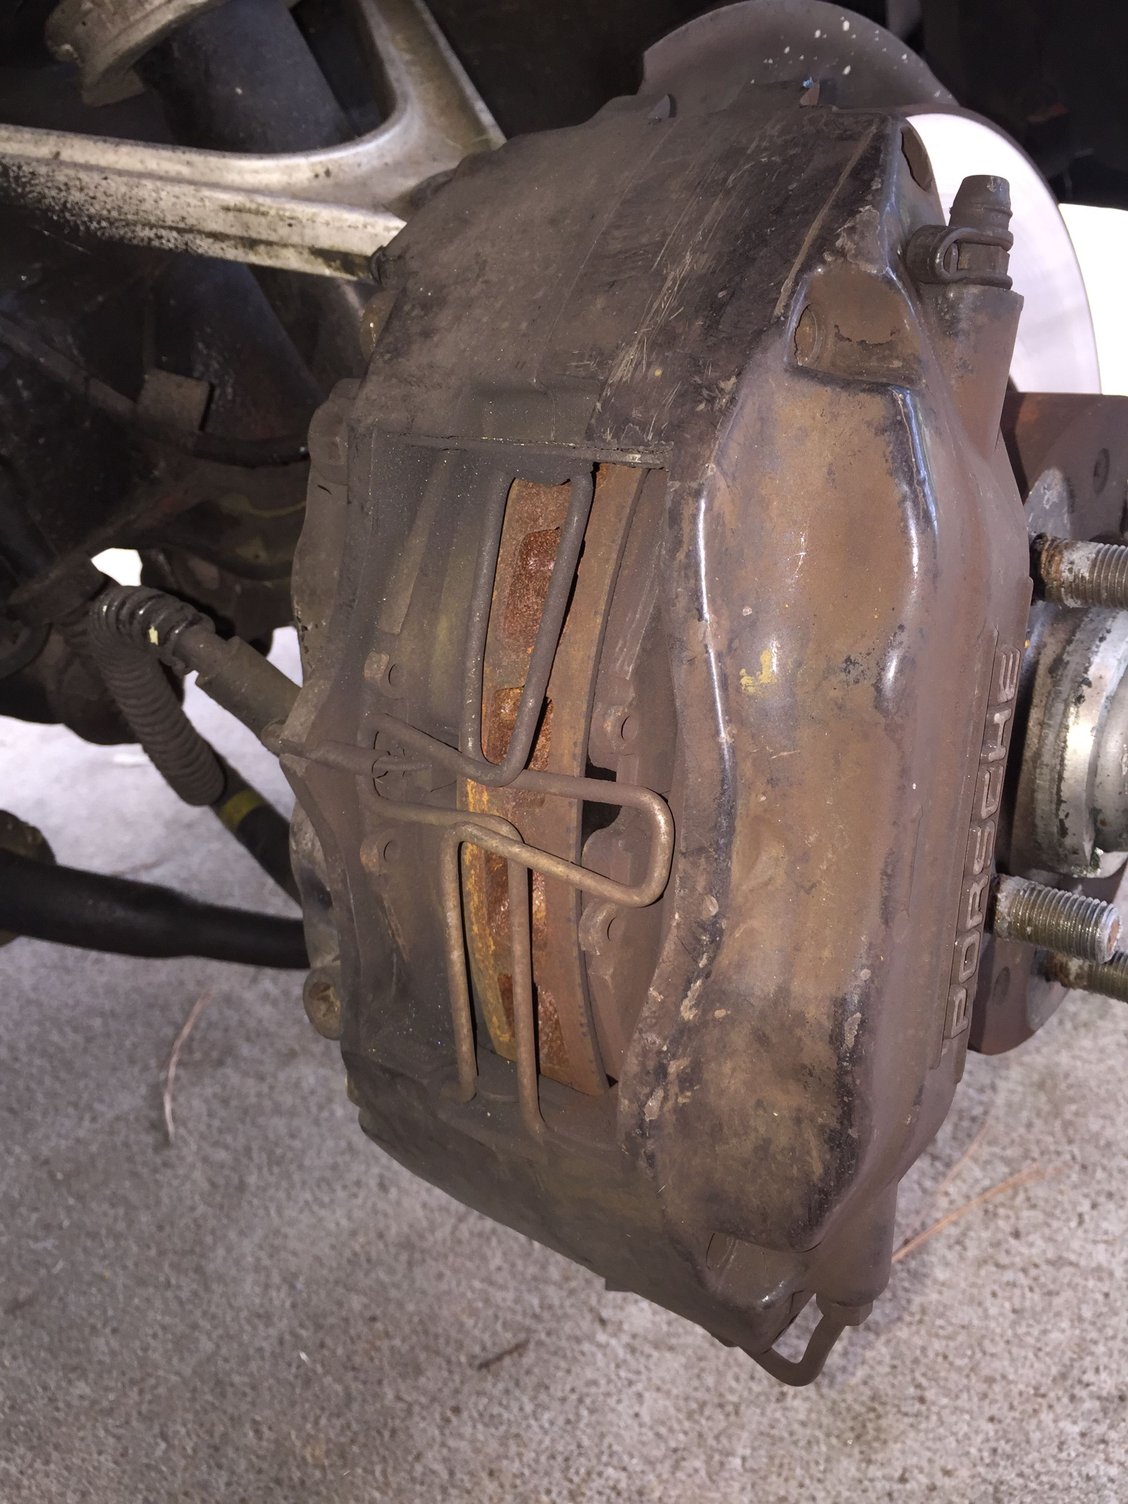
The rotors got chucked up in a lathe in Tool & Die. I used red coarse scotchbrite pads to clean the drum surfaces inside the rotors. I also gently worked the pad surfaces on the front and rear of each rotor.
I used a red coarse roloc pad to clean the front and rear mounting surfaces on each rotor. All in all, everything came out well. The rotors are by no means new, but they show no grooving or damage, so I will call them good.
I chased the adjuster and caliper mounting bolt threads, all were good. The adjusters are a little crusty on the outside, but are still quite serviceable.
I did source new M6 x 1.0 15mm long countersunk socket head screws for retaining the rotors. The screws that were in there were a mixed bag of lengths and age, as well as the phillips recesses were starting to distort. And I lost one.
My intent this morning after work is to scrub both E-brake assemblies clean, then reassemble everything. We shall see...
I got a little cleaning done on the passenger's side rear today. I thoroughly scrubbed everything with a toothbrush and mineral spirits. I followed up with a thorough blast of brake cleaner to remove all the stuff from the nooks and crannies.
Yummy.
It all cleaned up relatively well. Shoes look better cleaned up. If I remember the PO's receipts correctly, they, and the hardware, were replaced some time in the late 90's. All still look quite serviceable.
I cleaned up the lug studs by scrubbing, followed by running an M14 x 1.5 thread chaser down each one. That handily removed all the dried up/built up copper anti-seize that was on the studs.
I do not yet know if I am going to go back with a thin coat of nickel anti-seize on the studs. I probably will not, as most posts I have read say not to. I will see what the WSM says. I am taking the aluminum lug nuts to work with me tonight for cleaning and thread chasing.
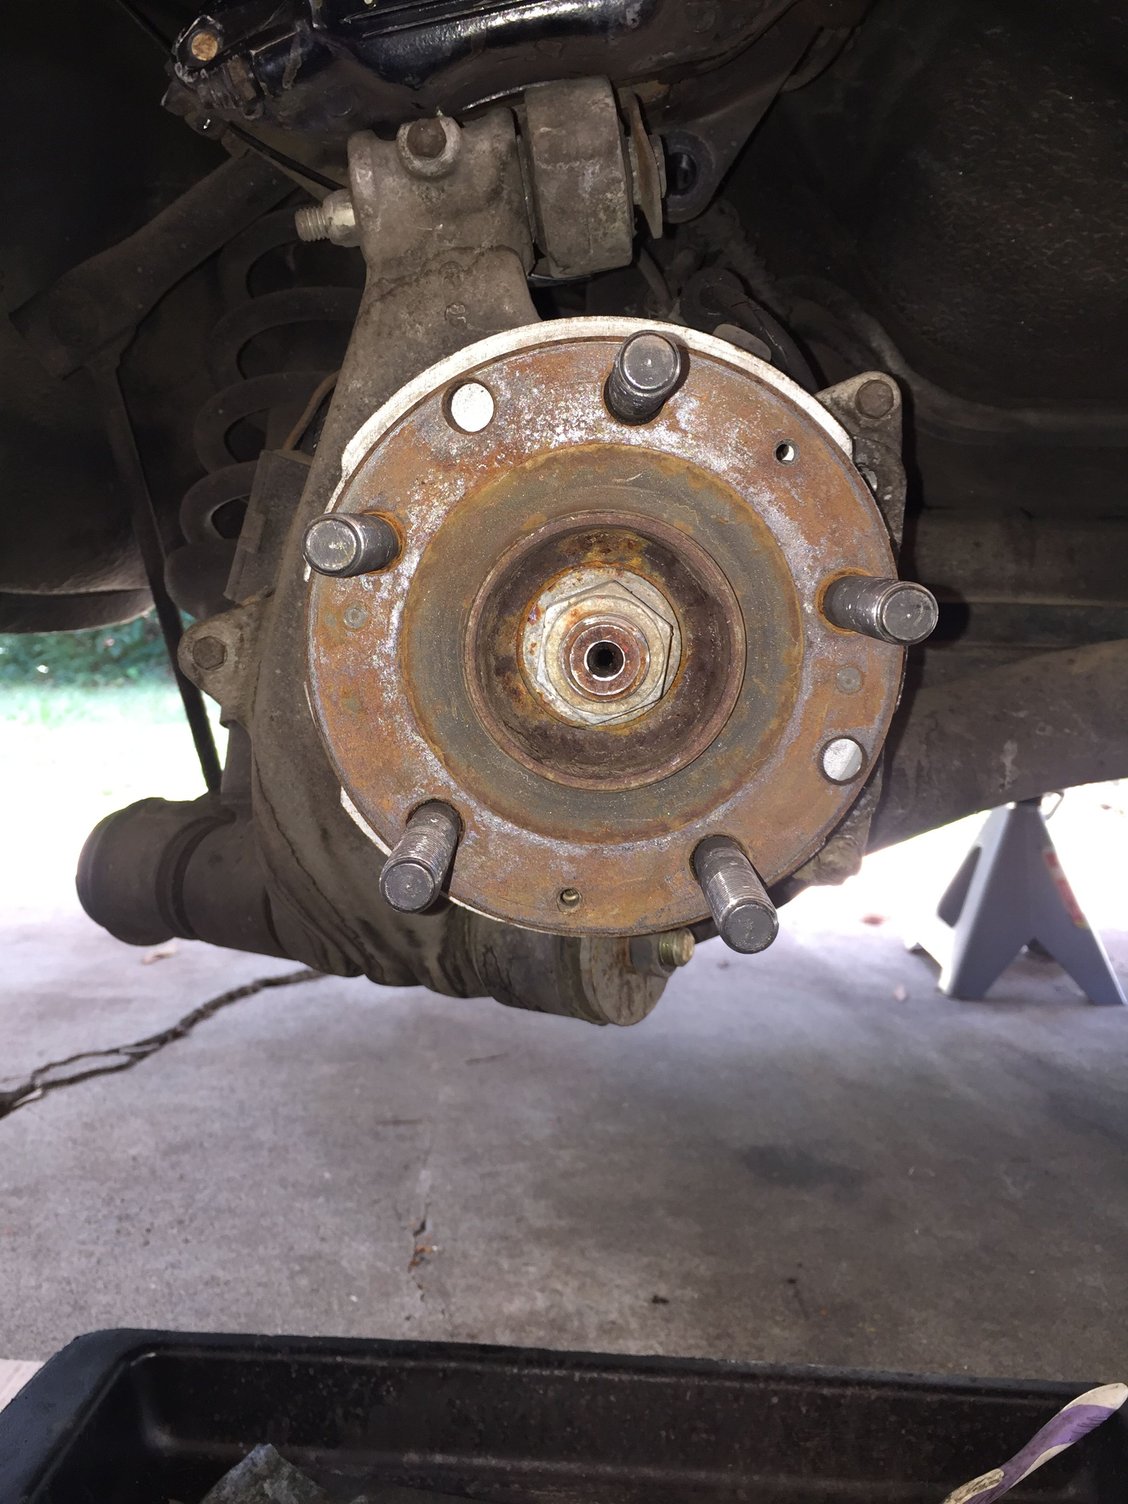
As is becoming a disturbing trend, I have found something else wrong.
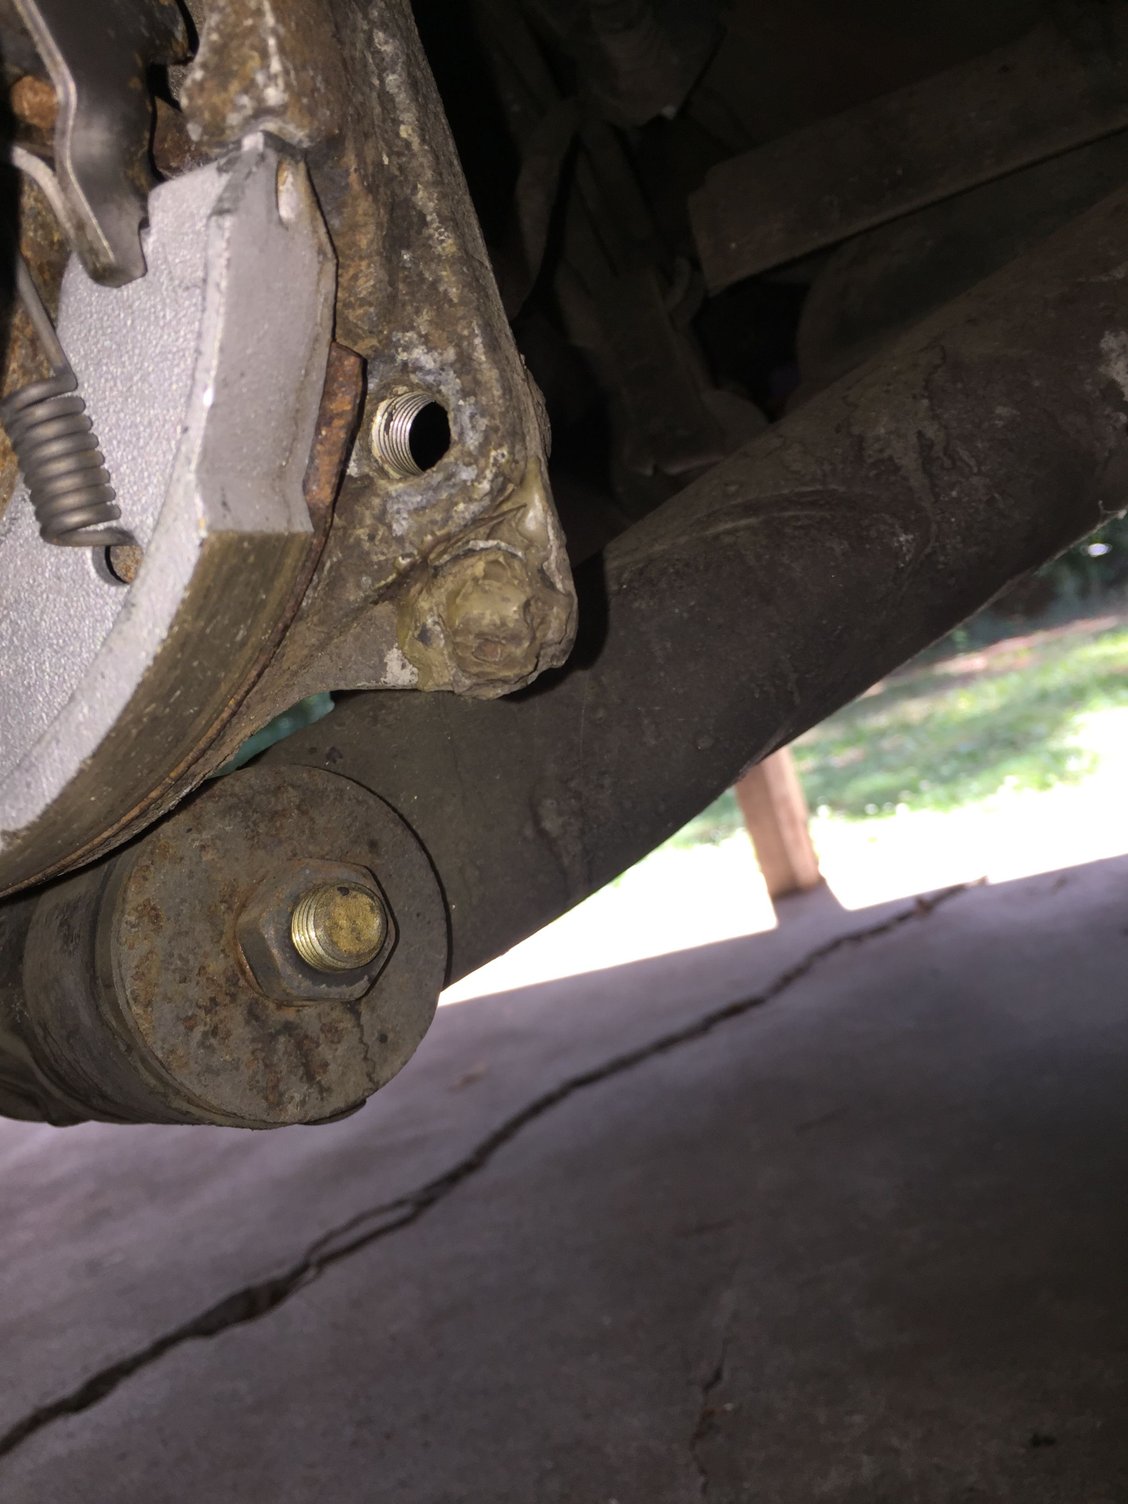
While scrubbing, I kept coming across these three threaded bosses that had bolts in them. Yet, they seemed to be for nothing. I checked PET. I am missing the back rotor shields. On both sides. Sh*t.
And there is something funky/epoxy looking going on with the front lower boss.
I will look closer at that, then contact Mark Anderson about a used set of shields.
What's missing...?
Note the expoxy looking substance on the lower boss.
I will continue cleaning in the morning. I still have to hit the passenger's side hub wheel mounting surface with a red coarse roloc pad.
I believe your rear backing plates are missing...that is what that open bolt hole is for...and the other two spots have the bolts in them...one looks to be holding the bracket for an ABS connector or something and the other just appears to be its spot for good looks.
All of your parts cleaned up nicely. It makes for easier assembly, when things are clean and lubed.


 07-04-2016, 10:19 PM