When you click on links to various merchants on this site and make a purchase, this can result in this site earning a commission. Affiliate programs and affiliations include, but are not limited to, the eBay Partner Network.
Thanks Don...It's been over a month of being side tracked by untangling the wiring. Then today I replaced the footwell flap actuator in a leisurely 1-hour. Nothing less fun than cleaning up other peoples' messes before making progress on the originally intended project. I'll take some after photos and post the before and after for comparison.
I replaced the comb flap actuator today. Honestly, it was a PITA for all but the last 20 minutes (Thank you Mr. 3/4 inch spade bit).
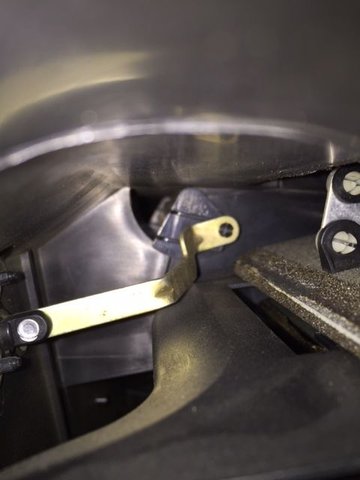
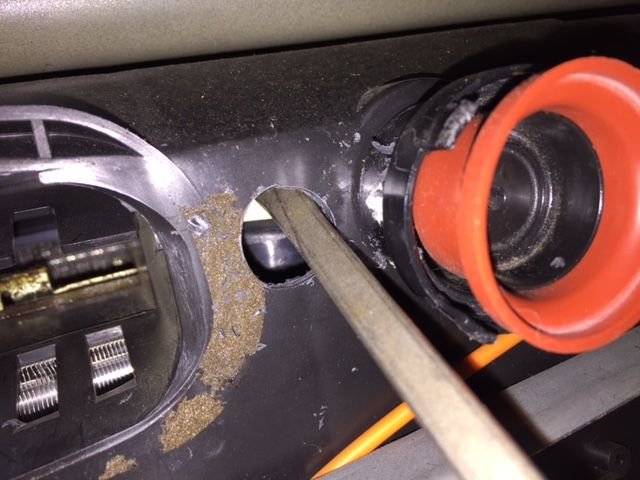
Below is a picture taken looking into the air handler through the port on the right side where the tube leading to the passenger door vents attaches. The four-pronged clip at the end of the brass-colored actuator arm is what needs to be released. Initially, I decided to try to replace the actuator without drilling a hole as Dwayne had. I can confirm that pulling the actuator out of its housing and rotating it slowly is a very effective method for releasing the arm from the clip....
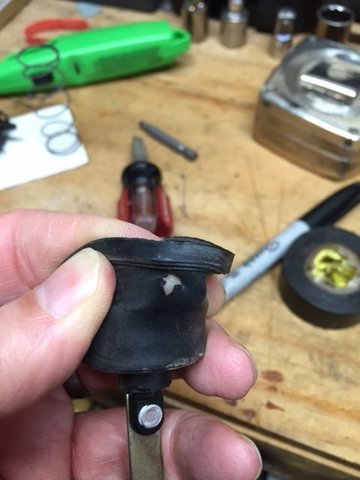
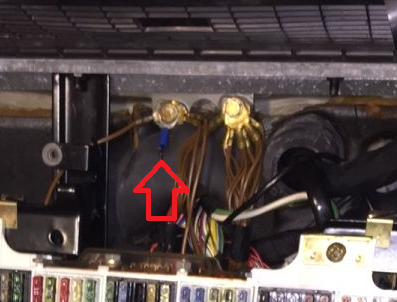
Here is the cause of the taptaptapiness...
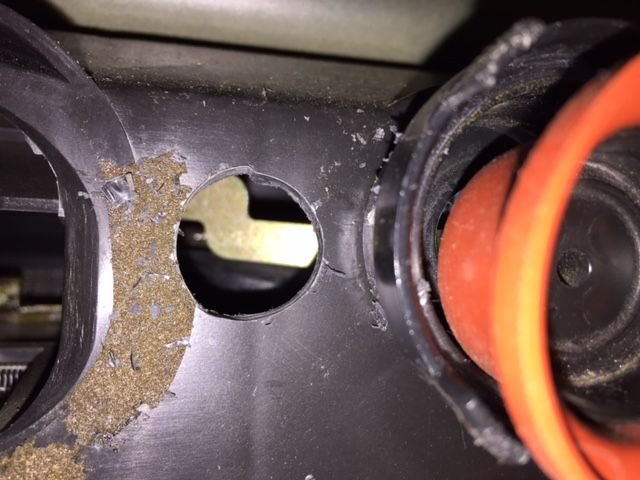
However, without a snake light or helper to hold the light so I could hold a small mirror-on-a-stick in one hand and press the brass arm back on to the clip with a screw driver in the other....I soon became frustrated and tired of contorting my over 50 body into varieties of yoga positions. I snapped...I grabbed the drill and the 3/4 inch spade bit (no worries...on Friday I ordered a 125-piece set of rubber body grommets with several 3/4 inchers that are webbed to blank off holes...just in case).
Note the zig-zag offset in the brass arm of the actuator. After placing the eye of the arm directly on the four-pronged clip (by eye and feel) I thought maybe I could simply pry the arm onto the clip, using the right edge of the hole in the air handler as the fulcrum. Worked great!
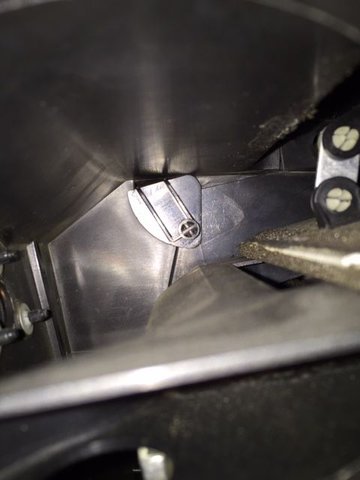
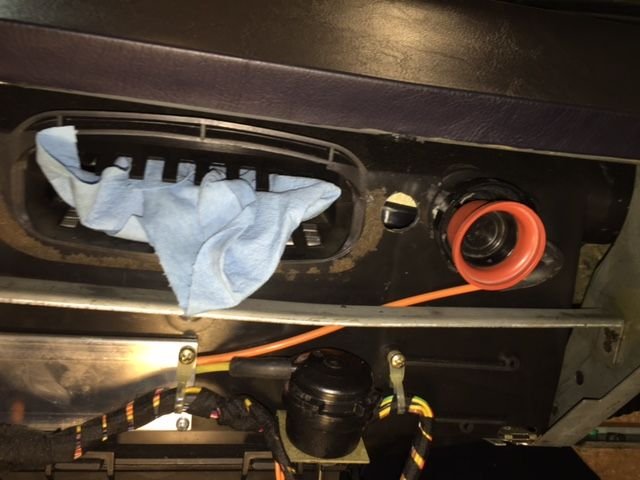
To make the task of a little easier I positioned the flap arm with four-pronged clip favorably by stuffing a paper towel under the comb flap.
Then I installed the spring and cap and tested with the Mighty-Vac. No more tap tap tap...just a flap that rises to various levels depending on how much vacuum is applied. Hard to beat the feeling of fixing a problem as annoying and hard to reach as this.
There's a great amount of joy in getting crap spaghetti wires out of a hacked job. Nicely done.
I wholeheartedly concur.
And that joy is further amplified by a better understanding of what's supposed to be there and the knowledge that what remains has been properly combed, tie-wrapped and stowed.
Such occasions call for a fine adult beverage and a few moments of contemplation to appreciate that your car is now better than before you begun.
If I ever have to do something like this, I will first build some sort of comfortable platform, and get a suitable pillow. And a bottle of Alleve.
I found a wad of vestigial wiring in my dead-simple Bugeye yesterday. As you say, it is very rewarding to be rid of it. Its PO was an electrician who cared not for the esthetics of wiring. But not as serious as the unexploded ordnance I found in the heater box.
I had similar in my dash. Labeled every wire in there, zip tied things up and made them orderly in the event someone else should ever need to get behind center console.
Curt...if your hand-crafted wooden engine support is any indication, you will be very comfy. Like motorcycle accidents...this is a WHEN not IF you ever have to go through it kinda thing (more likely if the car has lived in hot climates and/or experienced a lot of heat-soaking traffic jams). You should just start building it now. Lol. Just kidding...I hope.
My car has lived an easier life than most. Little evidence of drying, cracking, shrinking, due to heat exposure. Rubber is all in good shape, even under the hood. However, someone told me the comb flap actuator has a high failure rate because it's always working, while others, like the defrost actuator, are seldom used. Often the splits in the diaphragms appear to be locations of folding fatigue (in a crease)...like twisting wire until it breaks. This split in my comb flap actuator was in such a crease. In the photo above I had to push from the inside to flatten out the diaphragm to be able to photograph the split.
Last edited by Captain_Slow; 03-22-2016 at 12:38 PM.
Reason: heat not only factor
Installed the 3/4 webbed grommet to fill the hole I drilled. The the plastic air handler has thicker walls than I expected. The grommet is meant for thinner sheet metal, and it went in with a little shoe-horning and probing with a small flat blade screw driver. It works fine and it feels very secure, but if I had to do it again I'd use a "hat" shaped body plug like Dwayne used.
Last edited by Captain_Slow; 03-23-2016 at 10:48 AM.
I had what appears to be the exact same ring connector with a blue sleeve, with nothing connected to it at the ground point. Thought that it was something one of the POs did. Coincidence? Or something from the factory?
LOL...Ryan, I wondered if someone would notice the ring connector I left on the ground point. Wow. It's several deep and I didn't want to bother pulling the bolt to remove it and thread the rings back on...it's not effecting anything. But now I have to go out and remove it cuz it bothers me - and you notice it!
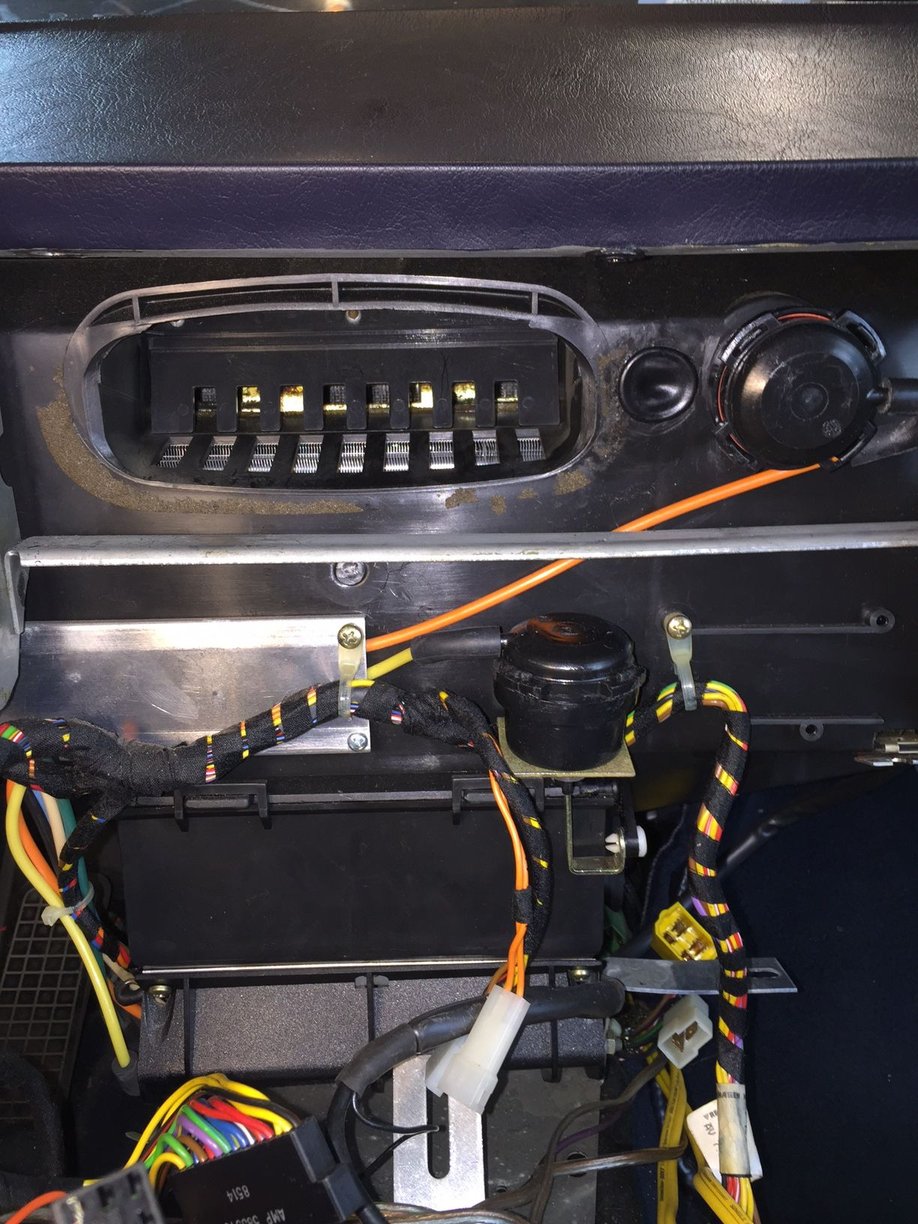
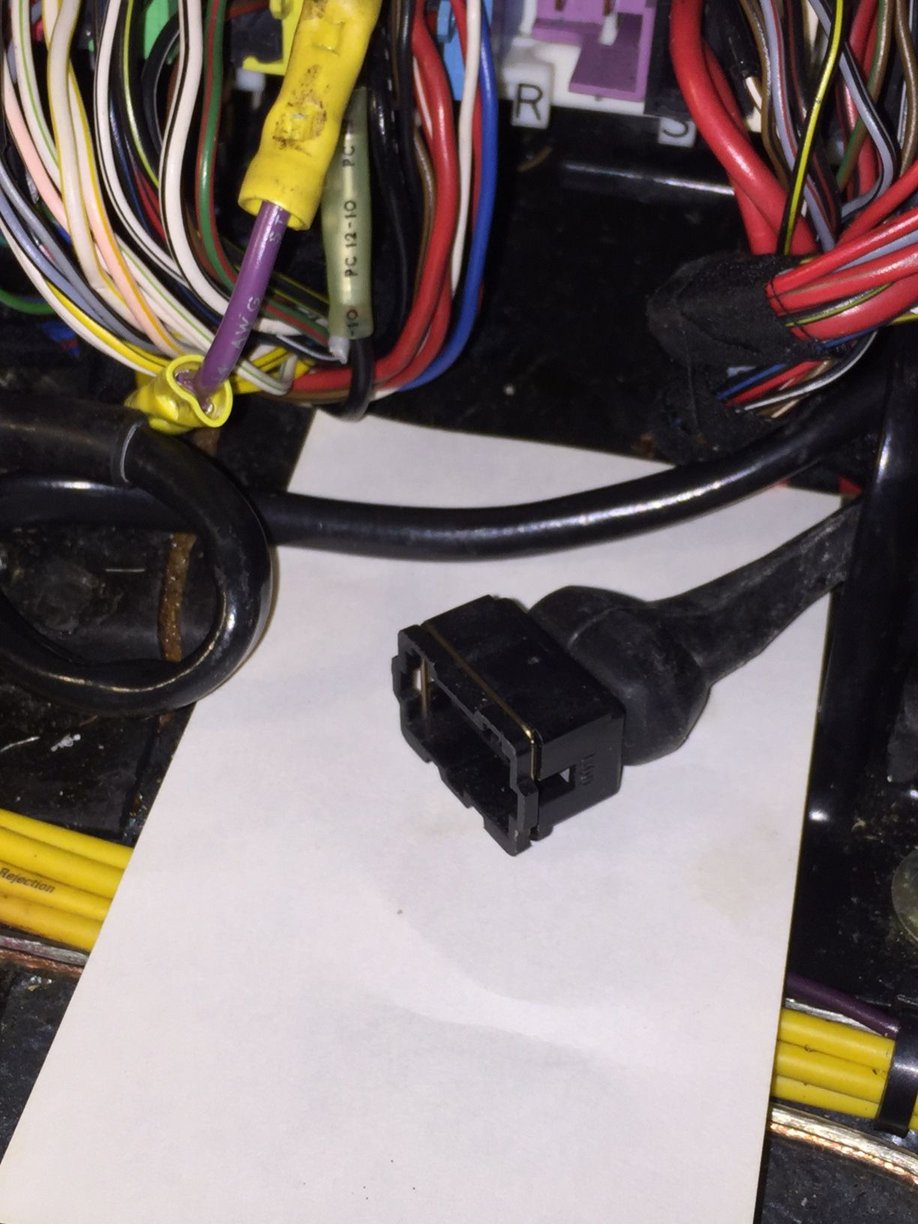
There is one wire that bothers me. The fat yellow wire at what appears to my eye to be CE connector Q was cut and wires spliced in to connect a relay that was part of a past aftermarket alarm or some other device. All added wires were thinner gauge than the factory yellow wire. Additional wires connected to the relay were dangling. Power was still connected the relay (Relay was laying behind panel. I tilted panel forward to trace wires and remove it). Unfortunately the yellow wire had been cut and crimp spliced with long wires to the relay (in three or four places...should have taken a picture). Now it has two yellow crimp connectors, shown below:
The yellow crimp splices are visible in upper left corner. Above and out of the picture the yellow wire from the Q connector at the CE panel enters the larger yellow crimp splice. The purple wire is left over from the aftermarket device wiring (purple wire was spliced to a gray wire leading to the above mentioned abandoned relay. A white wire returning from the relay was spliced to the end of the severed end of the yellow wire disappearing into the 928s wiring harness). I knew the relay was defunct and determined it would be best to restore the factory yellow wire. However, with the yellow wire ends falling a little short of each other I kept the larger yellow crimp fitting in place with enough of the purple wire to crimp splice to the harness-side end of the yellow wire. So, I got rid of a lot of wire, a defunct relay, and a few crimp splice connectors. It's not ideal...I'm open to suggestions that don't involve replacing the full length of the factory yellow wire. Right now I'm thinking I'll remove the purple wire and crimp connectors, buy some yellow wire of matching gauge, solder it in, heat shrink wrap the solder joints.
Note: The real reason I took the picture was to ask members to help identify the square black connector.
I searched early photos and found the funky end of the relay wiring at the panel. Gray off the black wire went to the relay. Purple wire connected to yellow at panel was connected yet another wire going to the relay. A white wire returning from the relay was connected to the harness side of the severed yellow factory wire. Amazing.
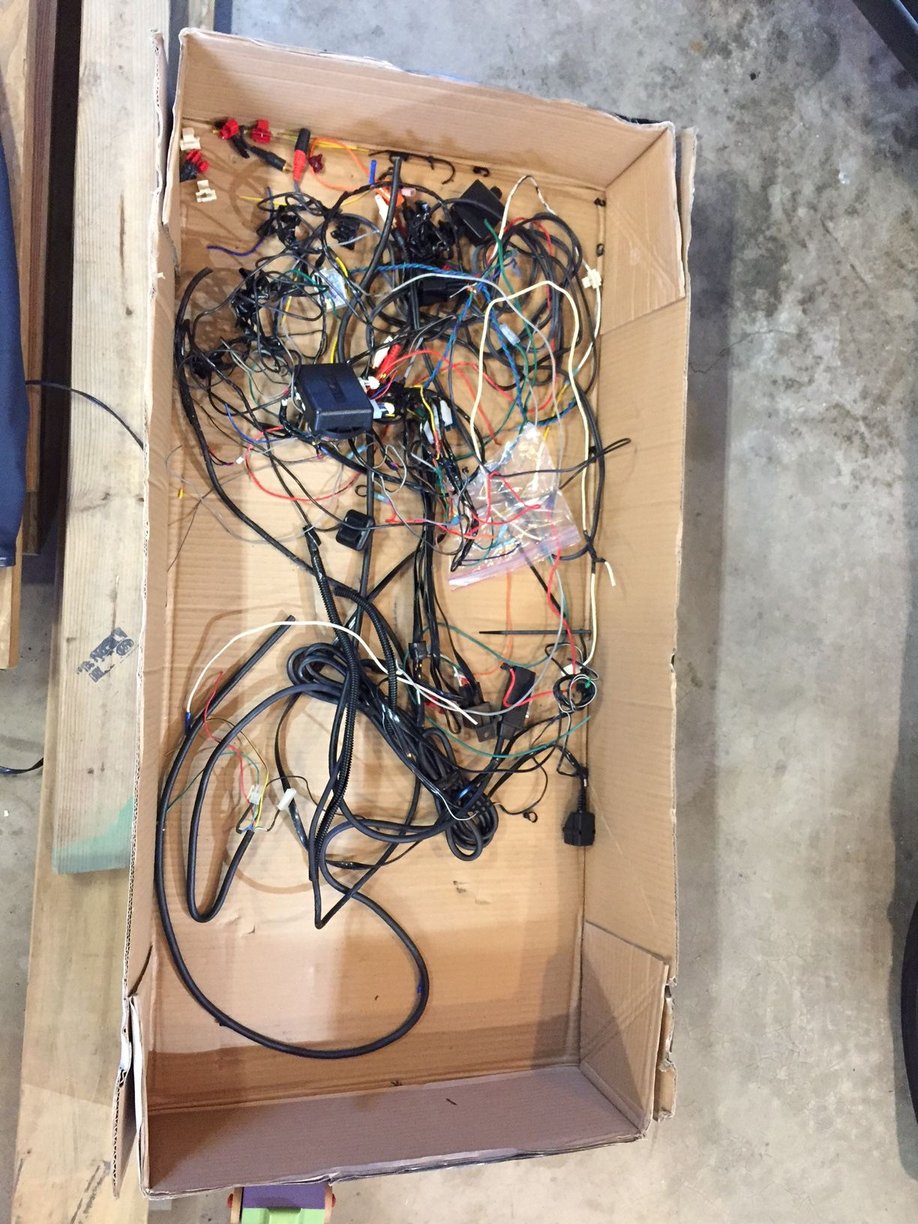
Last weekend finished all the wire clean up and installation of HVAC center and floor vent actuators. Spent most of yesterday putting the console, etc. back in place. Here is the final pile of wire removed:
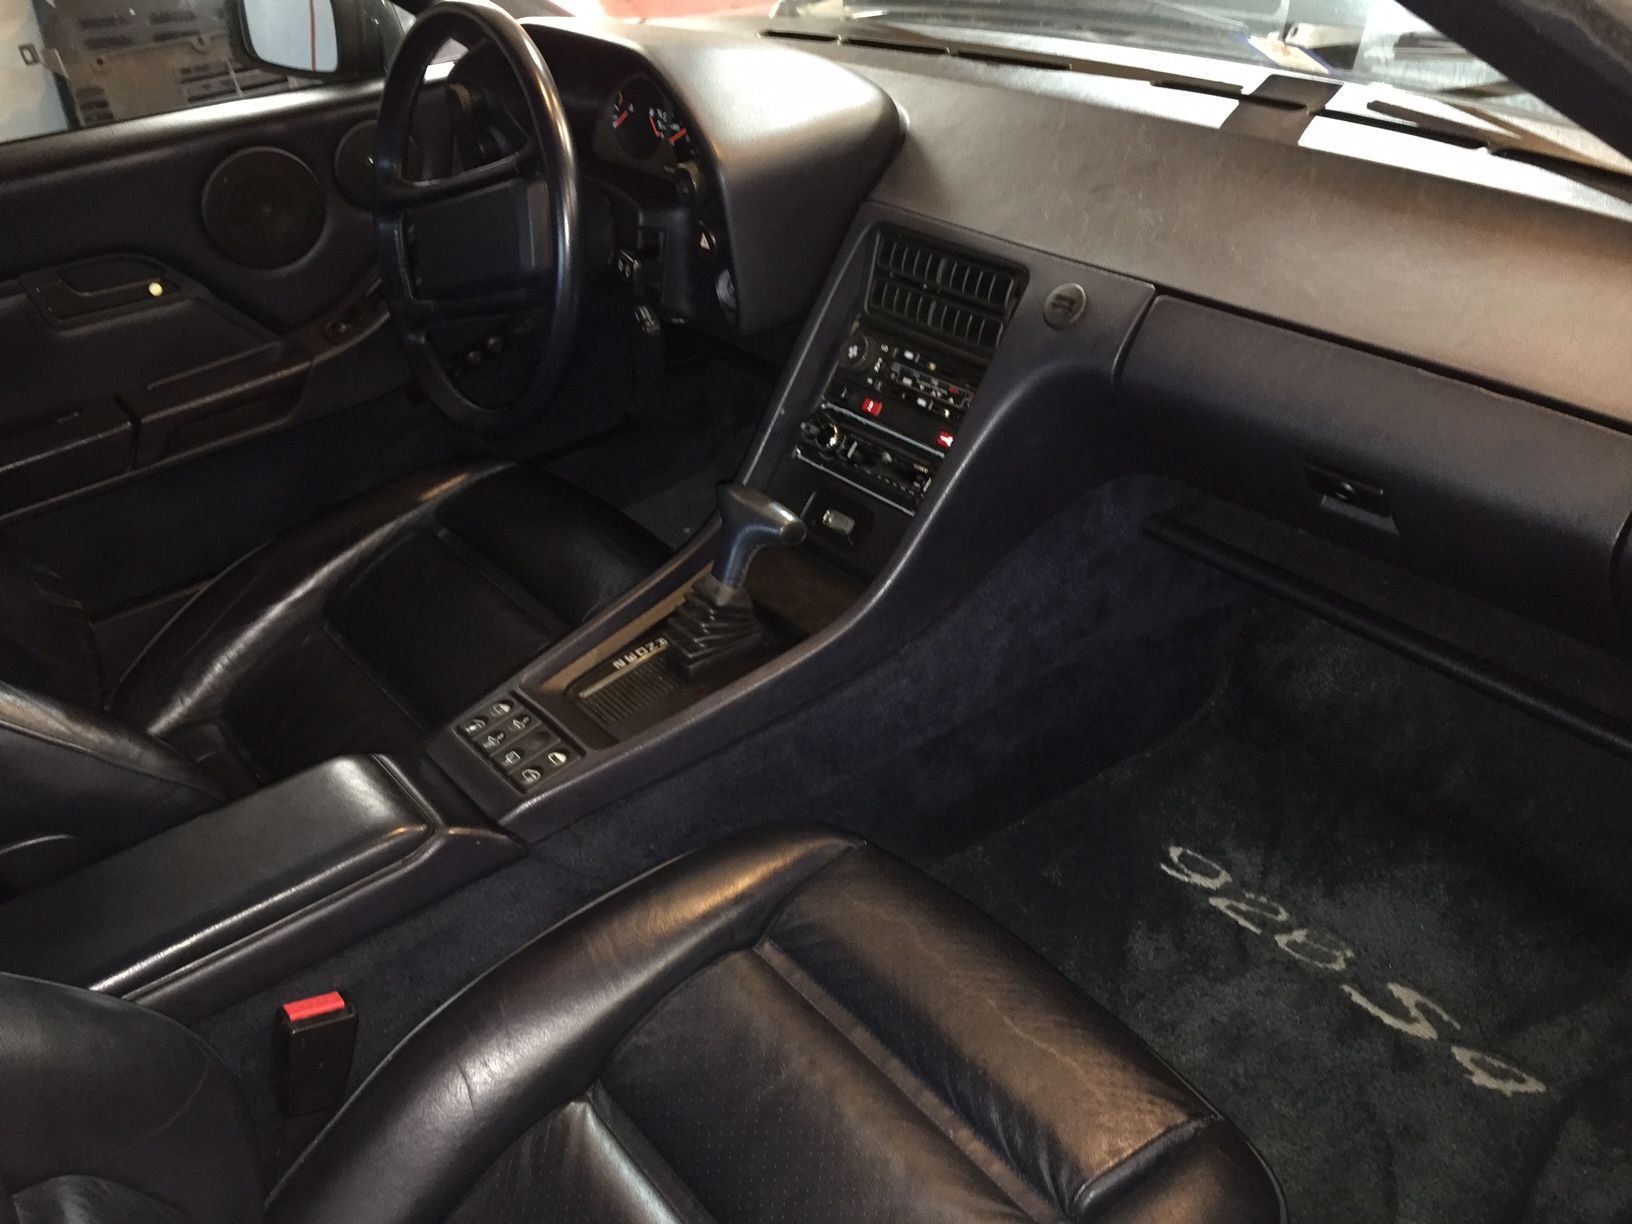
All back together, and everything lights up and is working:
No more TAP TAP TAP!!! My car even looks better inside and out (to me anyway) without the tap tap tap of the center vent. Don't live with this...don't cut the vacuum lines to make it stop. It's not really a bad job and it is a great way to learn how the hidden stuff works (or at least where stuff lives).
Last edited by Captain_Slow; 04-10-2016 at 05:33 PM.

 03-20-2016, 10:15 PM