When you click on links to various merchants on this site and make a purchase, this can result in this site earning a commission. Affiliate programs and affiliations include, but are not limited to, the eBay Partner Network.
It's important to realize that a garage or driveway surface is often more than simply slanted to one side (i.e. flat but inclined in one direction). When I measured my garage floor where I do my alignment jobs, I found it to be low in the LF and in the RR, so my garage is wavy. Does it make a big difference for toe? No, but it does make a small difference due to the droop I'd have in the LF and RR corners. If I'm taking the time to check my car's toe, I put it on a flat surface. It only takes a few extra minutes.
SmartStrings are designed to attach to the car. So as long as the car is sitting on its suspension at static ride height, an uneven floor will have no effect.
My custom tool was partially inspired by SmartStrings and what I observed at CART and IMSA races. It was not that difficult to design, and I use two pieces of <$10 electrical conduit.
I have also used the conduit on jackstands. On my '75 911, I square the car up using the machined surfaces of the rear stub axles and the front spindles. I have seen shops that use the front dust caps, but I prefer to pop them off and use the machined spindle surfaces.
Like I said before, it IS really important to ensure the suspension is "settled" for all suspension measurements, including toe. You can buy tools like slip plates to help with this, but like I said... you can use plastic bags with WD 40 or motor oil or whatever between layers. When I do set up work, I stand on the door sills and jump up and down vigorously to make sure I have done my best to overcome "stiction."
I would say if you want it repeatable, you need to control as many variable as possible. That means starting level as you can have a level areas anywhere (including the hill paddock at RA - you pick which RA). Having seen some of the setup documents for aligning a car, I can tell you that some of the top level teams in the world have 14 page documents to set every detail.
People align cars all different ways, being repeatable is what is important.
I think you guys might be getting a little nitpicky. Original question was where to measure toe from, correct answer as has been stated, is the wheel or setup wheel. Definitely not the tire.
Regarding level surfaces, not sure why you wouldn't be using a level surface to do your setup as you're likely going to be checking and setting corner weights, ride height and camber at the same time. A quick check with toe plates on a less than perfectly level surface should be fine for a sanity check in a pinch if need though.
I've worked for and with top level teams in IMSA. Nobody uses 14 page documents for setup that's for sure... You think a crew chief/car chief is going to go through 14 pages to do a set down/set up every time the car goes on the pad between sessions?? Definitely not, no time for that. Everything you need to do a proper setup can easily fit on one page. Which could include everything from damper settings, bar settings, static diff preload, wing and splitter angles, radiator/brake duct blocker amount, packer gap, setup wheel heights, driver/fuel ballast amount, and many more, along with the obvious setup numbers. Only time you're going to see a 14 page document is after visiting the K&C machine, which would just be a report or summary document showing your findings.
p.s. 6mm of rear toe in!?!? That's a gentlemen driver setup if I've ever seen one!
Last edited by SirLapsalot; 05-27-2020 at 12:38 AM.
Thanks - yeah I finally bit the bullet and bought the smart strings setup last week. $450 is a lot to pay for what you get but if it saves me hours of setup time and increases accuracy vs the home-brewed kit I was using, I think that's a fair trade. I agree their docs are great, and the have been very helpful in e-mailed support as As much caster as I can get using the GT3 LCAs up front
0 front toe ( may want a wink of toe in or toe out for stability on car you run on street.
5-6mm rear toe-in ( should be 1.5 or so per side...total of 3....give or take
As much caster as I can get using the GT3 LCAs up front
There are two ways to install the GT3 front LCA - one way gives a big increase in caster, which will almost certainly cause your front wheels to rub the fender liner (sometimes even if using the center hole and not the offset hole). The other way (with the offset hole pointing forward) allows to you take some caster out by using the offset hole that is facing forward. The reason to do this is because the shims push out the outer part of the LCA, and this already pulls the wheels forward (increasing caster), and then you can use the offset hole to let the wheel back and partially reduce that increase.
A friend of mine recently installed GT3 LCA with the offset hole facing back, and had to remove them and reinstall on the other side to resolve his rubbing issues.
Thank you, very timely reply as I was actually just researching this and was scratching my head. I was told lowering the car would remove a lot of caster and you'd need to add it back in by using the rearward holes to push the LCA forward, but I had already found the Tarett instructions that you just linked and was confused that they want you to swap the LCA's left for right, which would move the holes FORWARD, decreasing caster. But what you say about the LCA shims moving the wheel forward makes sense. I was hoping I could get away without having the check the caster measurement but it no longer looks like that is the case.
So to summarize, lowering the car reduces some caster, but not as much as adding shims to the LCA to get the desired amount of camber - the latter which adds so much caster that you need to run the left LCA on the right and the right LCA on the left, and either use the center hole or the offset hole to keep caster from going to high which may also result in fender liner rubbing?
I don't have turn-plates so last time I checked caster on a different car I used a home-brewed system where I could check/measure the wheel angle while checking the camber, 15 degrees each way. I'll do that again on the 997 though I question the accuracy of the method.
Back in the day (circa 1994), the Stone brothers at KMR suggested I buy some cheap teflon-lined cookie sheets and scribe 20 degree lines on them for caster measurements. I still have the cookie sheets.
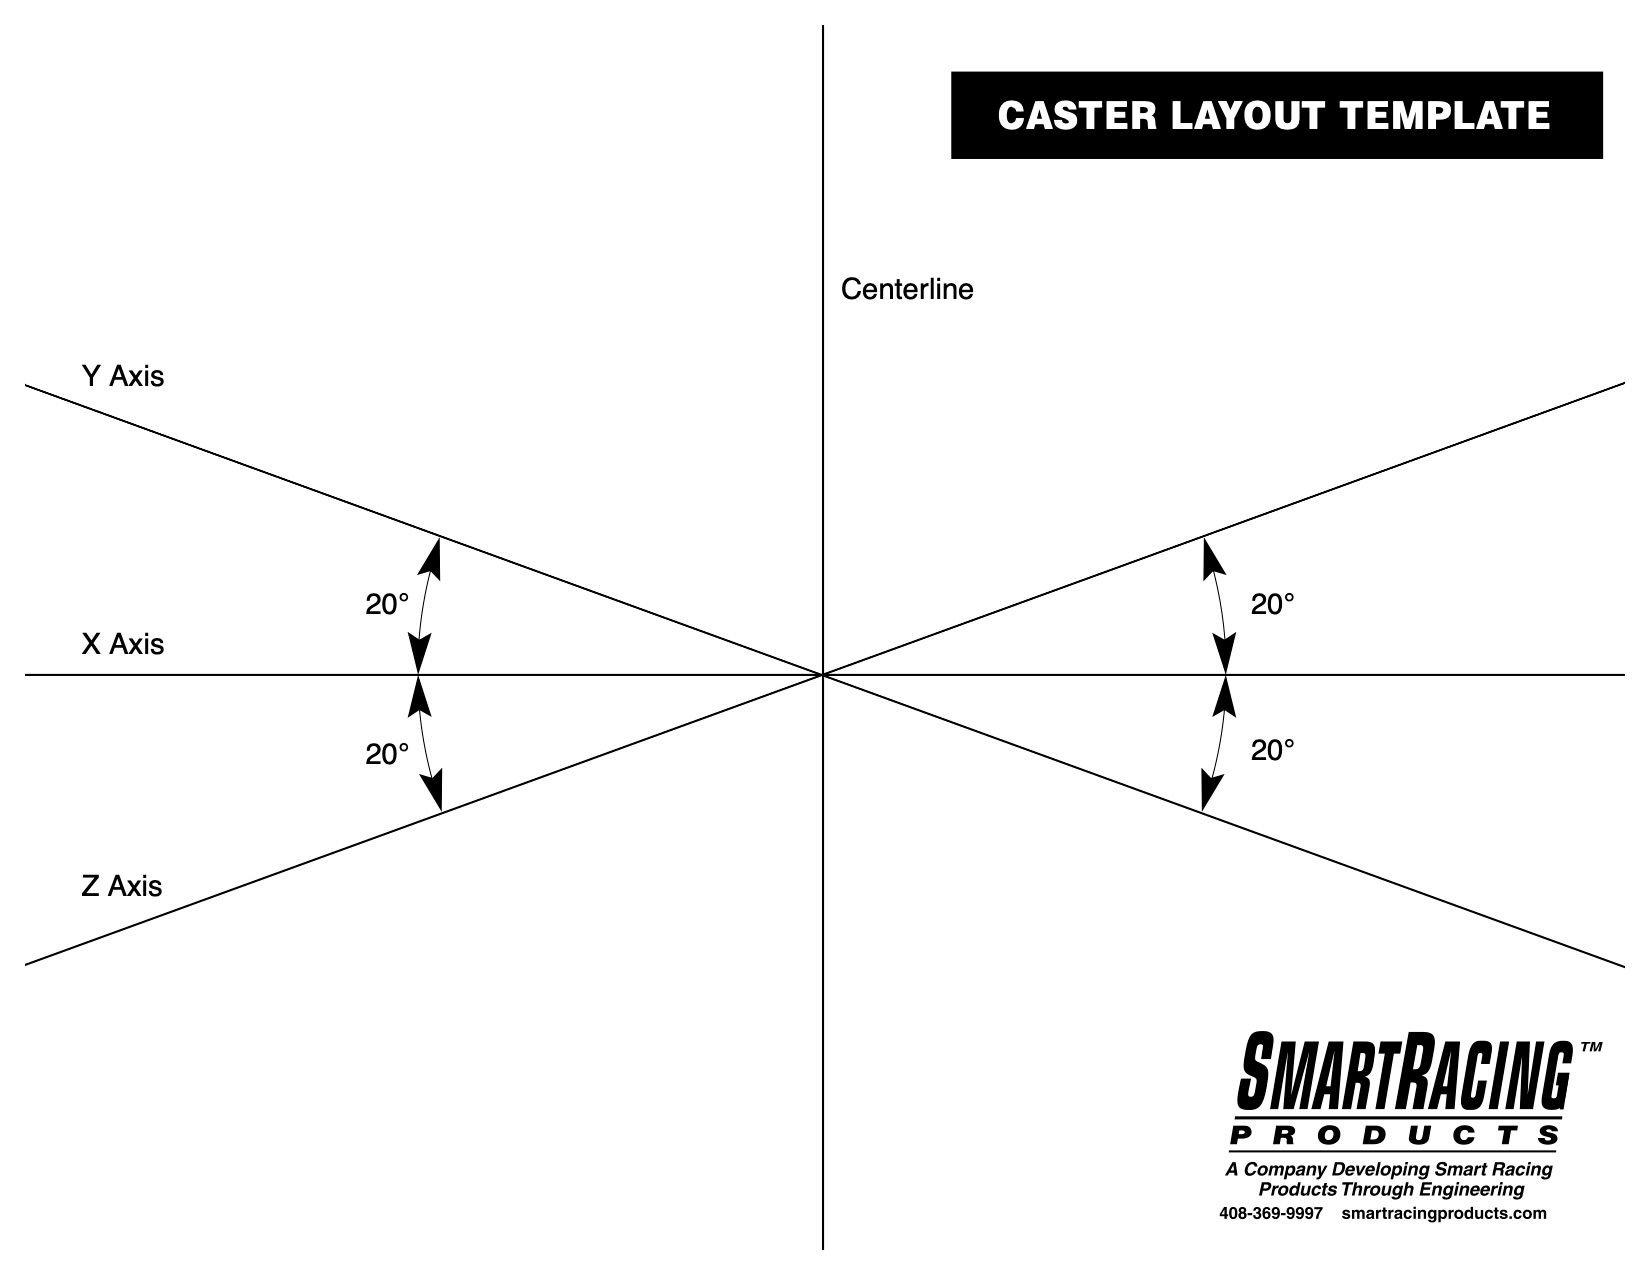
Craig provides some instructions to use SmartCamber to measure caster. See below for a template that he provides (or at least used to provide).
The SmartCamber is a great set-up tool. You can find the instructions on the web site (https://www.smartracingproducts.com/), which can be helpful even if you don't use that specific tool.
I was told lowering the car would remove a lot of caster and you'd need to add it back in by using the rearward holes to push the LCA forward.
That feels backwards - as you lower the car, the LCA flattens out (from pointing out and down from the car centerline, to out and less down) which pushes the wheel bottom out which adds neg camber but also then pulls the wheel forward, adding caster. Using the rear hole would move it even further forward, adding more. (Maybe I am mixing up "more" and "less" caster, and Porsche must have a reason for having the holes offset the way they do. If you were to run the arms with no shims I can see using the orientation with the hole facing back to add more caster.)
On my Cayman, I am lowered some (maybe Cayman R height or a touch lower) on Ohlin's Road and Track, with 15-17 mm of shims (can't remember), and I had to change from using the center hole to use the forward hole or else I rubbed when turning the front wheels (245/40/18 in front Hankook R-S4 vs 235/40/18 stock size). I don't have a caster measurement since mine was also done with strings and I didn't measure that. So I don't know what mine is, but the car feels good
Thank you. I do have a digital inclinometer that I use to check/adjust caster and camber so I'll try as you suggest to check and adjust rake.
Yes, I do have aftermarket rear toe links that are of the shimmable variety for bump-steer adjustment. I also have a digital bump-steer gauge which I plan to use to get the shims right. I've only worked on bump steer with one other vehicle, but I did it front and rear since both were adjustable on that car, so I learned a lot about it in the process.
Thanks for the rear toe input. I was going with 5-6 as that is what a guy at Tarett advised me to try. But maybe I will start with 4 and go up and down a bit to see how it changes things.
Diff? If you are referring to a limited slip differential, not to my knowledge. I don't think the 997.2 C2S has one and I have not added one to the transaxle.
If you're utilizing SmartStrings as previously stated, definitely measure off of the wheel itself. For a quick and dirty solution put some trash bags under the wheels, the plastic is rather slick and will help remove tire deflection and suspension binding. Having some sort of friction reducing device, trash bags in this case, is paramount to getting accurate measurements. Make sure you calibrate your inclinometer/Caster Camber gauge as well. That will get you 90% of the way and probably better than most alignment shops. If you want to save time and have more accurate, repeatable measurements then you'll want to control as many variables as possible, levelness of the floor, tire pressure, weight in the car, fuel level, etc...
The next level is getting into Hub Stands and lasers to further reduce variables. They ensure a constant wheel height to remove tire pressure variations, bearings for a low friction surface, lasers for much higher precision, etc... It's like anything else, depending on how "perfect" you want to get changes how far you take it.
At the end of the day repeatability and a solid process is key and from there you can confidently make changes.
The SmartCamber is a great set-up tool. You can find the instructions on the web site (https://www.smartracingproducts.com/), which can be helpful even if you don't use that specific tool.
I have a SmartCamber tool (and SmartStrings). I�m new to using them but learning. My issue with the SmartCamber is that my wheels have no square sections to rest the posts. It makes it really difficult to get consistent readings. I�ve reached out to Smart Racing Products about this but got no response. Any suggestions would be appreciated? I was thinking about making 18� aluminium bars to strap to the wheels, and read off of them, but then I have to try to hold them in place too.
I have a SmartCamber tool (and SmartStrings). I�m new to using them but learning. My issue with the SmartCamber is that my wheels have no square sections to rest the posts. It makes it really difficult to get consistent readings. I�ve reached out to Smart Racing Products about this but got no response. Any suggestions would be appreciated? I was thinking about making 18� aluminium bars to strap to the wheels, and read off of them, but then I have to try to hold them in place too.
Thanks CSM. So with that style gauge, the adaptor magnetically attaches to the face of the hub nut? or the end face of the axle shaft? Difficult to tell from the pictures, descriptions and videos.
I have a SmartCamber tool (and SmartStrings). I�m new to using them but learning. My issue with the SmartCamber is that my wheels have no square sections to rest the posts. It makes it really difficult to get consistent readings. I�ve reached out to Smart Racing Products about this but got no response. Any suggestions would be appreciated? I was thinking about making 18� aluminium bars to strap to the wheels, and read off of them, but then I have to try to hold them in place too.
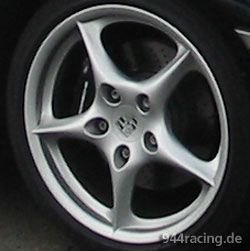
These are the wheels
I have a similar gauge, and the same issue with the wheels on my ZL1 1LE. I ended up removing the posts and bolting on large flat washers sized to rest against the wheel lip. Very easy to position for consistent readings now.


 05-26-2020, 12:31 PM