When you click on links to various merchants on this site and make a purchase, this can result in this site earning a commission. Affiliate programs and affiliations include, but are not limited to, the eBay Partner Network.
Hey guys, the exterior rubber trim on all 4 windows of my cayenne s (957) has been bulging out for some time now, after finally breaking to reveal corrosion inside! Anyone encountered this problem?
I asked an auto shop and they said they would have to take the entire door components apart, in order to get access to the frame which holds this rubber trim. Is there any other way to do this? The rubber looks to me like it could be detached somehow without dismantling the door, sand down the corrosion, and then attach a new rubber trim around. Any ideas, hacks or any other ways to get around this? I really don't like the look of it as it makes the entire truck look as if its corroding!
Any help is appreciated
A few photos of what you're referring to would be helpful. Sounds quite unusual. The bodies of these beasties are pretty rust-proof (except for a few where some door seams weren't sealed correctly from the factory..)
A few photos of what you're referring to would be helpful. Sounds quite unusual. The bodies of these beasties are pretty rust-proof (except for a few where some door seams weren't sealed correctly from the factory..)
Thank you, I didn't realise I posted twice as I was creating the account for the first time. I've been reading the forums on here, and they are extremely helpful; I have found almost all answers to my Porsche Predicaments, except this one! I attached the photos showing the rubber trims I was referring to.
All I can say is WOW! I've never seen or heard of that sort of corrosion on the window frames before.
The best treatment would probably to be to use a rust-converter after lightly sanding it, then cover it with POR-15 which should seal it to prevent any further rusting.
The 955 service manual is unusually quiet about how to replace any of the seals on the beastie. Your body shop may be correct - it may require complete disassembly to get all the seals replaced.
I captured the following from the service manual:
That shows removal of the window frame as a unit. That obviously requires complete disassembly of the door (and window mechanism.)
I do remain puzzled over what sort of environment the Cayenne was used in that caused that severe a rust problem on a part that normally is never even thought about..
Good luck - sorry I can't answer the primary question - but I think to avoid a reoccurrence it will require more than simply replacing the seals. The metal has to be sealed against further rusting.
Wow! Lucky, ain't I! I would really like to hear from someone who had/or have seen this issue before, just to know am not alone [img]images/icons/icon10.gif[/img].
The corrosion has been there ever since I shipped it from California couple years back, only now it started getting worse, probably extreme temperature variations!? There has been a water leakage problem into the passenger footwell and the headliner. I sorted those by clearing the drains, removing ALL plugs, fixing the AC pipes...and everything discussed in the forums, until I recently decided to remove the roof racks and head to the car wash: water poured in from the center and all the way back into both C pillars. Just today I removed the tracks, gave them a good clean, applied sealant around the 5 screws on each side and then put them back on again. I'm guessing maybe the water leakage had something to do with the frame corrosion somehow!
@the service manual: Part 3 is what the body shop offered to replace, they have 4 brand new pieces (the entire metal frame and rubber trim; so I don't have to treat any corrosion). They offered to replace all 4 frames for $1,200 including parts and labour. I was hoping to find another solution, but this seems like the only viable option so far.
@the service manual: Part 3 is what the body shop offered to replace, they have 4 brand new pieces (the entire metal frame and rubber trim; so I don't have to treat any corrosion). They offered to replace all 4 frames for $1,200 including parts and labour. I was hoping to find another solution, but this seems like the only viable option so far.
That's a steal. I'm guessing they're getting used frames from a wreck, but just the labor involved makes it a bargain. I'd jump on that offer before they decide it's too much work.
Well you were right, they got them off a wreck! However, it turns out that those corroded trims are rubber fully extruded onto metal strips and they fit only onto the upper half of the door frame represented as part 3 in the illustration you shared. On a leap of faith, I bought all 4 used trims for $200 and I'm hoping to DIY on a weekend; they are in a mint plus condition, but at least they are not corroded like mine. I'll post an update once done, in case anyone ever faces the same fate! Hopefully, I do not break anything else in the process.
Meanwhile, I am trying to do some research on how to remove the headliner, so I do it next weekend as well, as I definitely have leaking junctions from the sunroof drains. Ill try to find the designated forum and post there in detail.
Meanwhile, I am trying to do some research on how to remove the headliner, so I do it next weekend as well, as I definitely have leaking junctions from the sunroof drains. Ill try to find the designated forum and post there in detail.
Simply post it here - and I'll put together the DIY from the posts here.
Update: I changed those trims and its all good! The first one took me just over an hour, but then I finished all remaining 3 in less than 2 hours. I used a flat screw driver, torx key set and a lubricant spray.
I took some pictures and I will describe the process here:
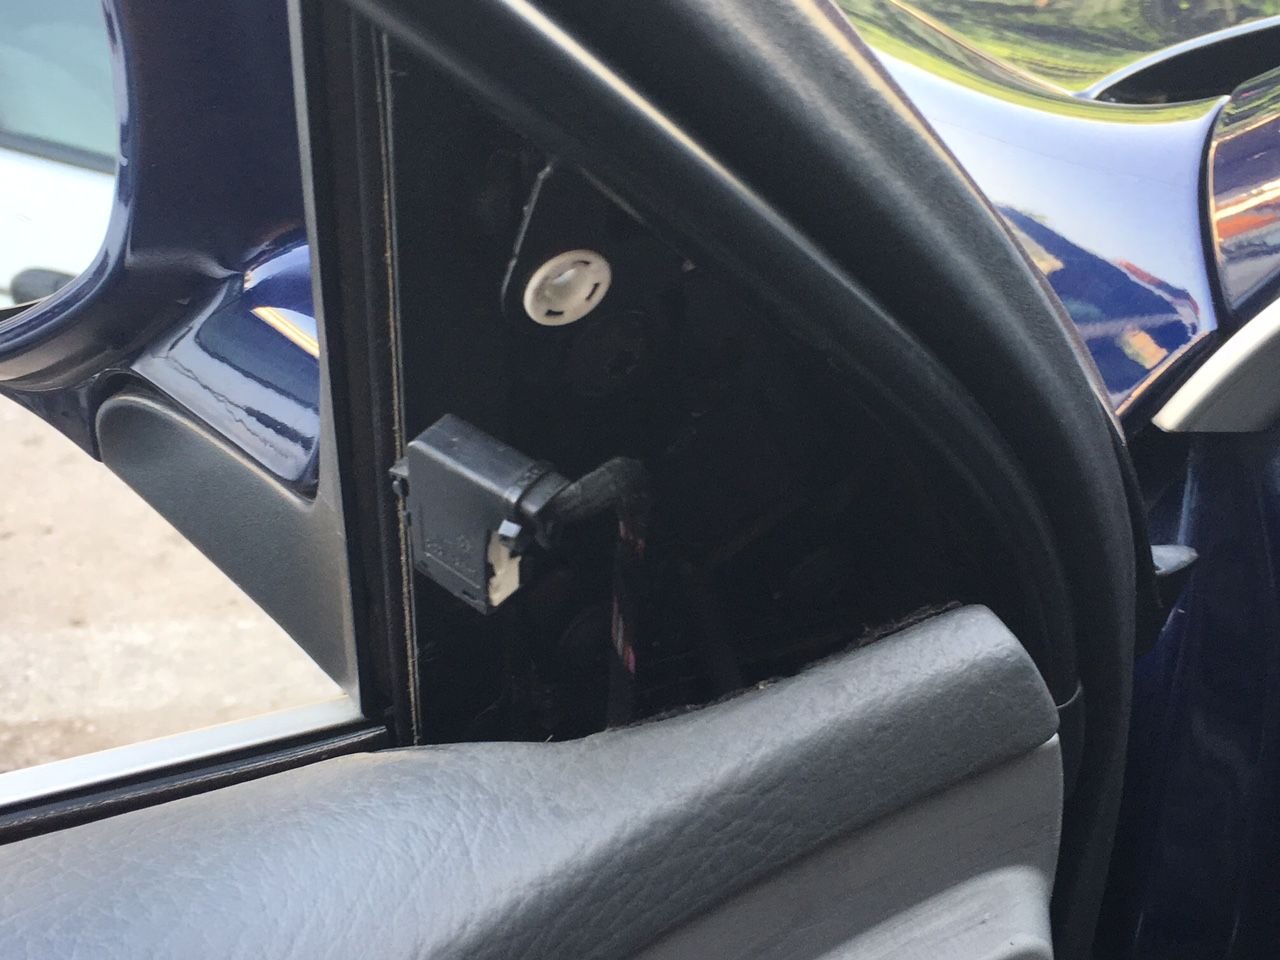
1- Remove the interior cover of the mirrors and unplug the electric cable for the control switch
2- Remove the interior door handle cover as shown in picture 2 below
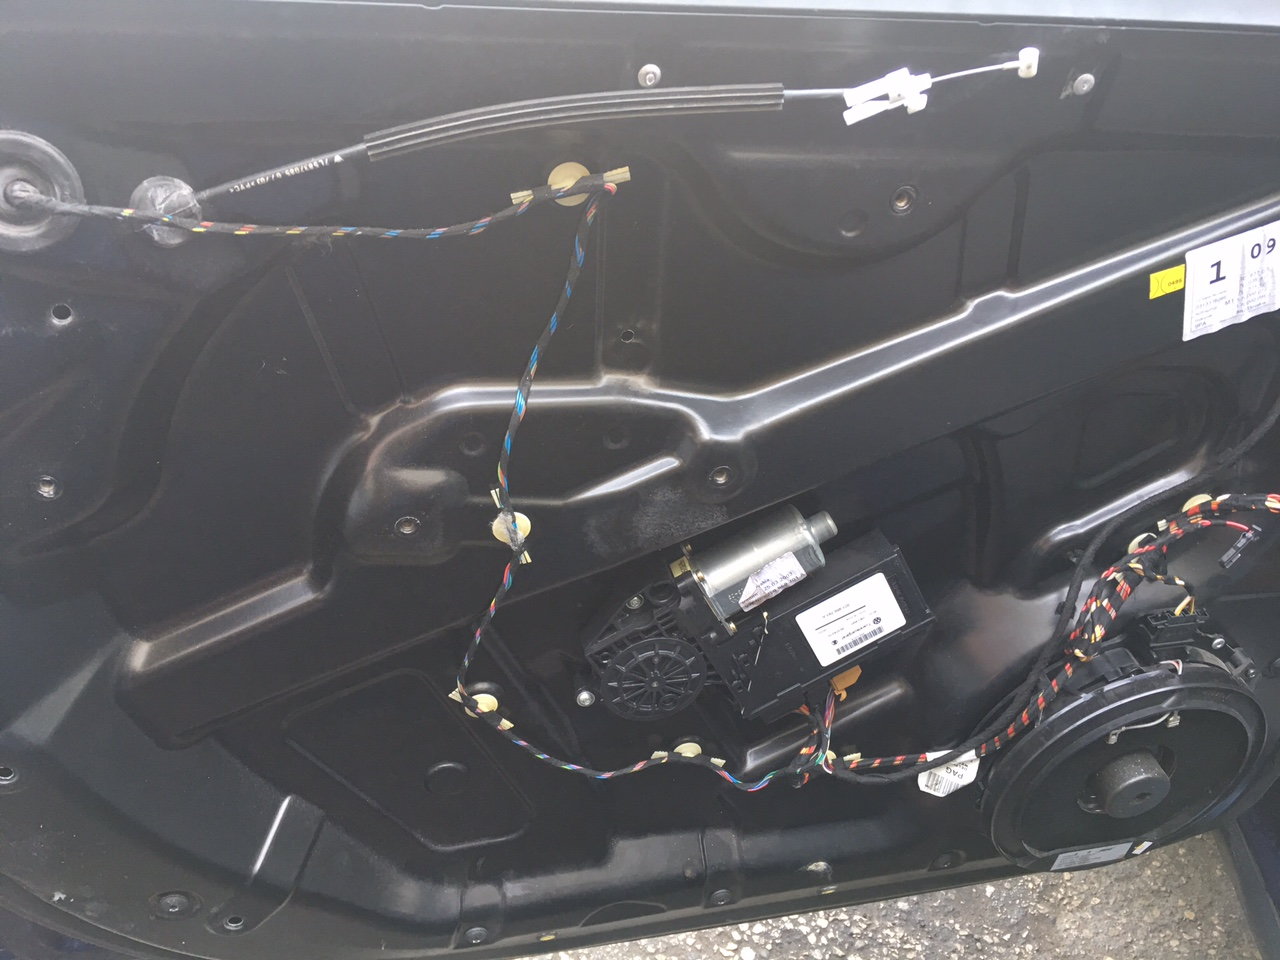
3- Unscrew the interior door panel and remove it to reveal the inner frame
4- Remove 3 screws that hold the mirror and then you could remove the exterior horizontal aluminium trim, this will reveal the rubber seal trim which slides down onto the side of the window
5- Pull that rubber trim towards you and upwards to remove it
6-- Watch out for the small triangular piece, this is used to hold the rubber trim onto the upper corner of each window; you will have tp remove this, and then install it on top of the rubber infused metal piece of the new trims in order to hold it in place
7- Spray some lube onto the frame before attempting to install the new rubber trim, and then do so by sliding it downwards and into its place on the frame
8- Reassemble following the same order in reverse, clean up, and congrats you have a normal looking beast now!
Hello @deilenberger. Do you have any idea how to fix the rear spoiler leakage? Ive dogged around here but couldn't find any details.
This is the last place that is leaking water, as I have already fixed the roof rack channels, and the sunroof. You can check my post on this matter here:
Hello @deilenberger. Do you have any idea how to fix the rear spoiler leakage? Ive dogged around here but couldn't find any details.
This is the last place that is leaking water, as I have already fixed the roof rack channels, and the sunroof. You can check my post on this matter here:
I can't imagine how the rear spoiler is leaking into the D pillar.. but something obviously is. Can we assume the seal around the rear side glass on that side is good?
You've done the drain hoses, and then even covered the entire sunroof with some film, and the D pillar keeps leaking? The only passage into that area I can think of would be the hinge for the hatch. Or a bad seal around the rear side window. Or perhaps a leak around the roof-rack fittings if you have the roof rack.
This is one where taking the headliner off in that area and the side panel of the luggage compartment and then sitting in the luggage compartment while someone hoses the outside of the car down might prove enlightening.
Using some baby-powder and a flashlight/mirror to look up into the D pillar while someone does a wetdown might lead you to at least the general area where the leak first appears. Poof the baby powder on the inside of the D pillar so there is a light coating all over the inside of the metal. Then have someone spray outside. If a leak is coming down the inside of the pillar it will be quite obvious where it runs through the baby powder. Then it's a matter of following it upward to where it starts.
I've heard of the rear spoilers filling up with water and destroying the electronics in them, but I've never heard of one causing leaks inside the car.
... The only passage into that area I can think of would be the hinge for the hatch...
Correct! I couldn't bother taking down the headliner again-although I like the baby powder idea-, so I messed around with the rear hatch hinges and success! Here is what I found, hope it may be useful to another distressed soul with their leaking beast (pictures attached):
1- Open the rear hatch
2- Grab the plastic cover around the hinges, from the topside, and pull it outwards
3- You can reach with your fingers into the area underneath the hinges to clean it out (mine was cluttered with dirt and leaves)
4- There is a small opening underneath, hidden under/next to the hatch rubber seal: enter a long screw driver or a straw to clear that passage
5- While you're there, pour a mixture of hot water and soap into the area underneath the hinges, and watch it drain from the hole you just cleared
6- Do the same on the other side
I've been through rain and car wash and it's been bone dry ever since I did that! Finally!


 09-29-2017, 11:05 AM