When you click on links to various merchants on this site and make a purchase, this can result in this site earning a commission. Affiliate programs and affiliations include, but are not limited to, the eBay Partner Network.
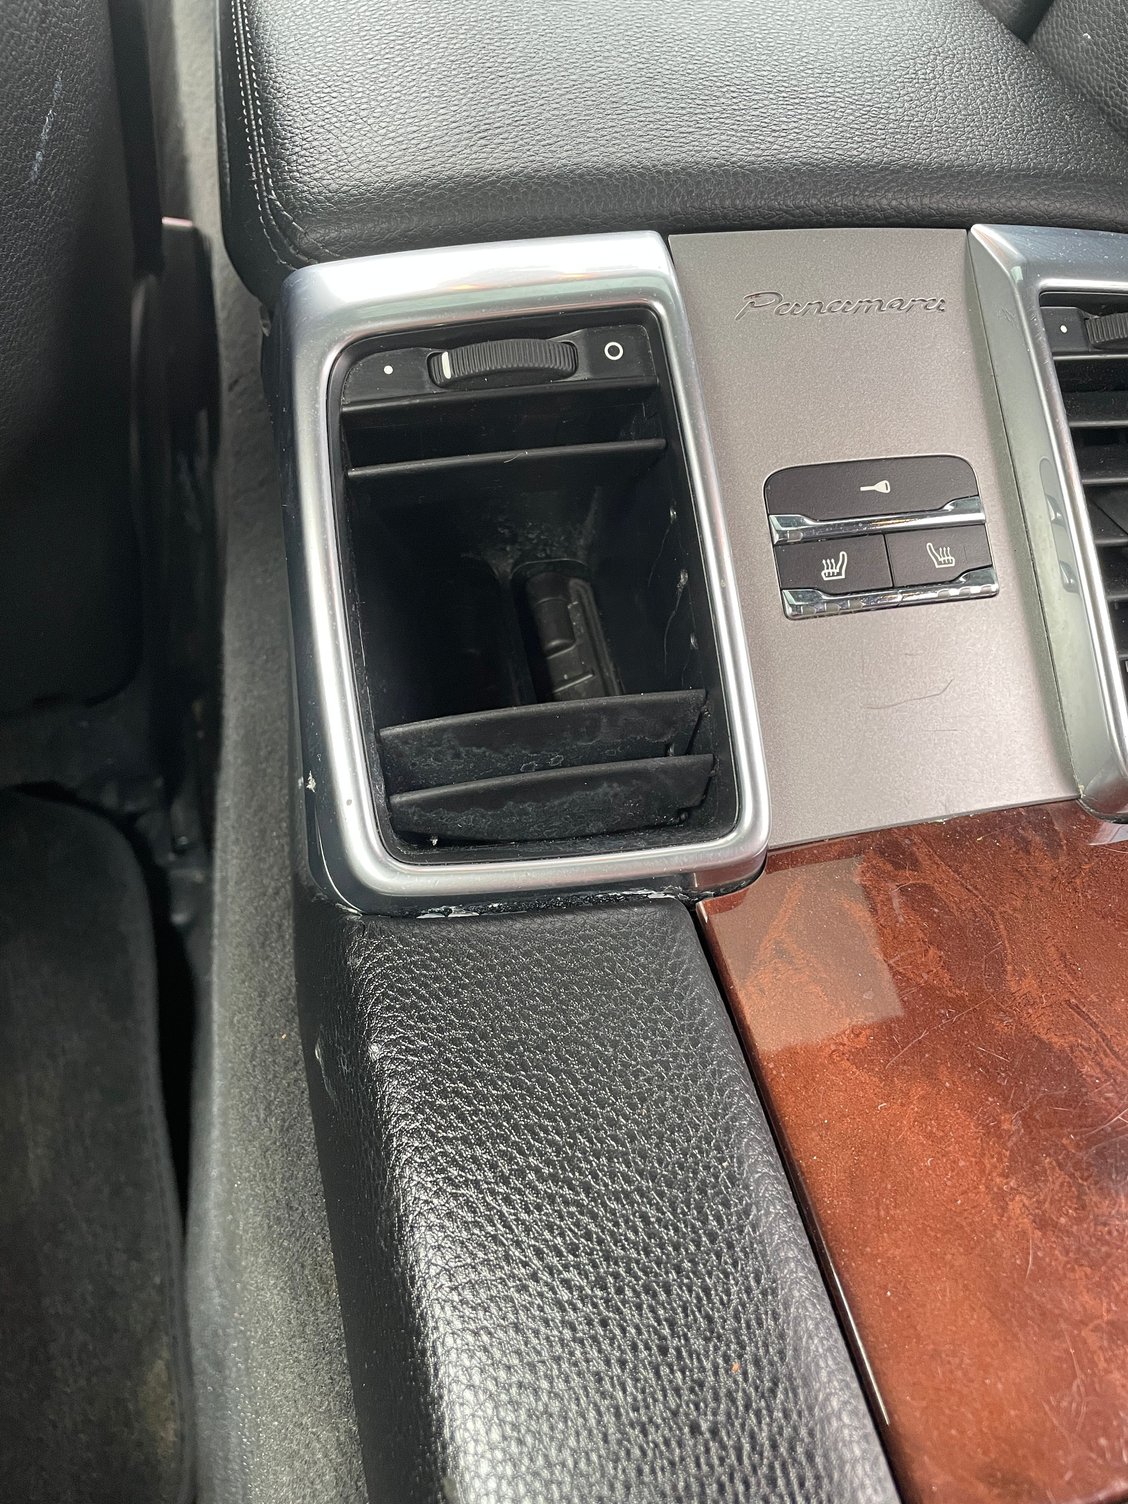
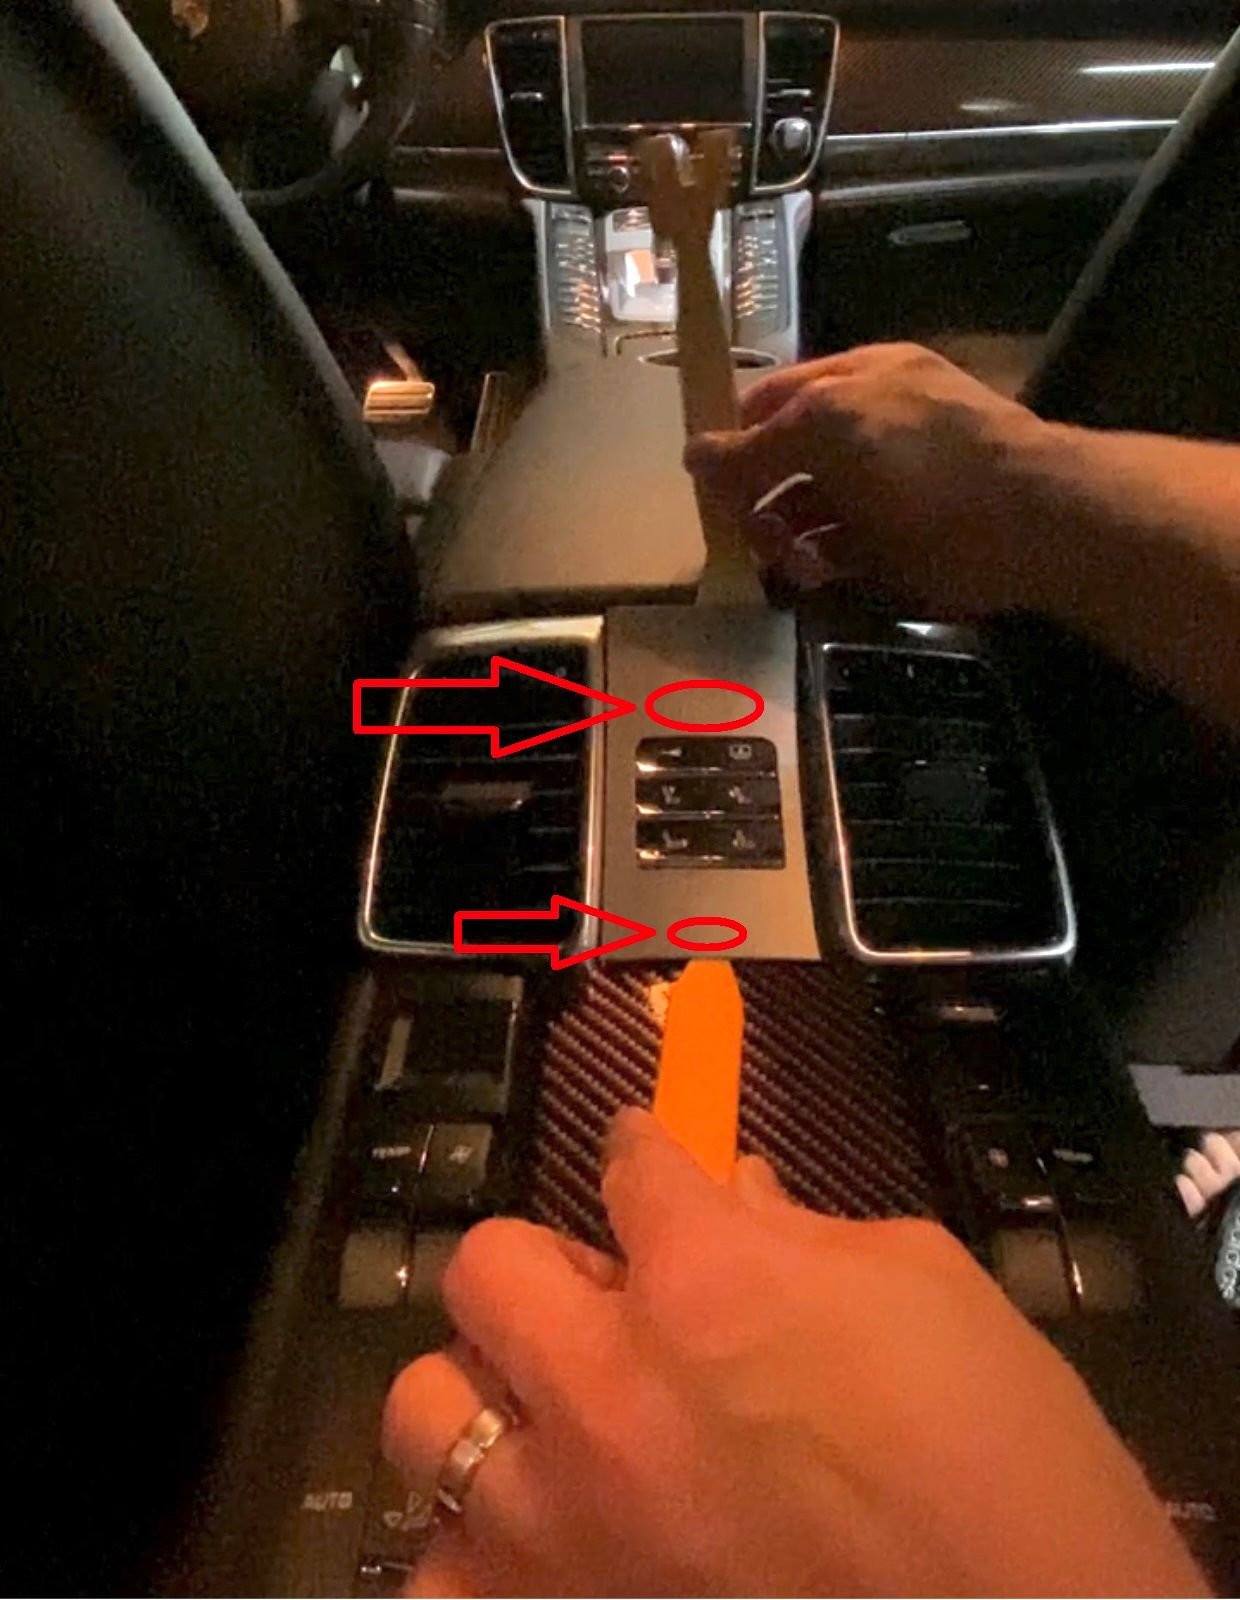
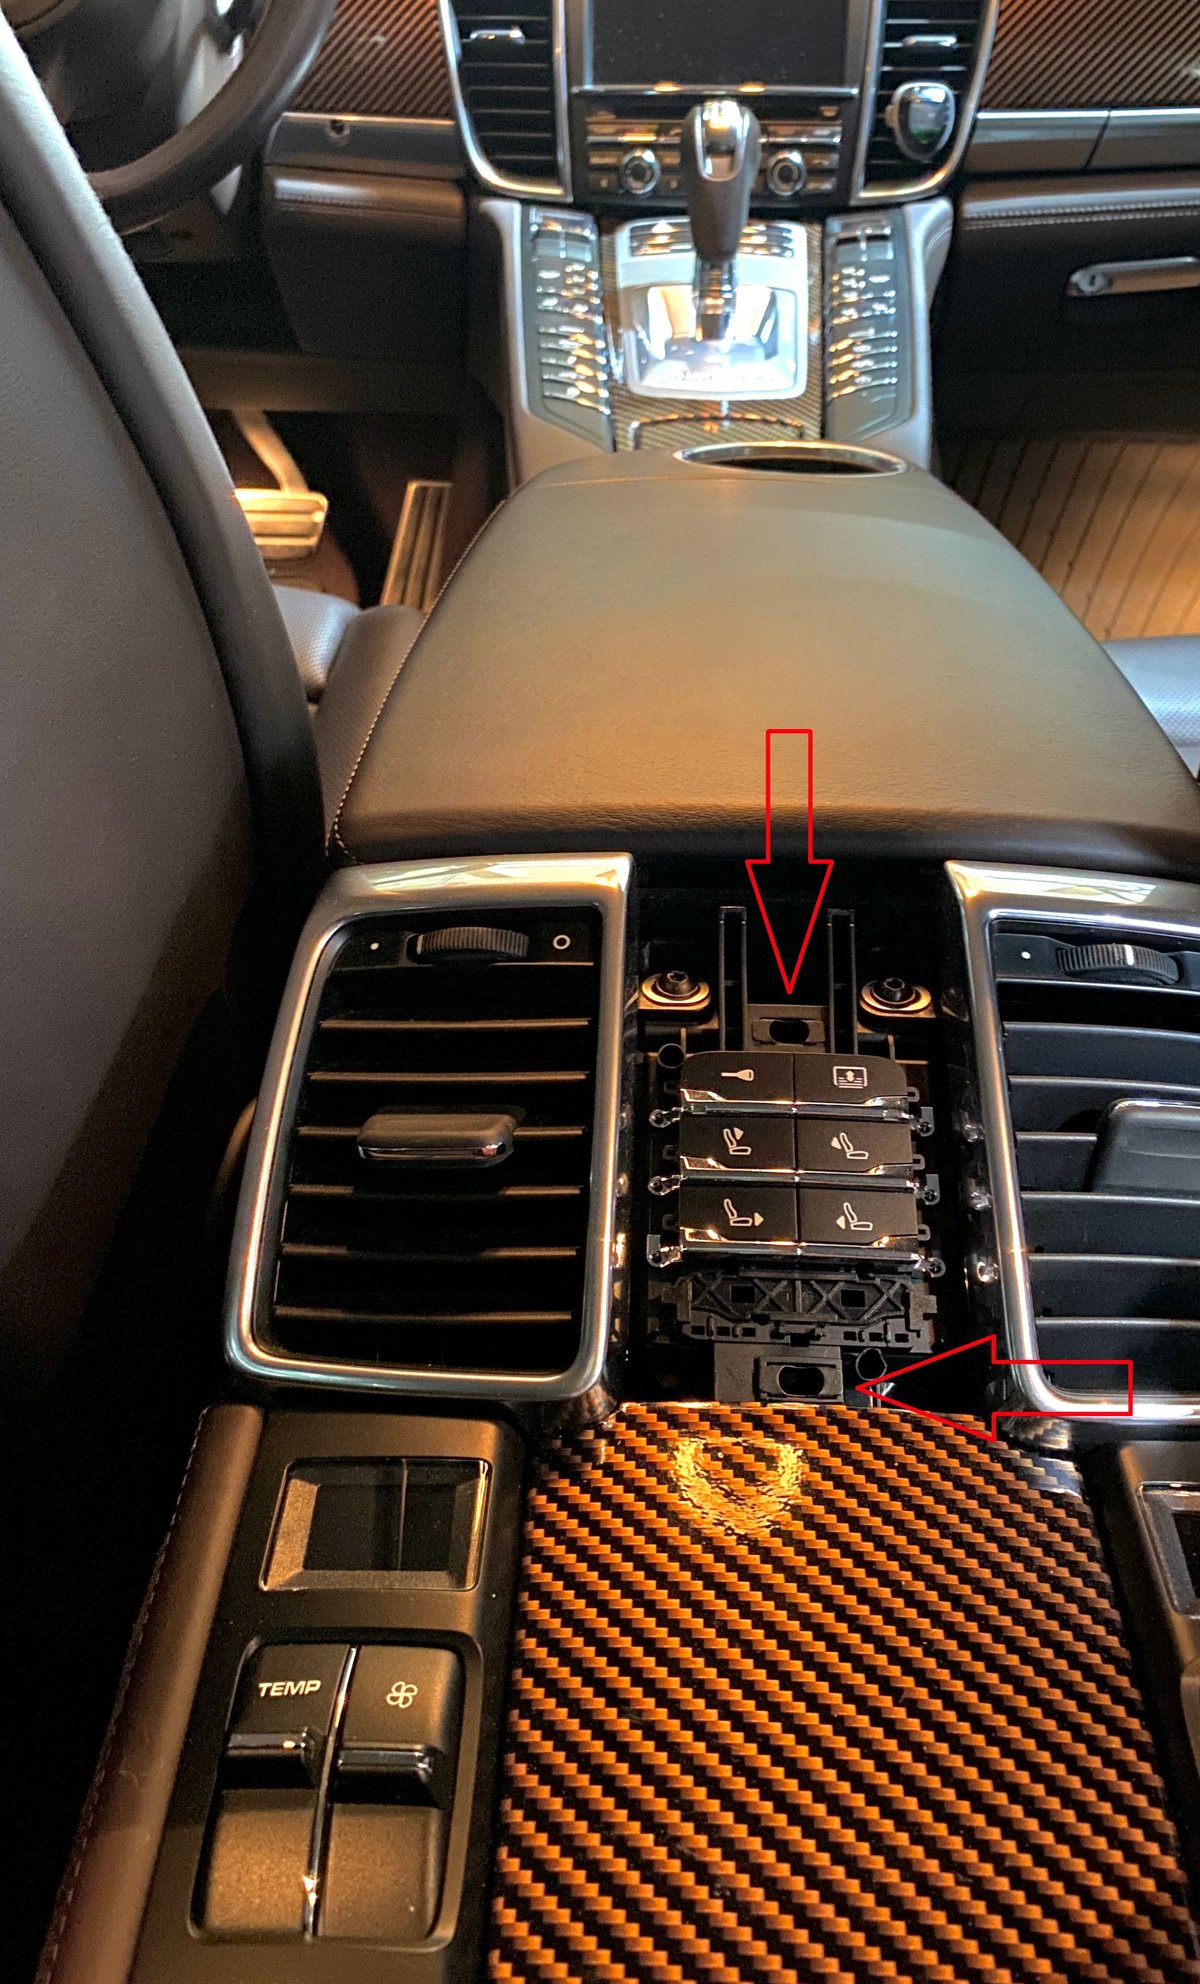
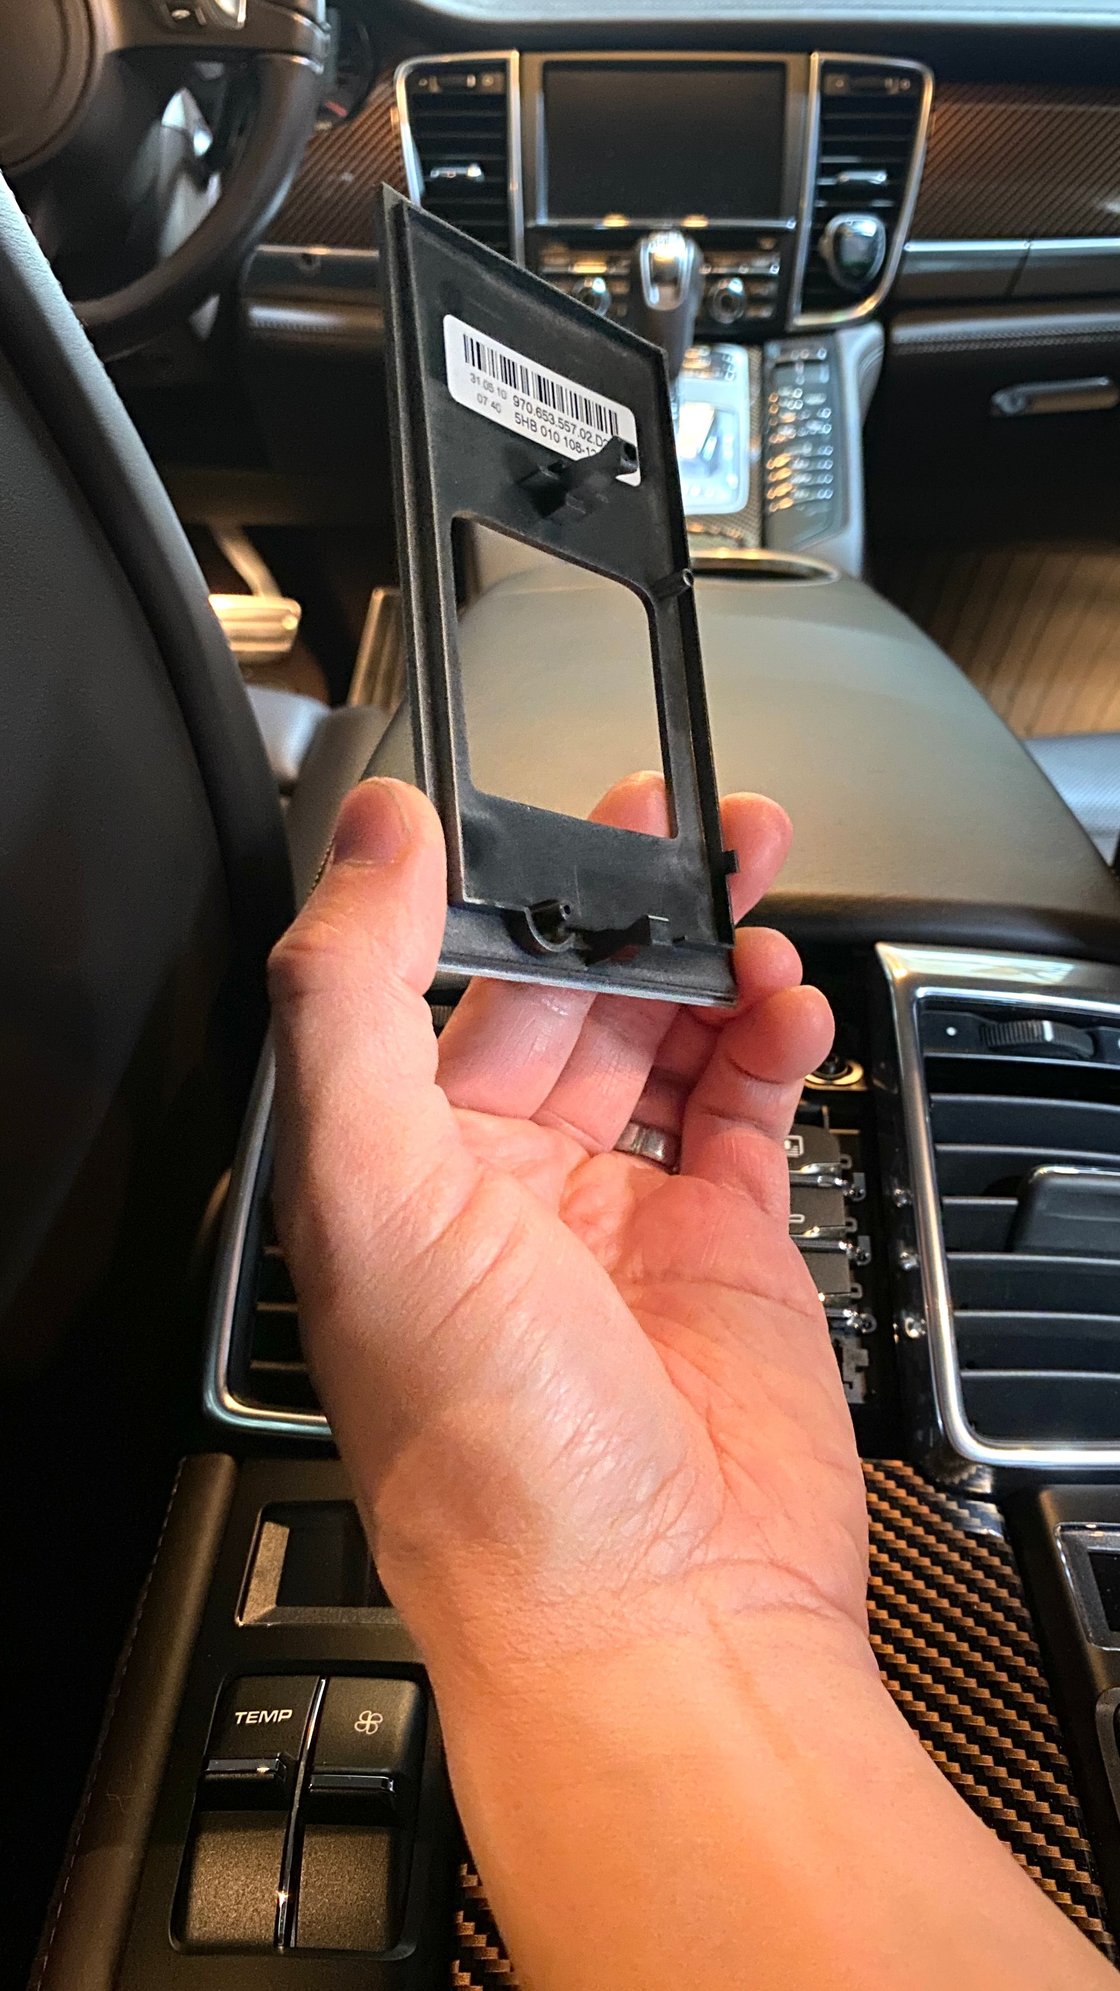
So, my new to me 2011 Panamera 4 has some broken/missing vent blades on left vent. I purchased a replacement vent, but wanted to see if someone has done this before. It looks like I need to remove the center Seat Heater/Door Lock switch that sits between the two console vents, to access the two bolts that are holding the vent in place. Does it snap out? or are there clips that I need to push/pull first? Didn't want to break anything trying to remove it, and can't find anything on the Web that shows the process or a diagram of the parts. Any thoughts/suggestions would be appreciated.
Thanks! That diagram/instructions was what I was looking for. Wish it would've given an indication on what sort of 'clips' are holding the two faceplates that need to be removed. Well, here's hoping nothing snaps/breaks. I'll comment on here after I undertake the job later this week so others can benefit as well. Again, thanks!
The clips on these cars are impeccable and very secure. I assume that's why it's the best among other cars as for minimizing panel creaks and rattles.
If you have any, use those interior plastic/composite pry tools until you can get a finger in to help pry them out. The trick is not to stay on one area and have too much bending and flex when prying it out on a single side. If you get one side out a bit, balance it out and start prying out on the other areas.
If you need to get an idea of what the clips looks like...remove the wood trim(yours may be a different finish) above the glove box. It's probably the easiest thing I was able to pry out on this car. It has the same clips for most of the trim and panels of the car.
Last edited by Deezflip; Feb 21, 2023 at 02:04 PM.
The clips on these cars are impeccable and very secure. I assume that's why it's the best among other cars as for minimizing panel creaks and rattles.
If you have any, use those interior plastic/composite pry tools until you can get a finger in to help pry them out. The trick is not to stay on one area and have too much bending and flex when prying it out on a single side. If you get one side out a bit, balance it out and start prying out on the other areas.
If you need to get an idea of what the clips looks like...remove the wood trim(yours may be a different finish) above the glove box. It's probably the easiest thing I was able to pry out on this car. It has the same clips for most of the trim and panels of the car.
This is the correct answer, I was literally going to say the exact same thing down to the glovebox trim.
I have the same issue at rear center console left vent, seen the website which was amazing diagram, but doesn�t show exactly how to remove that center cover in order to get to remove the screw for vent cover, any tips u can throw my way, would be greatly appreciated, thanks!
Originally Posted by 3Danim8r
Thanks! That diagram/instructions was what I was looking for. Wish it would've given an indication on what sort of 'clips' are holding the two faceplates that need to be removed. Well, here's hoping nothing snaps/breaks. I'll comment on here after I undertake the job later this week so others can benefit as well. Again, thanks!
I started from the top which allowed the most flex. Get a flat pry tool and get it as close as to the top tab as possible without over flexing the cover, you should feel the pry tool reach it. That's where you would pry and prevent the plate cover from over flexing.