When you click on links to various merchants on this site and make a purchase, this can result in this site earning a commission. Affiliate programs and affiliations include, but are not limited to, the eBay Partner Network.
I've just done perhaps the most tedious DIY job ever. Just want to post here for posterity in case other folks want to walk down this treacherous path. Book time for this job would be around 10 hours. Took me about 14 total including many parts store runs. I would consider myself an intermediate DIYer, armed with mostly hand tools and only floor jacks. Having access to a lift and various hoists would make this 10x easier. Apologies in advance for lack of pictures. I was too busy questioning my decisions to take pictures. Mine is a 2016 Macan Turbo with about 120k miles and 3.6L. Most Macan S and GTS with the 3.0L would be the same.
Symptoms - typical of most bad motor mount symptoms, excessive vibration at idle, worse in D than in P because of the increased load. Gets better as revs climb. There aren't many visual indicators as the mounts are really buried in there. You may see streaks of thick goo on the side of the undertray, which is the hydraulic liquid leaking out.
Tools required - a transverse 3 point engine support bar, triple square bit set (M12, M14, M16), lots of floor jacks, torx bit set, biggest impact wrench you can afford and impact sockets, angled and ratcheting wrenches set, various swivel extensions, breaker bars, ball joint separator, and most importantly, a low profile/thin wall 18mm 3/8in socket, a couple of 4x4 lumber pieces. Also of course the replacement motor mounts themselves. Not too expensive, around $150 for a pair + transmission mount + upper torque mount
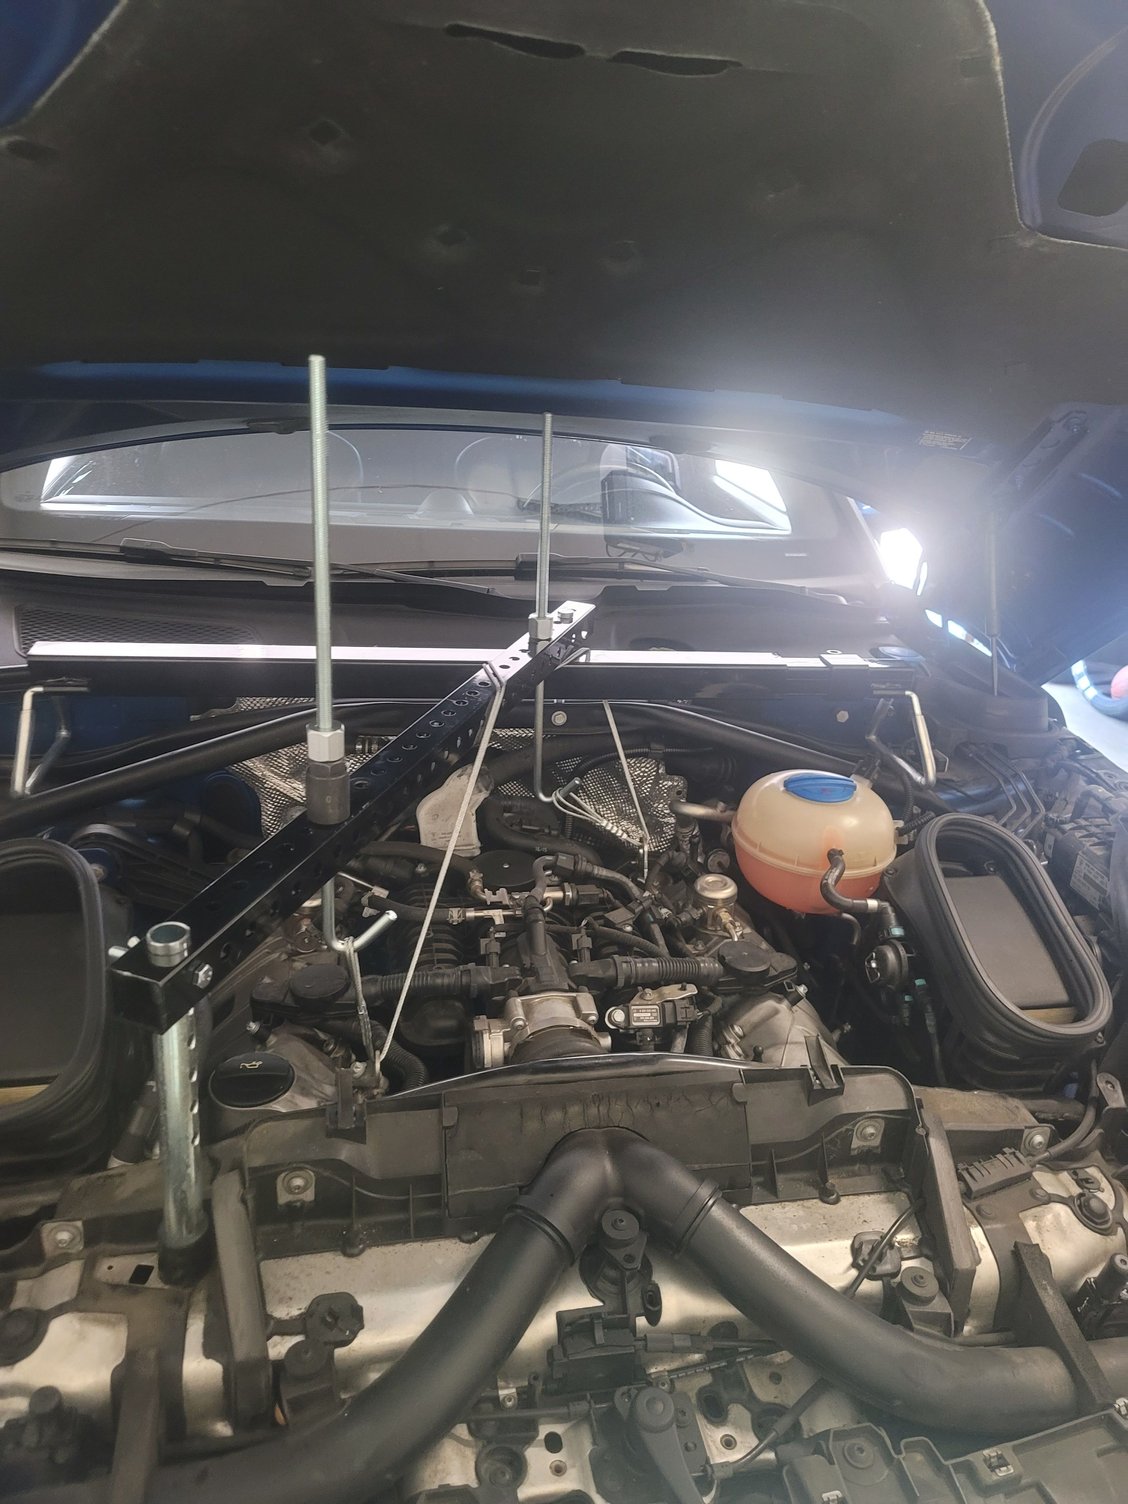
1. Use the engine support bar to secure the engine. This is critical as you'll be dropping the subframe later, you absolutely need to secure the motor in place. The harbor freight 2 post support bar won't be wide enough, get something with 3 legs as the factory engine lift points are diagonal. I had mine rest across the front strut bar and front frame.
2. If you have air suspension, put the car in jack model, lift the front as high as you can, remove front wheels,
3. Remove the large 1 piece under tray and both front inner wheel liners. There will be a million screws and bolts so keep them organized
3. Disconnect and remove the front sway bar. It'll be a little easier if you disconnect the end links first. Make note of the orientation for installing later
4. Disconnect the steering tie rods from the knuckle. The bolts are easy to remove, but the ball joint will be really stuck in there. Do not try to hammer it. Use the ball joint separator instead. Mine too a good amount of hitting with a impact wrench to be slowly pushed out.
5. Remove the black cross member support just aft of the steering rack, held by 6 bolts, only 2 of them are triple square for some reason. This will make removing the steering rack a little easier
6. Disconnect the steering column from the steering rack, just one e torx screw and you can pop it out. It's keyed so it'll only go back in one way. Disconnect the steering rack electrical connectors, there are 3 of them but you only need to disconnect the big one and middle one. The last one feeds back to itself. There are only 2 bolts holding the steering rack. Support the rack with a jack first before removing the bolts. The rack is very heavy and you can seriously injure yourself if it drops on you
7. Disconnect the lower forward control arm from the subframe and also from the strut. Remember to remove the ride height sensor too
8. Disconnect the lower rearward control arm from the subframe. This is where you want to find the engineer who designed this and assassinate him. The nut holding the bolt comes out easily, but the bolt cannot slide all the way out because the heat shield is in the way. So you'll have to remove the heatshield first. It's held in by 2 10mm and one blind 13mm. That blind 13mm is attached to the subframe from the top, and you'll only have a couple of inch of clearance between the bottom of the subframe and the top of the heat shield. You'll need an angled 13mm ratcheting wrench, a prayer, some blind luck, and willpower to suppress the urge to murder the engineer. After removing that, you can take out the heat shield and finally get the control arm bolt out.
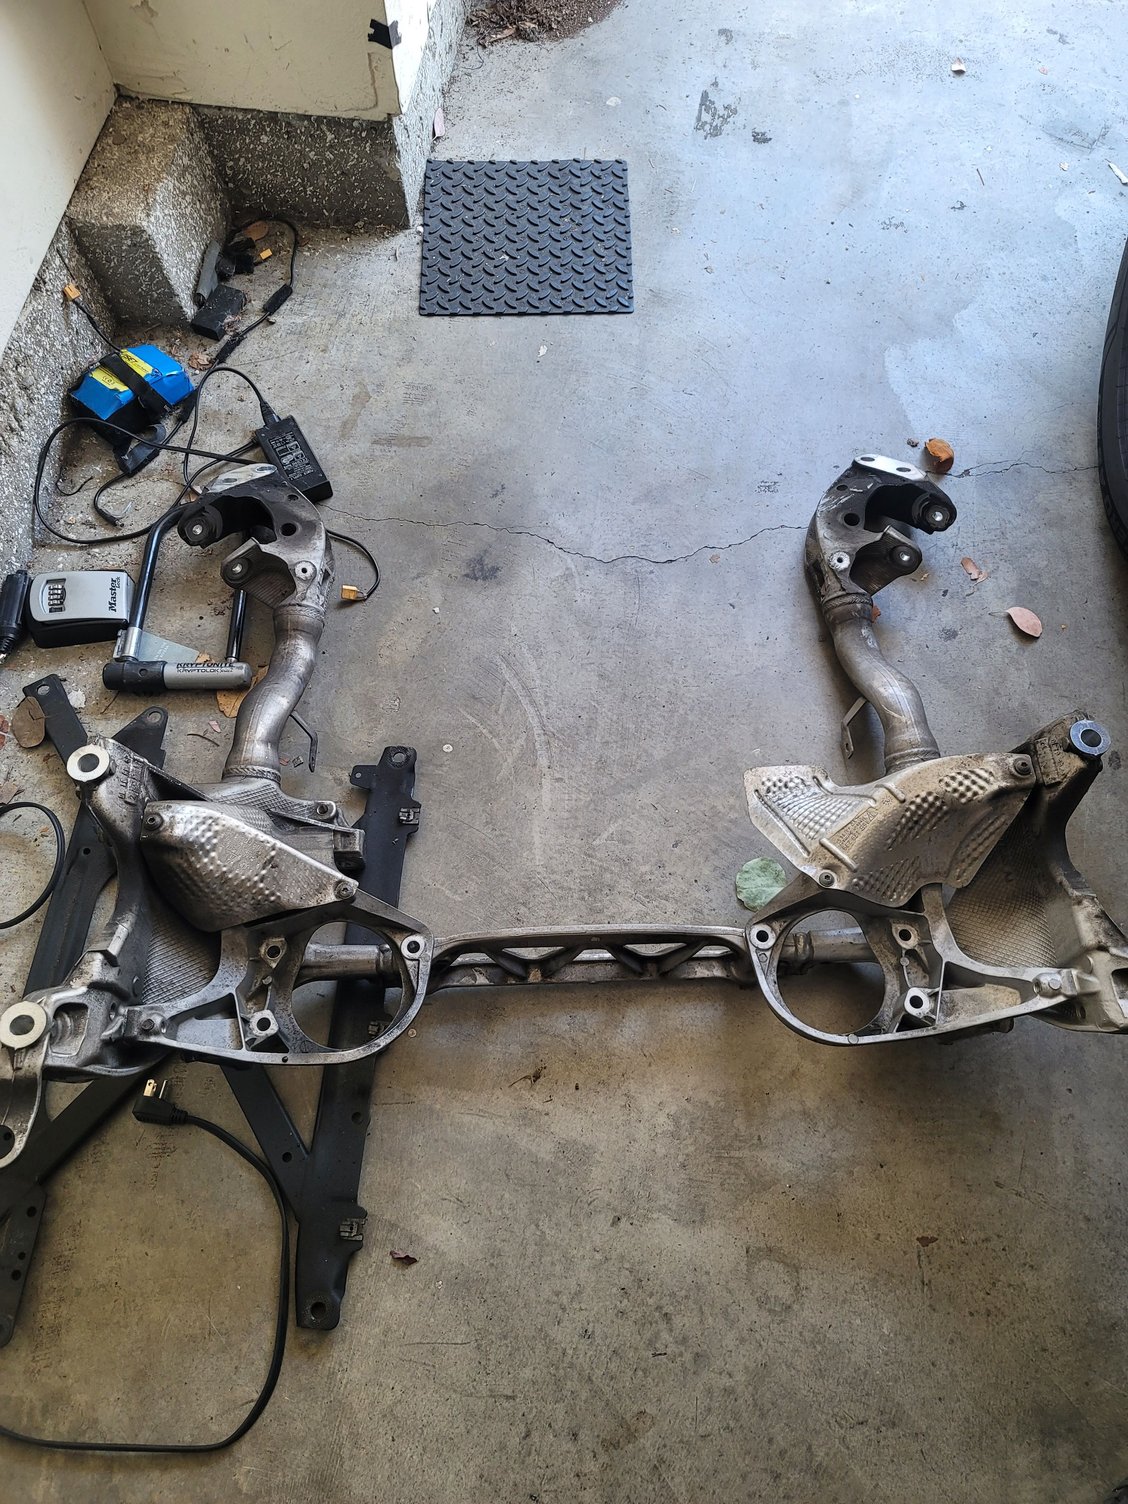
9. With all that stuff out of the way, it's time to drop the subframe. Check your engine support bar one more time to make sure everything is tight, and maybe but another jack with some block of wood under the oil pan just in case. There are 4 18mm bolt in the front section of the subframe, 6 13mm bolts of various length in the midsection and 4 more 18mm towards the rear section. Remember where all these bolts go. Support the subframe with jacks before loosening them since this is even heavier than the steering rack.
10. After surviving almost getting crushed by the subframe, it's finally time to remove the motor mounts. It's held in by only 1 18mm bolt tightened by the god of ugga duggas himself. Do not use any triple square bits here. It's just a tad larger than M12 and tad smaller than M14, so you'll stripe it if you use M12. Use 18mm socket on a swivel instead. Start with the passenger side first since it's relatively accessible. I went in dry with a 600ft-lb rated impact and couldn't make it budge. Spray lots of penetrating oil and go get something to eat, trust me. I eventually got it out with a breaker bar and lots of extensions. The impact hammering might've helped loosen it too. Now onto the driver's side. You'll see that it's almost completely obstructed by the turbo. So remove the 2 Torx bolt holding the wastegate actuator and nudge it our of the way. Now you'll have a sliver of opening through the oil return lines to snake a low profile 18mm 3/8in socket in there, as most other regular 1/2in 18mm socket wont fit. Then snake in some wobble extensions and pray that your impact and loosen it. Other wise you'll have to use a breaker bar at an impossible angle with lots of delicate oil lines in the way. I actually slightly bent the oil line here, but luckily it didn't cause any creases in the metal and I was able to gently fix the line later. After you somehow break the bolt, you'll notice that you can't back it all the way out with the socket since there are no room. Instead tighten it 90% of way back in, fish out the socket and use the M12 triple square to fit it at an slight angle to slowly rotate it out.
11. Congrats, you got the motor mounts out, half way there.
12. Reinstallation is just the reverse. But go slow to make sure everything is properly lined up and you're not missing anything. The subframe and steering rack are both very cumbersome if you're by yourself. Need to play around with your spare floor jacks to slowly raise and line them up. There will be lots of trial and error and prying around to line up the many bolt holes, just be patient and be safe. When tightening the bolts for the control arms, remember to jack the front suspension to normal ride height before tightening, otherwise you'll overload the bushings and crack them prematurely. At least for me, the steering ball joints were impossible to put back in on the passenger side. Not sure if it's manufacturing defect or something, but I had to grind a layer of material from the bore to widen it a bit before the ball joint can slide back in.
13. Oh yeah and you get to install the blind heatshield bolt again. have fun.
With everything buttoned up, enjoy the fruit of your labor and having just saved $2500+

 07-10-2024, 08:14 PM