When you click on links to various merchants on this site and make a purchase, this can result in this site earning a commission. Affiliate programs and affiliations include, but are not limited to, the eBay Partner Network.
Panamera 970 Front Strut Air Bag R&R - IMPORTANT info about top o-ring seal
Backstory - front suspension was leaking. Soapy water showed bubbles at the top shock nut. Common thought is that the rubber around the center collar cracks and allows air out. (That or the bag itself pops...rare...) I'd like to suggest a third and far cheaper culprit: the top o-ring seal. Details are down the page a bit.
Before that - some tools and parts you will require for this job: One good ratchet strap. Set of 1/2" and 3/8 sockets. 15/16" socket. Torque wrench. Tie-rod ball joint puller (can get from Autozone for free). Floor jack AND a small bottle jack.
Must haves: This is the socket to remove the top-nut. You put a 10mm on the shock itself to keep the shaft from turning, and then use a 1/2" socket on this guy to actually turn the nut off and then on.
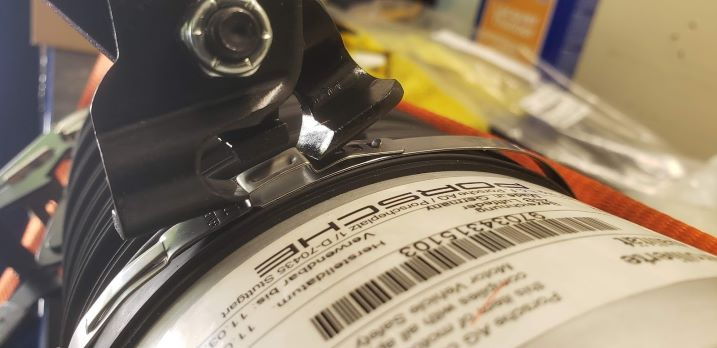
Pelican Parts. $15
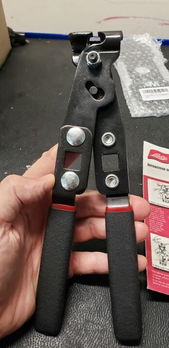
Another must have - CV strap pliers. $40. Amazon
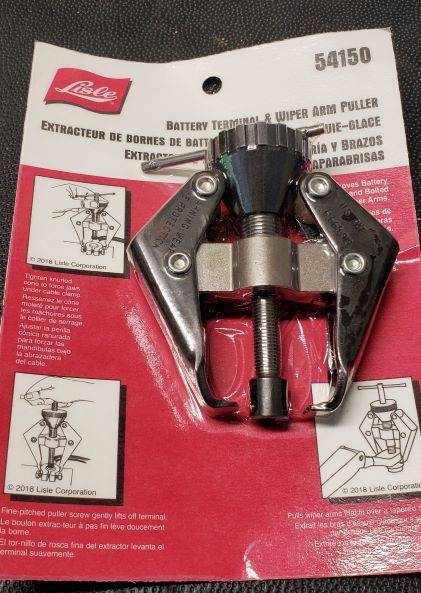
Last must have (besides patience) - Wiper arm puller. $30. Amazon.
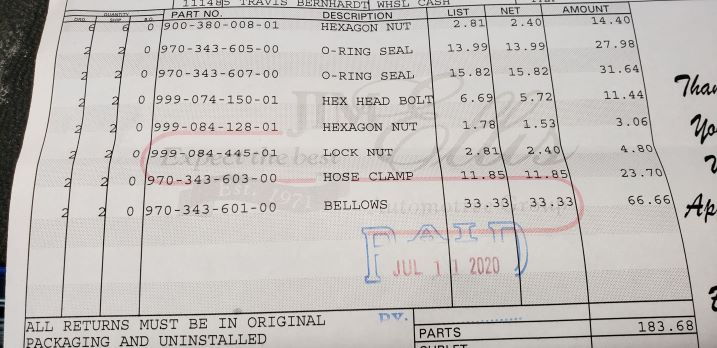
Here are the parts list of things you will need IN ADDITION TO the bag assemblies:
I looked at the other shock removal thread for inspiration, but came up with a better and faster way to get the strut out. Turn off the suspension, jack the car up, remove the tire. Unplug suspension sensor on the top a-arm. Unplug ABS sensor. Unclip the ABS sensor lines from their holders and get them out of the way. That's all just like the other thread - from here things differ a bit. I started on the driver's side because it's a bit more difficult.
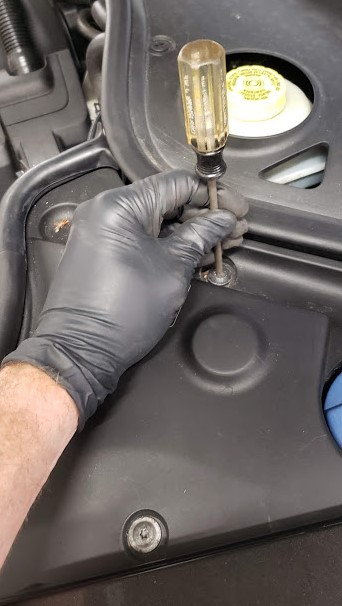
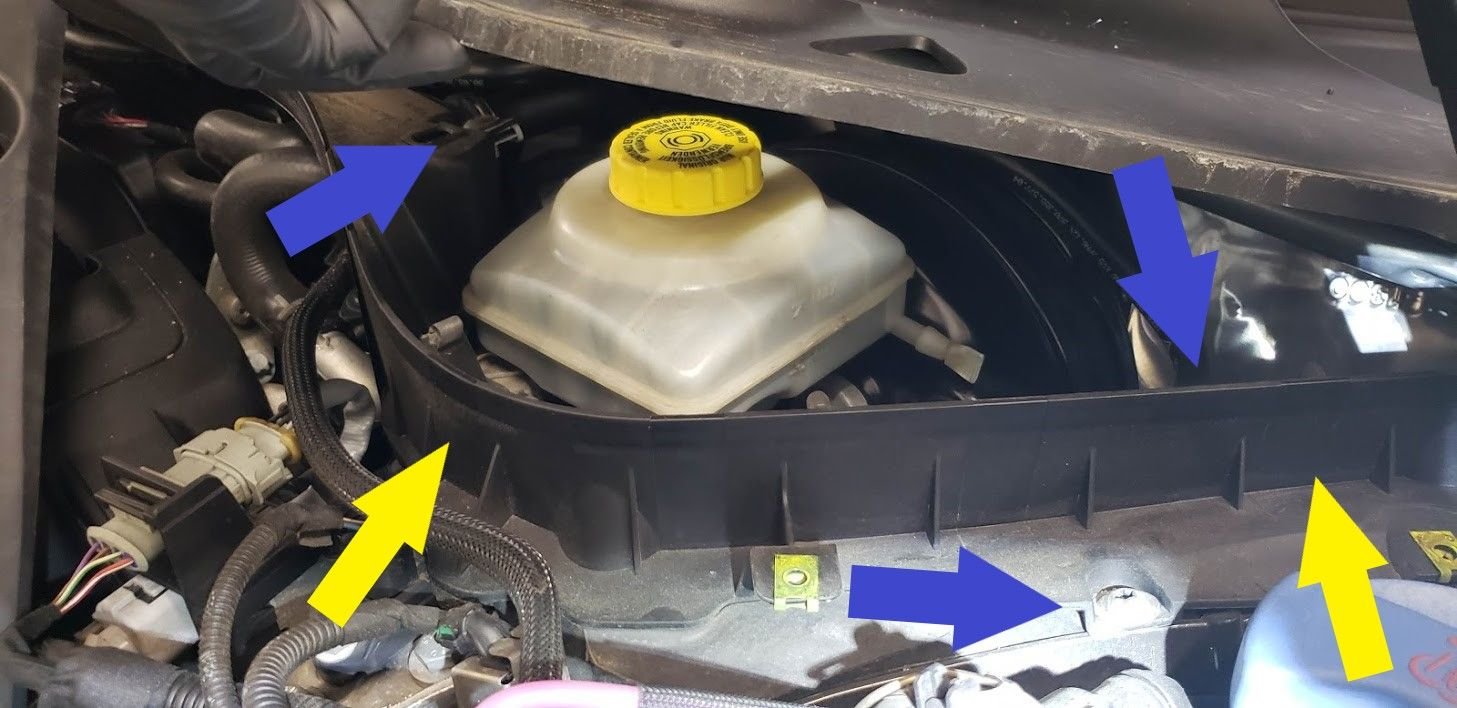
Under the hood, remove the coolant cap, and using a T25 torx, remove the 3 screws and remove the cover/panel
Pop-off the wiper arms, and leave the cowl cover attached near the windshield. Lift it up the cowl on the engine-side and look for the three T30 screws holding the plastic piece (yellow arrows pointing to it). Blue arrows point to locations of the T30. Remove these and put them in your bolt-box. Note that these T30s are snub nose. The T25's from the previous step are pointed.
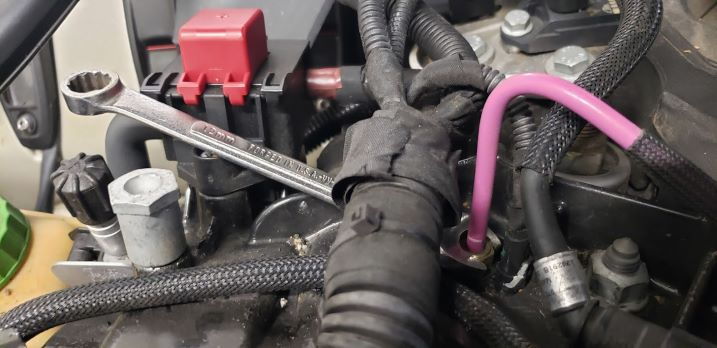
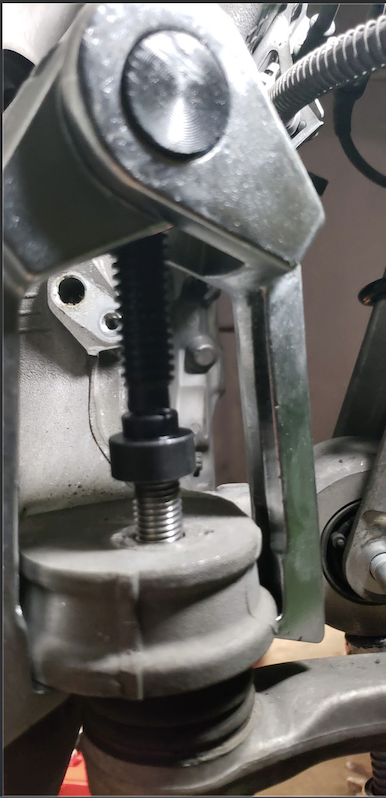
Once that is removed, you'll have clear access to the three strut mount bolts (must be replaced with new), and the various pneumatic and electronic connectors to the strut. Use a greenie (small flat screwdriver) and carefully disconnect the electronics to the strut. Using a 12mm wrench (ideally, a line-wrench), loosen and remove the air-line going into the strut. It will hiss and pop out followed by a gush of air, unless your system is completely flat.
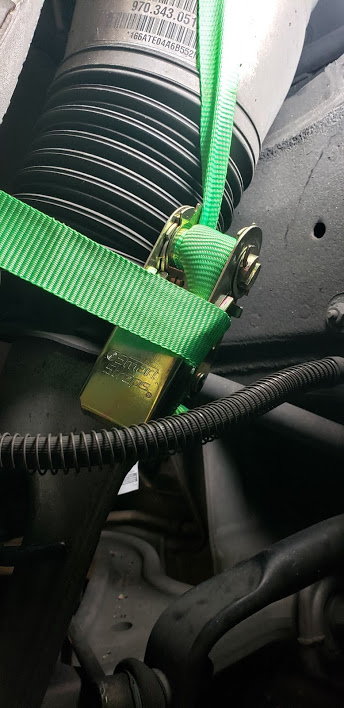
Get a 16mm socket and loosen all 3 strut nuts until the stud is about halfway out of the nut. (NOTE: Original nuts are 16mm. The factory replacements are 15mm). Doing this will allow the strut to hang down and create a gap between the top of the strut and the body of the car. Now carefully fish through the gap between the strut and the car one end of your ratchet strap assembly. Try to go between two of the studs and avoid the area with all the connections. This is how I routed mine. Pull the non-hooked end all the way through, and then hook the other side to one of the legs on the lower mount of the strut.
Hooked:
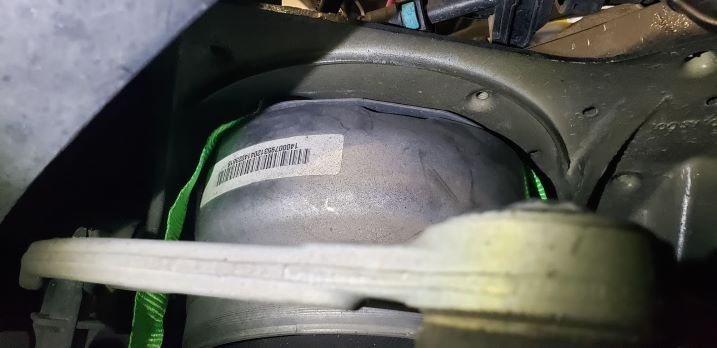
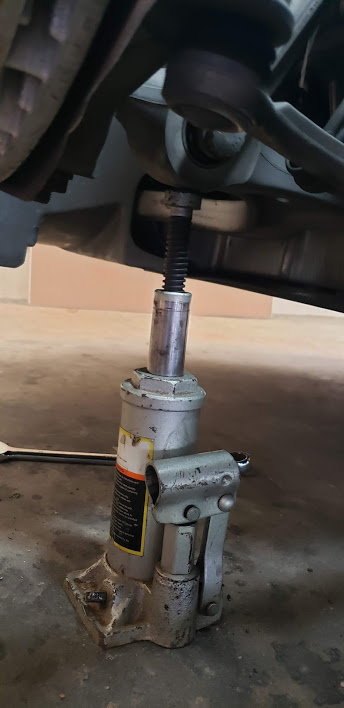
Now get your bottle jack and pop it underneath the lower control arm, near the mount for the lower strut. Put a bit of pressure on the LCA. This pic shows it later in the job so there's a good amount of pressure.
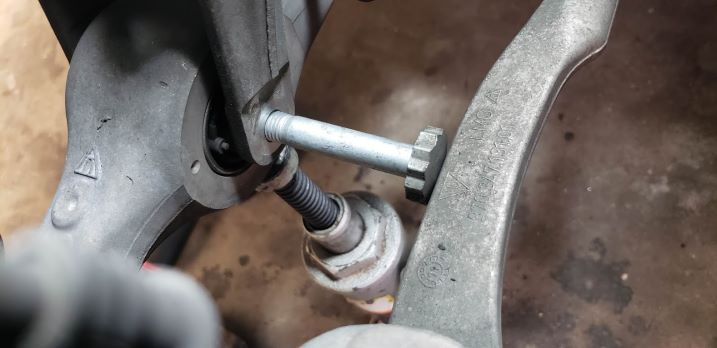
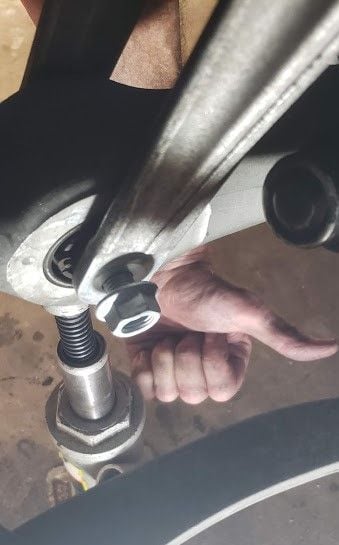
Now get your 18mm socket and remove the nut on the tie-rod ball joint, and the swaybar link. The swaybar link has a nut and a bolt. The bolt is 16mm and the nut is 18. Remove the nut - not the bolt. The bottom strut bolt is a 15/16 , the nut is 18mm. Do NOT remove the lower strut BOLT yet. DO remove the nuts from the lower strut bolt, swaybar link, and tie-rod. Using your tie-rod removal tool, position it on the wheel carrier and put the fingers of the puller on the ears of the wheel carrier. Start screwing down the plunger of the tool. Get a GOOD amount of pressure on it, but not an ungodly amount - you don't want to damage the balljoint, the threads, or break the tool. Now, under pressure, get a flat-face hammer and whack the side of the carrier right where the balljoint goes through. 2-5 good hits and that thing will pop out with a bang. Move the tie-rod out of the way.
Puller/press installed:
Start jacking up the lower control arm. (Yes, the ratchet-straps are still dangling...). Jack it up a pretty good amount. Like almost all the way up. Once it's topped out, Get the ratchet-assembly of the strap. You've got one hook already connected so connect the ratchet-side hook to the opposite finger of the strut mount. Here you can see the other side hook, and the ratchet.
Now, with the suspension fully compressed, ratchet down the strap until its tight. You have now locked the strut into the fully compressed position.
Let down the bottle jack a bit and you'll find the sweet spots where you can just pull out the swaybar end-link and lower strut mount bolts. Now the only things holding your strut in the car are the three top mount nuts. BTW - why do you need to remove the tie-rod ball joint? Because some Porsche engineer was a dick:
Fully release the bottle jack.Go back up top and remove 2 of the three nuts. As you start working on the third, reach around and put a hand on the strut so you can catch it as it falls out. When the nut pops off, the strut will drop. Using the bottle jack again, find the area in the suspension travel where you can wiggle the strut out. You'll have to fiddle with it a bit. On mine, I had to get the lower fingers of the strut pulled to the side. Then I jacked up the LCA a bit to open the gap at the top between the UCA and the strut. Trust me - you'll figure it out. It takes about 30 seconds of jack-stuff. On the driver's side, it comes out towards the car. On the passenger side, it comes out towards the front bumper.
Believe it or not, I was able to do ALL of the above steps in 22 minutes on the second strut. It's not that hard and using this guide will really speed you along.
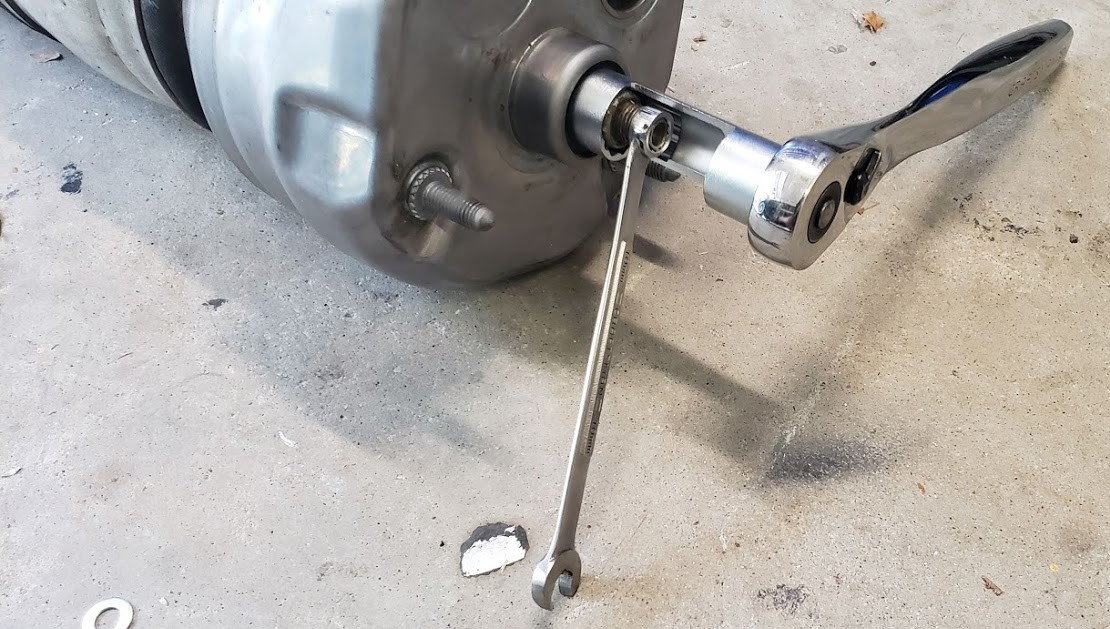
Now the strut is out. Remove the ratchet strap. Using the special socket and the 10mm wrench, loosen the center nut. I used the leverage of the ground against the 10mm to break it free.
Once the center nut has been removed, using a flathead screwdriver, pry the tab of the metal strap holding the top of the bellows to the airbag housing. It will pop off. Slide the bellows off the airbag housing.
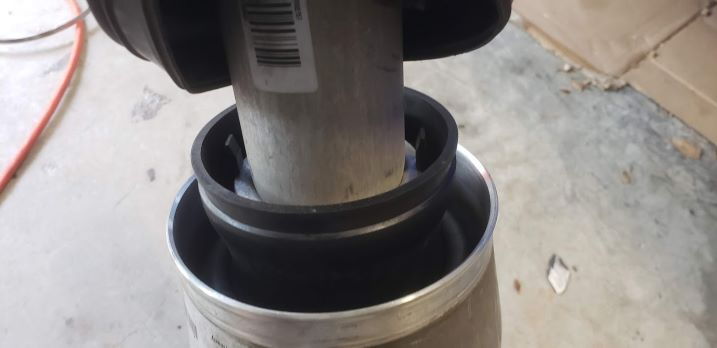
This next step sounds weird, but it works. Get on the floor with your strut. Put the bag-side away from you and have the forks pointed at you. Put your feet on either side of the bag housing, and give the forks a good tug. You will pull the actual bag inside out and this will let you get to the next step.
There are two plastic fingers inside the metal part of the airbag housing. These fingers attach the airbag to the shock itself. Wedge nylon screwdrivers or something similar between the fingers and the metal of the strut. They are pictured here:
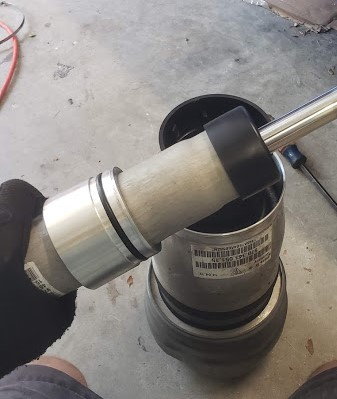
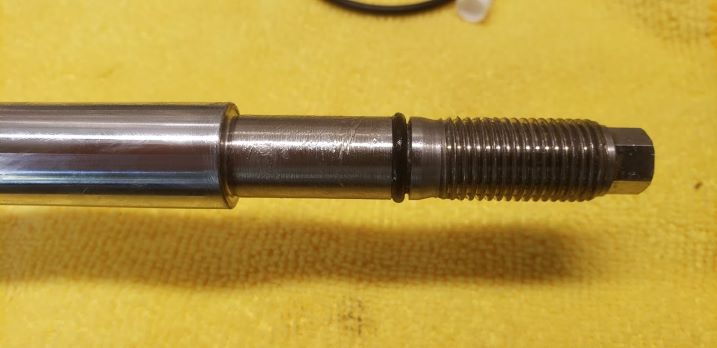
With the fingers pried out a bit, do the same thing you did to overextend the bag. Give it a good, sharp yank and the bag will pop off the shock. Here you see the lower seal on the shock. This seal and the top seal are what actually keeps the air inside your airbags.
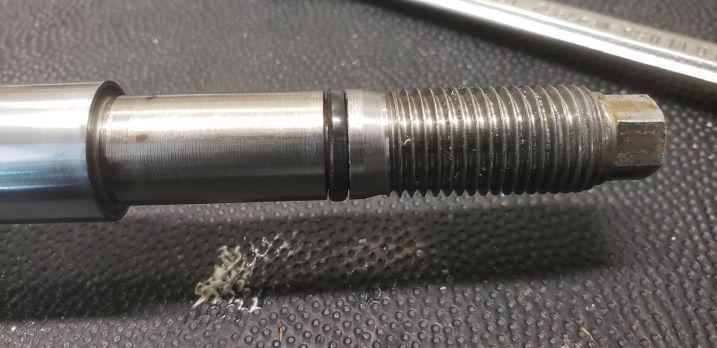
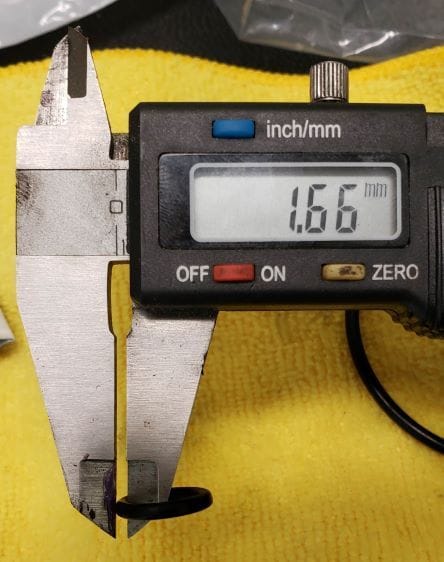
Here's the top-seal - and where I think my leak was coming from. You can see the seal has flattened out along the top edge.
Old seal thickness;
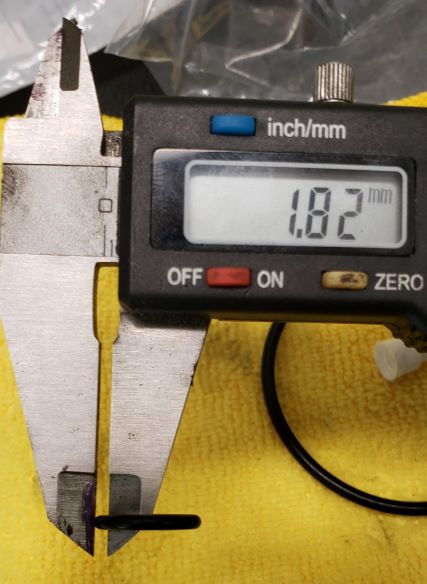
New seal thickness:
The lower seal showed slightly less shrinkage. Both seals were dry and deformed. I can't say for sure, but I think my leak at the top was due to the seal getting hard and shrinking.
CLEAN CLEAN CLEAN. Installation of new seals requires cleanroom levels of clean. No dust or dirt if at all possible. Use a nylon pick and remove both seals. Lacquer thinner and a lint-free cloth will make quick work of the seal channels and the upper part of the strut shaft. Clean them well. Get some dielectric grease which is the same as the Porsche spec'd grease and lube up the seals. Goop some DE grease into the o-ring channel. Slide them into position, and then apply more dielectric grease to them, as well as the top part of the shock where it goes through the bag housing.
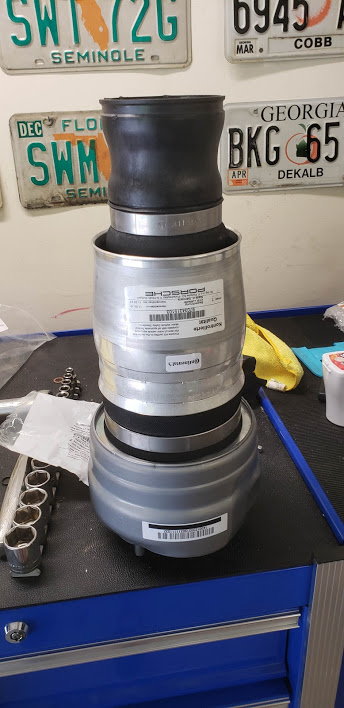
Get the new bag and pull the lower part of the bag out like you did above to get to the ears. It'll look like this;
Slide your new bellows onto the shock, narrow side towards the fingers. Put the strut fingers-down on the ground, and slide the new bag over the top. Thread a NEW nut on the top until its finger tight. Flip the strut assembly over. Get your ratchet strap out again. Loop it over the top and between the fingers of the lower mount and start cranking it down - watching the clips slide up the side of the shock. They won't clip in. Use two sets of pliers, one each at 45-degrees from each of the clips - one on either side of the plastic clip/mount and pull UP on the plastic bag-housing and the ears will click into place. Loosen the ratchet strap. The fingers will keep the shock from popping back out.
(Now is a great time to go back to the car and make a mental note about which side of the strut the swaybar end-link bolts to. Then go back to the strut on the bench and make sure the orientation is correct as you're setting it up. Learn from me. I didn't do this and got lucky on the driver's side. Not so lucky on the passenger side. Wasted another hour taking the strut back out, taking it apart, flipping the ^&*(Q)$ thing around, etc...)
Use the CV strap pliers and fasten the bellows to the strut.
Using the same setup you used to remove the top-nut, install it. Torque it to 41 ft-lbs. Use your ratchet strap to compress the assembly again. This will also flip the bag right-side-in. Installation is the reverse of removal - with the exception of FLIPPING AROUND THE DAMN LOWER STRUT MOUNT BOLT so it can be removed without pulling the tie-rod.
Torque specs for everything are in the other strut removal thread. IMPORTANT: Do not torque down any suspension components unless there is a full load on the suspension. Tightening fasteners on unloaded suspension parts is an amazingly efficient way to destroy bushings really quickly. Put the bottle jack back under the LCA and lower the car to where it's at normal ride height. Measure the distance from the floor to the center of the wheel and replicate that measurement from the floor to the center of the hub by jacking up the bottle jack. NOW go ahead and torque down the swaybar end link and the lower strut mount. The tie-rod doesn't really care if its loaded or not, but I always tighten it at the same time.
Do one side at a time. Once everything has been re-installed on one side, DO NOT put the covers back on underhood. Put the tire back on and using your floor jack, lower the car until it's just a smidge below level. The jack will still be supporting the weight of the car. Do not let the car all the way down. There's no air in the bag - it'll just slam into the bumpstop. No bueno. Get in the car, close the door, and start the car. Re-engage the suspension and set it to "comfort". The pump will run for a bit, fill the bag, and level the car - lifting it off the jack. Shut the car off. Get some soapy water and check all of your connections for leaks.
Torque lugs to 100 ft-lbs.
It took me 3.5 hours for the driver's side - taking pictures and "trial and error" stuff, and about 2 for the passenger. Most of the passenger side was because I f-ed up by getting the orientation of the swaybar end-link ear wrong. Had I not screwed that up, I bet I could have gotten the passenger side done in 90 or less.
No leaks.
Your mileage may vary. I make no guarantees. That said, I bet my leak was my $15 seal.
Last edited by Shrike071; 07-22-2020 at 07:42 AM.
Reason: Changed title
Crazy I'm the first on responding to this. Thanks for this. My car is slammed right now and will try this before shelling for arnotts. Previous owner put on rmt and they didnt even last a year. The crappy valve block they out on was some generic chinese part.
 07-22-2020, 07:34 AM