When you click on links to various merchants on this site and make a purchase, this can result in this site earning a commission. Affiliate programs and affiliations include, but are not limited to, the eBay Partner Network.
Rear Door Lock Actuator Removal & Sun Shade Removal
I replaced the right rear door lock actuator on my 2013 CTT last weekend. Because the door wasn't looking the car would not chirp when I looked it. I wrote up the following to help anyone else who wants to attempt the repair, which took a long time, but wasn't that difficult.
TOOLS: 1/4 torque wrench, 1/4 ratchet, w/ 4� extension, E6 female triple square, 6 mm triple square, 13mm 1/4� drive socket, T30 socket with 1/4 adaptor, Screwdriver with T20,T25,T30 bits, screwdriver, special hook tool, trim removal tools, tape measure, tape.
REMOVAL:
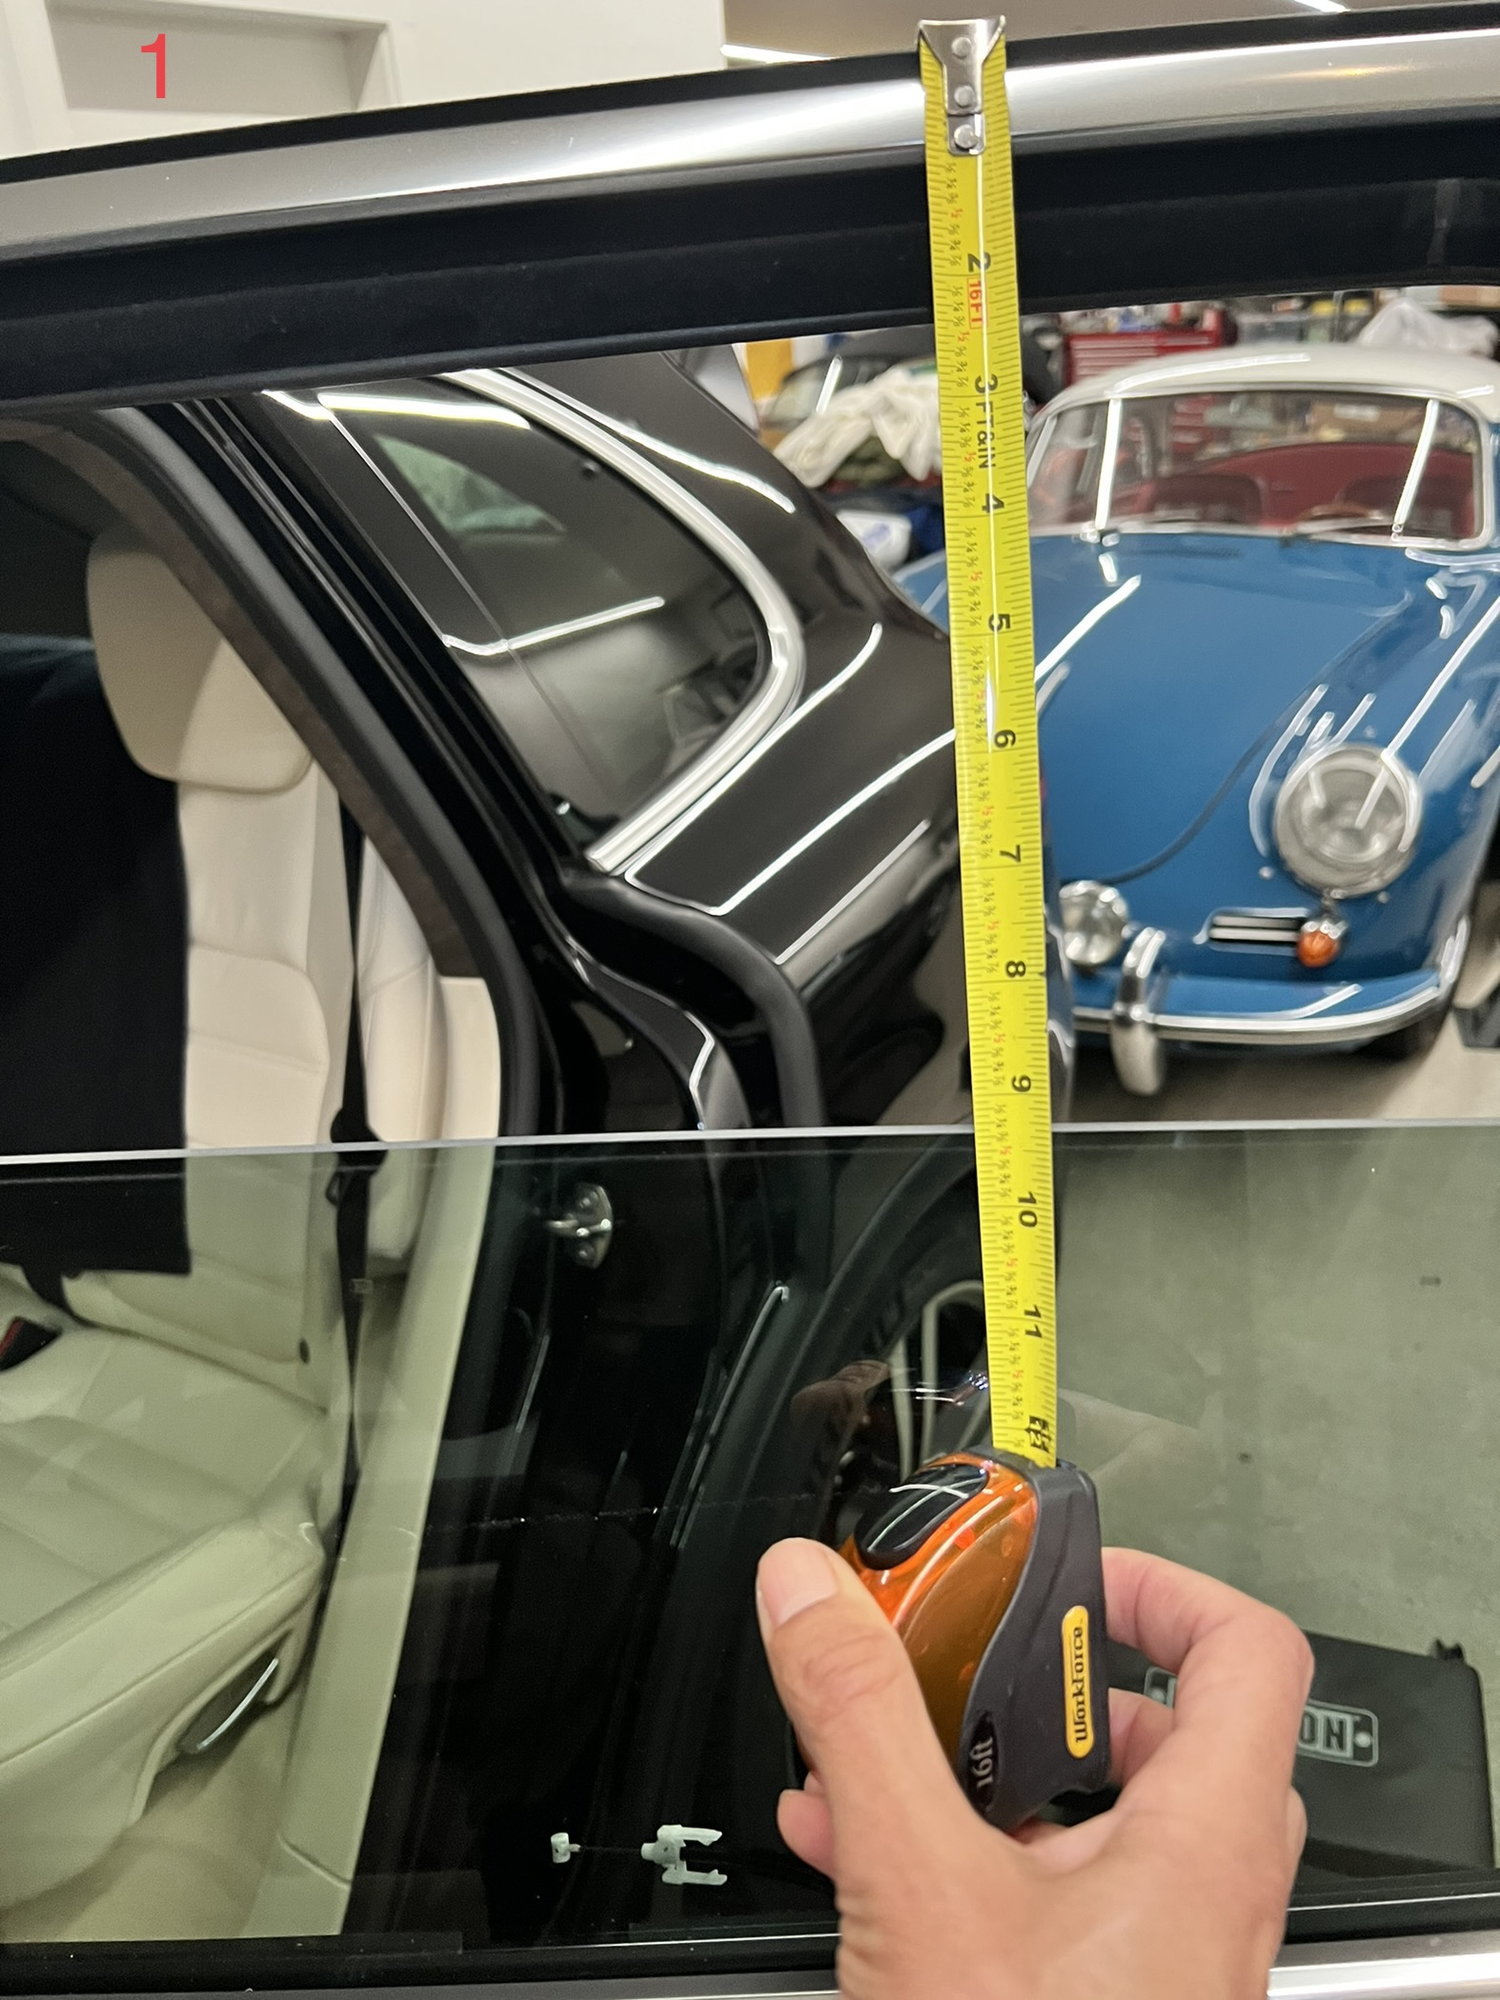
1) Roll rear window down 9". Measured from the top of the upper door rubber the top of the window glass. 9" will expose the window fastening bolts in the subframe.
2) Unplug door wire harness at the door hinge.
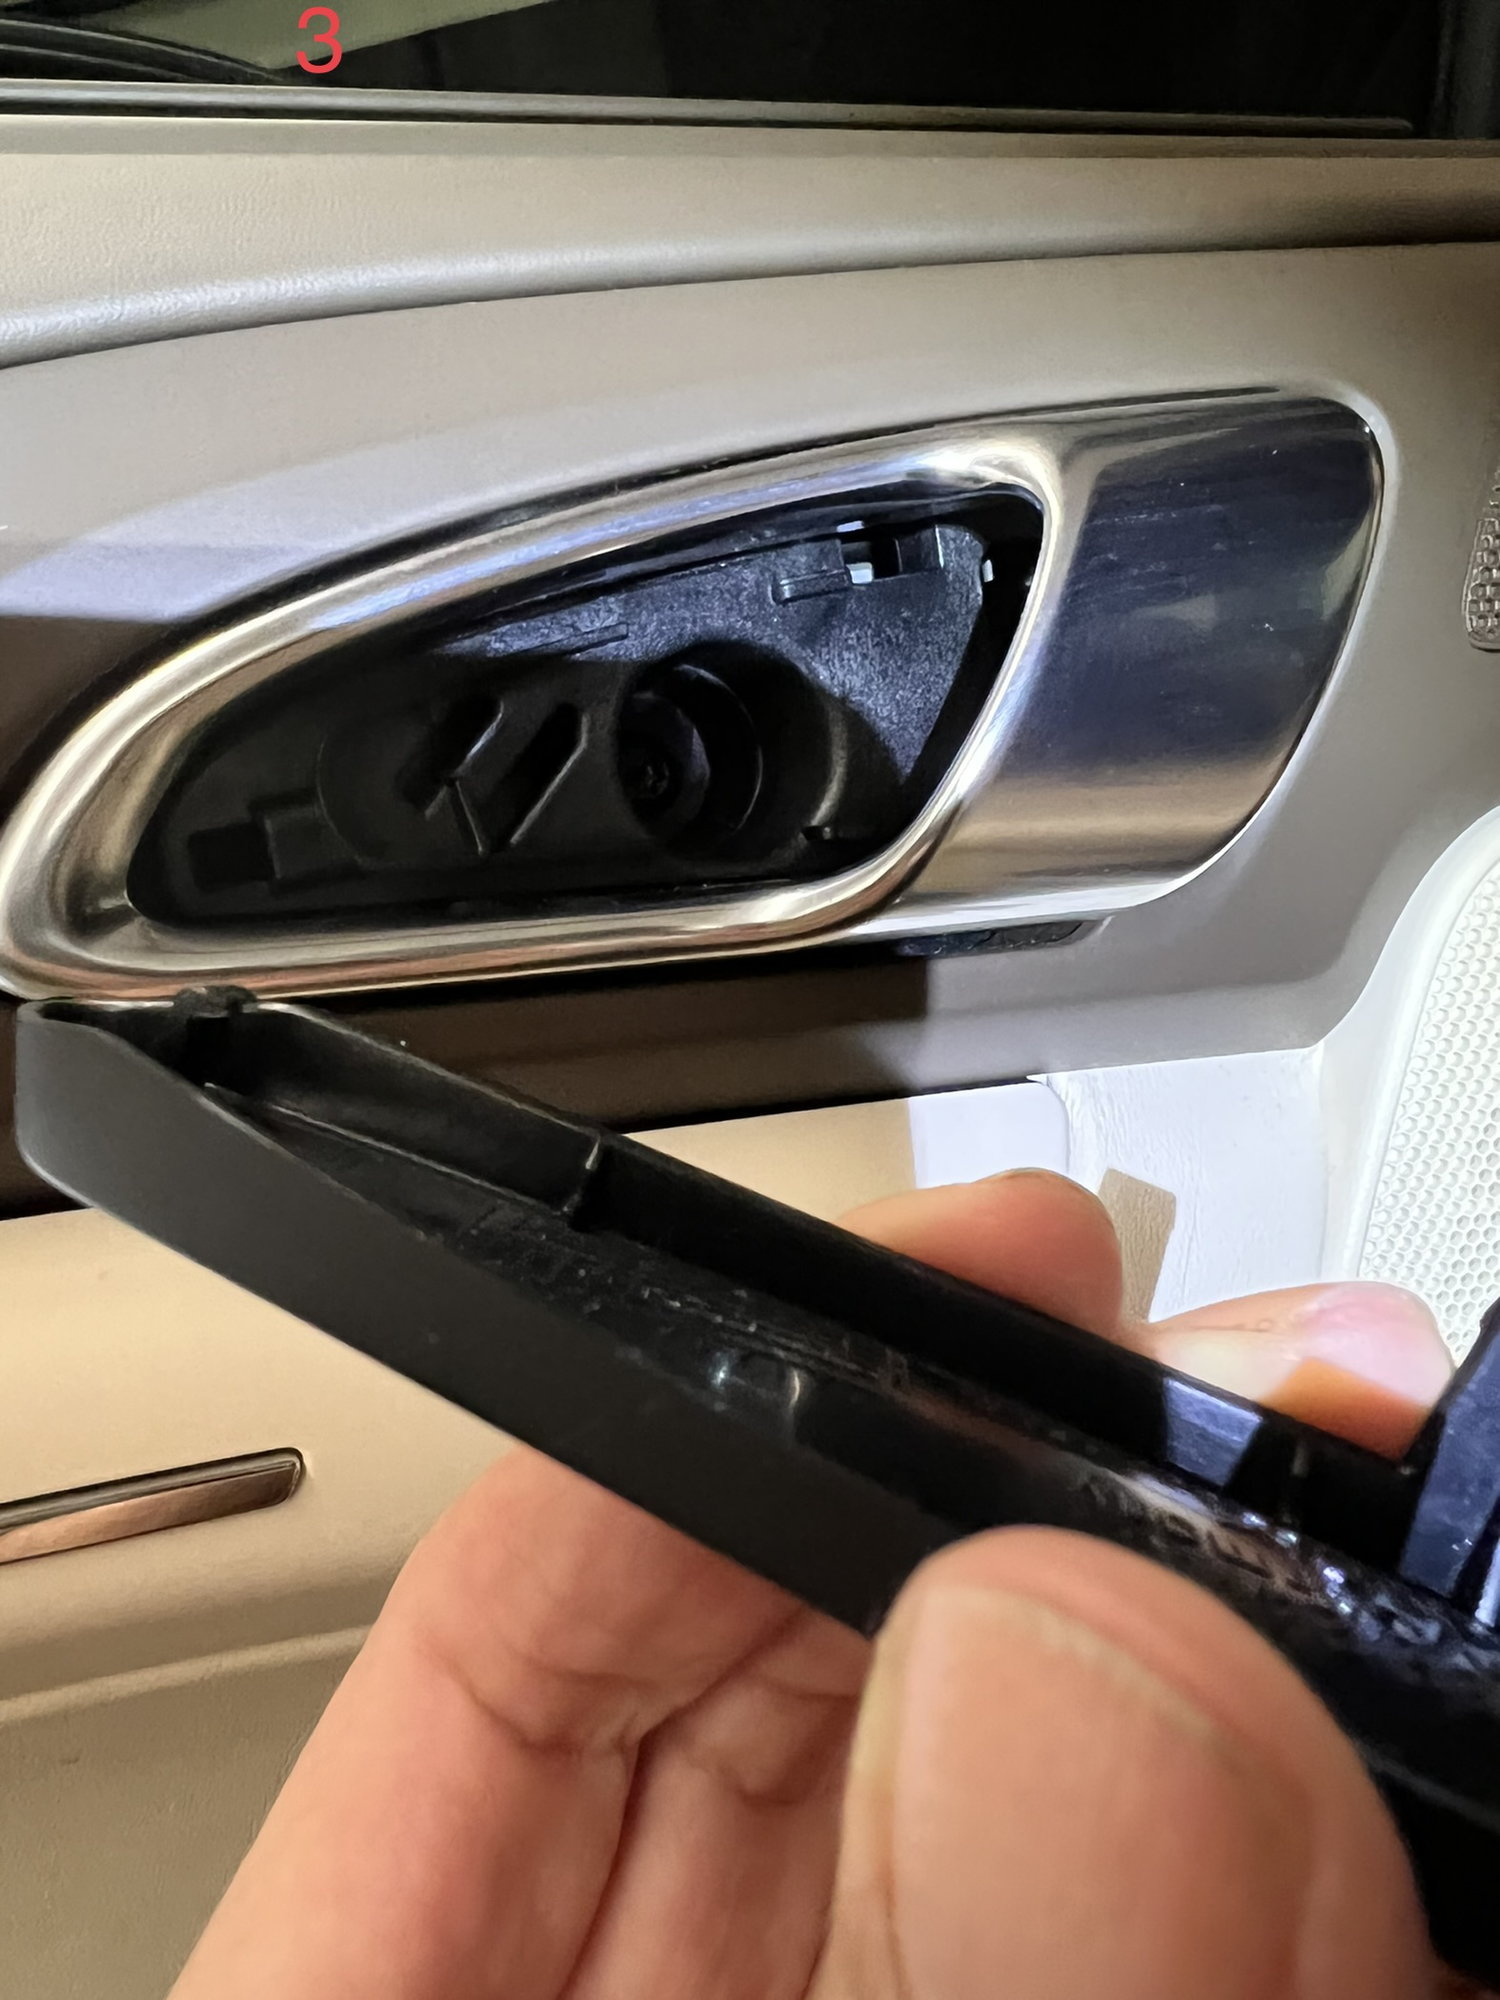
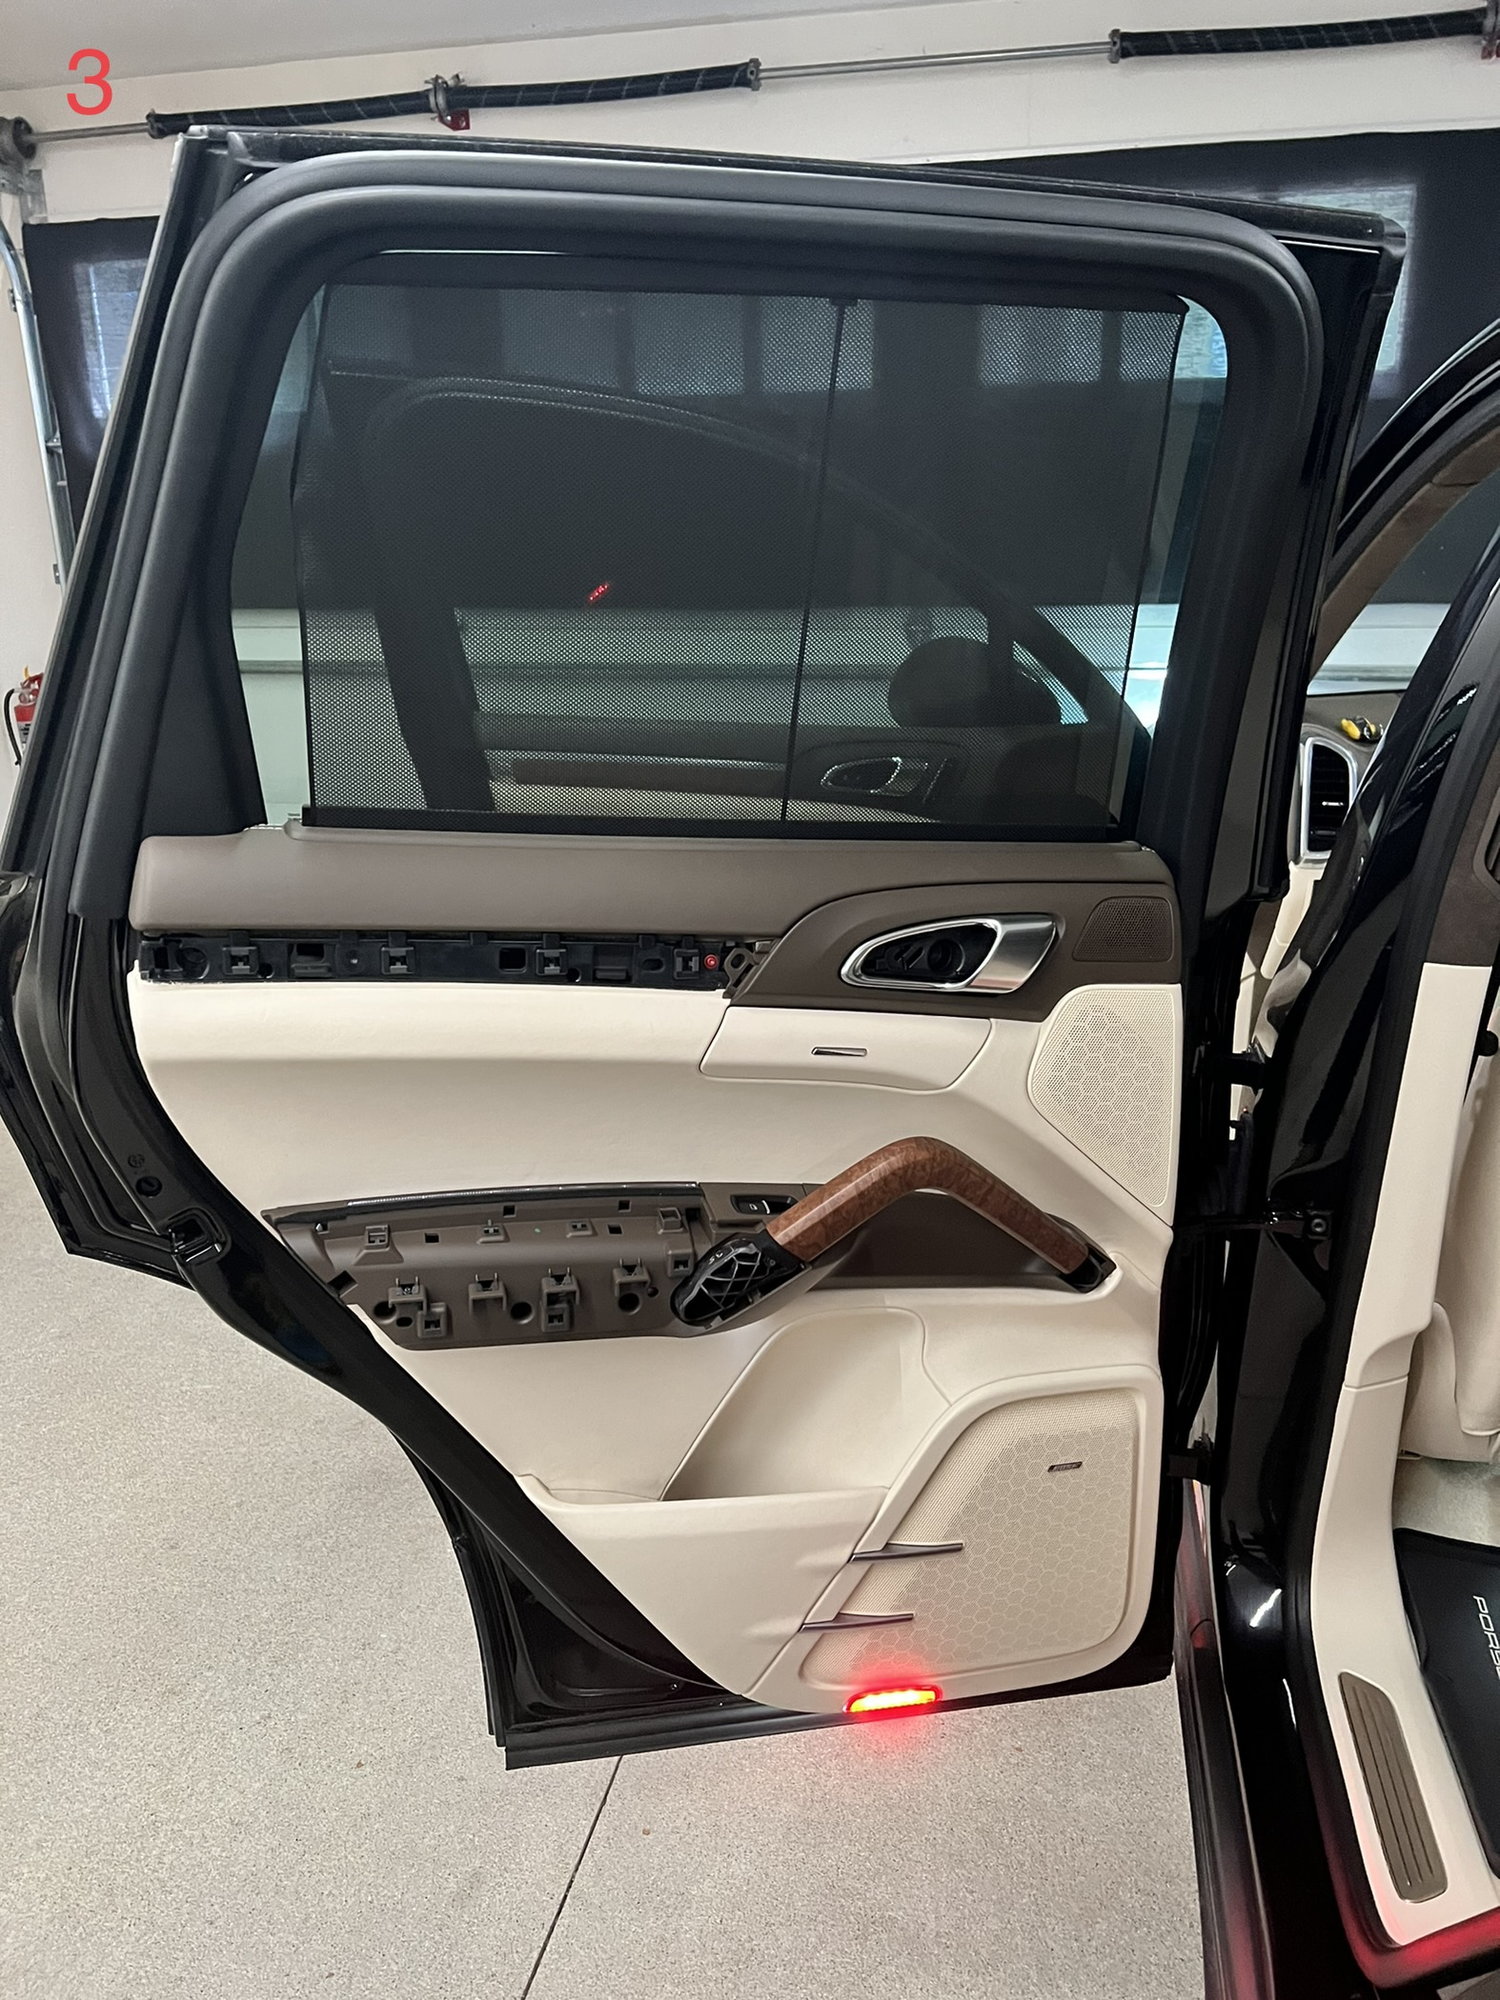
3) Remove the armrest by pulling straight up. Remove the plastic trim piece below the armrest by pulling it outwards. Remove the door pull handle by pulling off the small front cap at the front of it. Remove the two T30 screws that hold the handle to the door panel. Remove the plastic behind the interior door handle. It has a catch on the left-hand side. To get it out push it towards the rear of the door and pull out. Behind it is a T30 screw that will need to be removed. Remove the upper trim to the left of the door handle, by pulling it away from the door. There is one T30 screw behind that trim and another screw to the left of the light at the bottom of the door. It is a T25. Once all those screws have been removed pry the door panel away from the door frame starting at one of the bottom corners and working up along the sides. Use pry tools to make room to fit your fingers and use your hands to pull the door panel off.
4) Before removing the door panel the sun shade needs to be extended by pulling it up. Be sure to keep it along along the inside of the window frame as far as pull it up. Once it's up as far as it will go, pull the door panel up and away from the door frame. The goal is to pull the sunshade rod up and out of the rod-guide that is in the door frame.
5) Disconnect the 3 cables that attached to the outer door panel.
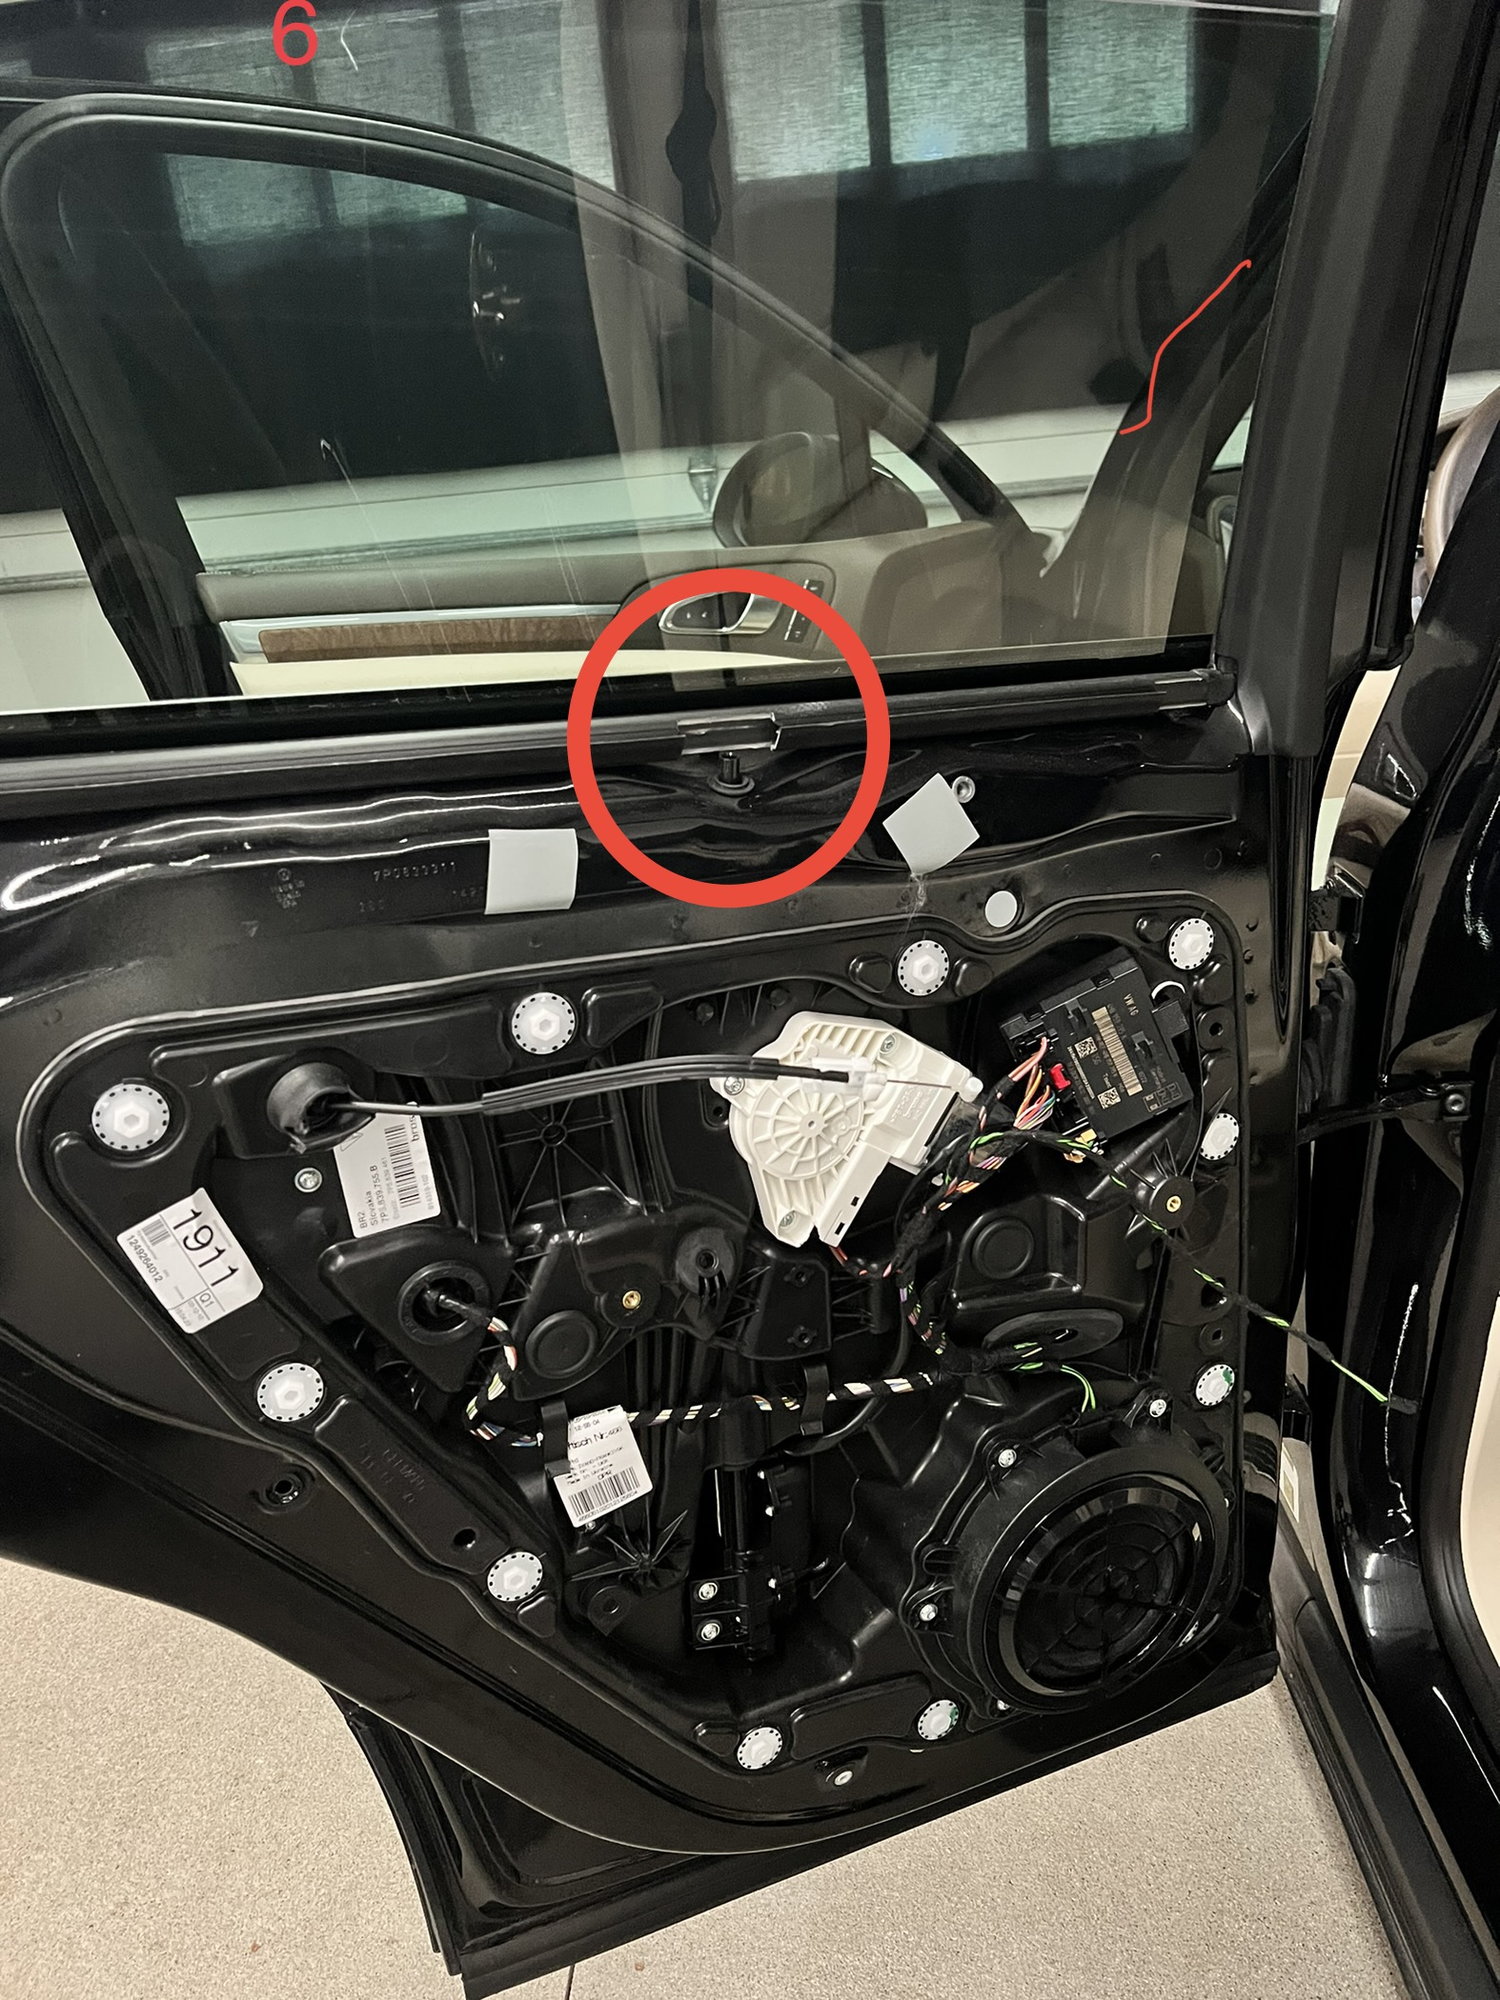
6) Remove the sunshade rod guide at the top of the door frame.
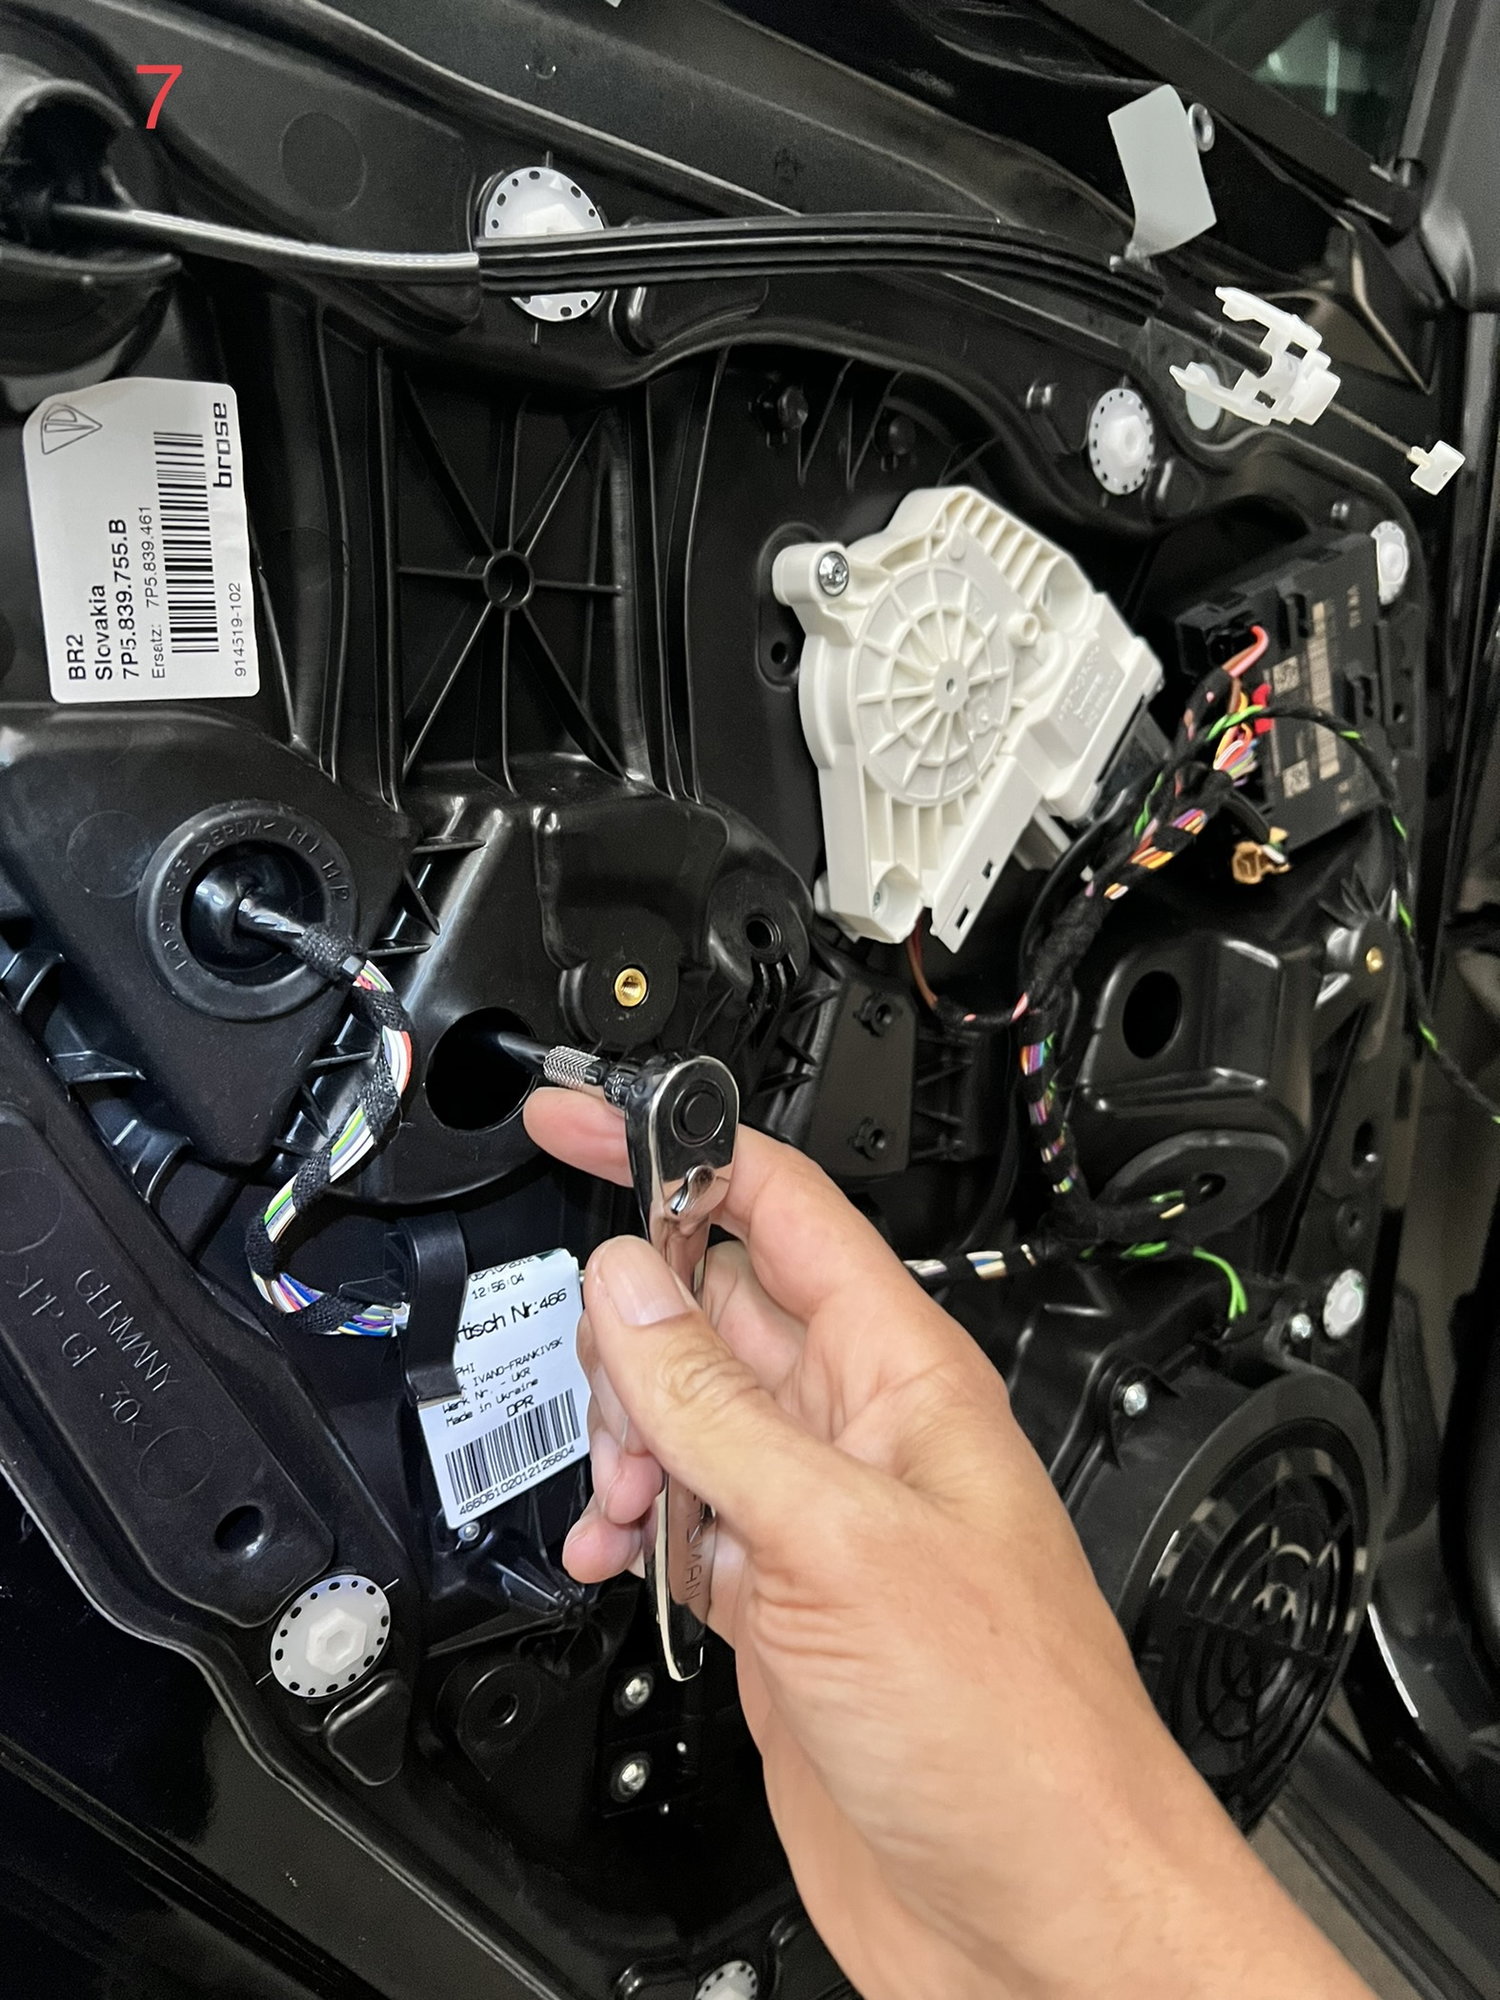
7) Remove the two rubber plugs in the middle of the door sub panel. Behind the rubber plugs are the screws for the fastening clamps of the window. Use a female E6 triple square socket. They are reverse thread. Turn the screws clockwise to loosen them until you can slide the window up. Use two pieces of tape to secure the window in the up position.
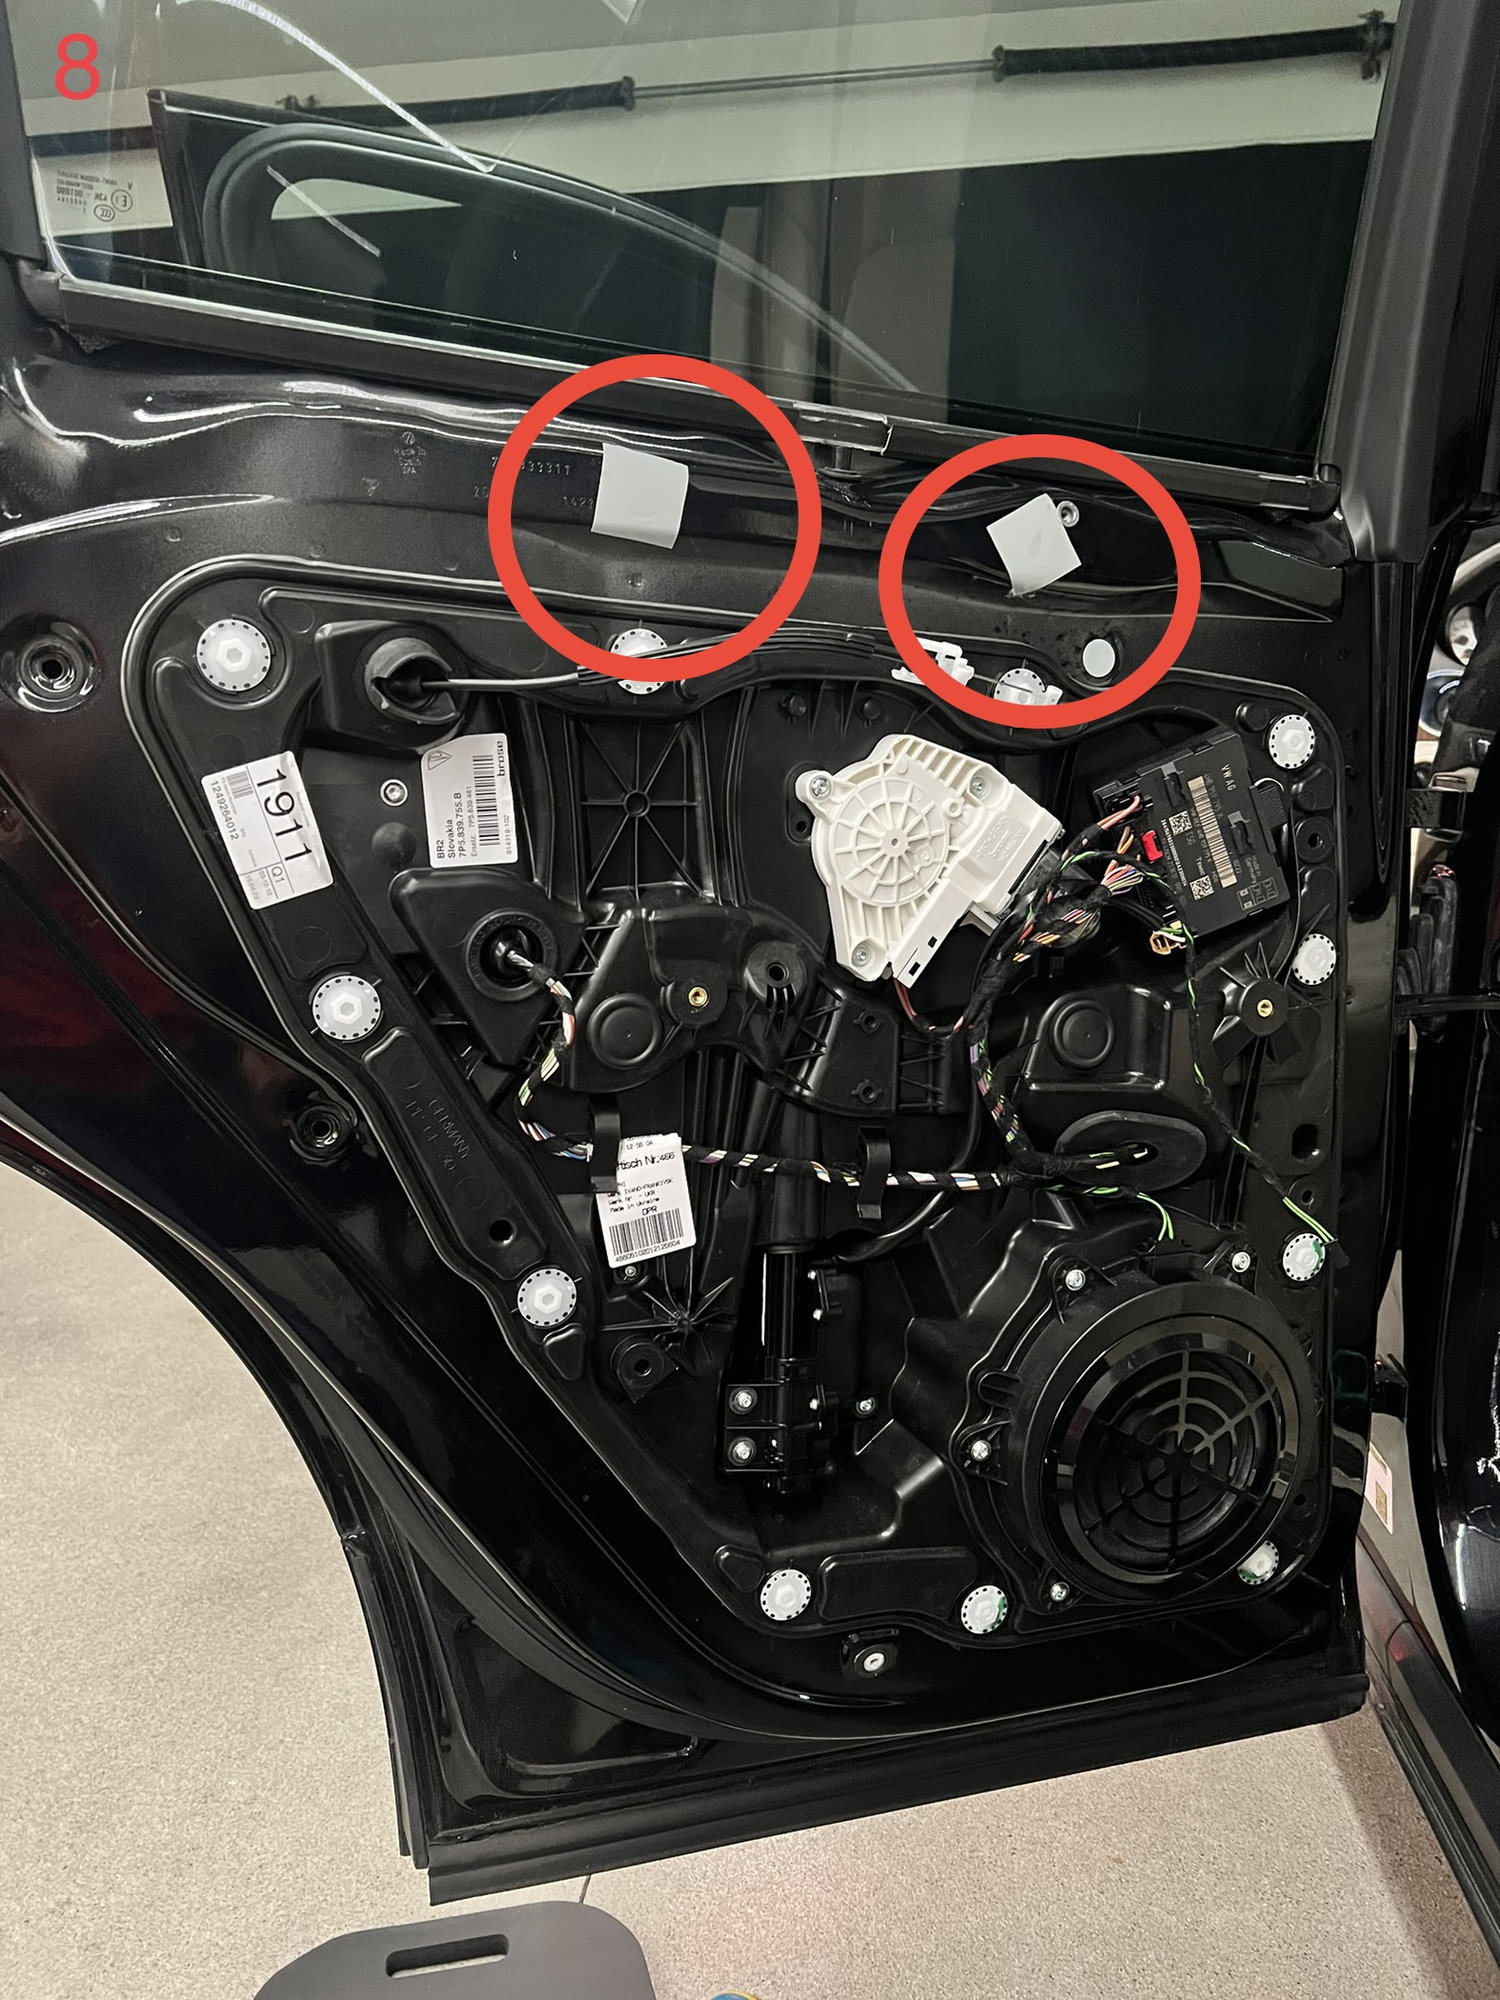
8) Remove the 2 cloth tape covers along the top of the door frame to expose the bolts that hold the window mechanism. Remove the T30 bolts.
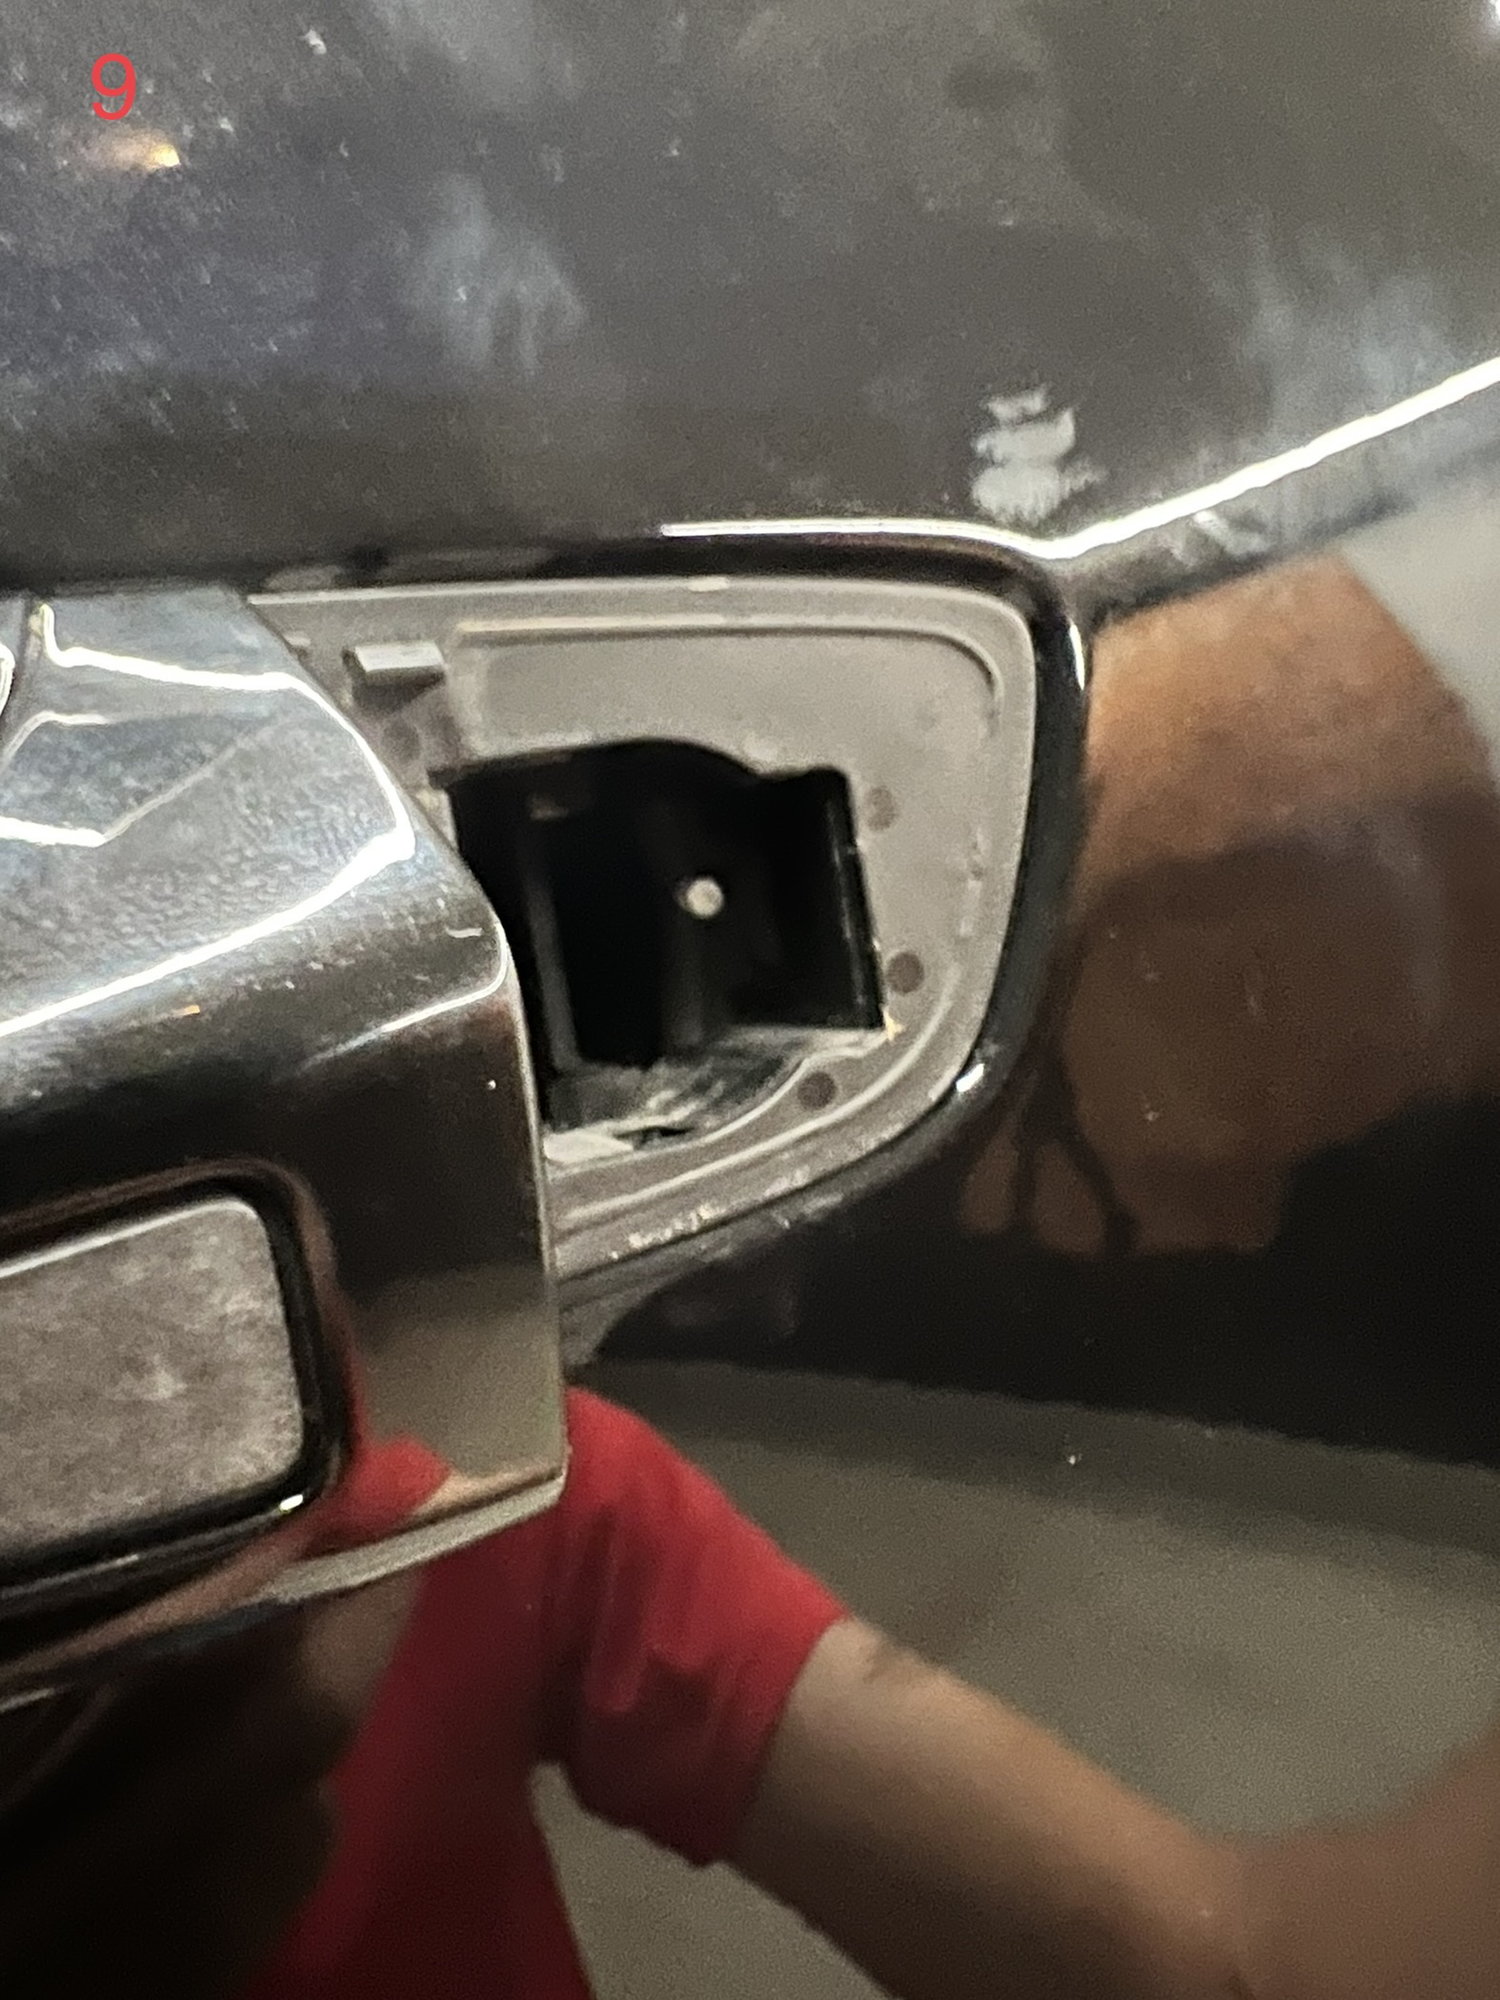
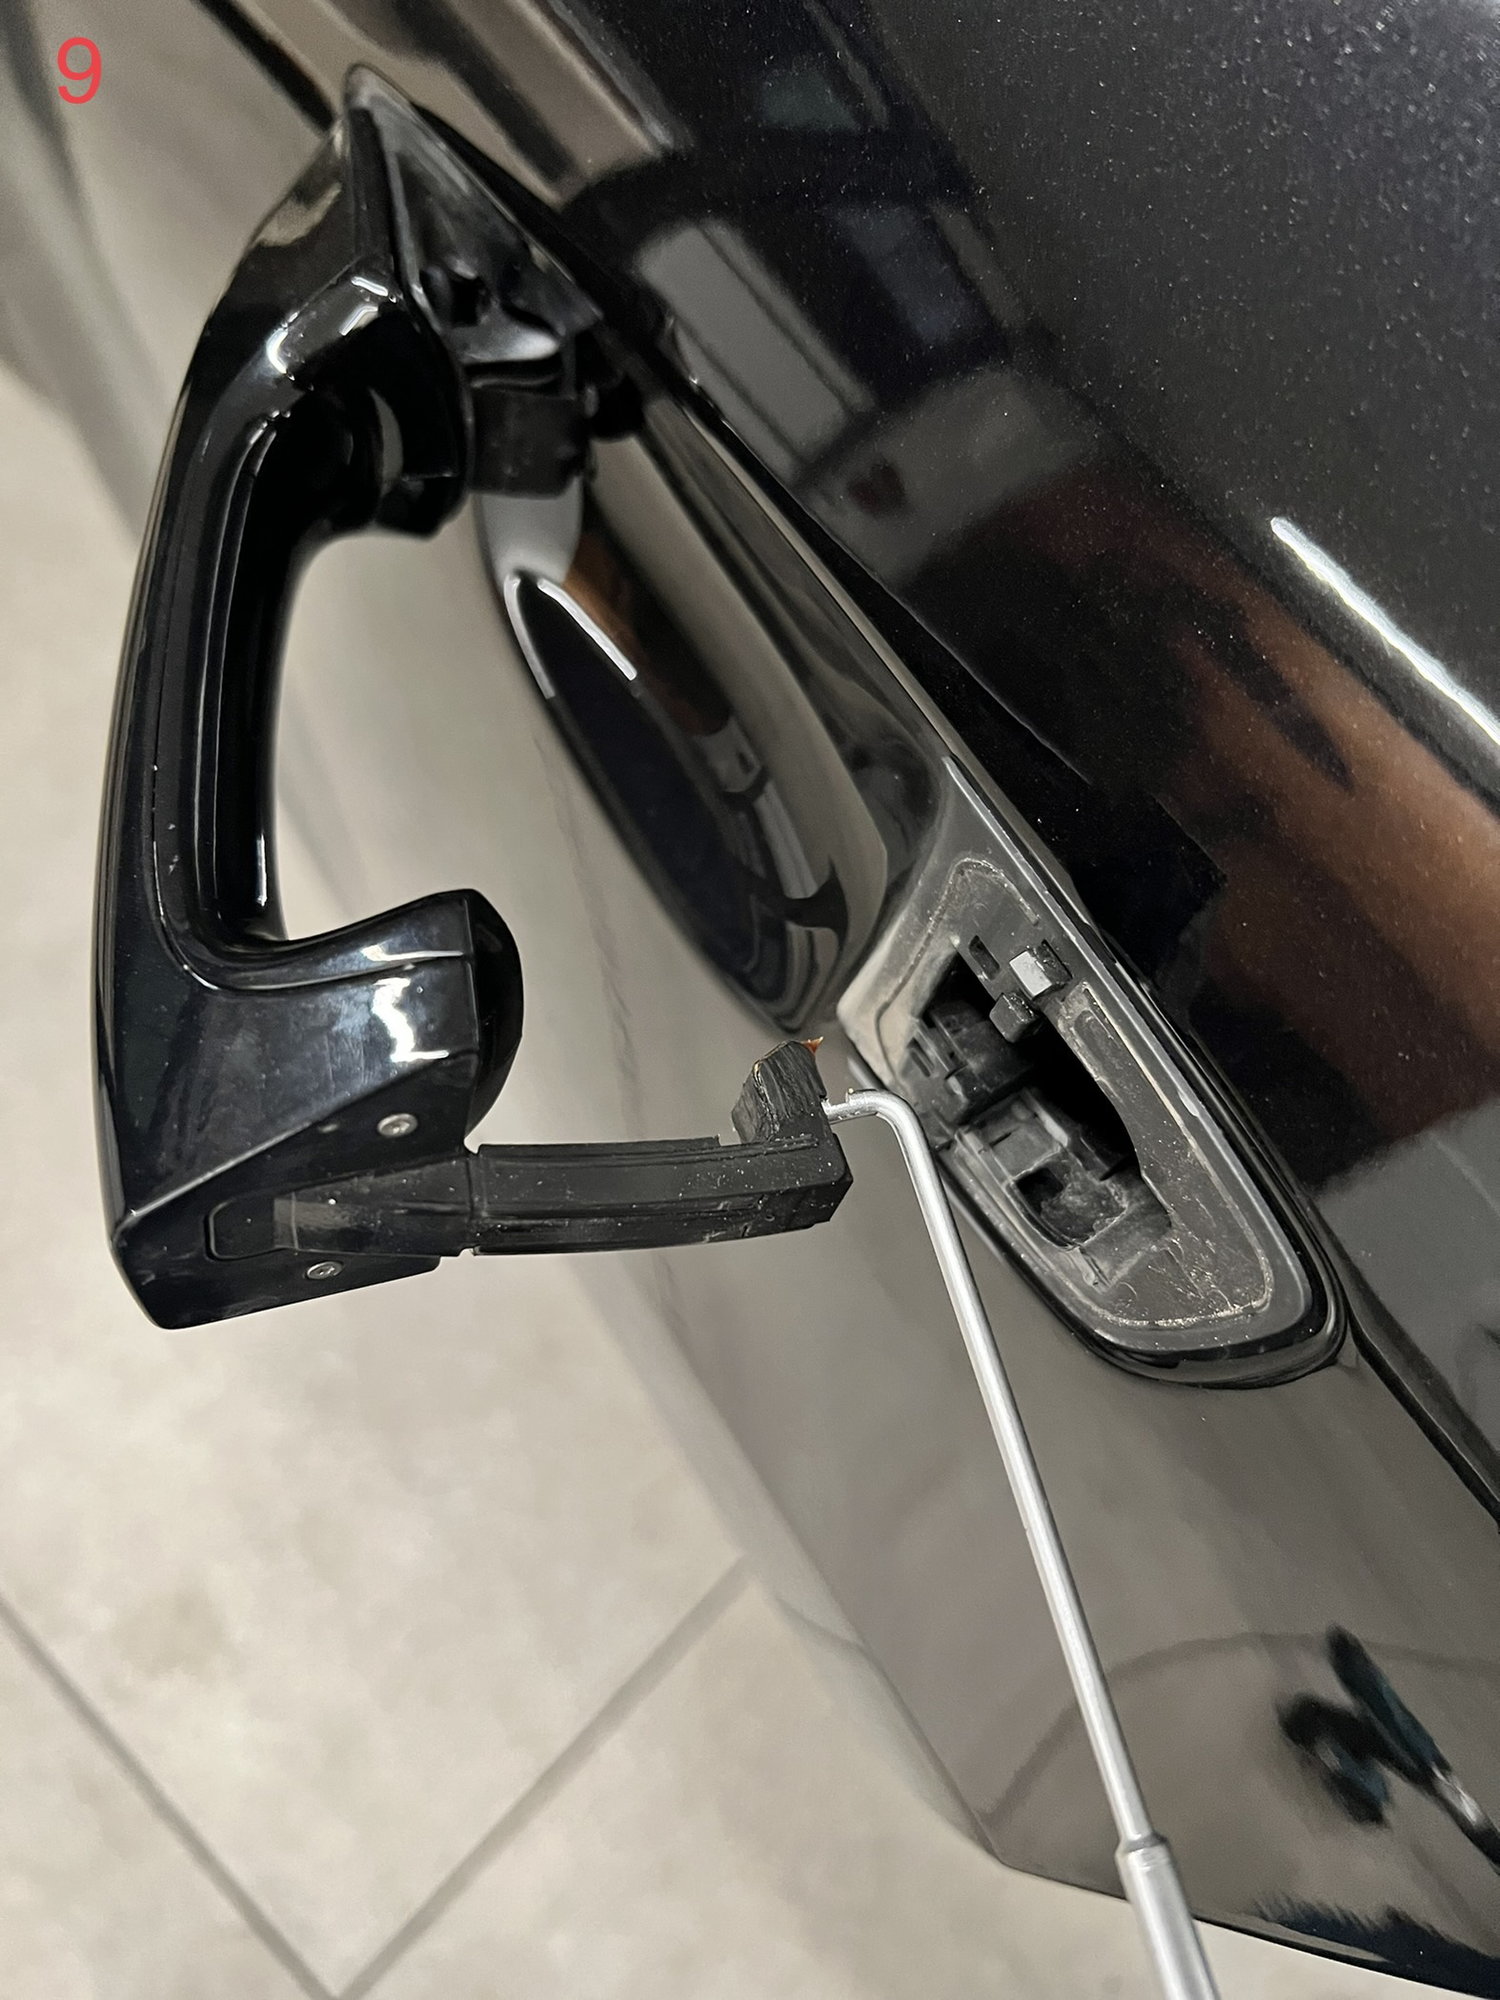
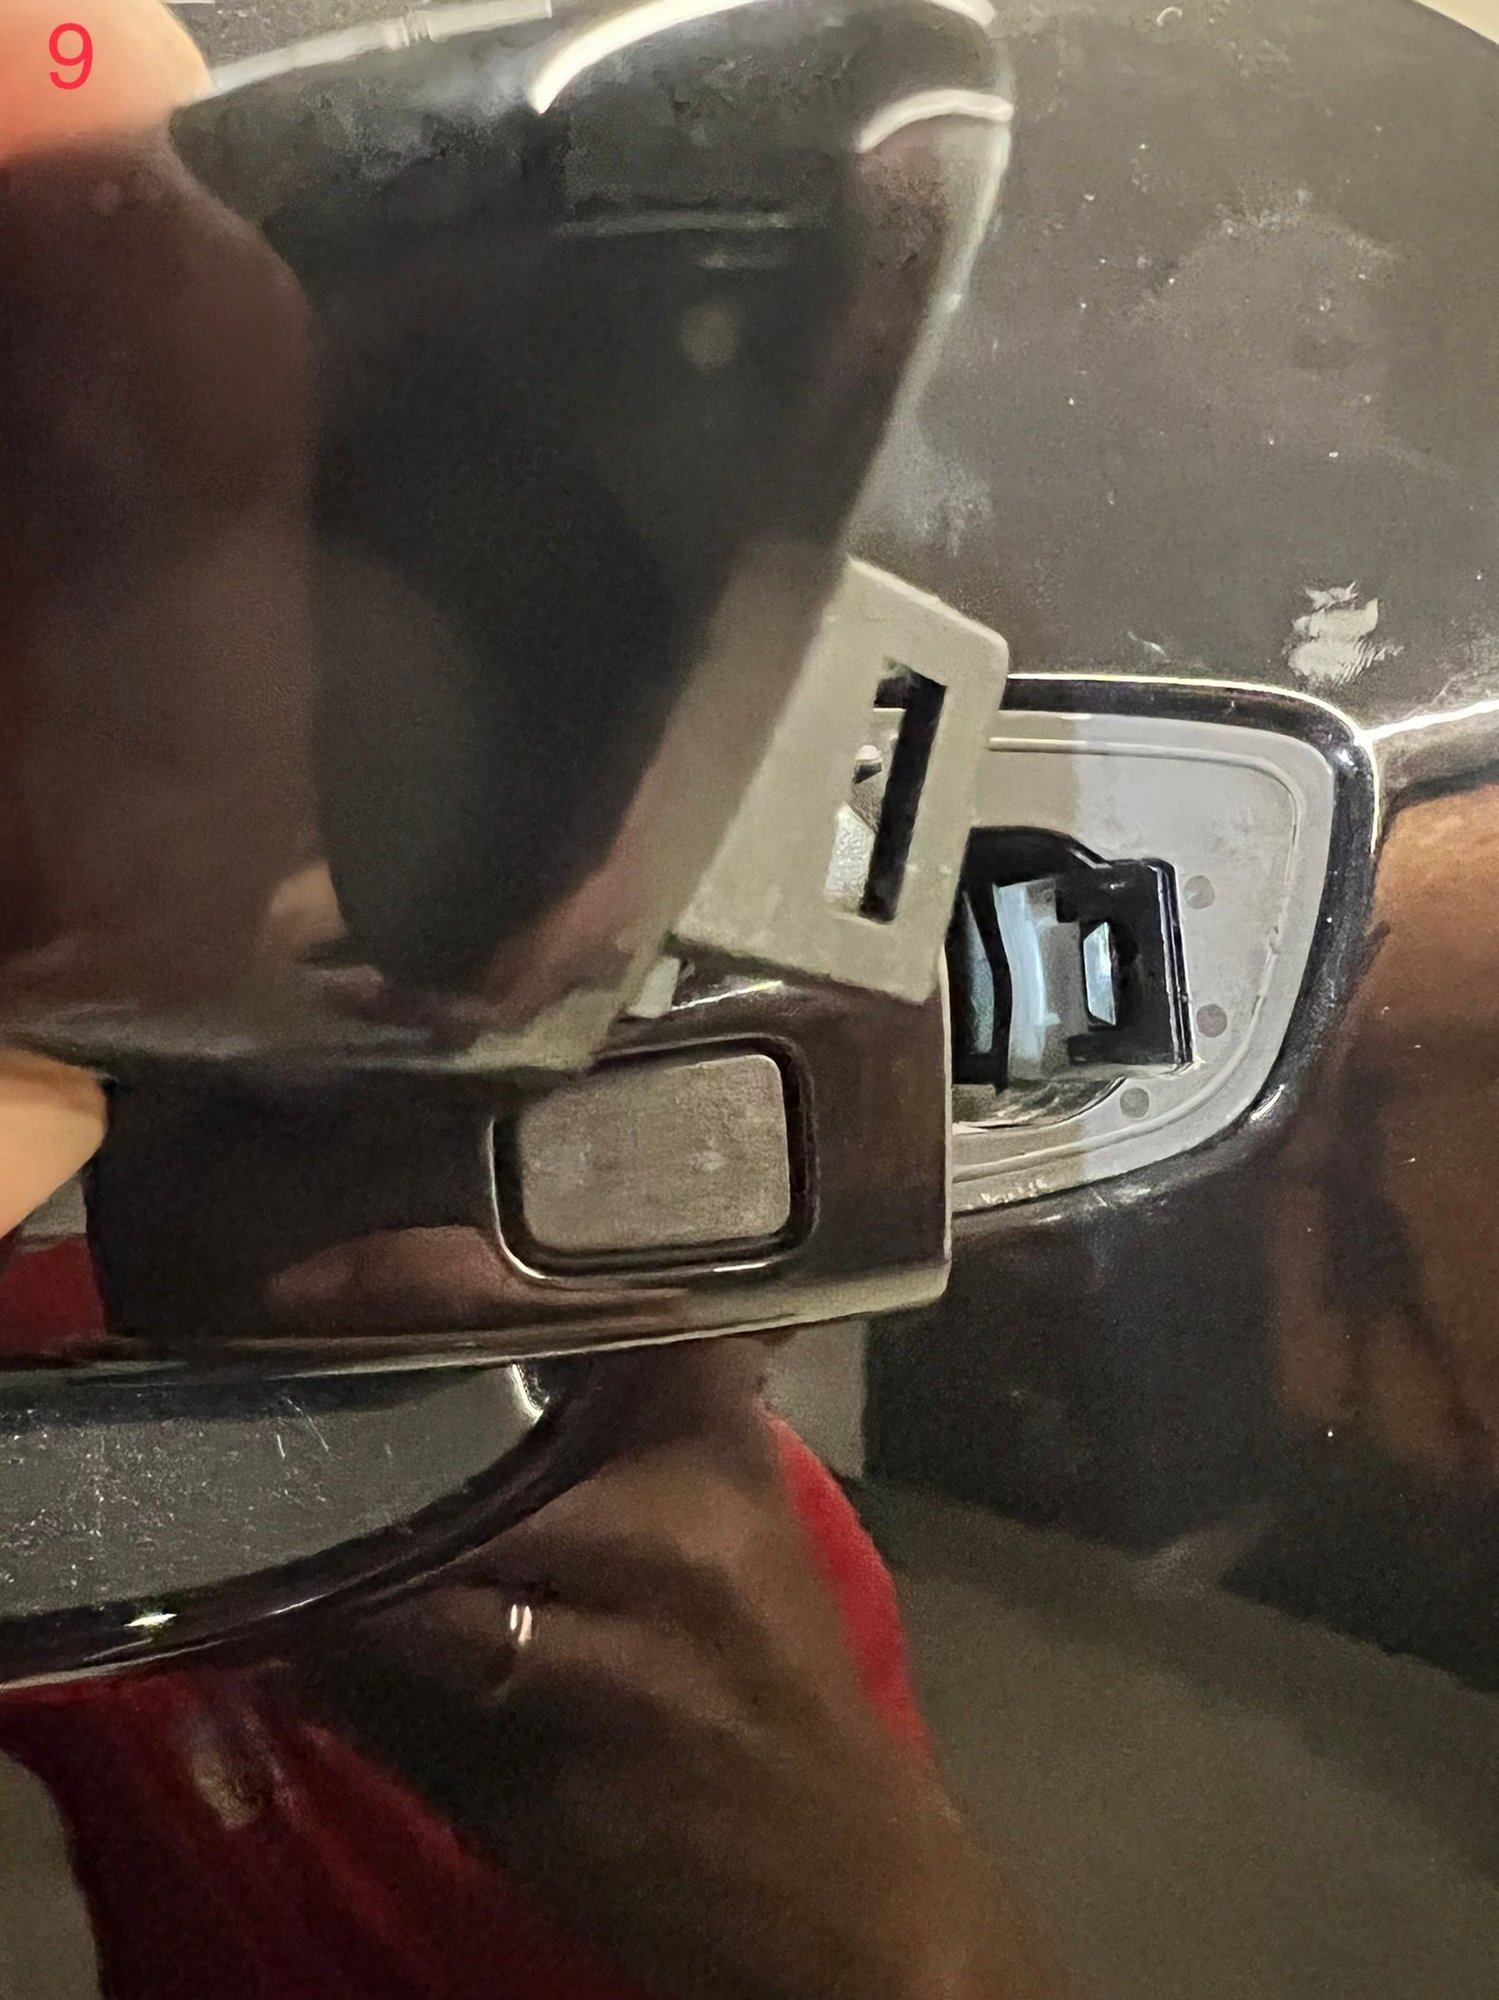
9) Remove the outer door handle. Remove the rubber plug in the door frame above the door latch and use the special hook tool to pull back the plastic tab that holds the end piece of the door handle. If you don�t have the special tool, any tool with a hook will work. You just need to be able to reach to the doorhandel. Once the tab is pulled back the square piece of the door handle can be slid out and removed. Remove the handle by inserting the hook tool again and catching the end of it to release it from the tab. Remove the handle and unplug the plug at the end of it. Remember to feed this plug through the hole when re installing the door sub panel.
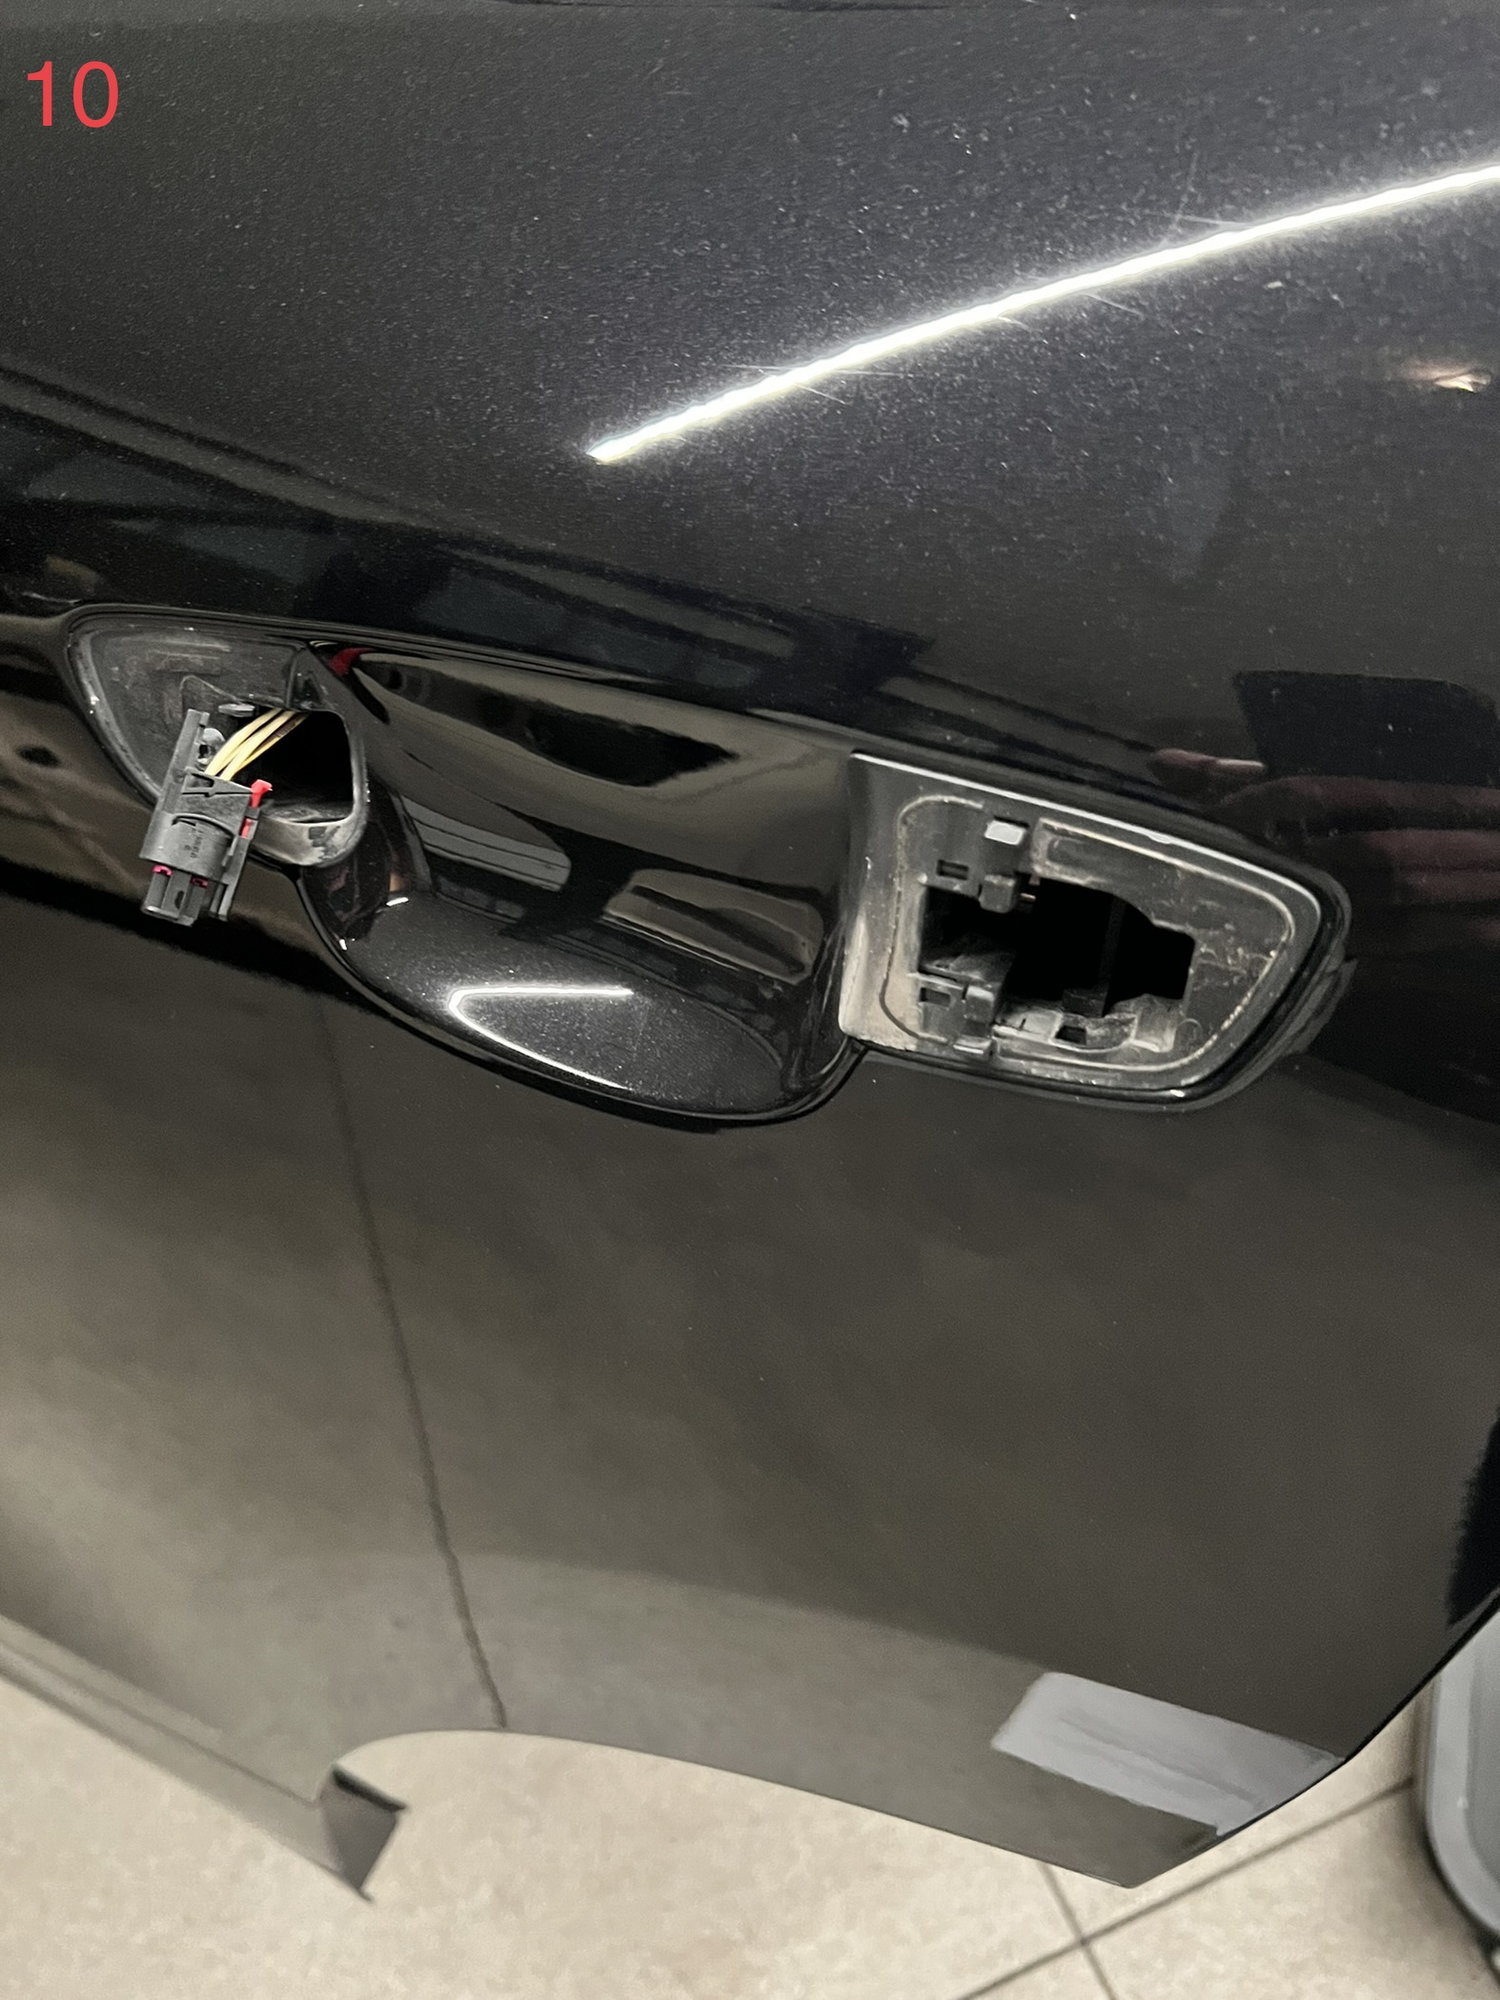
10) Remove the T20 screw that holds the inner plastic behind the door handle, slide the plastic to the back of the door and push it in to release the little hooks from the door skin.
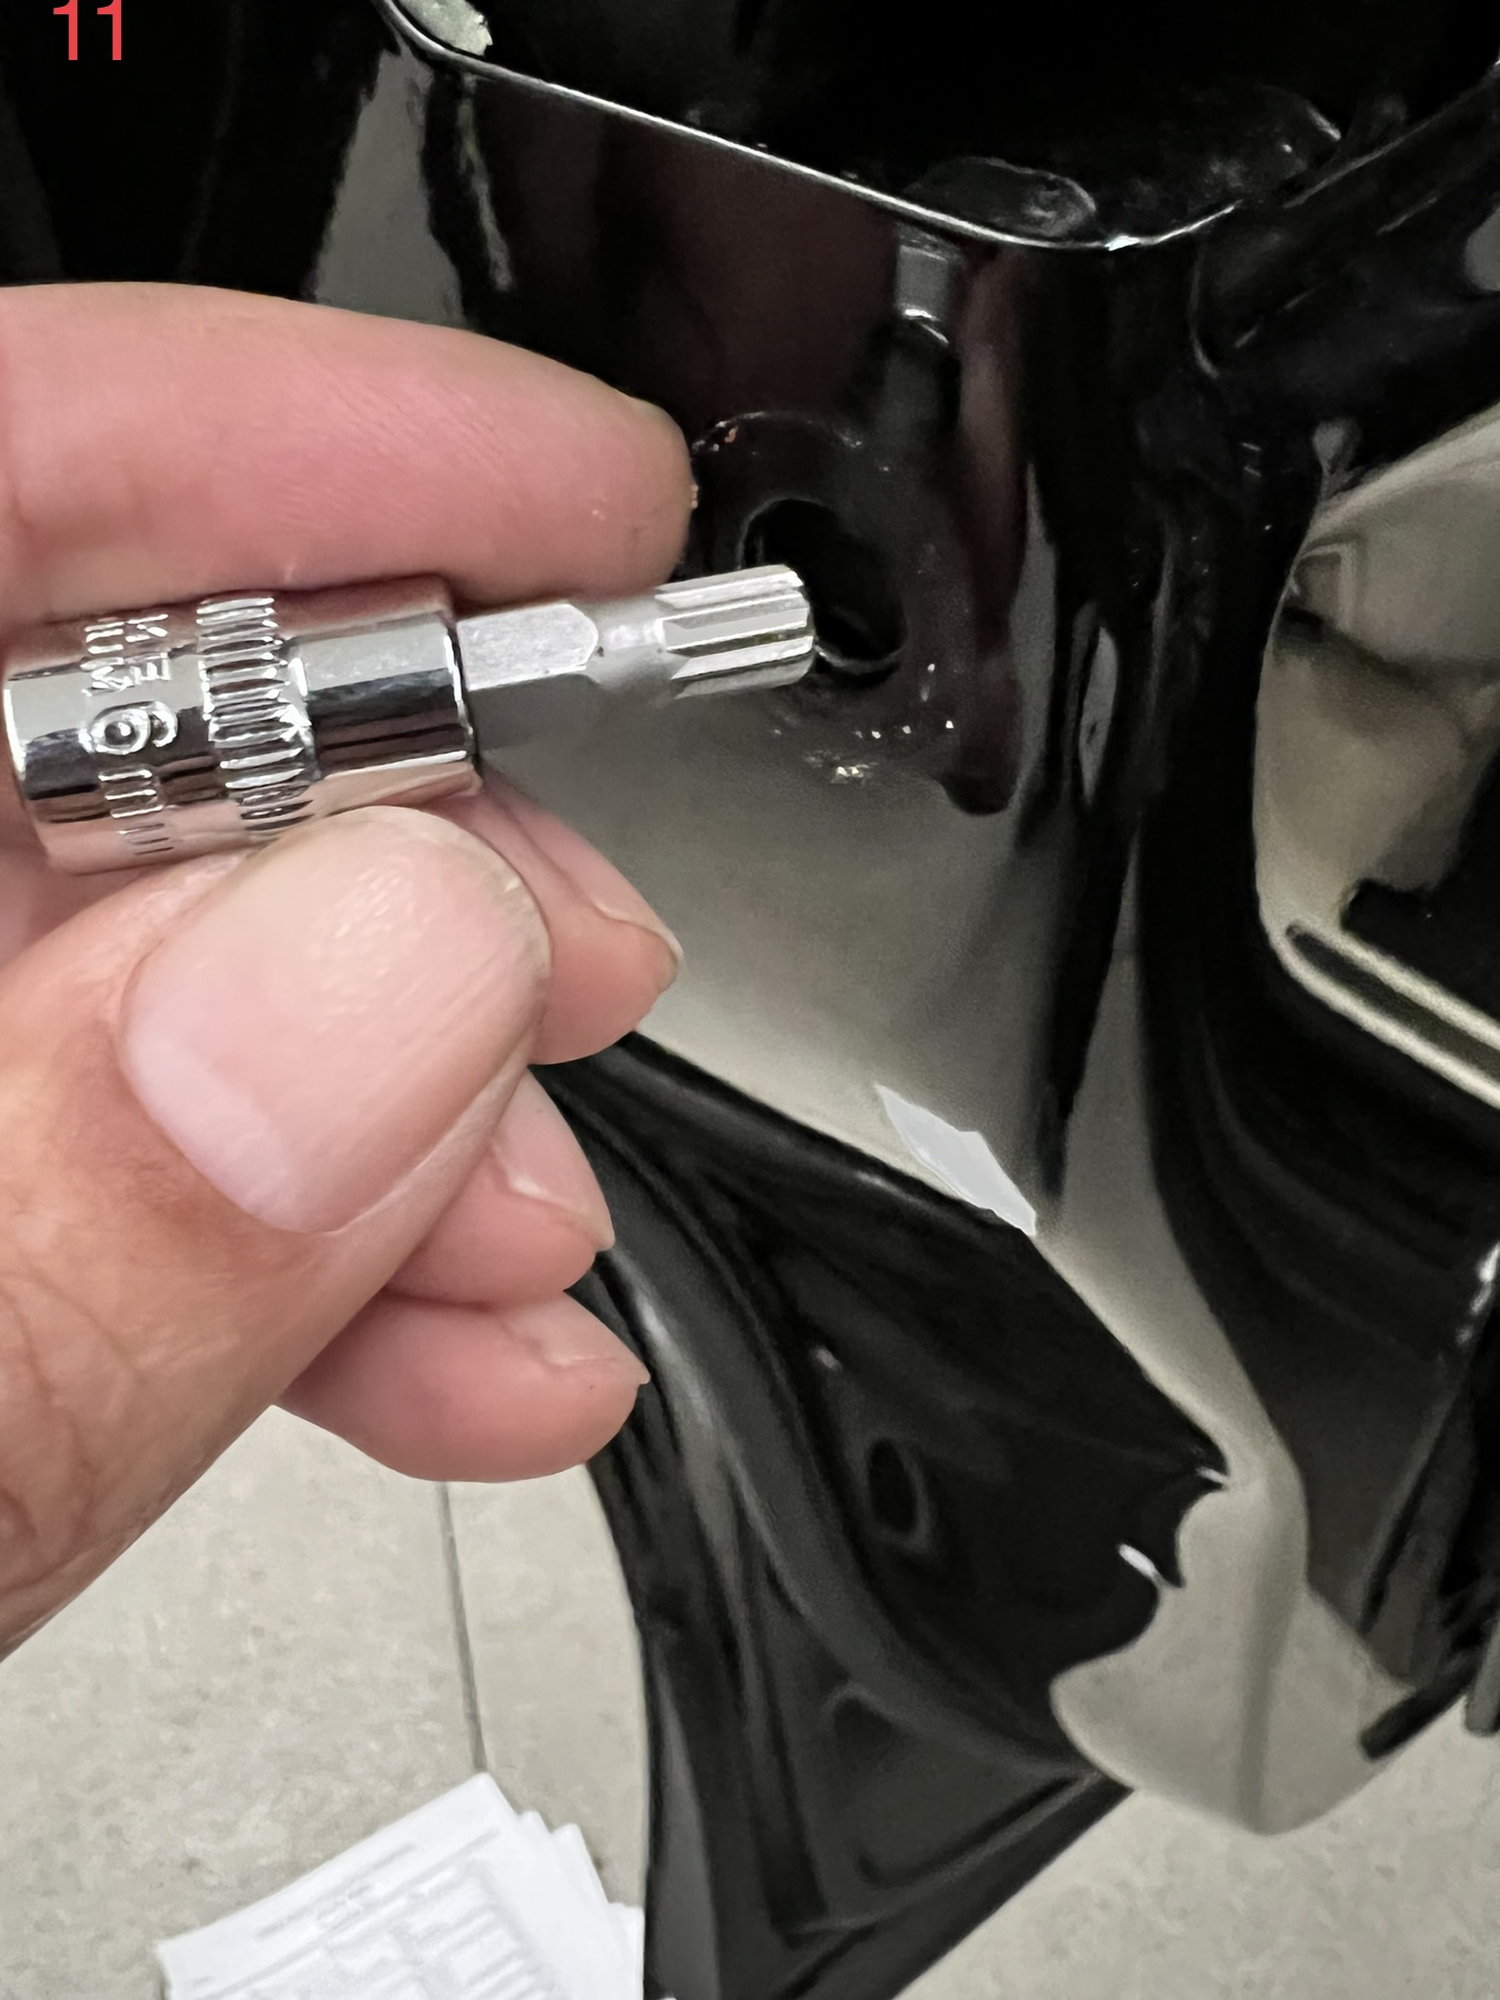
11) Note the latch position from two sides. Remove the two door latch screws. They are 6 mm triple square screws.
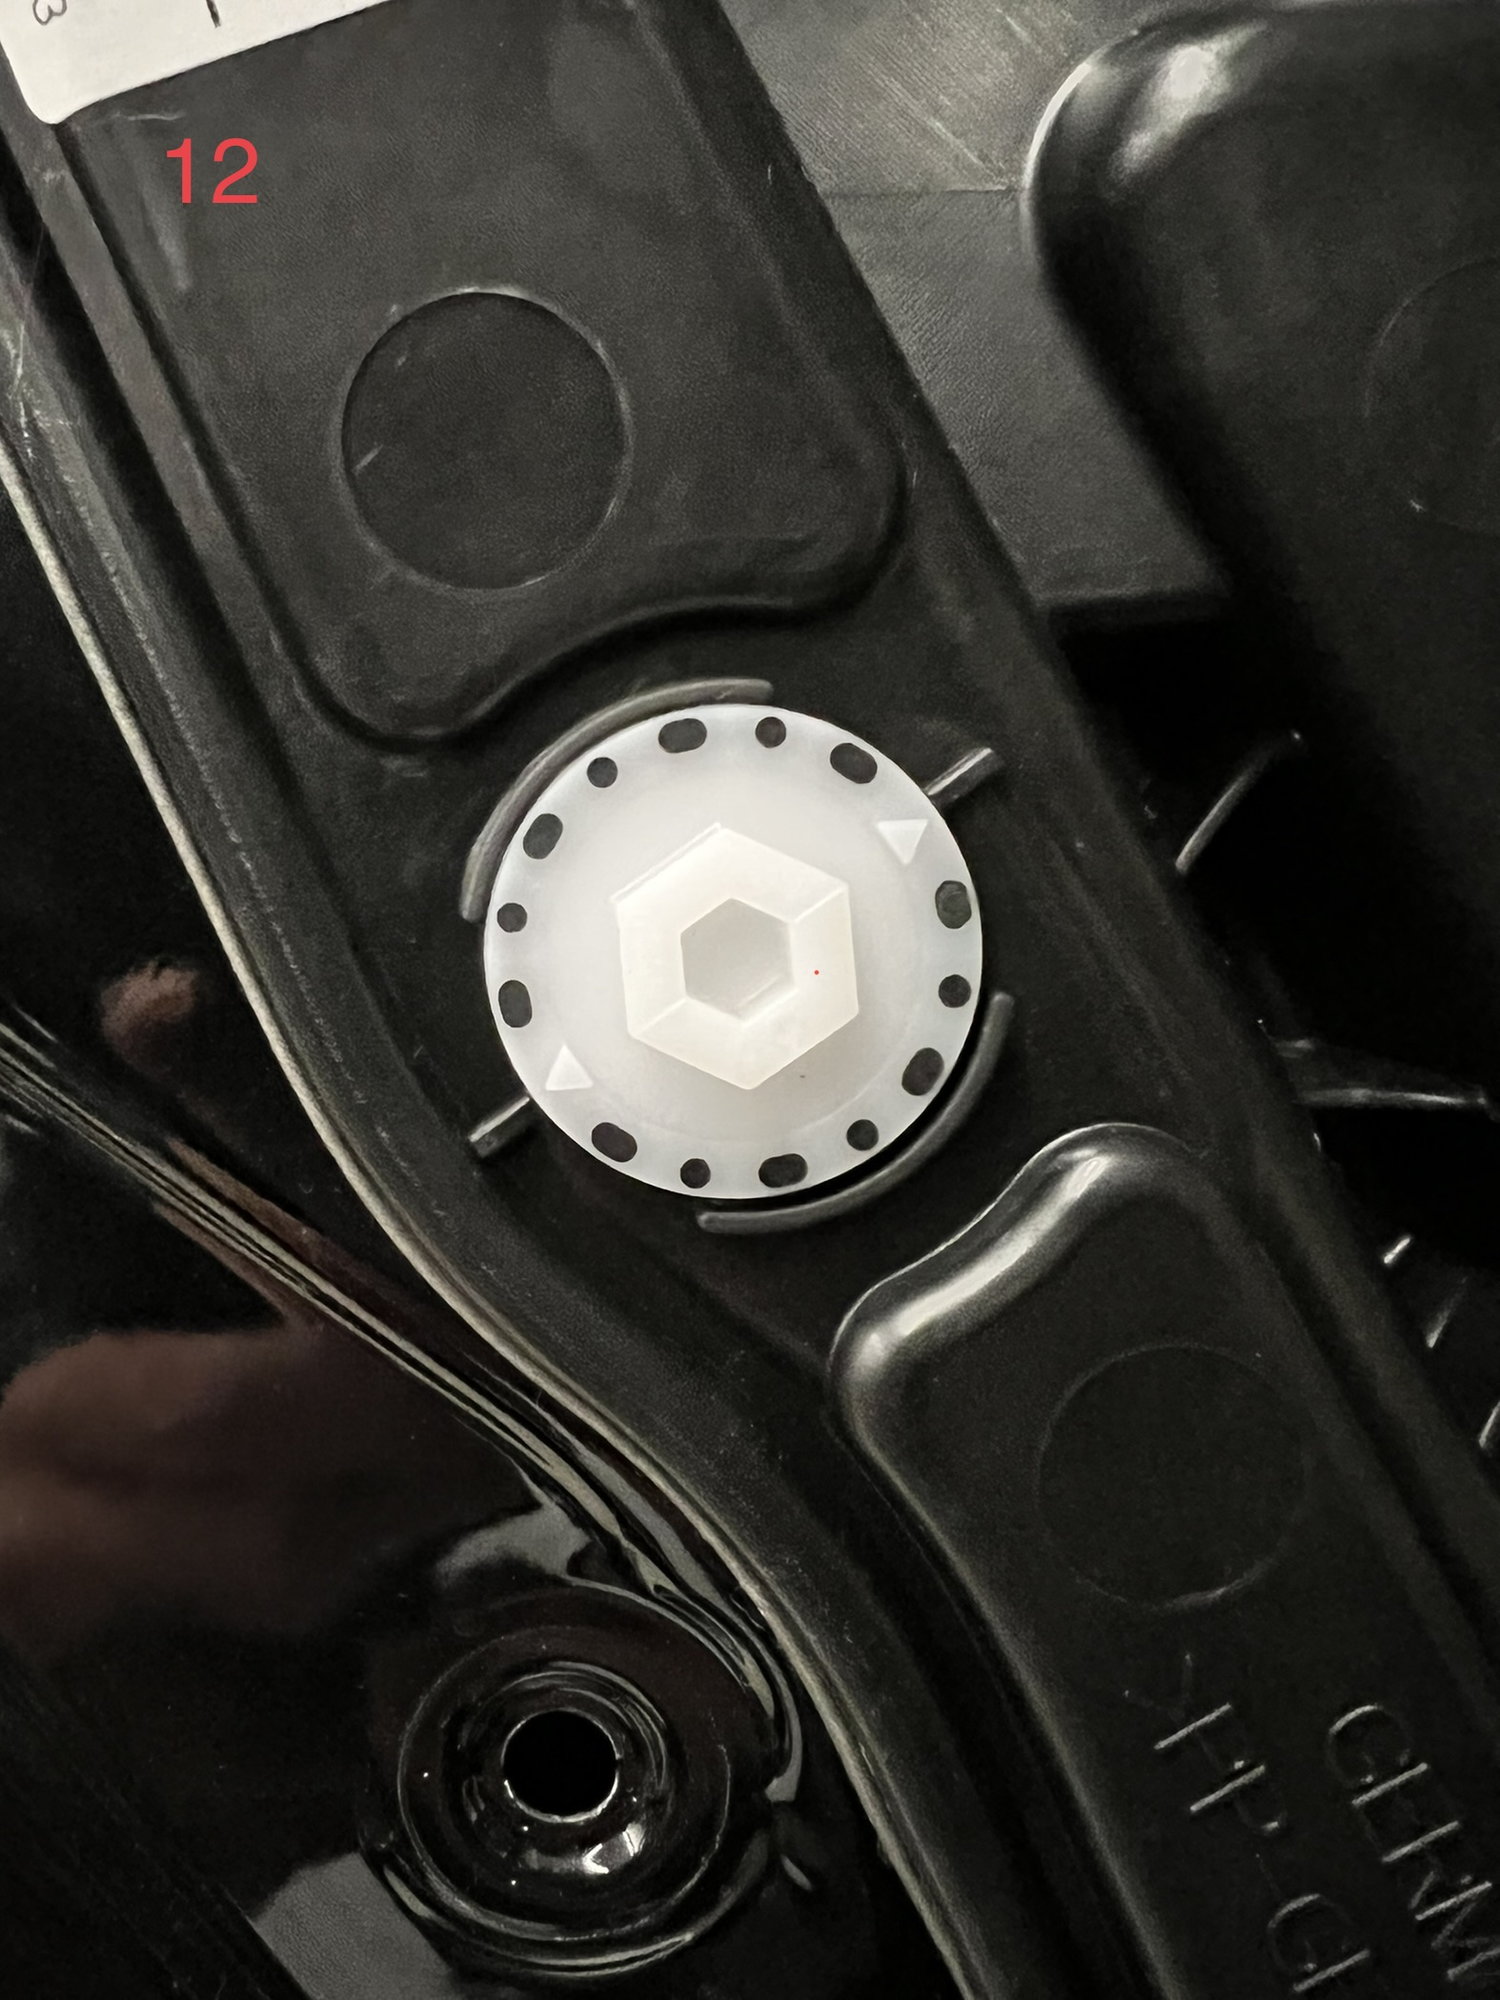
12) Feed the electric connection through the door frame so the door subframe can be removed. Remove the door subframe by turning the white plastic clips 90� with a 13 mm socket. Once turned they need to be pulled back a little to release. Now slide the subframe up outwards then inwards.
INSTALLATION:
1) Push the wiring harness through the vehicle door to the B pillar.
2) Guide in door lock with mounting bracket and move door subframe into installation position.
3) Make sure the door handle plug is positioned through the door lock hole in the door shell..
4) Guide the locking hooks of inner part of exterior door handle through the door skin and press inner part of door handle forward to secure the hooks in the door skin. Fasten the T20 screw to secure the inner part of door handle. Install the door handle and plug.
5) Align the latch and fasten the two bolts to 15 ft lbs.
6) Fit white clips from the door subframe to the vehicle door and turn them 90�. Connect the wiring harness.
7) Tighten fastening screws on the upper window mechanism support to 6 ft lbs. These are the two T30 bolts behind the fabric tape. Secure the fabric tape back into place.
8) Remove the tape holding the glass and guide the glass down into the mounting. The glass must be perfectly level. Measure both ends of the glass to make sure. Tighten the fastening screws to 4.5 ft lbs. starting from the left.
9) Softly close door to test latch alignment.
10) Test the window to ensure smooth operation. Then lower the window all the way down to facilitate installation of the sunshade rod. Install the rod guide then install the inner door panel by pulling up the sunshade and guiding the sunshade rod into the guide hole.
10) Attach Bowden cable and electrical plugs.
11) Push outer door panel into door frame and 3 replace fastening screws.
12) Test operation of the sunshade.
13) Reinstall remaining trim pieces inner pull handle.
PICTURE NUMBERS CORRESPOND TO THE REMOVAL PARAGRAPH NUMBERS
Great write up, helped me so much. Here is a picture of step number 7 which is the door clamps. This step is important and I initially missed it causing a time delay. This is not a bad job, takes some patience, but is doable Window clamps.
Thanks for this breakdown, especially the tool list. I just did this job on my 2015 CD and it is not that hard (and I am all thumbs). Just be careful and take your time when removing the trim and electrical connections on the door panel and you'll be fine. I purchased a few extra door clips and retainers, just to be on the safe side, but didn't wind up using them.
Also, I found this video to be very helpful in competing this job.
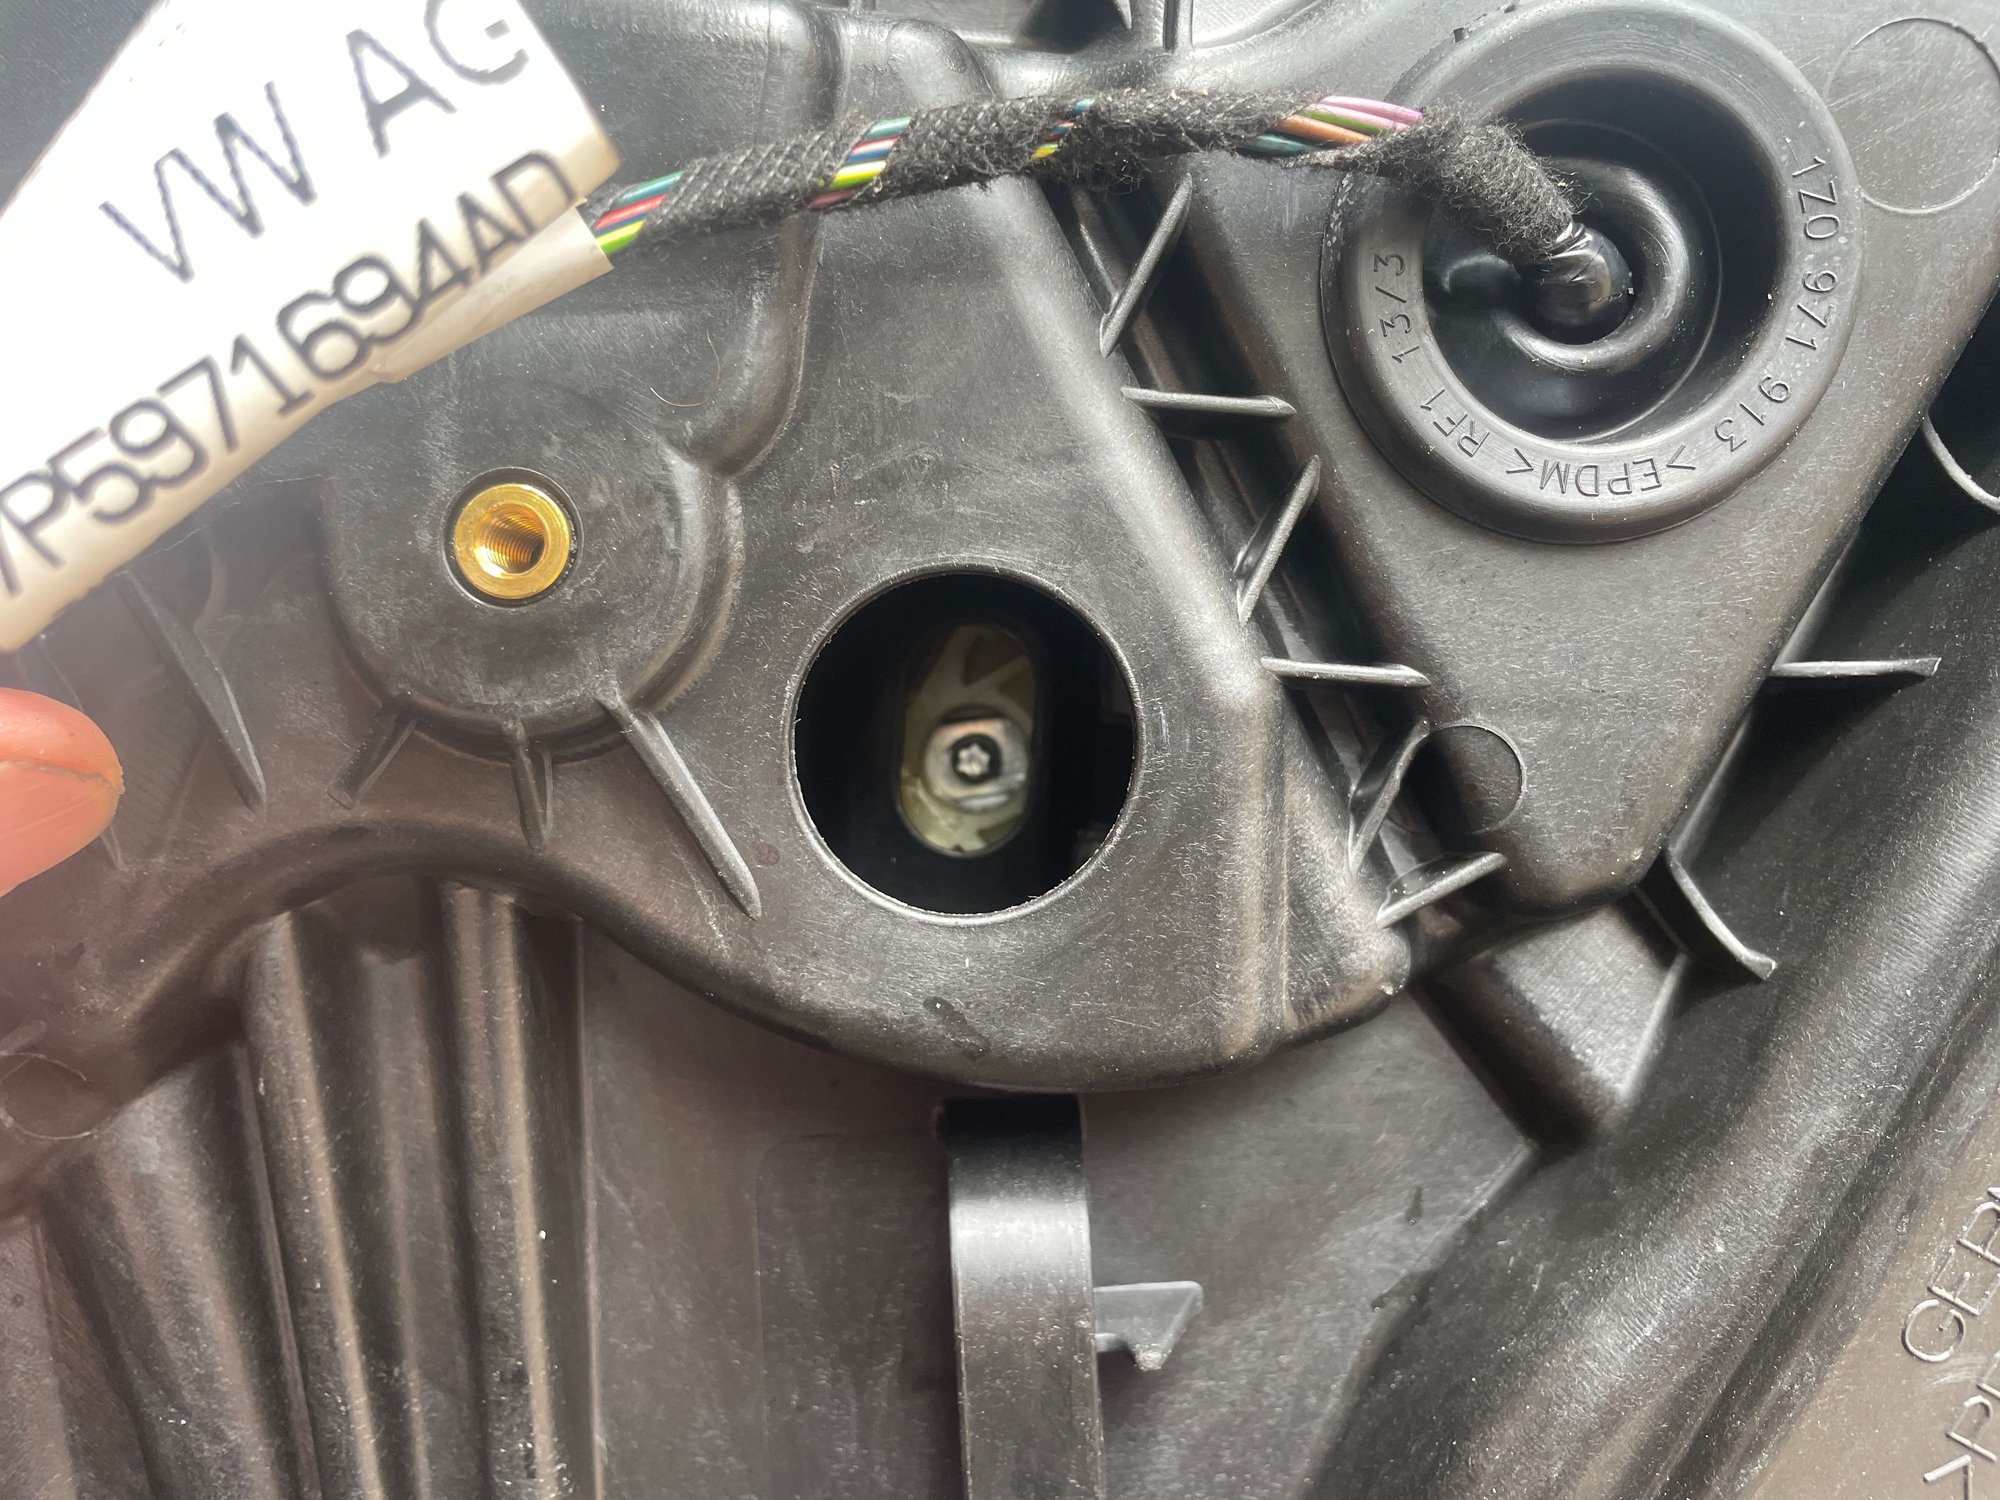
Hi there, I just contacted FCP Euro as they don�t have a listing for my vehicle. They confirmed the following genuine part is a match with my VIN. The thing is there is no left and right, just one part number. Does this sound right? Has anyone done both and compared the two? https://www.fcpeuro.com/products/aud...-por-8k0839015
I have just done my back left door, the second lock I have changed having done the back right a couple of months ago. I thought it would be dead easy following this DIY again armed with previous experience. However I had a problem with the screw at the hinge end of the door handle having been done up so tight the brass insert turned in the plastic and had to be pulled out and glued back in place. Thinking the rest would be easy I was wrong, when I undid the second window clamp bolt despite having the correct E4 socket turned clockwise the end rounded off in the socket. Having sworn a lot I searched this forum and found it is possible to undo the bolt from the inside.
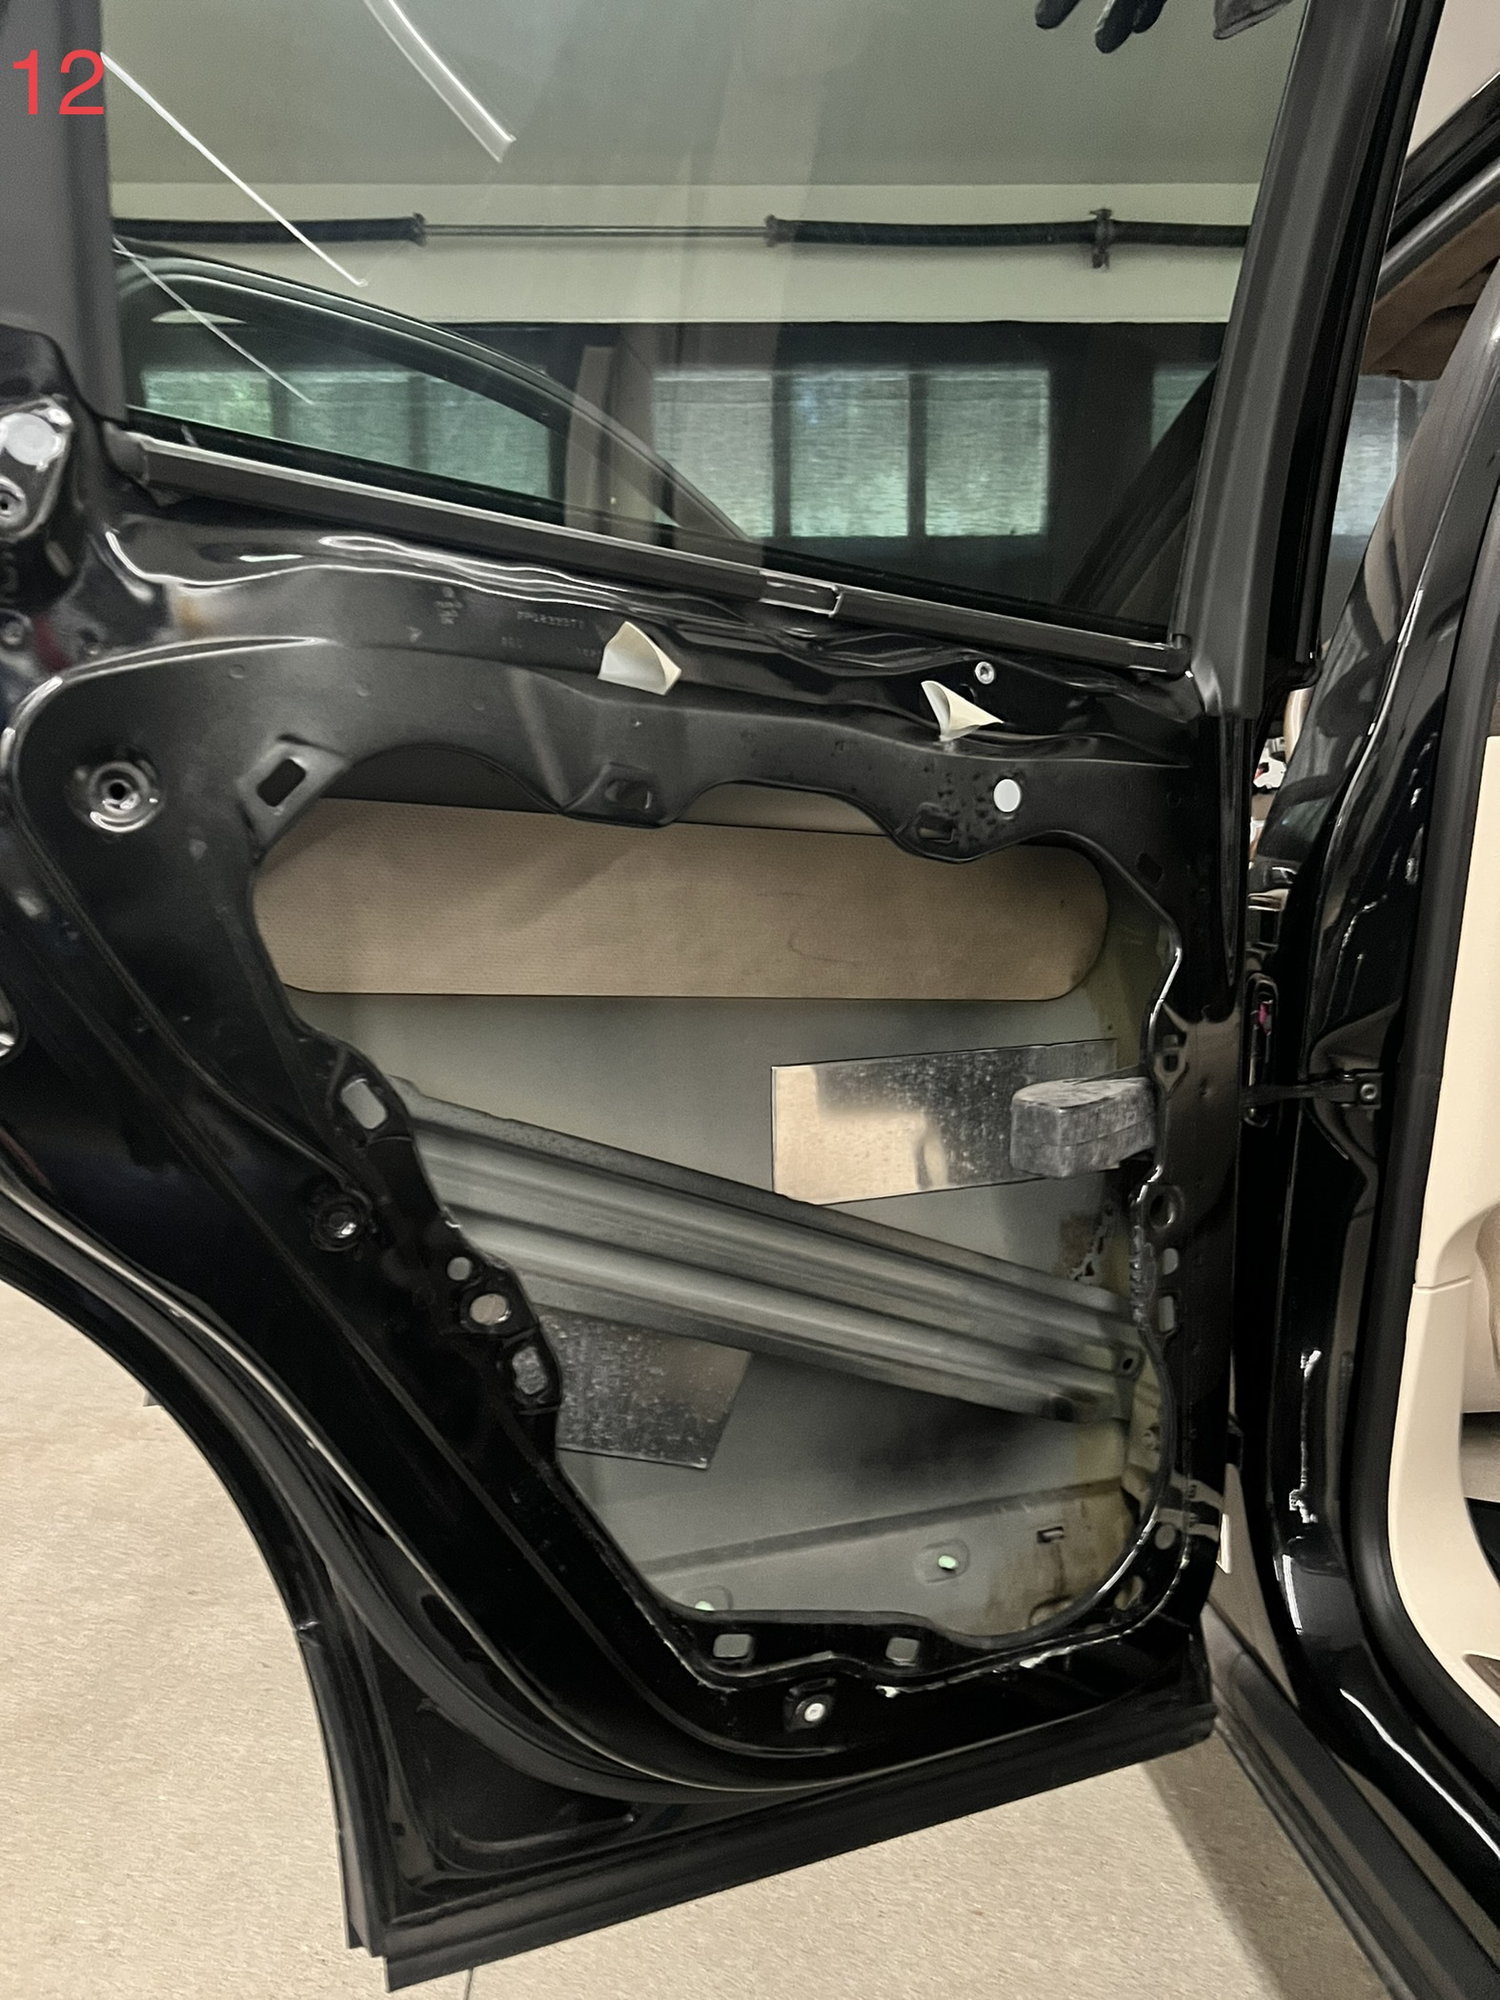
My method was to undo all the fixings on the inner door card, including the two bolts behind the taped over holes, except the two top white plastic fixings. I then pulled out the bottom of the black plastic door card as far as I dared - it had begun to creak - and placed a wooden block to hold it in place. This gave me room to reach up with a 1/4" drive ratchet fitted with a T30 torx bit and undo the screw.
Reaching up - note wooden block. These glass handles make manoeuvring the window easier.
For reassembly I tightened more of the white fixings to try to get everything aligned and kept the glass pushed to the hinge side of the door. I could then tighten the good screw before releasing all but the top two white fixings and tightening the damaged one. Fortunately fate finally smiled on me and everything went back together without further trouble.
For those horrified by the mud on the door my next job was to wash the car!
Hi guys. I need to do this on the pass rear door. In post #3, the video shows that the latch replacement did NOT require removal the outer door handle. Step 9 in this thread does remove the outer door handle. So, is it necessary to remove the handle or not??
 05-26-2023, 10:02 PM