When you click on links to various merchants on this site and make a purchase, this can result in this site earning a commission. Affiliate programs and affiliations include, but are not limited to, the eBay Partner Network.
While this video is for a PDK, it is very similar to a manual center console. See my pictures below for the differences and, this is very important. DO NOT remove the trim surrounding the sunroof buttons as instructed in this youtube video. It is completely unnecessary and is hard to remove and even harder to reinstall. I wasted 1.5 hours removing and reinstalling this sunroof button surround trim piece.
Here is the youtube video from Numeric Racing for installing the short shifter.
Ignore the first 10:36 secs of the video as that is for 991 trim removal. Start watching from 10:36 to see how to take out the stock shifter and install the Numeric short shifter. The instructions for this part are identical for a 991 and 992.
To do this installation, you will need a T25 torx wrench and a plastic trim removal tool. You may also need some other regular tools like an adjustable wrench and small flat head screw driver.
While I wasn't installing any electronics, because I know I'm slow and didn't want to drain the battery and didn't want any issues with me disconnecting all of the various harnesses, I disconnected the battery. Not sure if it's absolutely needed, but better to be safe than sorry.
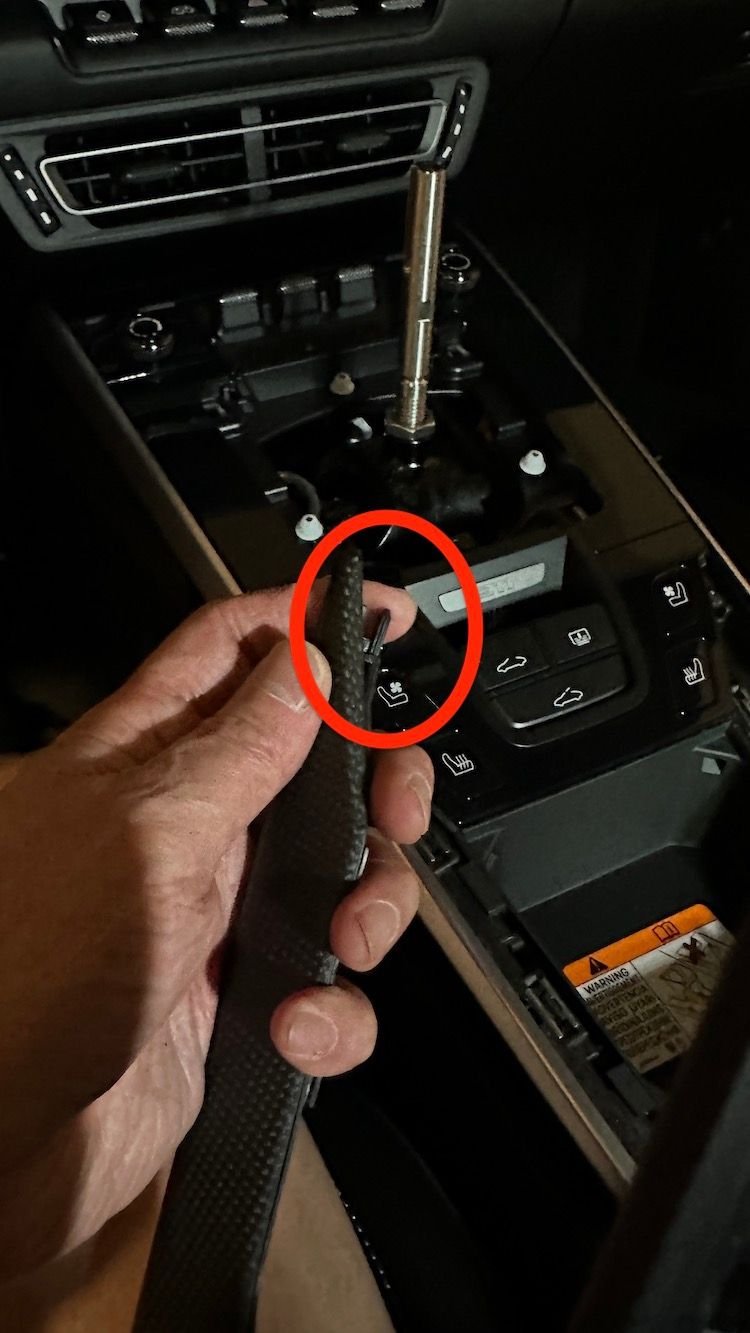
1. First remove the shift boot trim piece. Insert the flat end of a trim removal tool here and twist slightly and it will pop off very easily. There are 4 clips - two at the top and two at the bottom right where the stitching is. I just used the trim tool for the bottom and then popped the top off w/ my fingernails.
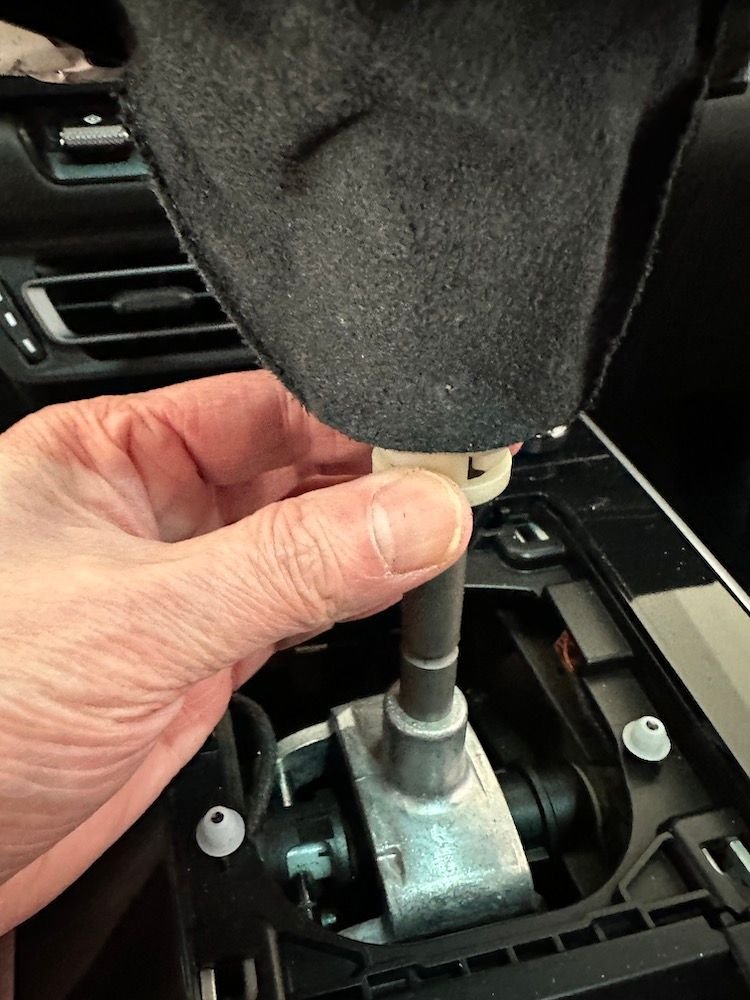
2. Once the shift boot trim piece is unclipped, pull it up to reveal the shifter shaft. There is a white clip that holds the shift **** in place. You cannot pull the shift **** off unless you first unlock that white clip by grabbing it and rotating it counter-clockwise. It takes a bit of strength to do and I ended up just grabbing it with my entire hand and twisting. It turns maybe like 1/3 of a full turn. Don't over twist or you may break the clip. Once that clipe is unlocked, you grab the shift **** and pull straight up and it should come off. BE CAREFUL. On other car forums, people pulling off shift ***** have accidentally yanked too hard and the shift **** flew up and cracked the sunroof! You won't really be able to twist the shift **** off because there are grooves on the shaft so it has to come straight up.
3. Remove the trimp piece around the cupholder by pulling up here. I used my fingernails instead of the trim removal tool. It comes off easily. Once the clip is freed, slide the piece towarads the back of the car as there are prongs at the very front of this piece so you don't want to pull directly up.
4. Once you've removed the trim piece surrounding the cup holder area, remove these two T25 torx screws. Note that all of the T25 torx screws holding down the center console are the exact same (the four T25 screws holding the shifter are different) so you don't have to keep track of where they came from. Just drop them all in a box so you don't lose them.
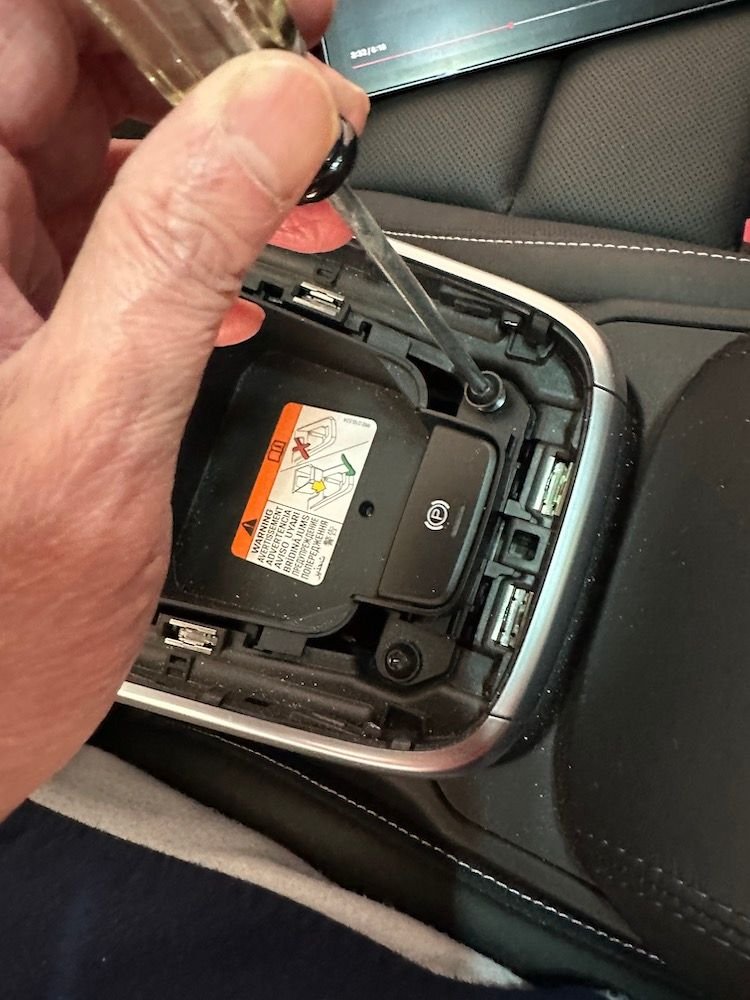
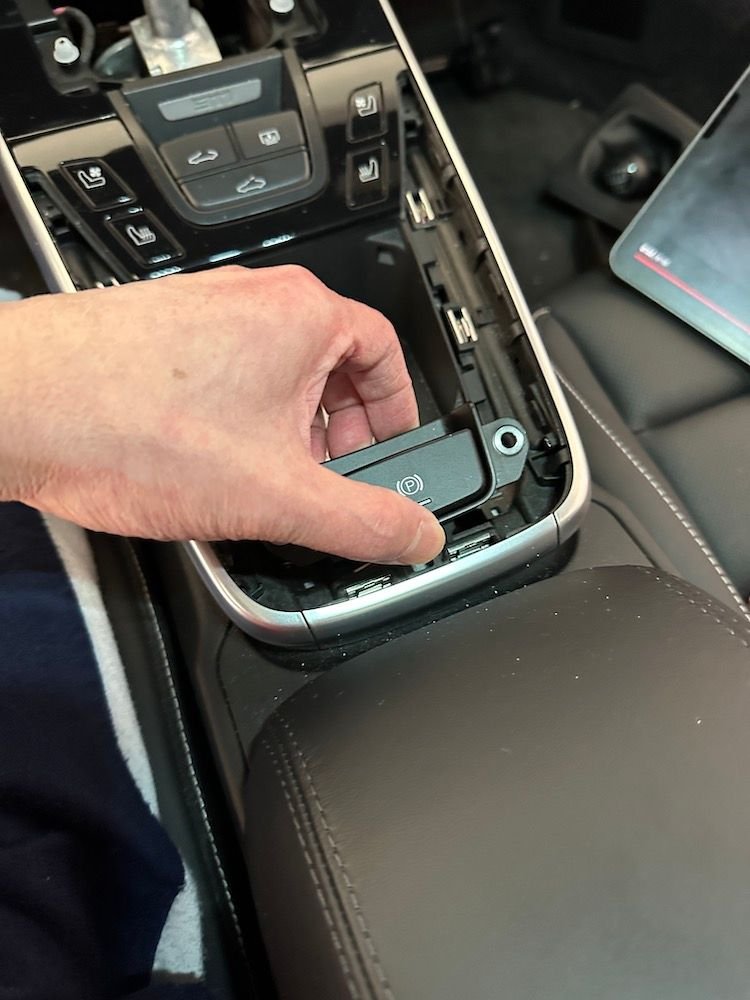
5. Once the two screws are removed, set the parking brake button aside. You do not need to disconnect this button from the harness.
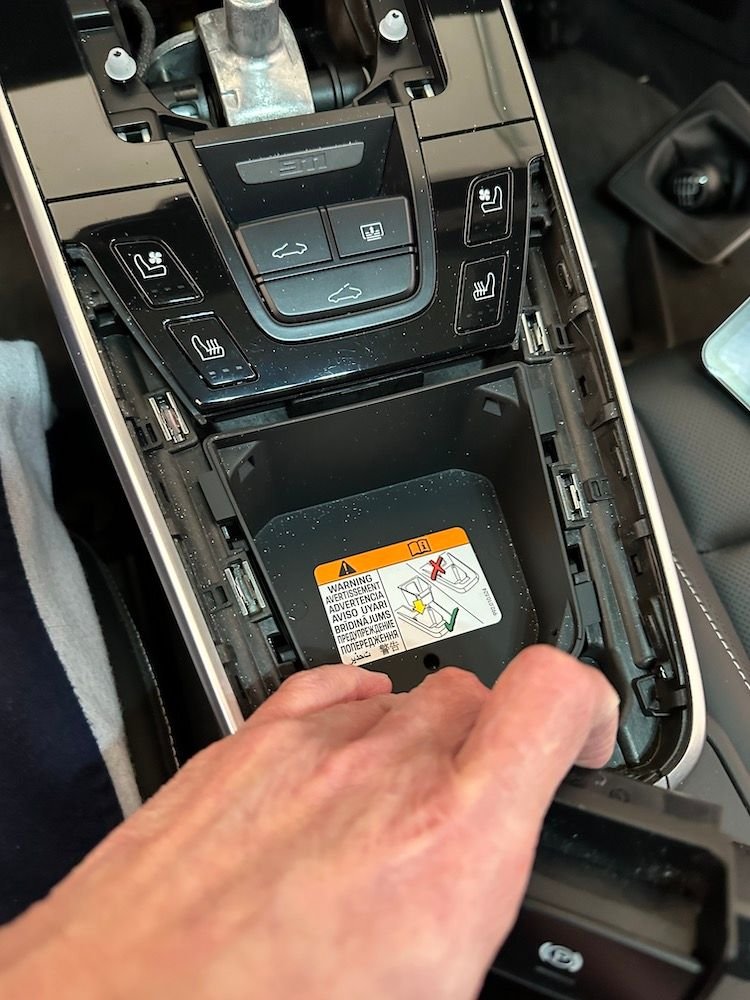
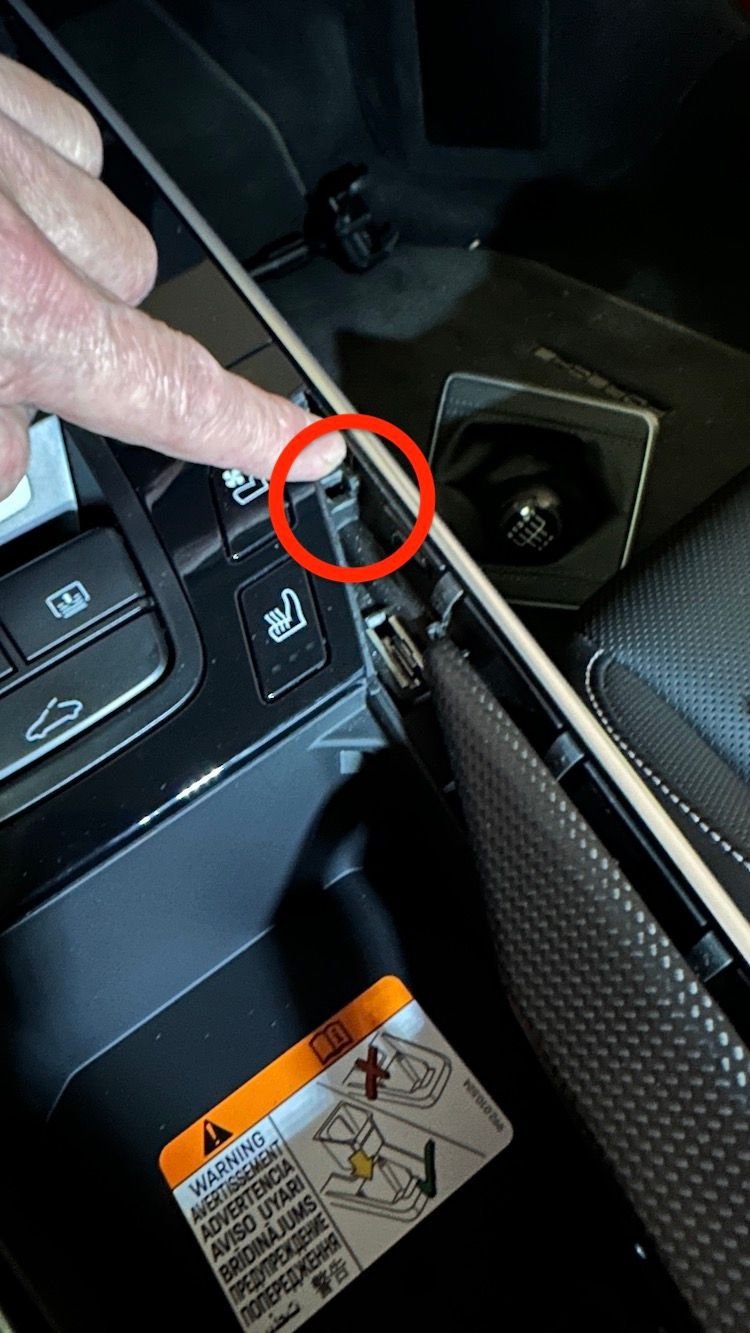
6. The rectangular piece w/ the warning label needs to be pulled towards the back of the car a tiny bit before it lifts out.
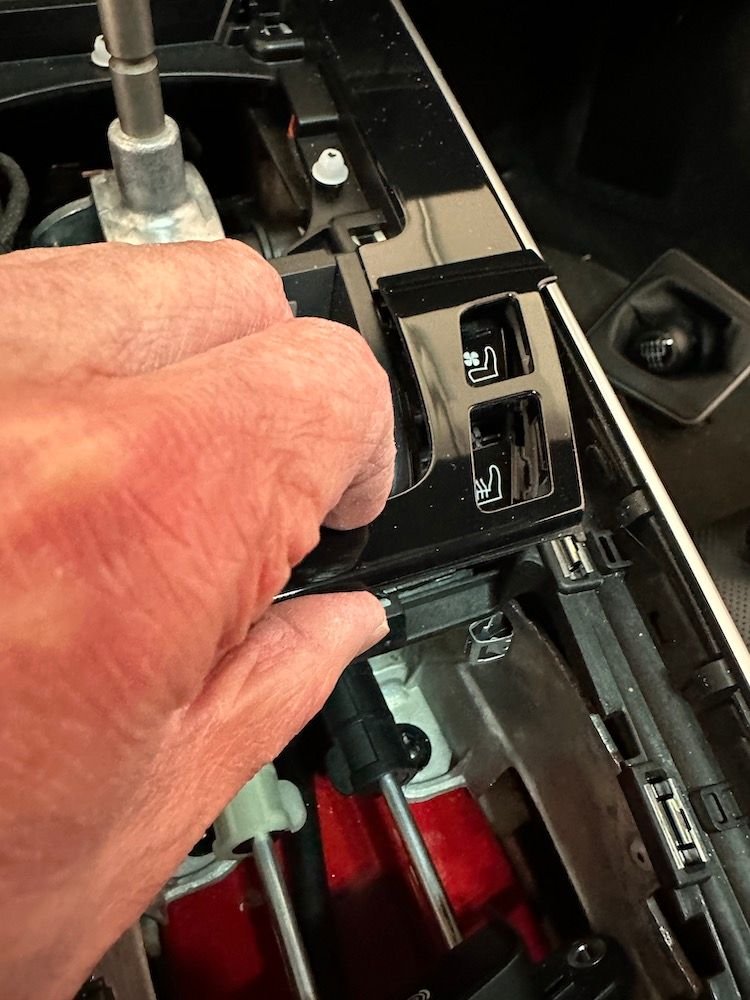
7. The trim piece surrounding the seat ventilation controls easily pops off. You can use a trim tool or your fingernails. Note that once this trim piece is removed, the seat cooling and heating buttons are loose and may pop out when you pull up the trim piece. Don't worry. You can just put them right back into place.
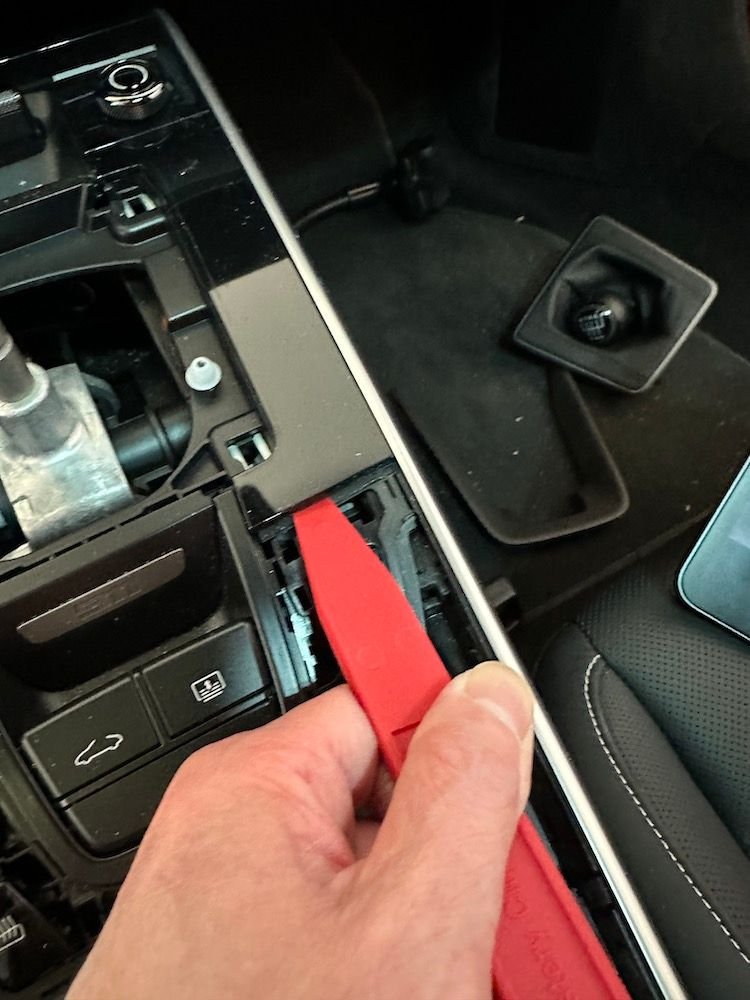
8. This trim that surrounds the shifter is different on manuals vs. PDKs. In the youtube video I linked above, on the PDK version, there are separate left and right trim pieces. On the manual, it is one single piece that connects the left and right sides. It removes very easily. Start at the bottom where I have the trim removal tool inserted, twist a bit and it pops off. Do the same on the left side.
9. As you can see, unlike in the PDK, this is one connected piece on the manual.
10. OK THIS IS VERY IMPORTANT. In the video, it shows that you can remove this plastic trim piece surrounding the sunroof controls. This step is completely unnecessary. You do not need to moreve this trim piece. I did and it took me 30 minutes to get it off because the top sunroof control buttons are shaped like upside down Ls so there's a lip on the top that makes it very hard to remove the trim piece and even harder to put the trim piece back on. As I said, I spent over 1.5 hours screwing around with this trim piece alone. DO NOT REMOVE IT!
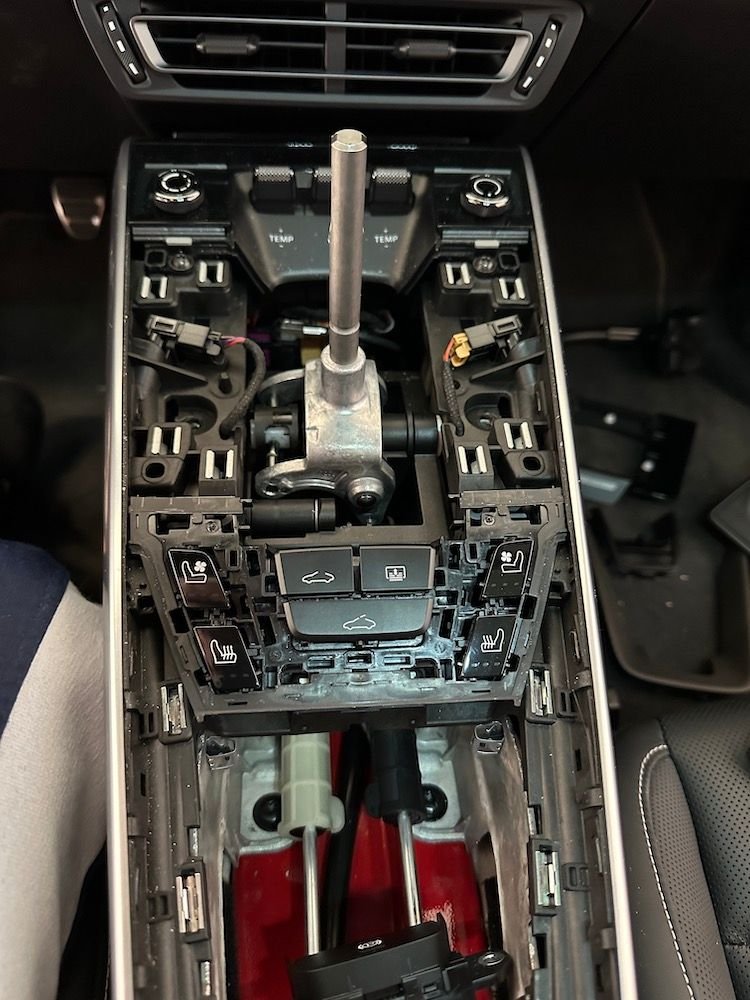
11. Picture of the center console with most of the trim pieces removed. Note where the T25 torx screws are. You will need to remove all of those screws. They are all the same size.
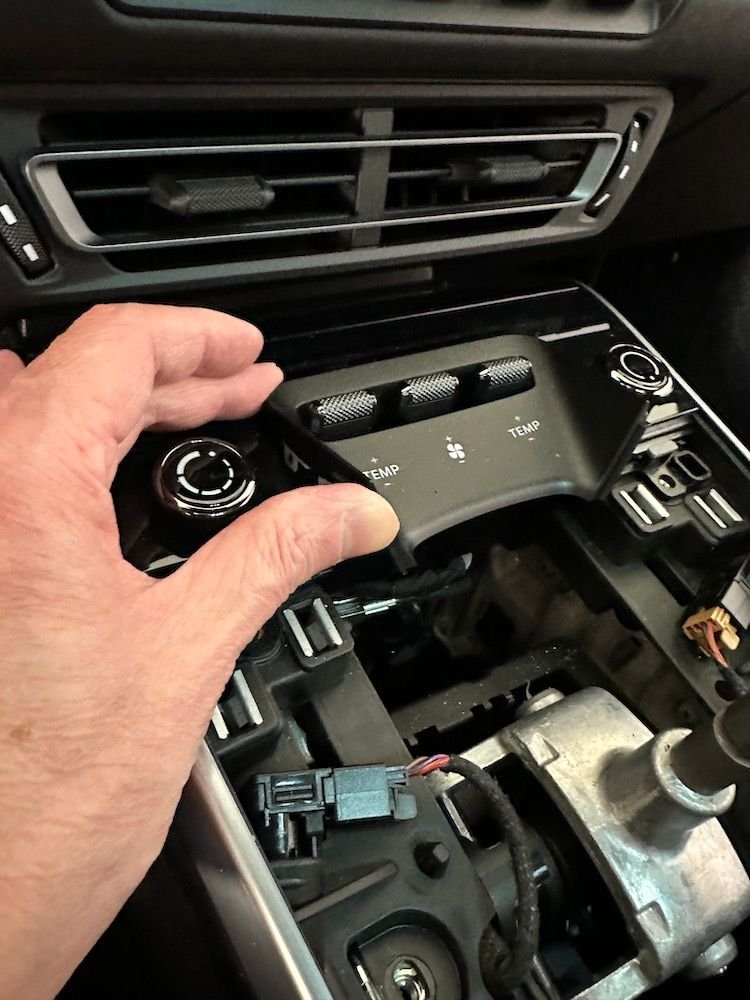
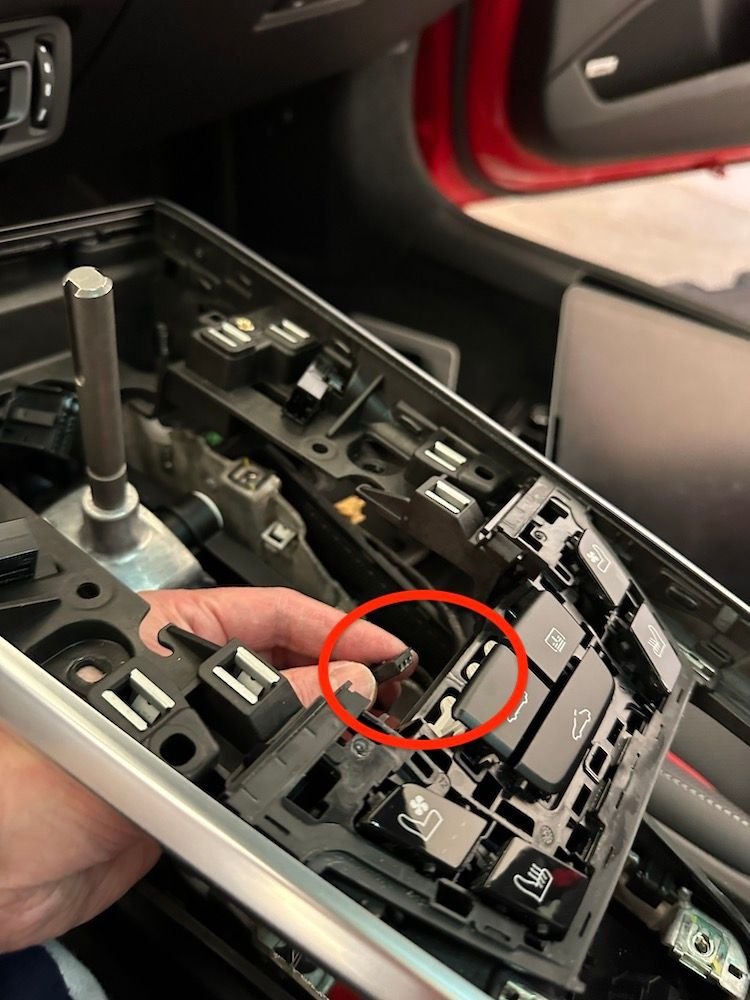
12. To remove the trim piece surrounding the temp controls, push on the bottom left and right sides and it pops off easily.
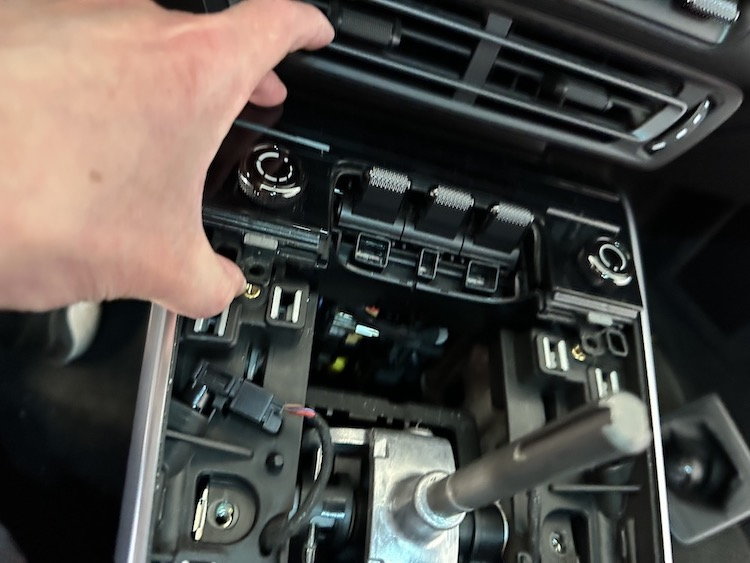
13. To take off this next trim piece, make sure you remove the T25 torx screws first, then lift up from the front tabs where the screw holes are.
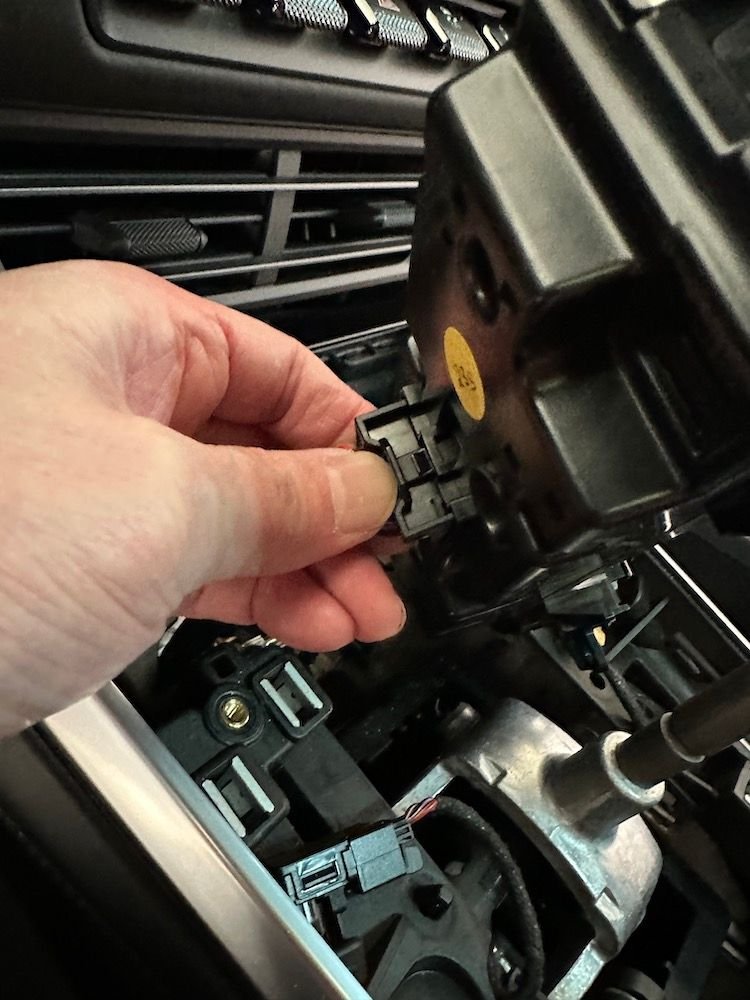
14. Once you've lifted up that trim piece, you will need to disconnect the harness underneath. You can see in the picture the little tab that needs to be pushed to remove this harness.
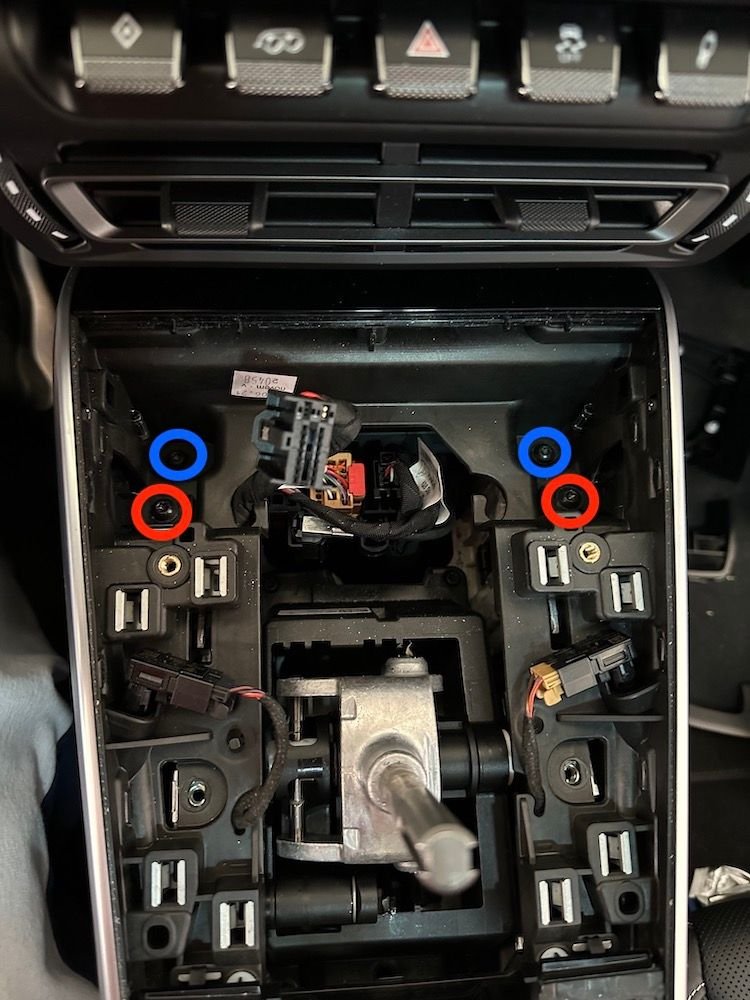
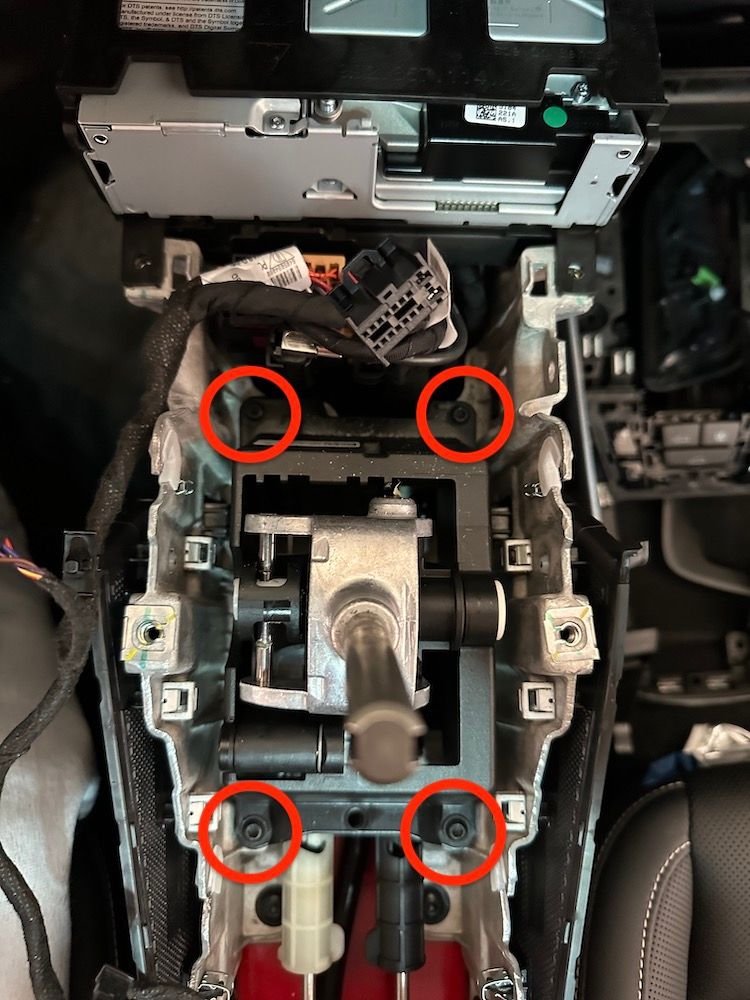
15. With that piece gone, it reveals the last four T25 torx screws. Note the two red ones on the bottom need to be removed first before you can remove the side knee bolsters as they are held in place by those two screws circled in red. Just remove the remaining four T25 torx screws.
16. After the screws are removed, the side knee bolsters just pops right off. I started pulling from the front and worked my way around the bolster to undo the clips.
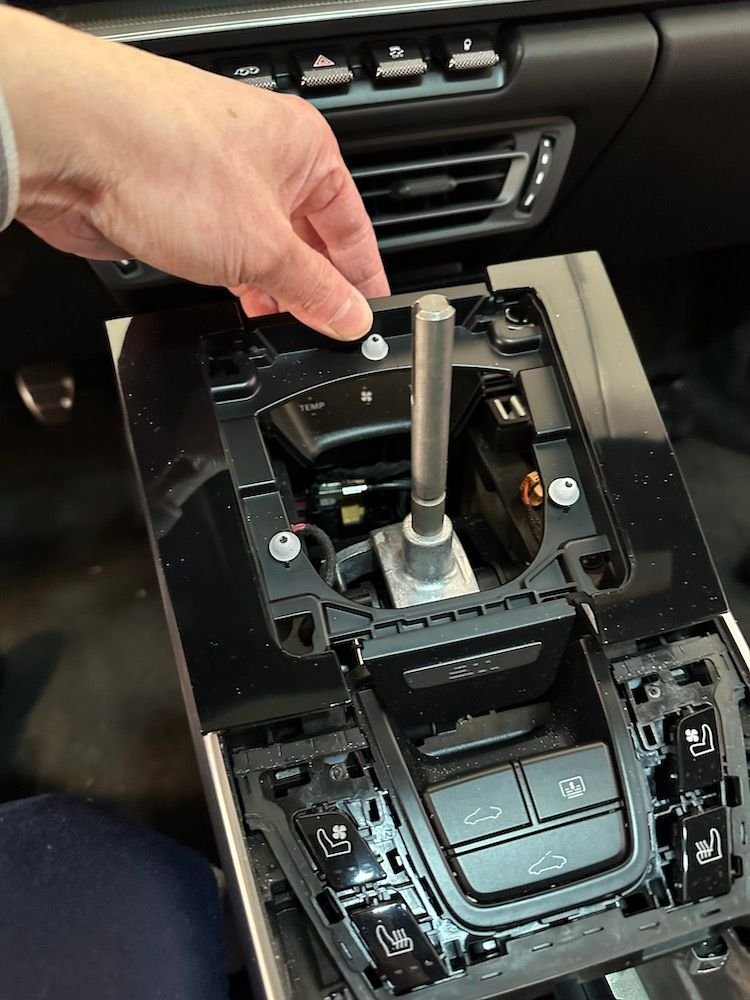
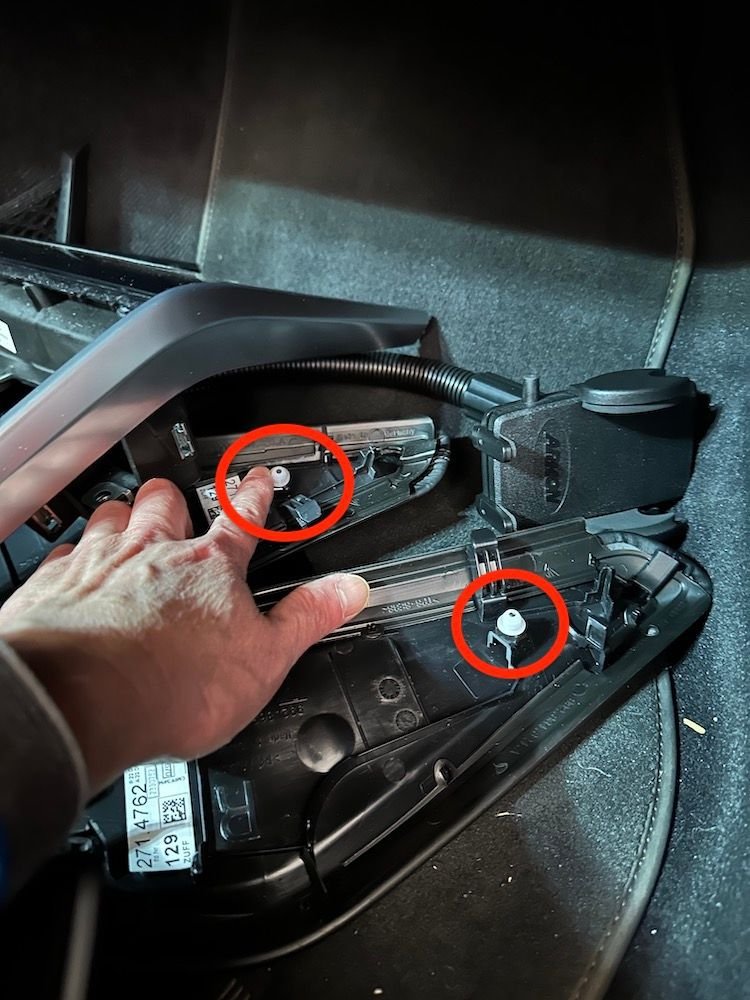
17. When I removed the knee pads, a couple of these round white clips popped off. Make sure you look around for any loose clips and put them back on before you reassemble the trim pieces.
18. Remove these two harnesses. There is a black one on the left and a tan colored one on the right. The screwdriver is pushing down on the little latch that needs to be depressed to unlock the harness. Push that down then pull the harness out.
19. Unlike in the 991 video where there are zip ties holding these wires and harnesses, the 992 has no zip ties but instead has these notches that hold the wires in place so you will want to make a mental note or take pictures of where all the wires route and are held in place by these notches and take the wires out of these notches.
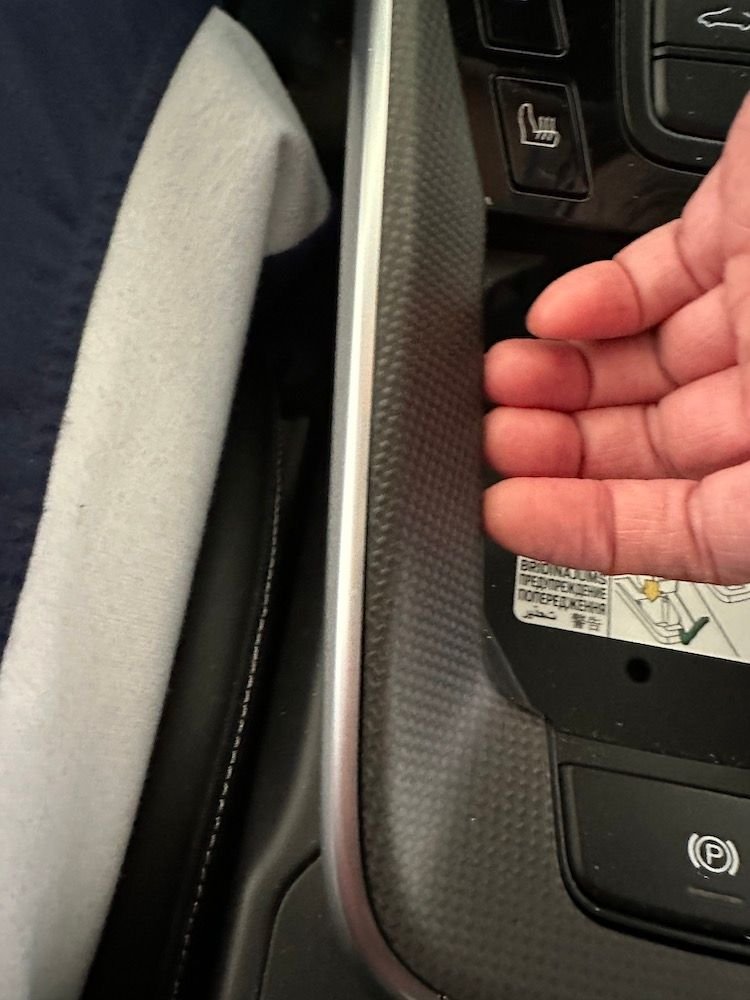
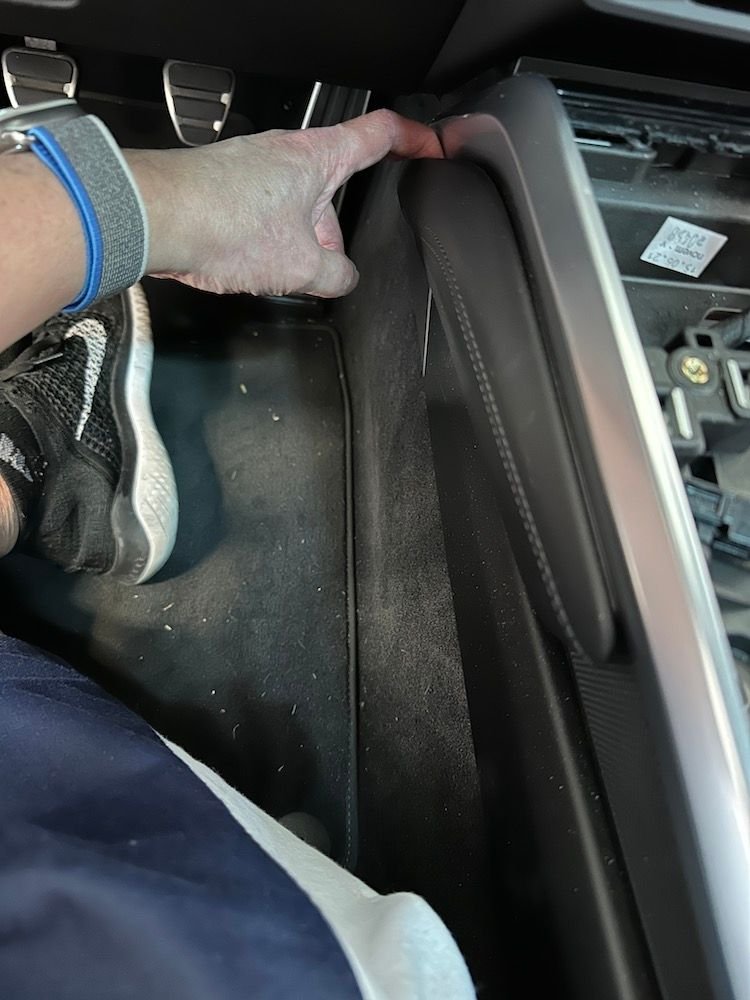
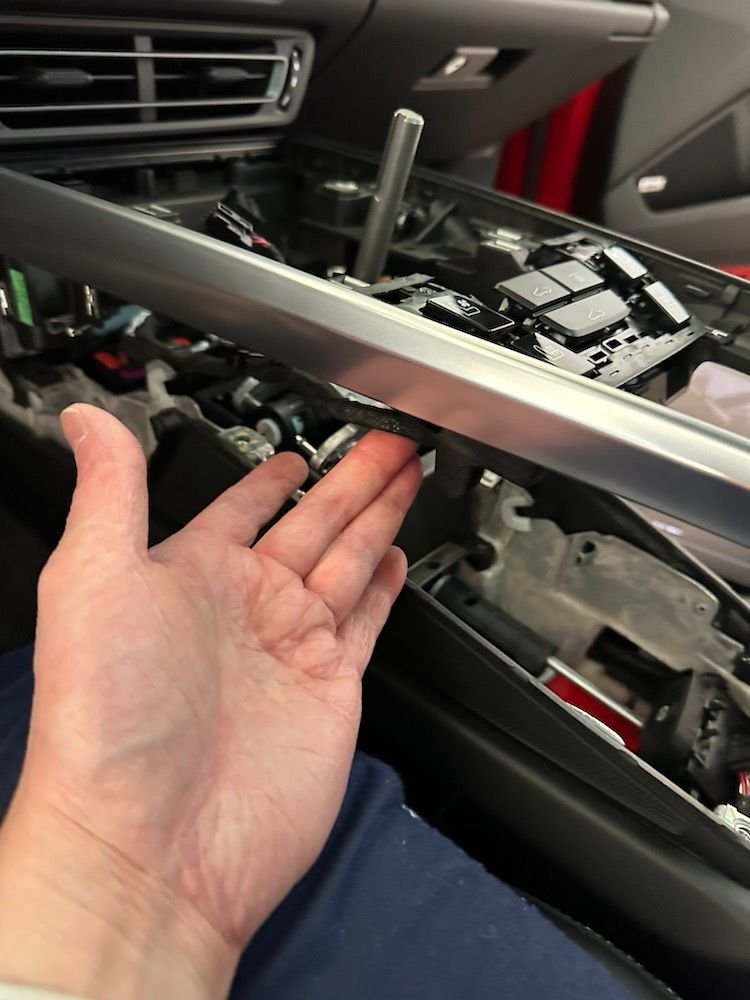
20. Now to remove the large silver frame that surrounds the center console, you need to pull that piece towards the back of the car first before you lift up. See the red arrow and how there is a gap btw the silver surround and the leather glove box cover? Those pieces need to touch before you can lift the silver surround up.
21. With the silver surround shifted back, you can now lift up and start removing that silver surround.
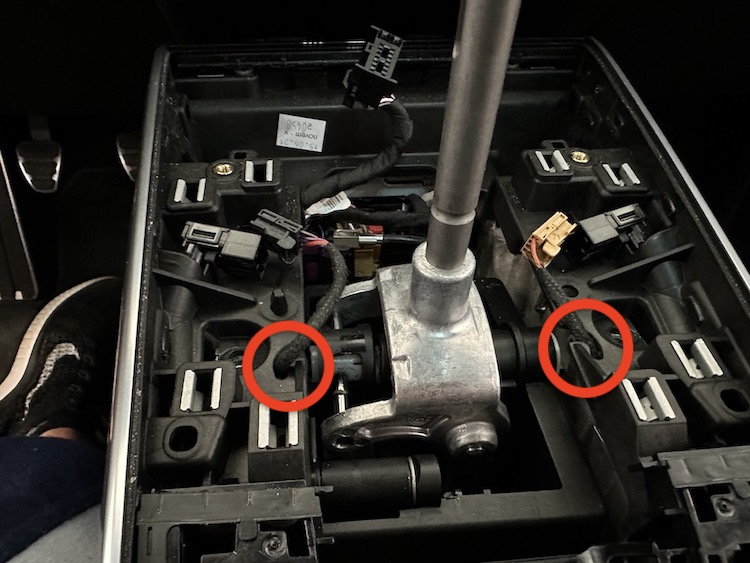
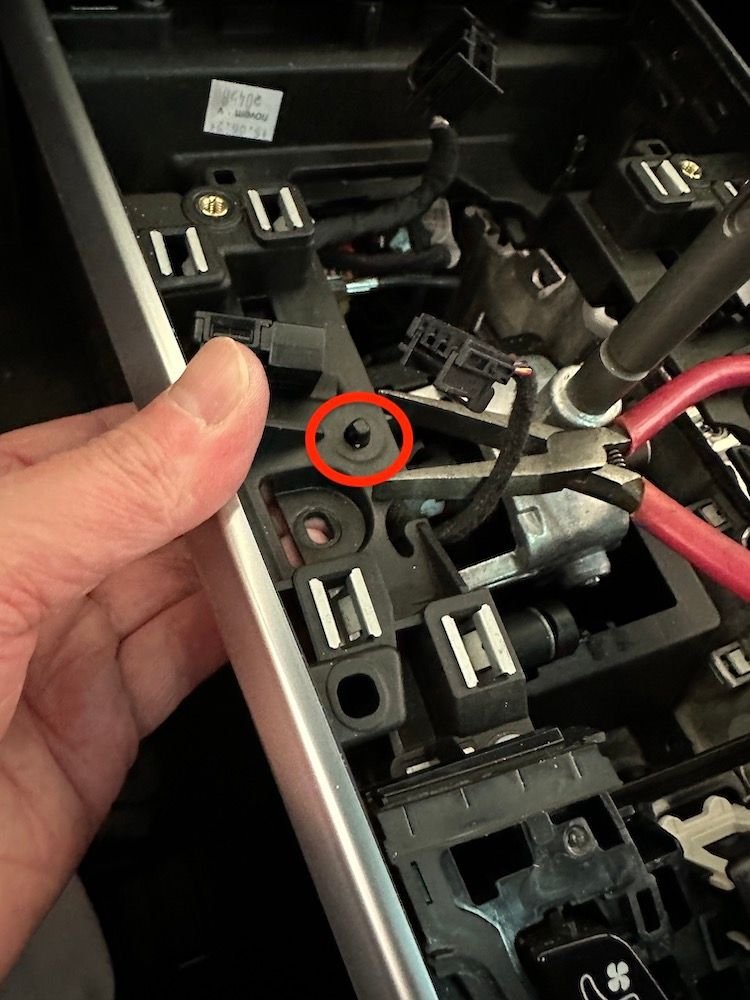
22. Note there is a little bullet nosed clip (see red circle) holding one of the wire harnesses that needs to be removed. I used some pliers to squeeze that clip and it falls right out from underneath.
23. This is the wire that is loosened after unclipping that clip in step 22 above. As stated in step 19, there are no zip ties holding the wires in the 992, you will have to unhook the wires from the various notches and grooves underneath the silver center console surround.
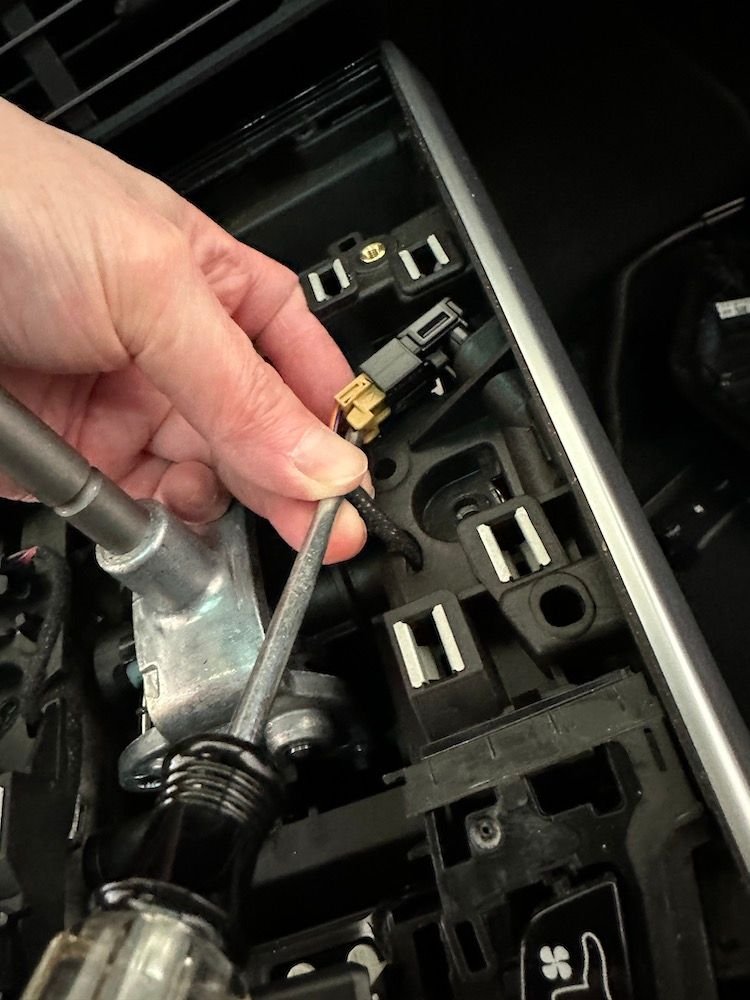
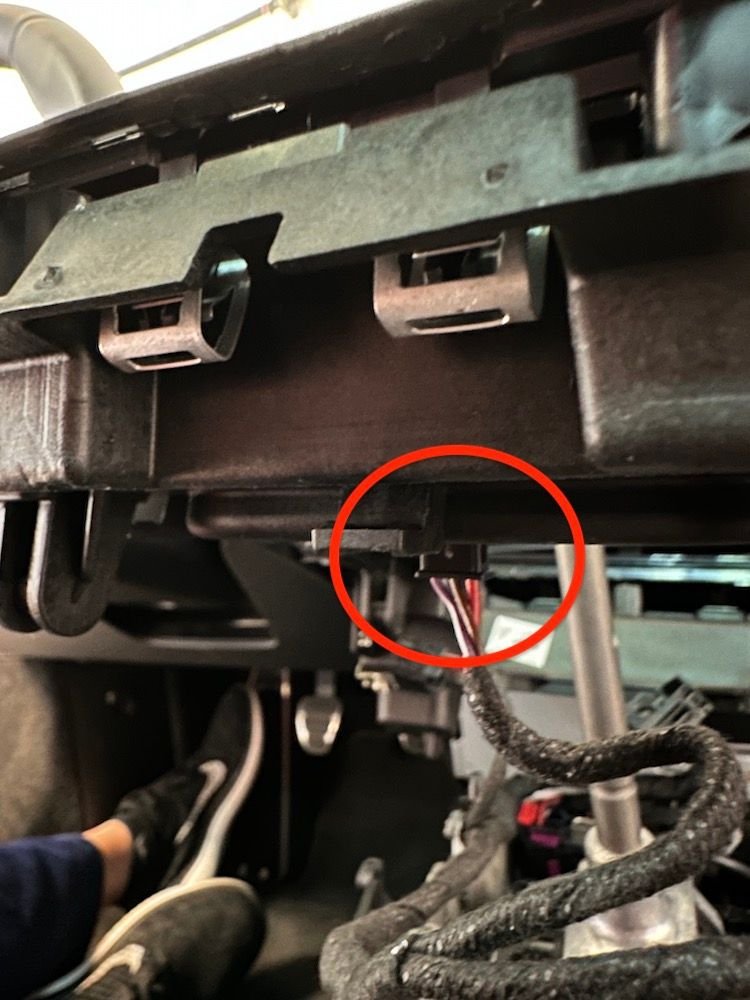
24. There is another wire harness that needs to be disconnected. This one just pulls out. See step 25 for where this one is located. It's right under the sunroof control buttons.
25. This is the harness that was disconnected from step 24 above.
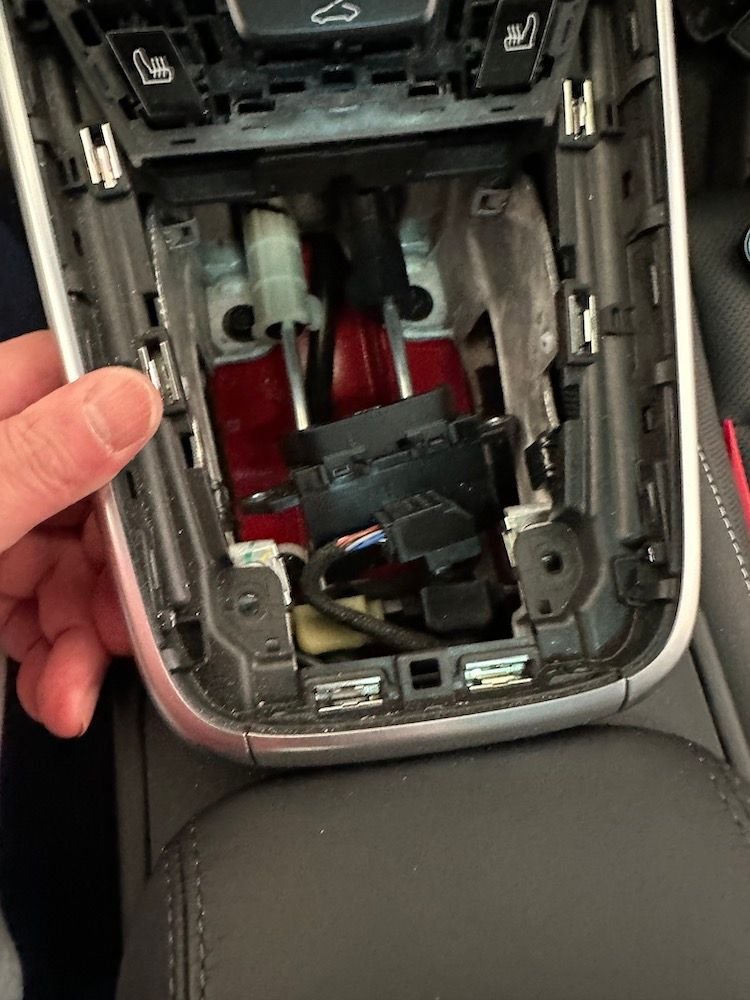
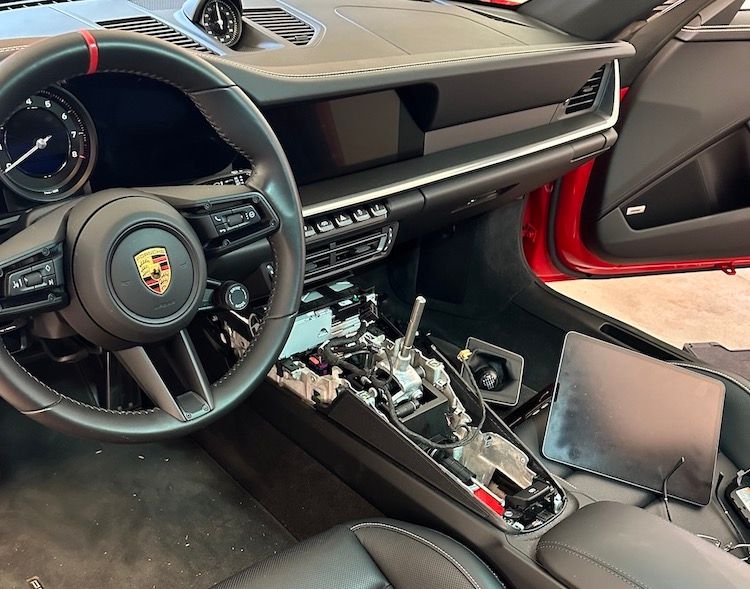
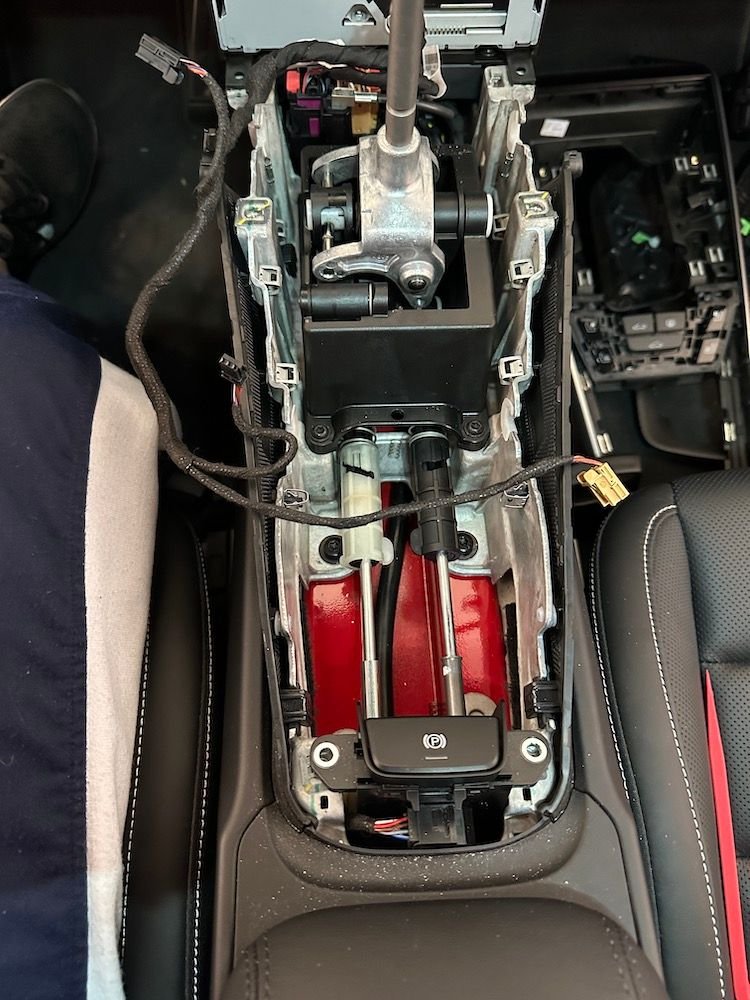
26. Once you've disconnected the various harnesses and unclipped the wires from the notches on the center console surround, it lifts right out and the shifter is now accessible.
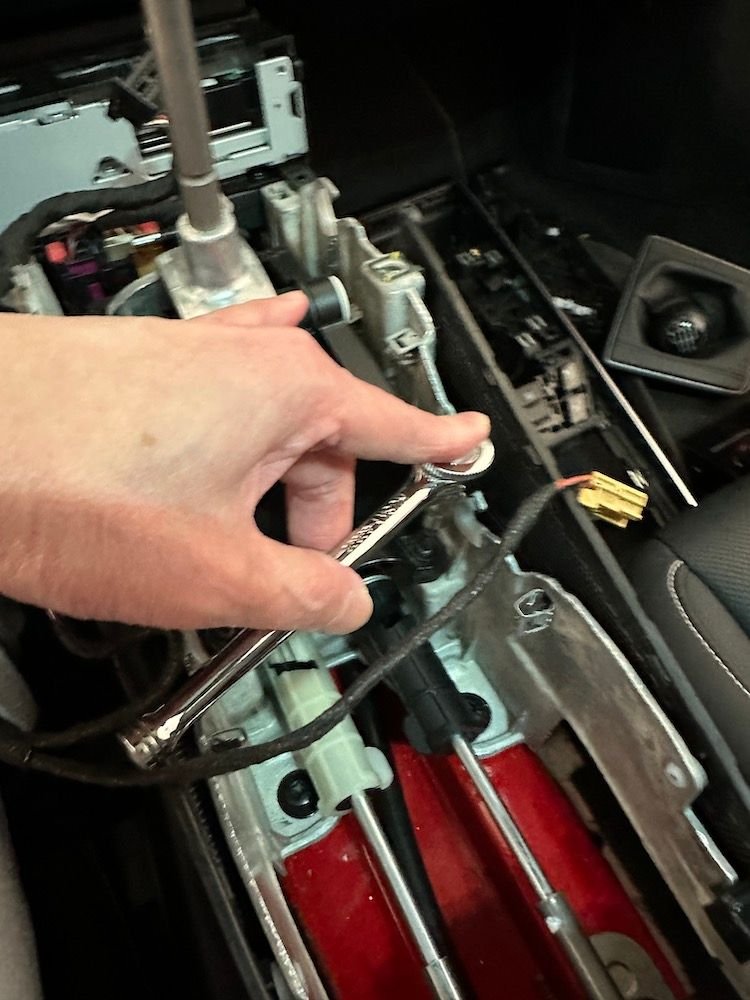
27. The shifter is held in place by four T25 torx screws. They are held on fairly tight so I used a wrench instead of T25 screwdriver. These four screws holding the shifter are different than the T25 screws holding the center console trim pieces so keep them separate.
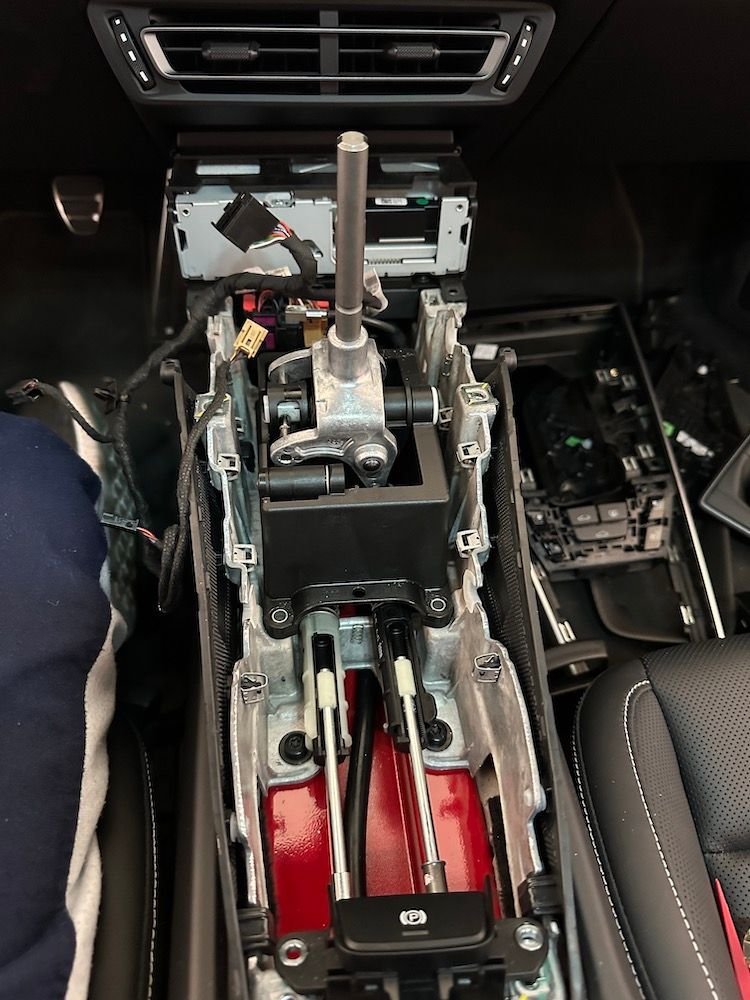
28. This shows you where the four T25 torx screws are holding the shifter. Remove them all.
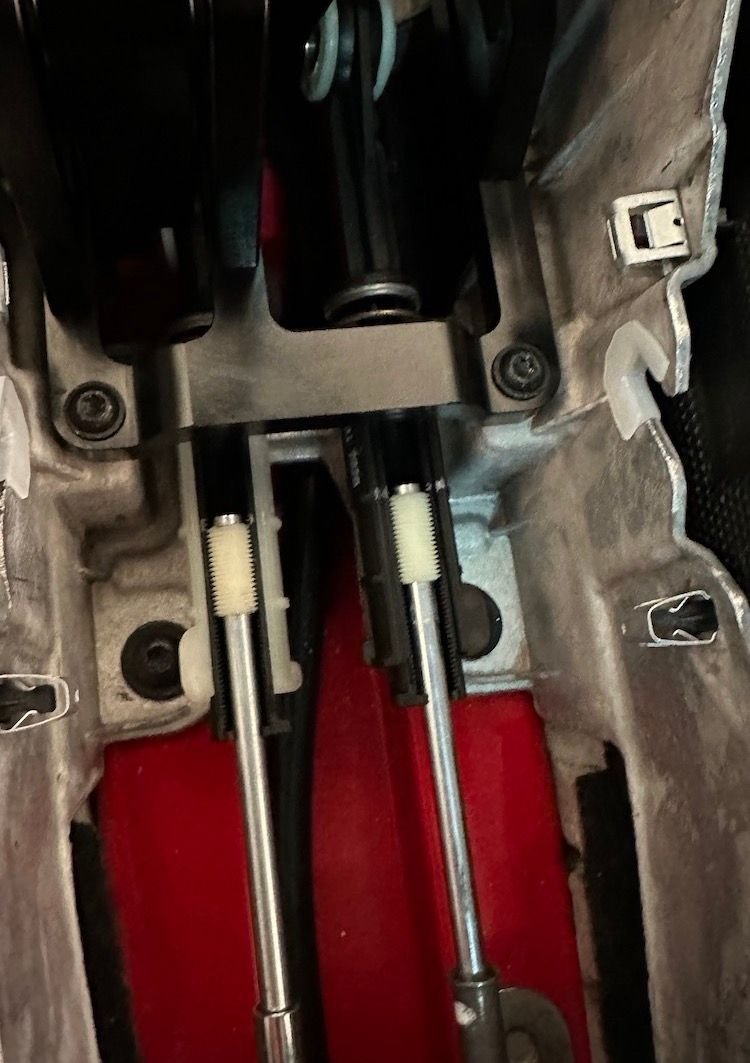
29. There's a white cylindrical cover on the left and a black one on the right partially covering the shift rods. Note tha the have tabs. For the white one, you will rotate the tab counter clockwise as you simultaneously push up. For the black on the right, you rotate the tab clockwise and push up.
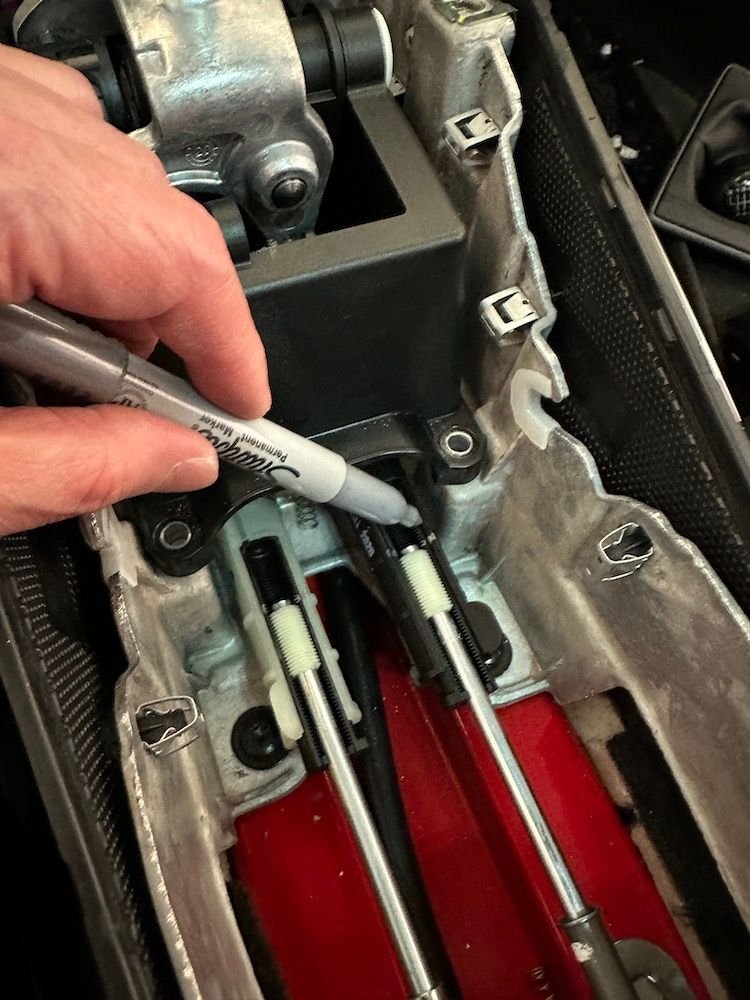
30. Once you've opened those cylindrical covers, it exposes the top ends of the shift rods.
31. With the shift lever in neutral position, use a silver sharpie to mark exactly where the shift rod ends rest in the white and black shift rod covers. You will need to place the shift rods back in the identical position when you install the Numeric shifter.
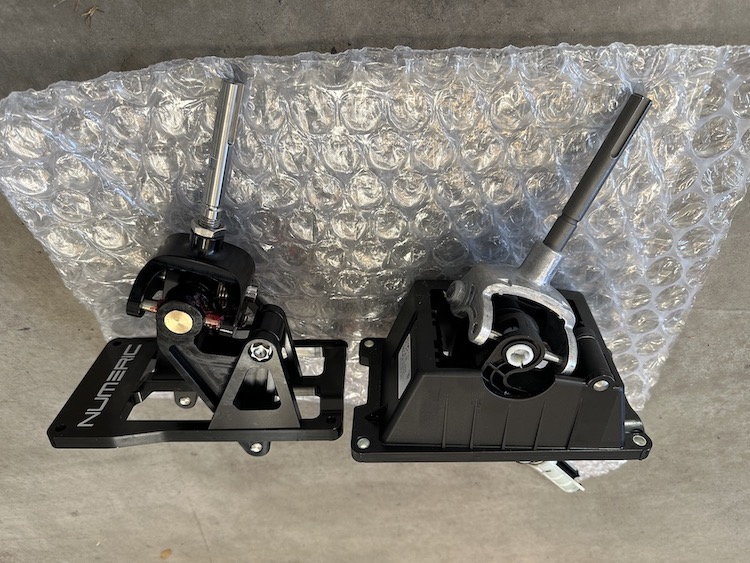
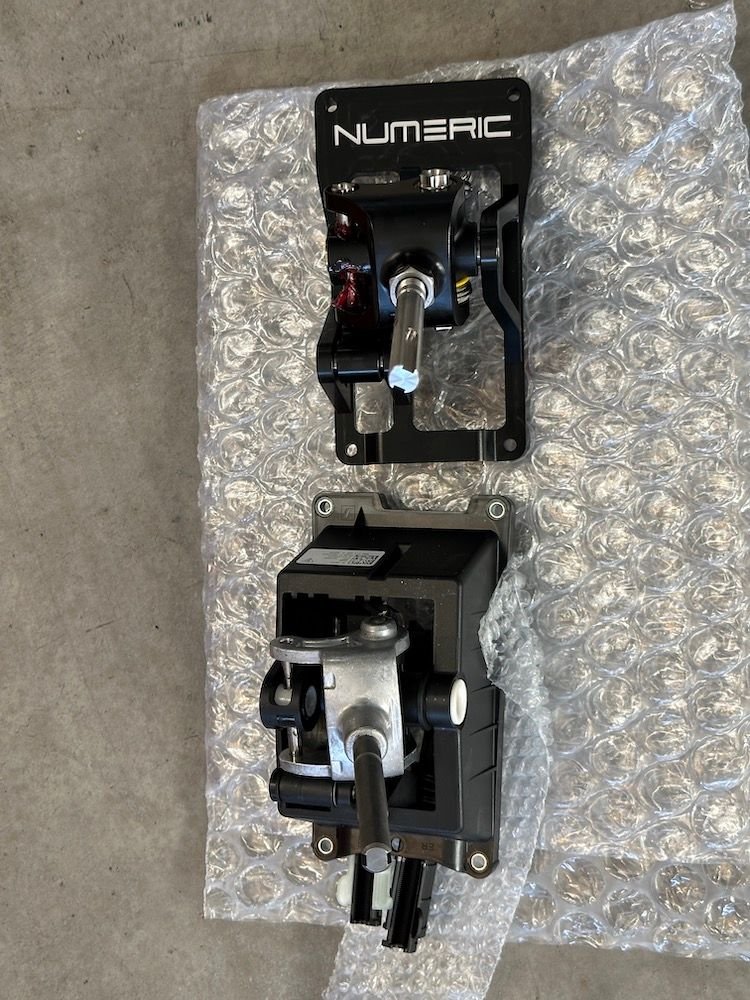
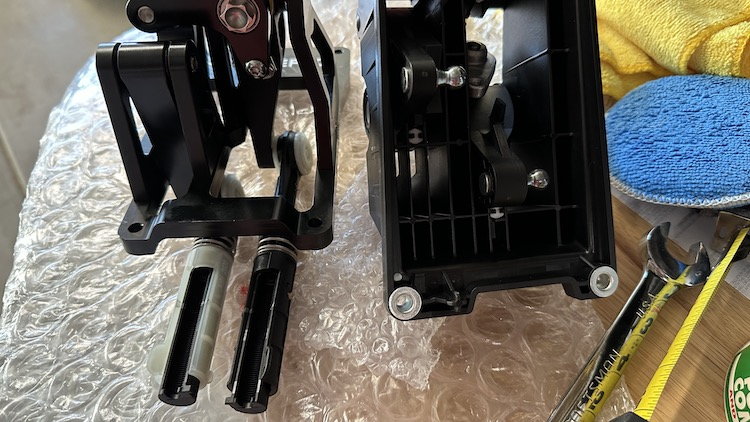
Here are some pictures comparing the Numeric Racing shifter and the stock shifter
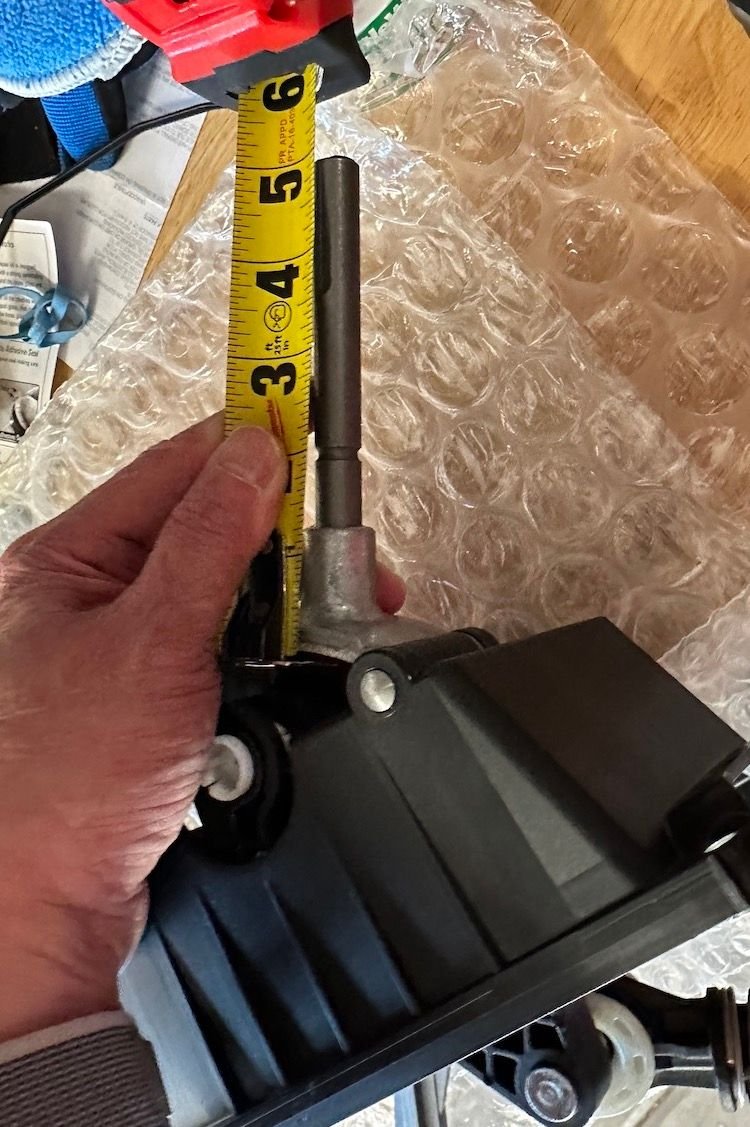
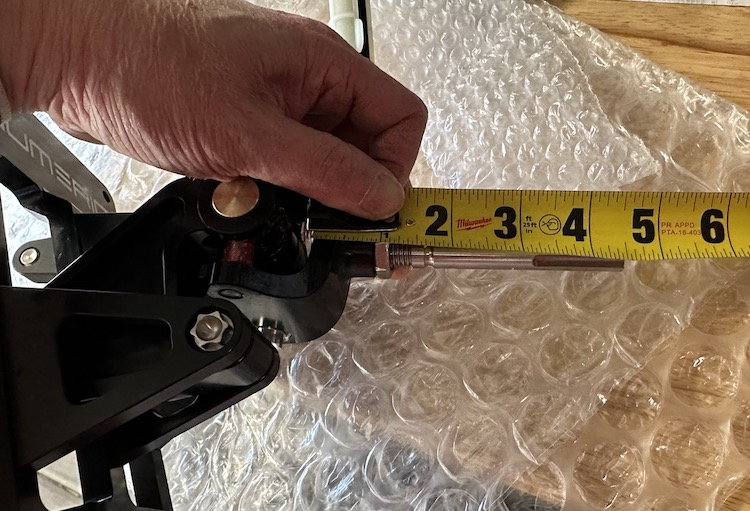
Comparison of shaft length between stock and Numeric shifter...
Note that the Numeric shifter's shaft length is adjustable by about 3/4". What I have found is even a 1/4" change in shaft length leads to a very big change in shifter throw distance.
I had the shifter shaft set at about 4.5" but I think I had to raise it because the shfiter throw felt too short for me. This is further accentuated by the Function First shift **** which sits lower than the stock shift **** and the Function First **** also has it's own height adjustment (though it's more limited compared to the shaft adjustment length on the Numeric short shifter).
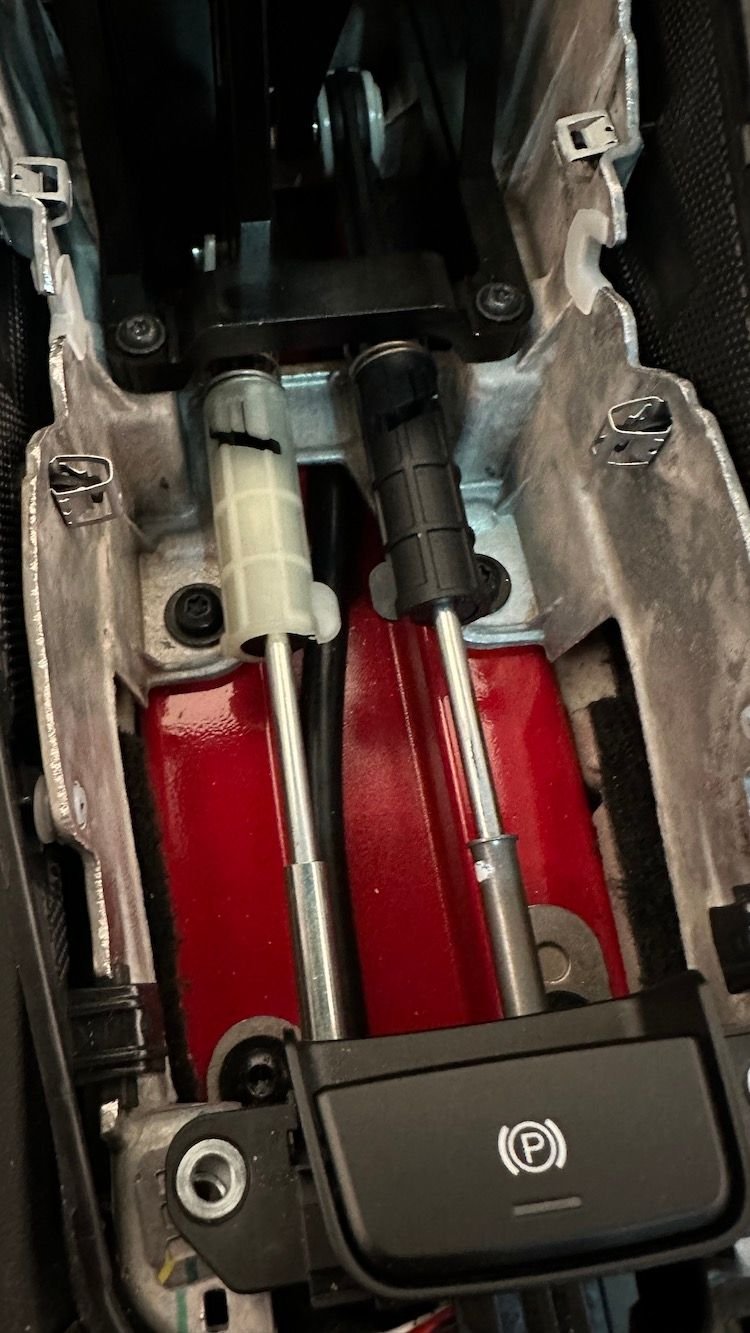
32. Remove the white and black shift rod covers from the stock shifter and install them on the Numeric Racing shifter. These pop right off and pop right back on. It's a bit tricky but not that hard to do.
33. Place the Numeric Racing shifter into the car and secure it with the four T25 torx bolts. The snap the shift rods back into the white and black cylindrical housings making sure to match the top ends of those shift rods right where you marked the cylindrical housings. It shouldn't be a problem. With the whifter in neutral position, it should all fall right in place. I didn't have to pull or tug on the shift rods to match up to the sharpie lines.
34. Rotate the cylindrical housings to cover the shift rods. Now just do the reverse of what you did to remove all the various harnesses, trim pieces, etc. to put everything back together again and you're done!
35. I didn't take pictures of reassembly. It was very easy to put the trim pieces back in place. Everything lined up and clicked back in without issue. I do want to point out that this trim piece surrounding the cupholder has prongs on the from front edge so you can't just push this trim piece down or you may snap off those prongs.
36. Those front prongs go into this hole so slide that in first, then push down on the trim piece and it should snap right into place.
37. Note... The next steps are for installation of the Function First shift ****. If you are installing the OEM shift ****, it goes back on exactly the same way as you removed it from the stock shifter.
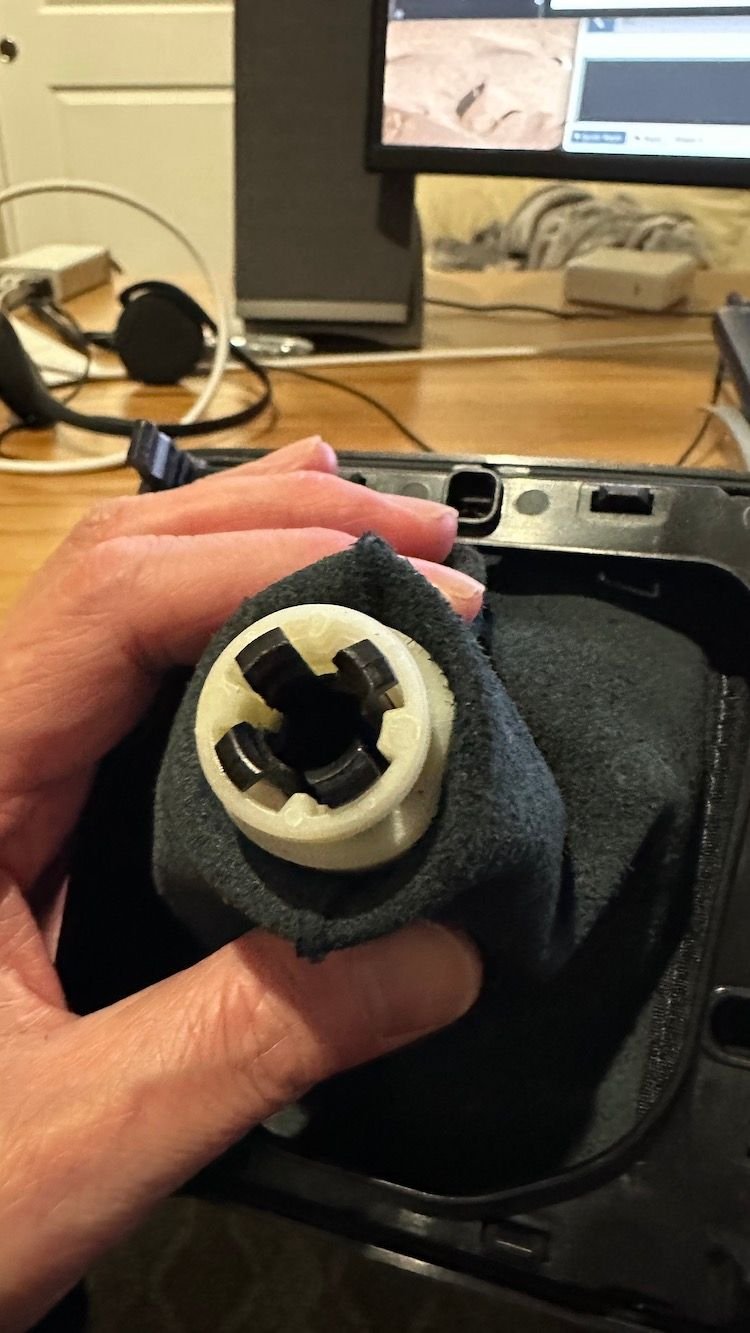
Installing the Function First shift **** was very simple once I figured out how to separate the stock shift **** from the shifter boot. This took me about 30 minutes to figure out because I didn't want to break the stock retaining clips holding the shifter boot to the stock shift ****. But it's pretty simple. You basically use a screw driver to push those four black prongs inwards past several levels of notches on the inside of the white retaining clip and the shifter will eventually separate from the shift boot.
38. Here's another angle showing those four black prongs being moved past several notches on the inside of the white clip.
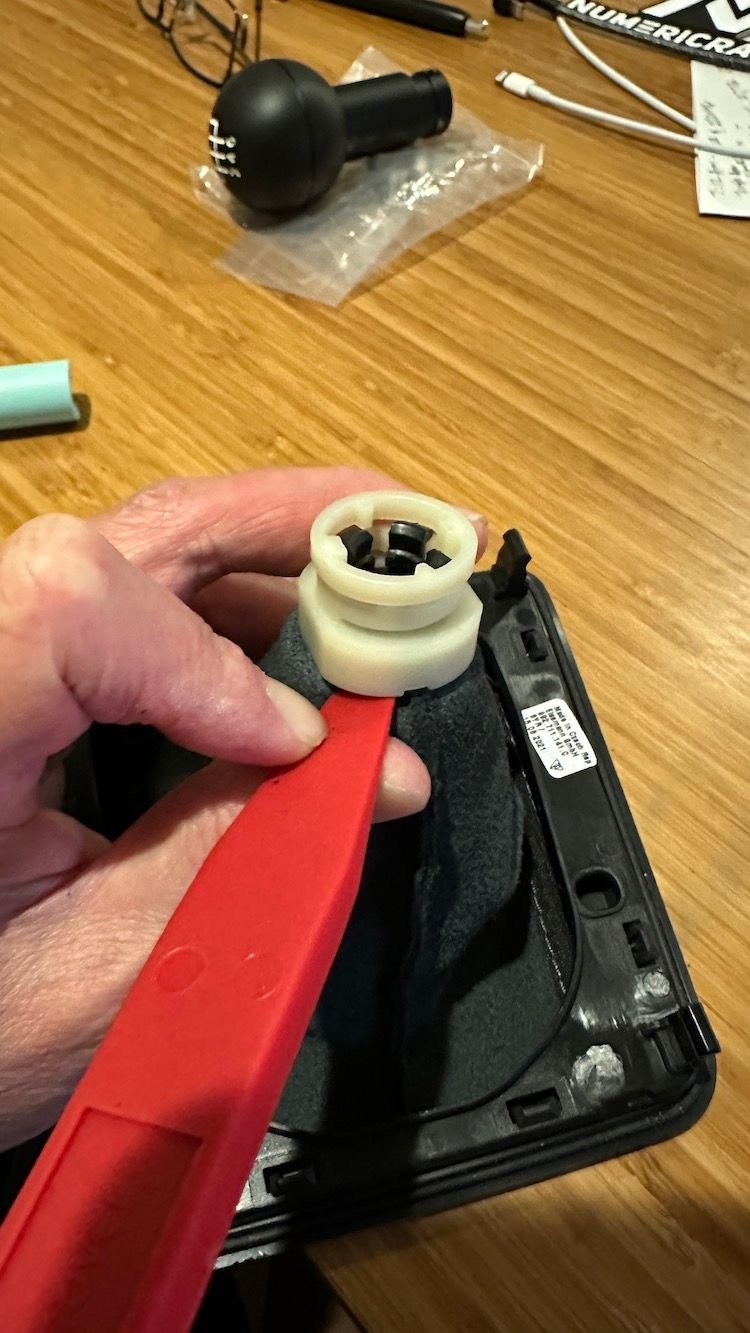
39. Once the black clips are pushed out of the white retaining clip, the shift **** lifts out. Then you need to flip the boot back over and from the top, you need to remove this concentric clip as that is what's holding the leather to the white retaining clip. That concentric clip comes out very easily.
40. OK... I ran out of steam and didn't take pictures of the installation of the Function First shift **** but for me, the hardest part was just removing the stock shift **** from the leather boot. After that was done, installation following the Function First instructions were VERY easy. It's also super easy to make adjustments to perfectly center the shift **** and to raise or lower the Numeric Racing shifter shaft in order to lengthen or shorten the shifter throw distance. You only have to remove the shift **** and shifter boot trim piece and you can easily make these adjustments.
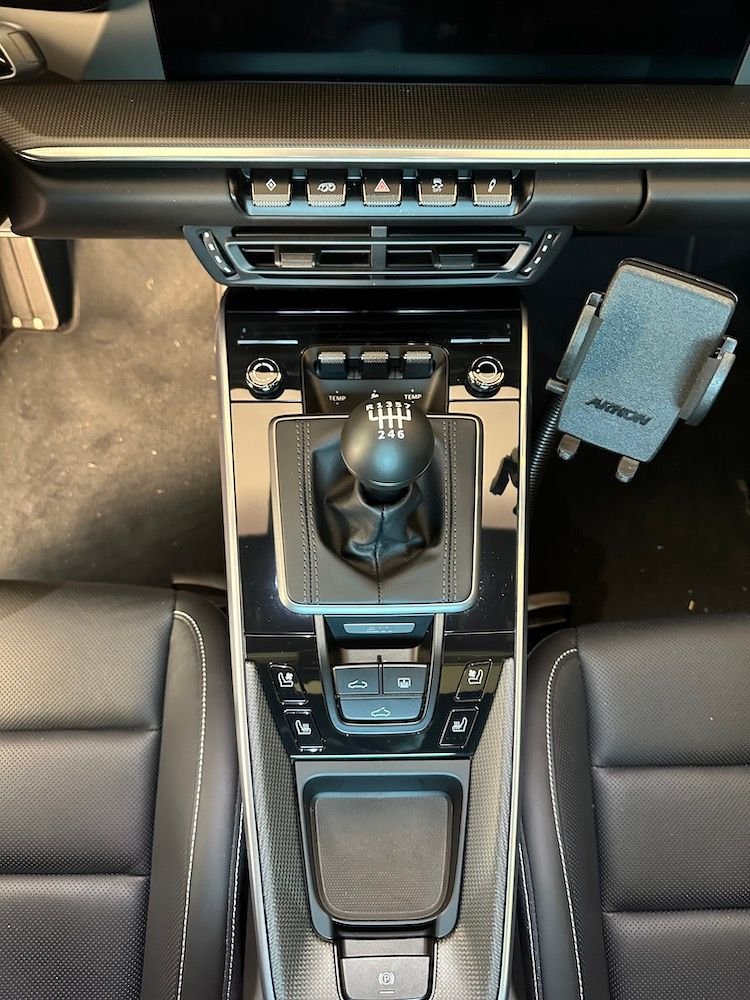
Here's another picture of the completed install. I will write a review tomorrow.
 12-19-2022, 02:50 AM