When you click on links to various merchants on this site and make a purchase, this can result in this site earning a commission. Affiliate programs and affiliations include, but are not limited to, the eBay Partner Network.
For those who purchase a 958 without the tow package, and would like to add the ability to tow or throw miscellaneous attachments on, fear not! It's easy to do! (Additional Bike carrier thoughts at the end)
No drilling or welding required.
I ordered a Draw-Tite hitch receiver from etrailer.com. They also offer a Curt, both at pretty good prices so far as I could tell, and both install the same way. Also, I cheated and screenshot some of the photos from an installation video I found on YouTube (will link it in the bottom)
What you will need:
- 958 Cayenne (duh)
- Hitch Receiver of your chosing (also, duh)
- T25 Torx bit (I used a T20 & T27 on mine, as my T25 went missing)
- 18mm socket, 1/2" ratchet, 4"-ish extension, and a jack handle for leverage couldn't hurt
- An extra set of hands can prove VERY useful in this. Highly recommended.
What To Do:
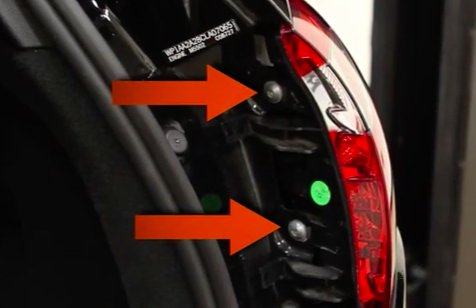
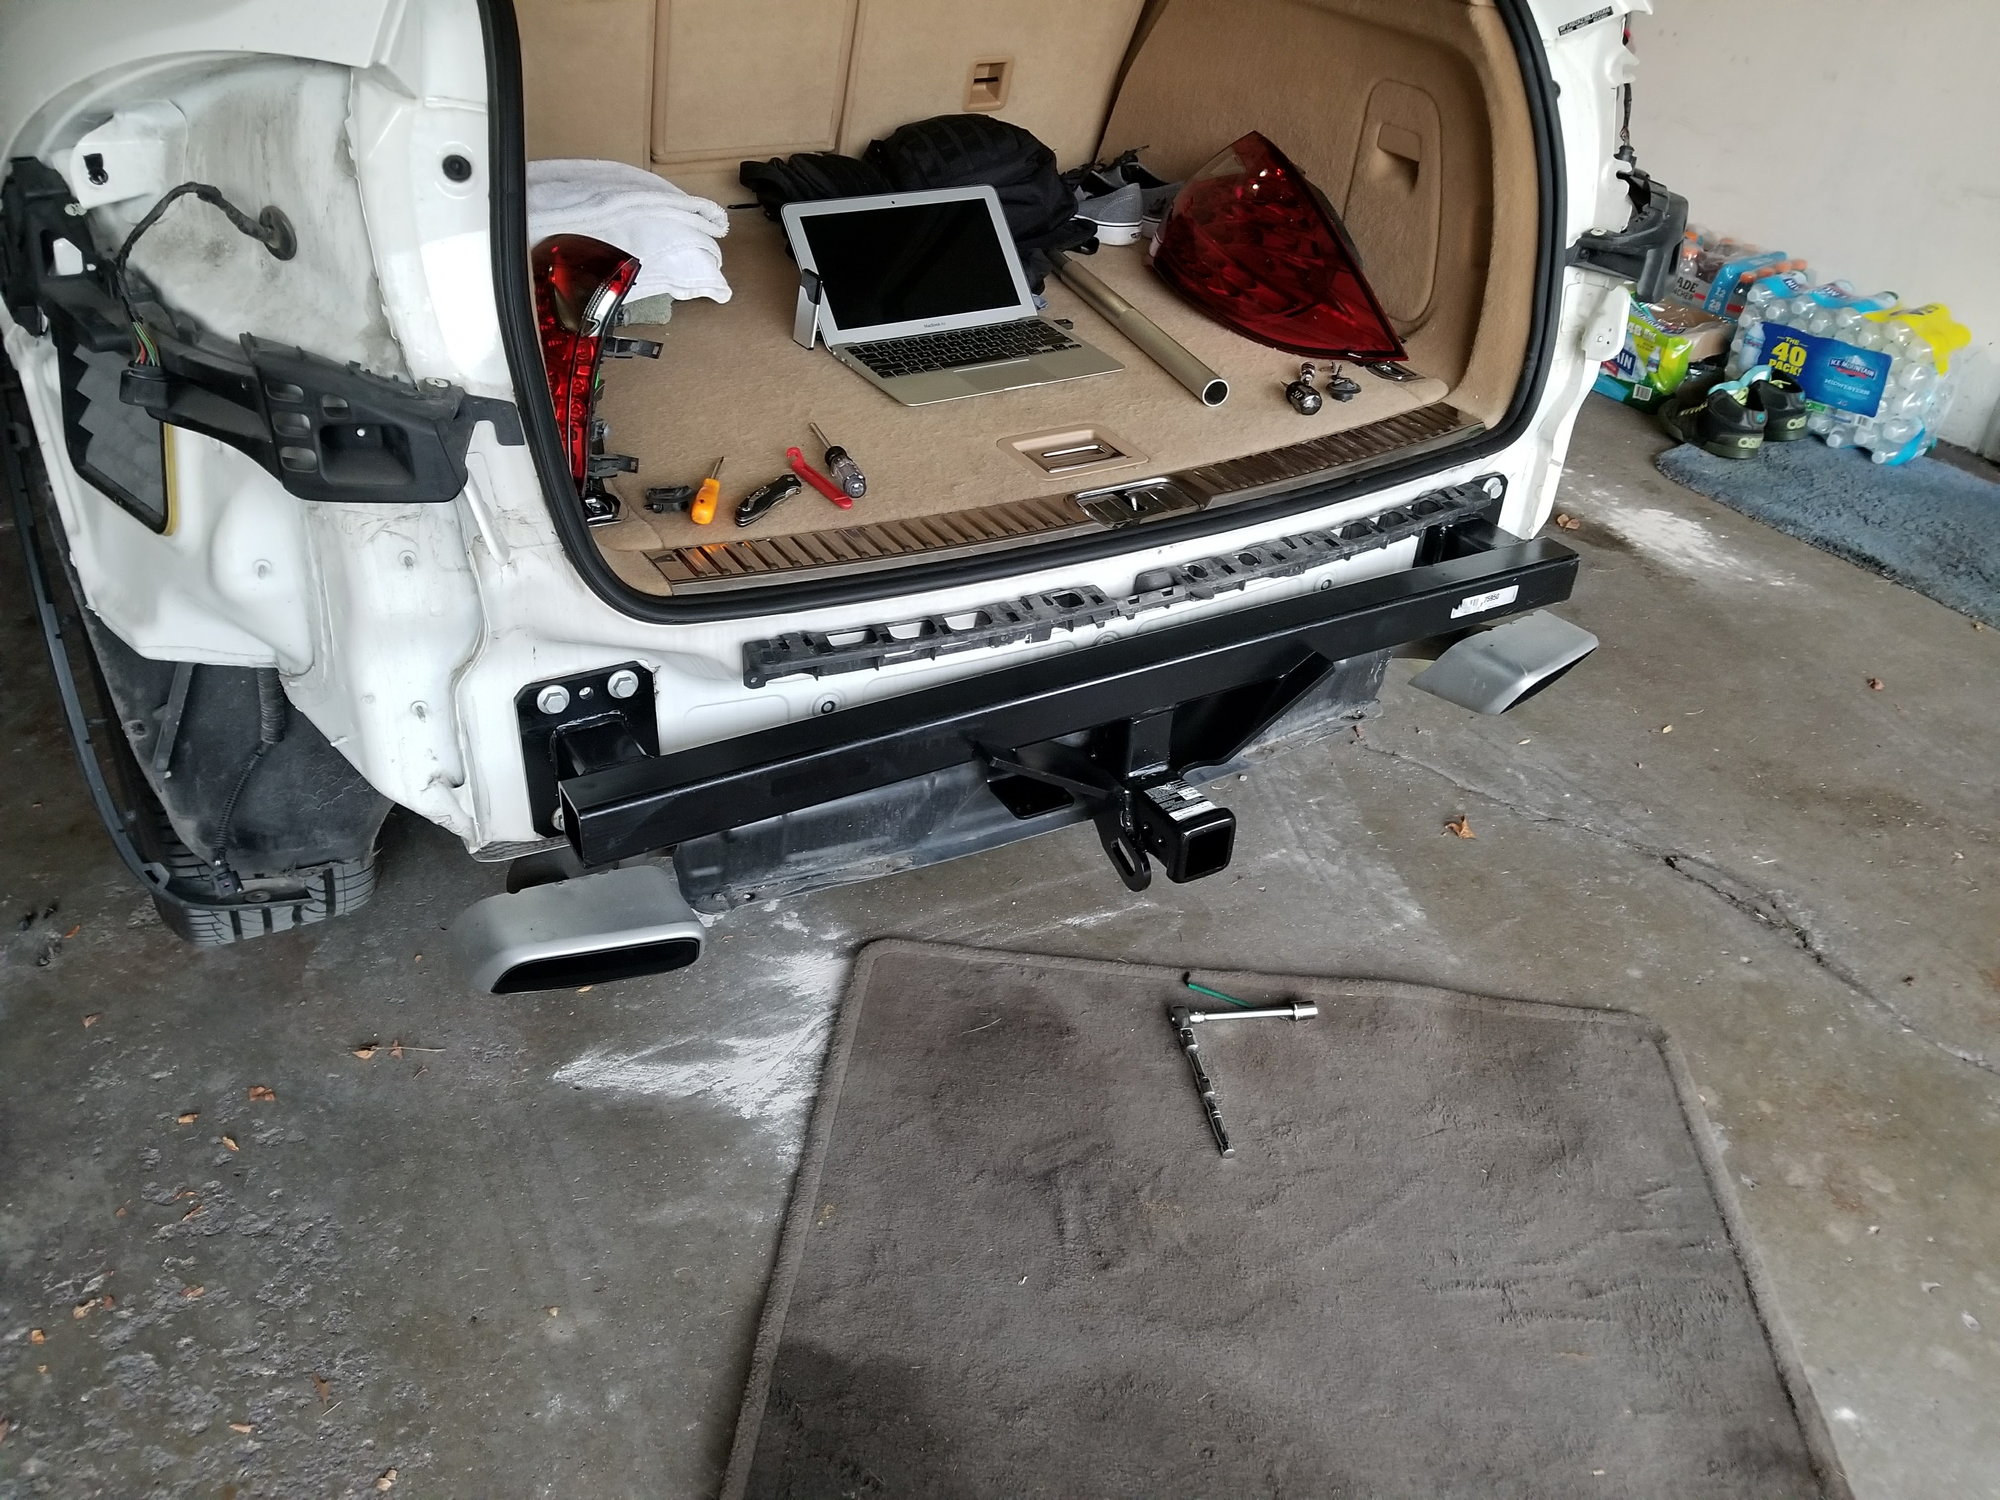
1. Remove your outboard tail lights by pressing in on the side of the black cover thingy towards the front of the car. Undo two screws holding them in, unclip the wiring and set them somewhere safe.
2. There's 4 screws on the bottom of the middle panel. Remove those.
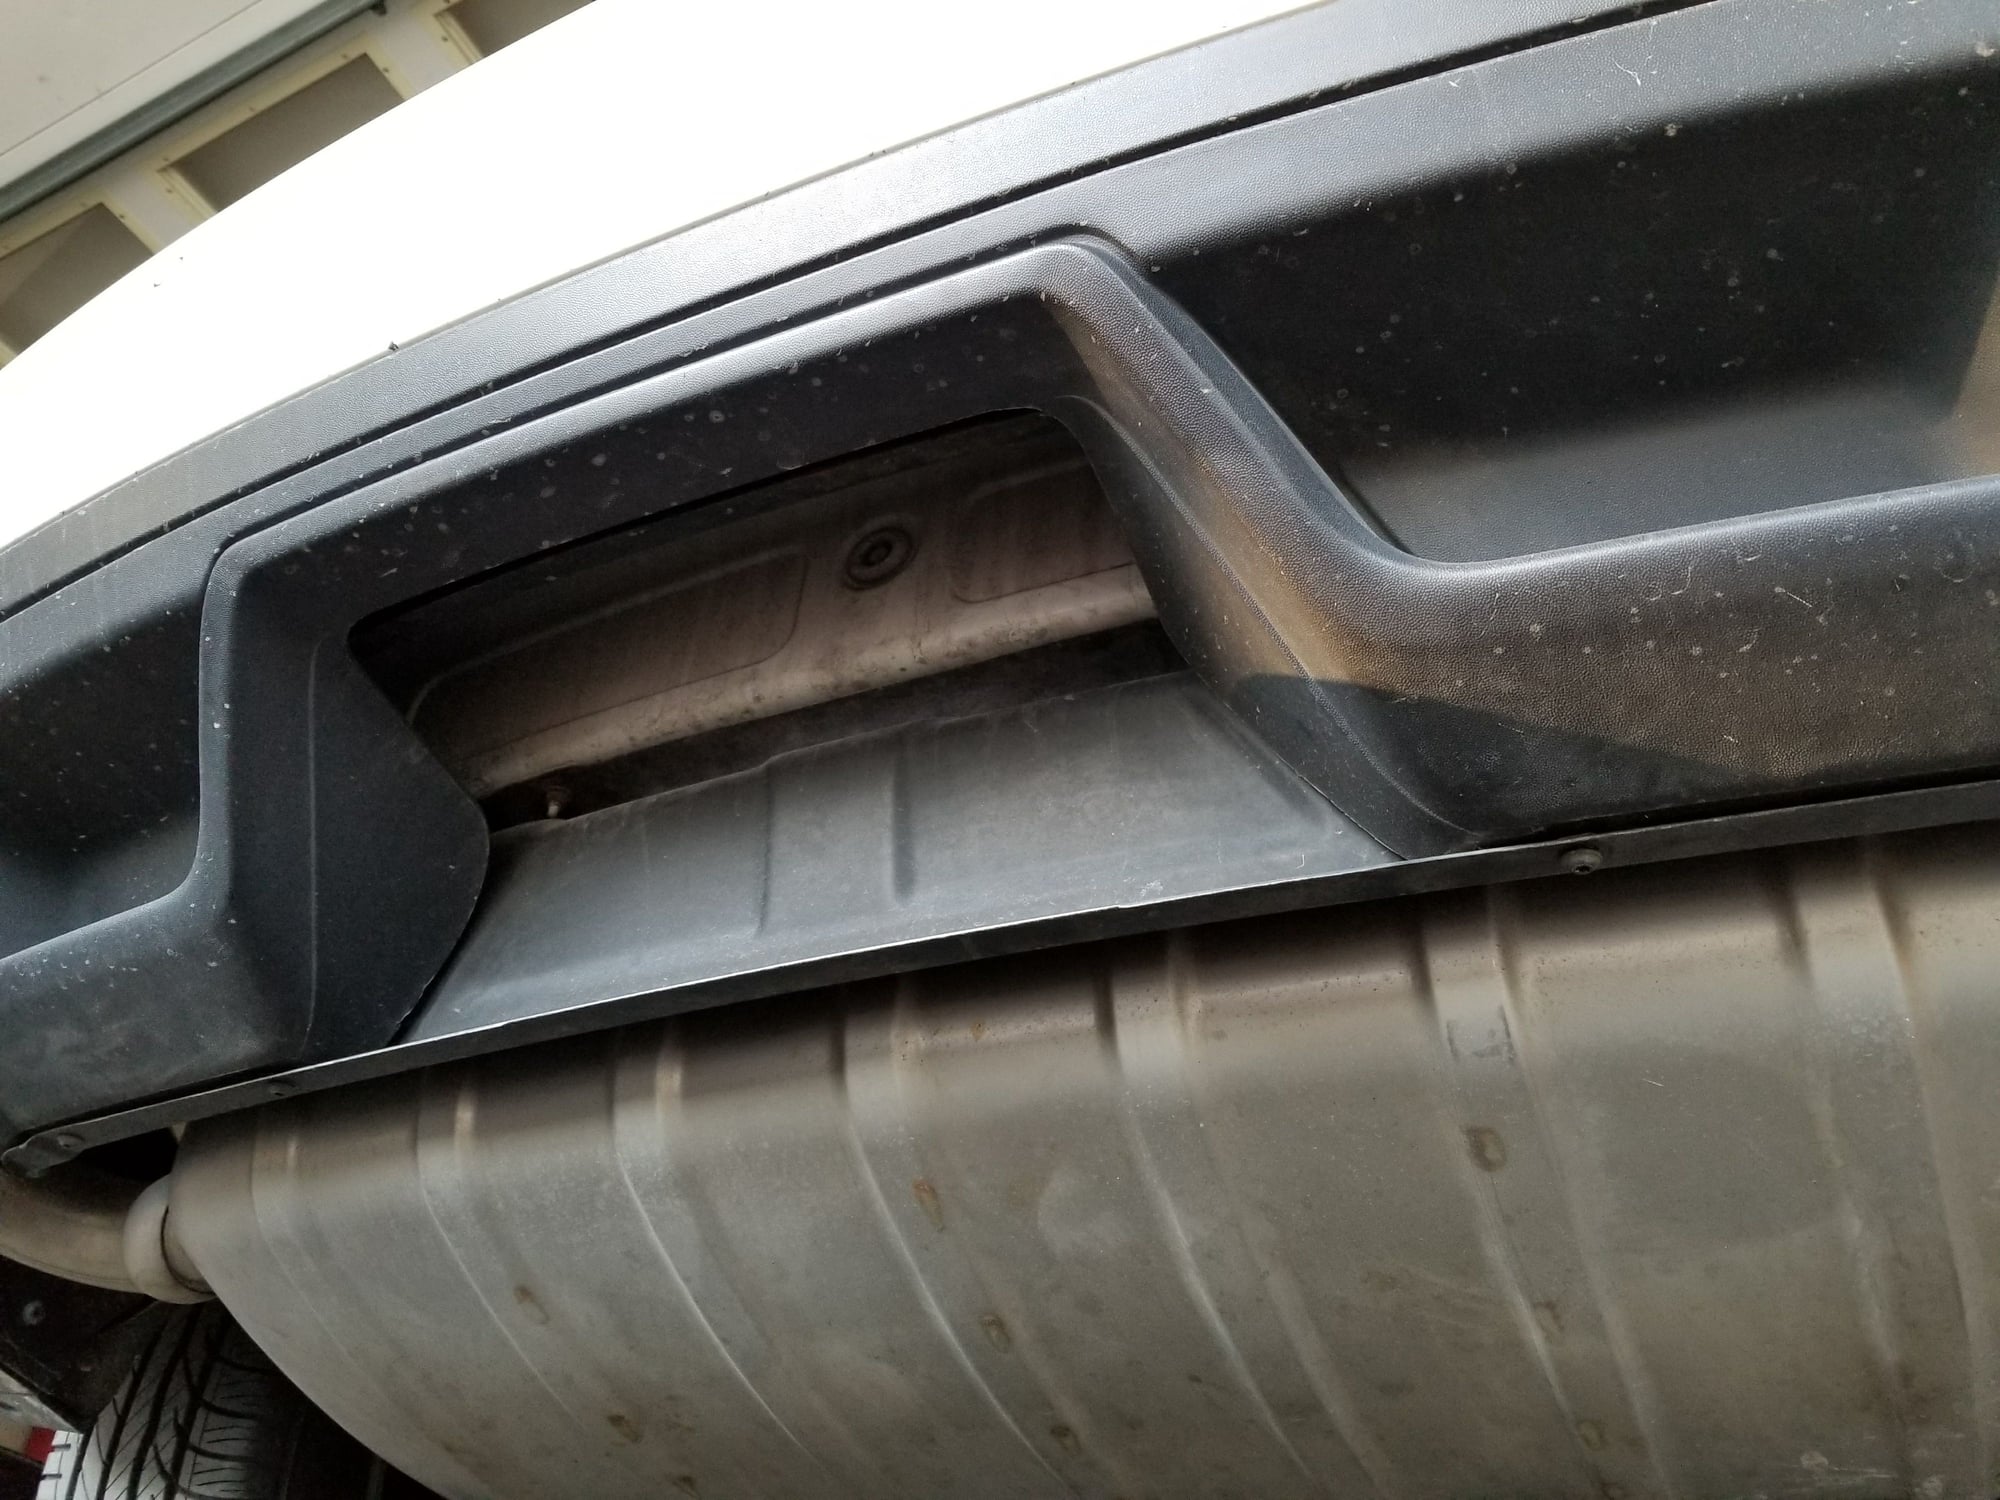
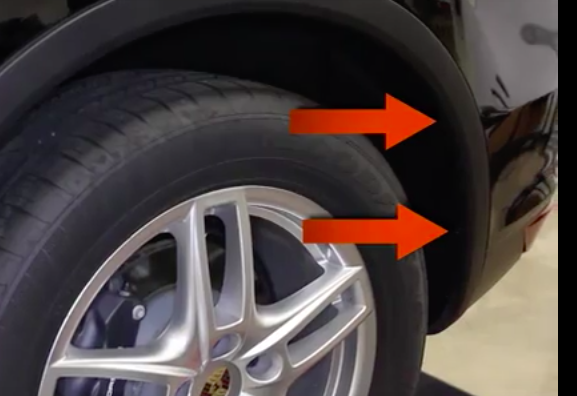
3. Remove two screws (per side) from under & inside the bumper cover.
4. Remove two screws (per side) securing the wheel well liner.
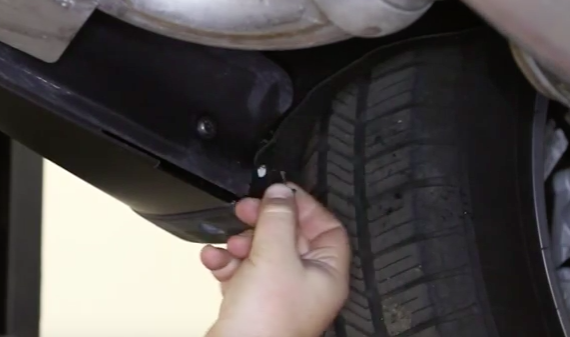
5. Carefully pop the wheel arch trim outwards (only need to do about halfway around) and remove the 3 screws (per side) holding the bumper on.
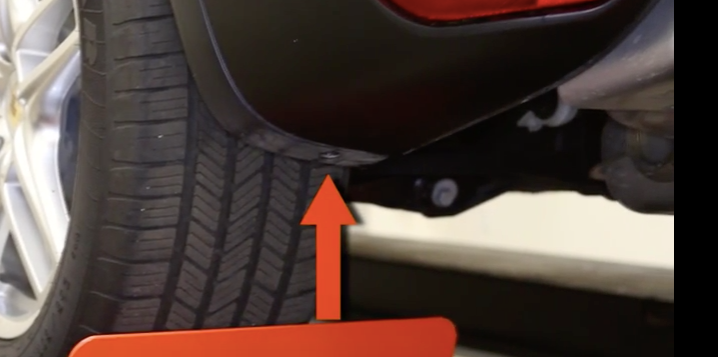
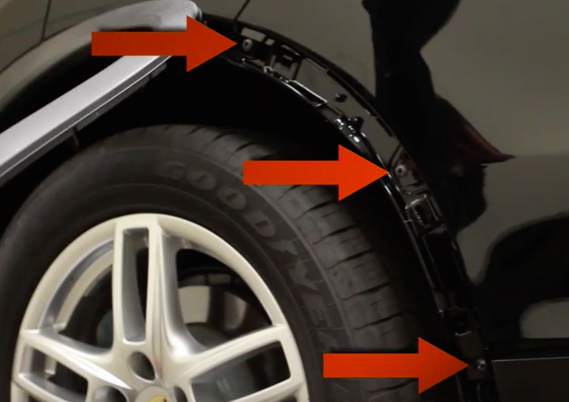
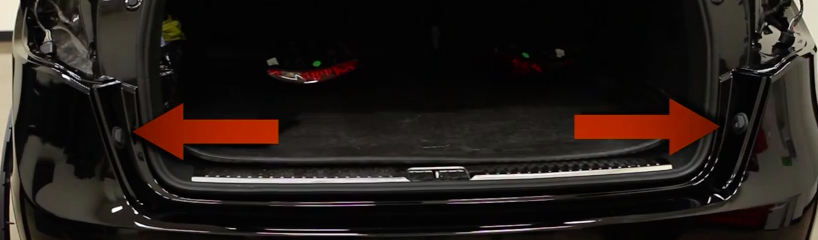
6. Remove one screw (per side) in that black bulbous bit inside the hatch opening, with the black bulbous bit.
7. Remove the bumper by pulling the sides by the rear wheel well outwards on both sides and bringing the whole things straight back. This is part A where it will be helpful to have a second set of hands. (Watching the video will be more helpful than photos if needed) If you have the parking sensors, those connect with one harness clip similar to the tail lamp wiring connection at the driver's side of the car. The joint of the two attaches inside the bumper and pops out pretty easily.
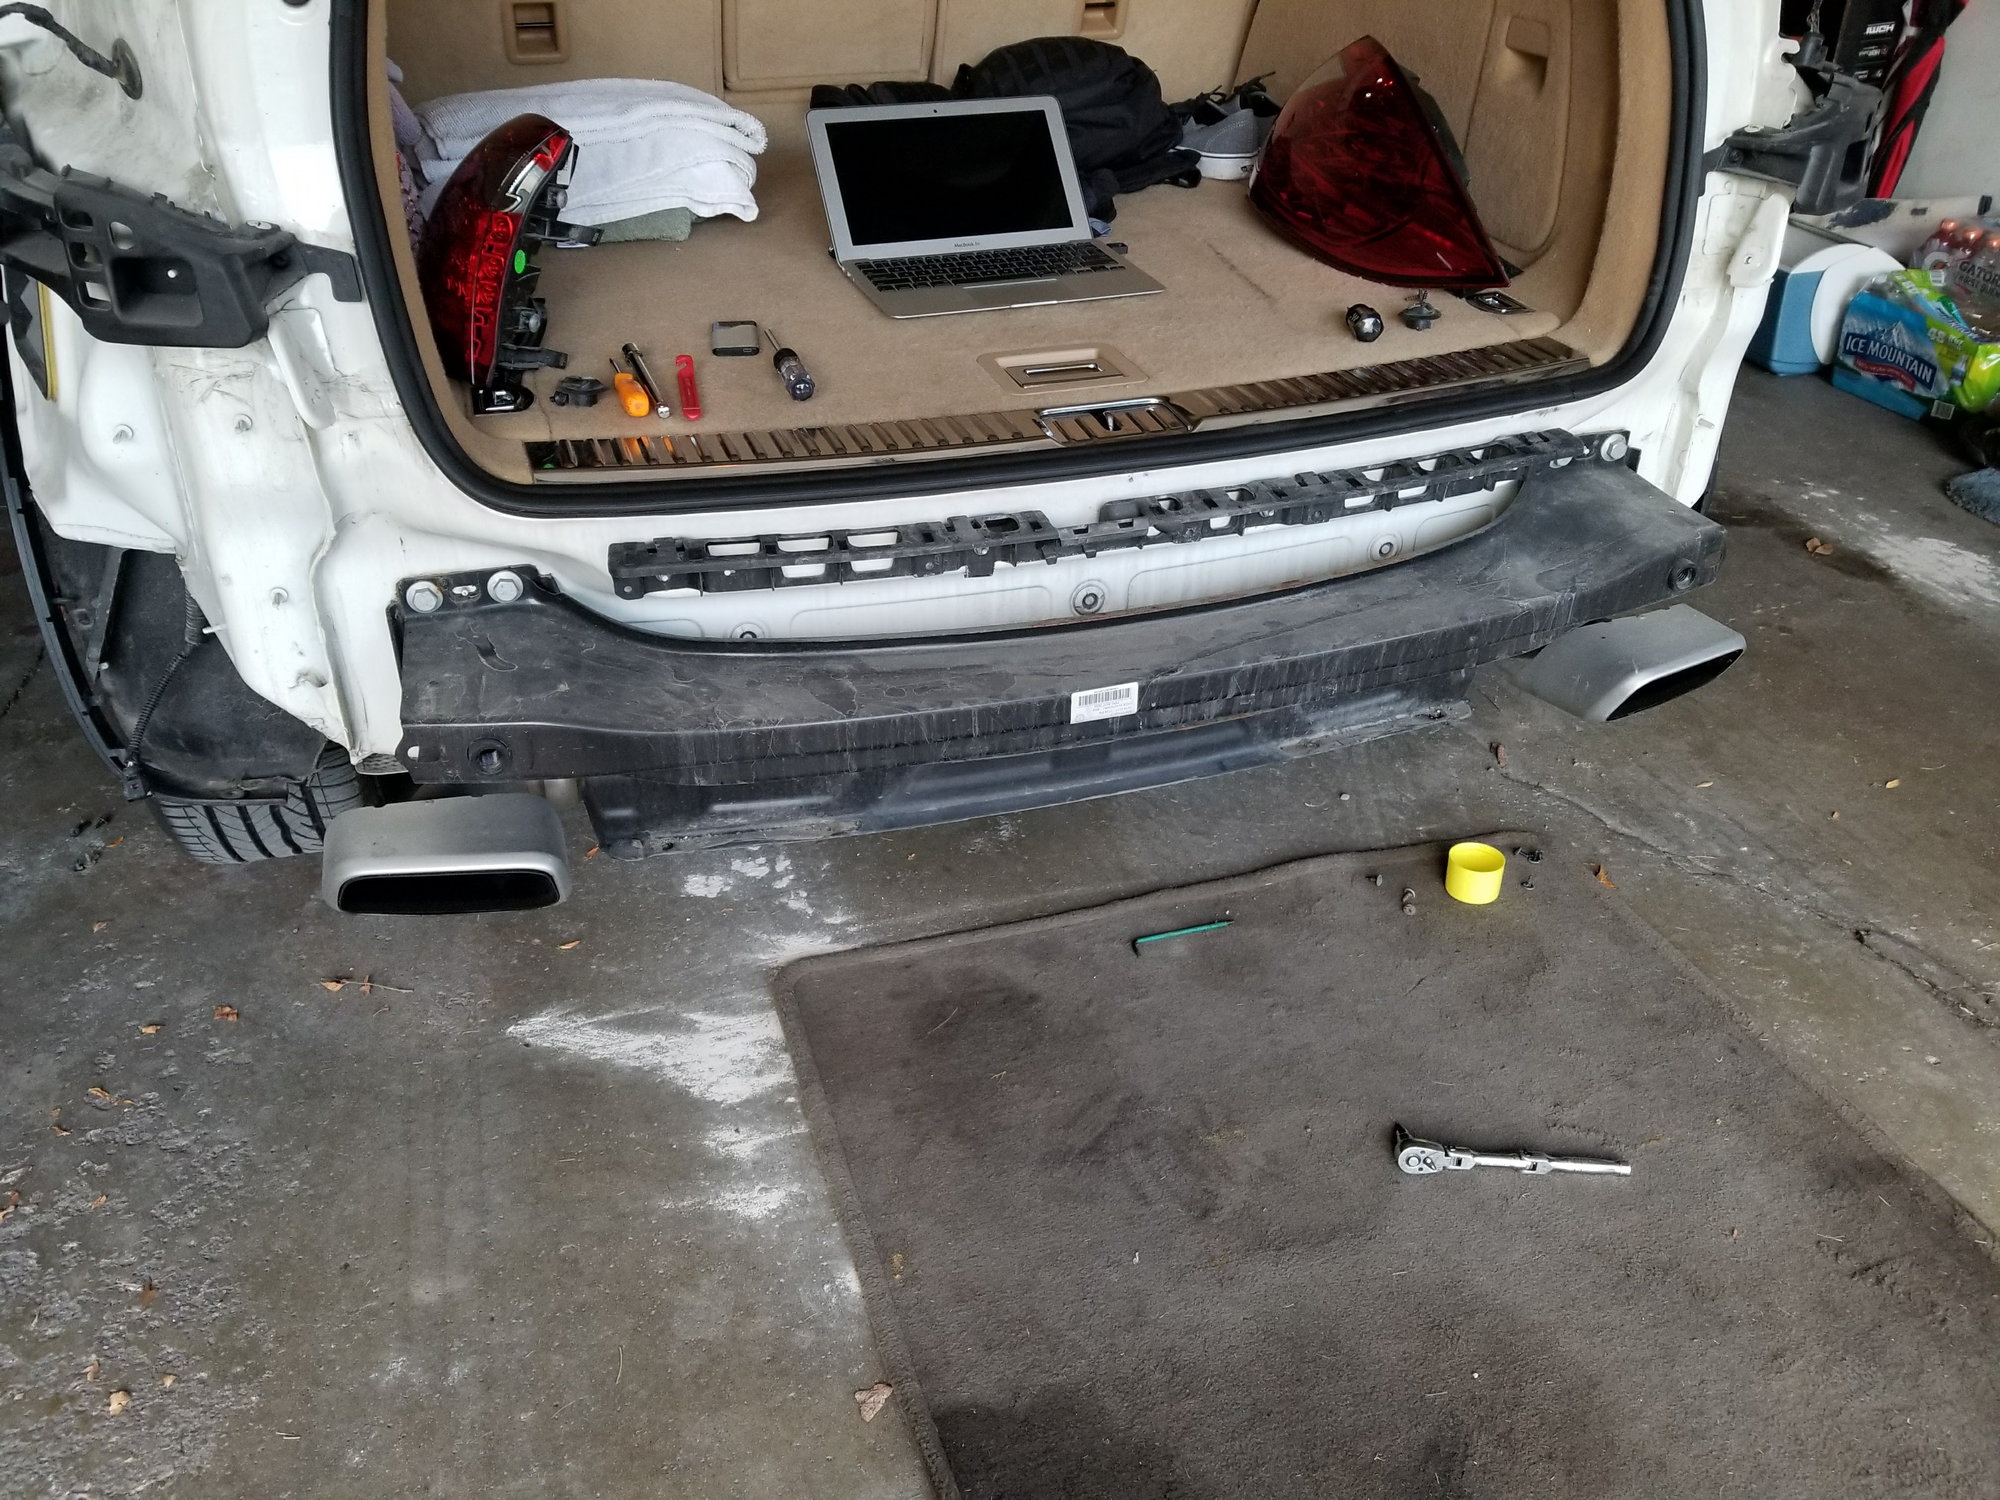
8. Remove the 4 18mm bolts (per side) and remove the bumper bar.
9. Replace with hitch receiver of your choice. This is where it will be VERY helpful to have a second set of hands, and tighten down the 4 bolts per side.
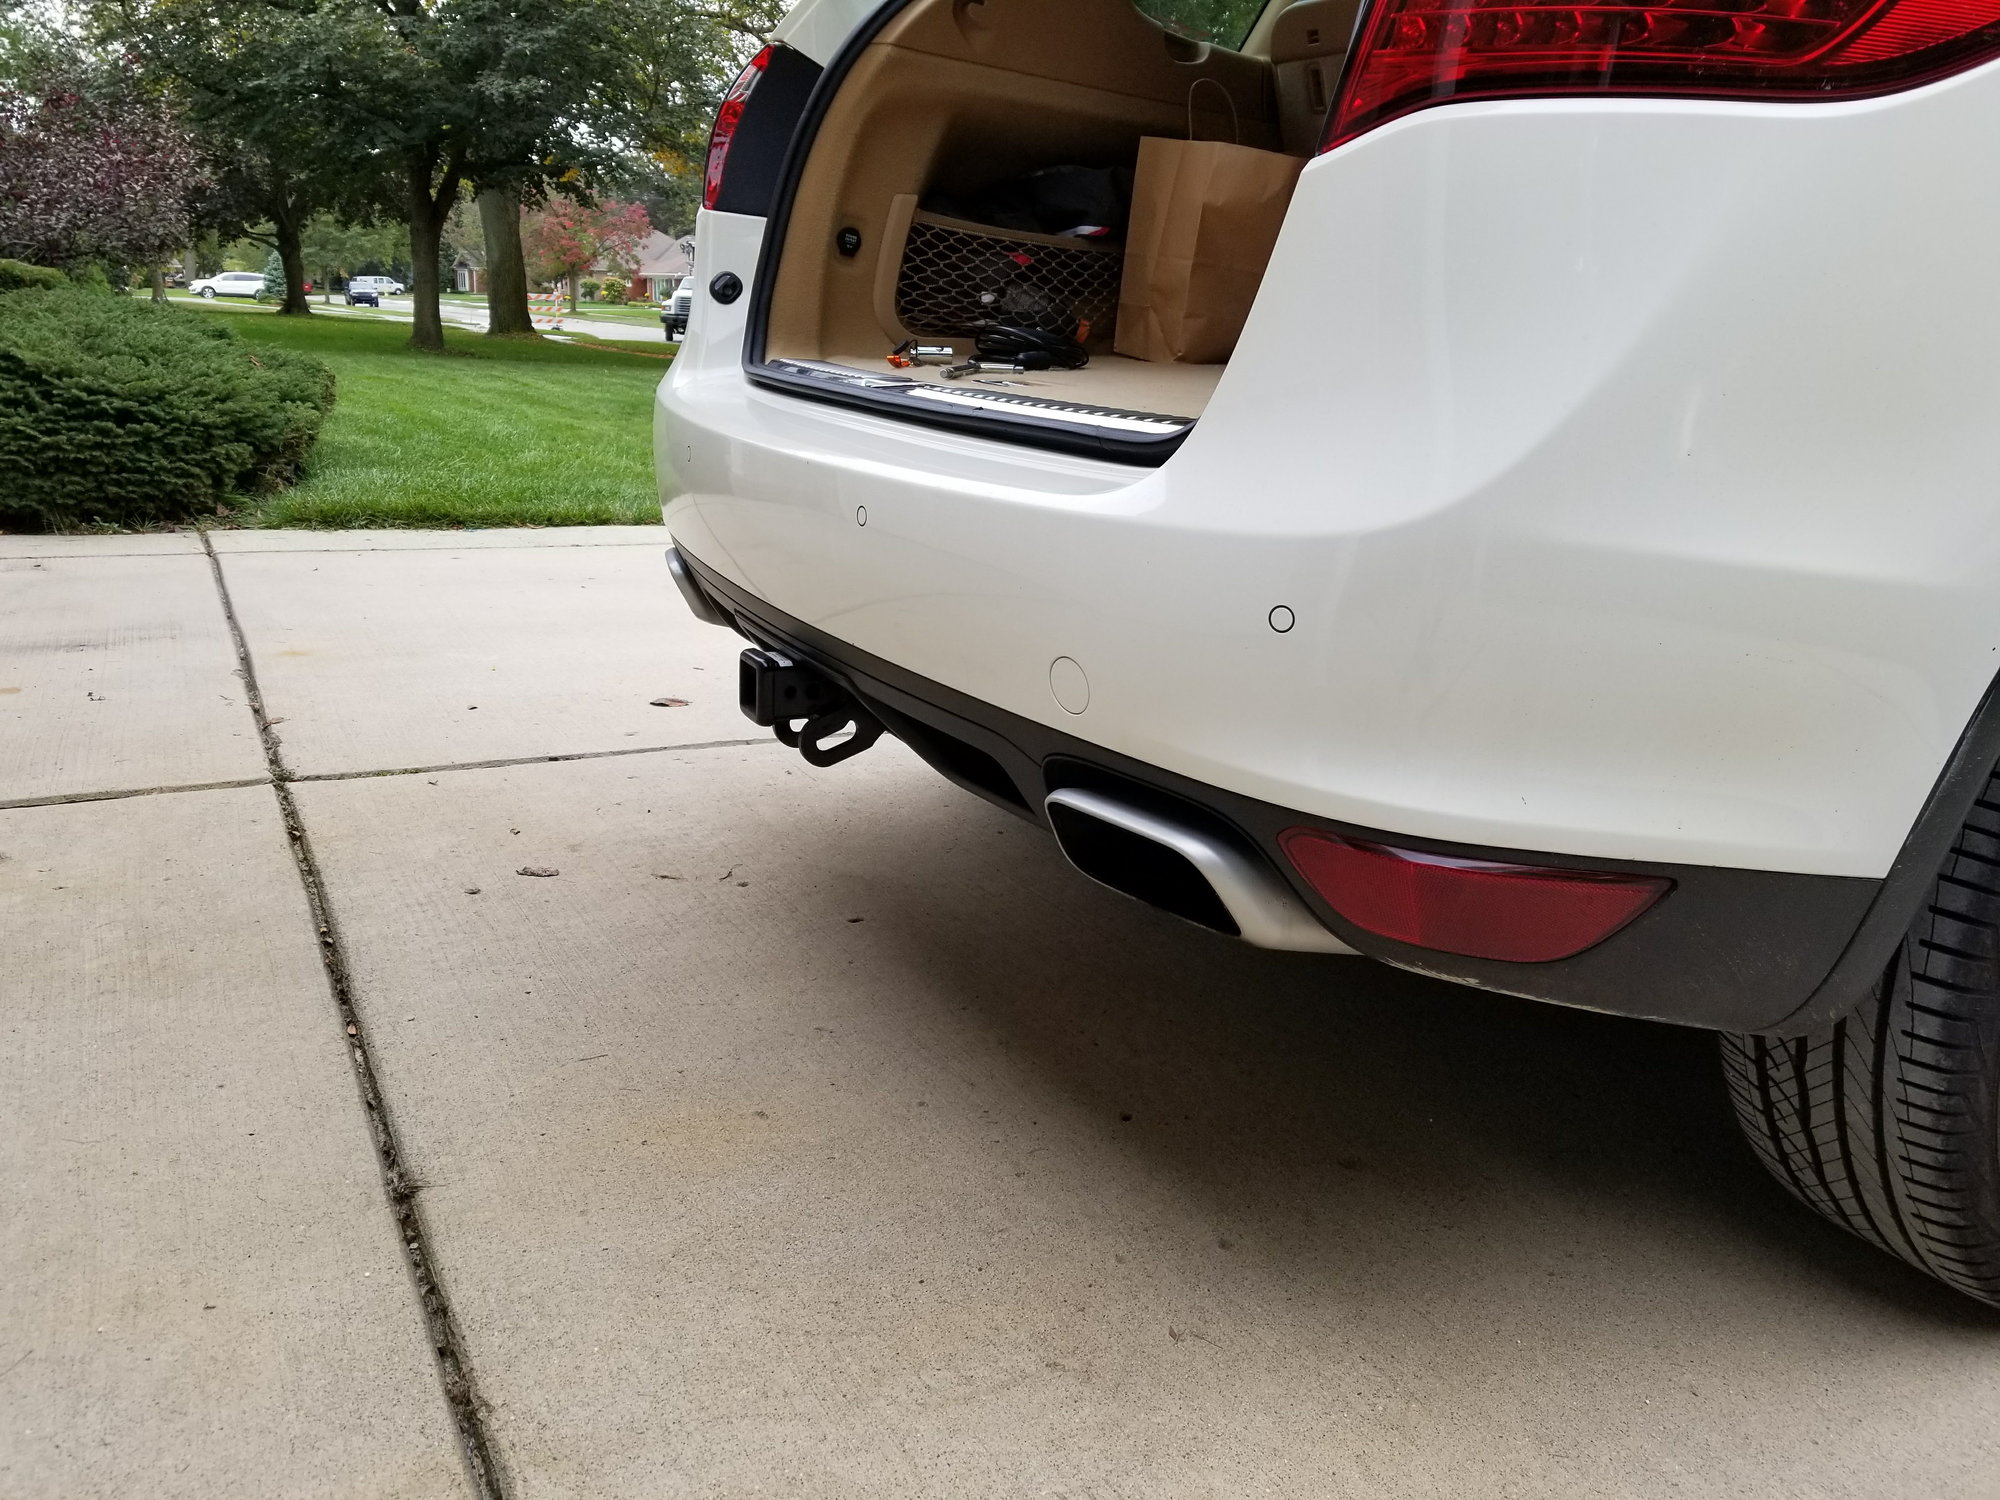
10. Installation is reverse of removal. At no point did I come across any hiccups, or can think of any tricks aside from having multiple little containers to hold the screws nearby where they came out, and pushing forward on the bumper cover while tightening the 3 screws that hold it on. All said and done this took me about an hour and a half working at a leisurely pace.
11. Sit back and be proud of your handiwork. Consider purchasing a boat for a little bit, then remember that you own a premium German SUV, and that will likely cost you as much as operating costs of a boat. Think of all the practical things you can do, but probably won't, then throw a bike rack on it (and a bike) and go hit your favorite trails, knowing that you won't be making a filthy mess of your interior, or trashing panels with tire marks ever again.
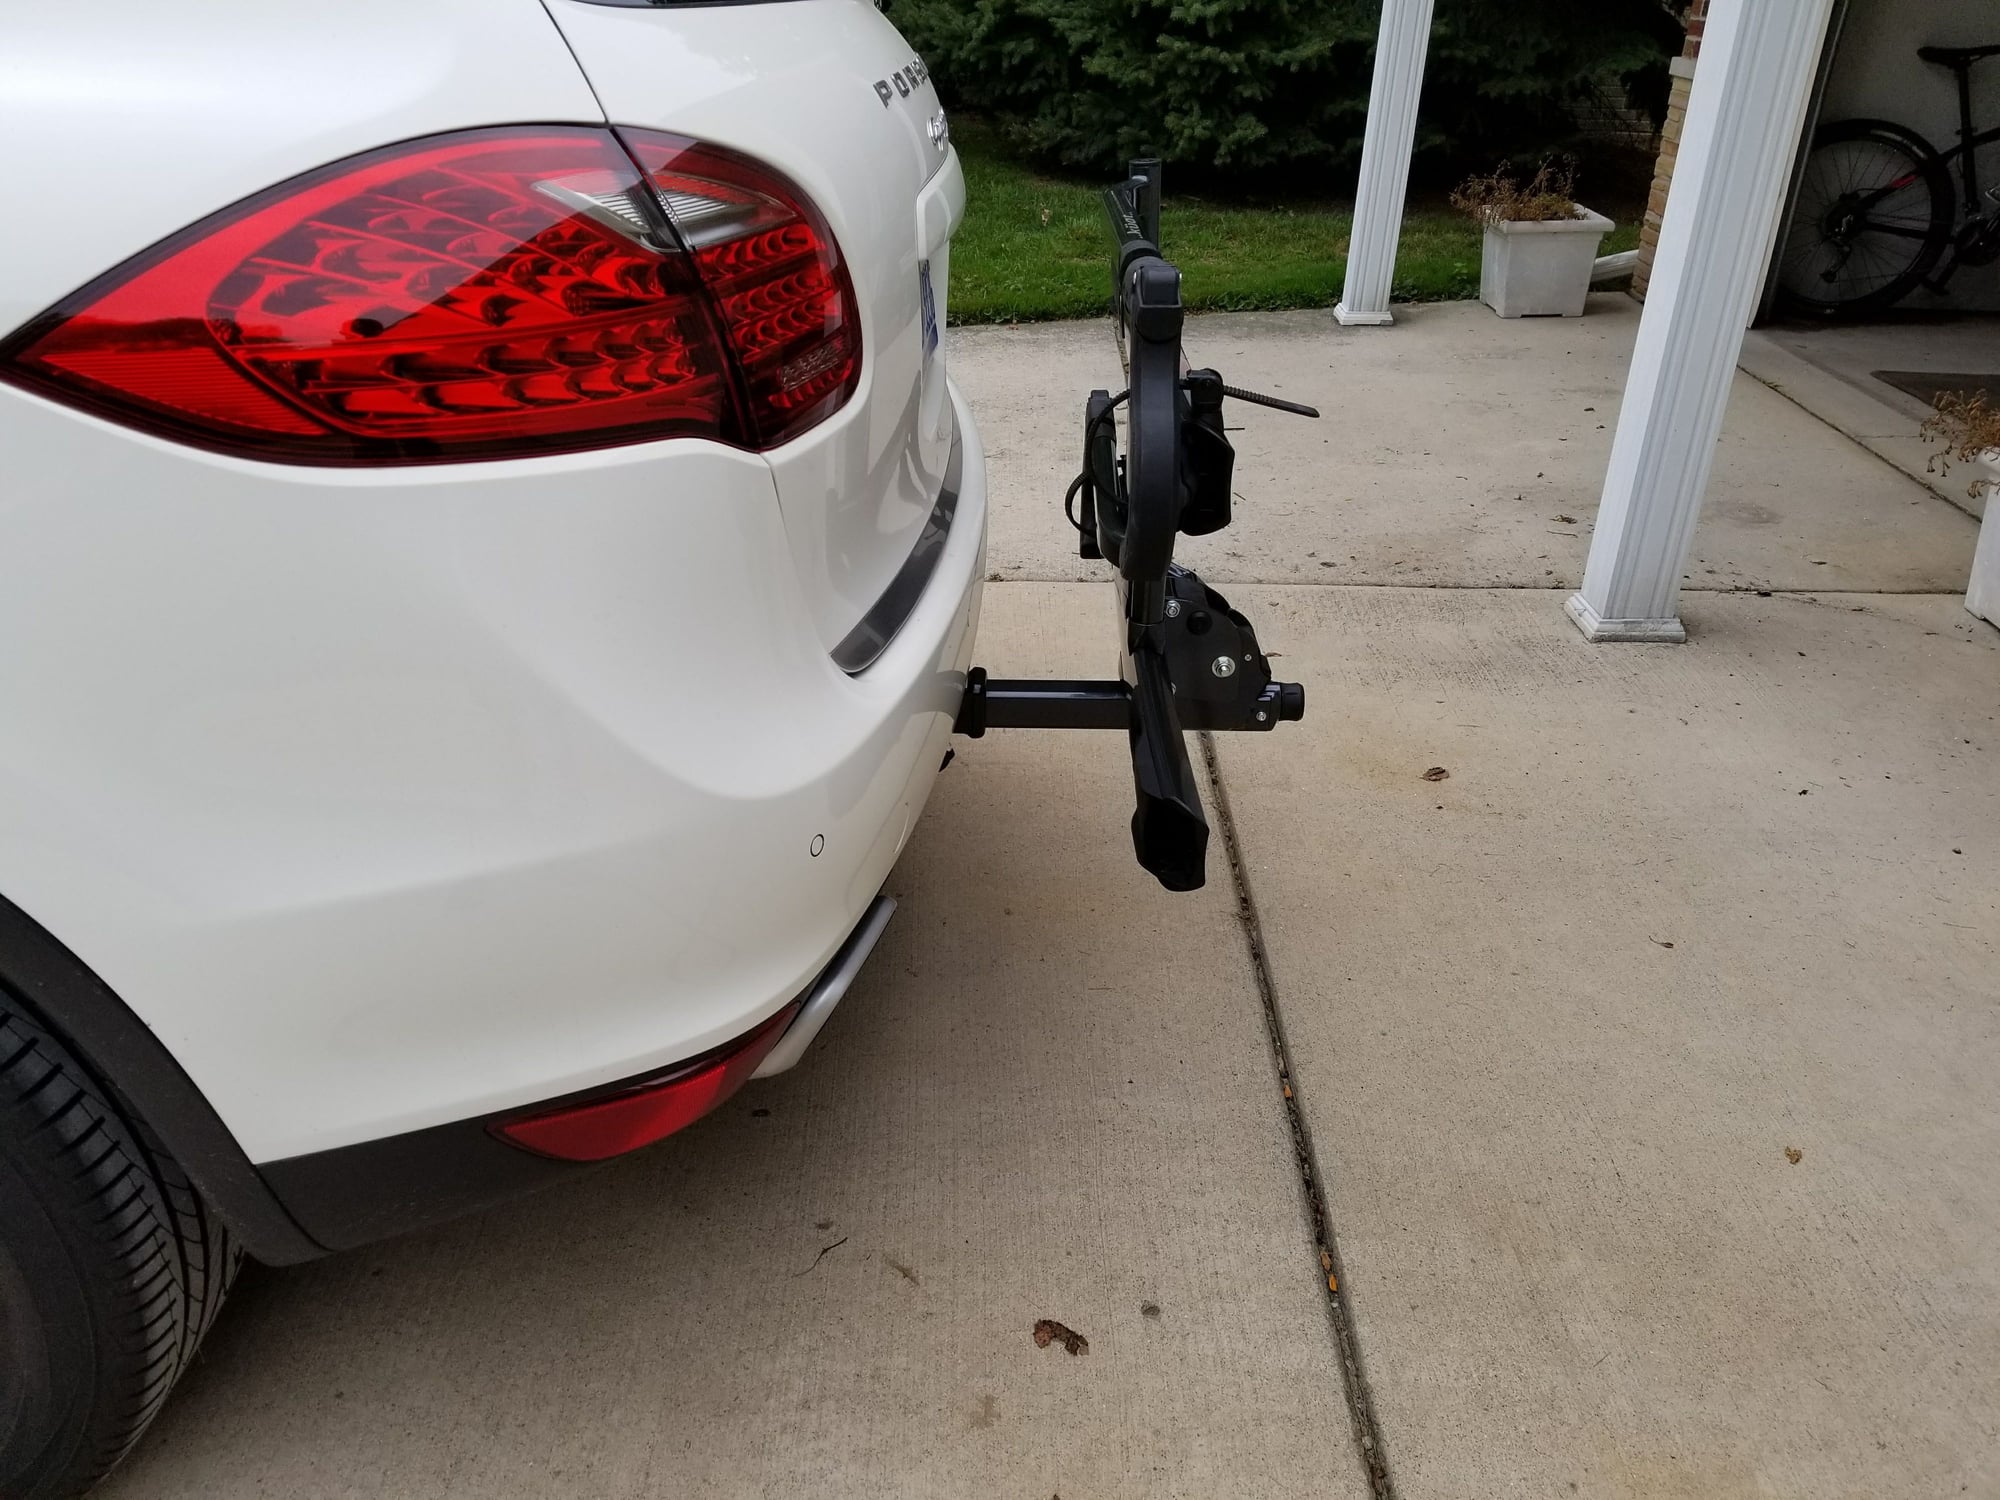
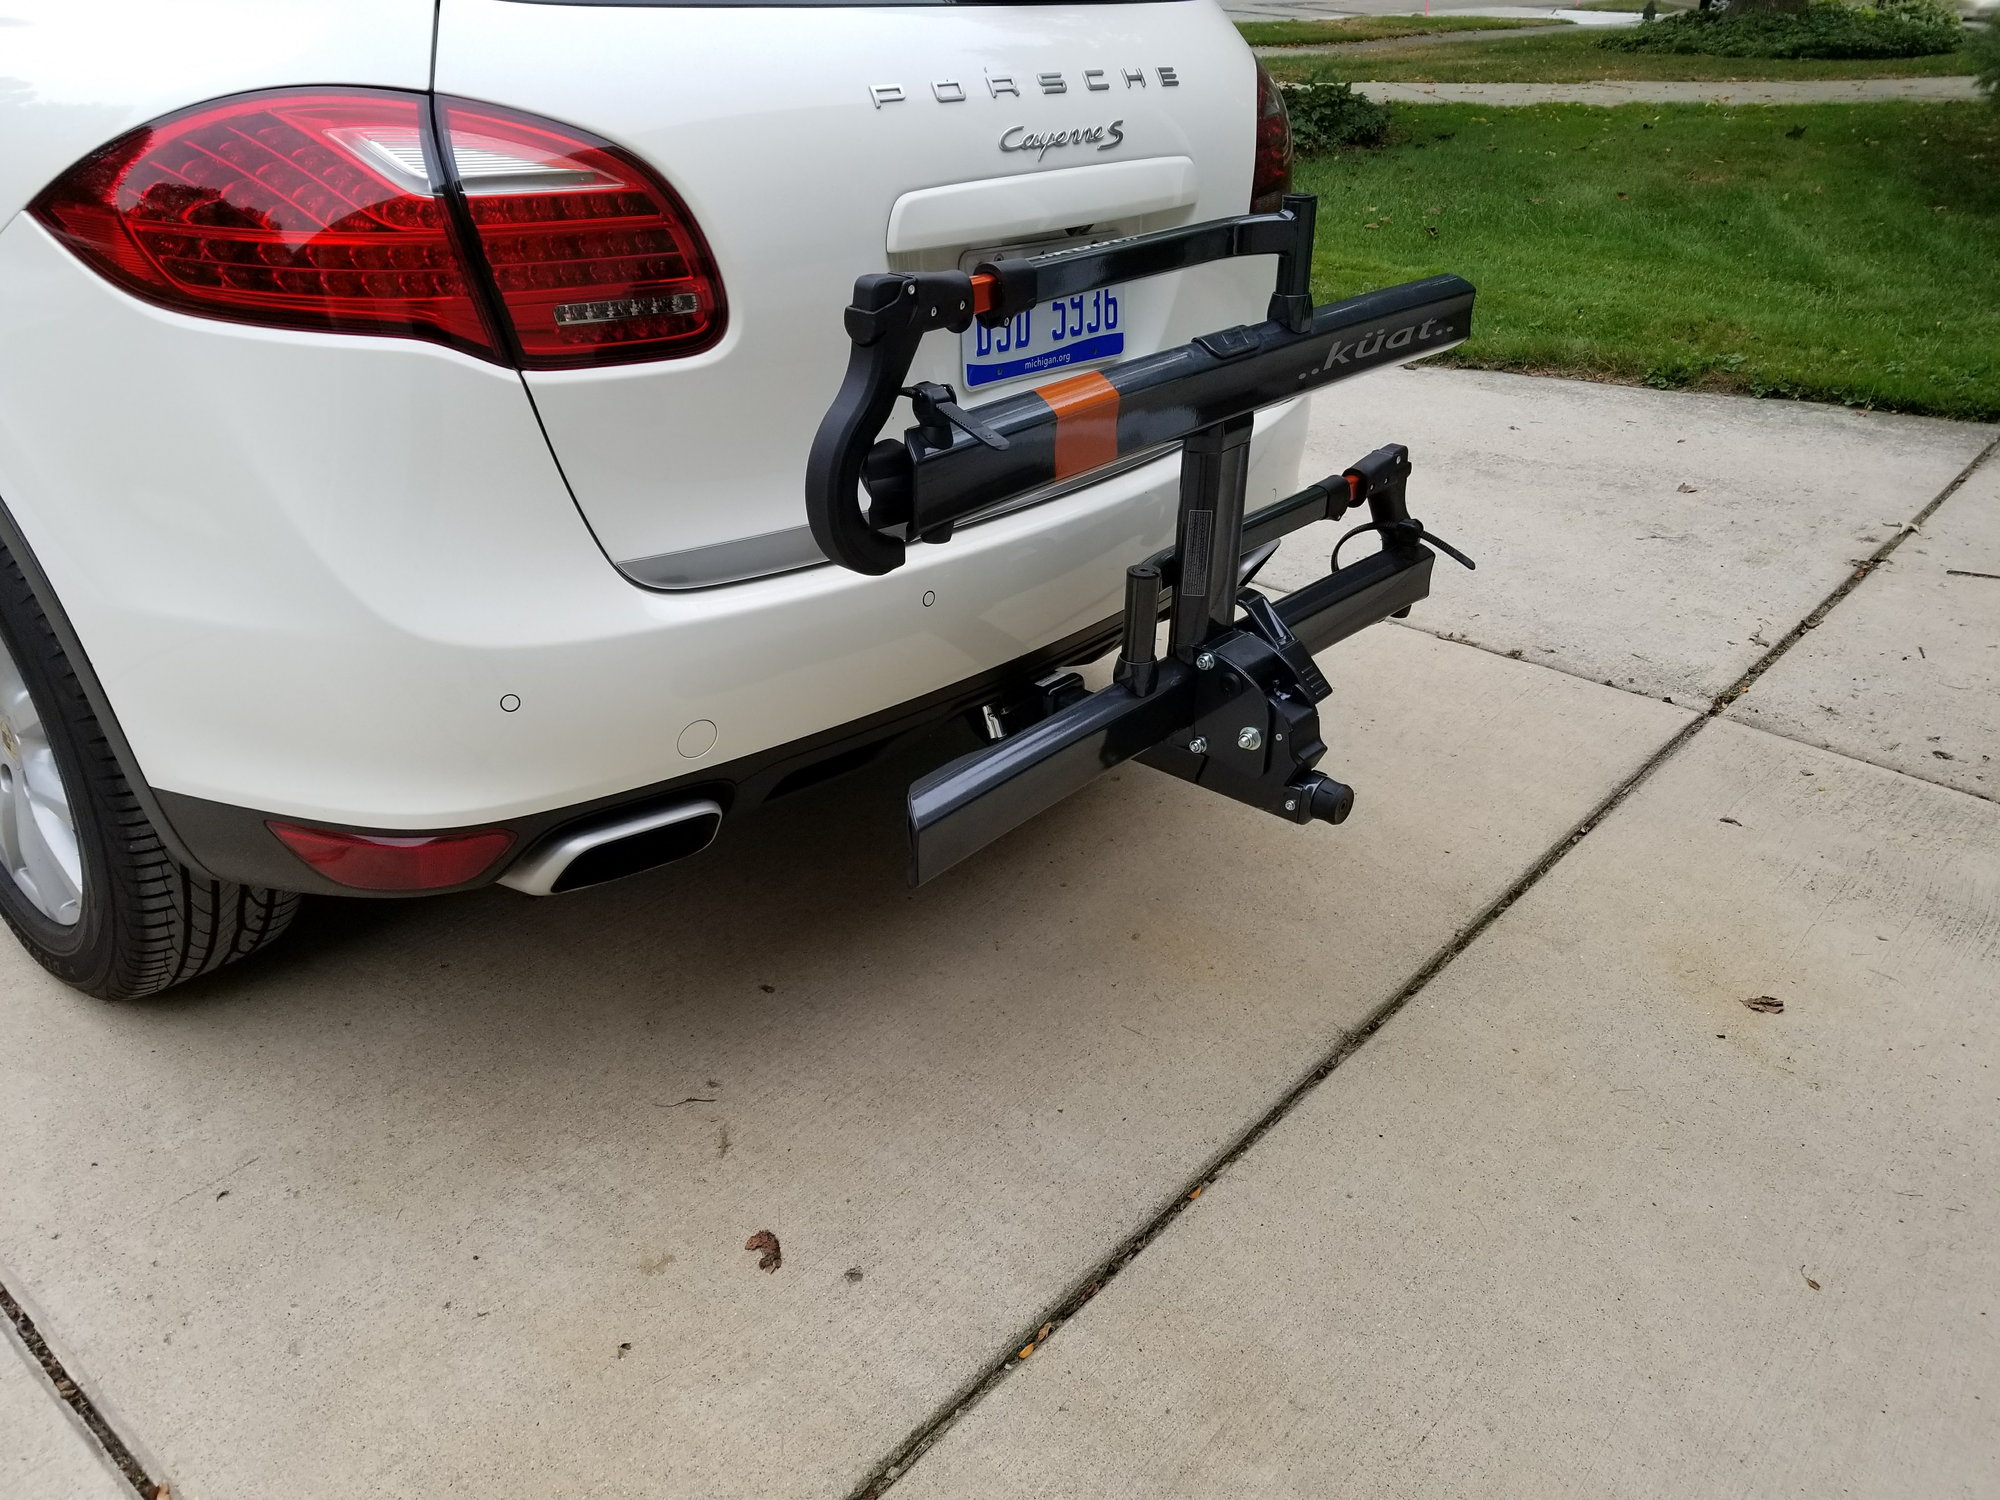
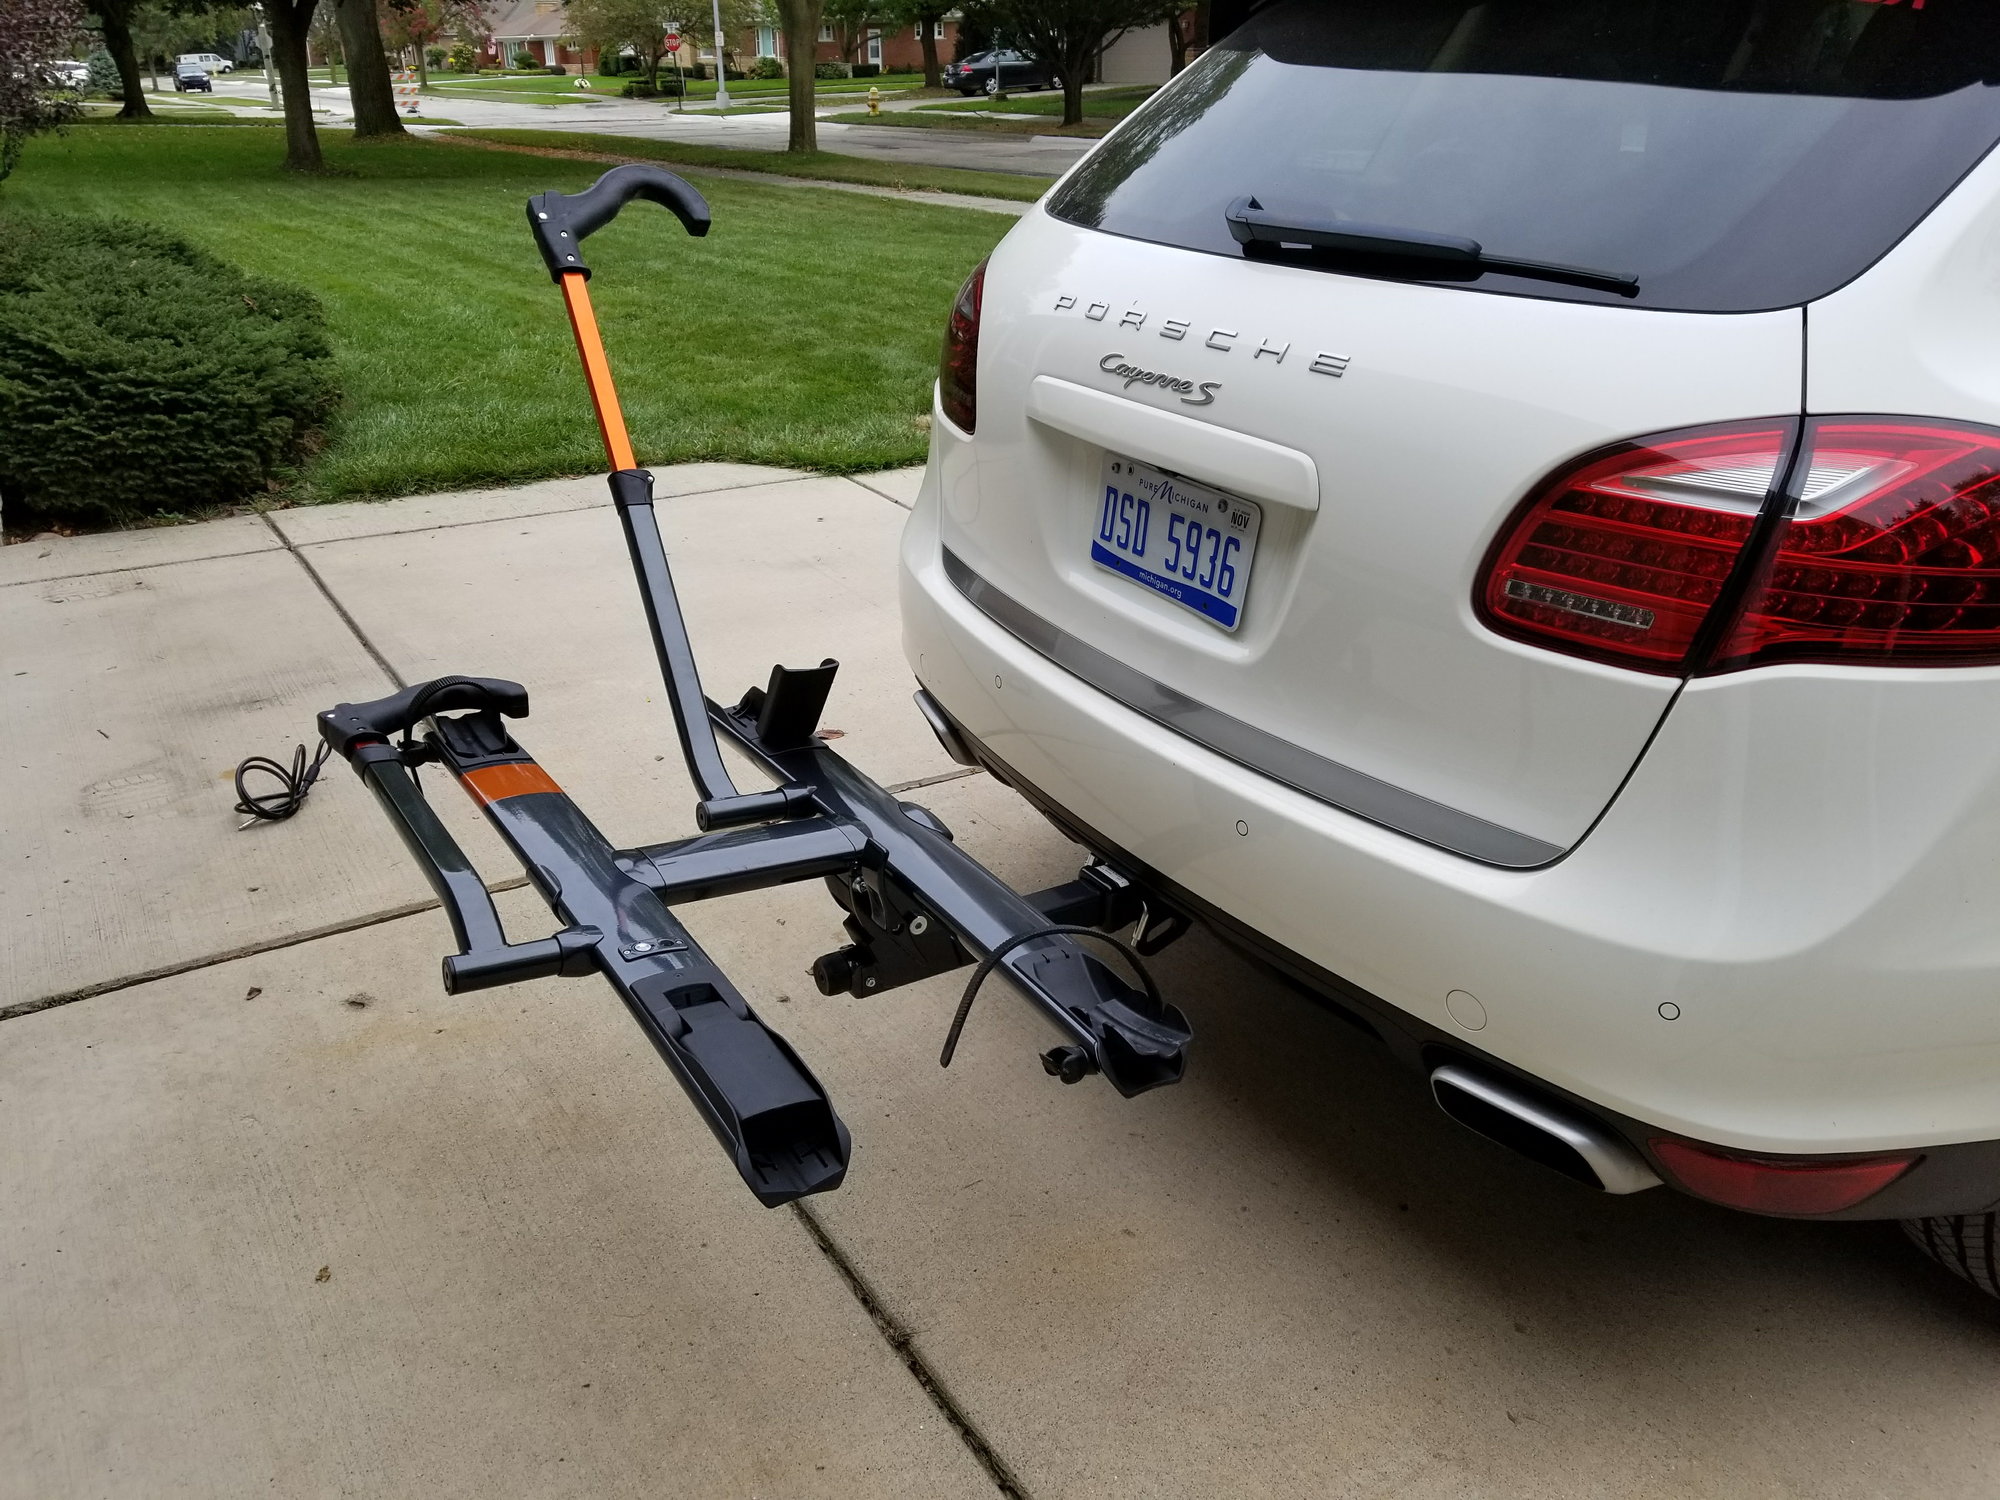
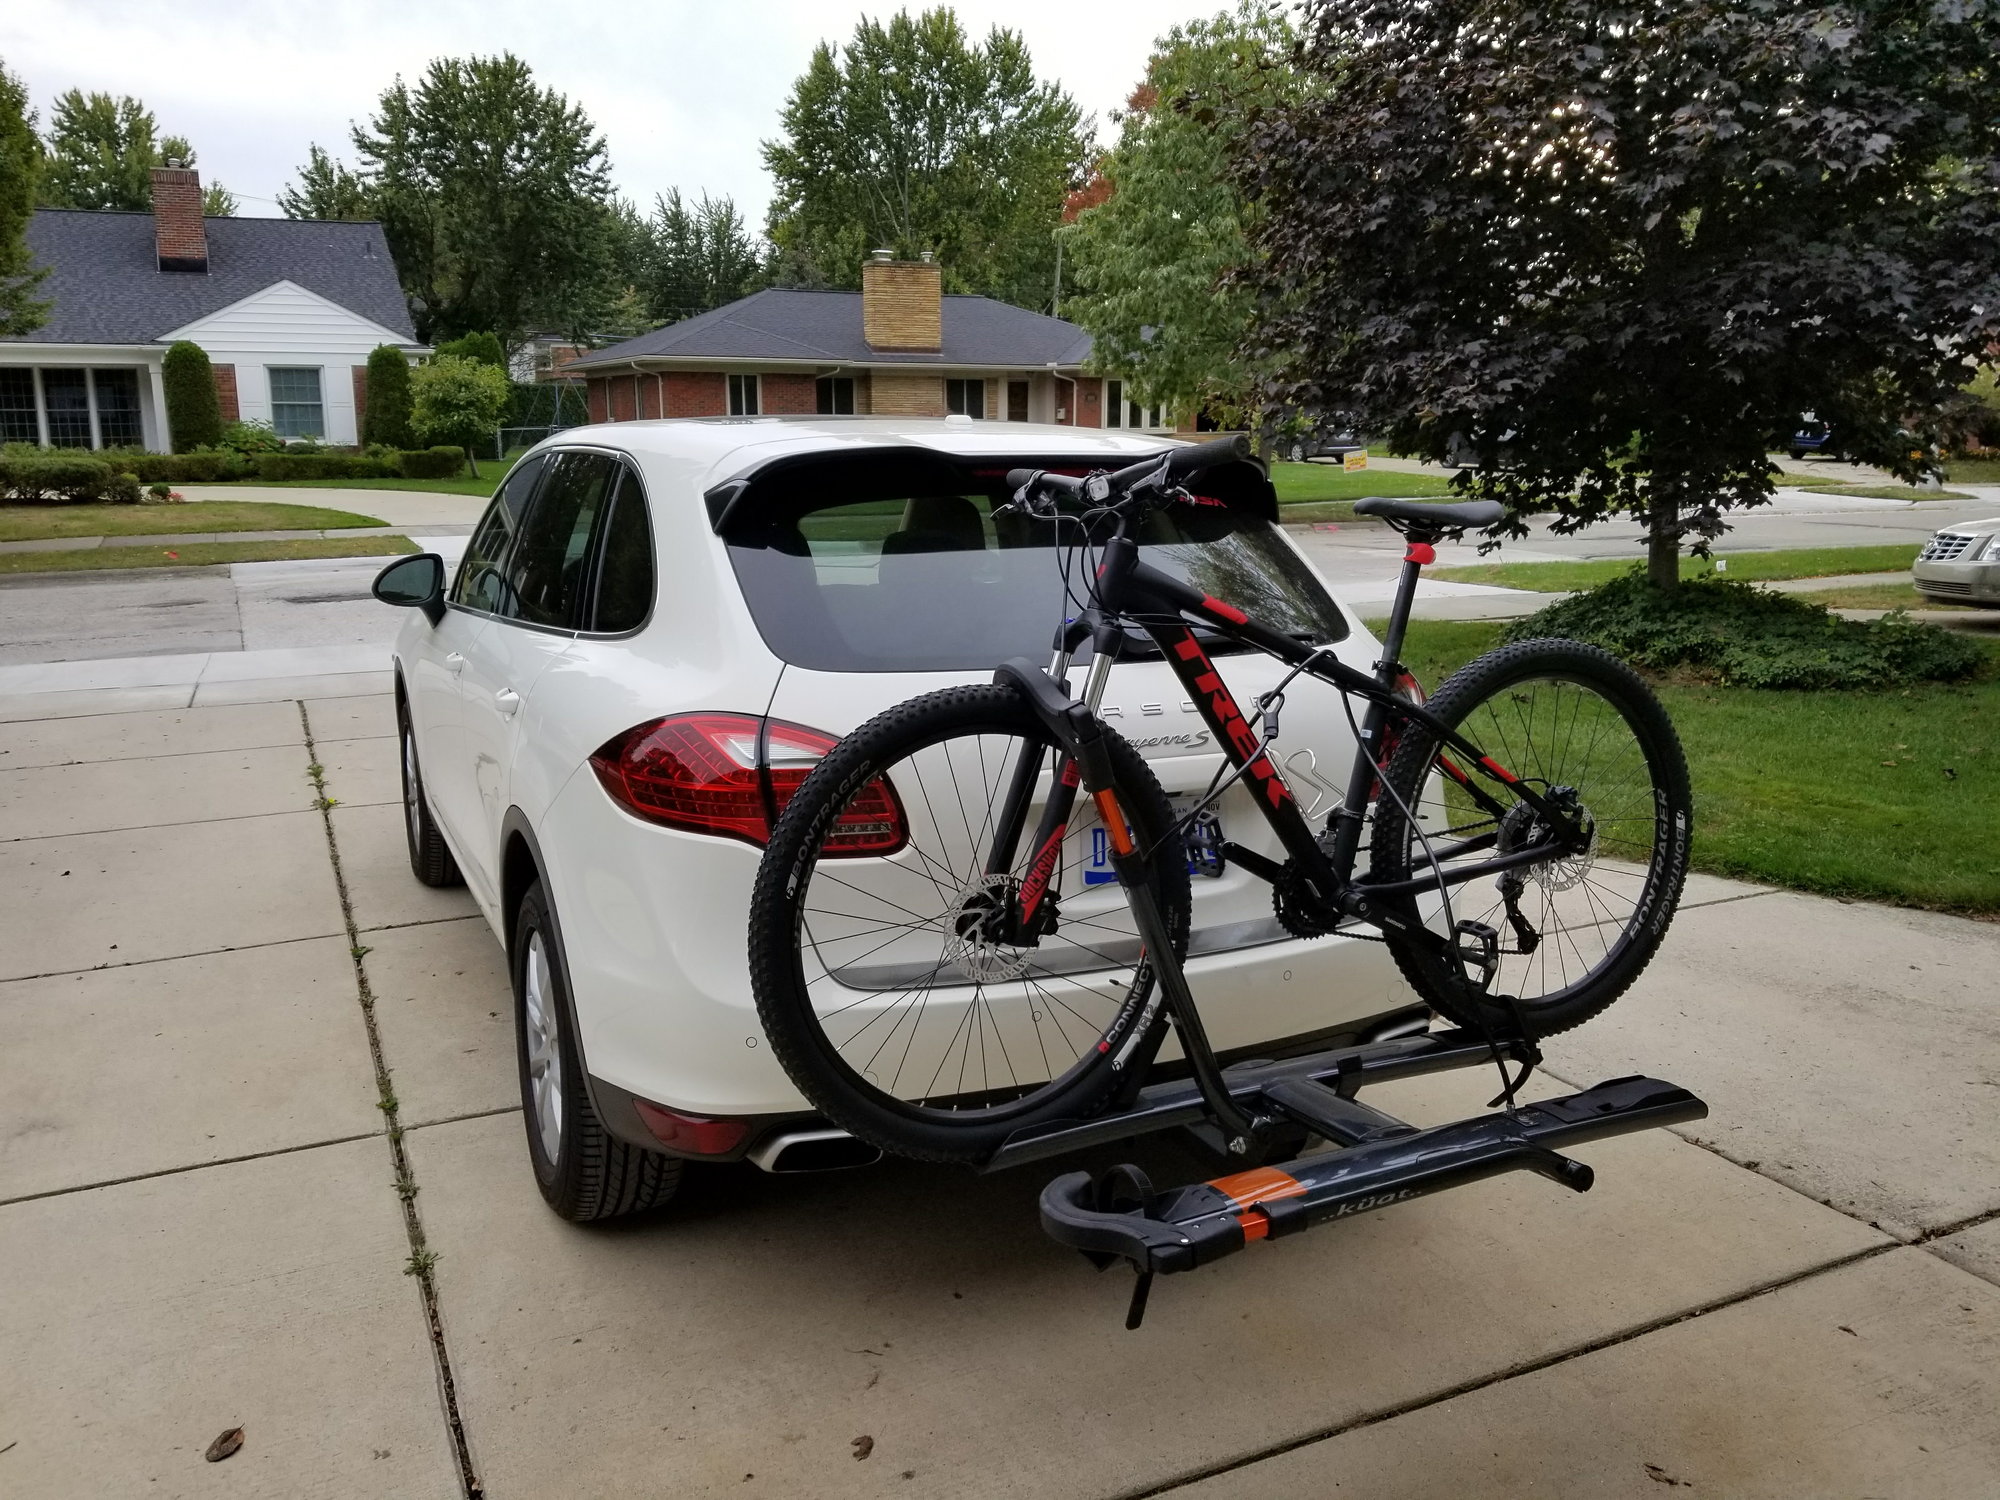
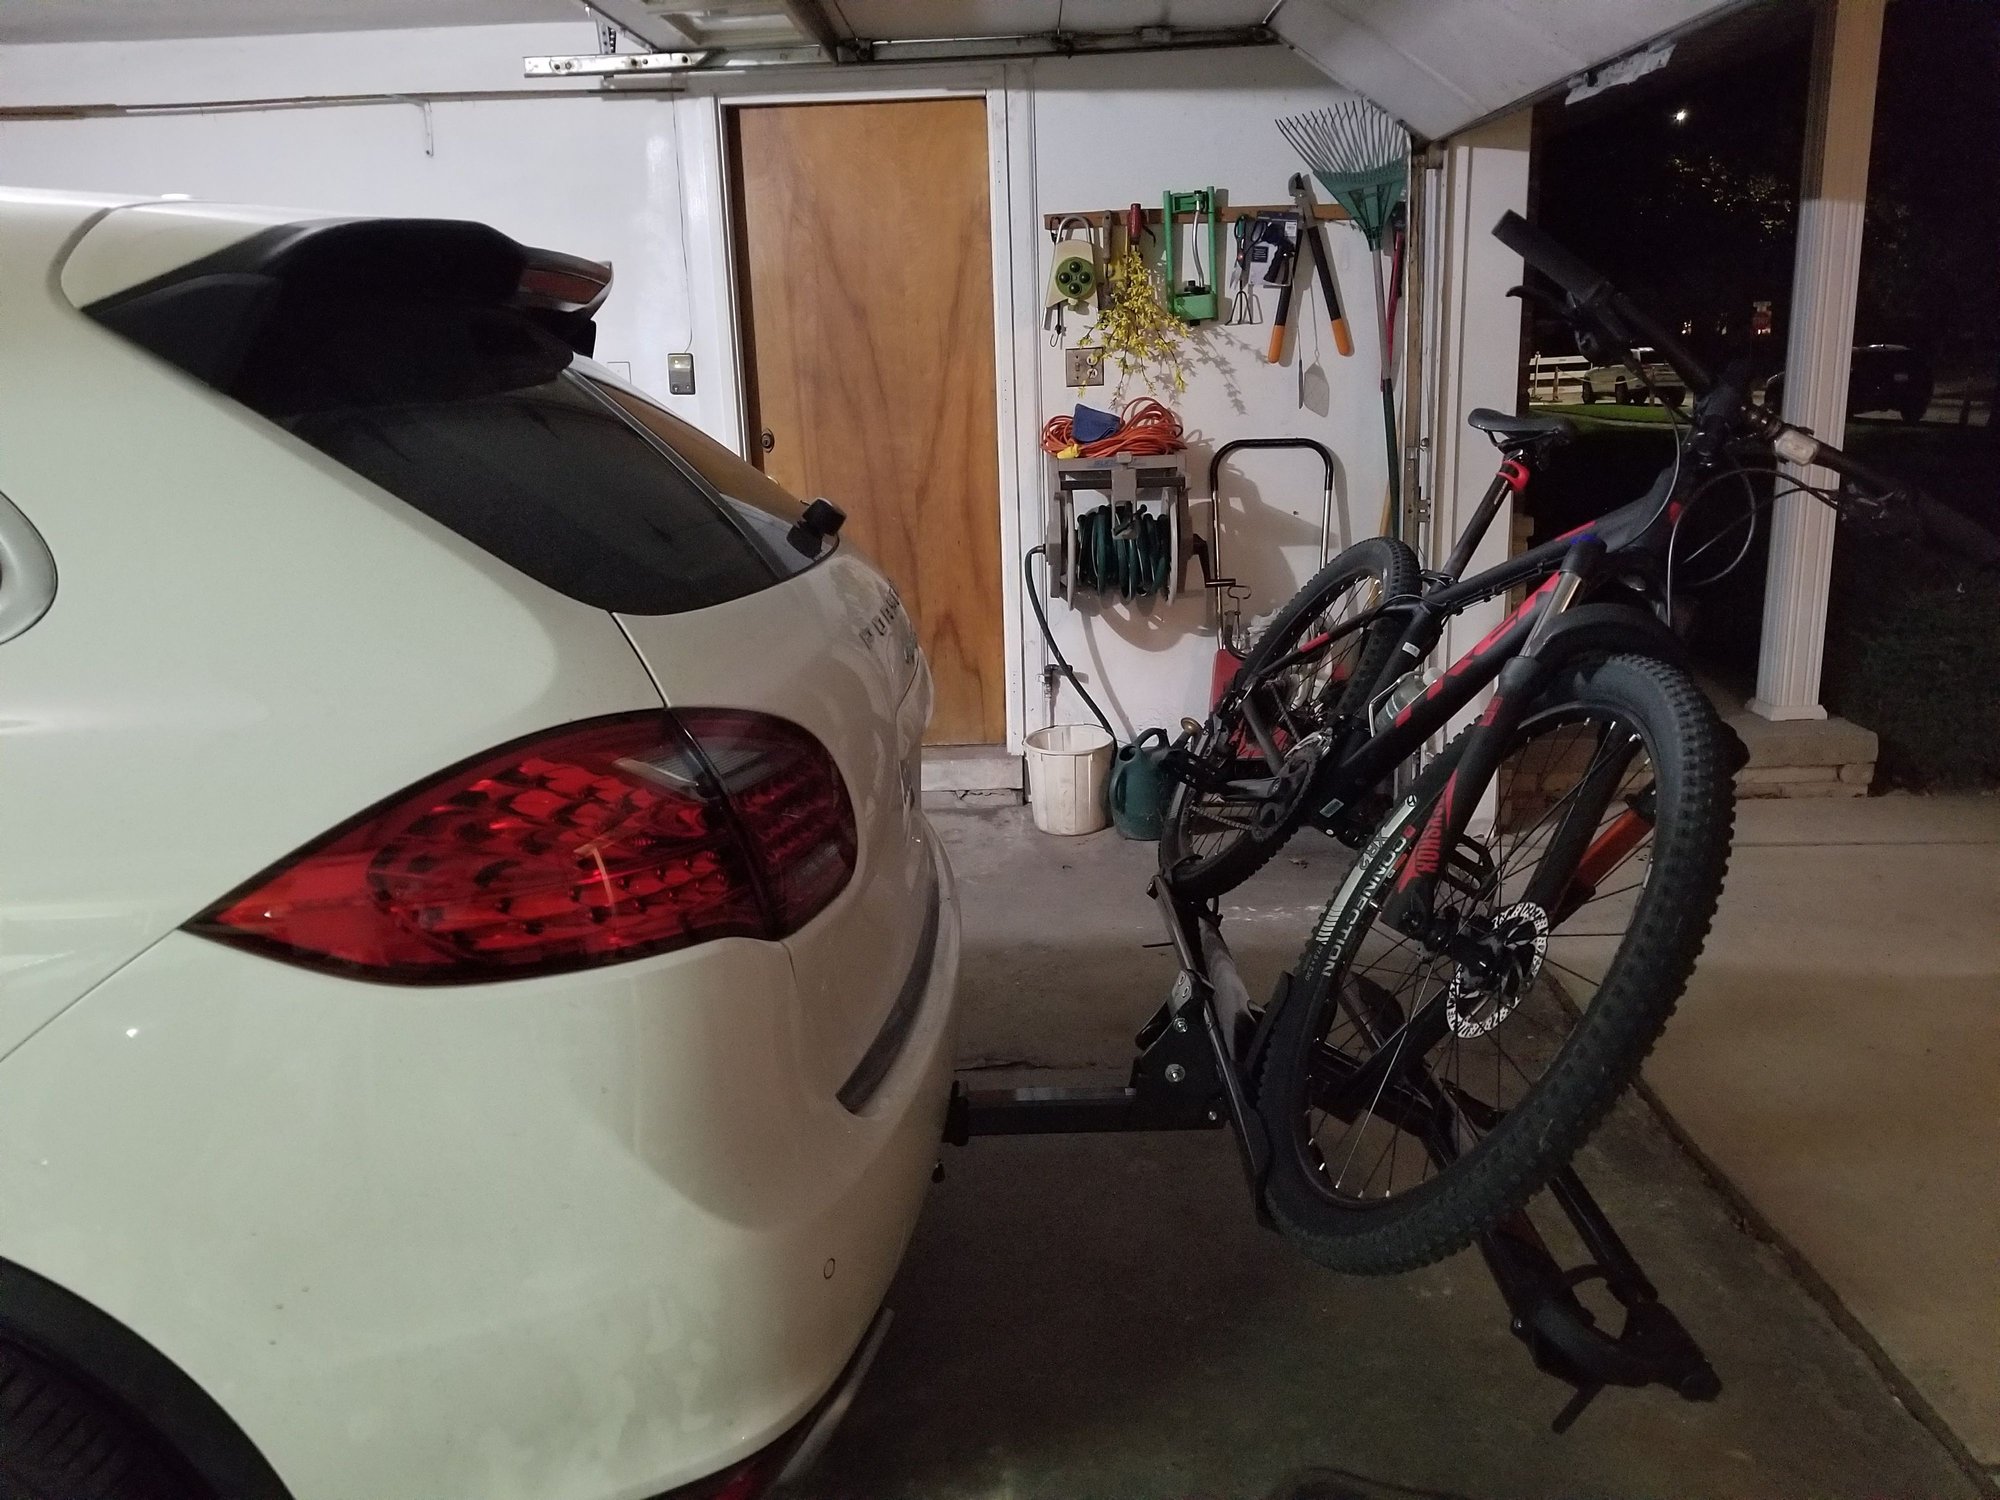
For those who may be interested, I picked up a Kuat Sherpa 2.0 rack to carry my bike. This was the main reason for the hitch install. I went with this because I decided I wanted a platform-type carrier, rather than a hanging type. The Sherpa is one of the lighter ones of it's type out there, at only 31lbs, making it VERY easy to remove and install. It's also small enough when folded up to fit in the trunk, should you ever want to for whatever reason. The easy of use, and the fact that I can tilt it backwards to be able to access my trunk with the bike on were pretty big factors in my choice. I also think it's one of the most aesthetically pleasing bike carriers on the market.
NOTE: Small photos showing a black vehicle are captures from the Curt installation video that's included in the thread.
It's a pretty inexpensive ($170 for the receiver shipped if I recall) and easy (2 hours taking my time) addition that definitely adds an element of practicality.
I'll likely be picking up a hitch basket for camping trips this spring, and eventually adding the trailer wiring.
Does anyone have recommendations and a similar installation thread for the trailer wiring harness? I want to do the hitch and trailer wiring at one time (note: I am not looking to integrate with the brakes, I will pull a trailer without brakes, or with the hydraulic set-up). Thanks in advance!
Does anyone have recommendations and a similar installation thread for the trailer wiring harness? I want to do the hitch and trailer wiring at one time (note: I am not looking to integrate with the brakes, I will pull a trailer without brakes, or with the hydraulic set-up). Thanks in advance!
I just installed the Draw-tite hitch onto my dads 2016 Cayenne Diesel, along with the Tekonsha ZCI 4 pin wiring harness. The install was easy, but the wiring and disassembling the interior was just tedious. In total I think we spent about 4 hours messing with it. I installed the wiring module on the right side where that little cover, but in order to hide wiring I did have to remove the 2 rear side panels, the hold downs on the floor, and the rear chrome trim below the tailgate. The wiring is super easy, and I was able to figure out which wire did what with a simple test light and somebody in the car hitting the brakes/blinkers. I ran the constant 12v source from the Bose amp that is on the driver side with a simple T-tap, I was going to use the cigarette lighter, but it is a switched source, the module power needs to be constant. Also great news is that there was no trimming necessary for the Draw-tite hitch!
If you have any questions just message me or comment on here. I have a Porsche tech friend that does some side work, and he quoted me $350 to install the hitch and wiring. After completing the work, I think that would have been fair. I've attached a couple of pics of in progress and completion.
I just did this over the weekend with a Curt hitch and wanted to add a couple of observations:
The Curt Hitch weighs 51# compared to about 15# for the OEM stamped metal piece. If there was a crane that had to pick up the Cayenne from a single point, the Curt hitch would be a good choice.
The install in this thread isn't too hard. Just take your time.
The wiring harness is also not too bad with one exception...
If your hitch doesn't have a mount for the 7 pin plug receptacle (the Curt doesn't) it will take a bunch of time to fabricate a mount.
I spent as much time fabricating the mount for the 7 pin as I did on the entire rest of the install combined. I got something I thought would work and then test fit the bumper... no. Make adjustment and test fit the bumper... no. Repeat three or four times... Finally got something that looks great (can't see it without crouching down) and should work great. I haven't actually hooked the trailer to it yet but I think we are in good shape.
Also for new people reading this on a search, the 'trailer module' talked about often in the forums is NOT the same as a brake controller. You still need a separate brake controller if you have a heavy trailer with brakes. That is an aftermarket piece (I'm not aware Porsche makes one) and plugs in under the dash. I'm going to finish that up this upcoming weekend.
Late model Q7 and Touareg hitches are identical to the Cayenne hitch. I bought a Q7 hitch off eBay for $350 shipped, and bought the 8 longer mounting bolts (required) from one of the online providers. The sheet metal mounting bolts will not be long enough.
If you've been renting UHauls, you've got a 2" hitch ball.
If you try to pull a travel trailer, you will probably find out (eventually) that the coupling requires a 2 5/16" ball.
If you don't know any better and drive gingerly, the 400# tongue weight will probably keep a 2" ball in a 2 5/16" coupling. Or it may not. I was very lucky. (Note...I would not have done this on purpose. I put 40 miles on the rig in hilly upstate NY and consider myself *very* lucky that nothing bad happened.)
 10-12-2017, 12:00 AM


