When you click on links to various merchants on this site and make a purchase, this can result in this site earning a commission. Affiliate programs and affiliations include, but are not limited to, the eBay Partner Network.
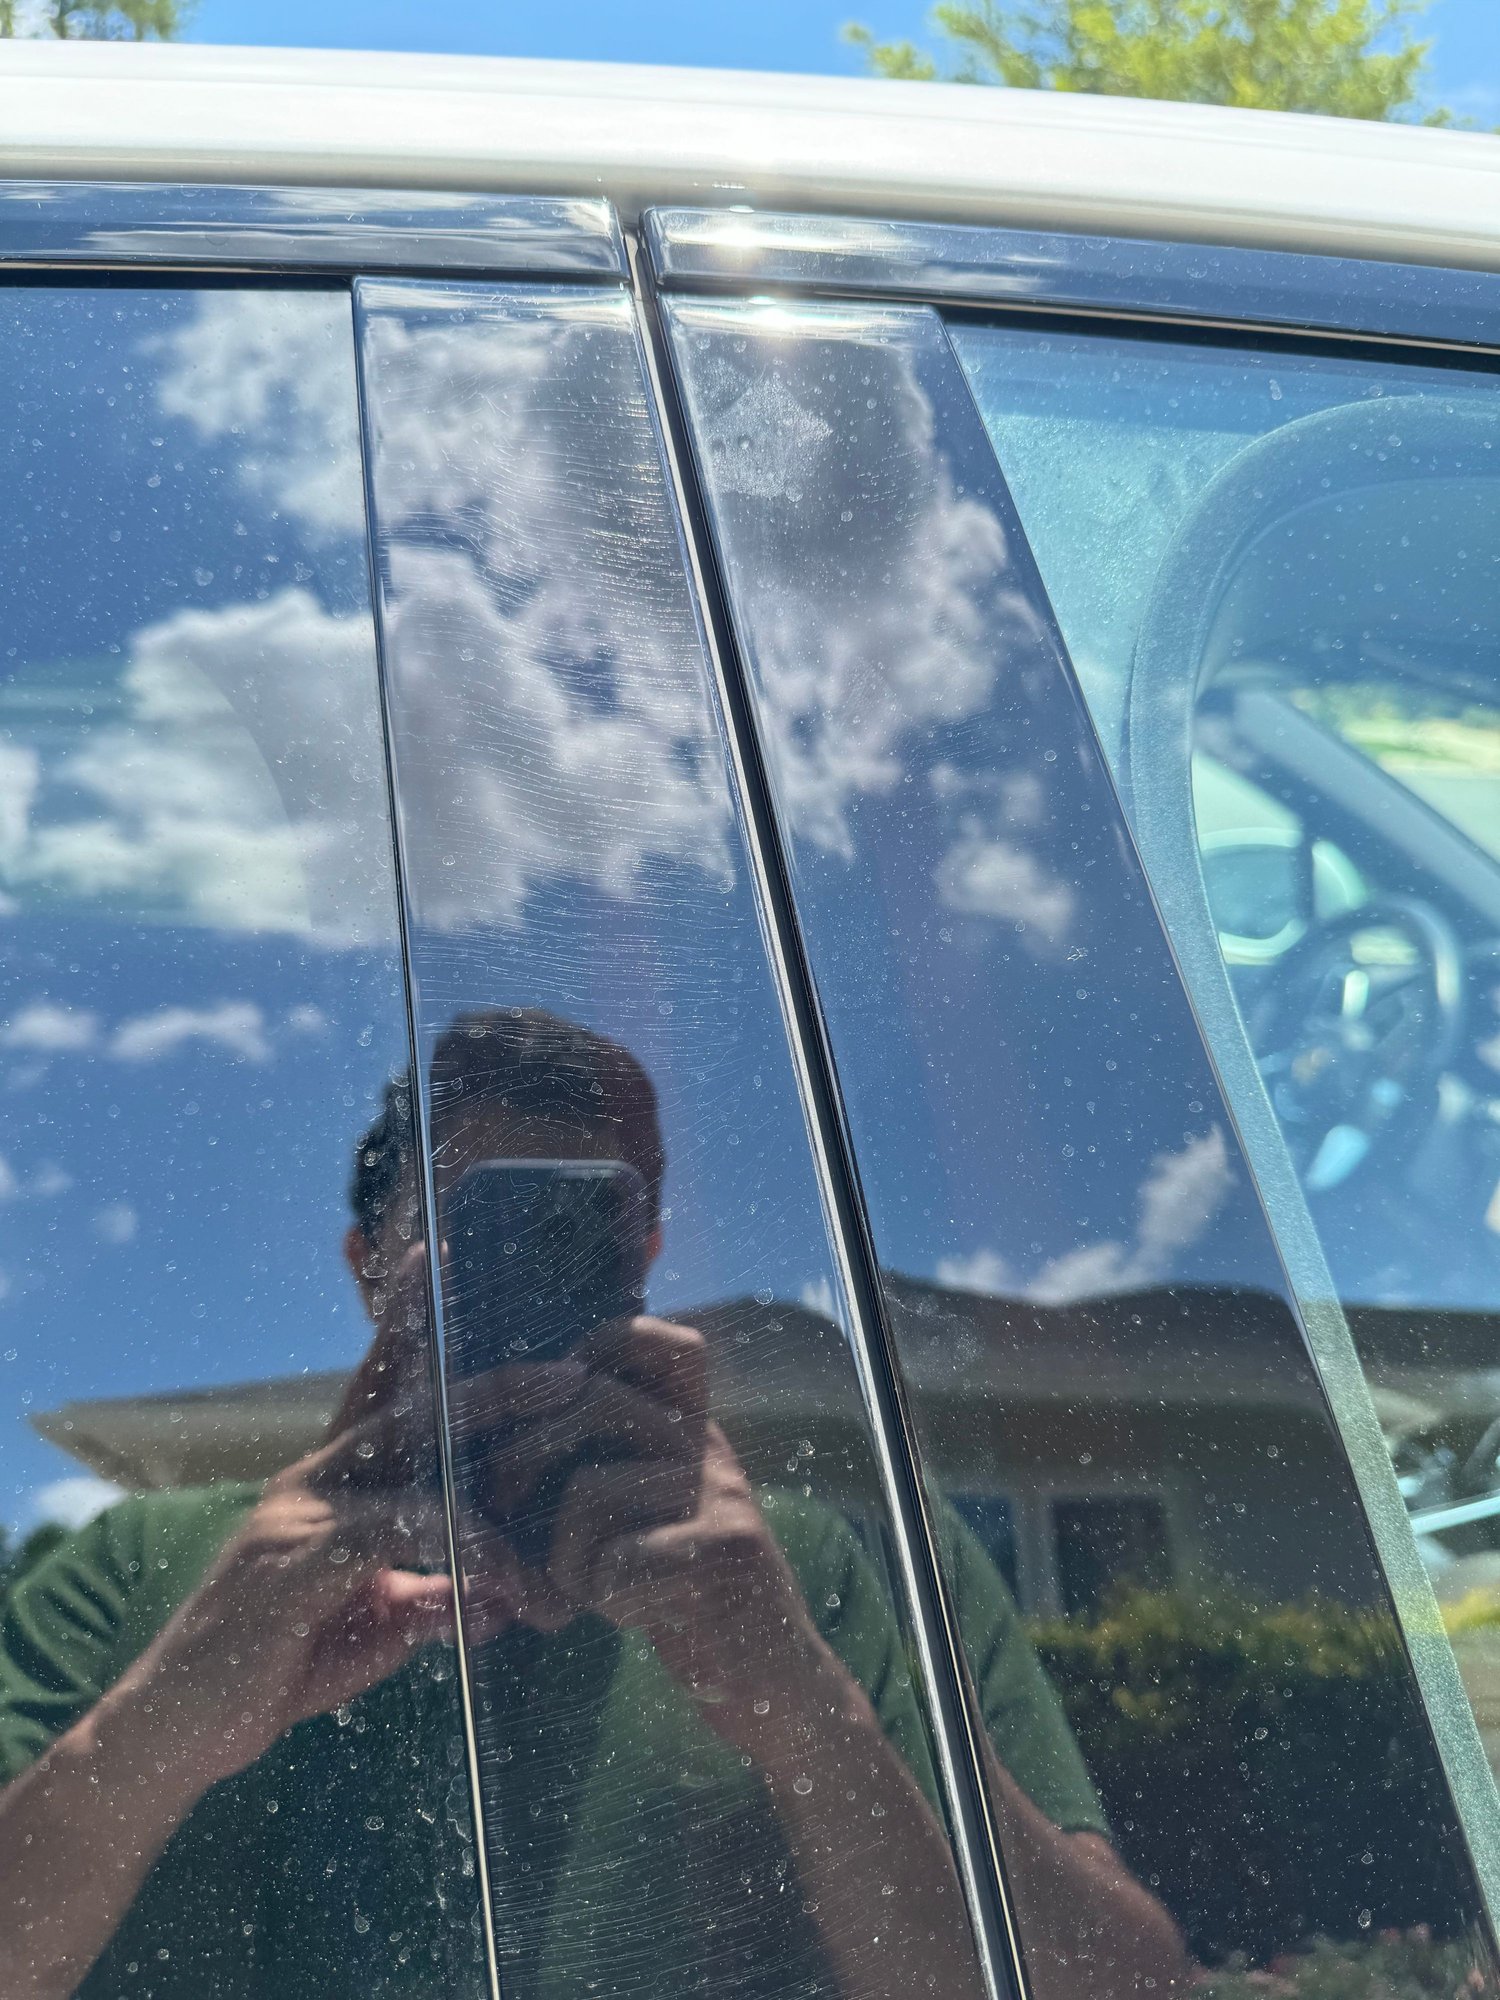
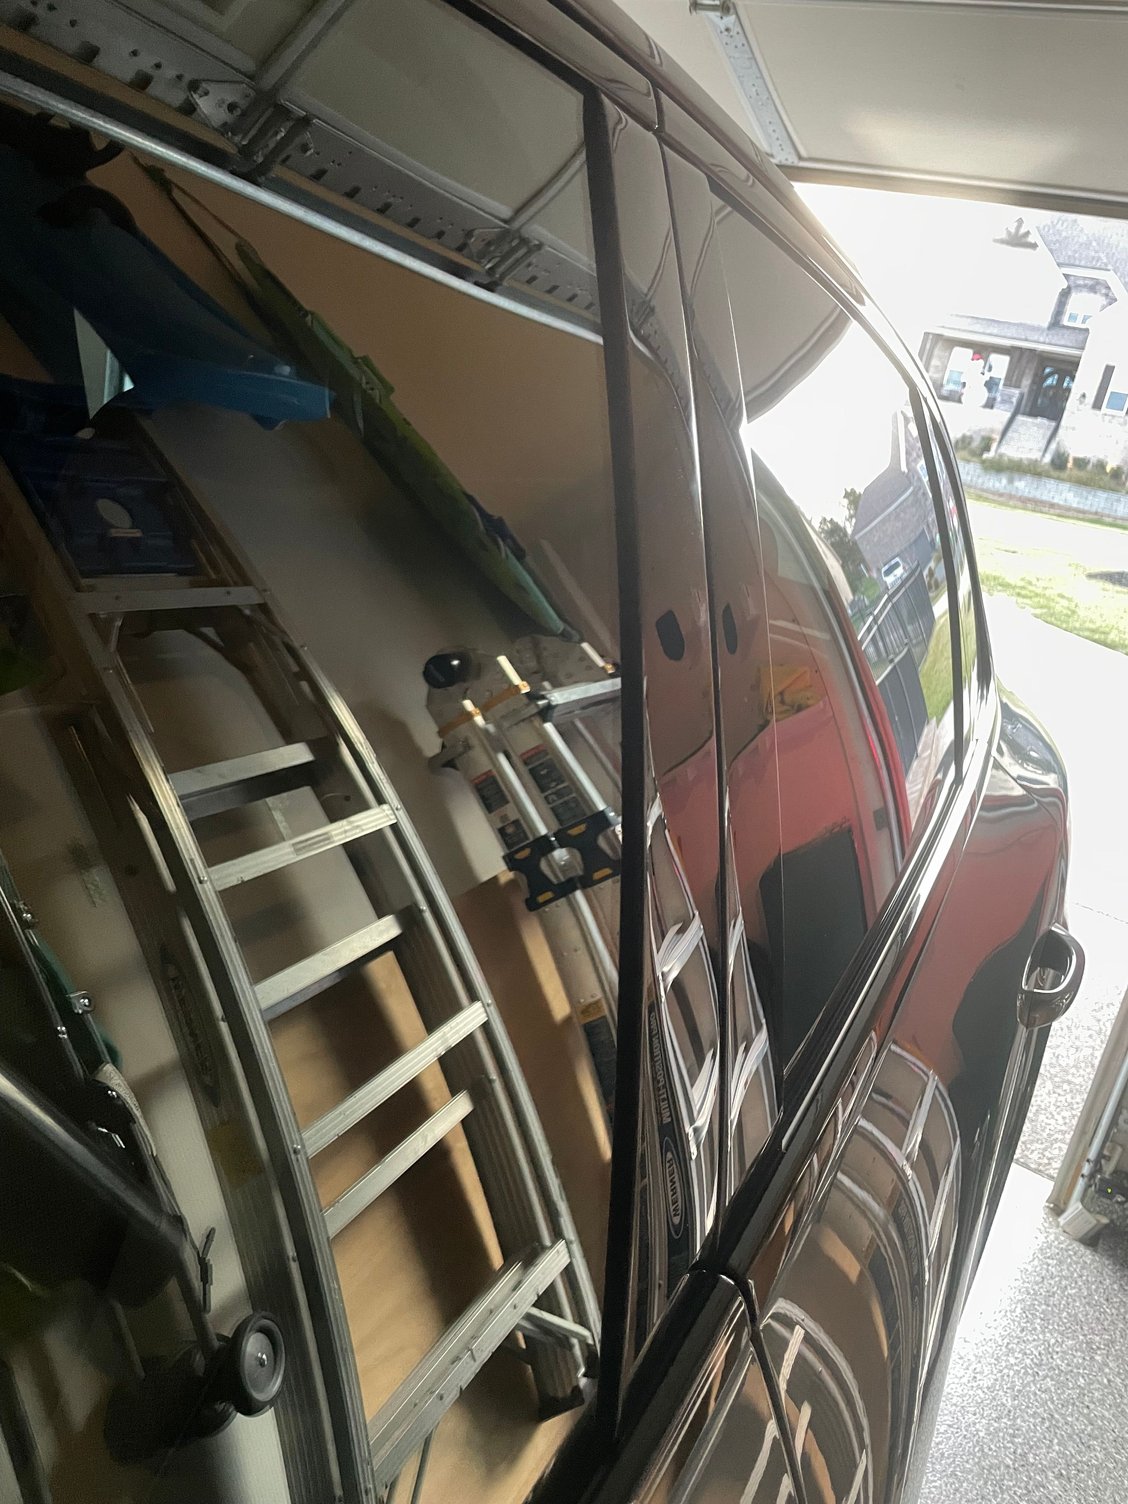
Hi guys here with some questions again, All is well with my 2019 base Cayenne but need to replace (cracked)
exterior piano black trim at B pillars, both sides front and back please see picture, any help removing them and reattaching will help a lot!!!!
Covered on this site. Early production had ill-fitting trim panels, prompting the desire of owners to remove existing panels. Removal appears to be pretty involved, might require interior door panel removal. Search feature should find it.
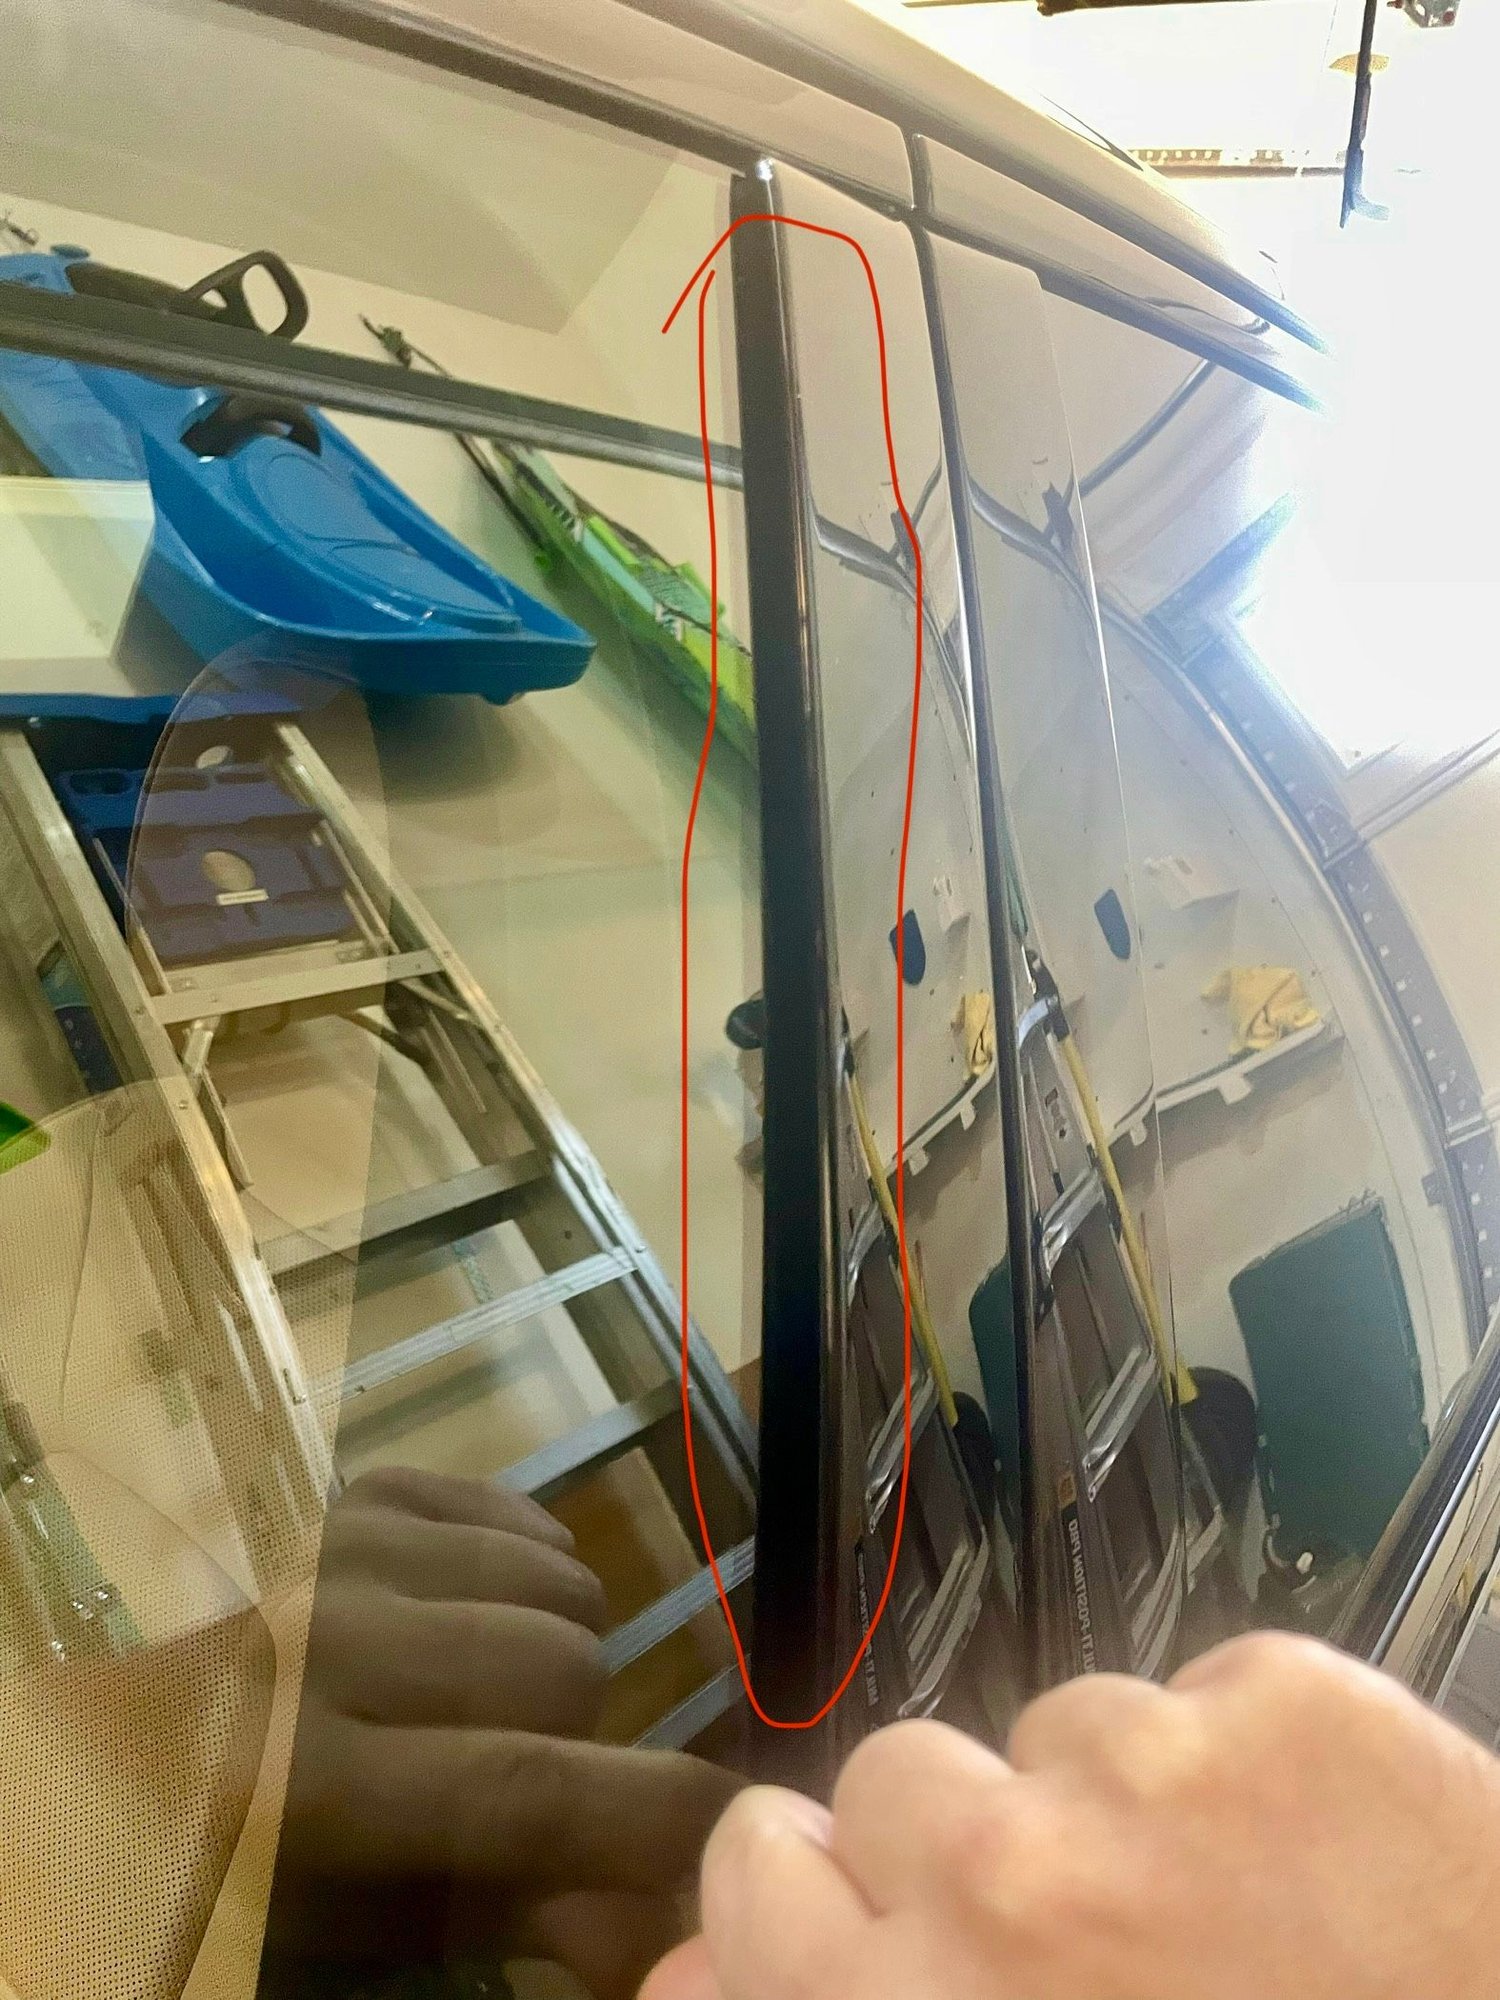
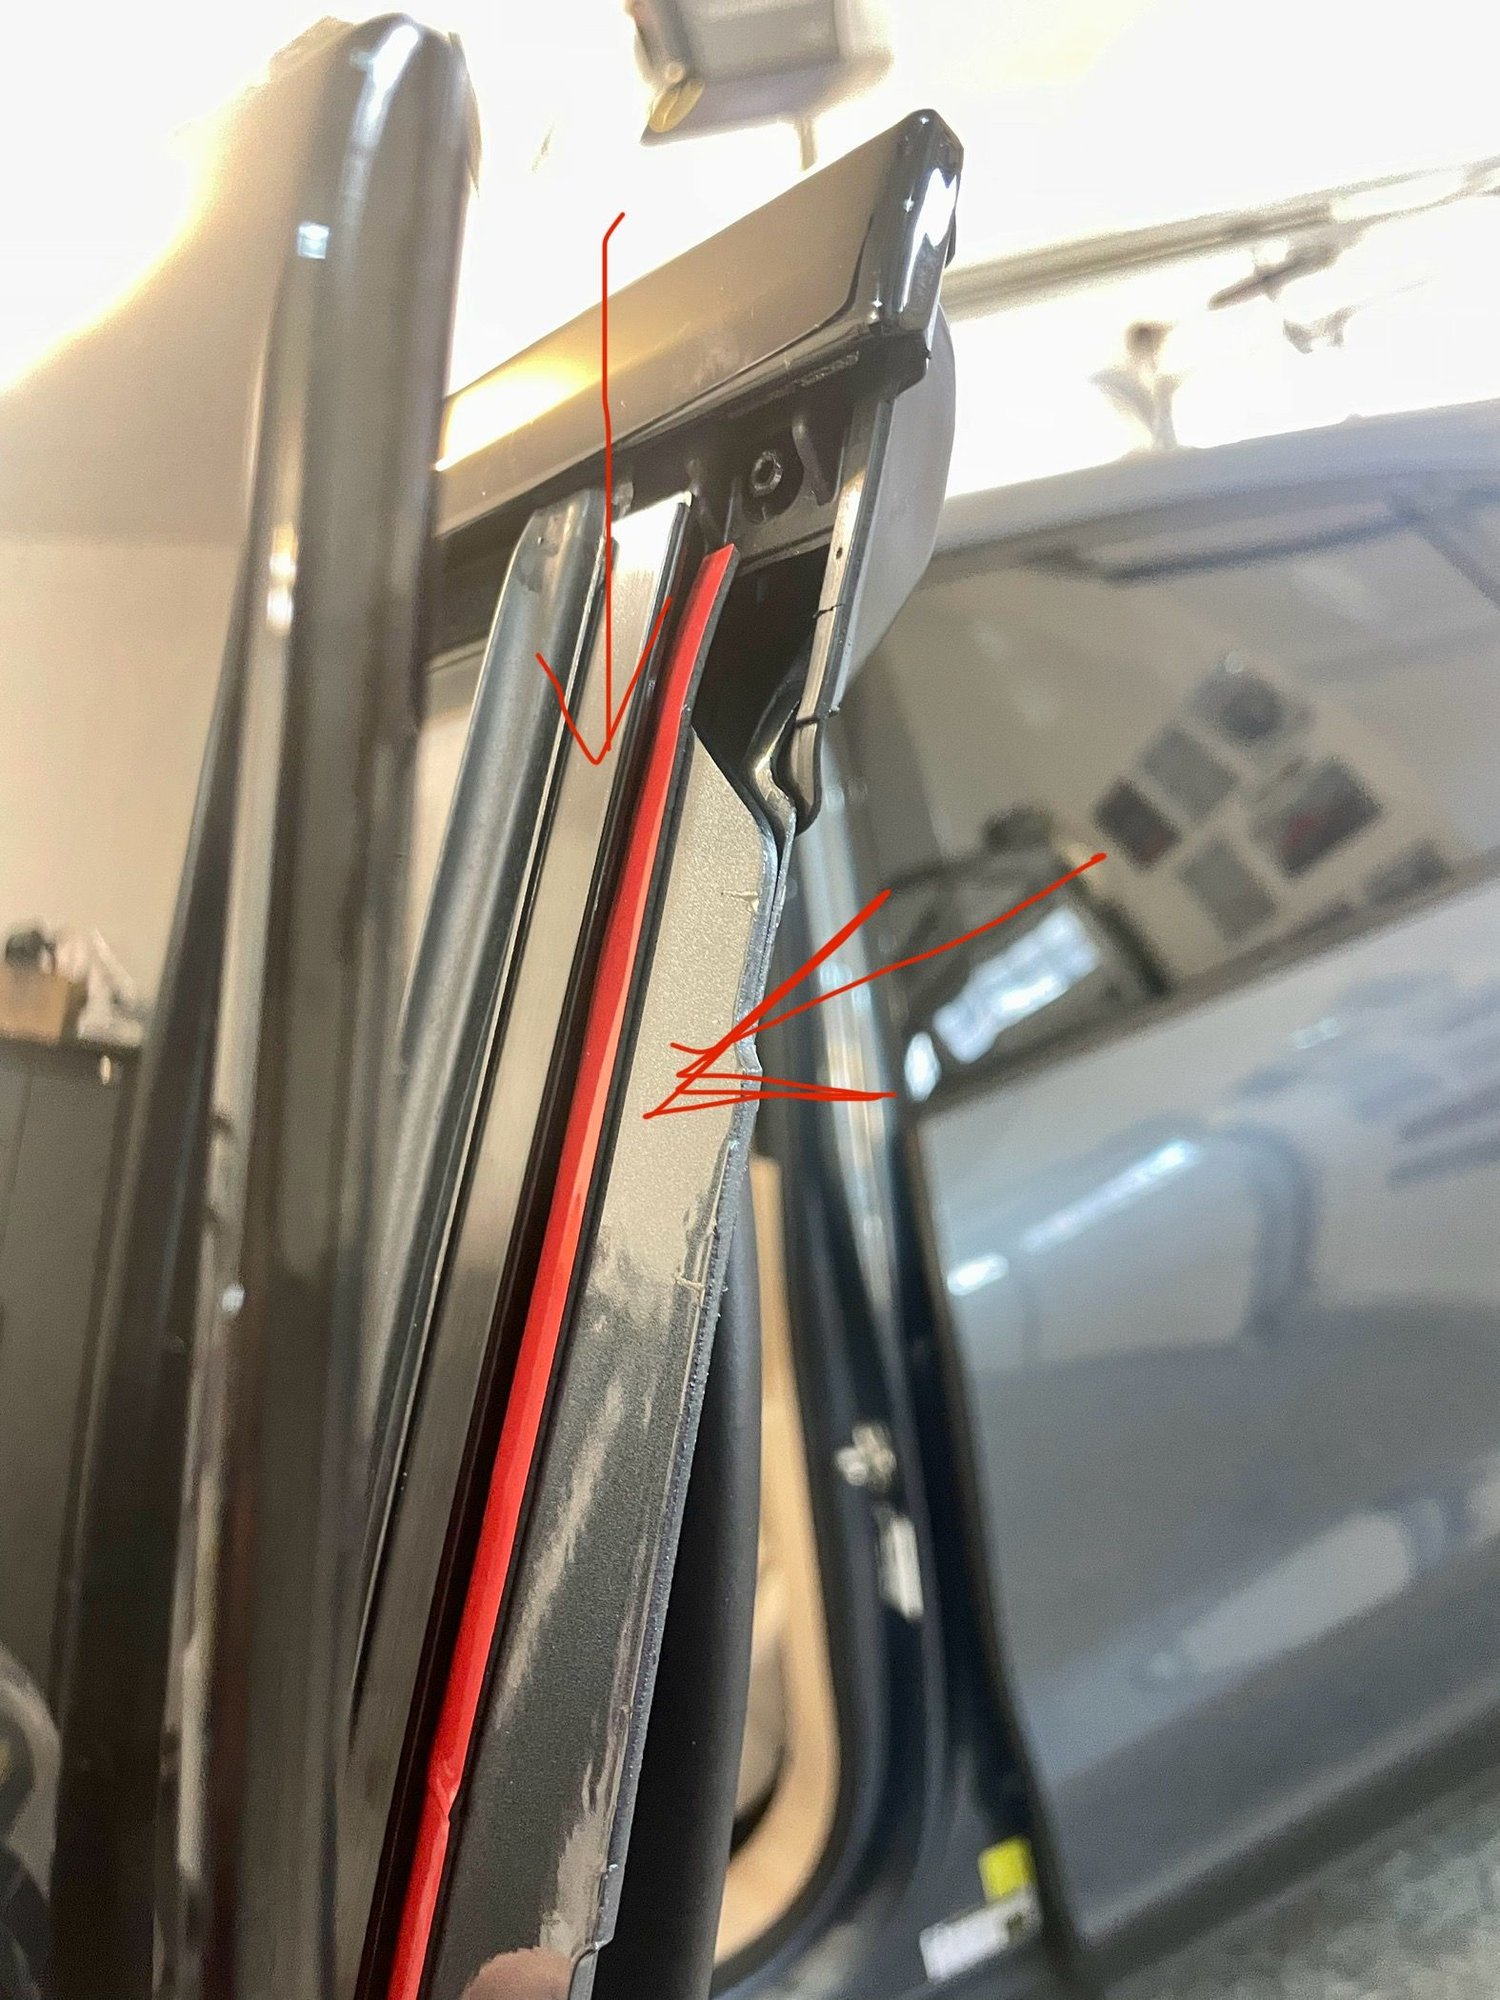
My trim (2019 Base) looked like this below and created intolerable wind noise at highway speed.
The middle of the piece had the biggest gap and the top was rotating outwards.
Quote from the dealer was 3.5 hours labour and ~$200 for the trim piece per door
Indy quoted $650 total per door.
With that knowledge, I decided to fix/break it on my own first
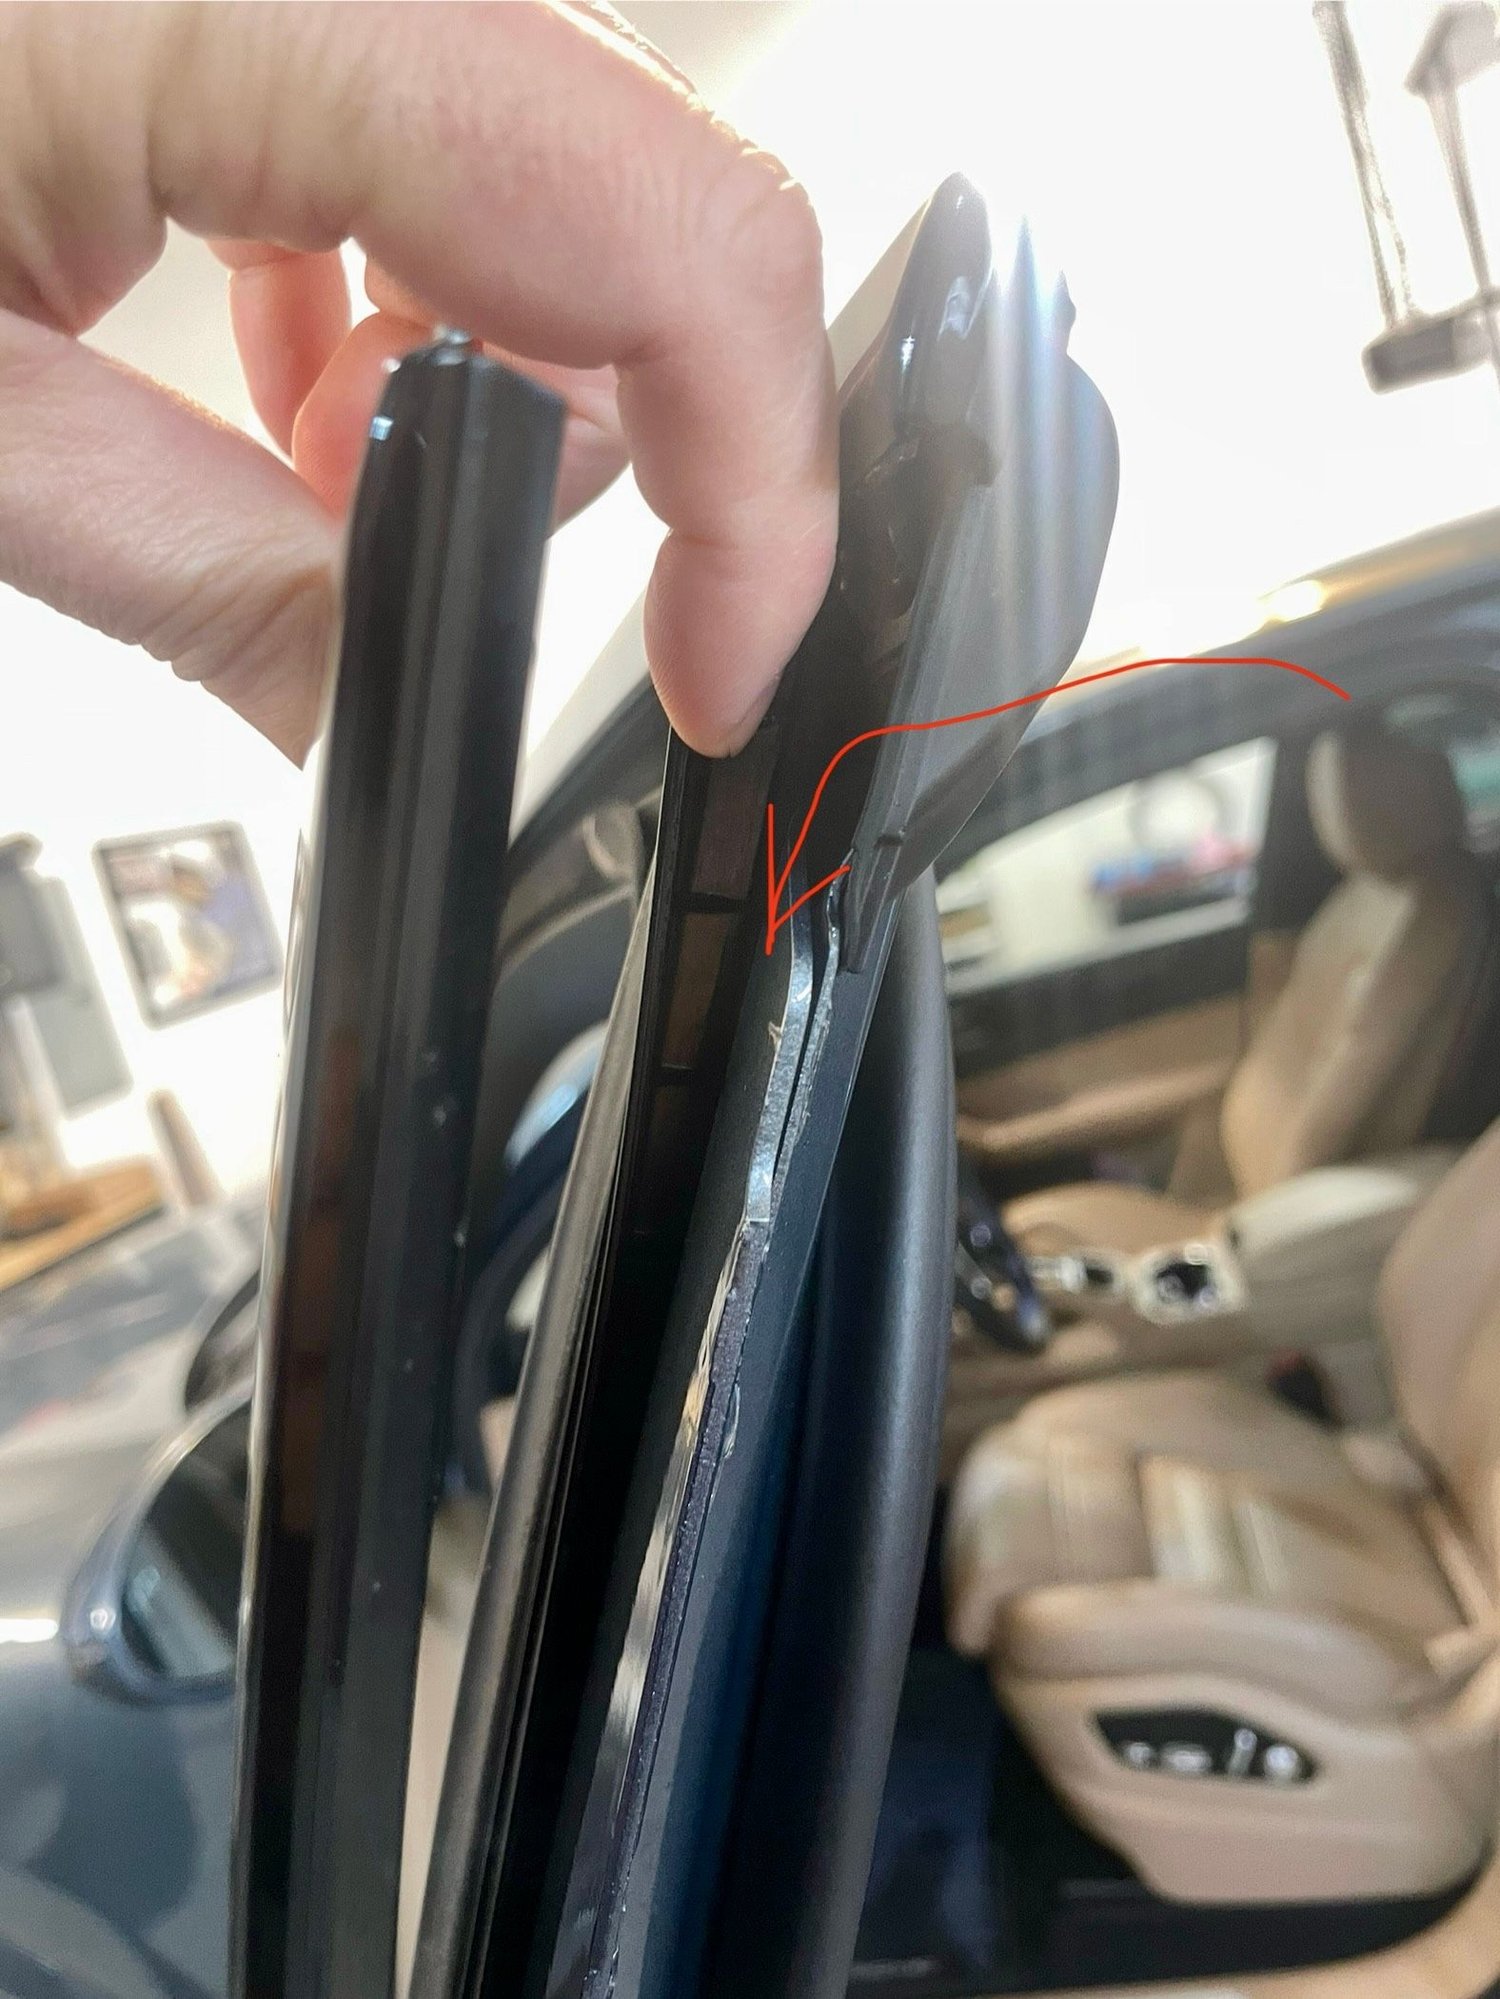
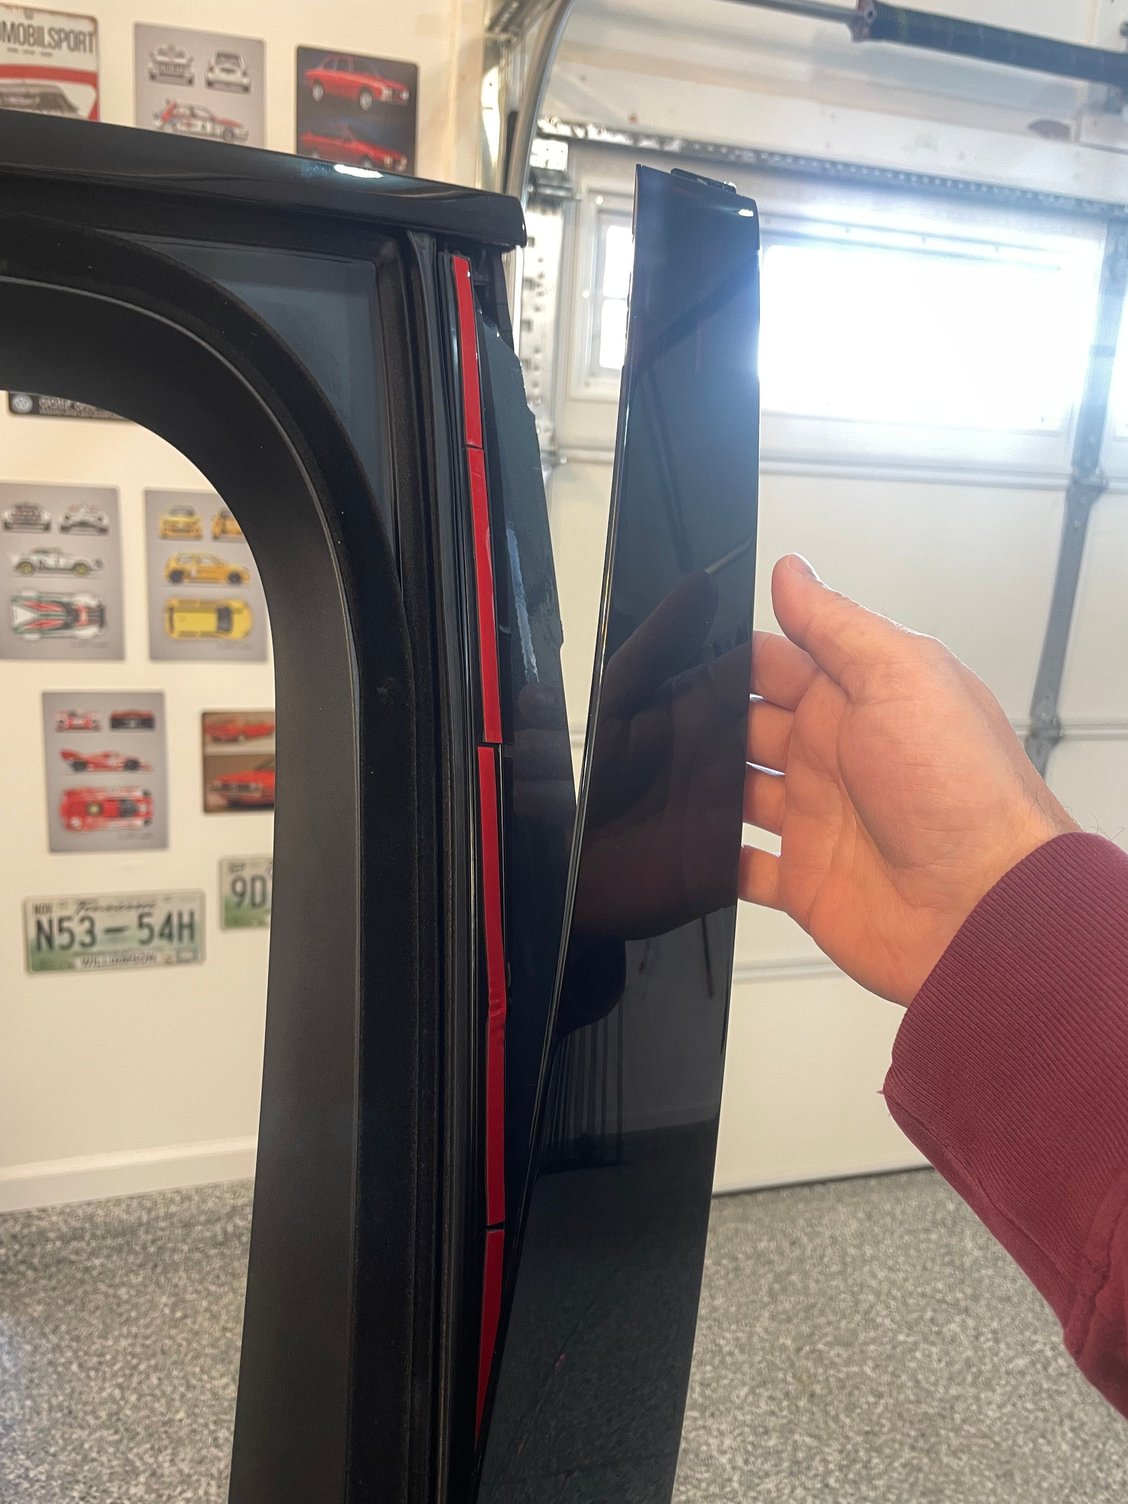
I slid the top portion of the front door trim towards the back of the car:
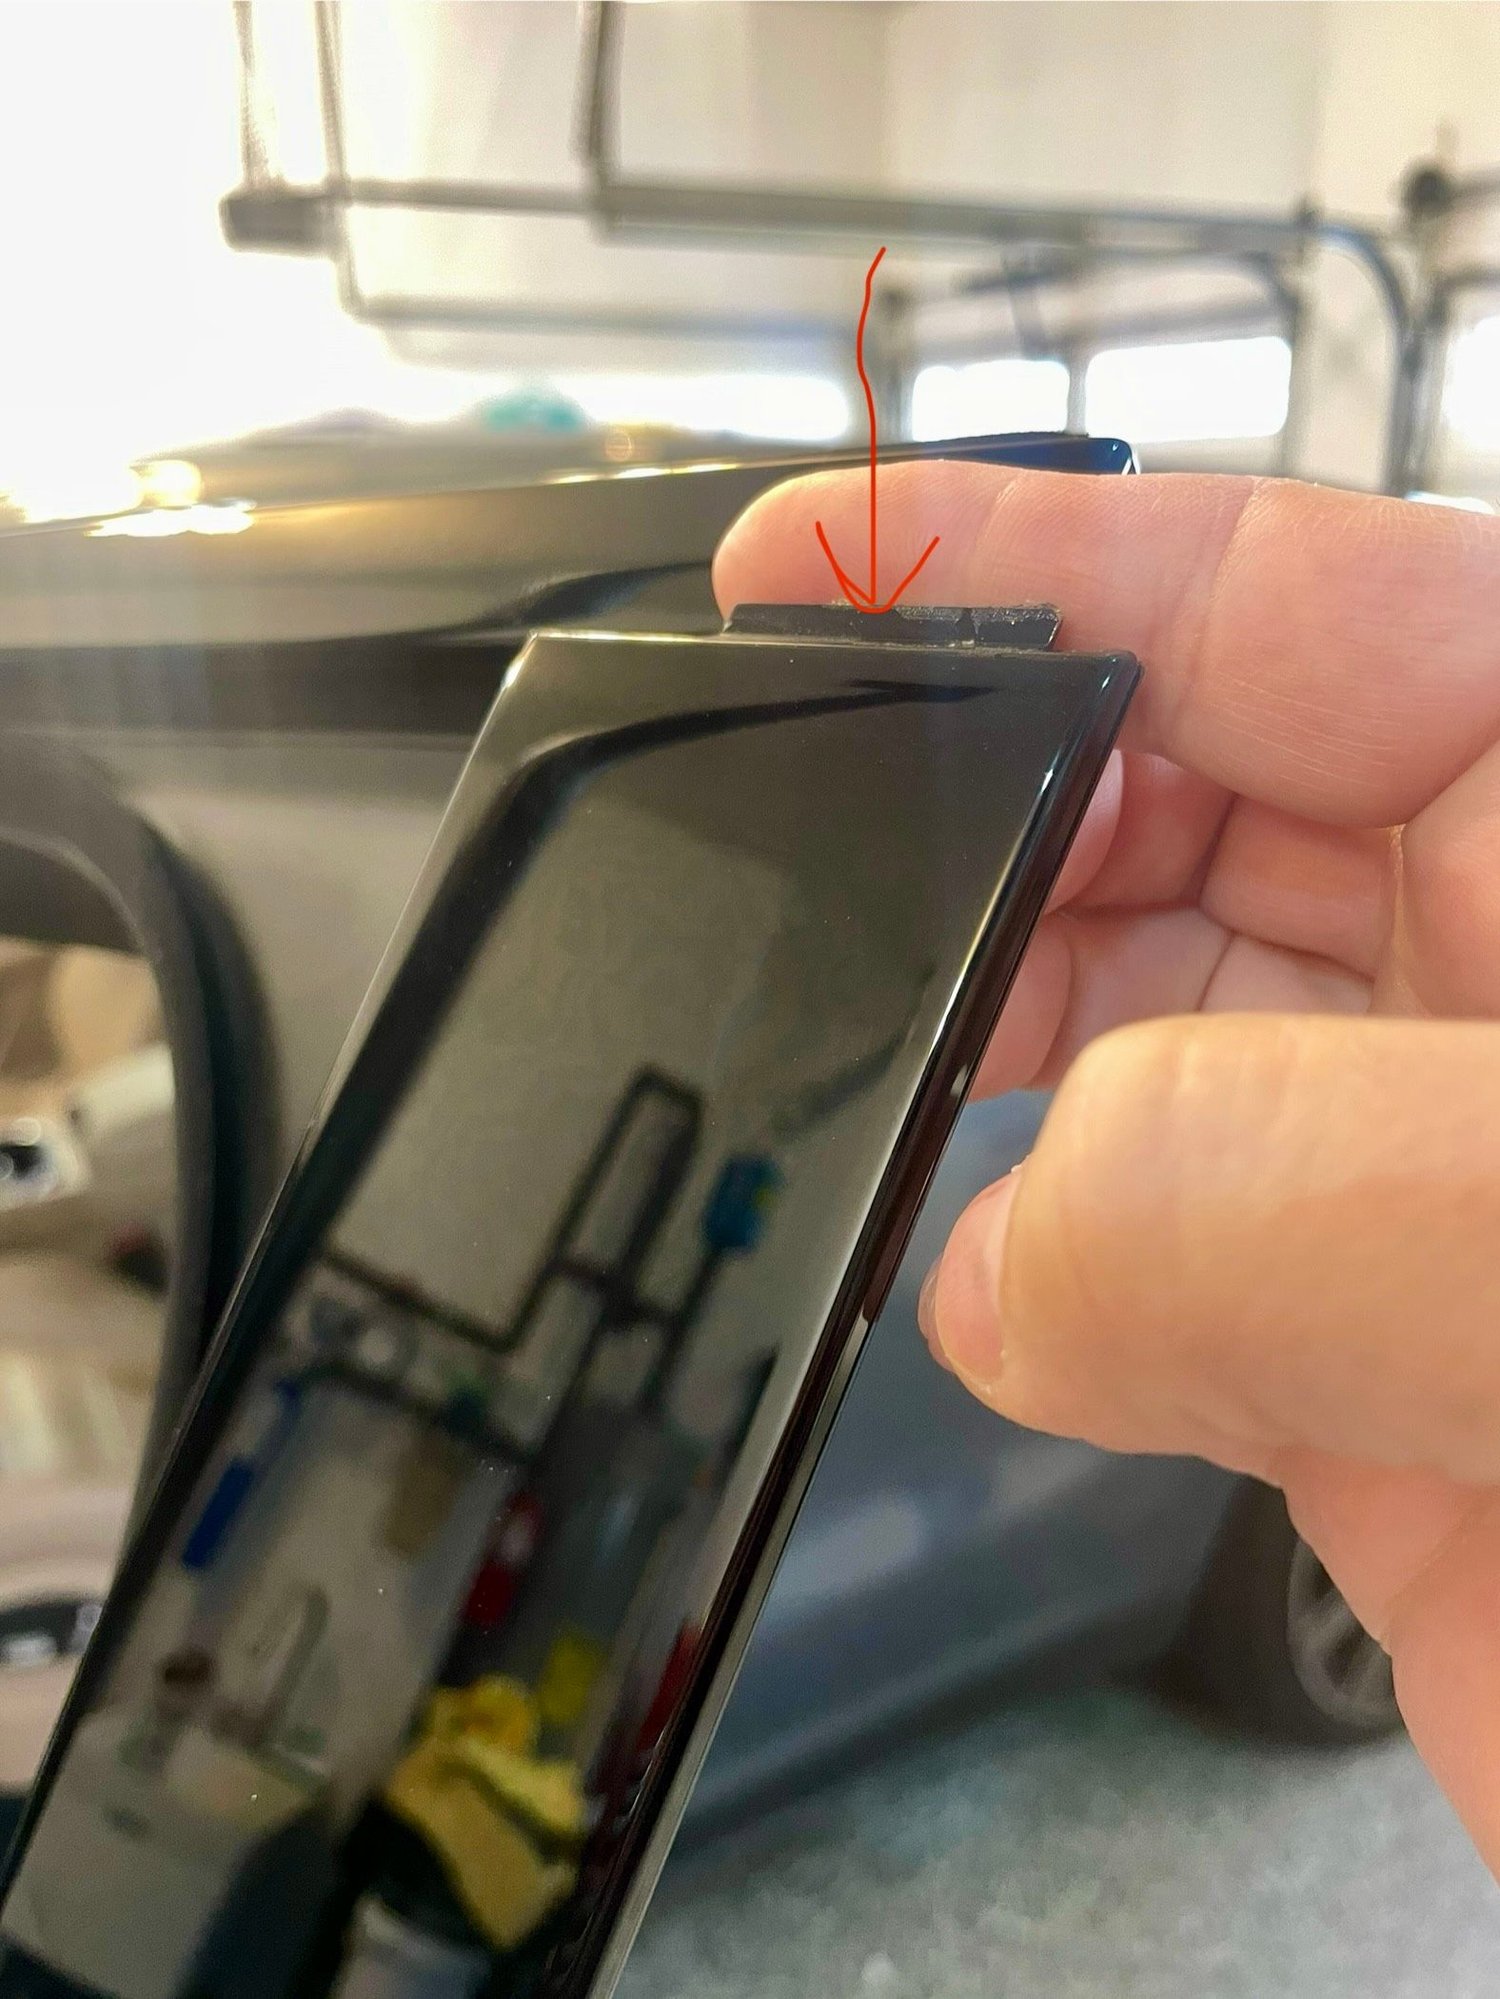
Note the little piece that is tucked in, under the top door moulding:
Once I had the piano black trim pushed back it was possible to separate it from the door enough to open a gap, while still connected on the bottom (no need to remove the door card)
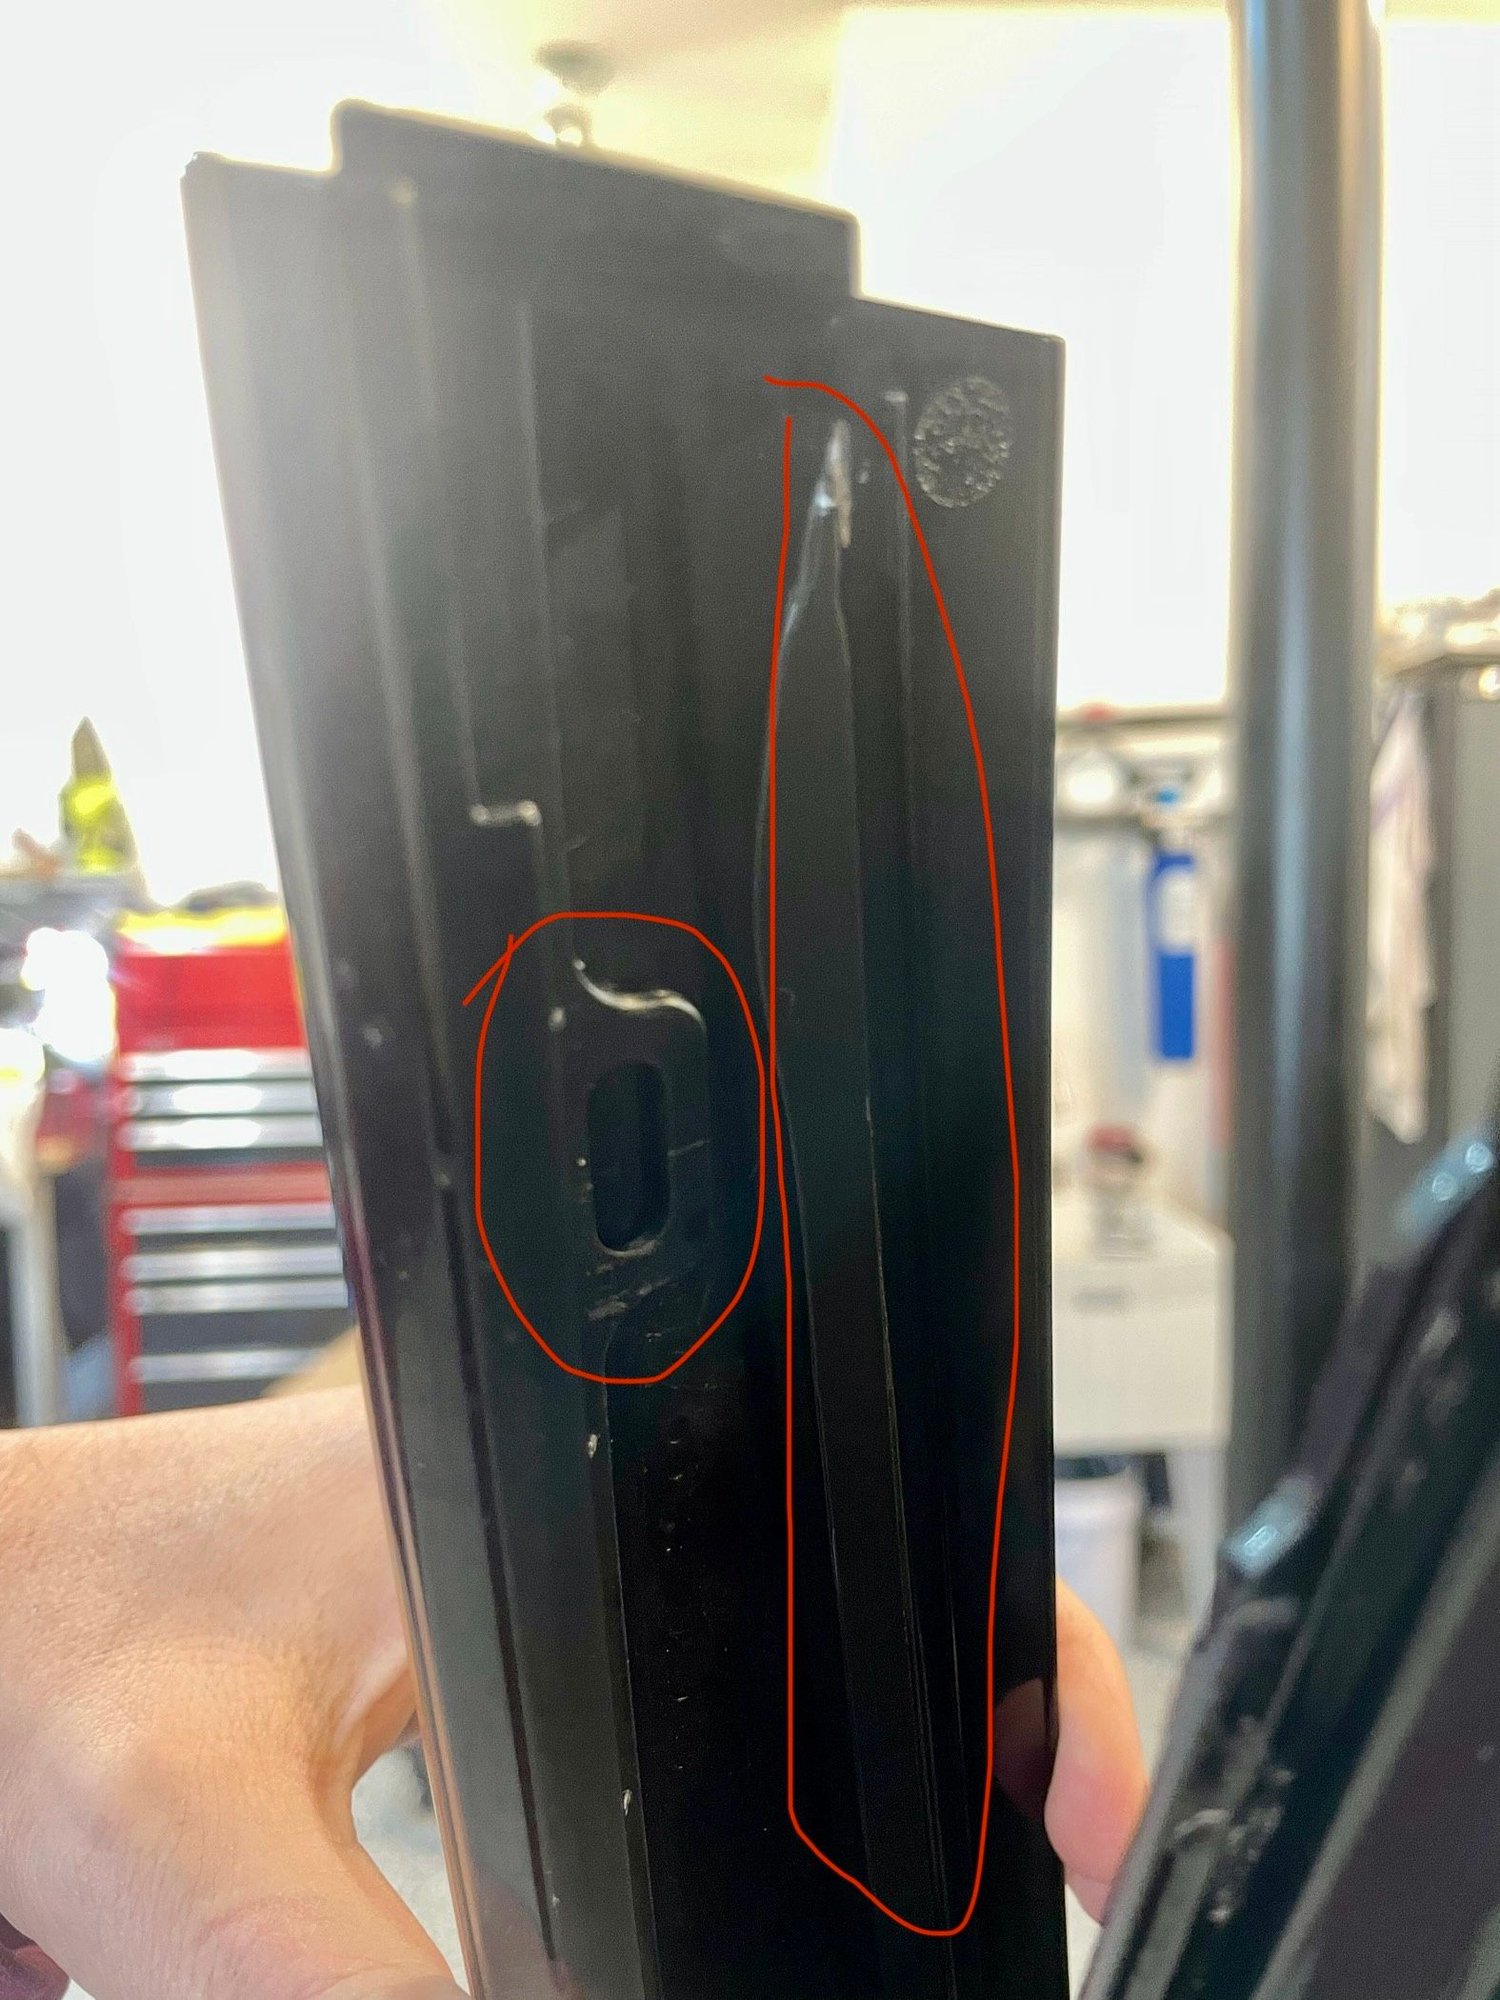
Seems the trim consists of at least two major parts- 1. The trim piece itself 2. Inner base peace that the trim latches onto.
The inner piece appeared a little loose and separated from the metal door frame.
you can see the gap where my finger fit behind it and was able to move it back and forth.
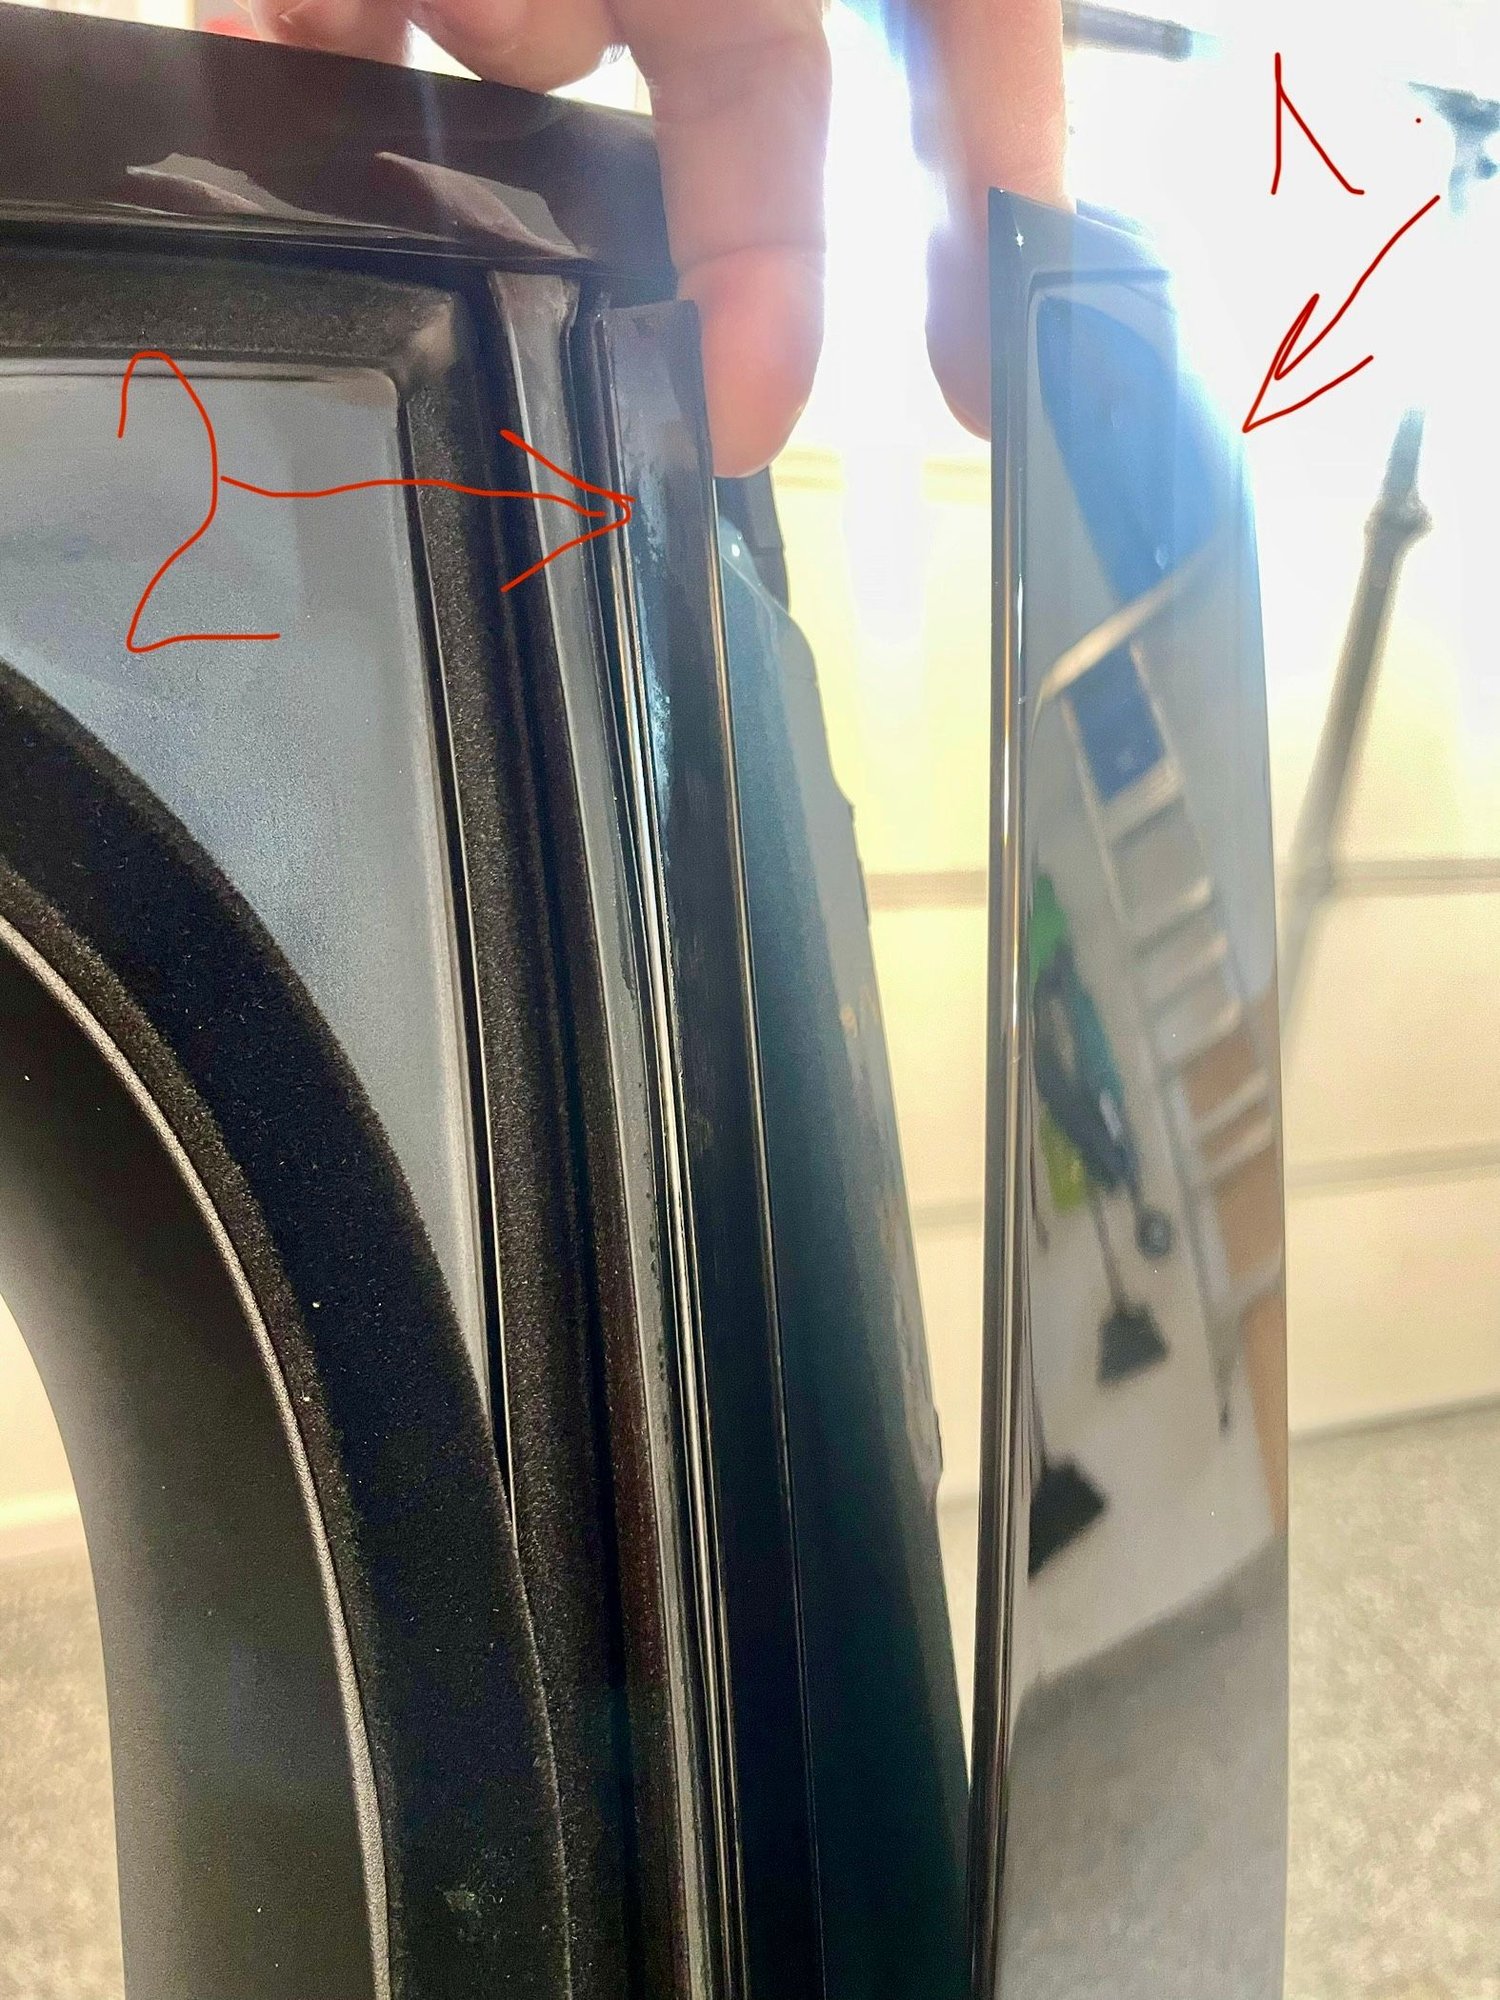
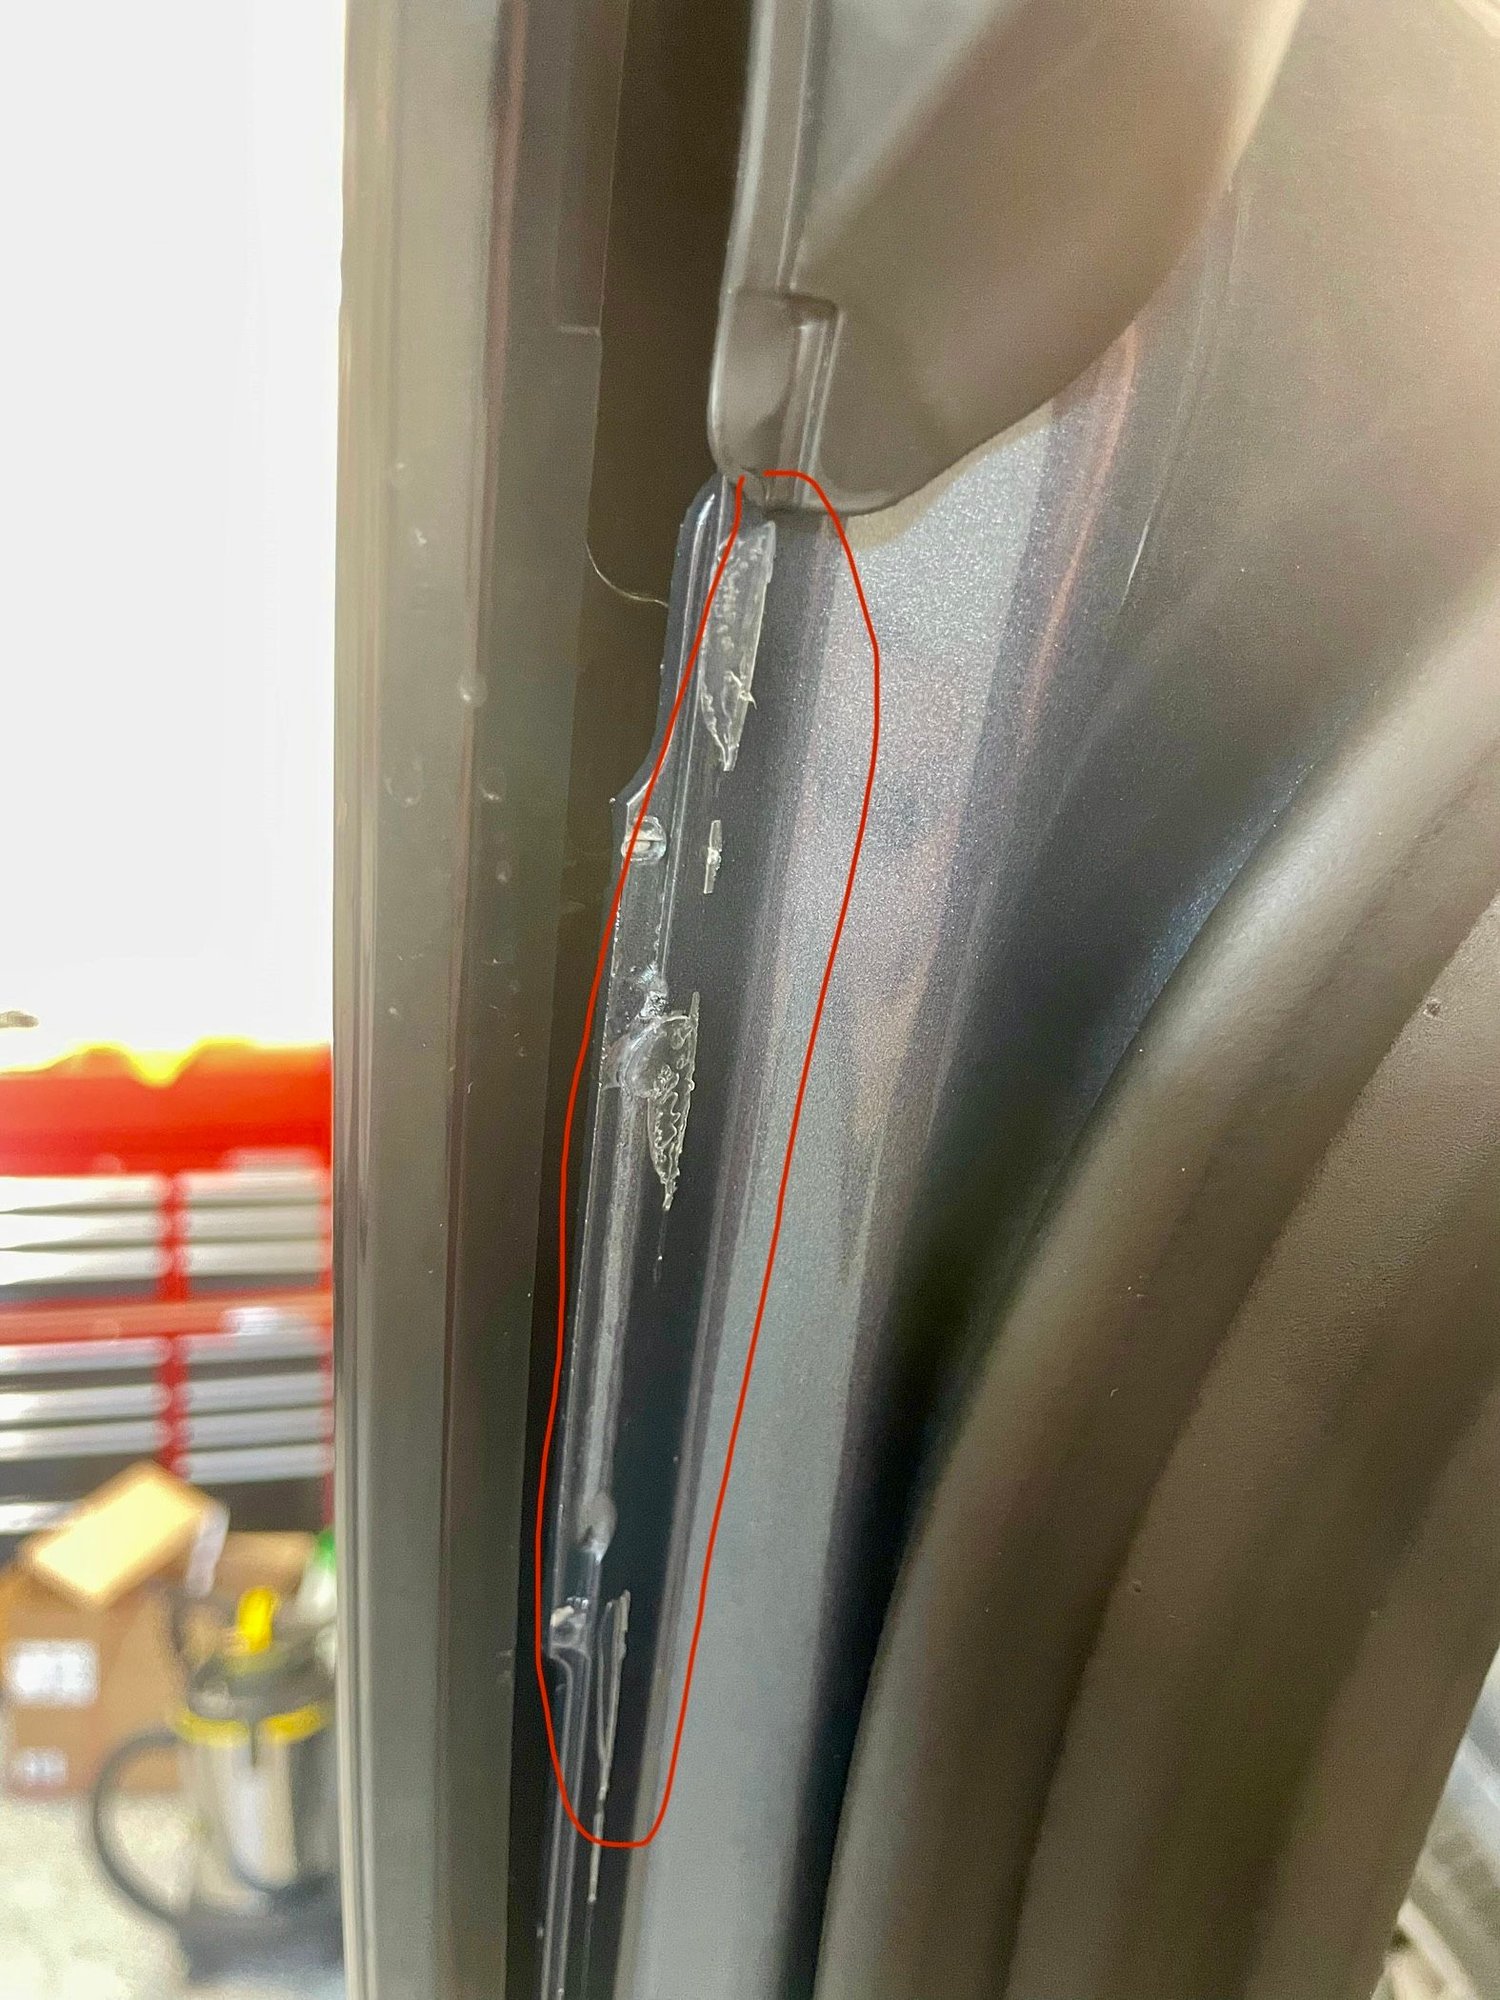
On further inspection, there was failed adhesive on both the inner side of the piano black piece and on the inside of the door frame too. The inner side adhesive connected the piano black piece to the inner base piece. It was also what was holding the outer piano-black piece flush with the glass- especially in the middle of the window where it bowed out the most. The inner adhesive bead was holding the inner part of the piano black trim in place. See pics: This is the inside portion of the door - very thin bead on the edge only. Important to notice the two tabs - one on top and one on bottom - they latch under the inner base piece.
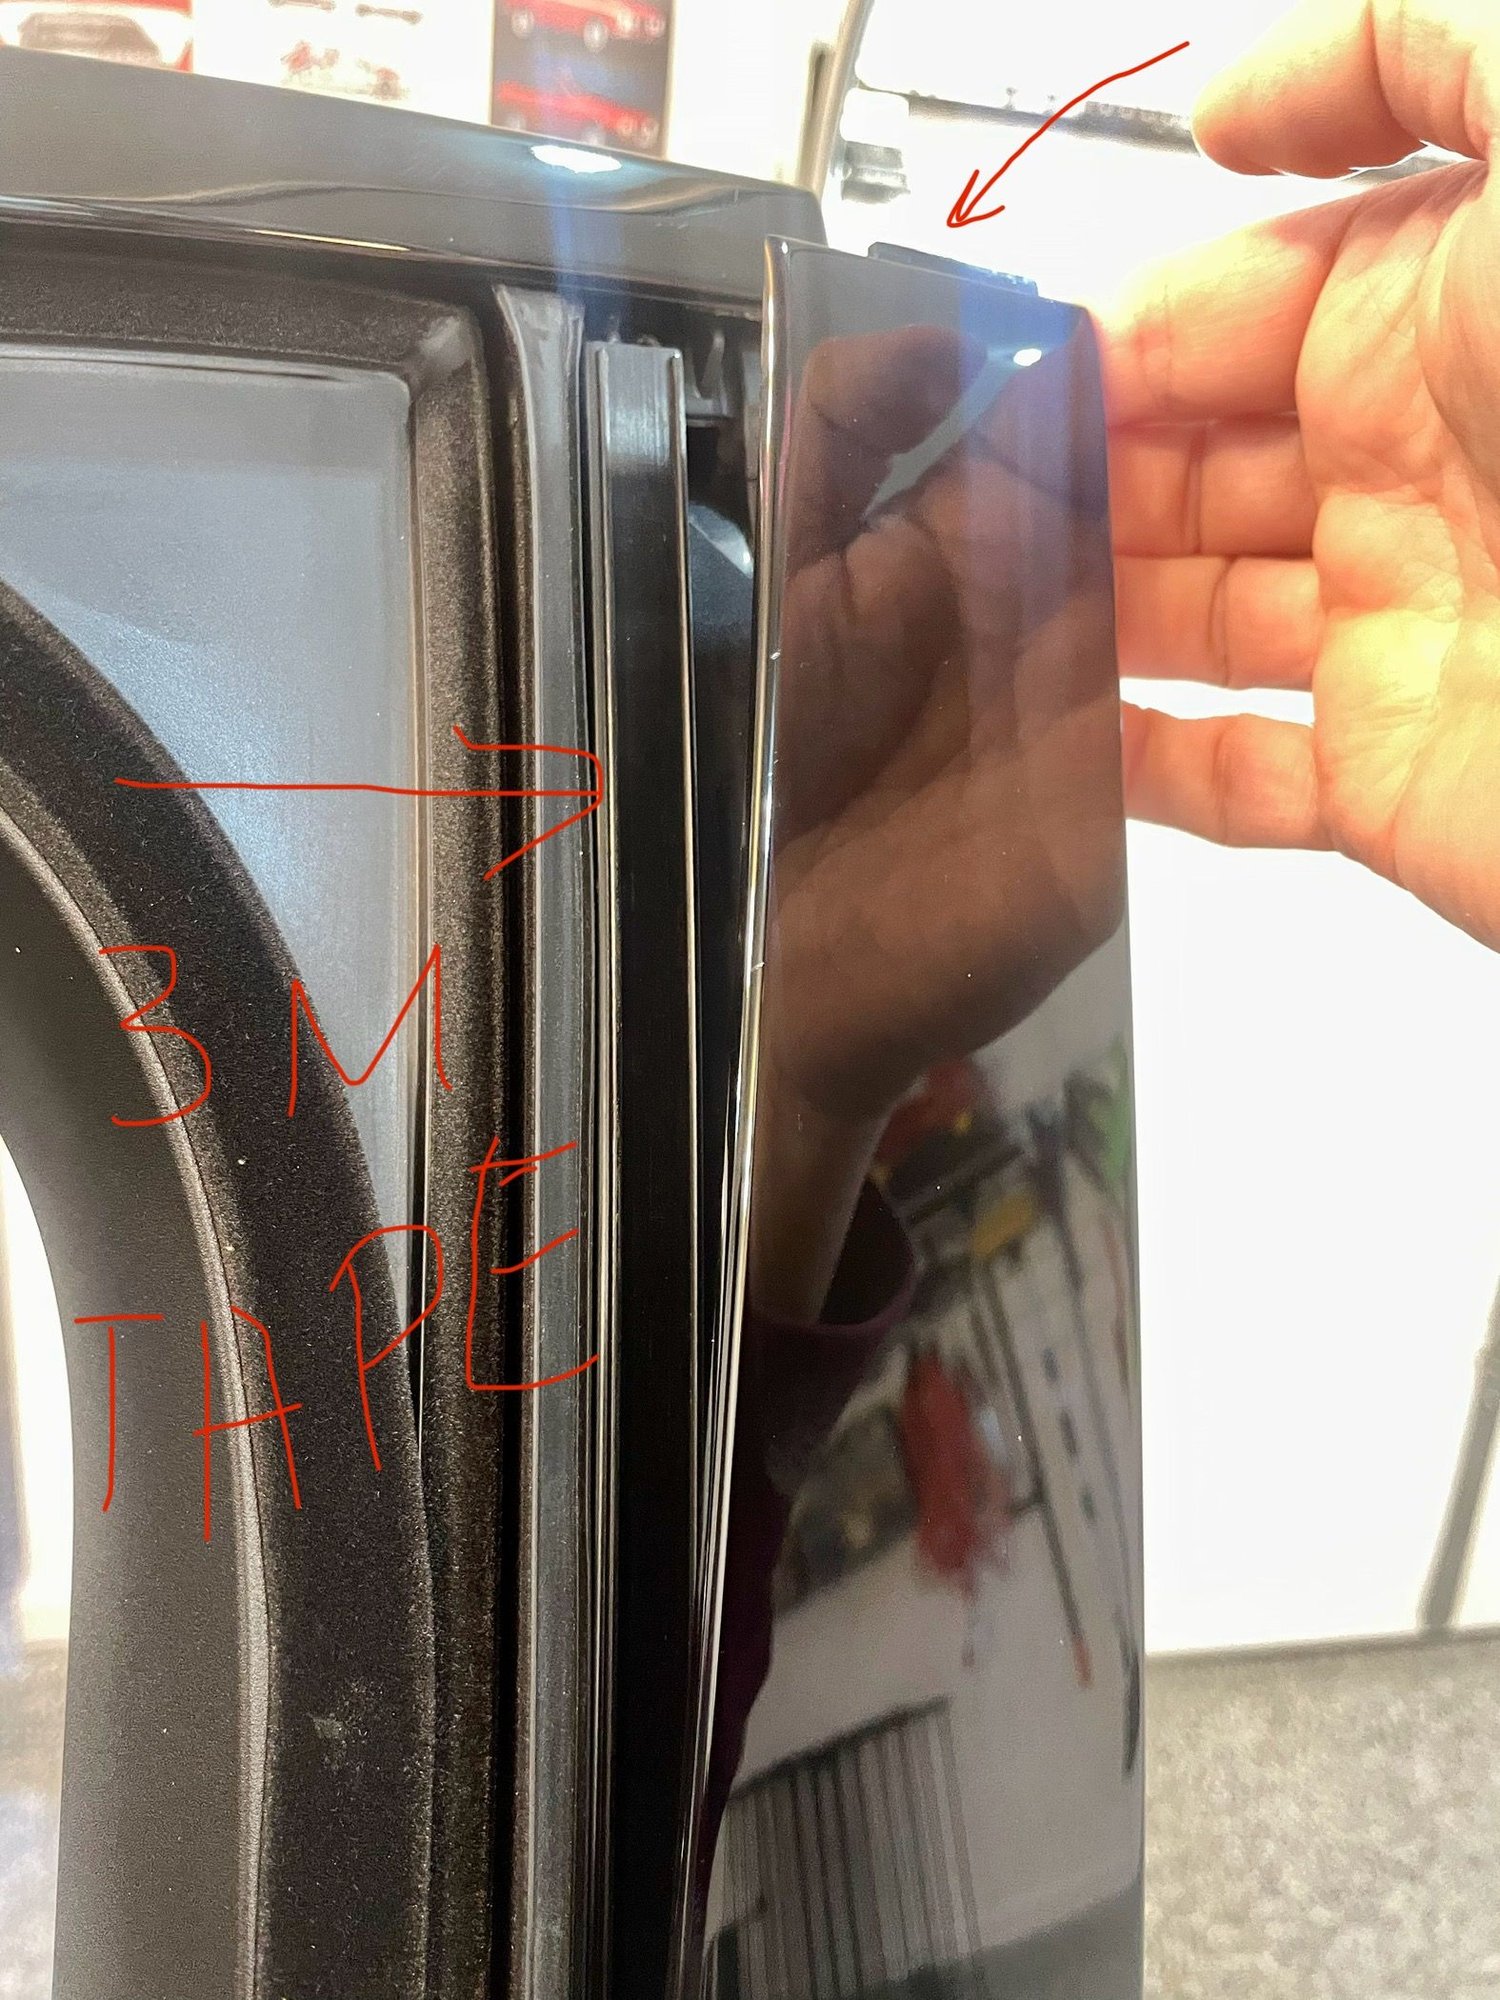
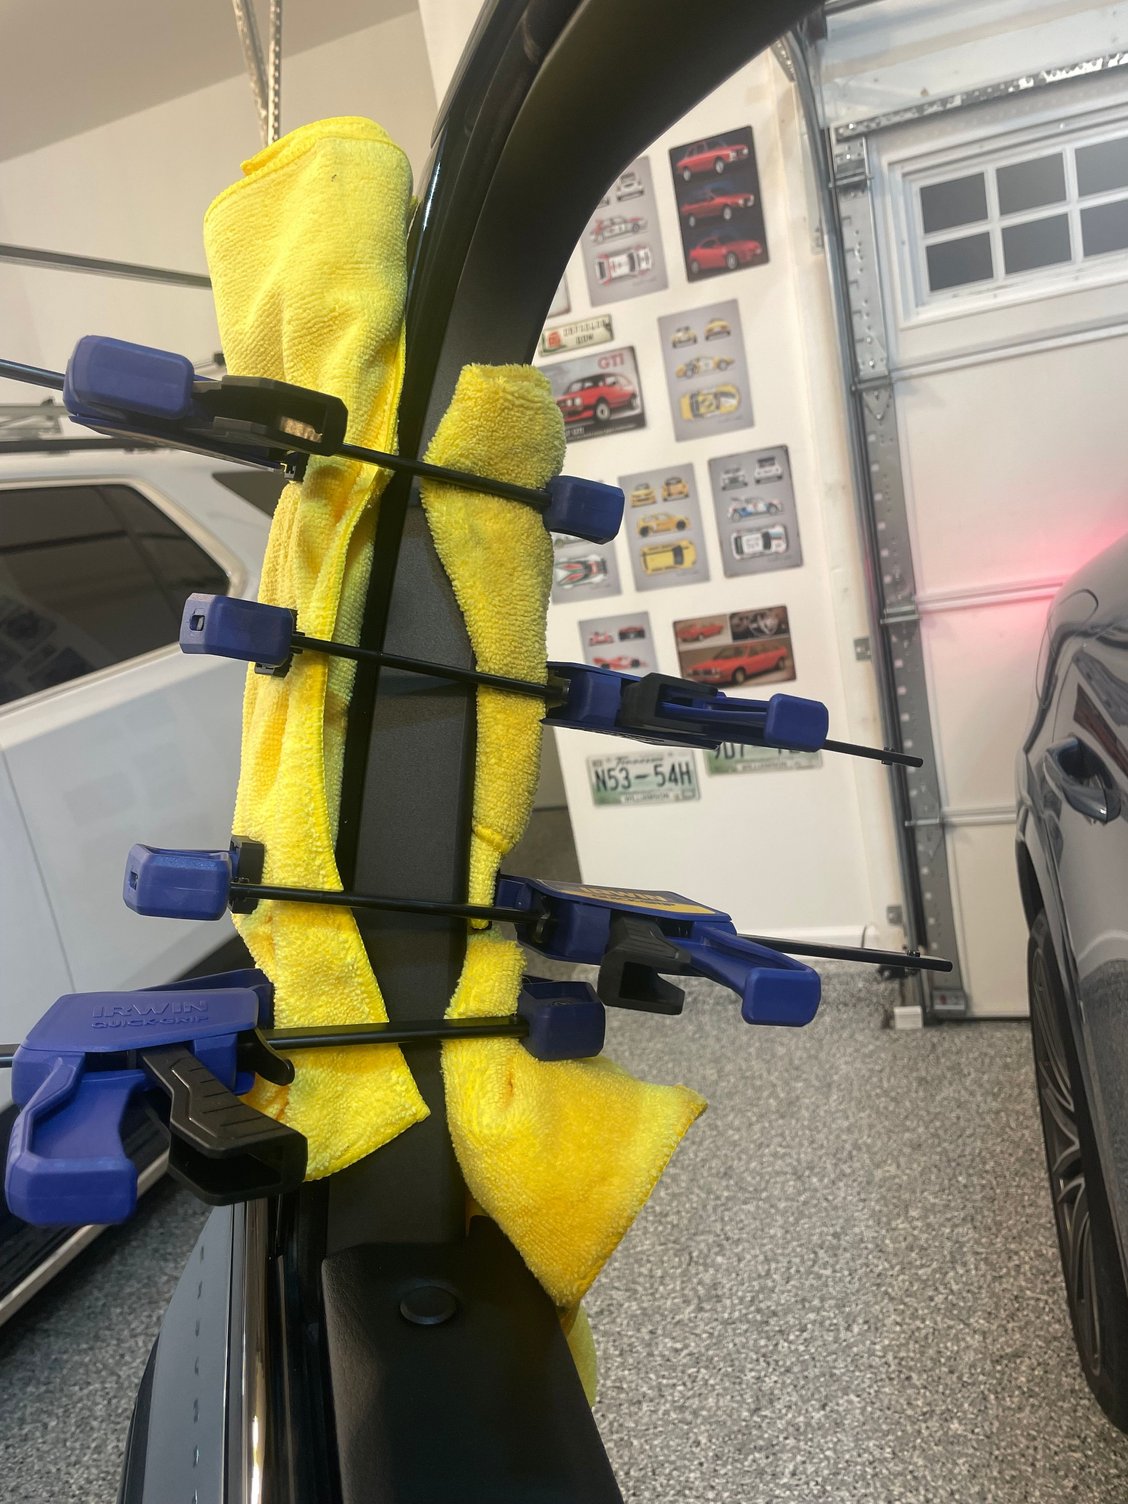
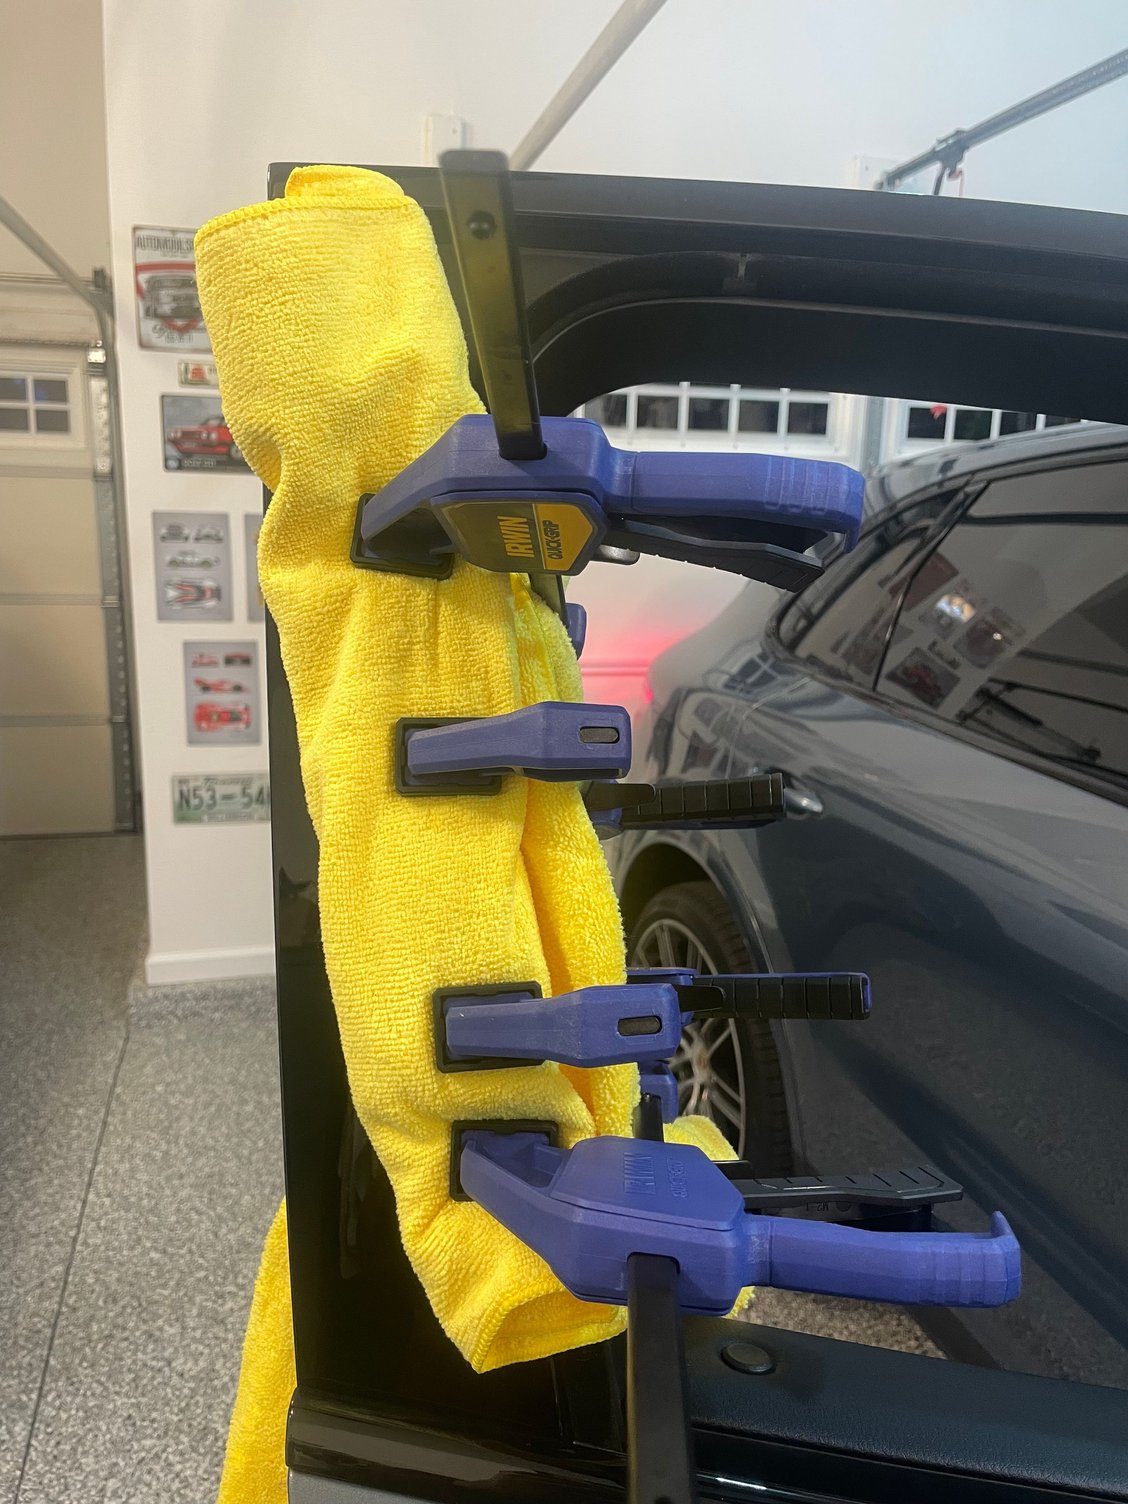
At this point I applied automotive 3M tape behind the inner base piece and also on the top of it.
and then used several microfibres and a piece of wood to put pressure on the reassembled parts.
since its not that warm, after cleaning all parts with alcohol I used a hair drier to warn up the parts and the tape. Left the "assembly" clamped for 12 hours. Tape behind the inner piece to eliminate its play Tape on the top of the inner piece.
*smaller pieces of tape were easier to work with compared to one continuous strip.
Brother thanks for the fast response I will take a look I was not able to find out a video I will guess I will do it and repost back to the community! will see is almost 4K to get them all replaced at the dealer!
Covered on this site. Early production had ill-fitting trim panels, prompting the desire of owners to remove existing panels. Removal appears to be pretty involved, might require interior door panel removal. Search feature should find it.
Brother thanks for the fast response I will take a look I was not able to find out a video I will guess I will do it and repost back to the community! will see is almost 4K to get them all replaced at the dealer!
My trim (2019 Base) looked like this below and created intolerable wind noise at highway speed.
The middle of the piece had the biggest gap and the top was rotating outwards.
Quote from the dealer was 3.5 hours labour and ~$200 for the trim piece per door
Indy quoted $650 total per door.
With that knowledge, I decided to fix/break it on my own first
I slid the top portion of the front door trim towards the back of the car:
Note the little piece that is tucked in, under the top door moulding:
Once I had the piano black trim pushed back it was possible to separate it from the door enough to open a gap, while still connected on the bottom (no need to remove the door card)
Seems the trim consists of at least two major parts- 1. The trim piece itself 2. Inner base peace that the trim latches onto.
The inner piece appeared a little loose and separated from the metal door frame.
you can see the gap where my finger fit behind it and was able to move it back and forth.
On further inspection, there was failed adhesive on both the inner side of the piano black piece and on the inside of the door frame too. The inner side adhesive connected the piano black piece to the inner base piece. It was also what was holding the outer piano-black piece flush with the glass- especially in the middle of the window where it bowed out the most. The inner adhesive bead was holding the inner part of the piano black trim in place. See pics: This is the inside portion of the door - very thin bead on the edge only. Important to notice the two tabs - one on top and one on bottom - they latch under the inner base piece.
At this point I applied automotive 3M tape behind the inner base piece and also on the top of it.
and then used several microfibres and a piece of wood to put pressure on the reassembled parts.
since its not that warm, after cleaning all parts with alcohol I used a hair drier to warn up the parts and the tape. Left the "assembly" clamped for 12 hours. Tape behind the inner piece to eliminate its play Tape on the top of the inner piece.
*smaller pieces of tape were easier to work with compared to one continuous strip.
hope the writeup helps. Feel free to PM me if you have questions.
Cheers
Pal
Brother thanks for the fast response but it looked like someone already worked in that panels also looked like he never took panels out, I will take a closer look. I was not able to find out a video I guess I will do it and repost back to the community! will see, is almost 4K to get them all replaced at the dealer!

 06-17-2024, 01:16 PM