When you click on links to various merchants on this site and make a purchase, this can result in this site earning a commission. Affiliate programs and affiliations include, but are not limited to, the eBay Partner Network.
Has anyone compared and/or tried the Audi equivalent (4M0 819 439B)? If it fits, it opens up many options with much easier access at more reasonable price.
4M0 819 439B Audi – original (made by Mahle) Mahle HS032001 Mahle FP31003 (OEM - Activated Charcoal & Polyphenol) - Verified by @celiawessen that it’s in 9Y0 Mann CU31003 Mann CUK31003 Activated Charcoal Mann FP31003 Activated Charcoal & Polyphenol
Most likely the parts with numbers xx31003 will fit size-wise but may differ in carbon, charcoal, polyphenol features.
The Audi part 4M0819439x is also the same size but again, the x will denote different features like anti-bacterial layers.
The RockAuto site is pretty useful for detective work in cross referencing parts from different manufacturers where “size fits, but features are different”.
Hello. Just bought a 2019 base 9Y0, any good threads you can recommend on DIY maintenance? Oil change part numbers, instructions etc? Used to tons of content on my 997, but maybe these are too new for DIY? Thanks, Matt
Hello. Just bought a 2019 base 9Y0, any good threads you can recommend on DIY maintenance? Oil change part numbers, instructions etc? Used to tons of content on my 997, but maybe these are too new for DIY? Thanks, Matt
Lots on YouTube: brake pads, front rotors, engine oil+filter, engine air filter, brake fluid replacement. Haven't seen 9Y0 videos on cabin filter or drivetrain oil (front/rear axles, transfer case, transmission) yet.
And haven't seen a video on 2.9L TT spark plugs yet.
Shout out to @Sobrut911 and @philhallenbeck for the DIY tutorials. I used your info to change mine. I’ll add my experience and photos to the collective wisdom.
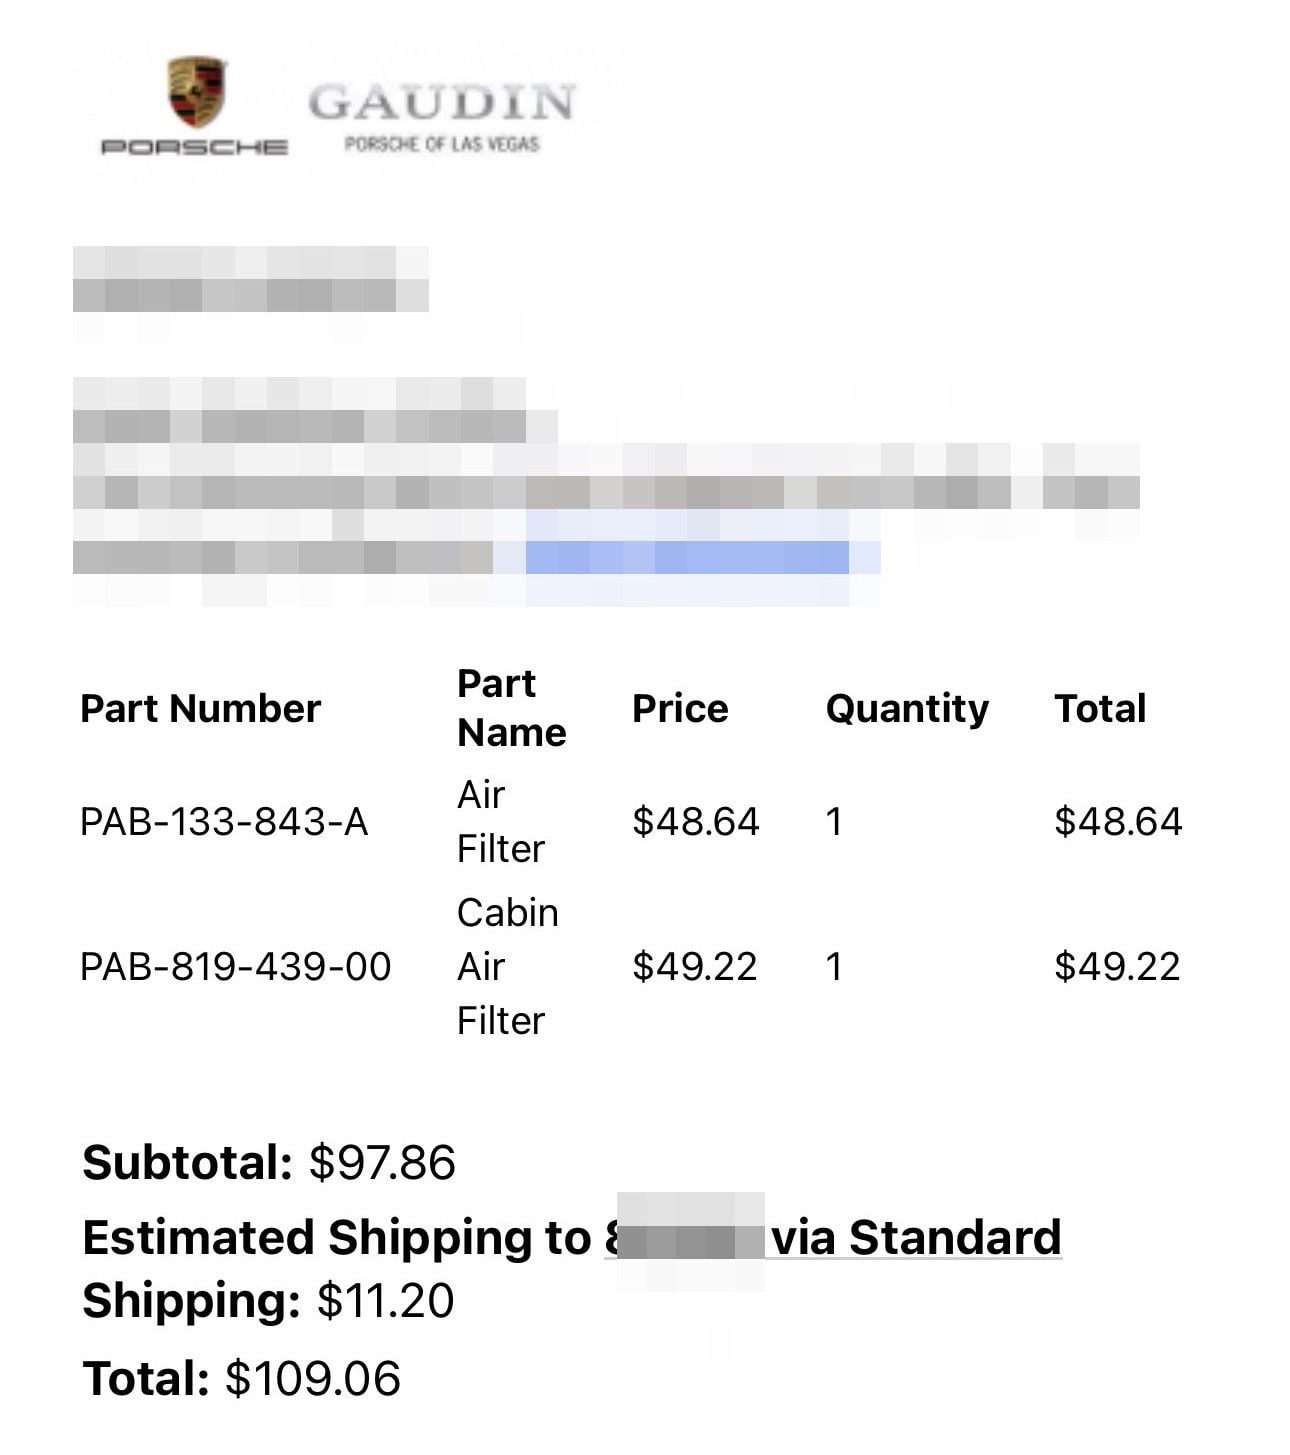
I purchased the OEM filter, Porsche Part # PAB81943900. I reviewed the tips from the previous posts then got to it. Total time was about 45 minutes but I was taking lots of pictures. I also took a couple breaks to stretch my back, as you need to be a bit of a contortionist for this DIY. Next time should take about 15 minutes to change the filter. You’ll need an 8mm socket to remove a couple bolts and a flat blade screwdriver to help remove an electrical connector.
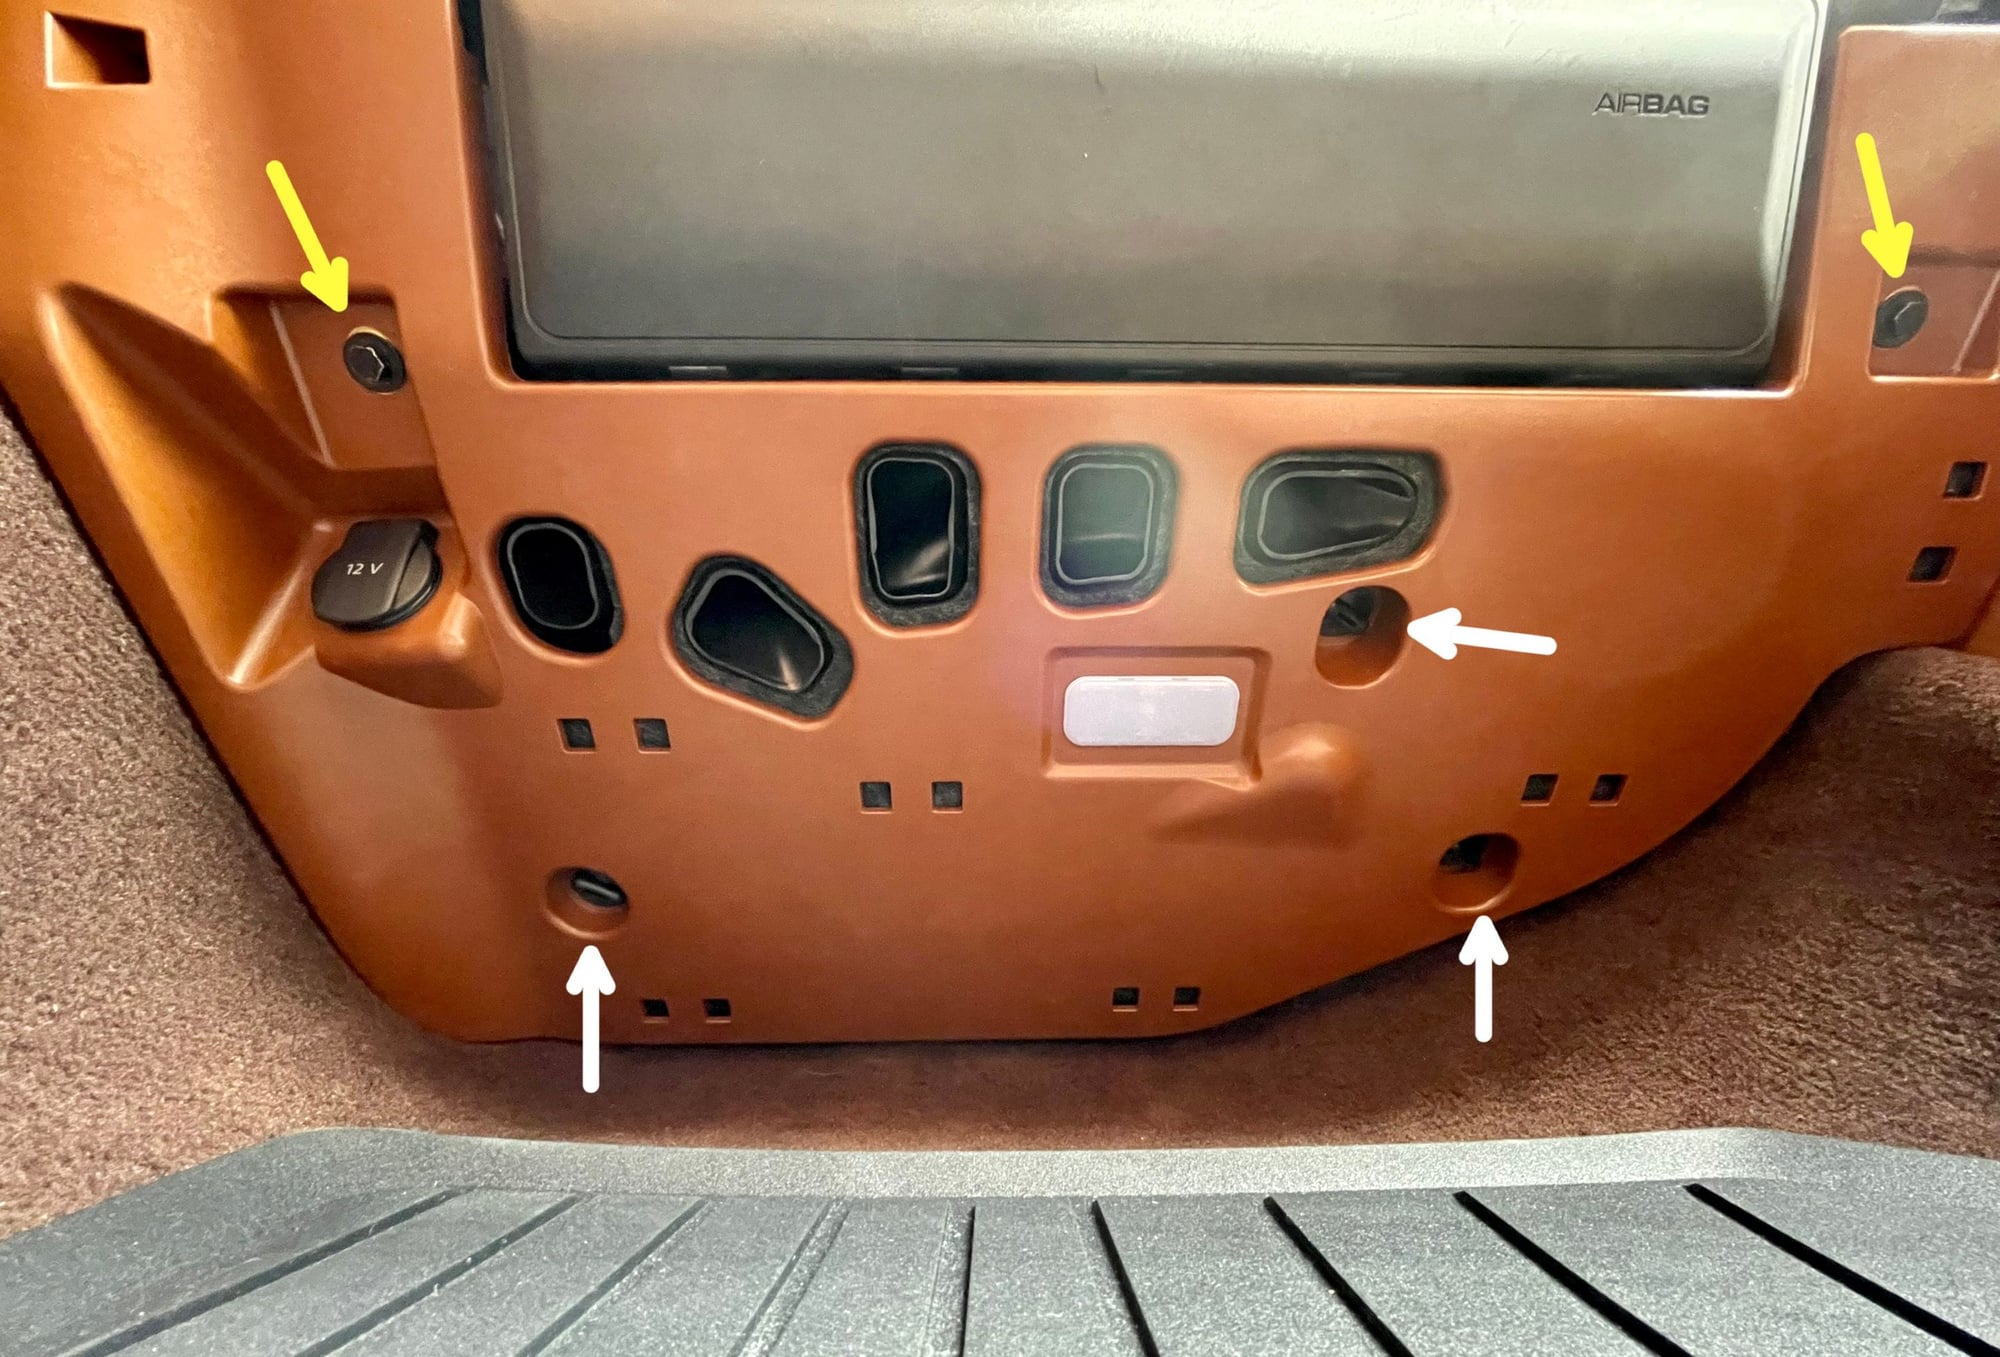
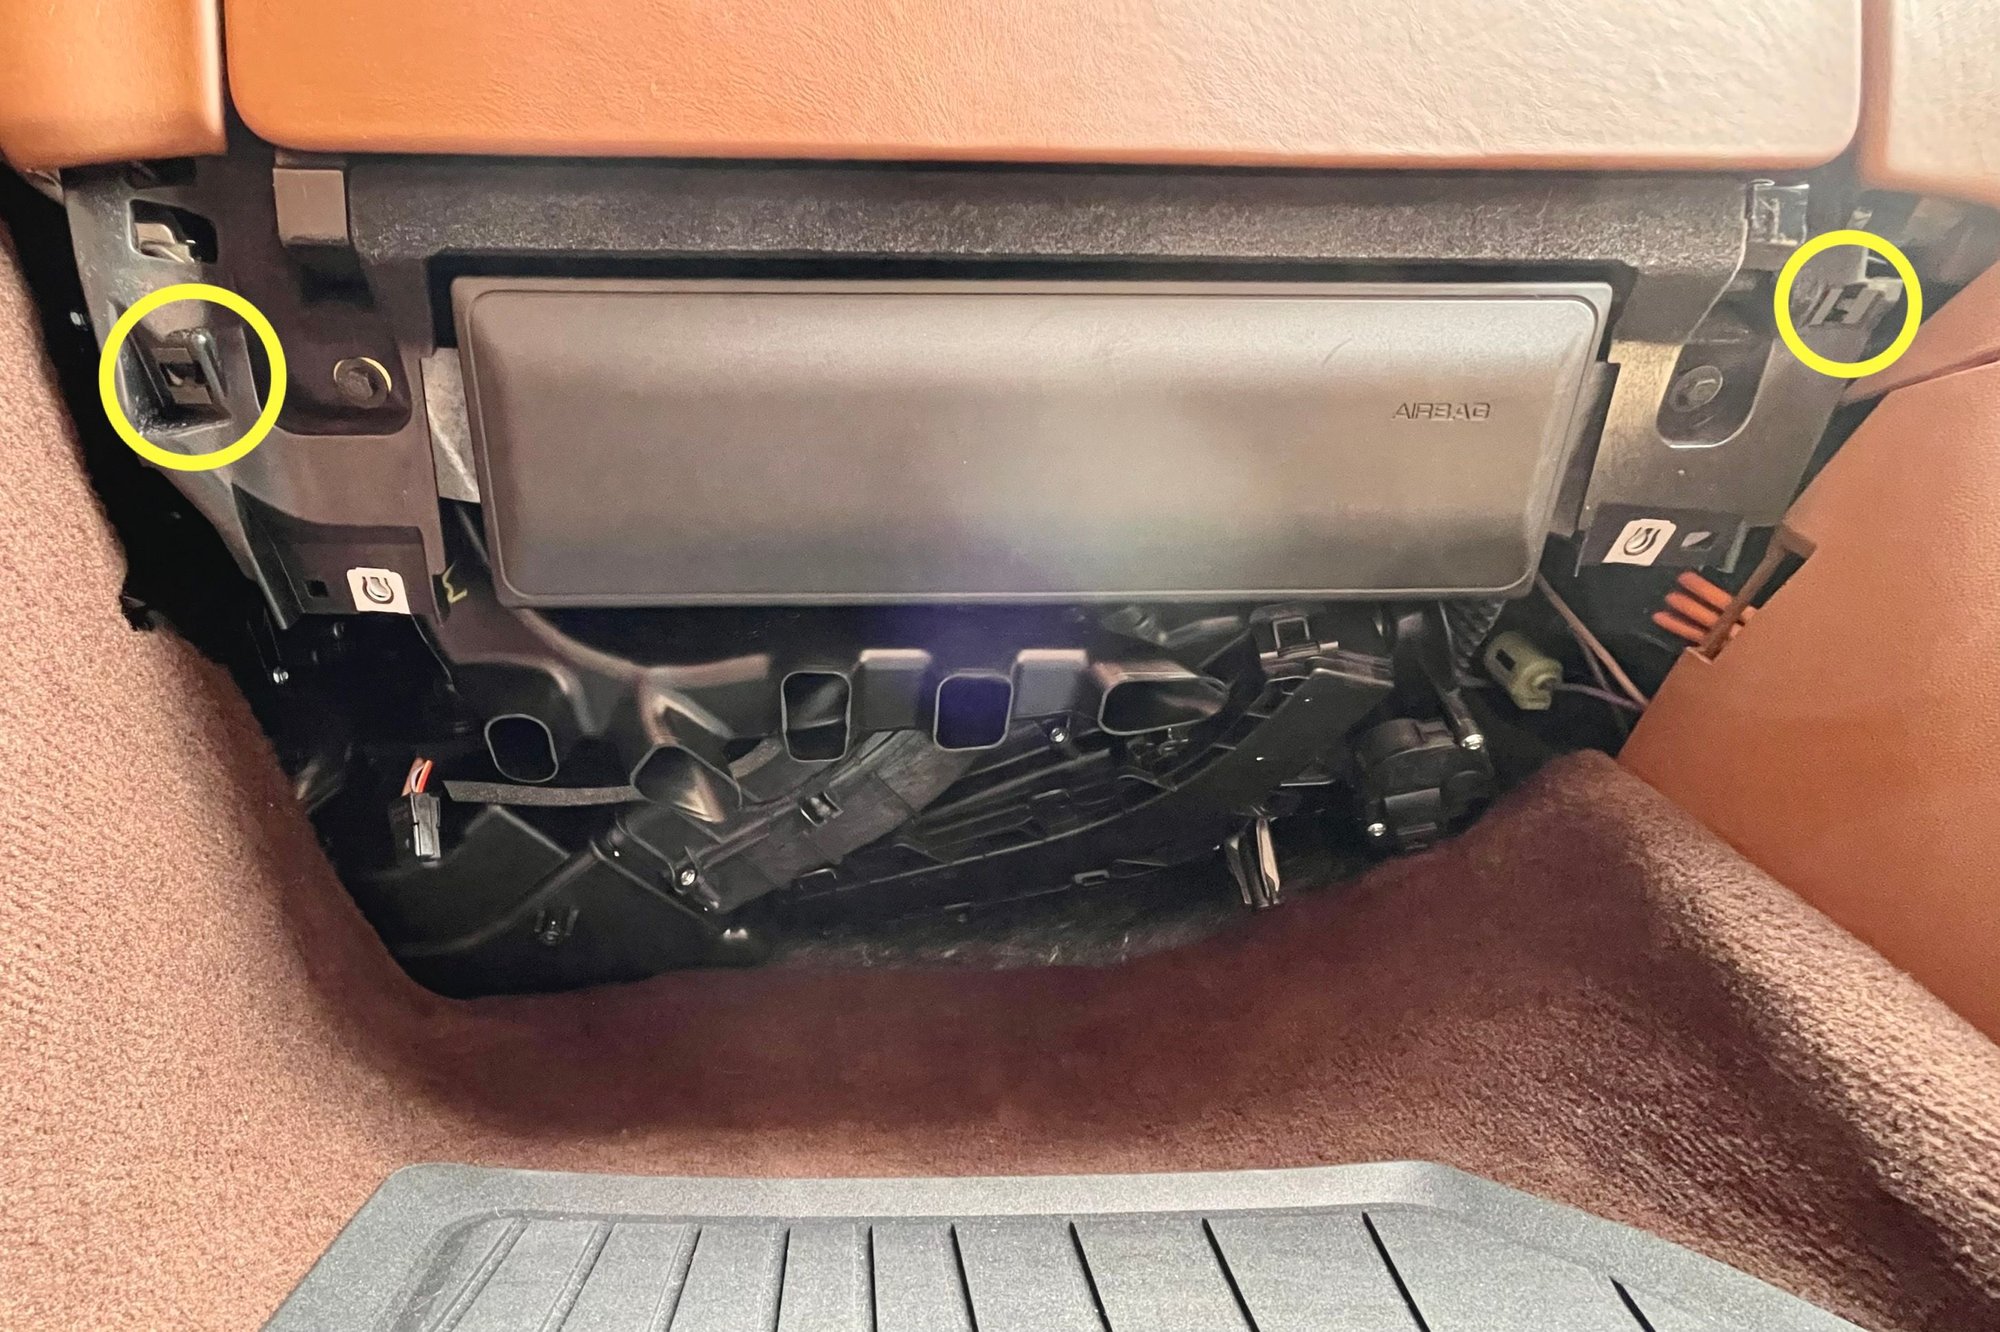
Move the passenger seat to the rearmost position and contort your body into the footwell. This is what you will see. I used a Petzl headlamp which made the job easier. The yellow arrows denote the 8mm hex bolts and white arrows denote the thumbscrews.
After removing the fasteners, pop out the aligning tabs located at the arrows, pictured below.
Disconnect the wiring to the light and 12V socket to remove the panel as philhallenbeck describes in post #6
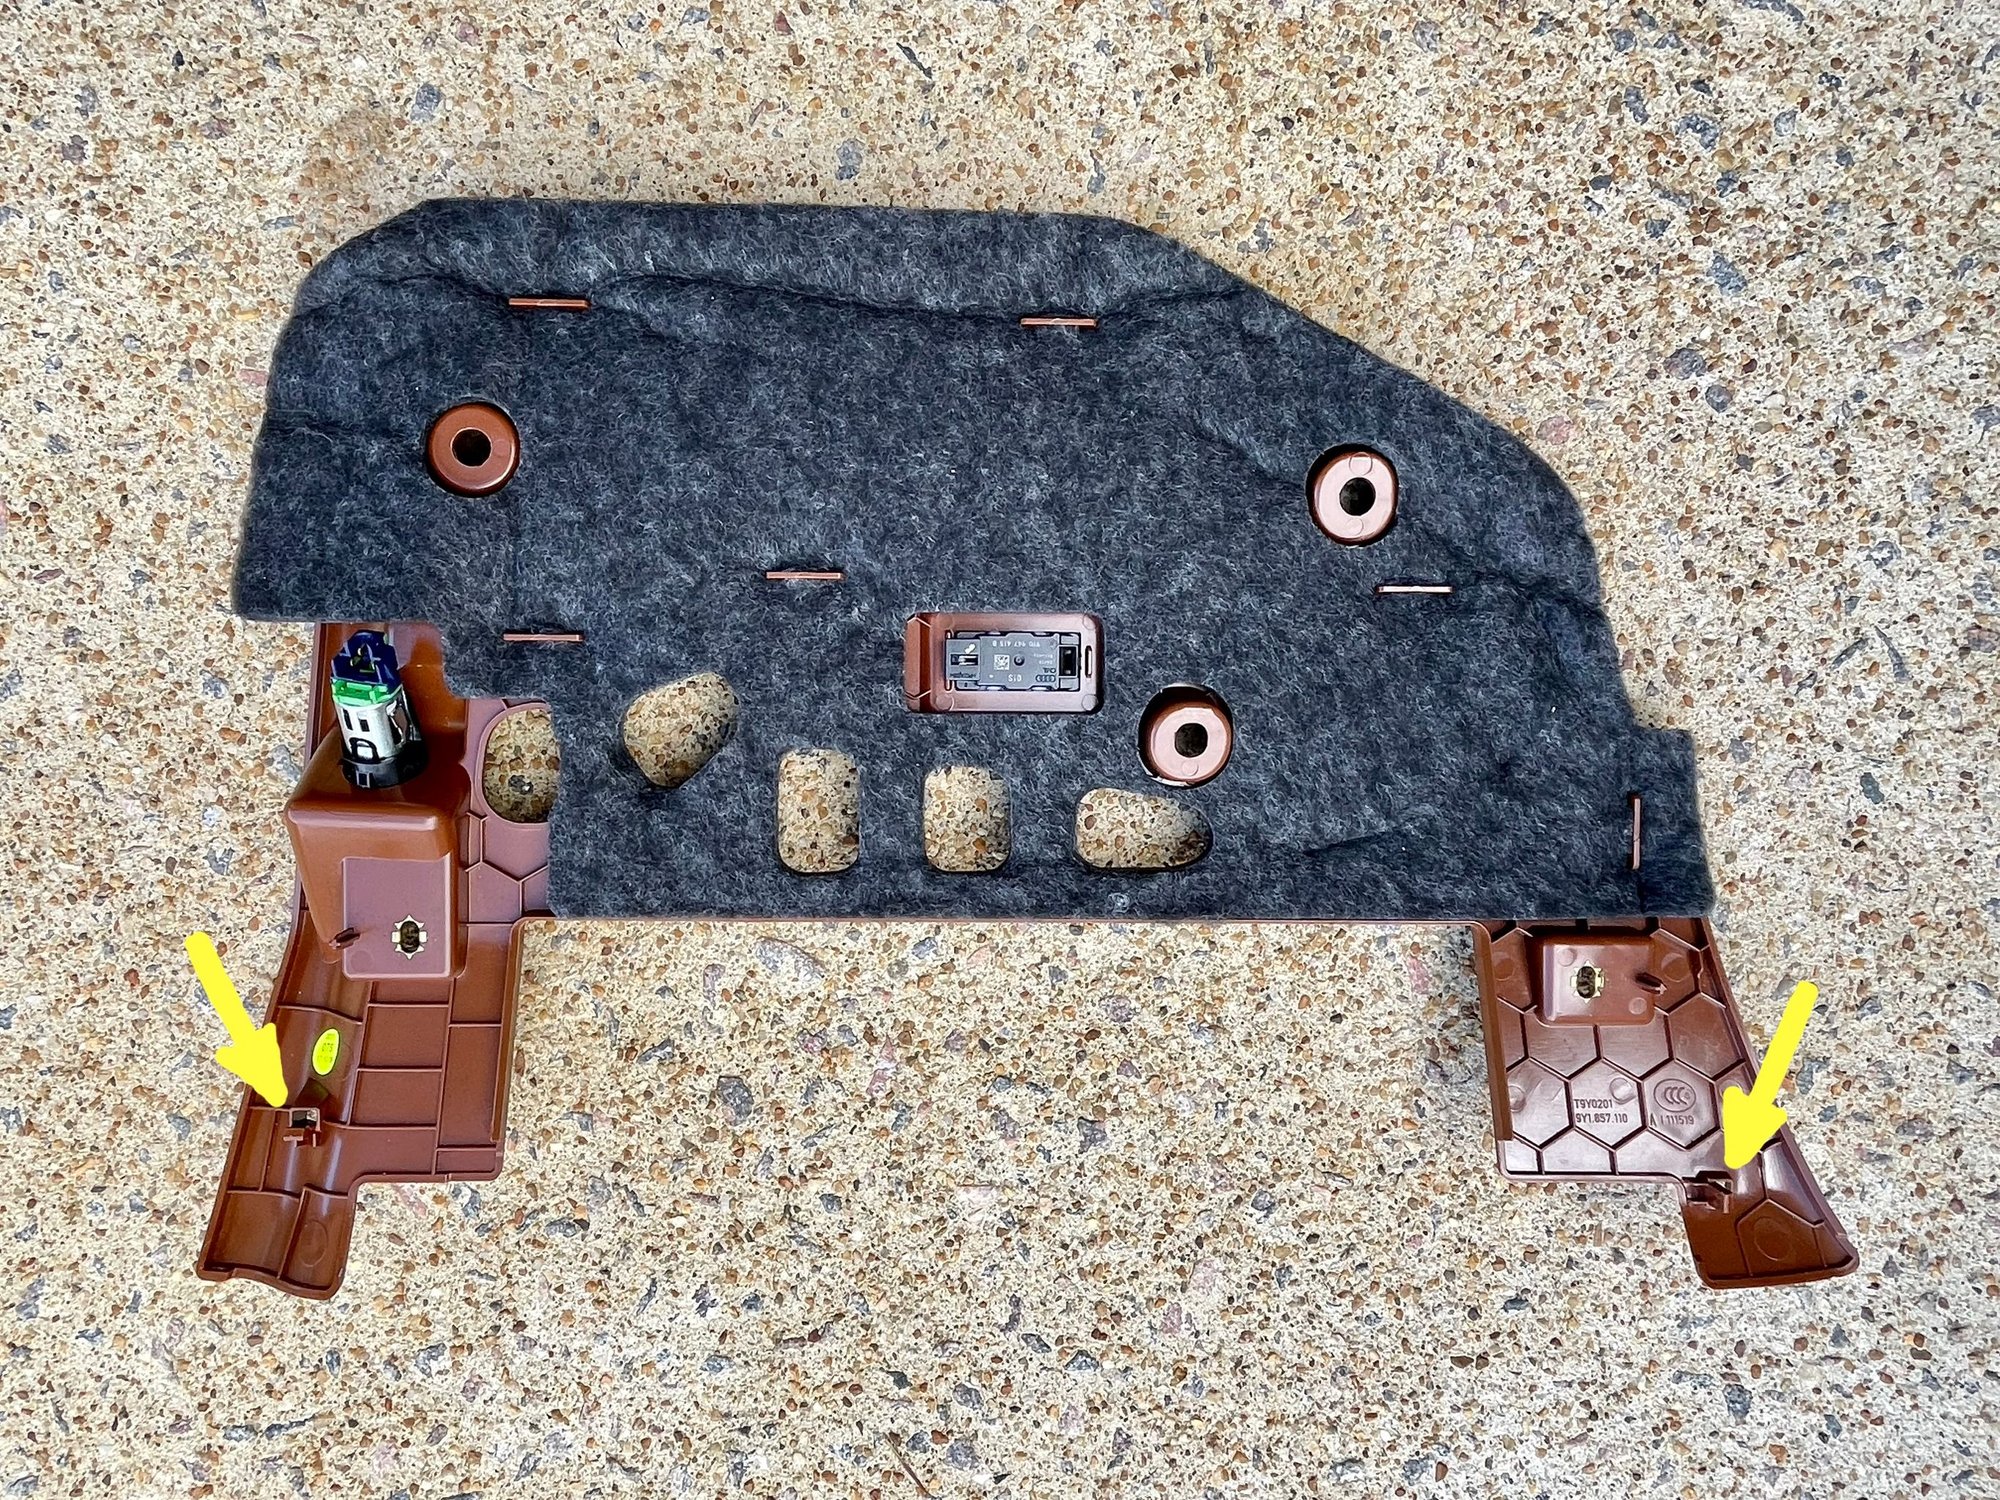
Here’s the other side of the panel with the fasteners located next to the respective holes.
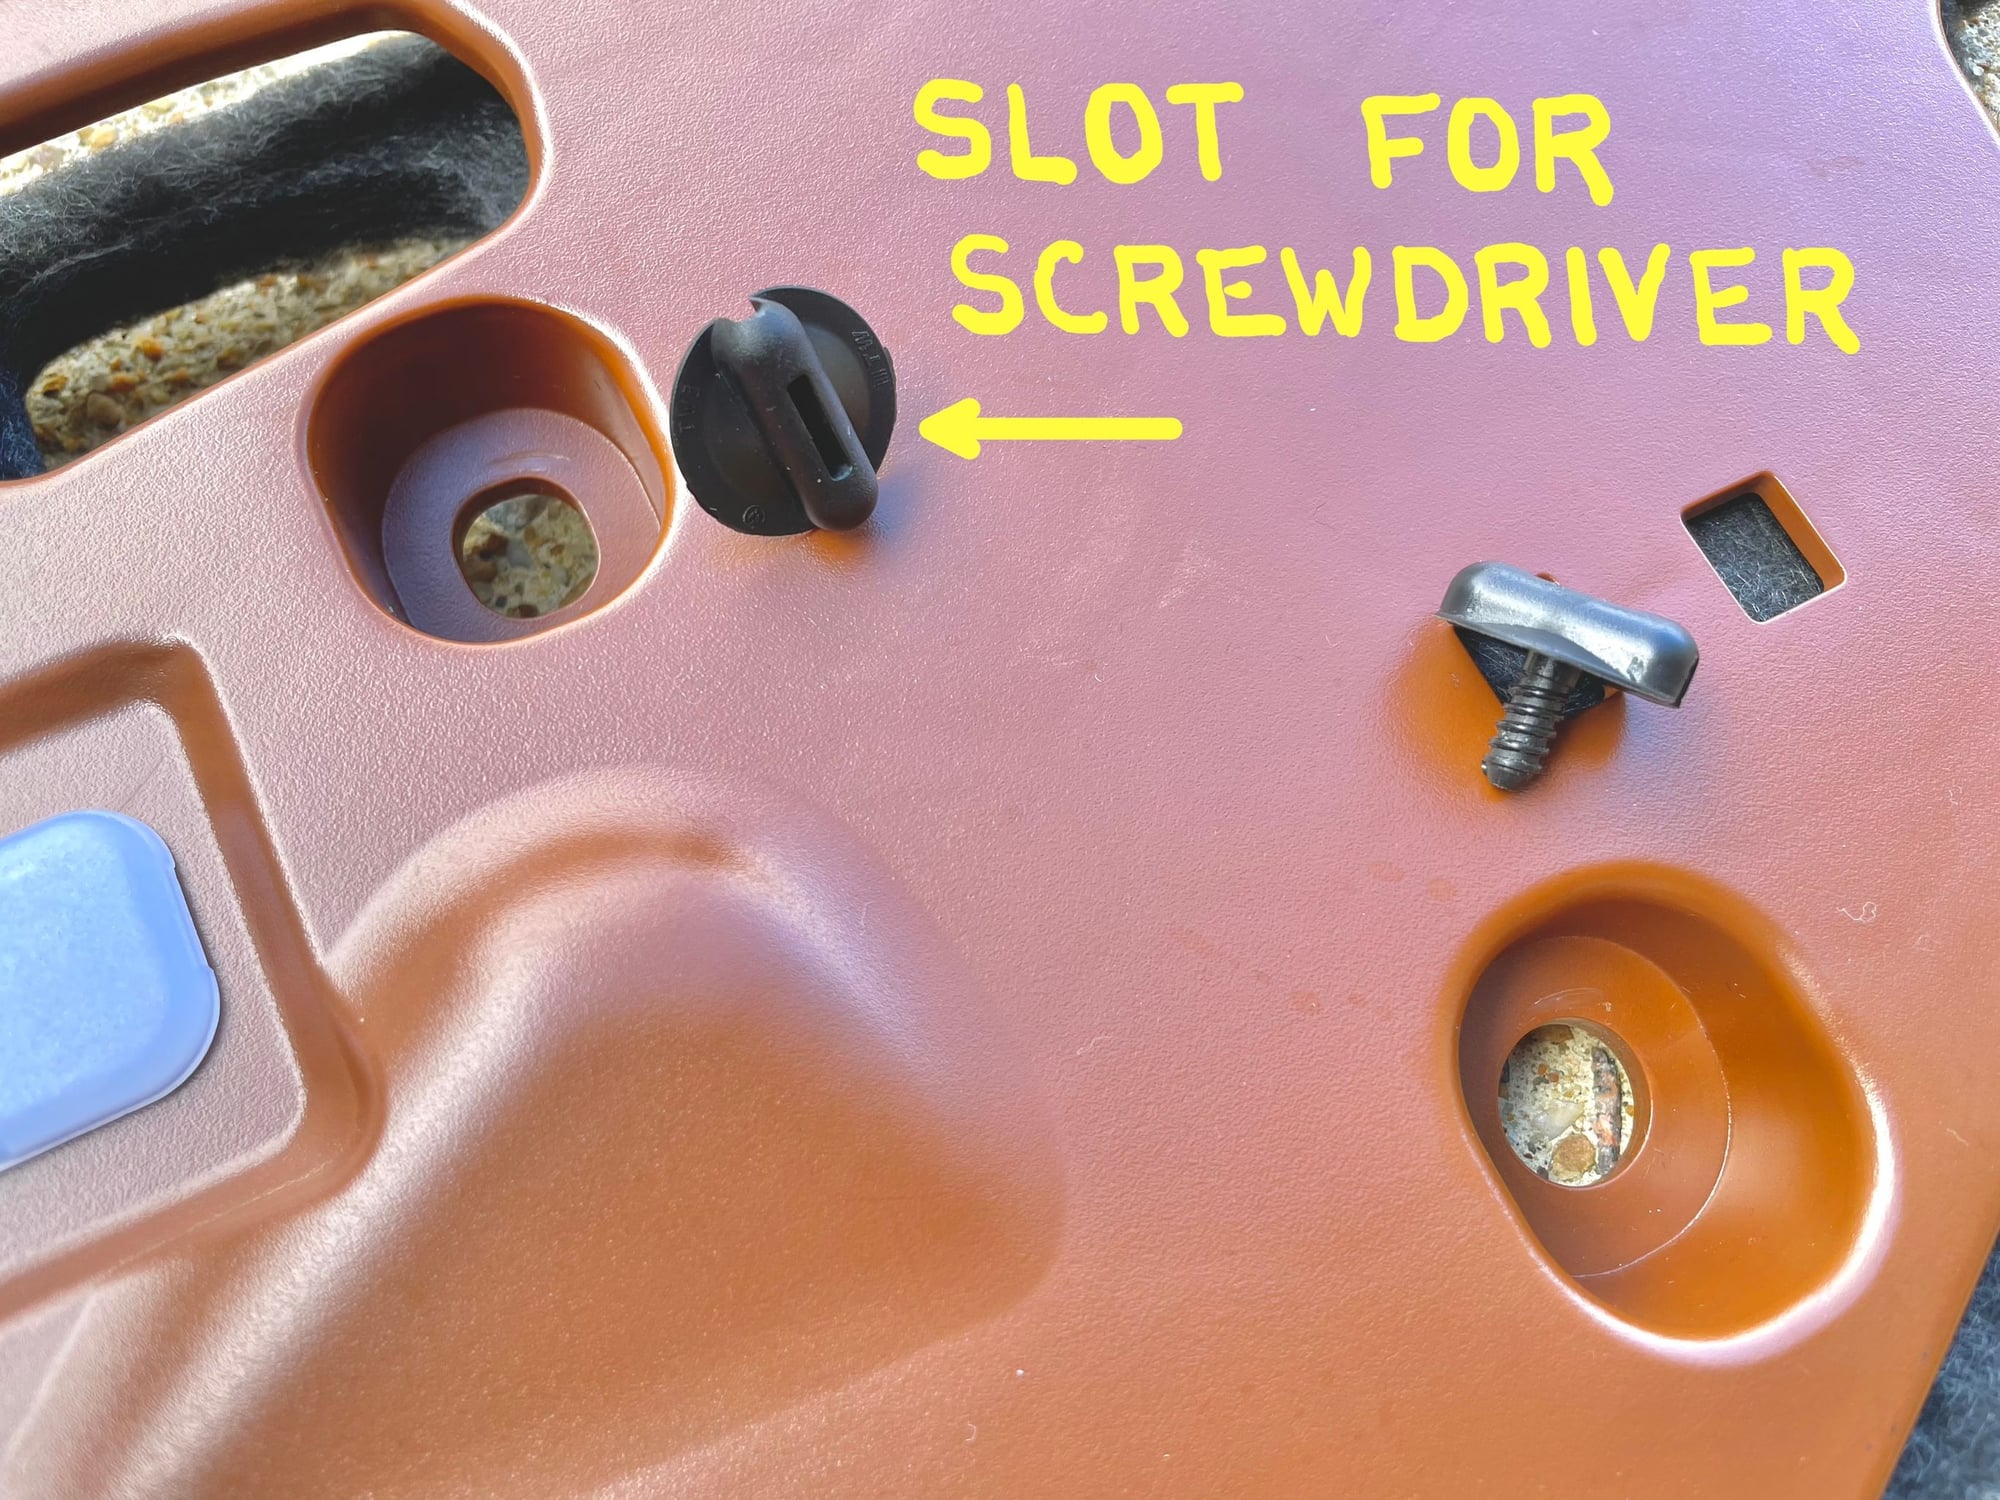
Closeup of the plastic thumbscrews with the slot for a screwdriver highlighted.
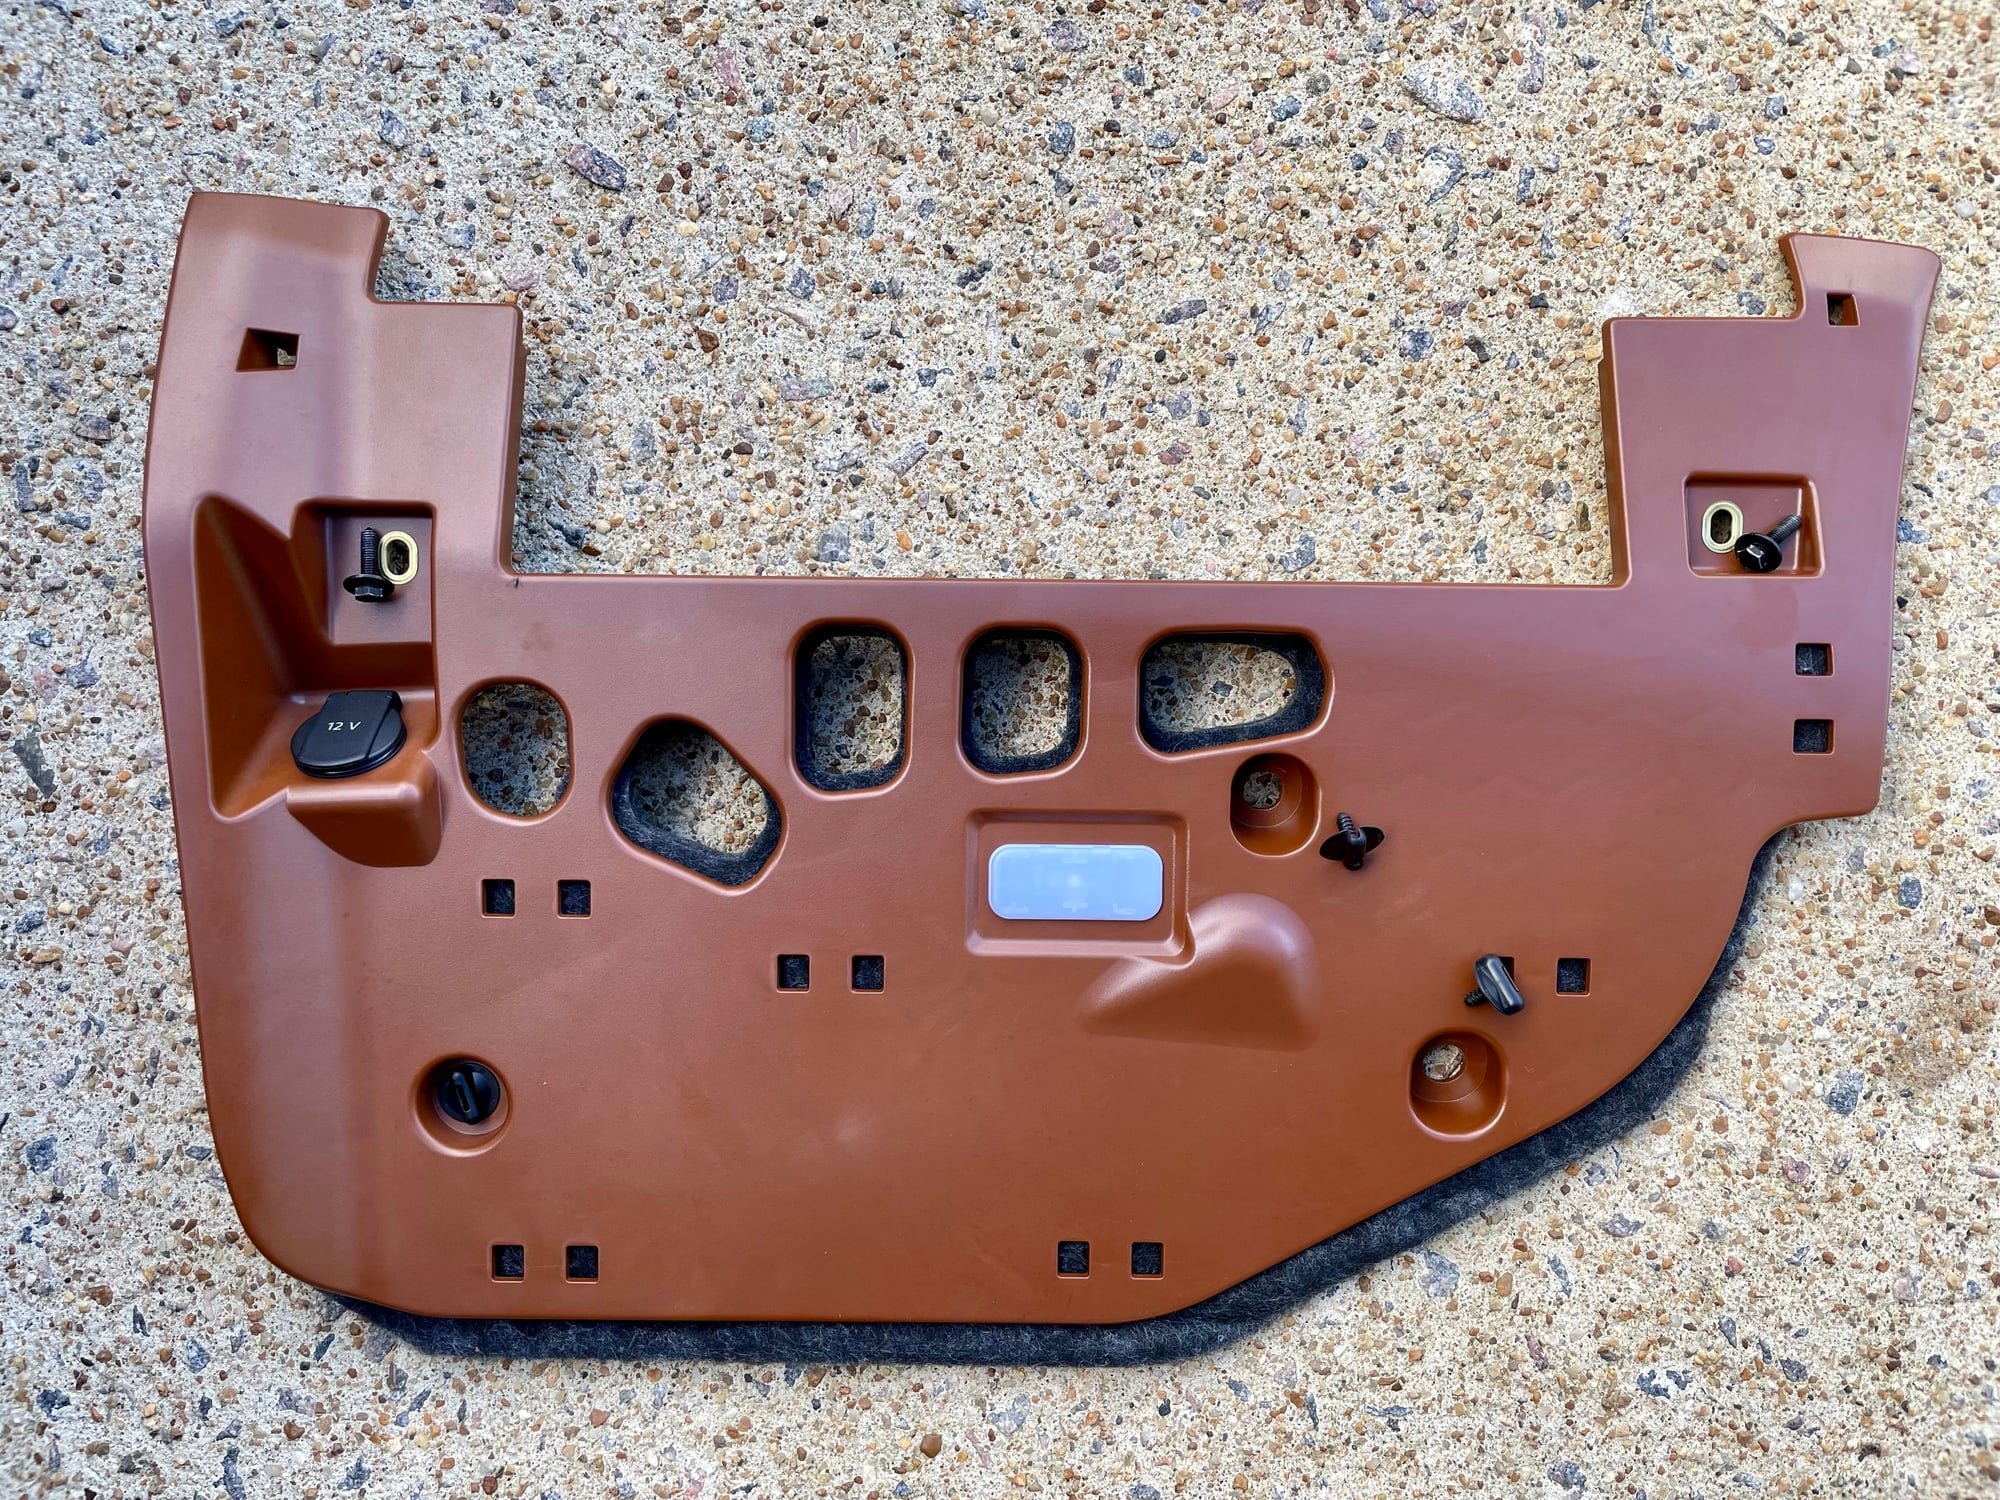
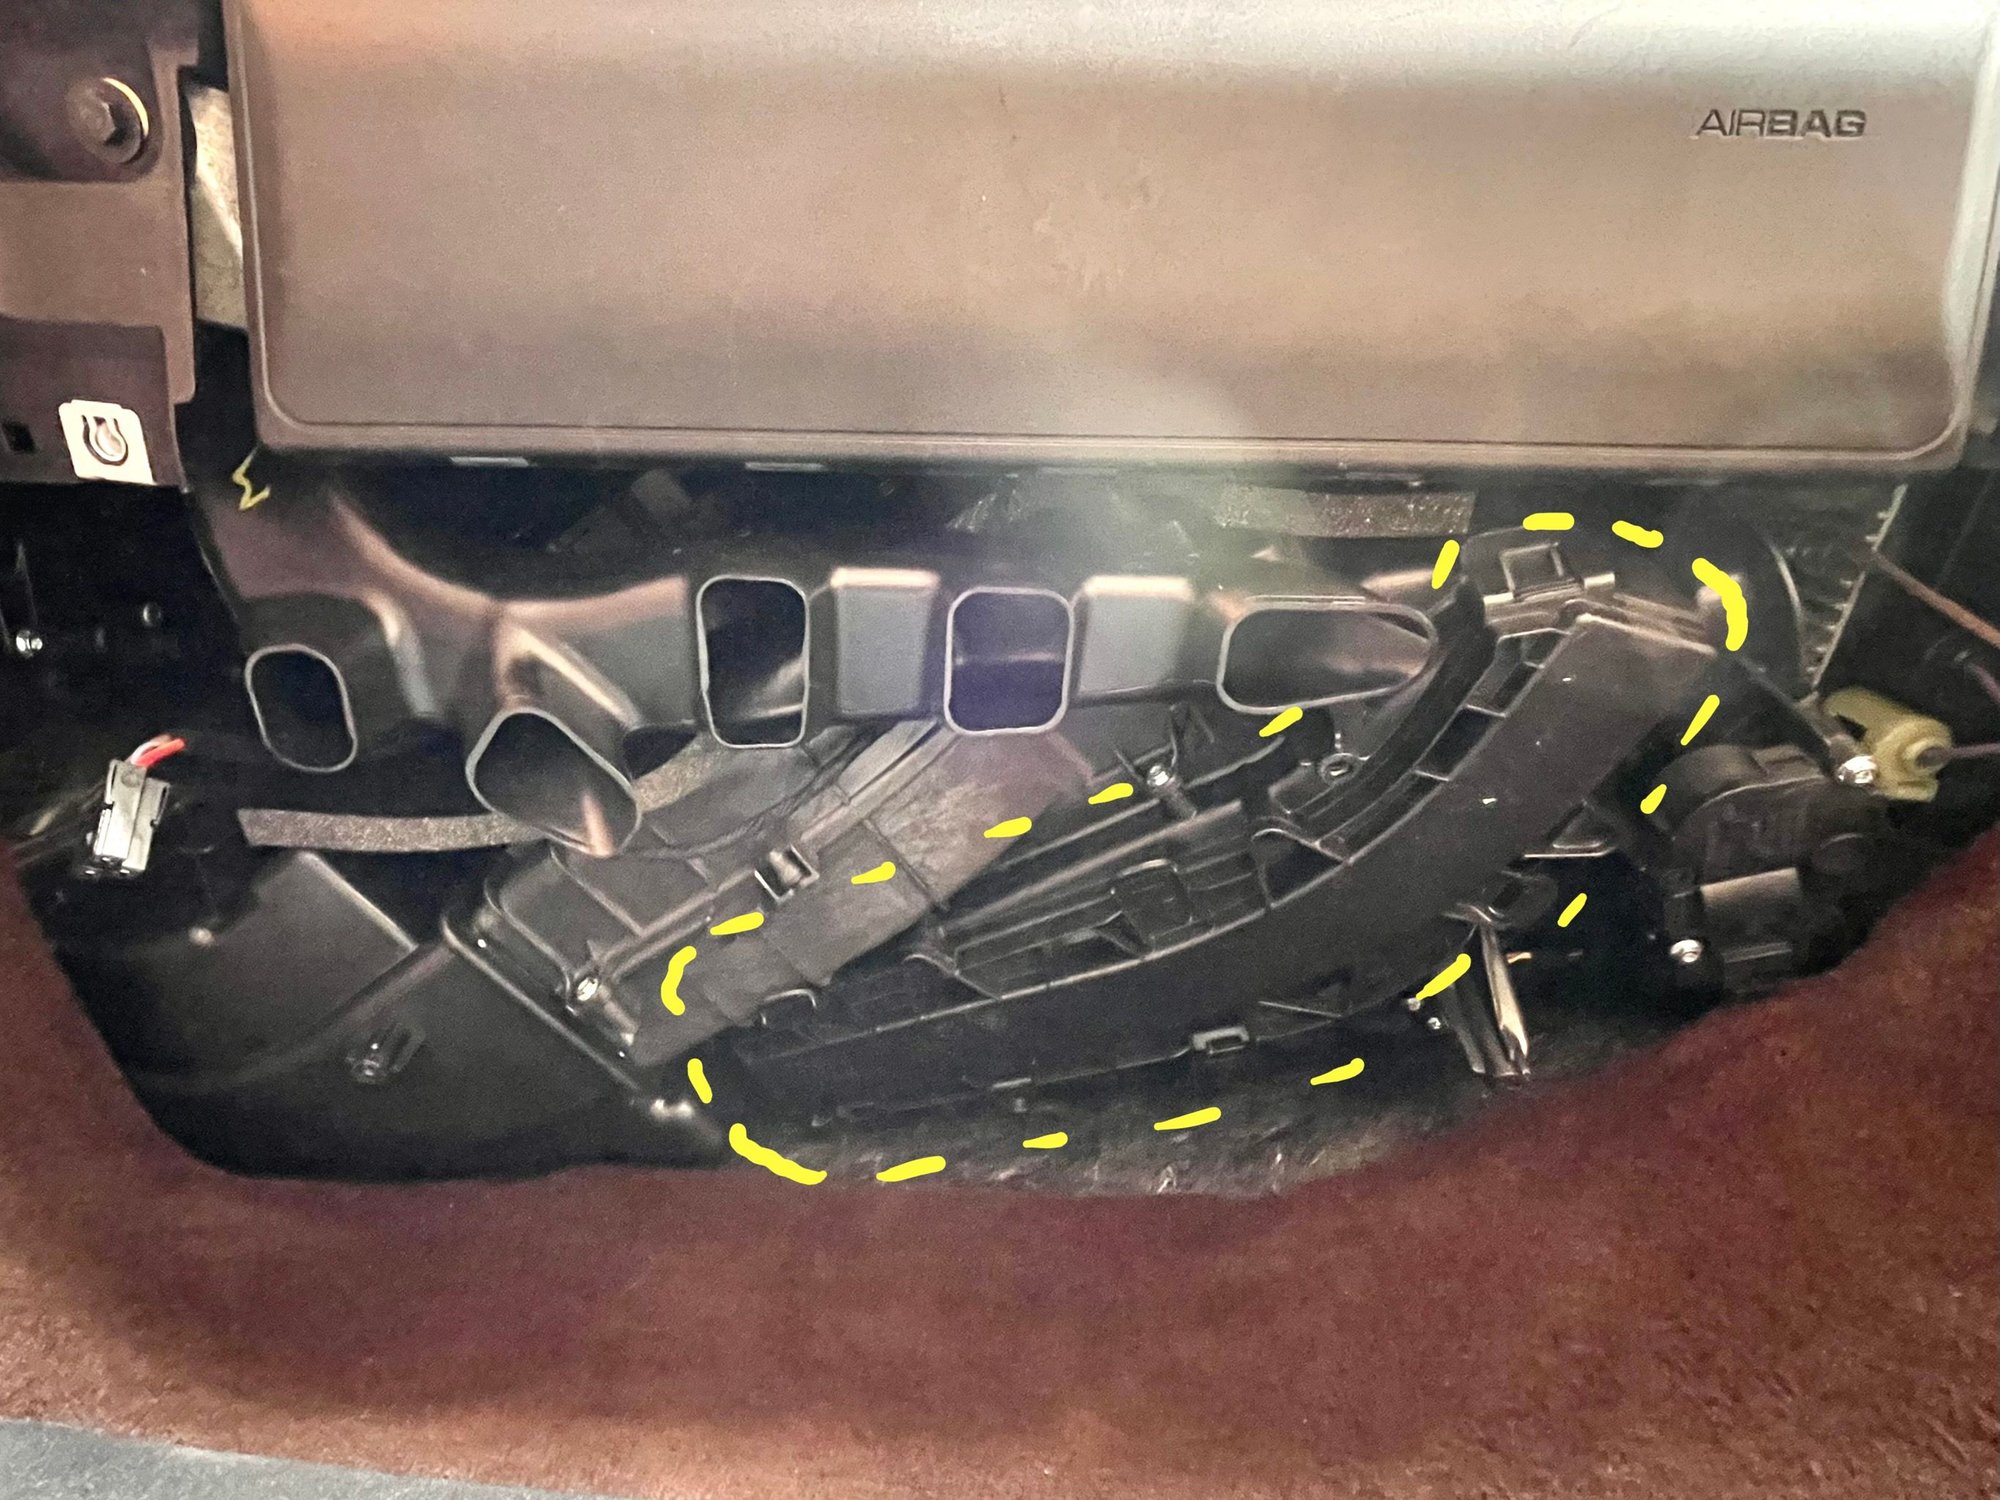
Here’s the view after you remove the panel. Aligning tab locations for the panel are circled.
Closeup of the cover for the cabin filter.
Remove the cover by squeezing the tabs as illustrated below. The bottommost tab in the photo is slightly different. Just pull it away from the male tab on the housing. Fortunately, it is the easiest to access. You can see how it fits over the male tab in the photo above.
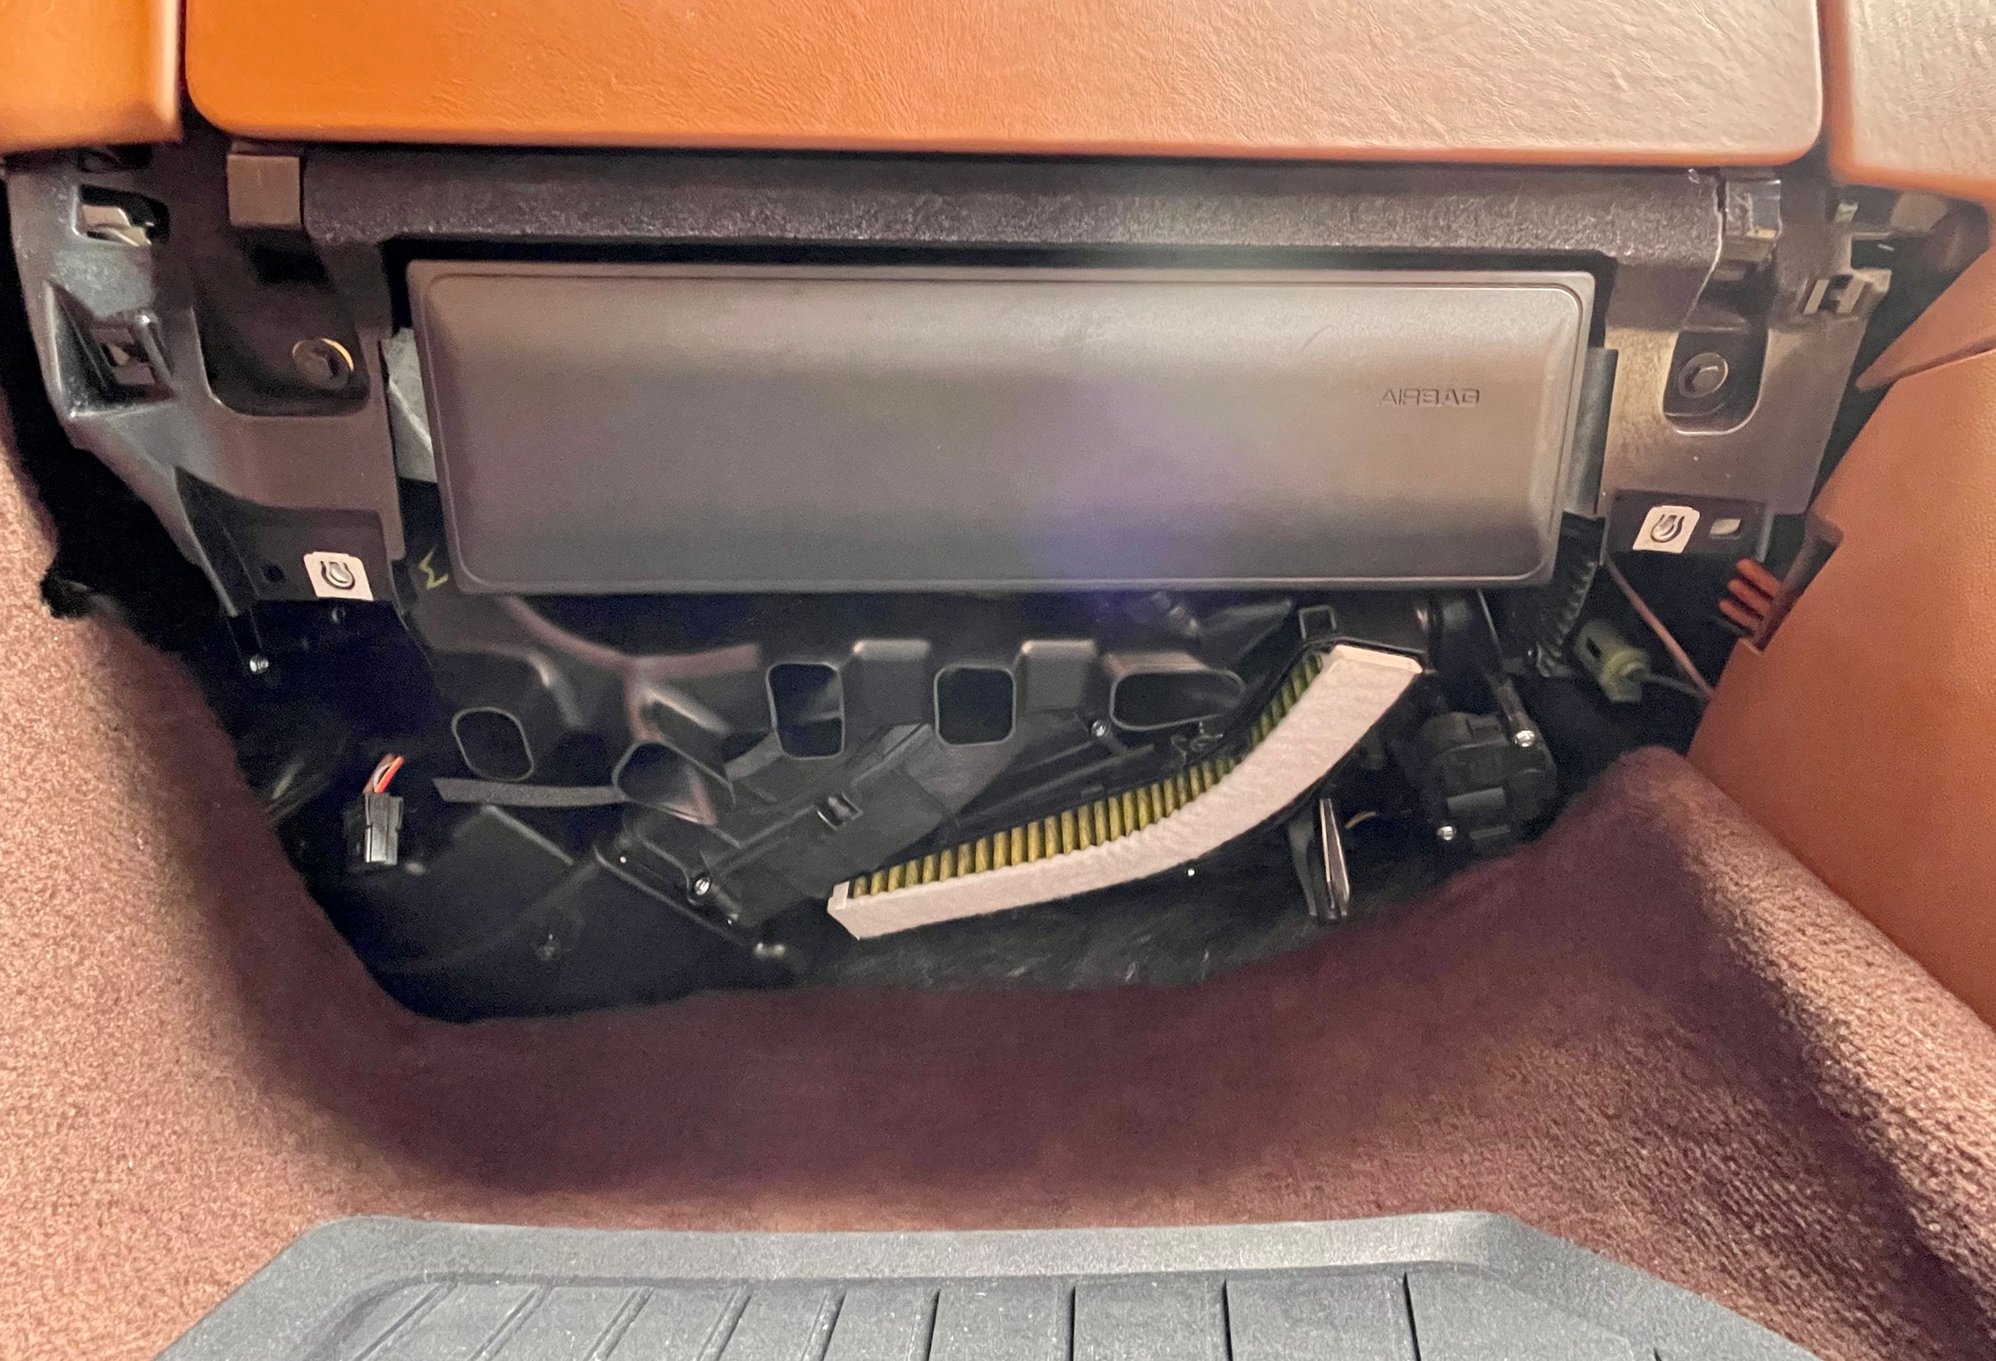
Picture shows the side that faces the filter and is oriented as it is installed
There’s the filter element. Note that the filter has a green side and a white side. The green side should face the rear of the vehicle.
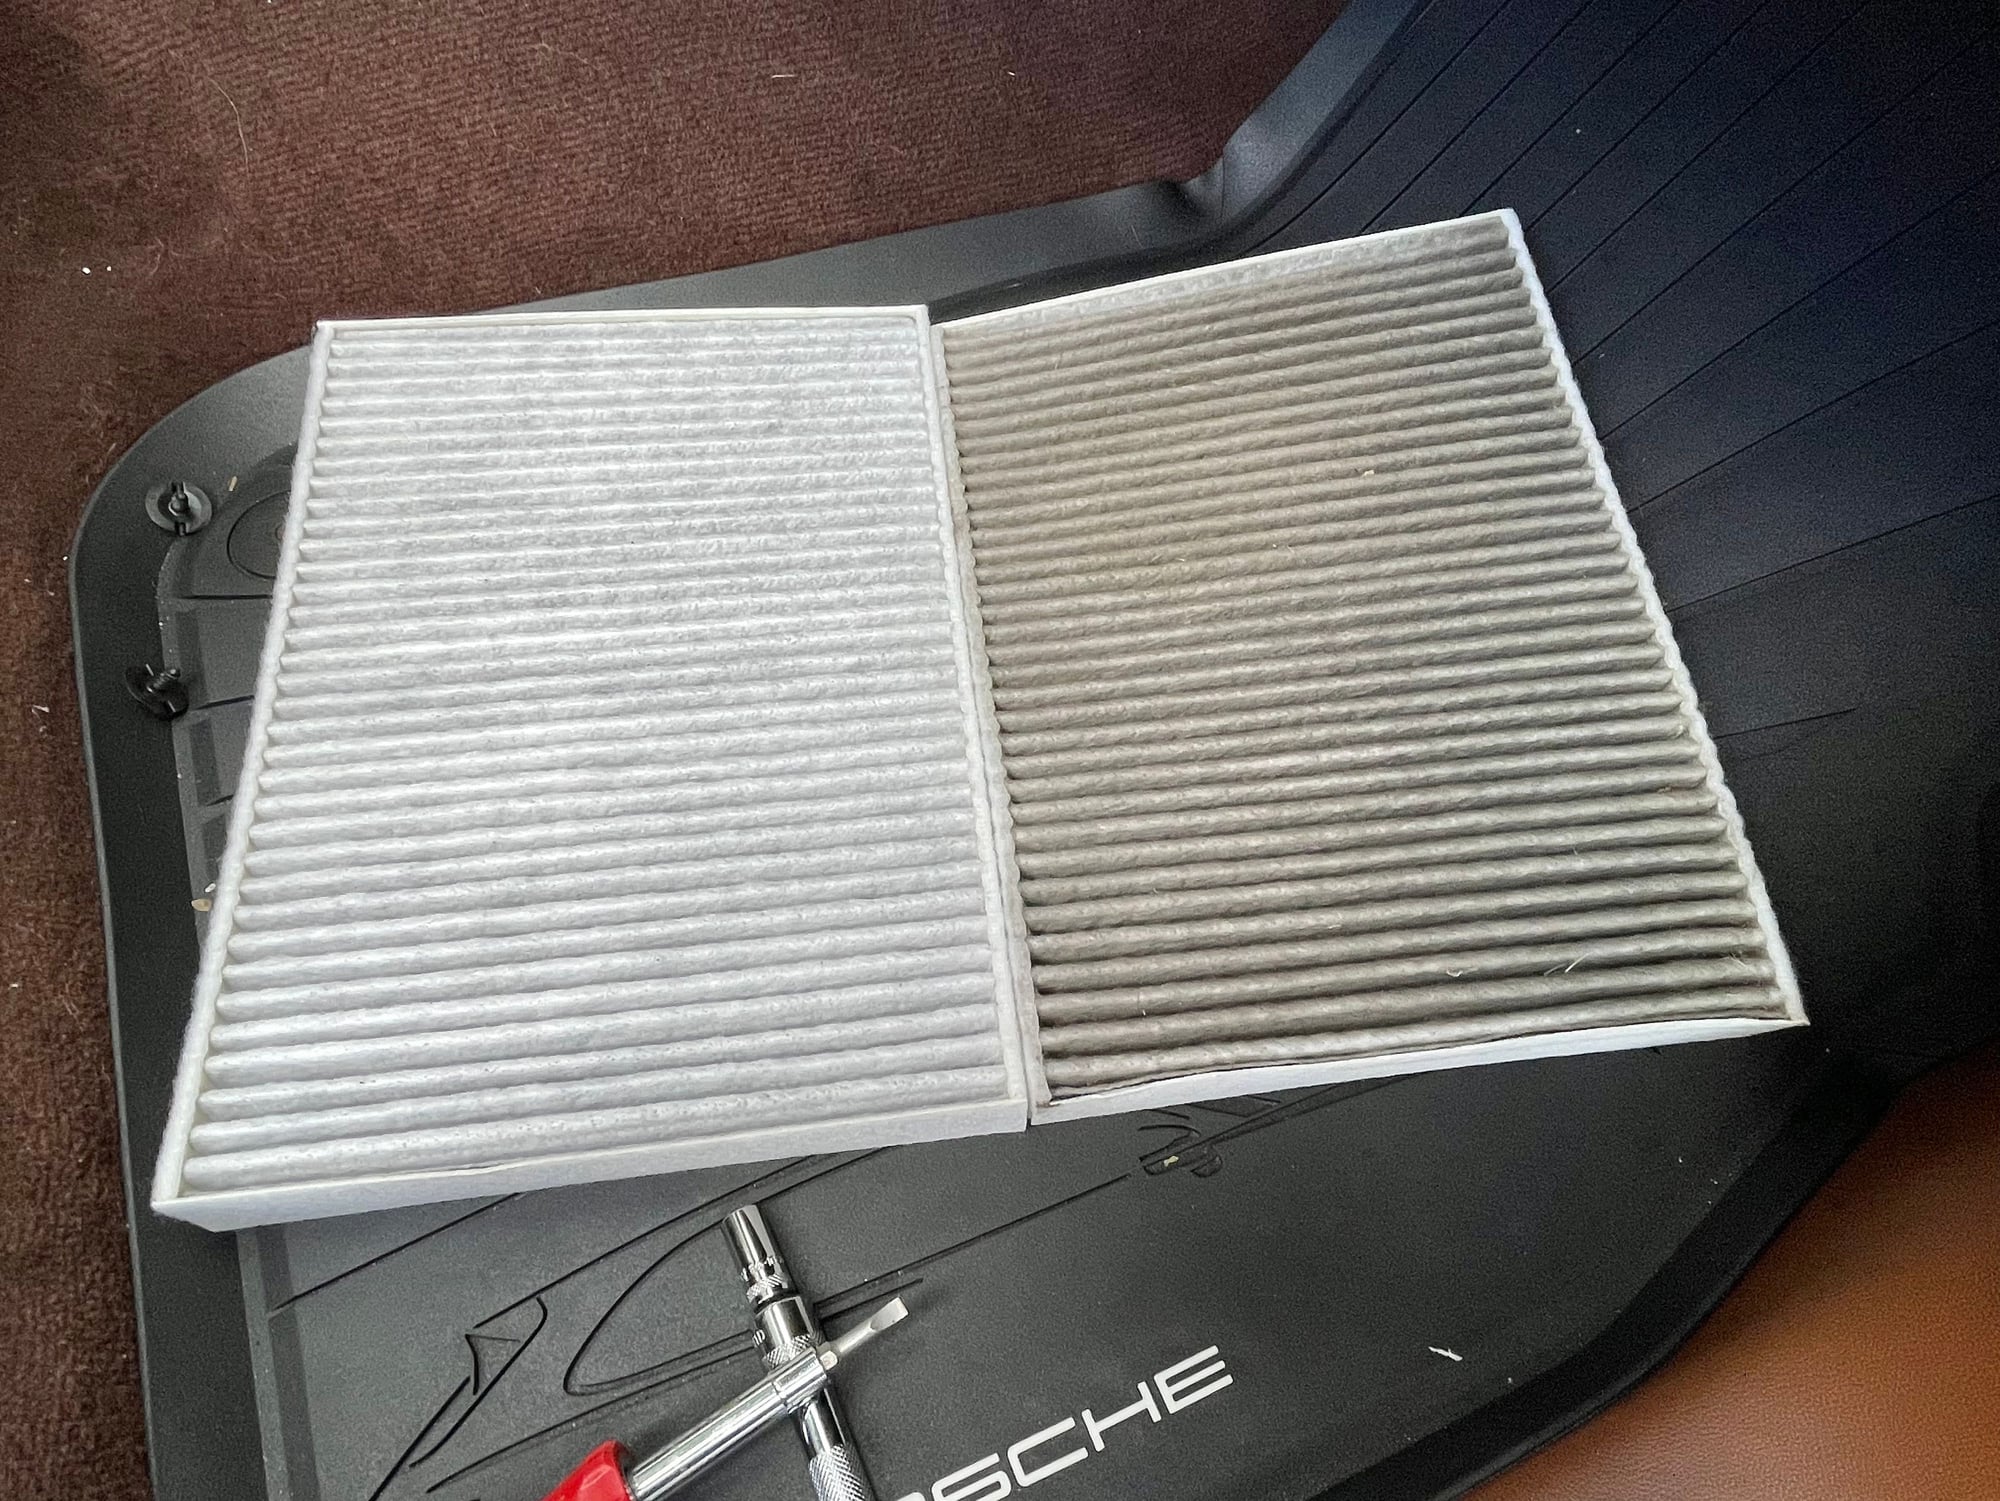
Note how the filter must be bent to conform to the curved slot. Some have noted that some aftermarket filters were rigid and difficult to bend. No issues with the OEM filter. It was easy to bend.
TIP: There isn’t much room between the floor and the filter slot. When installing the new filter slant the rear end up and into the back of the inlet. Rotate the front end upwards while bending the filter to fit into the front.
Two years of use took a toll on the old filter. There were small bits of leaves and other debris deep in the pleats. New filter on the left for comparison.
After inserting the new filter, pop on the filter cover, making sure that all tabs engage. Reconnect first the 12V and then the light’s electrical connectors. Install the cover by first aligning and popping in the locator tabs. Then install the 8mm screws and thumbscrews. You’re done!
Whew - am 6'3" and the contortionist in me barely survived
Not complicated but awkward. FYI if you don't have 8mm then 5/16 works fine. Things that helped were positioning a folding chair next to the open passenger door and a headlamp. I was trying to unfasten the 3 plastic thumbscrews in the back until I realized that the dealership failed to put them back in when they previously did this task! Just unhooked the foot well light. Start to finish was < 30 minutes…


 10-08-2021, 12:28 PM