DIY Fitting rock sliders/running boards and brackets: step-by-step
#1
Race Car
Thread Starter
Join Date: Sep 2006
Location: Jacksonville, FL Duval County
Posts: 4,220
Likes: 0
Received 35 Likes
on
24 Posts
1. Don't.
2. Seriously it's a huge pain in the *** don't go to the trouble to buy all these parts because the brackets are nigh impossible to install.
2. Seriously it's a huge pain in the *** don't go to the trouble to buy all these parts because the brackets are nigh impossible to install.
#2
Race Car
Thread Starter
Join Date: Sep 2006
Location: Jacksonville, FL Duval County
Posts: 4,220
Likes: 0
Received 35 Likes
on
24 Posts
update: I have figured it out and will post pictures later 
Here are the pictures showing how the brackets install. Keep in mind that they are left/right specific, except the center one. For the driver front, you have to unbolt the one bolt for the air tank and then just slide the tank off its resilient mounts.
The passenger front is the hardest to work on because the air pump is in the way. I did not remove the air pump.
The M8 x 22 hex head bolts part number 909 210 01 are not regular m8 bolts. They have very large heads, which you need because the bolt holes in several places are large and you need that surface area under the bolt head. Also, they have non-threaded tips that are chamfered; a regular M8x22 bolt won't fit in the center mount locations because the threaded portion is too long and the bolt bottoms out.
That being said, I don't think the passenger front bracket is installable with the air pump in place using the porsche bolts, but it is with the smaller-head "regular" m8 bolts like you can get at lowe's.
I also attached a picture showing the witchcraft of how the hex nutserts work- you just slide them in the hex-shaped holes in the chassis, then thread the M8 bolt in until it bottoms. Then, keep turning. The nut can't rotate because it's trapped by the body so the bolt will start crushing the nut and reducing its length- this creates a bulge on the other side of the chassis sheet metal and now the nut is captured.
Last edited by knfeparty; 07-15-2017 at 07:02 PM.
#3
Thanks for sharing.....Getting some sill protection is still on my list to do. However, I worry that the rock sliders for cayenne are either not up to the job, or actually lower the clearance.
What other options have people used? The sills take a beating every straight crest I do. So Its only a matter of time, before they break.
What other options have people used? The sills take a beating every straight crest I do. So Its only a matter of time, before they break.
#4
Race Car
Thread Starter
Join Date: Sep 2006
Location: Jacksonville, FL Duval County
Posts: 4,220
Likes: 0
Received 35 Likes
on
24 Posts
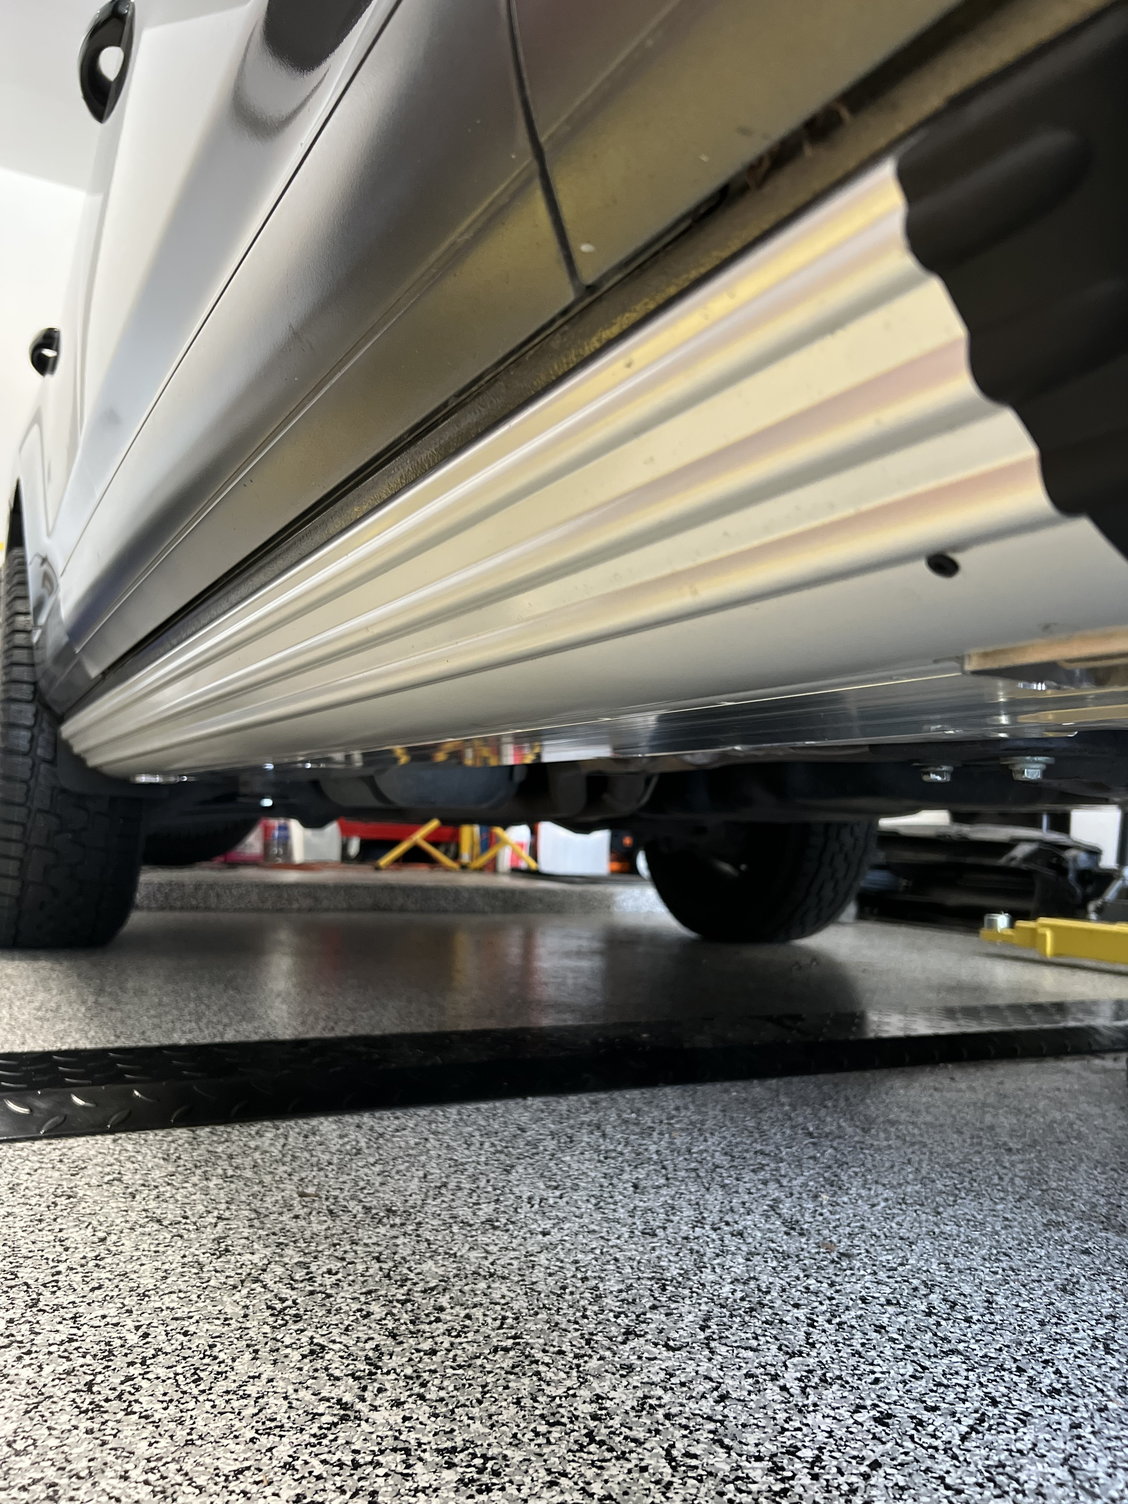
The sliders are well-engineered in that they are very lightweight aluminum and provide a lot of coverage. They are also smooth with no shapes that would snag on anything so you really could "slide" over rocks. The drawback is that they are incredibly rare in the US and stupidly expensive to buy new. I am probably going to draw up some simple ones for laser cutting or a tubular design that could be made at lower cost (albeit heavier).
#5
Thanks - thats good to hear. Apart from the expensive bit, I've just about managed to avoid smashing the plastic sill covers so far. But I know its a matter of time.
I've still not decided what to do. Did they lower the clearance at all?
I've still not decided what to do. Did they lower the clearance at all?
#6
Advanced
I've just received a pair of these running boards from a salvage yard for $400 and $80 for shipping from central California to Seattle. Another yard wanted $850 for the same.
I found the best way to locate them is to just go on car-parts.com and look at salvaged Cayenne's. I was able to locate a handful of Cayenne's that showed running boards in their photos. Some of the salvage yards had had their Cayenne's for so long running boards were long gone but I bet with some dedicated searching it would be possible to find a set for a decent price like I did.
These instructions should be a big help when I get mine installed.
Trending Topics
#8
Bought a pair for a 06 Turbo S we are doing an overland conversion. They run a bit over $1200 a pair and seem really well engineered. I found it takes about 1 hr 15 min per side. It was very straight forward. The passenger side front bracket attaches on directly on top of the bracket for the air compressor. I decided to trim the small metal tab, rather than remove the plastic insert. The passenger side uses 5 nut-certs, two along the main rail and three for the rear bracket. They installed without any issues. On the driver side you do need to remove the front air tank. It is held in with one bolt and a couple of rubber grommets. Best to reuse one of the bolts for the front as it 1. holds down the front bracket 2) has a tab that also isolates the forward rubber grommet for the air tank. The driver side also uses 5 nut certs in the same locations as the passenger side. I used my lift to support each slider and slowly raised it until I could gently lift the slider into place. I put two bolts in the front and rear, lowered the lift and then tightened the rest of the bolts. This is really an easy install and they look great installed.
Last edited by rob76turbo; 12-05-2022 at 12:11 AM. Reason: fix typo
#9
Rennlist Member
Bought a pair for a 06 Turbo S we are doing an overland conversion. They run a bit over $1200 a pair and seem really well engineered. I found it takes about 1 hr 15 min per side. It was very straight forward. The passenger side front bracket attaches on directly on top of the bracket for the air compressor. I decided to trim the small metal tab, rather than remove the plastic insert. The passenger side uses 5 nut-certs, two along the main rail and three for the rear bracket. They installed without any issues. On the driver side you do need to remove the front air tank. It is held in with one bolt and a couple of rubber grommets. Best to reuse one of the bolts for the front as it 1. holds down the front bracket 2) has a tab that also isolates the forward rubber grommet for the air tank. The driver side also uses 5 nut certs in the same locations as the passenger side. I used my lift to support each slider and slowly raised it until I could gently lift the slider into place. I put two bolts in the front and rear, lowered the lift and then tightened the rest of the bolts. This is really an easy install and they look great installed.
Knife above mentioned pursuing a simple DIY design out of tube. It sure seems like a 1/4 way around of an 8" diameter or so pipe would basically do the job, and be tucked up nice and tight, with minimal fab for brackets. Then some sheet aluminum or plate steel "boards" flat under the underbody as sliders... would do the trick.
Or $5K at Eurowise and be done with it. Gulp.
#10
Pics! Did you do OEM (if so: running boards, or "rock rails" from the TS?) or aftermarket (if so: eurowise, or ???)
Knife above mentioned pursuing a simple DIY design out of tube. It sure seems like a 1/4 way around of an 8" diameter or so pipe would basically do the job, and be tucked up nice and tight, with minimal fab for brackets. Then some sheet aluminum or plate steel "boards" flat under the underbody as sliders... would do the trick.
Or $5K at Eurowise and be done with it. Gulp.

Last edited by rob76turbo; 12-05-2022 at 06:53 PM. Reason: Add info


