When you click on links to various merchants on this site and make a purchase, this can result in this site earning a commission. Affiliate programs and affiliations include, but are not limited to, the eBay Partner Network.
This attempt for diagnosis is that of a water leak in the left/drivers side cabin footwell. The typical culprit sunroof drain lines, engine side grommets behind the inner fenders, & rocker panels have all been serviced the cleared.
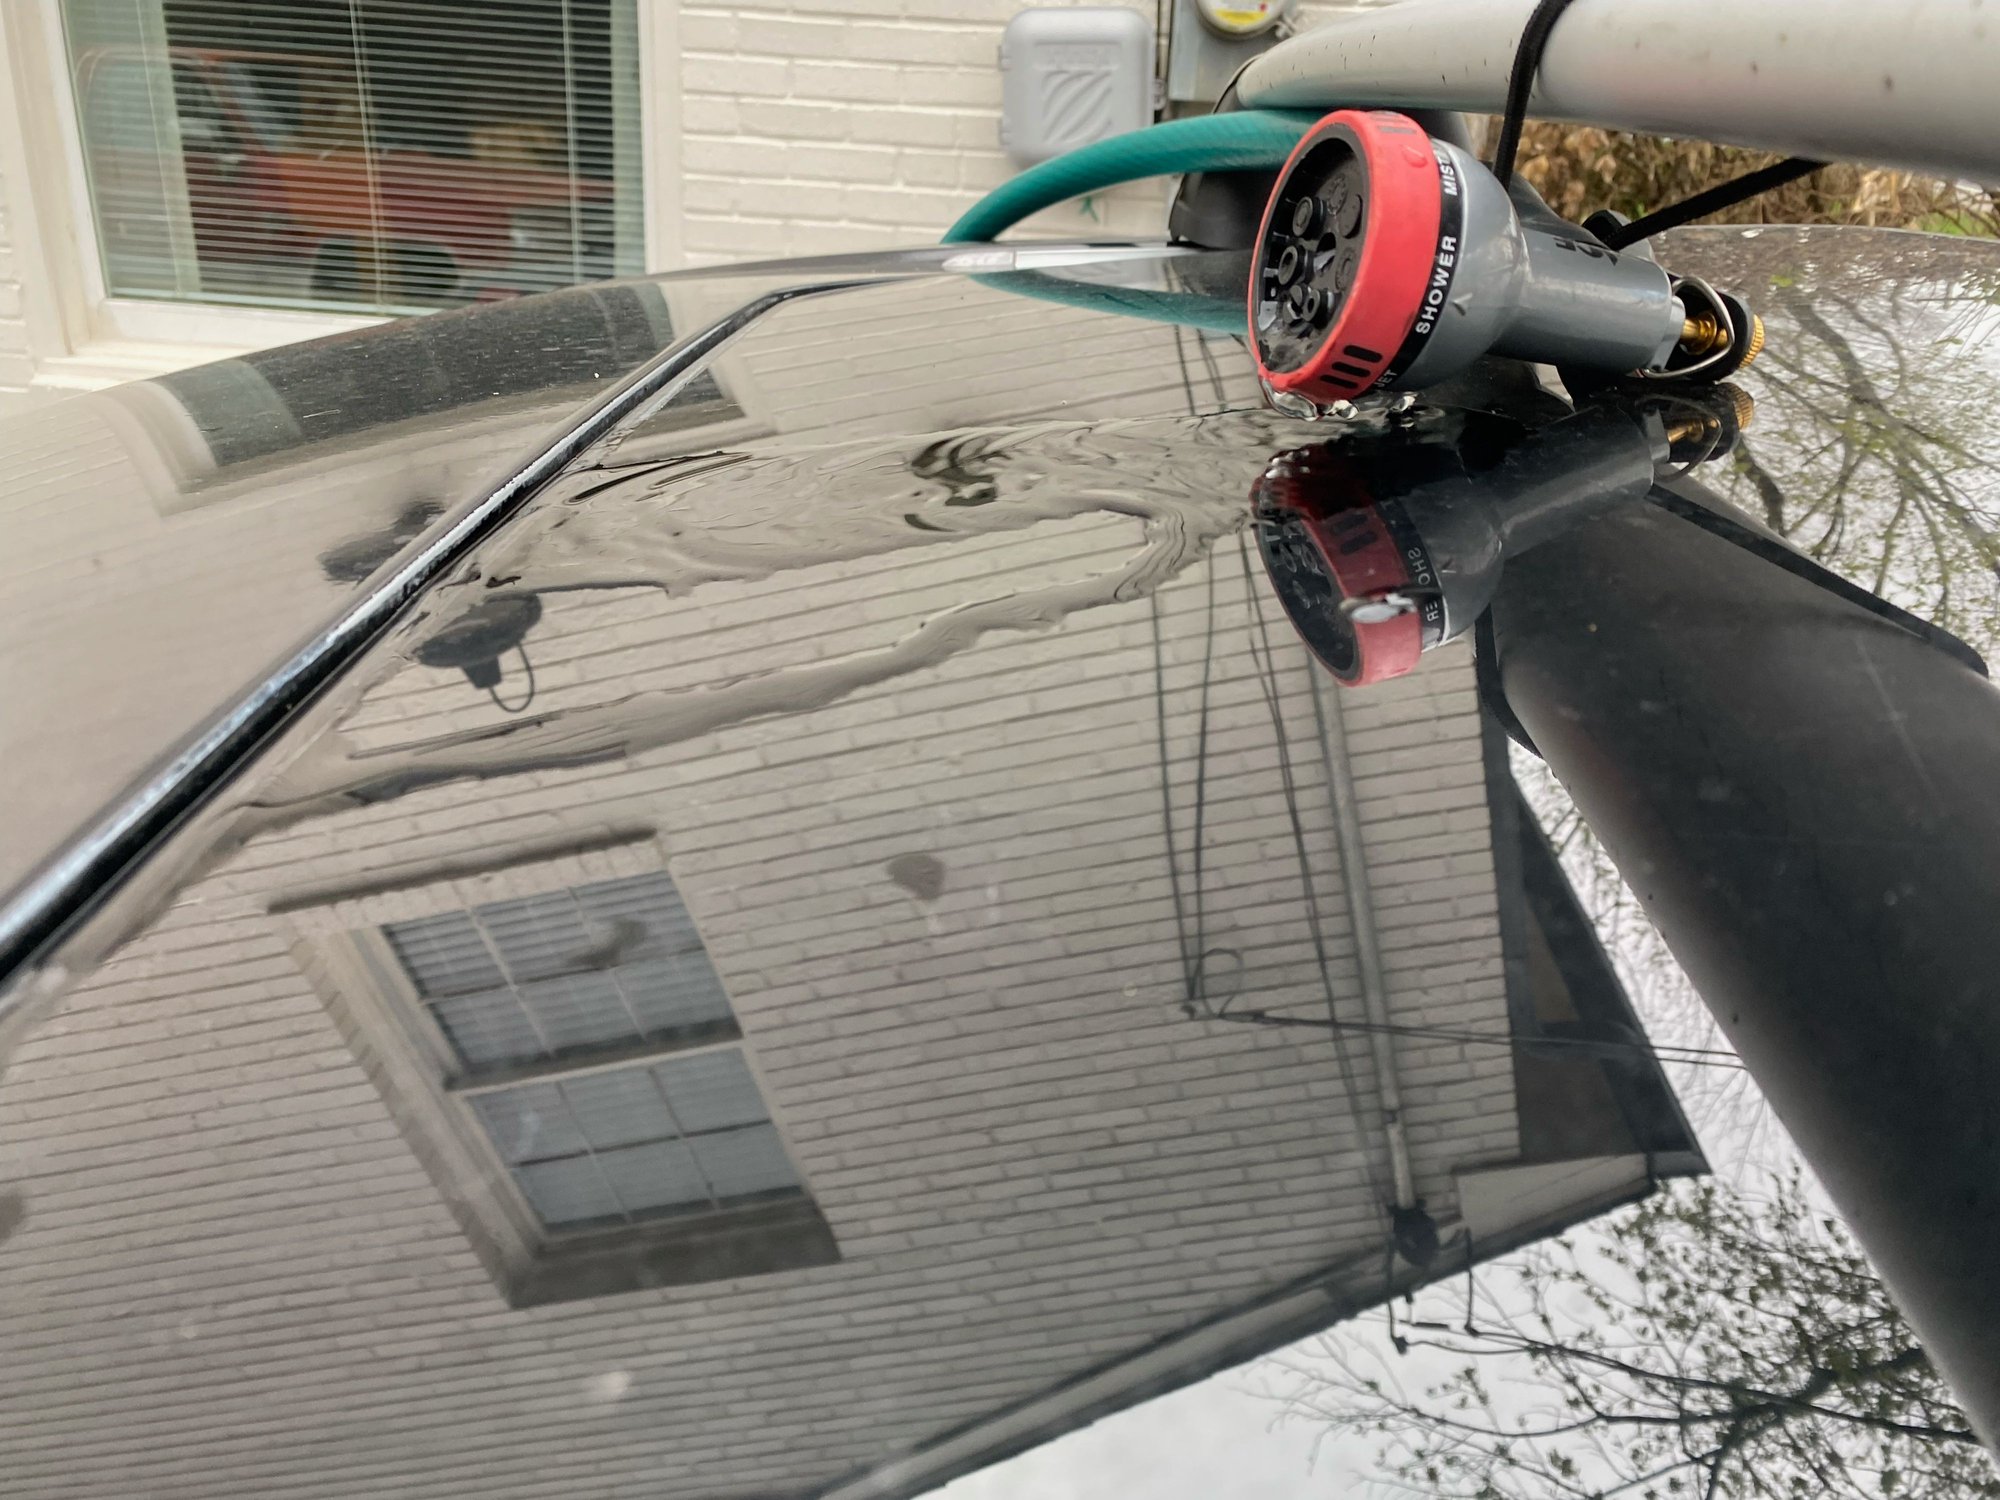
The sunroof has been proven to be fully operational per the test process pictured below. I ran water over the sunroof for 90 minutes (with a slight rear glass lift to introduce more water down the front drain) and maintained a dry footwell. The succeeding day or two came rain showers that I used to confirm an 'all-clear' before I reinstall all of my trim. Frustratingly, I had minimal water accumulation and damp insulation that lies between the pedals firewall and the carpet.
I lifted the carpet and began the drying process, again. I engaged my water hose set up but this time moved the outlet to over the windshield only; slightly to the drivers side. With the wiper blade up and a steady stream of water running down the windshield, I had water beginning to build up in the water well. At the moment, my wiper arms are stuck on the shafts preventing me from getting the plastic cowling off to inspect underneath. PB Blaster hasn't worked yet and am trying to pry and gently pet the wiper shaft with a hammer. If all else fails, a bead of silicone ought to seal it up. I'll apply mechanic tape over the cowl seal to the windshield to test this theory beforehand.
I have repaired the faulty sonic-welded wires that commonly cause chaos with the "Brake Proportioning Warning Light", "Faulty Air Suspension", 'Limp-mode', and others noted in prior threads.
Thank you for that suggestion ThePRF! I'm embarrassed I had not thought of that yet with a two prong puller in my tool drawer 🙈😝 I'll get to work on that in the next day or two. Thanks again for the recommendation.
After pulling off the wiper arms and lower cowl, I can see that there is no seal at the bottom of the windshield that would cause water to be diverted back into the cabin.
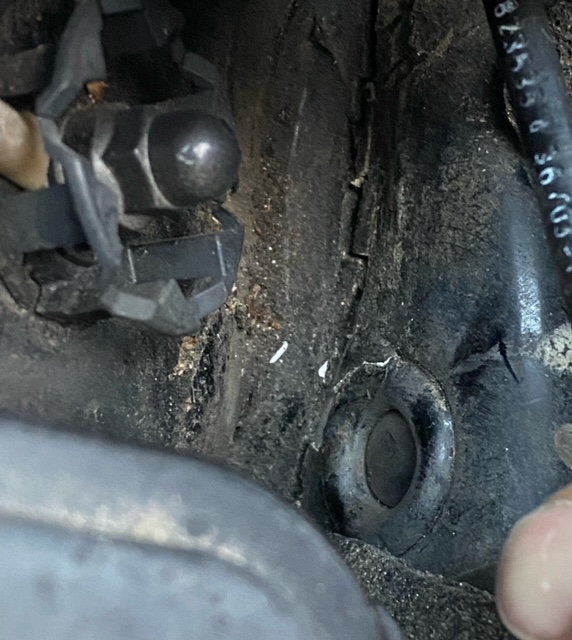
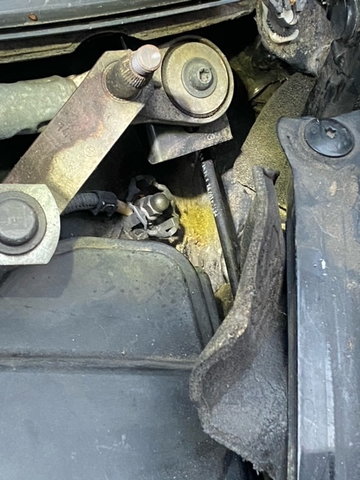
The pictures below show a noticeable crack in the sealant that may be allowing rain water to seep through the crack to the footwell. This is assuming the sealant is/was 'sealing' the corner panels making the firewall. I've cleaned the area to dry overnight and will apply new sealant tomorrow for curing. The image is of the drivers corner aft the hood henge; one zoomed in, the other zoomed out with a light on the suspect area. Passenger side has cracking but higher up though I'll seal all suspect areas.
Any additional thoughts out there that I'm tracking right or off course?
OP - I’d def clean and reseal. Take very little time and it’ll drive you crazy, even if it’s not the culprit. I’ve got a leak getting to my driver side at the center console that I’ll now be looking where you did. Thanks for that!
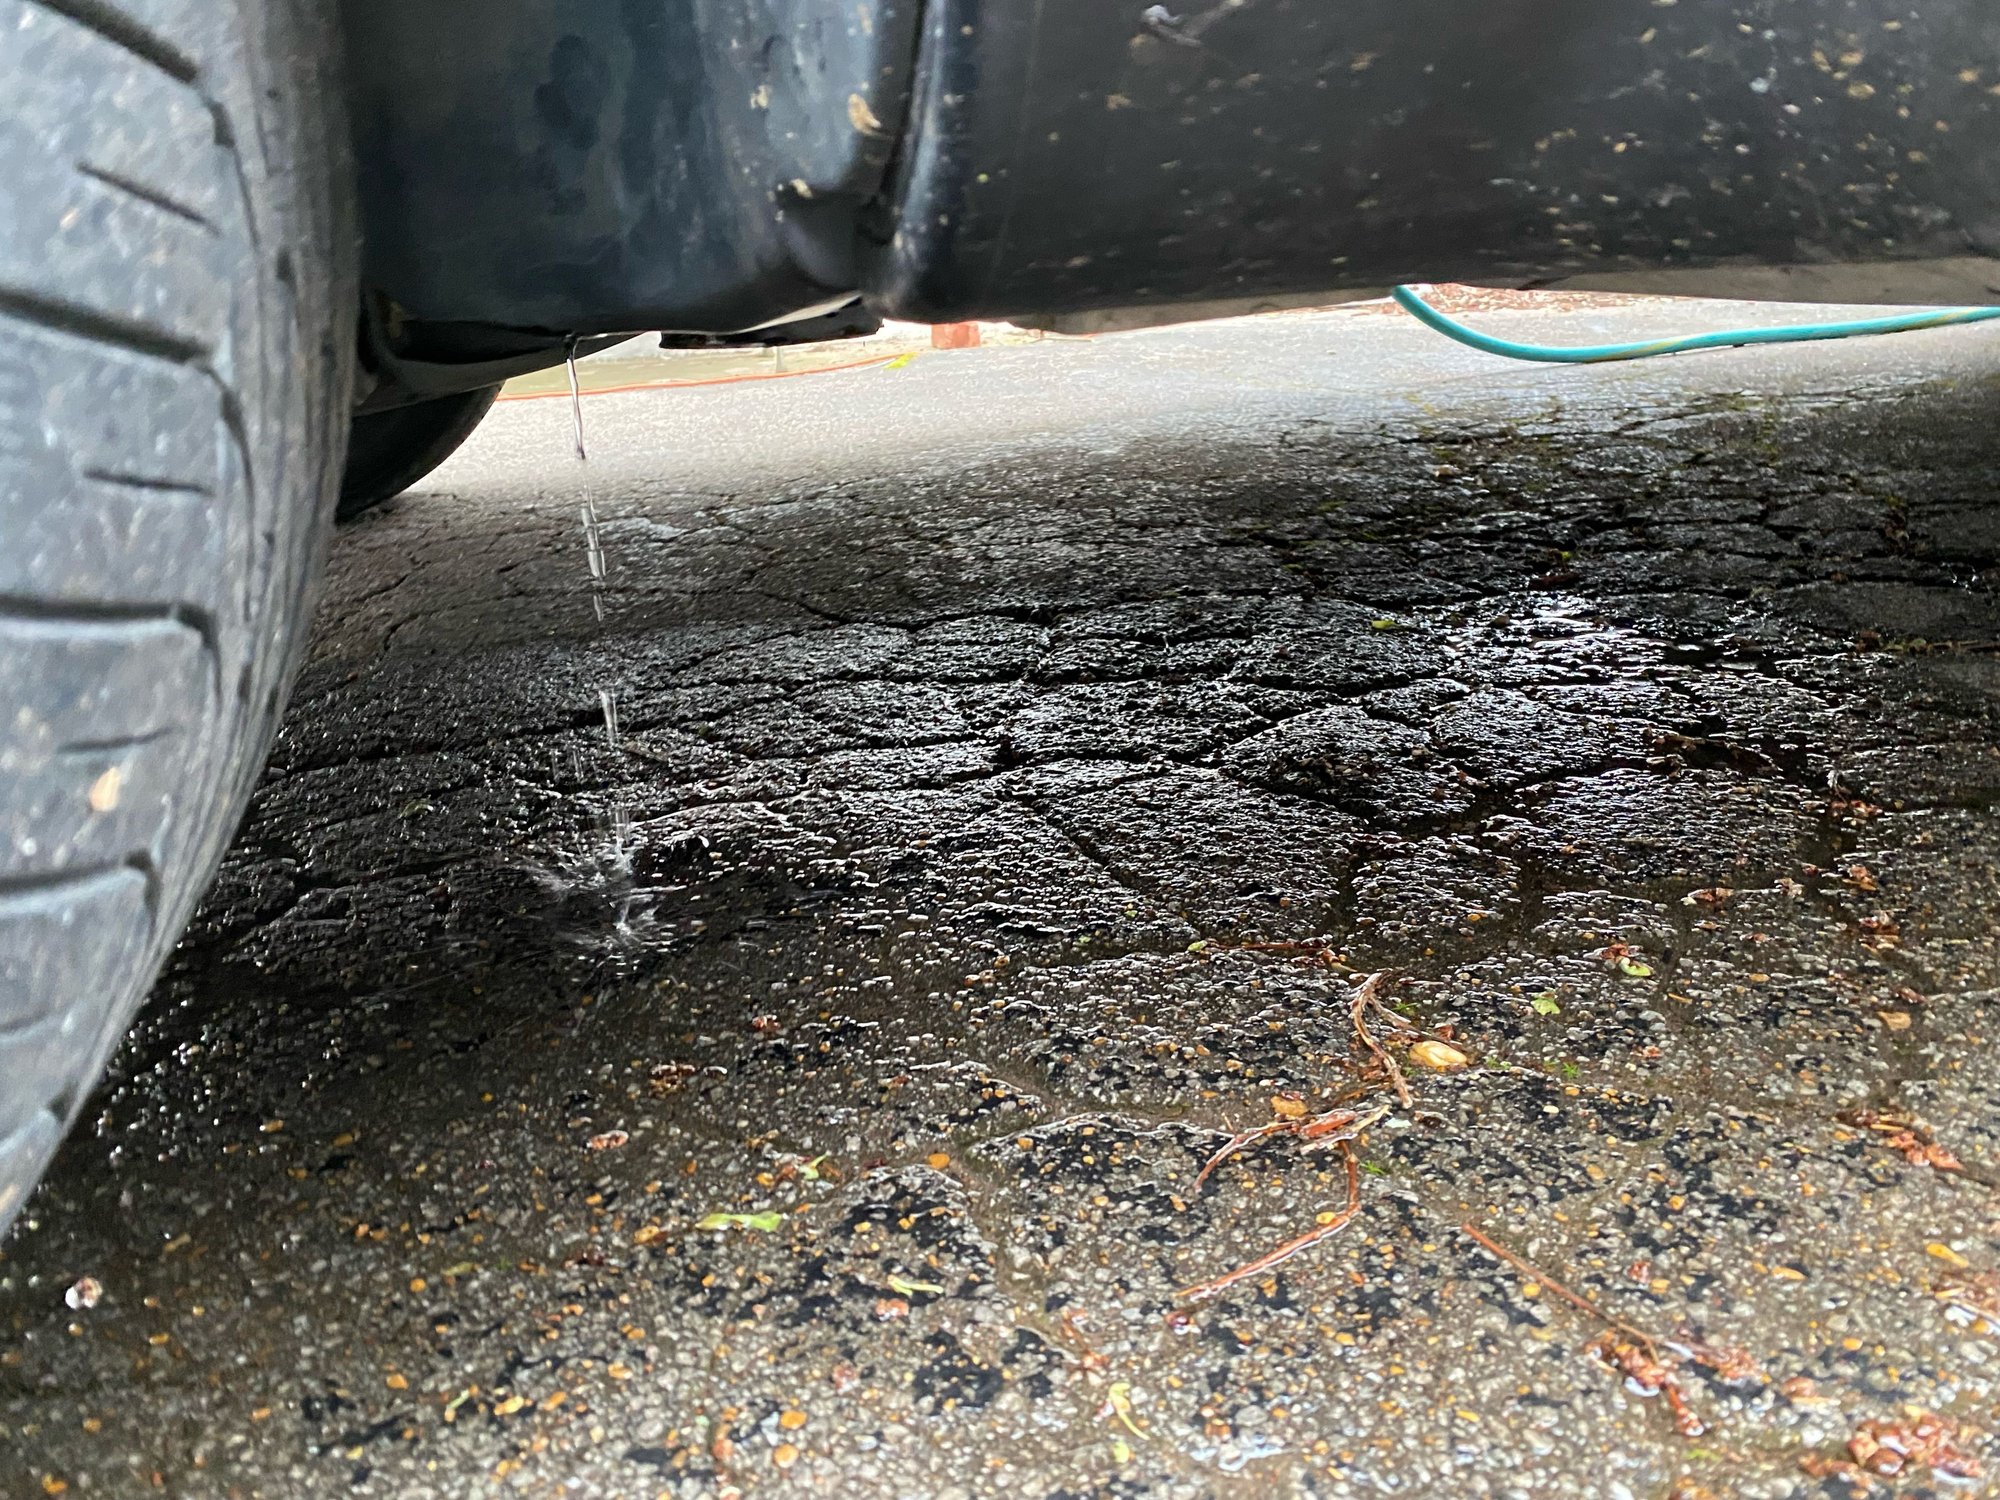
OK, so bad news on my optimist re-sealing on the above cracks. I placed a water hose over the repaired area with the water flow on low. See picture below.
I am now stuck in a pickle... do I pull the front fender or take out the carpet which seems to include pulling the console to get the carpet out in one piece. This assumes the front carpet is split under the console too.
Thoughts of how best to look further into where this water leak is coming from?
To close the loop on this thread, the water leak problem was one that I was unable to find any prior diagnosis on. The seal the goes around the firewall which the brake booster and cabin pedals are mounted to had separated from the main firewall. The leak was at the very bottom and towards the center of the vehicle; all under the brake booster. For those who have pulled the fuse box know how EXTREMELY LIMITED the space is between the bottom of the booster and 'floor' of the firewall.
I applied roofing cement up and down the seal and every awkward twist my hands and arms would do, I finally reached fall enough under the booster to apply the cement.
This area was eventually determined by my water hose experiment. Initially I was convinced the leak was at the top but smartened up after many failed sealing attempts. I lightly sprayed water in target areas near the bottom of the 'inner sealed firewall' and with the help on my endoscope to look up under the insulation that is inside the cabin, bolted up with the pedal assembly, I was able to determine where the leak was originating.
I hope this helps anyone else whose is struggling to find that one off floor leak. Feel free to message me if you have questions.
CsnailnRun - I am having this exact issue on my Cayenne currently. I have tested the leak many times now using a borescope camera. I have determined water is coming in from the bottom of that firewall seal near the bolt. My guess is it separated just like yours. I have a few questions with your fix;
Did you need to remove the front firewall? Did you remove the brake booster or anything else to get to it?
Hi Woot. This was a bear of a leak to find and eventually seal. It's now been a year since finally fixing that leak that plagued me for 4 months or so. 😝 Thankfully, still dry!
The front/split-firewall I did have to remove. This was to gain access to the two piece firewall where the booster and assembly are bolted. Apologies if the exact terminology is off. Once the front split firewall was removed, we use that space to disconnect the fuse box (from the top connections) and fold back the box with the lower connections still intact. I removed the horn and any other small objects that are in that cavity. I did not remove the booster as I was not going to open that can of worms. If you're a smaller framed guy like myself (155lbs-medium/large glove size) you can twist your hand and wrist in such a way to apply sealant along the original seal bead with new sealant. I tried wearing medical gloves but found that I really need to rely on my sense of feel of the fingers to apply the sealant. I had to apply 2-3 times in order to finally get the sealant far enough back and under the booster. Every time I was reaching beyond what I thought I could do the prior times... each reach foregoing any attempt at not getting the sealant all over my hand. So a word of advise is forget about trying to keep the sealant contained to your fingers and accept the fact you may need to use your palm and back of the hand to get a good covering of the original firewall seal! I did not like the idea of smearing it as I did but if it works and is never seen... I've slept well at night that I have a dry cabin.
Obviously you'll wash and allow the area to dry prior to sealing the area. Best practice is to go ahead and re-seal cracks along the vertical seam of the firewall body on both sides (Driver/Passenger) since the cowling is removed.

 03-19-2023, 11:58 AM