New 957 Owner - Gosser
#46
2.7 with a single turbo set up! Automatic to manual conversion as well. Should be a blast.
Not much of an update, but finally starting some part acquisitions, starter:

Every V6 I have owned, for whatever reason, has had this high voltage strap disintegrate on me. This one looked like it was close to doing so.

The replacement has an additional terminal on the right, not sure what that is all about:

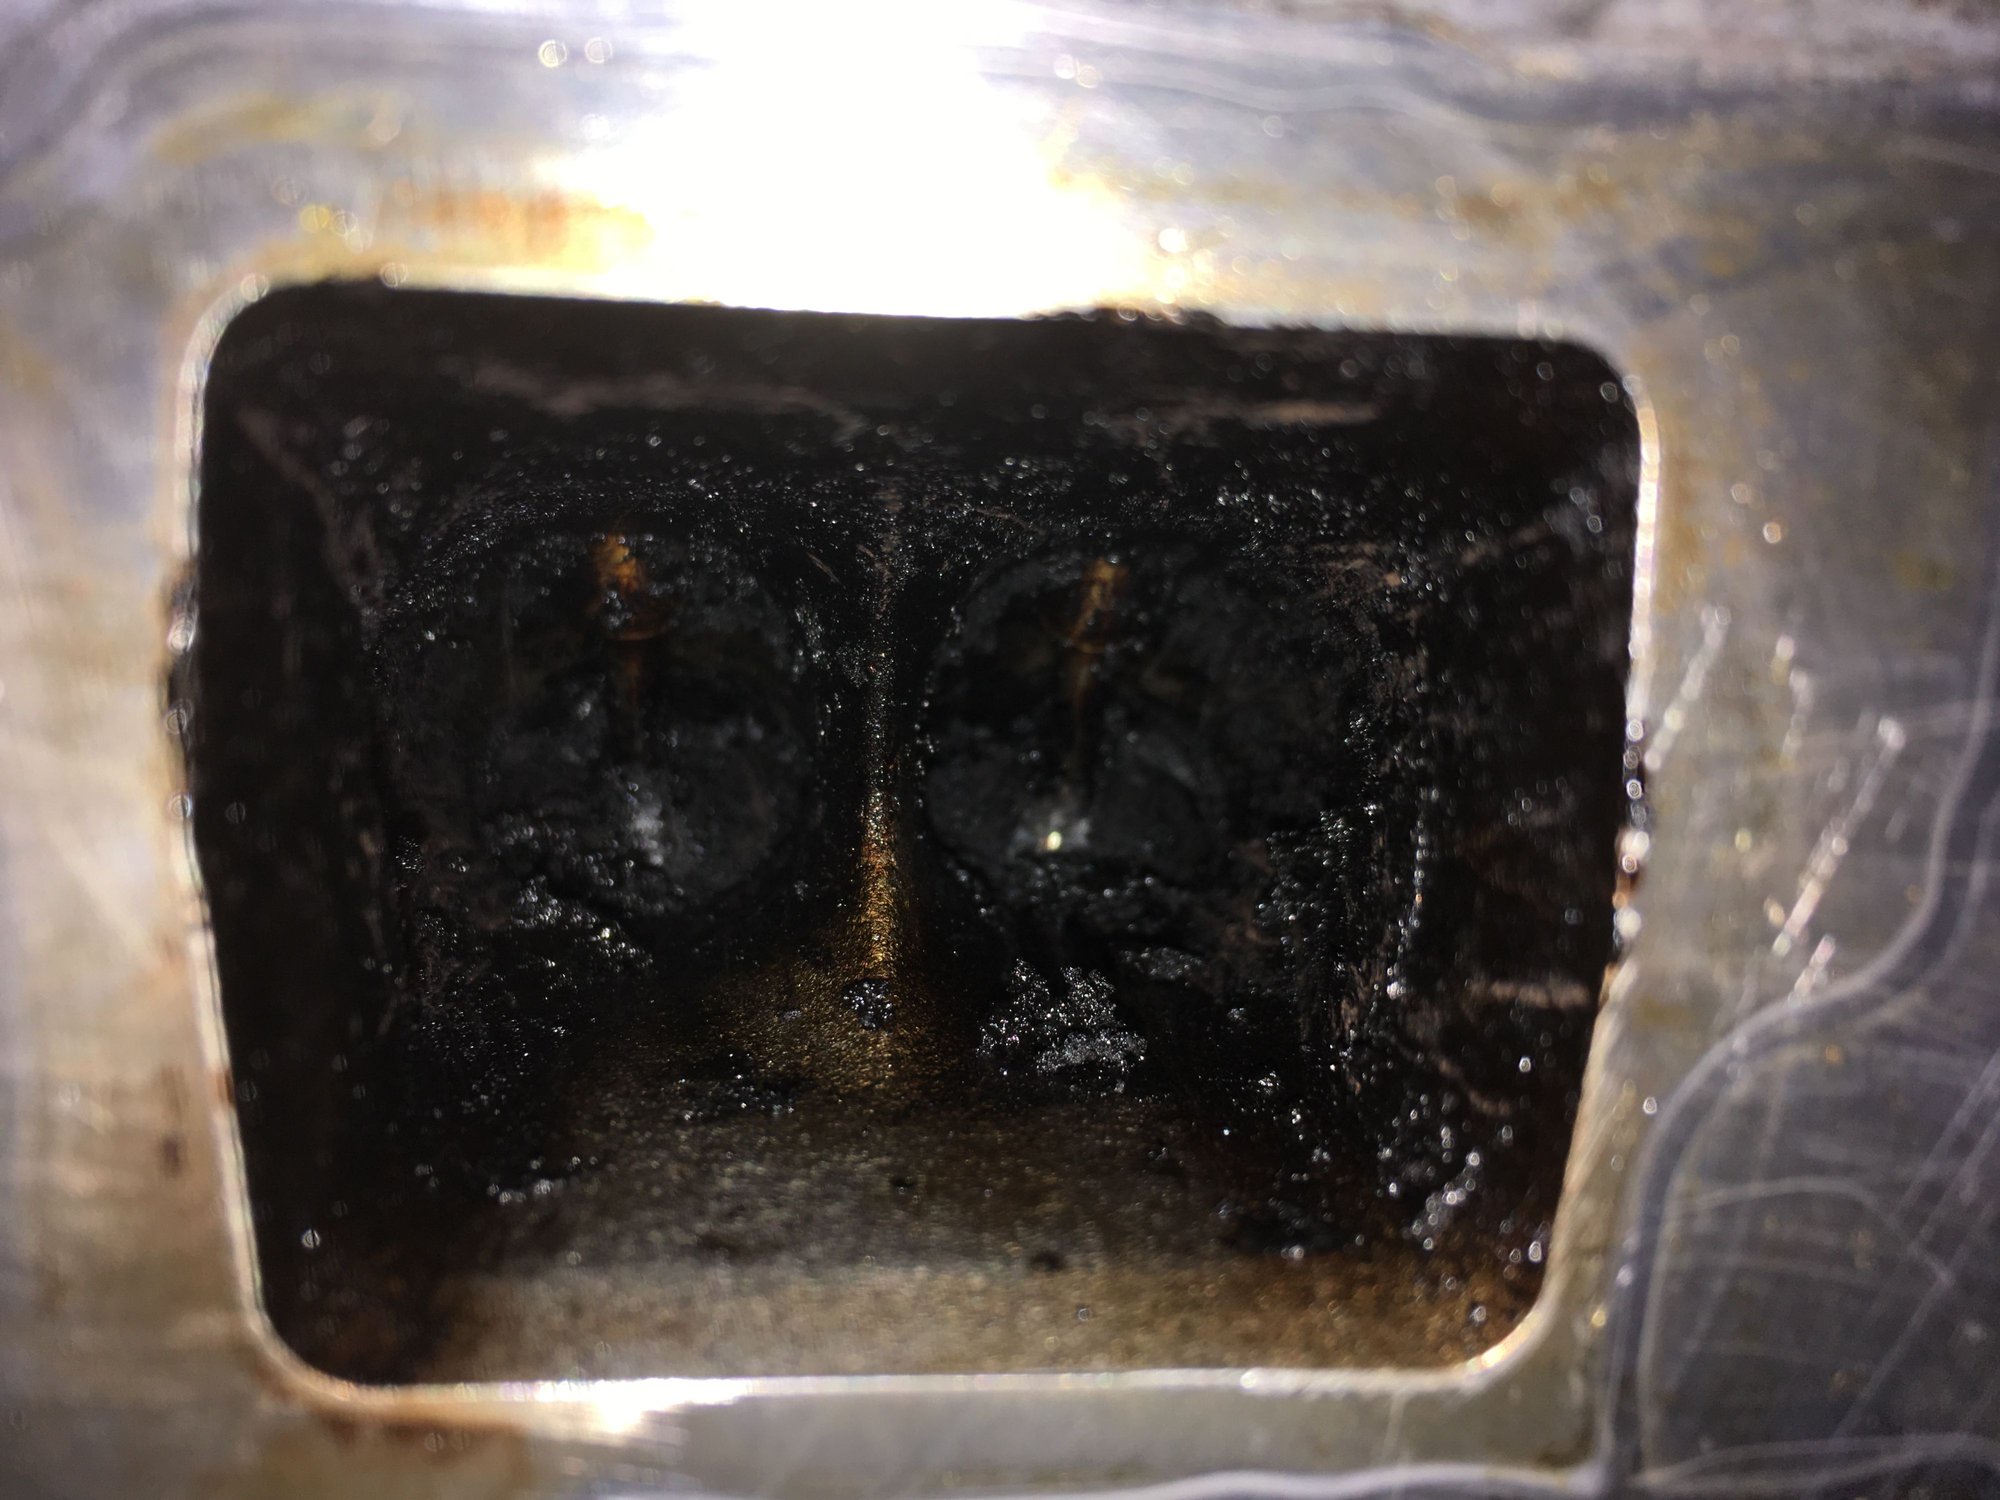
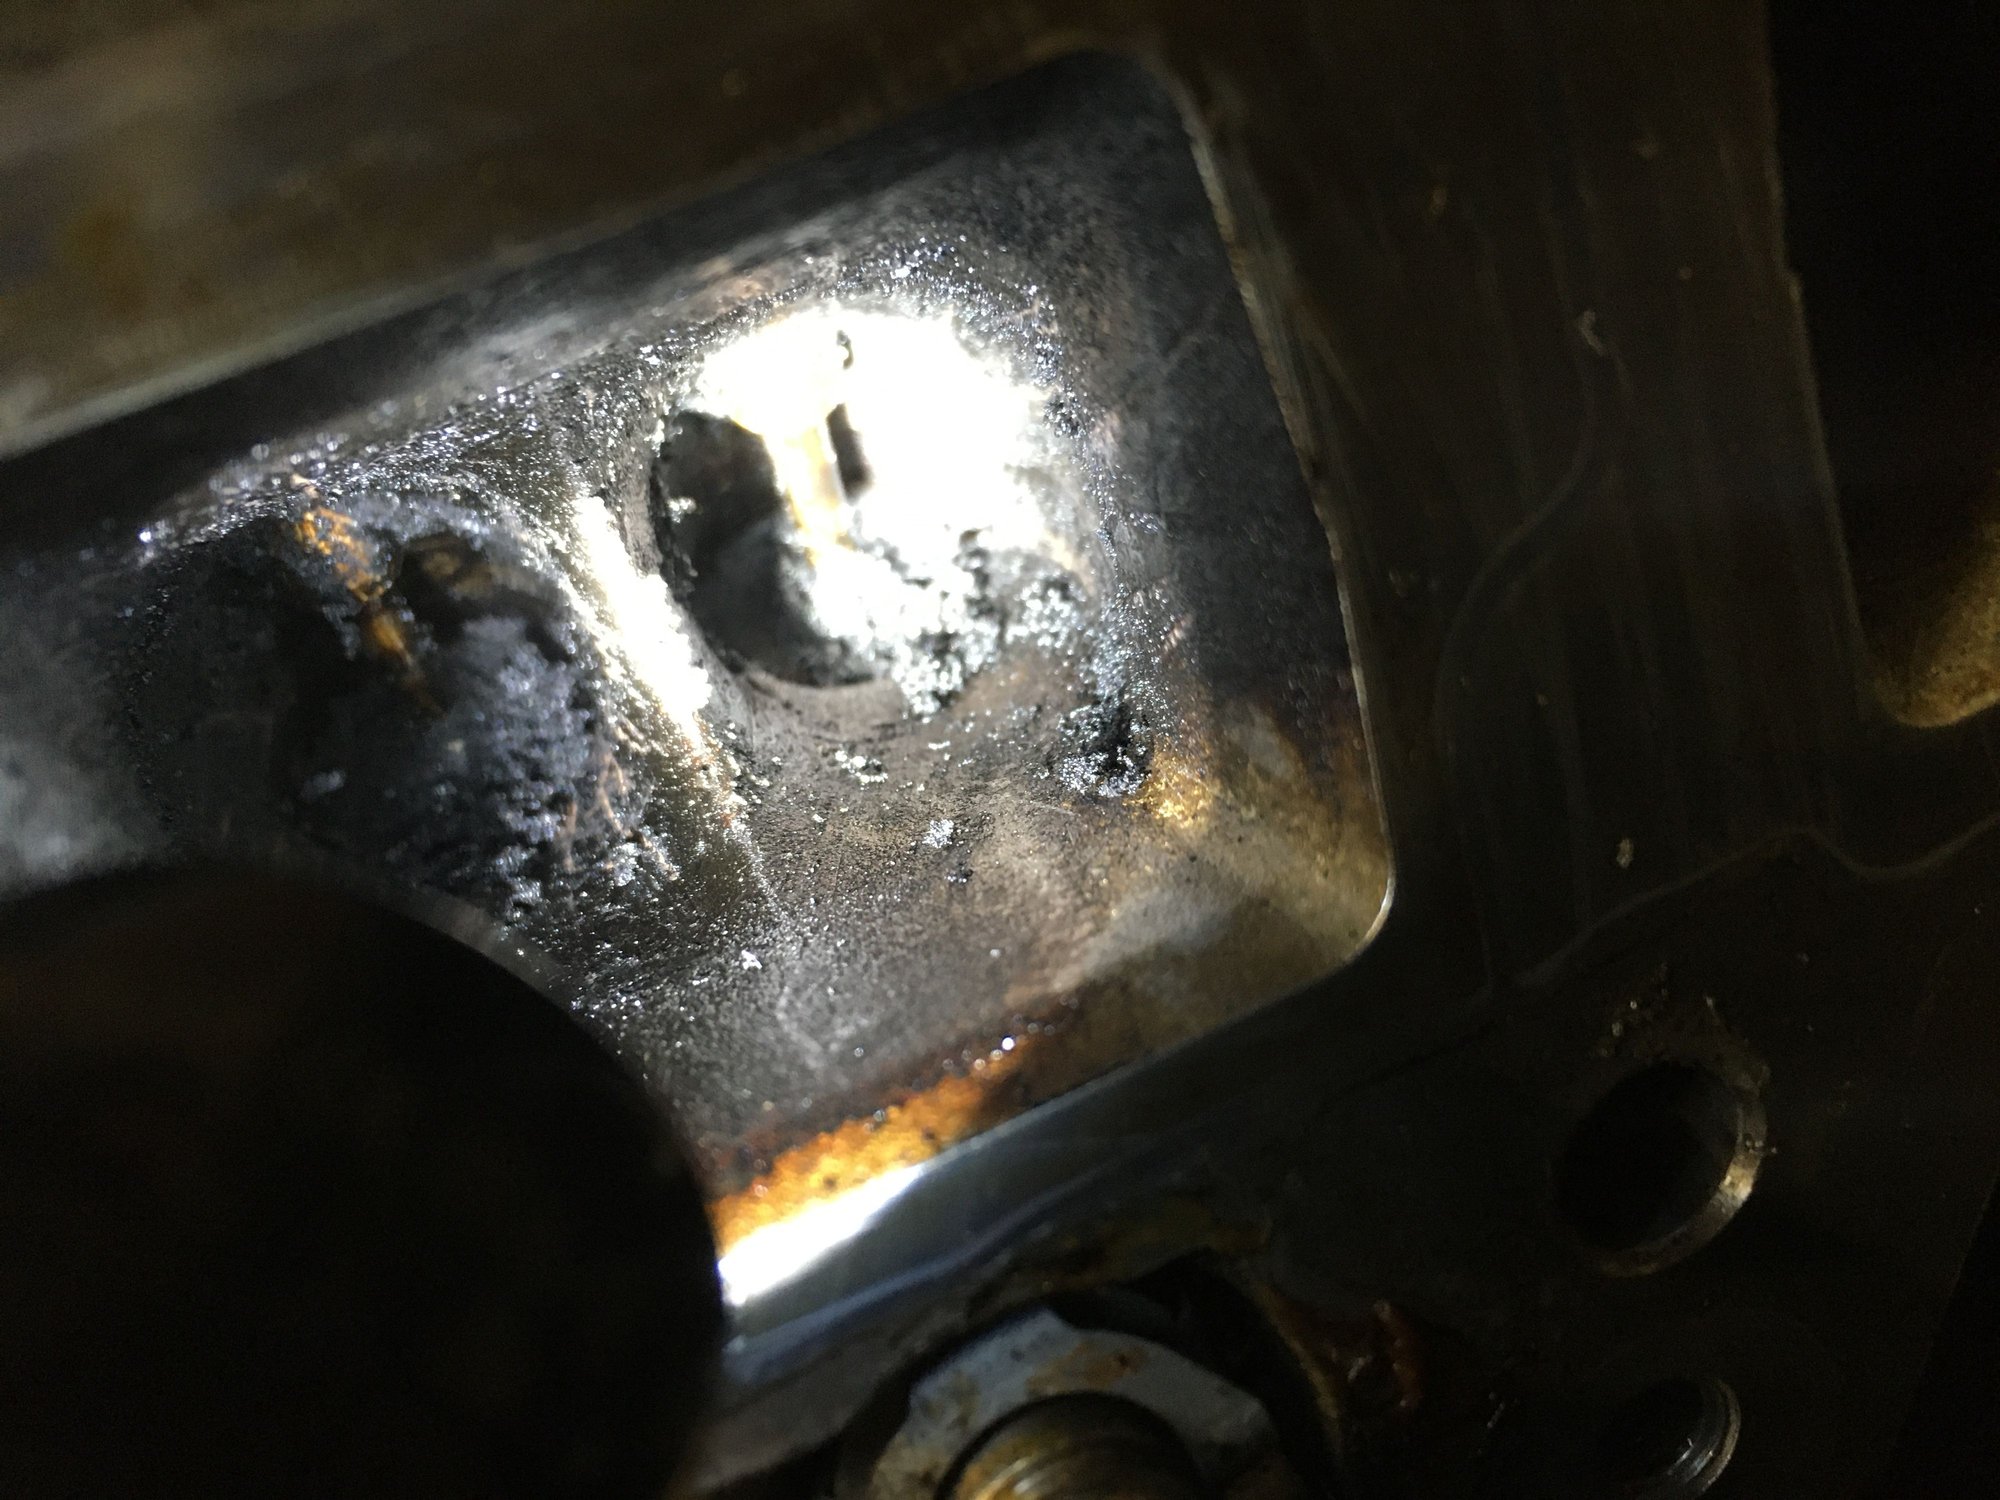
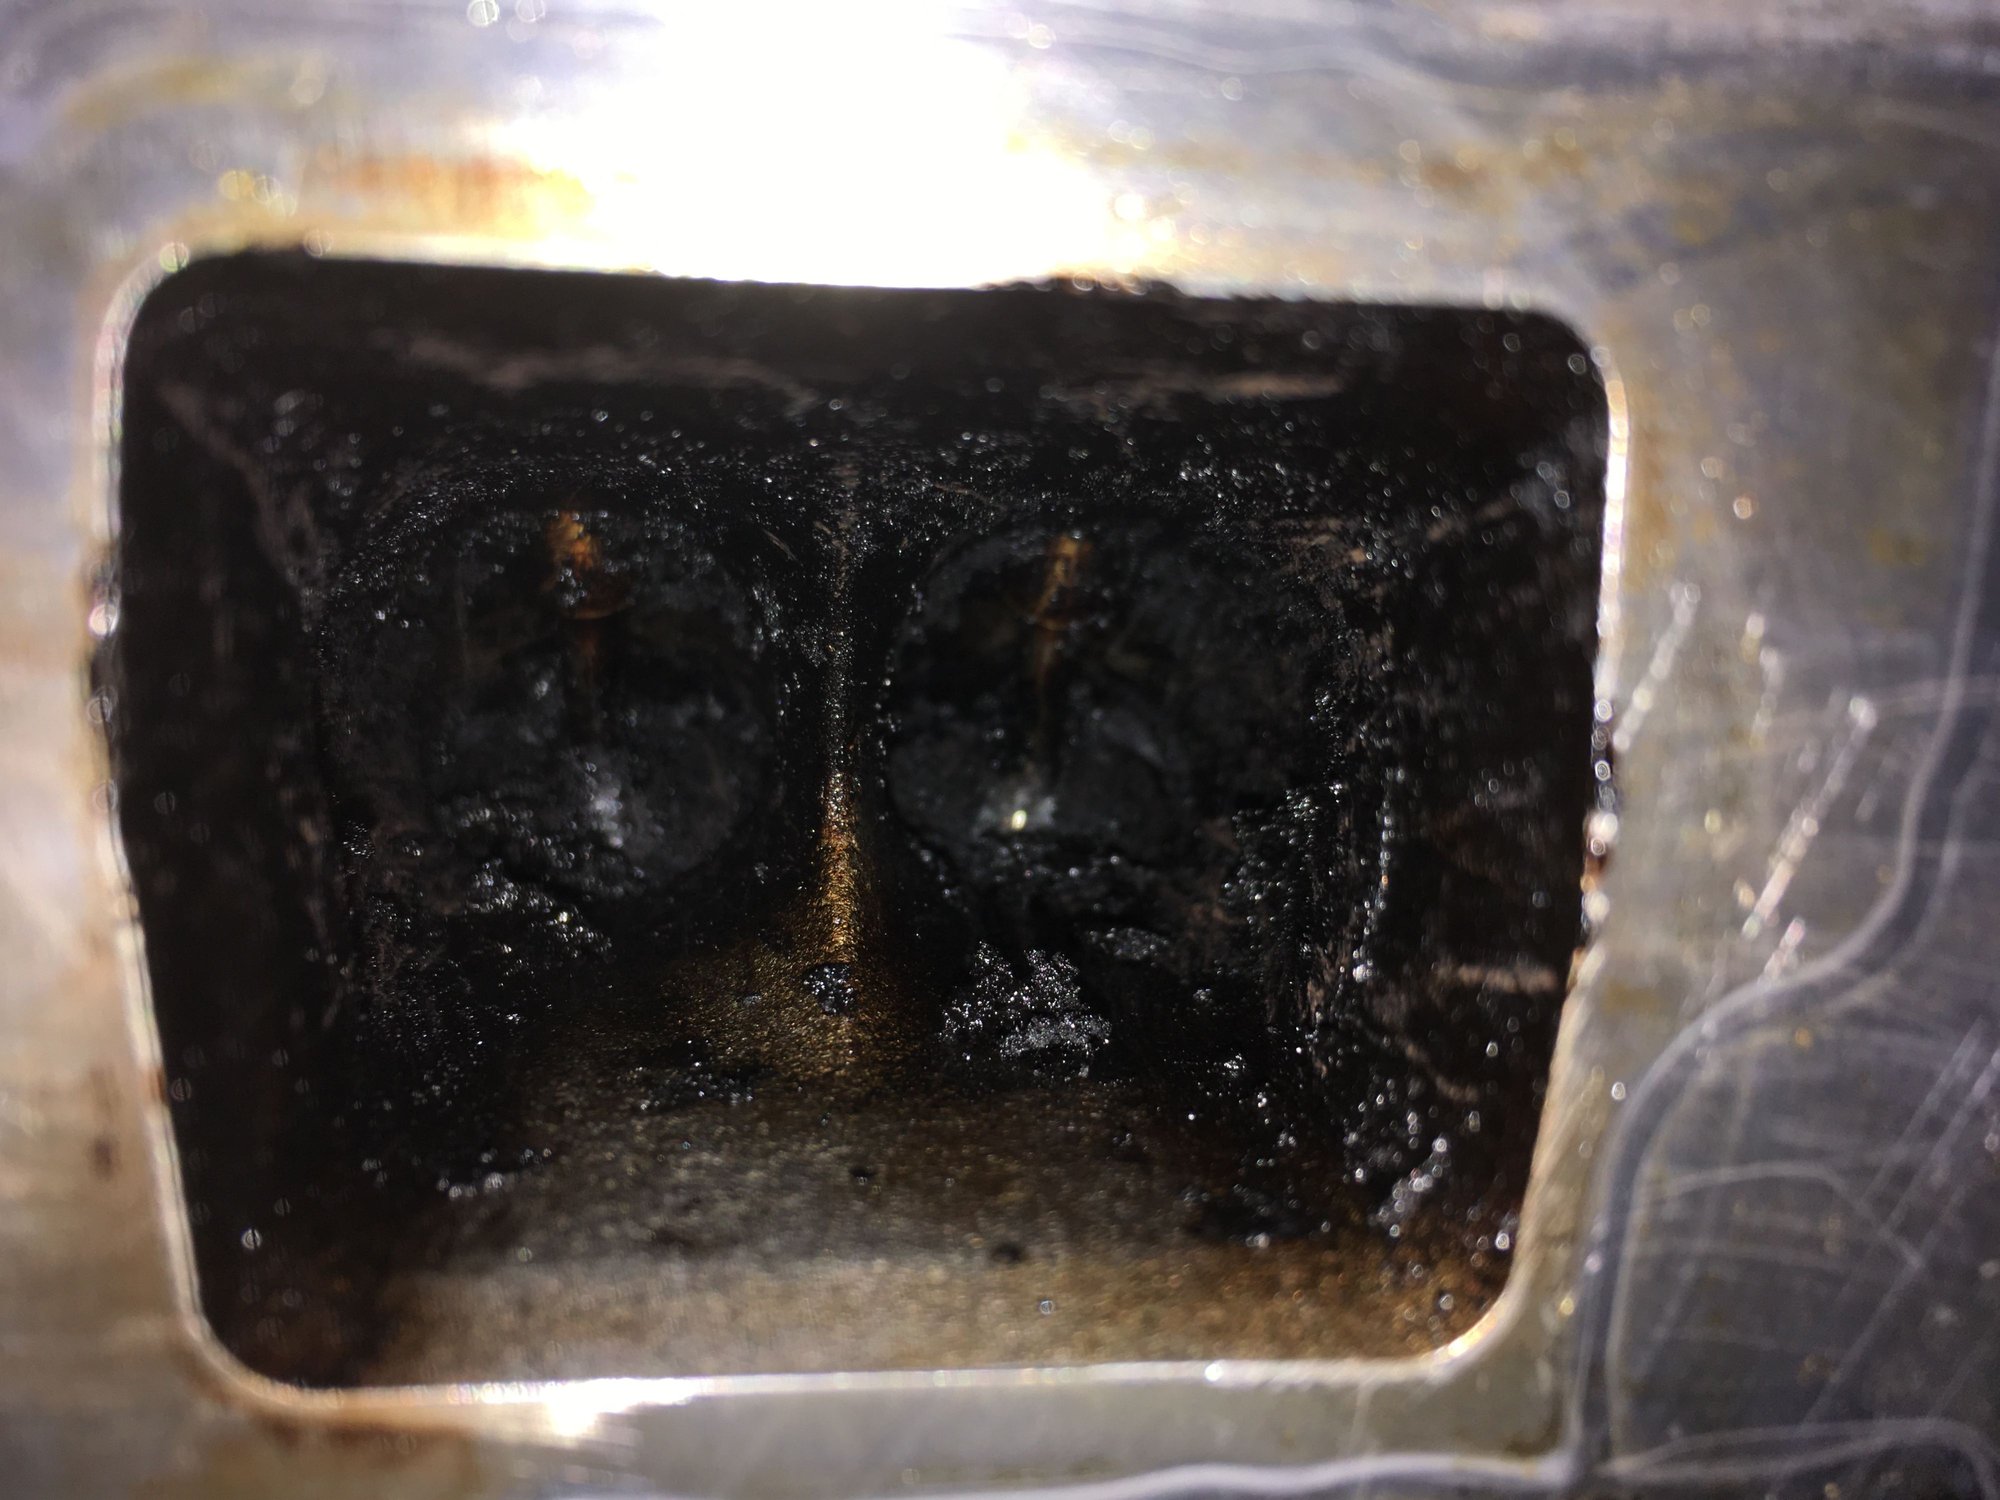
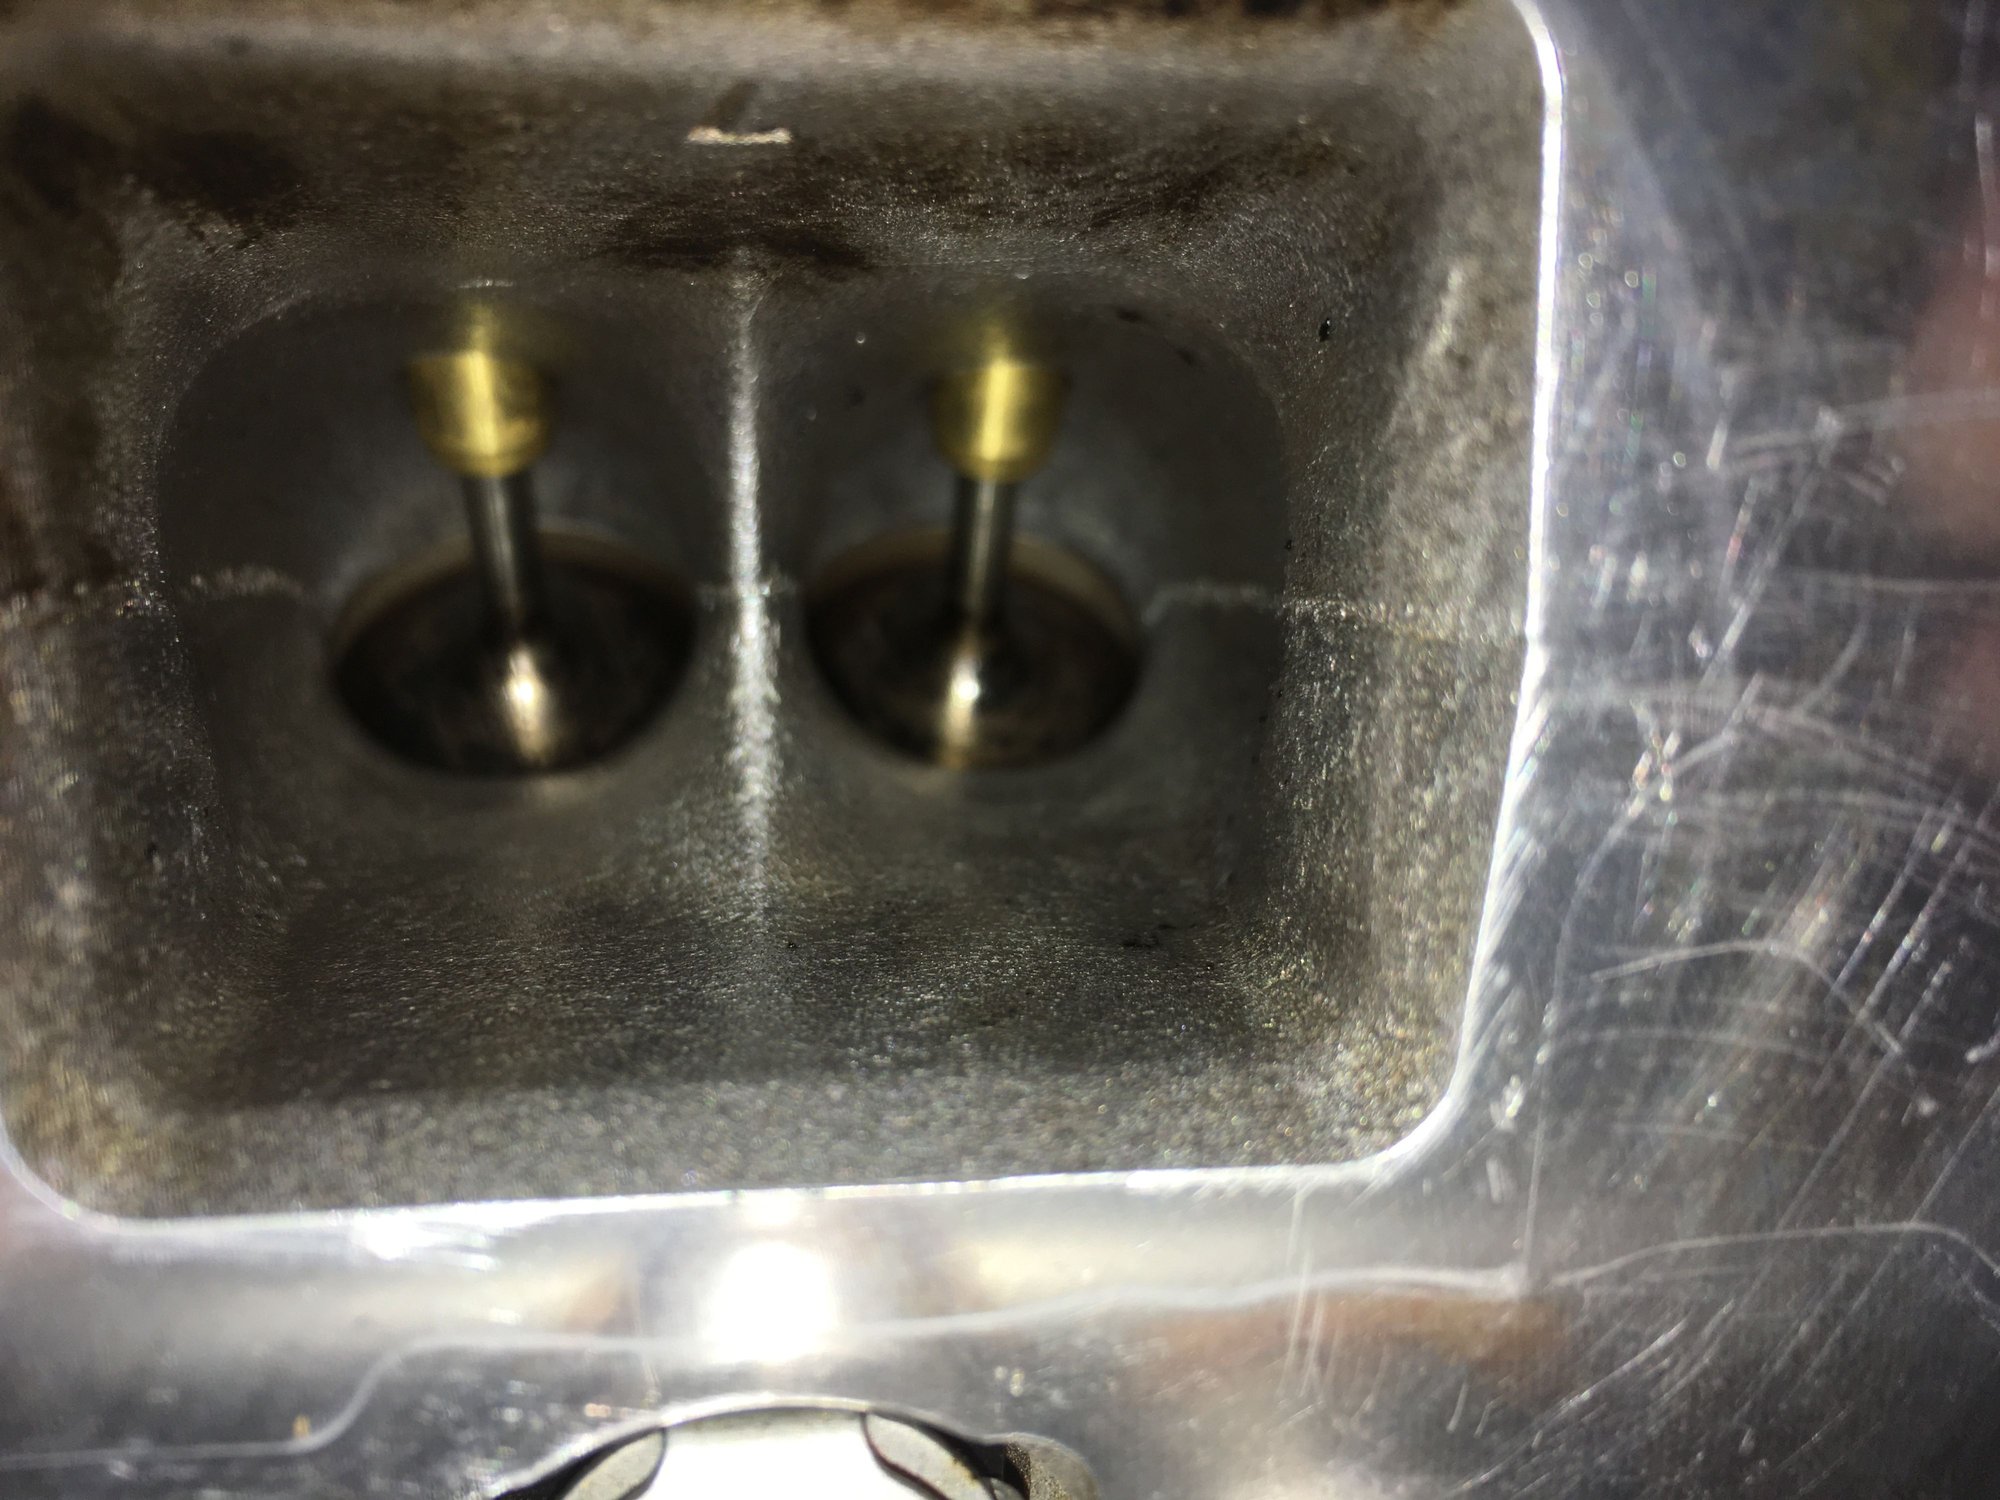
Head returned from cleaning, two new valves, lapped, all ports vacuum tested, everything checks out:


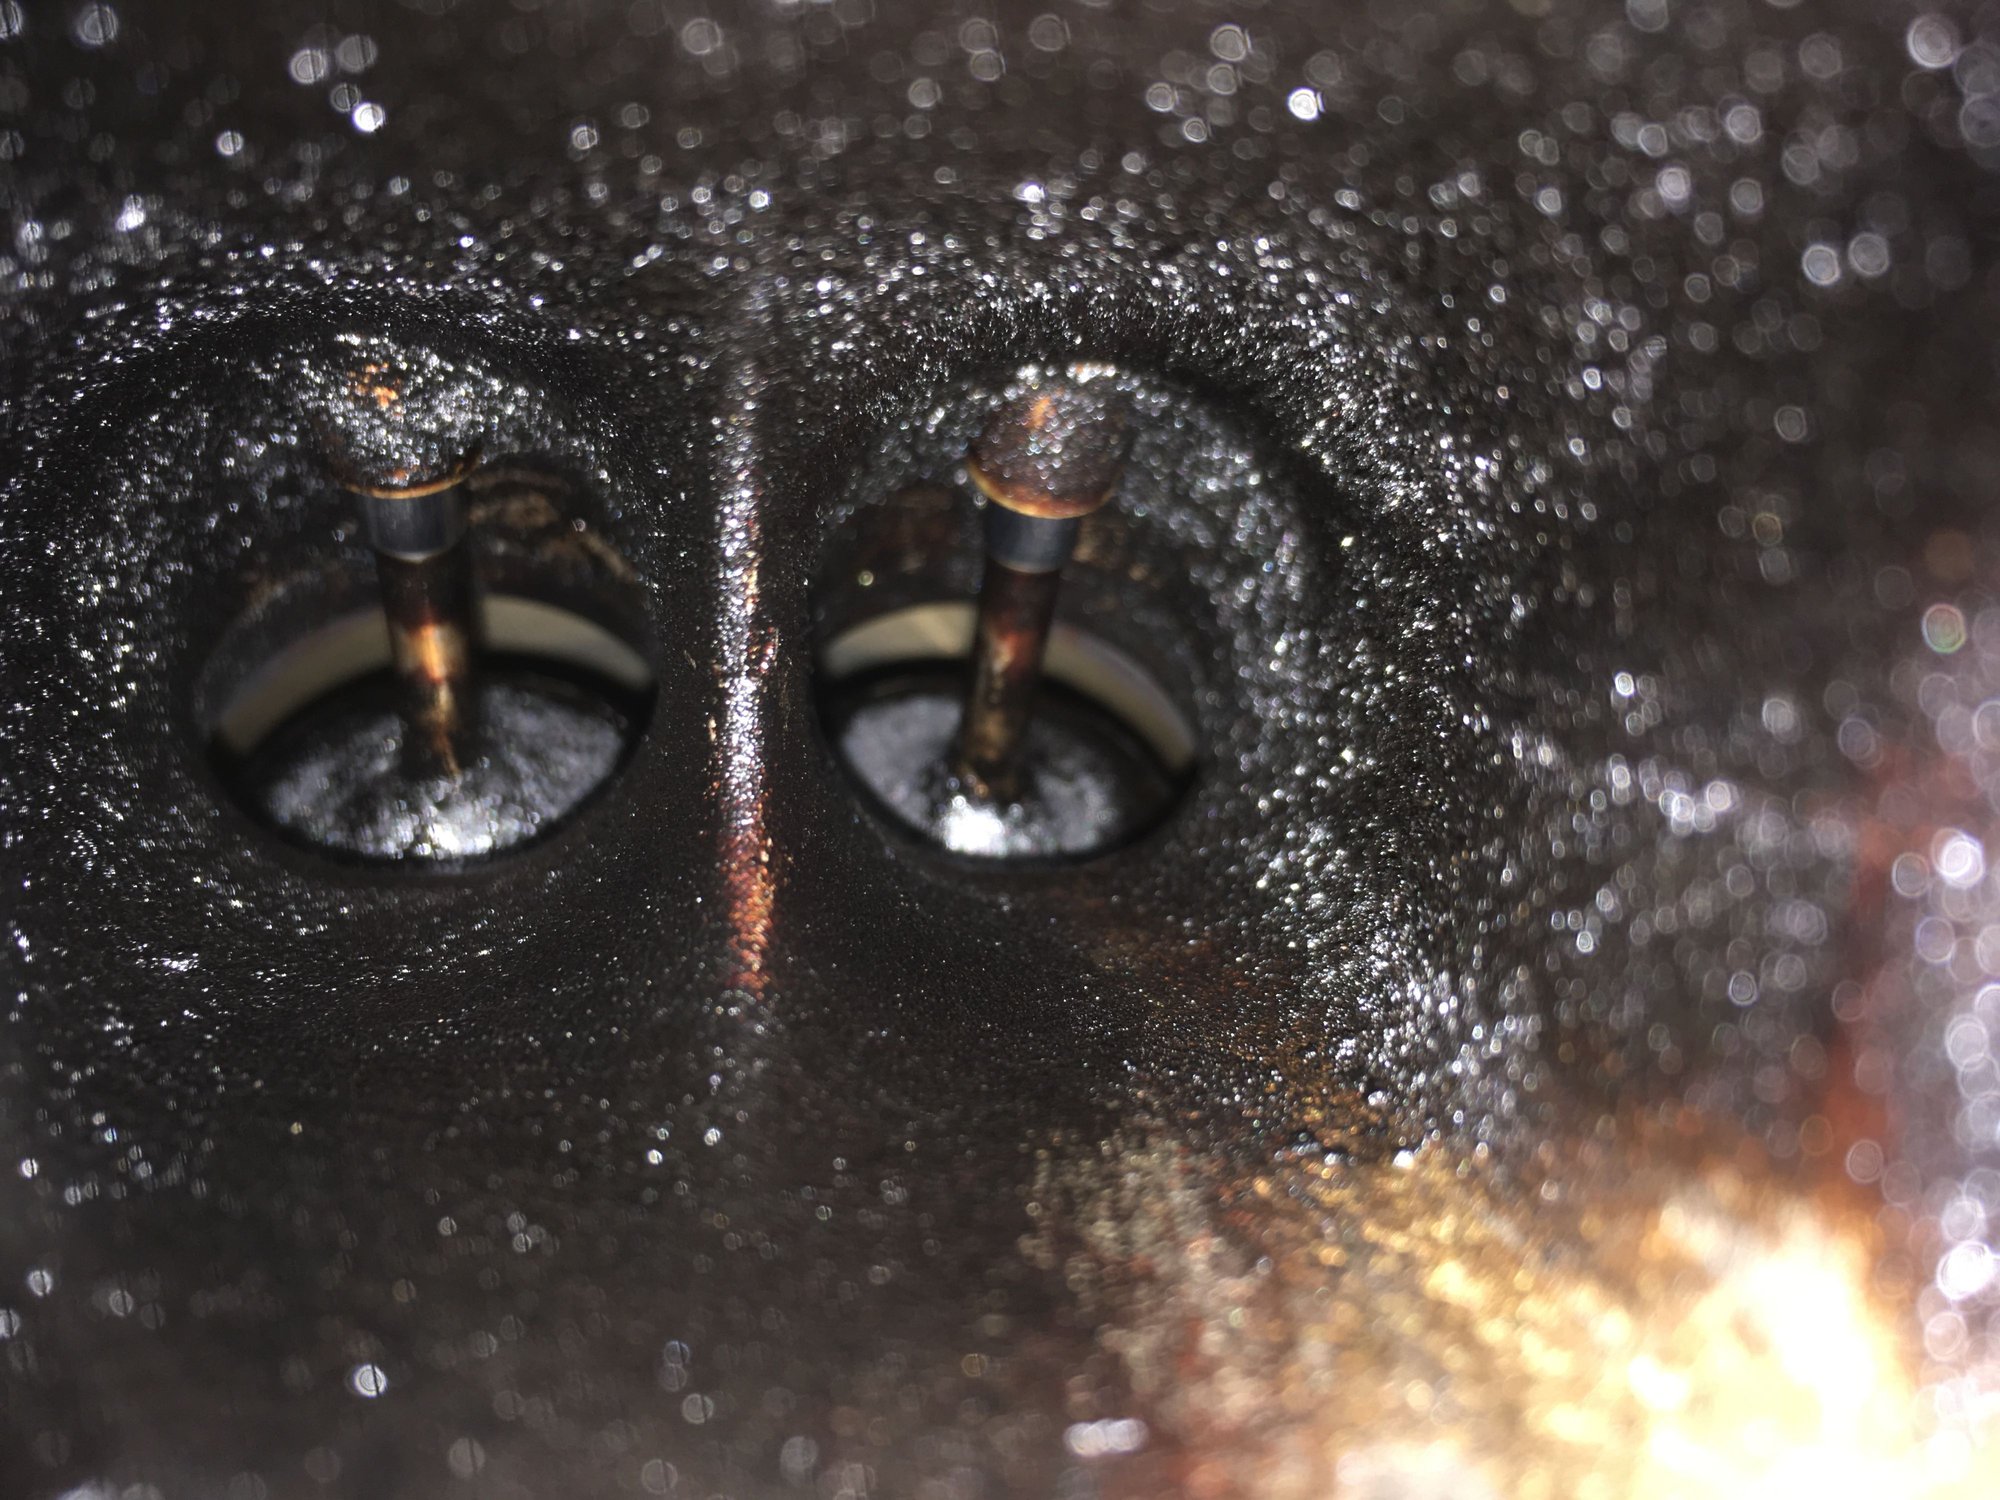
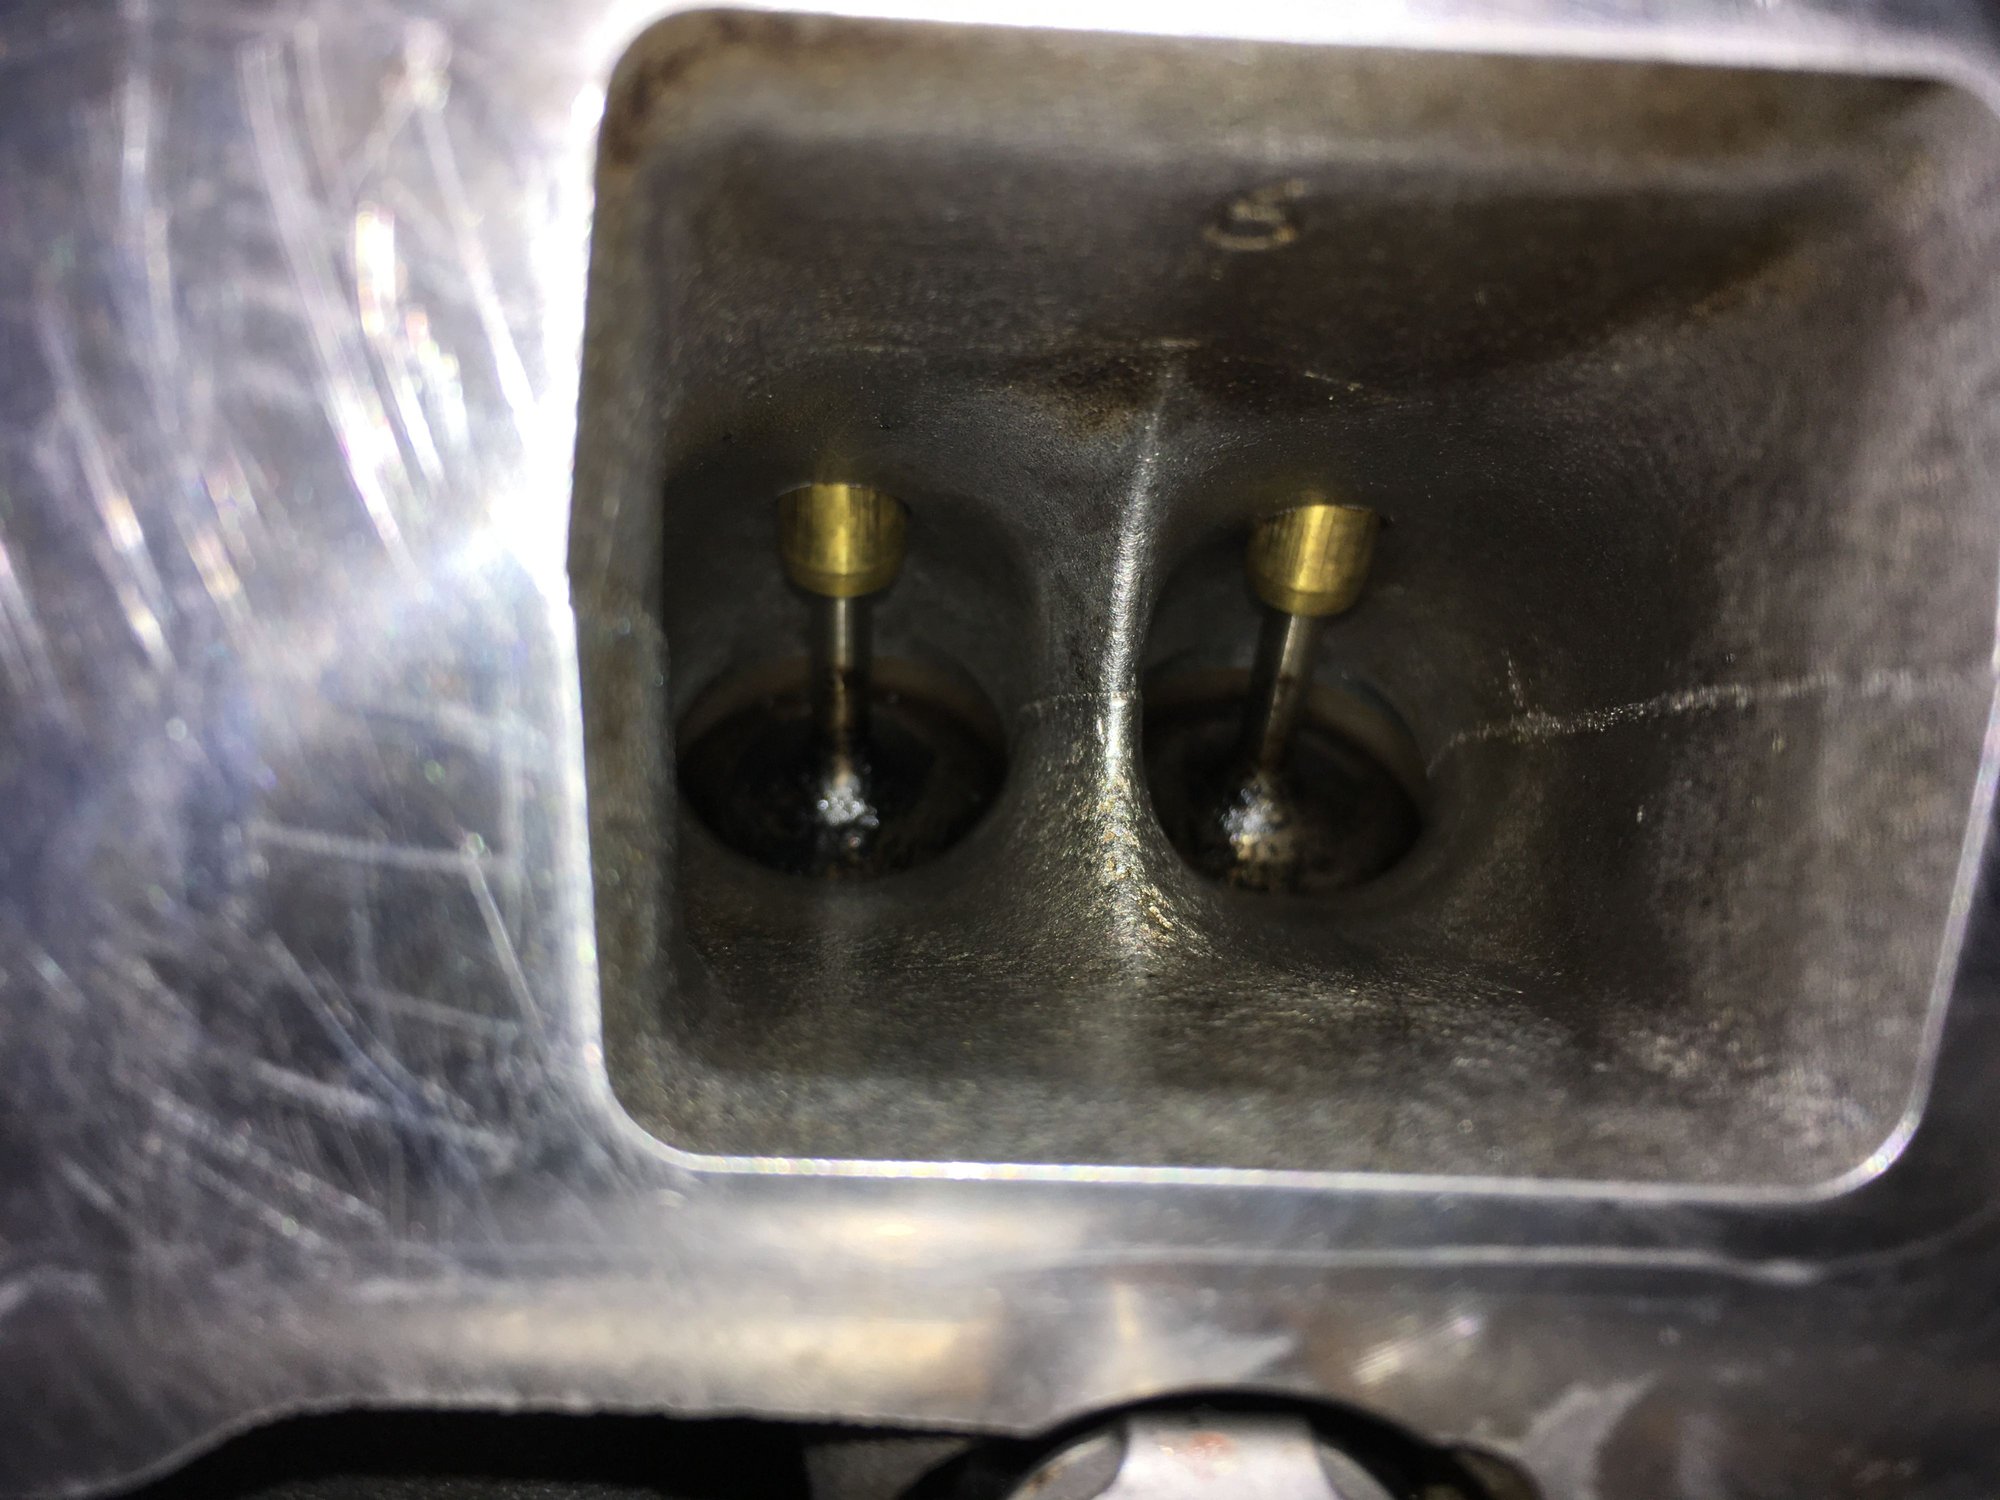
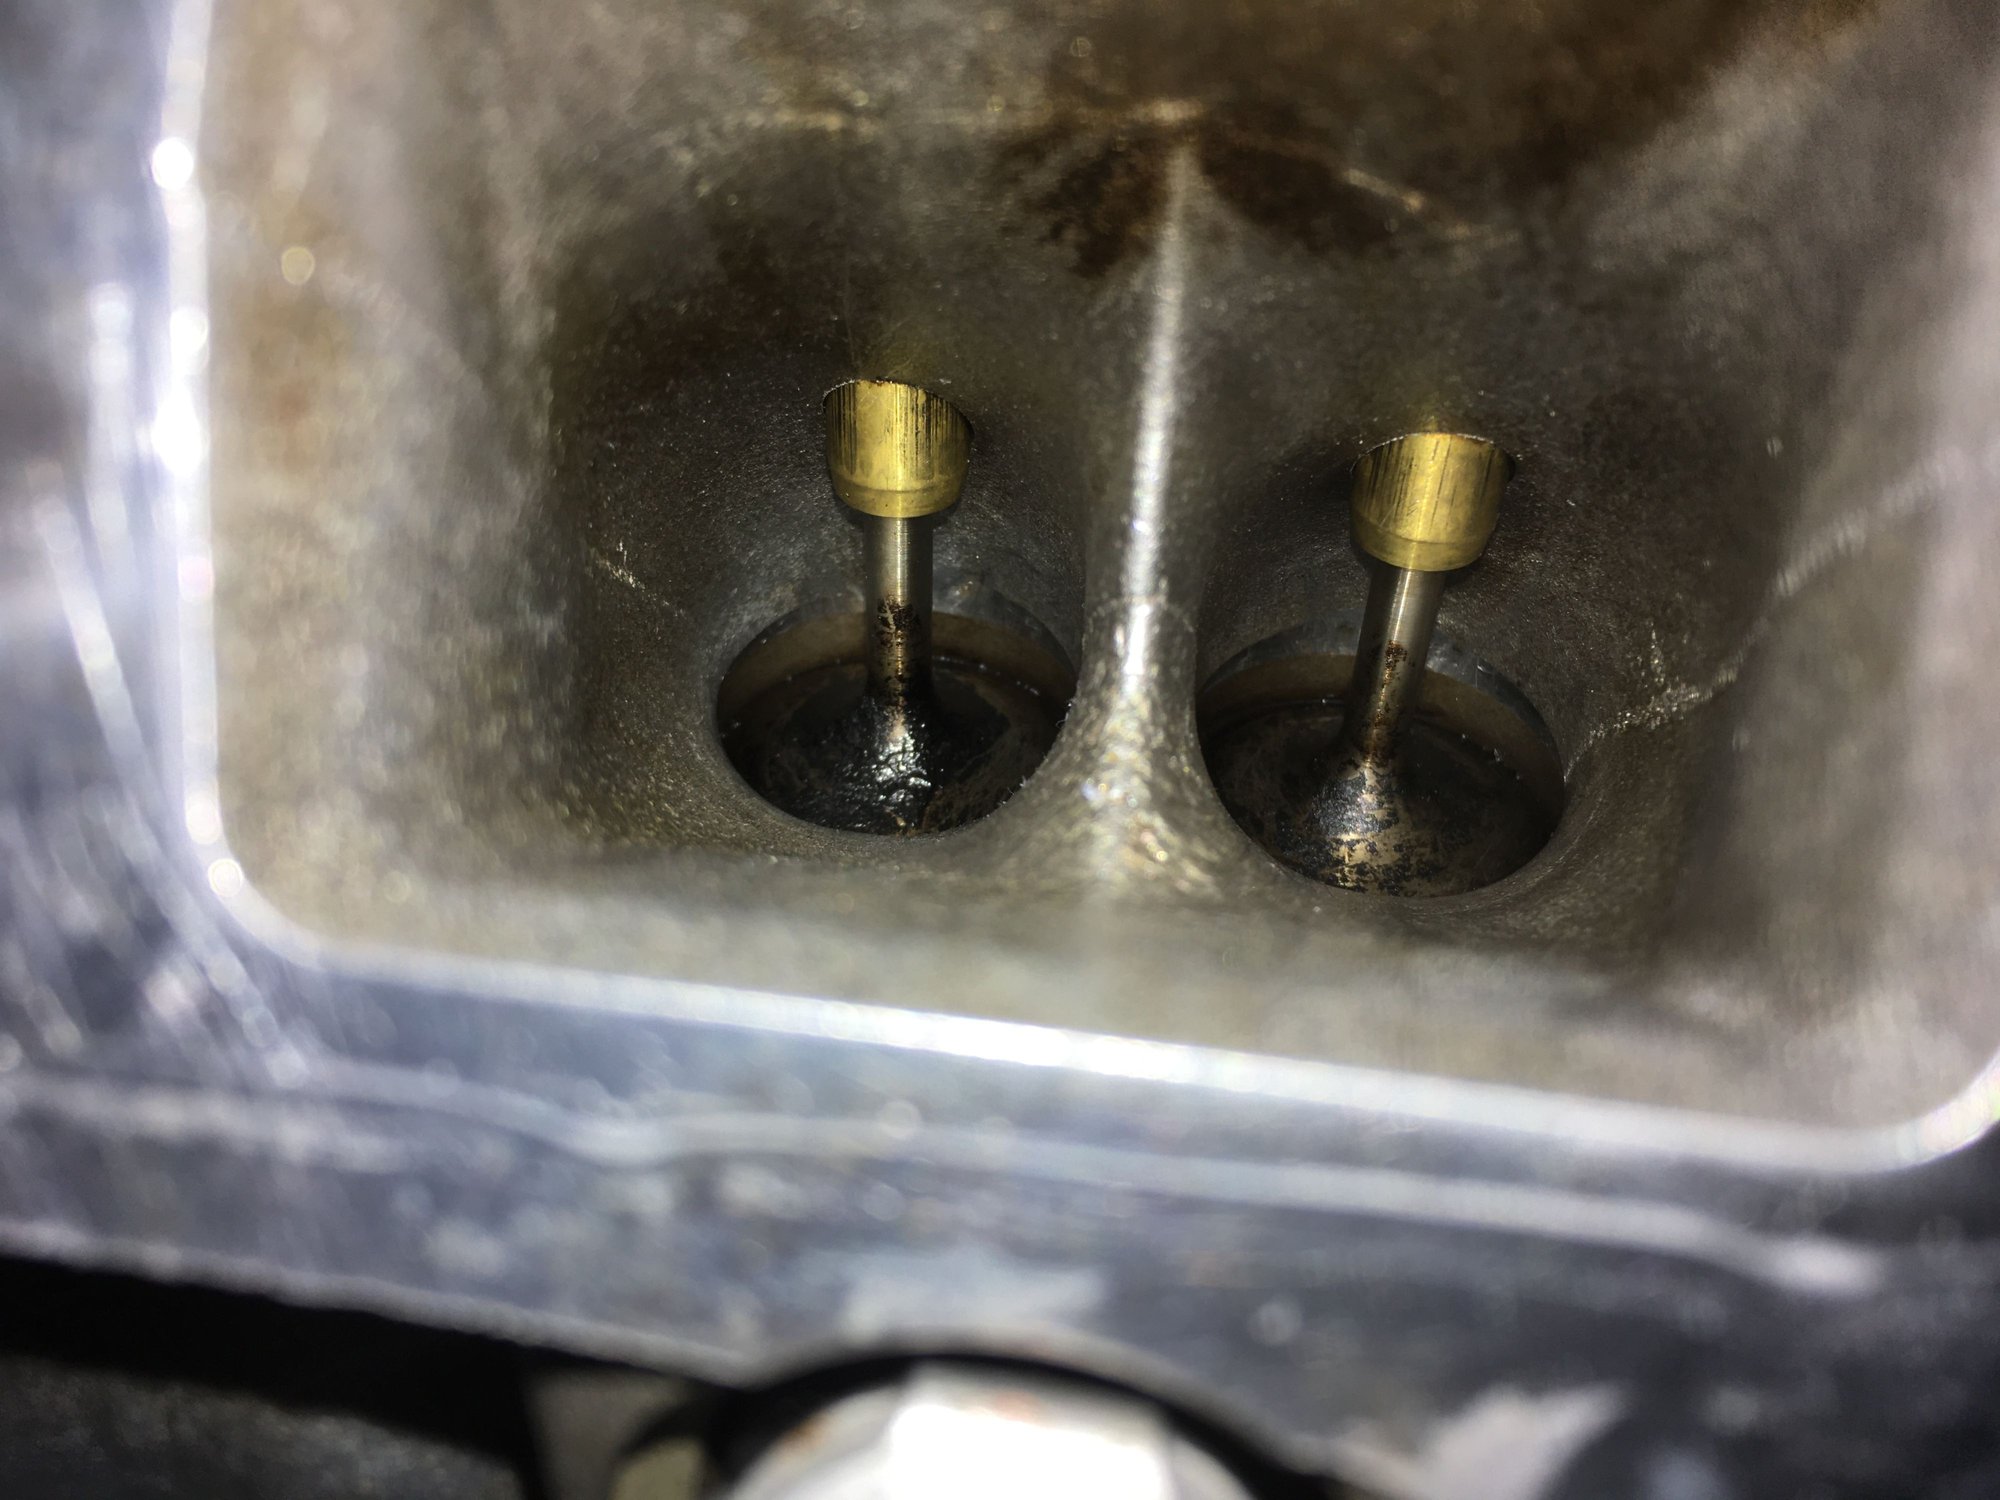
They didnt walnut blast the valve stems, or underside. Who knows, this looks clean enough. The underside of the valves seem to leave much to be desired:


But all in all, cleaning it any further probably will not increase any metric at this point.
The machine shop said what most likely happened is that the cylinder experienced a lean condition due to a faulty injector, blew the exhaust valve and the misfiring would have broke the spark plug. Still waiting for my injector testing to come back to see what their story is.
Not much of an update, but finally starting some part acquisitions, starter:

Every V6 I have owned, for whatever reason, has had this high voltage strap disintegrate on me. This one looked like it was close to doing so.

The replacement has an additional terminal on the right, not sure what that is all about:

Head returned from cleaning, two new valves, lapped, all ports vacuum tested, everything checks out:


They didnt walnut blast the valve stems, or underside. Who knows, this looks clean enough. The underside of the valves seem to leave much to be desired:


But all in all, cleaning it any further probably will not increase any metric at this point.
The machine shop said what most likely happened is that the cylinder experienced a lean condition due to a faulty injector, blew the exhaust valve and the misfiring would have broke the spark plug. Still waiting for my injector testing to come back to see what their story is.
The following 3 users liked this post by gosser:
#47
Not much of an update, but managed to get the engine cradle out since the two motor mount bolts snapped, only took about 2 hours to remove:

Replacement cradle came from ebay, in pretty quick order too. and the motor mounts are Corteco:

The old mounts look cooked:


If these sway bar bolts snapped, which they were real close to doing so, then the subframe would have needed to be replaced. Happy to be addressing them with some new bolts for ease of future removal.

The rest of my orders came in, so I'll finally be able to continue with reassembly and more meaningful updates.

Replacement cradle came from ebay, in pretty quick order too. and the motor mounts are Corteco:

The old mounts look cooked:


If these sway bar bolts snapped, which they were real close to doing so, then the subframe would have needed to be replaced. Happy to be addressing them with some new bolts for ease of future removal.

The rest of my orders came in, so I'll finally be able to continue with reassembly and more meaningful updates.
The following 3 users liked this post by gosser:
#48
I been reading your thread but have not had a chance to chime in. Did you get your test results from the injectors yet? It would NOT surprise me if that was the cause. I too had a misfire/CEL situation similar to you. New spark plug, new coil, compression test perfect, etc. finally I decided to take out the injectors and took it to a shop that specializes in cleaning and testing them. They said two were clogged and not putting out enough volume. Funning thing is, it NEVER had a code throw up about the injectors. Using a multimeter, they test ok. So my guess is because its a direct injection engine, the tips got partially clogged, etc. Anyway, I changed out the TWO bad injectors and have not had a problem since.
For those of you guys reading this with the VR6, anytime you have the intake manifold off the car, take the injectors out and have them professional tested, its like $10-15 each and if they test bad, they don't charge for it (at least the shop that did mine). Its a small price to pay to not have to do a job twice, lol.
For those of you guys reading this with the VR6, anytime you have the intake manifold off the car, take the injectors out and have them professional tested, its like $10-15 each and if they test bad, they don't charge for it (at least the shop that did mine). Its a small price to pay to not have to do a job twice, lol.
#50
Those were my intake valves at 160,000 miles. To my knowledge, its never been walnut blasted or anything of that nature. Since I was having the CEL/Misfire, I cleaned those too. I used seafoam, berryman, intake valve cleaner, wire brush, a roll of paper towel, vacuum cleaner, etc. and just soak, scrub, and repeat. It took like 3 days, but I didn't care since I was waiting on parts anyway.
For those of you reading this with the VR6, if you have to take the intake manifold off, you mine as well plan for this. I also did the AOS, valve cover gasket and a few other things while it was off. I HATE that metal fuel pipe when trying to reinstall the intake manifold. LOL
For those of you reading this with the VR6, if you have to take the intake manifold off, you mine as well plan for this. I also did the AOS, valve cover gasket and a few other things while it was off. I HATE that metal fuel pipe when trying to reinstall the intake manifold. LOL
#51
I been reading your thread but have not had a chance to chime in. Did you get your test results from the injectors yet? It would NOT surprise me if that was the cause. I too had a misfire/CEL situation similar to you. New spark plug, new coil, compression test perfect, etc. finally I decided to take out the injectors and took it to a shop that specializes in cleaning and testing them. They said two were clogged and not putting out enough volume. Funning thing is, it NEVER had a code throw up about the injectors. Using a multimeter, they test ok. So my guess is because its a direct injection engine, the tips got partially clogged, etc. Anyway, I changed out the TWO bad injectors and have not had a problem since.
For those of you guys reading this with the VR6, anytime you have the intake manifold off the car, take the injectors out and have them professional tested, its like $10-15 each and if they test bad, they don't charge for it (at least the shop that did mine). Its a small price to pay to not have to do a job twice, lol.
For those of you guys reading this with the VR6, anytime you have the intake manifold off the car, take the injectors out and have them professional tested, its like $10-15 each and if they test bad, they don't charge for it (at least the shop that did mine). Its a small price to pay to not have to do a job twice, lol.
You make a good point of, while you are in there with the intake manifold off, send the injectors out for sure. Its a little more expensive here for the testing and cleaning, but there are not many options locally. I know there is some online options, but that usually adds up to be more in shipping since where I am located.
Nice intake valves!
I managed to reinstall the engine cradle, new starter, and torque the subframe, engine cradle, motor mounts, brackets and sway bar. I also prepped the cylinder head surfaces, installed the new main coolant pipe, thermostat housing assembly. Next steps are to enlist two buddies to assist in placing the cylinder head on the block. Planning that for tomorrow.
Some shots of all the parts:

Coolant pipe refresh:

New OEM rear timing cover was only 24 dollars, hard to say no!

#52
Motor mounts and engine cradle shot, cradle was from a VW clearly 

Coolant piping installed:

Laso Water pump installed:


Prepped the block a bit more, WD-40, nylon brush on drill, metal blade, rinse, repeat:


Just need to hit the four pistons real quick, and its ready.


Coolant piping installed:

Laso Water pump installed:


Prepped the block a bit more, WD-40, nylon brush on drill, metal blade, rinse, repeat:


Just need to hit the four pistons real quick, and its ready.
#53
Wire brushed finish of piston tops creates a great surface for carbon to get a grip. I would polish the surface a bit to preclude the ability for carbon to stick to the combustion chamber. You you rather have it flake off with an occasional Italian tune.
#54
He posted he used a nylon brush...
#55
I hated the main coolant line, which is why the replacement is still sitting on my desk here. The use of Zip ties to hold critical units in place is something I learned about after my VR6 was scrapped thanks to M539 restorations on Youtube. I didn't think to test the injectors when I had the valve cover off the car, given I was never able to reinstall the valve cover successfully because I kept knocking the fuel rail off, my mechanic had a chance to examine them and at least finish the seal/o-ring swap during my refresh. The water pump on the VR6, however, was only surpassed by the 987's water pump in terms of 'that was suspiciously too easy, actually that was almost fun/cathartic.'
#56
Yep, that nylon brush is real soft as long as you keep pressure off it on aluminum part, then it does a real nice job I find. I've used that method on cast blocks and aluminum heads previously with great results.
I hated the main coolant line, which is why the replacement is still sitting on my desk here. The use of Zip ties to hold critical units in place is something I learned about after my VR6 was scrapped thanks to M539 restorations on Youtube. I didn't think to test the injectors when I had the valve cover off the car, given I was never able to reinstall the valve cover successfully because I kept knocking the fuel rail off, my mechanic had a chance to examine them and at least finish the seal/o-ring swap during my refresh. The water pump on the VR6, however, was only surpassed by the 987's water pump in terms of 'that was suspiciously too easy, actually that was almost fun/cathartic.'

Got the head on and torqued, stopped at messing with the fuel pump gear:


It'll be smooth sailing from here on out.
The following users liked this post:
brett968 (04-23-2021)
#57
Gosser- quick question, I can't tell from the pictures, but how did you support the engine while changing the motor mounts? Floor jack and a block of wood on the oil pan?
I thought about changing my motor mounts since I don't know when it was last done, but after seeing what you ran into, I am leaning towards, "don't touch it if it ain't broke".
Did you ever find out what that extra lug does on the replacement starter?
I thought about changing my motor mounts since I don't know when it was last done, but after seeing what you ran into, I am leaning towards, "don't touch it if it ain't broke".
Did you ever find out what that extra lug does on the replacement starter?
#58
Gosser- quick question, I can't tell from the pictures, but how did you support the engine while changing the motor mounts? Floor jack and a block of wood on the oil pan?
I thought about changing my motor mounts since I don't know when it was last done, but after seeing what you ran into, I am leaning towards, "don't touch it if it ain't broke".
Did you ever find out what that extra lug does on the replacement starter?
I thought about changing my motor mounts since I don't know when it was last done, but after seeing what you ran into, I am leaning towards, "don't touch it if it ain't broke".
Did you ever find out what that extra lug does on the replacement starter?
As for the motor mounts, like you said, jack and piece of wood. There are not many places to support/jack the motor up, since the cradle, subframe and sway bar cover nearly the whole underside of the motor, leaving only the crank pulley exposed and the connection at the bellhousing/motor. I stood up a 10" length of 2x8, and put that at the bellhousing/motor, right where the three rubber bellhousing plugs go(I removed the plugs as to not drive them into the bellhousing). I put it essentially tight to the engine cradle, it it worked out perfectly.
I was thinking of using a fender to fender engine stand, but that didnt have the lifting capabilities that wanted. To be honest I am a little surprised I was able to change out the entire engine cradle without a crane or even jacking up the chassis!
Update coming soon.
Last edited by gosser; 04-25-2021 at 05:44 PM.
#59
Before we get into the meat of it. I got hung up on Friday night with a couple curve *****. I noticed this leaking heater core connection during the initial tear down, and finally addressed it:

I remove the conenction from the aluminum core pipe then used some channel locks to break the connection with the metal band:

Rebuild the pieces to make sure nothing is left in the heater hose:

New elbow connection: VW part 1J0122291C with Gates 32925 PowerGrip Hose Clamp shrunk on. I could have replaced the entire hose assembly at 250usd, but I thought since I had these on hand from previous VAG related projects I might as well try it here too:

Moved on to injectors:

Got to use my GDI injector tool kit again! I love this kit, just some generic Amazon kit:

Then started installing the injectors, but wait, there is still a body from one of the injectors stuck in the bore in the head!!! FFS!!

If the head was off still, i would have been about to pound it out, instead there is nothing pretty about the extracting process:

This thing was oxidized in place, took some dremeling to split the case, then pound it out of round and extracted it:

All cleaned up, not to bad, a few marks here and there, but nothing that will affect the performance of the injector:

Injectors in!

Buttoned up the hot side:

Extracted this snapped bolt that holds the starter cable clear from the exhaust. Used some heat, and by some I mean molten:

Nice to know that all bolts are 100% accounted for, replaced a bunch of bolts, studs, all new exhaust gaskets along the way too.
This screen that sits between the head and the variable cam control assembly has a screen that prevents debris from entering the phasers, but as it would turn out, the screen deteriorates lodging itself into the phasers anyways! Pretty common by the sounds of it. Unfortunately you cannot replace just this screen, you need to buy the whole control assemble. The good news is that the assembly is still available new, but at 1300usd! So I elected to cut out the rest of the screen and put the seal back in. I honestly do not think that it actually seals anything and is truly just a screen, since there are other passages without any sort of seal to it. Hard to see, but the screen is missing in the upper section of it:

I opened up the exhaust cam phaser/adjuster since I thought it was jammed from the screen. This trigger wheel just pops off, I used a socket to punch it out:

It turns out it was not jammed, just locked in place, but fun to take apart and see how it all works. From what I understand the intake remains adjustable without oil pressure, and the exhaust gets locked without, hence why when the intake one moved freely, and the exhaust did had me curious. But all seems to be normal:

Onto some meat! Put in a new intermediate timing guide:

Adjusted the fuel lobe, installed the cam adjusters. I only hand tightened, then rotated the motor a bunch until I was content with everything re-aligning and started torquing things:

Rear timing cover sealant:

Then back to the usual stuff, valve cover, wiring, connectors, vac hoses, etc:

I probably spent about 4 hours in this position:

Never skip lower back day! I thought I had a replacement o-ring for my air pump on the back, but it turns out I do not, and already threw my old one out... So this is where it ended. Which gave me some time to clear my bench from the madness over the last 2 months:

Almost there guys!

I remove the conenction from the aluminum core pipe then used some channel locks to break the connection with the metal band:

Rebuild the pieces to make sure nothing is left in the heater hose:

New elbow connection: VW part 1J0122291C with Gates 32925 PowerGrip Hose Clamp shrunk on. I could have replaced the entire hose assembly at 250usd, but I thought since I had these on hand from previous VAG related projects I might as well try it here too:

Moved on to injectors:

Got to use my GDI injector tool kit again! I love this kit, just some generic Amazon kit:

Then started installing the injectors, but wait, there is still a body from one of the injectors stuck in the bore in the head!!! FFS!!

If the head was off still, i would have been about to pound it out, instead there is nothing pretty about the extracting process:

This thing was oxidized in place, took some dremeling to split the case, then pound it out of round and extracted it:

All cleaned up, not to bad, a few marks here and there, but nothing that will affect the performance of the injector:

Injectors in!

Buttoned up the hot side:

Extracted this snapped bolt that holds the starter cable clear from the exhaust. Used some heat, and by some I mean molten:

Nice to know that all bolts are 100% accounted for, replaced a bunch of bolts, studs, all new exhaust gaskets along the way too.
This screen that sits between the head and the variable cam control assembly has a screen that prevents debris from entering the phasers, but as it would turn out, the screen deteriorates lodging itself into the phasers anyways! Pretty common by the sounds of it. Unfortunately you cannot replace just this screen, you need to buy the whole control assemble. The good news is that the assembly is still available new, but at 1300usd! So I elected to cut out the rest of the screen and put the seal back in. I honestly do not think that it actually seals anything and is truly just a screen, since there are other passages without any sort of seal to it. Hard to see, but the screen is missing in the upper section of it:

I opened up the exhaust cam phaser/adjuster since I thought it was jammed from the screen. This trigger wheel just pops off, I used a socket to punch it out:

It turns out it was not jammed, just locked in place, but fun to take apart and see how it all works. From what I understand the intake remains adjustable without oil pressure, and the exhaust gets locked without, hence why when the intake one moved freely, and the exhaust did had me curious. But all seems to be normal:

Onto some meat! Put in a new intermediate timing guide:

Adjusted the fuel lobe, installed the cam adjusters. I only hand tightened, then rotated the motor a bunch until I was content with everything re-aligning and started torquing things:

Rear timing cover sealant:

Then back to the usual stuff, valve cover, wiring, connectors, vac hoses, etc:

I probably spent about 4 hours in this position:

Never skip lower back day! I thought I had a replacement o-ring for my air pump on the back, but it turns out I do not, and already threw my old one out... So this is where it ended. Which gave me some time to clear my bench from the madness over the last 2 months:

Almost there guys!
Last edited by gosser; 04-25-2021 at 08:01 PM. Reason: grammar as per usual.
#60
Eager to hear how she runs compared to the 1st time you drove it before the tulip valve face let a piece.
BTW, I have to run 91 in mine in California, so highway MPG at 70-80 is 22-23.
BTW, I have to run 91 in mine in California, so highway MPG at 70-80 is 22-23.


